
Print That Custom Aquarium Part
By Taylor Landry
Creating 3D-printed items has become extremely popular in recent years due, primarily, to the virtually unlimited potential of the technology. Cars, houses, clothing, food, and even functional human organs are not only printable, but are likely only a few years from becoming commonplace. It should be no surprise, then, to hear that 3D printing has ready application in the marine-aquarium hobby.
3D printing is a process used to make three-dimensional objects. More specifically, it’s an additive manufacturing process. That is, material is deposited by a specialized printing machine, layer-upon-layer, to produce a 3D object. 3D printing has been around since the 1980s, but early machines cost hundreds of thousands of dollars and required engineers and expensive maintenance contracts. It is the recent emergence of affordable, desktop 3D printers that has changed the equation.
There are various types of 3D printers, but for this article and for reef keeping in general, the fused-filament-fabrication (FFF) technique/printer is what we will be discussing and using. FFF printers melt various thermoplastic materials and extrude them through a tiny nozzle, one layer at a time, until the part is complete.
Currently, more than 30 different materials can be used in FFF machines and some of them are reef safe. ABS, Nylon, PLA (a corn-based, biodegradable, non-toxic, and renewable plastic), and high-impact polystyrene (HIPS) are all readily available materials and are good candidates, depending on intended function, for use in aquaria.
The specific material properties, and the technical details of the printers, are outside the scope of this article. For more information about printers and filaments, visit matterhackers.com.
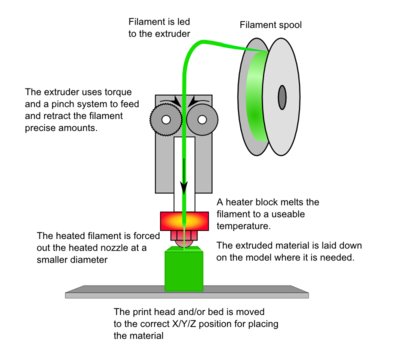
This diagram describes how a 3D printer makes three-dimensional objects.
Printing aquarium parts
If you’ve had an aquarium operating for more than a few months, you’ve undoubtedly wanted something very specific for the tank or sump. Whether it was a probe holder that fits in a small sump chamber, a stand to get your skimmer to just the right depth, or a plumbing fixture for a DIY project, you were able find the exact item or were forced to settle for something that works but isn’t perfect. The reason you often can’t find exactly what you’re looking for is because you’re likely the only one looking for it.
With a 3D printer, you can make just about anything you can think of and you can make it exactly the way you want it. It’s difficult to fully comprehend 3D printing and all of its potential until you see it, so I’ll share a few of the things I’ve designed and printed for my tank.
When I started my current 40-breeder/sump system, I wanted an internal overflow box, but I didn’t want to spend twice what I spent on the tank and sump combined simply to drain water. I also wanted it a bit wider than and not quite as deep as the options that were available. So, I modeled my own and printed it out of ABS.
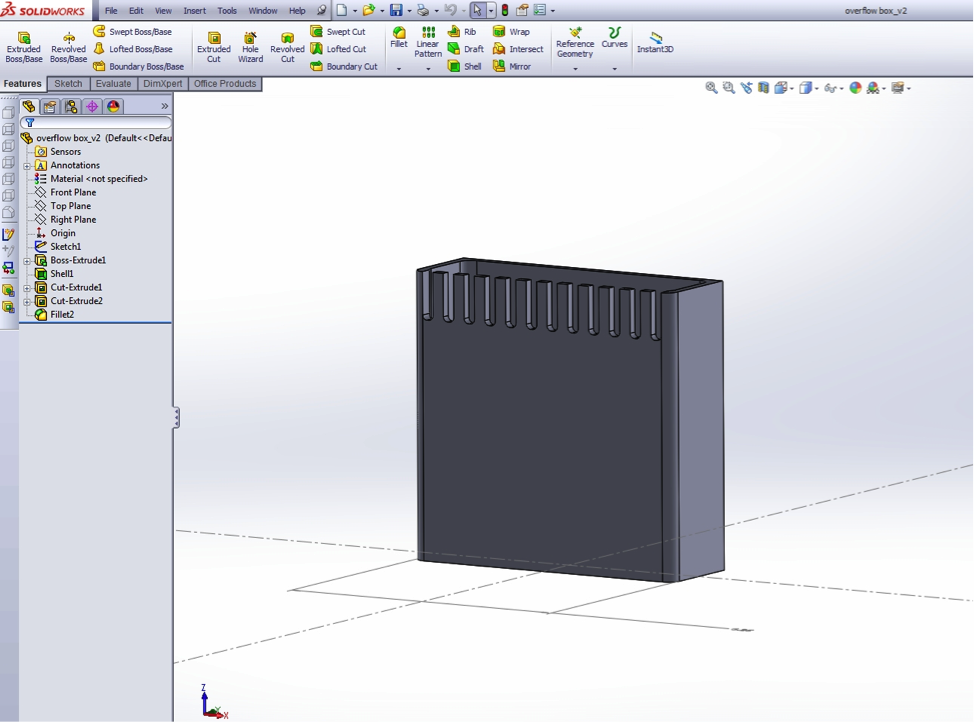
This screen shot shows the front view of the author’s overflow box.
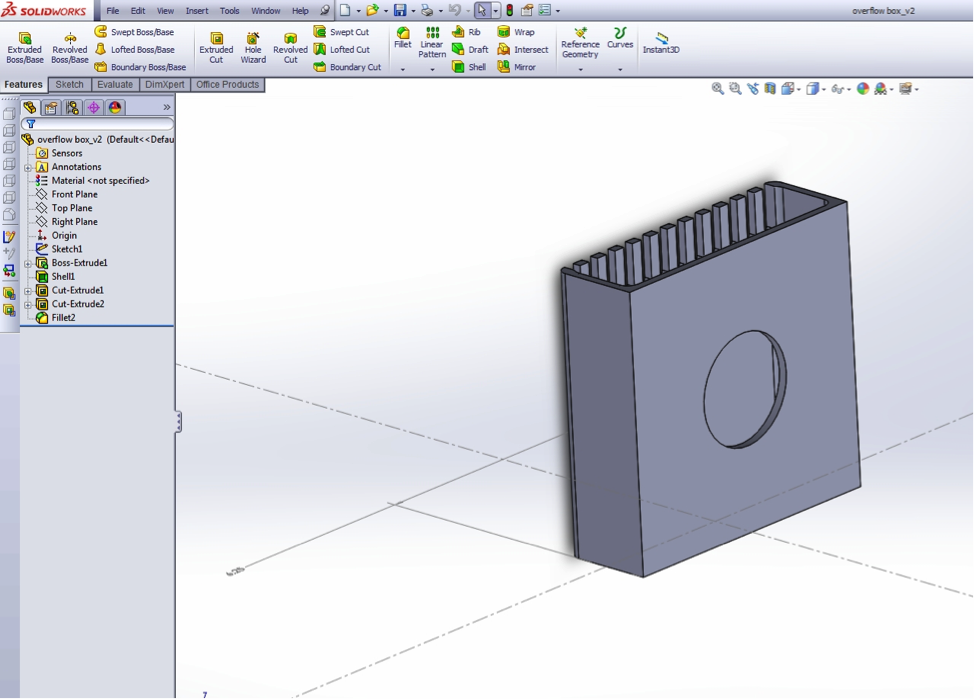
This is the back view of the overflow box, showing the drain-hole location.
The box printed as a single piece with no seams or weak points. It required about $10 worth of ABS filament and took about 10 hr. to print.
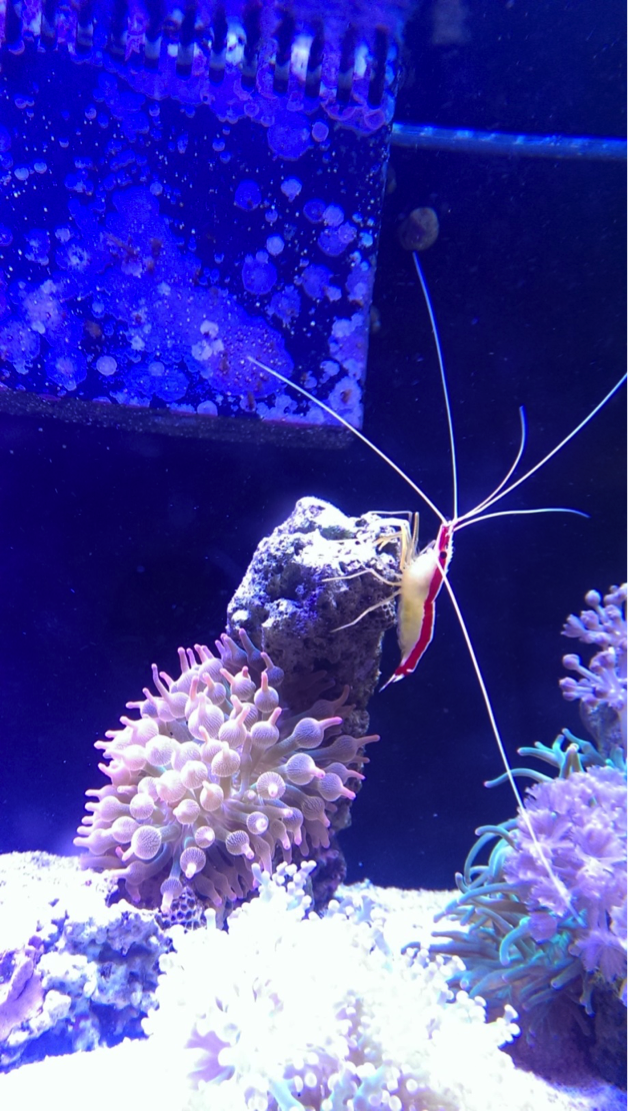
The printed overflow box has been installed for more than a year and is encrusted with coralline algae. The model in the image is the author’s cleaner shrimp Cid.
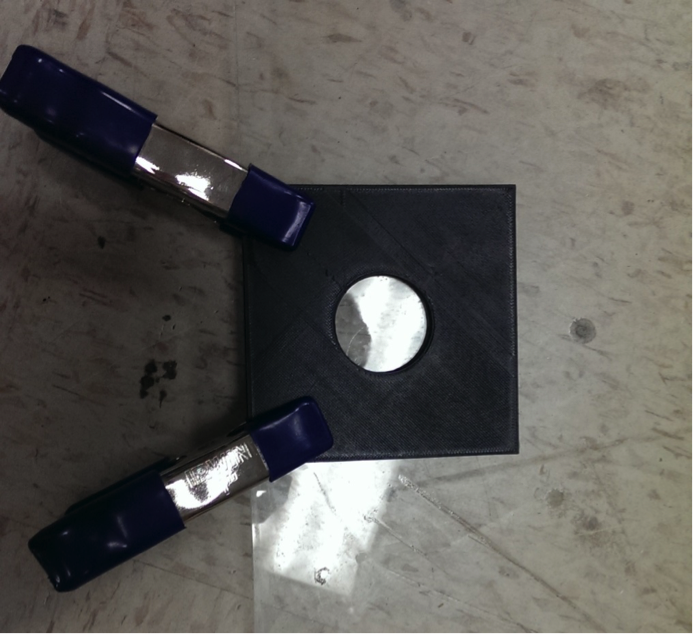
Before I installed my printed overflow box, I needed to drill my tank. Anyone who has drilled a glass tank before knows that this can be a little nerve-racking and difficult, especially the first time. The last time I drilled a glass tank was about 10 yr. ago without a drill guide or hole-cutter template.
This time I let my 3D printer do the work and printed out two different hole-cutting guides. One was a 60-mm hole for the drain and the other was a 36-mm hole for the return. To drill the holes, I clamped the guides to the glass and had a perfectly drilled tank using nothing more than a cordless drill, 2-in. clamps, and some water for cooling. Each template used less than $2 of ABS plastic and took about an hour to print.
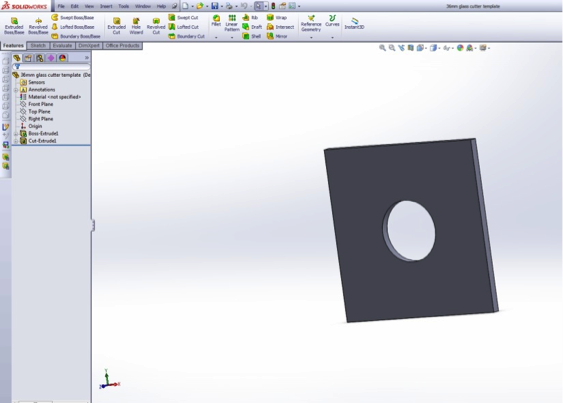
This screen capture shows one of the hole templates as it’s being designed.
Holding probes
My latest project was designing a holder for the probes that connect to my recently purchased Apex controller. I designed the holder to fit perfectly on the rim of the 20-gal sump. Each probe very gently snaps into place.
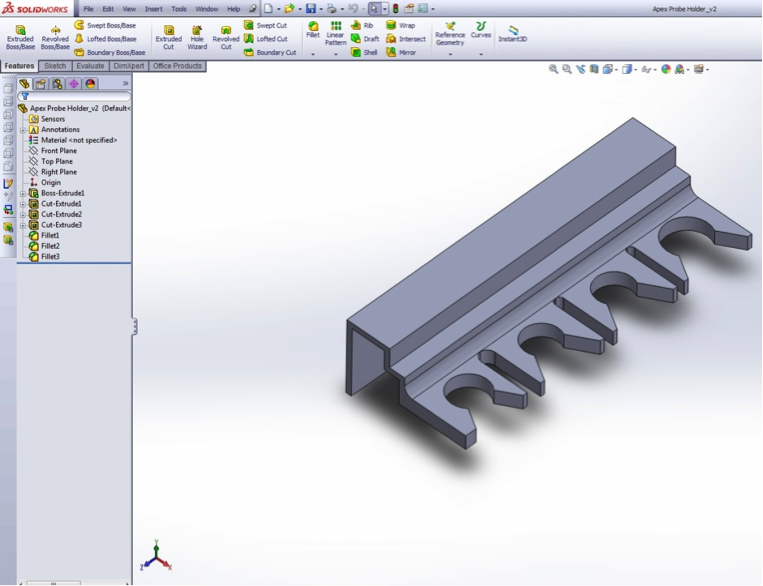
The design software shows a 3D view of the probe holder.
The holder required $3 worth of PET polymer filament. PET is the material they use to make most water bottles. It’s FDA approved, durable, and recyclable.
As you can see, it’s nothing fancy, and I’ll likely be modifying the design a bit to allow the temperature probe to sit a little deeper in the water. For now it does the job, cost significantly less than off-the-shelf options, and can be easily modified to fit any tank.
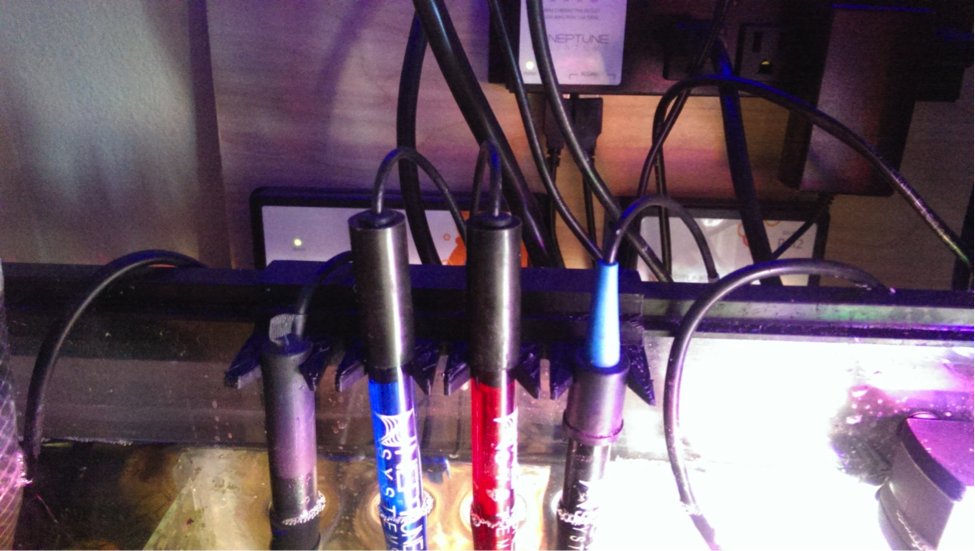
Probes are snapped into the holder’s clips in the author’s 20-gal. sump.
To date, I’ve printed replacement hood flanges for on older Aquapod 24-gal. aquarium, tank-cabinet magnetic door latches, a functioning protein skimmer (the free, open-source design can be found at www.thingiverse.com/thing:285874), airline/doser guides and clips, tank mounts for my LED fixtures, a brine-shrimp hatchery, and various turkey baster nozzles/attachments. In the near future, I have plans to make custom frag plugs that will fit into specific holes and crevices in my live rock, an acclimation box, and an algae scrubber.
My hope is that you’re already thinking about a few things you would want to design and print for your aquarium. If that’s the case, then you’re probably wondering how much 3D printers cost. The good news is that 3D printers are affordable, relatively easy to use, and require very little maintenance. I printed all of the parts for my tank using a kit that cost $999. There are machines starting at $600 that could print most, if not all, of the projects I’ve shown. New printers are coming out all of the time and the cost will only continue to come down.
If you have questions, post them in the Reef2Reef forum and I’ll try to help. My Reef2Reef name is Cope413.
Also you can check out many more DIY ideas and projects here.
“Taylor Landry is the Director of Print Solutions at Matterhackers where he helps individuals and businesses employ 3D printing in powerful and practical ways. He earned a BA in philosophy from Cal Poly, San Luis Obispo, and is an avid DIY-er and serial entrepreneur. He has kept reef tanks for 13 years and also enjoys hockey, golf, Tolstoy, and great coffee. He lives in Orange County, CA with his wife and their dog, Tucker.”
Leave a Reply
You must be logged in to post a comment.