Randy's build thread in BHM

hawkinsrgk

Valuable Member
View Badges
Joined
Feb 11, 2010
Messages
1,363
Reaction score
238
Location
Hoover, AL.
Rating - 0%
0   0   0
Hello Everybody

Just wanted to put together a build thread after we have moved from Huntsville to Birmingham. I have been working on this build for a while so I really didn't know where to start.

Let me know what you think. Here it goes.
Thanks
Randy
 
OP
OP
hawkinsrgk

hawkinsrgk

Valuable Member
View Badges
Joined
Feb 11, 2010
Messages
1,363
Reaction score
238
Location
Hoover, AL.
Rating - 0%
0   0   0
When we moved back to Birmingham we stayed in an apartment while our house was being built.
IMG_0027.jpg


The idea here was take the fish that were in the 125G, move them to the 30G then move the 125G to the house and then transfer everything back. The liverock would be put in brute garbage cans while everything was being moved.
 
OP
OP
hawkinsrgk

hawkinsrgk

Valuable Member
View Badges
Joined
Feb 11, 2010
Messages
1,363
Reaction score
238
Location
Hoover, AL.
Rating - 0%
0   0   0
At this point I did not have to worry about the fish any longer. The pump on the skimmer shorted out and killed all of the remaining fish that I had.

So after the 125G was cleaned it was ready to be moved

IMG_0037.jpg
 
OP
OP
hawkinsrgk

hawkinsrgk

Valuable Member
View Badges
Joined
Feb 11, 2010
Messages
1,363
Reaction score
238
Location
Hoover, AL.
Rating - 0%
0   0   0
The house that we were moving to was new and we knew where the tank was going to go so we had some things added to help along the way. This utility sink would be used for the RO/DI water line
IMG_0051.jpg
 
Last edited:
OP
OP
hawkinsrgk

hawkinsrgk

Valuable Member
View Badges
Joined
Feb 11, 2010
Messages
1,363
Reaction score
238
Location
Hoover, AL.
Rating - 0%
0   0   0
Two 20 amp circuits were added and the furnace had to be moved to around the corner

IMG_0162.jpg
 
Last edited:
OP
OP
hawkinsrgk

hawkinsrgk

Valuable Member
View Badges
Joined
Feb 11, 2010
Messages
1,363
Reaction score
238
Location
Hoover, AL.
Rating - 0%
0   0   0
The idea here was to start the cycle process in the rubbermaid stock tank and then connect the tanks to the union once everything was completed

IMG_0163.jpg
 
OP
OP
hawkinsrgk

hawkinsrgk

Valuable Member
View Badges
Joined
Feb 11, 2010
Messages
1,363
Reaction score
238
Location
Hoover, AL.
Rating - 0%
0   0   0
Replaced the Sicce 2500 with a Sicce 1000 pump on the SWC180. It took a lot of sanding and cutting to get everything to fit. I also stabbed myself in the thumb in the process. That caused quite a delay LOL

IMG_0170.jpg
 
OP
OP
hawkinsrgk

hawkinsrgk

Valuable Member
View Badges
Joined
Feb 11, 2010
Messages
1,363
Reaction score
238
Location
Hoover, AL.
Rating - 0%
0   0   0
The tank stand on the left is from the 180G that was setup in Huntsville. Since the two tanks will be side by side I decided to refinish to a black stain.

IMG_0179.jpg
 
OP
OP
hawkinsrgk

hawkinsrgk

Valuable Member
View Badges
Joined
Feb 11, 2010
Messages
1,363
Reaction score
238
Location
Hoover, AL.
Rating - 0%
0   0   0
Here is a picture of the rock cooking. At this point I realized the Mag 18 return pump would not be strong enough so I broke everything down and started over.

IMG_0182.jpg
 
OP
OP
hawkinsrgk

hawkinsrgk

Valuable Member
View Badges
Joined
Feb 11, 2010
Messages
1,363
Reaction score
238
Location
Hoover, AL.
Rating - 0%
0   0   0
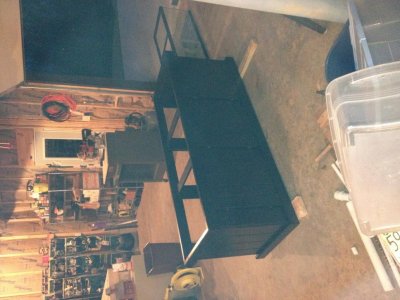
Tank Stand complete. I used two coats of black stain and two clear coats<br>
 

Attachments

  • IMG_0232.jpg
    IMG_0232.jpg
    95.8 KB · Views: 338
  • IMG_0232.jpg
    IMG_0232.jpg
    96.3 KB · Views: 291
Last edited:
OP
OP
hawkinsrgk

hawkinsrgk

Valuable Member
View Badges
Joined
Feb 11, 2010
Messages
1,363
Reaction score
238
Location
Hoover, AL.
Rating - 0%
0   0   0
Cut a hole in the wall for the plumbing and added an access panel on each side to try to clean everything up.

IMG_0236.jpg
 
OP
OP
hawkinsrgk

hawkinsrgk

Valuable Member
View Badges
Joined
Feb 11, 2010
Messages
1,363
Reaction score
238
Location
Hoover, AL.
Rating - 0%
0   0   0
Here I cut holes in the back of the tank to be used for a Herbie overflow. The Durso standpipe would be used for the emergency drains

IMG_0240.jpg
 
OP
OP
hawkinsrgk

hawkinsrgk

Valuable Member
View Badges
Joined
Feb 11, 2010
Messages
1,363
Reaction score
238
Location
Hoover, AL.
Rating - 0%
0   0   0
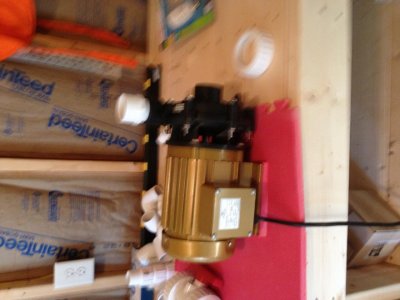
Here is a picture of the upgraded hammerhead pump. This thing is a beast.

IMG_0244.jpg
 

Attachments

  • IMG_0243.jpg
    IMG_0243.jpg
    90.7 KB · Views: 285
OP
OP
hawkinsrgk

hawkinsrgk

Valuable Member
View Badges
Joined
Feb 11, 2010
Messages
1,363
Reaction score
238
Location
Hoover, AL.
Rating - 0%
0   0   0
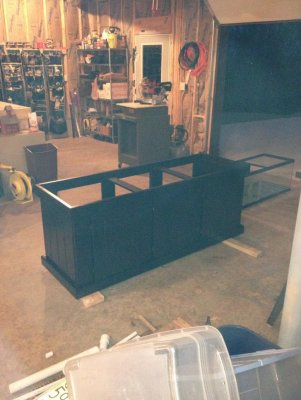
Got the layout of the tanks in place. Really pleased with the black stain on the 180.

IMG_0247.jpg
 
OP
OP
hawkinsrgk

hawkinsrgk

Valuable Member
View Badges
Joined
Feb 11, 2010
Messages
1,363
Reaction score
238
Location
Hoover, AL.
Rating - 0%
0   0   0
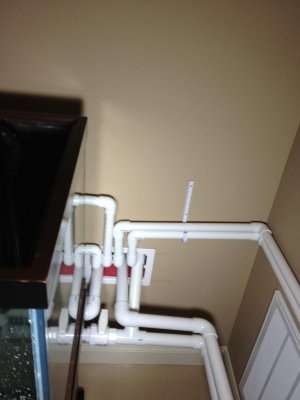
Here is a pic of the plumbing. The two 1 inch lines on the right (125G) and the two 1 inch lines on the left (180G) are the Herbie overflows. The 1.5 inch drains are the emergency overflows and the 1.5 inch line on the bottom is connected to the return pump.

IMG_0259.jpg
 

Attachments

  • IMG_0262.jpg
    IMG_0262.jpg
    86.7 KB · Views: 276
Last edited:

Clear reef vision: How do you clean the inside of the glass on your aquarium?

  • Razor blade

    Votes: 153 61.4%
  • Plastic scraper

    Votes: 67 26.9%
  • Clean-up crew

    Votes: 87 34.9%
  • Magic eraser

    Votes: 43 17.3%
  • Other

    Votes: 67 26.9%
Back
Top