Trials and Tribulations of Recharging DI Resin

cdness

2006 - Present
View Badges
Joined
Jul 15, 2009
Messages
3,988
Reaction score
165
Location
West Fargo, ND
Rating - 0%
0   0   0
So I will begin this off with, I am aware of the dangers associated with the chemicals used and all safety precautions were accounted for... Also I am aware that there are some out there who will say this is not worth my time and to just buy new stuff. However I am a person who likes to at least try something that seems plausible once and let my personal experiences support whether or not it is a good choice for myself.

I am following the steps outlined in the following website: How to Recharge DI Resin » Reef'd Up Aquatics or http://reefkeeping.com/issues/2008-09/nftt/index.phphttp://reefkeeping.com/issues/2008-09/nftt/index.php. I will not report the directions here as they are all over the place. This thread will show what I did and why it did or did not work...

Here are my reasons of why I would like to try regenerating the DI resin:

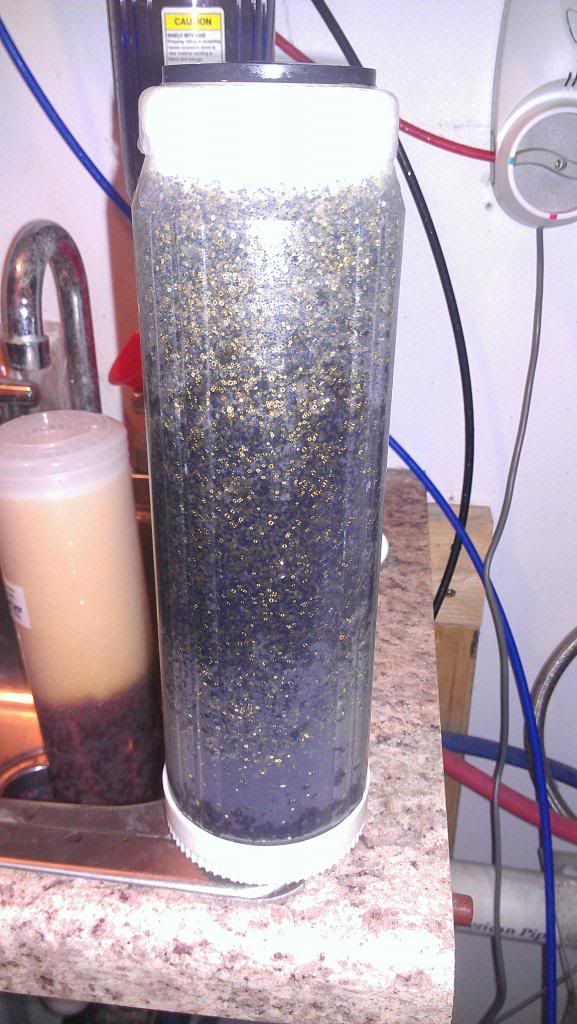
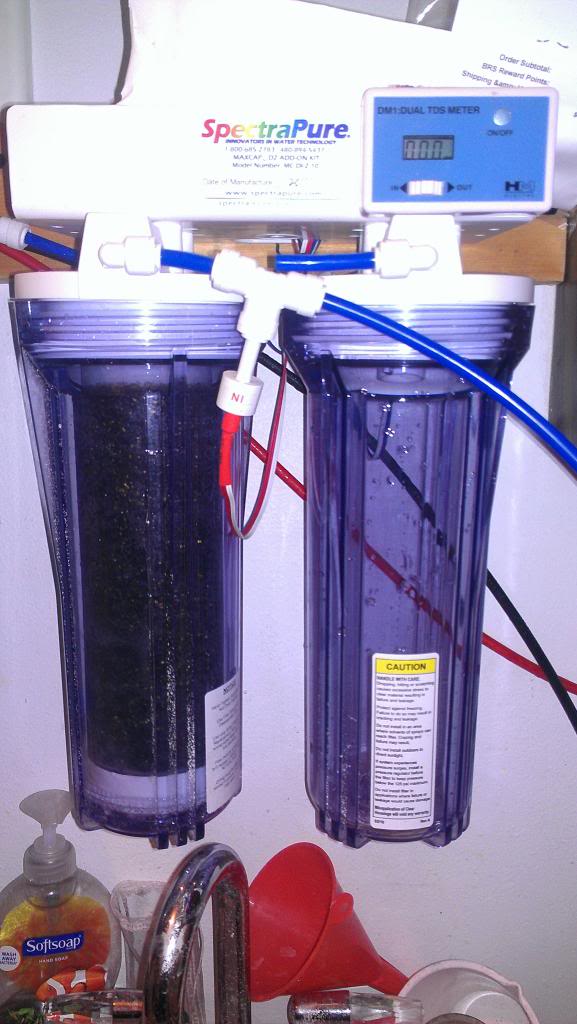
1. Cost savings
- In West Fargo there is a large amount of CO2 and sediment in the tap water. The high amount of CO2 causes my DI resin to be exhausted in approximately 50 - 100 gallons of good filtered water. This adds up over time as my top off alone takes approximately 15 gallons per week... $50 in DI resin will last me less than 3 months.

2. Landfill Reduction - If the resin can be regenerated, there is no need for it to end up in a landfill. I know it is small particles and takes up very little space, but every small impact is still an impact.

3. Personal Achievement - I want to see if it can be done as easily as it says on the websites.


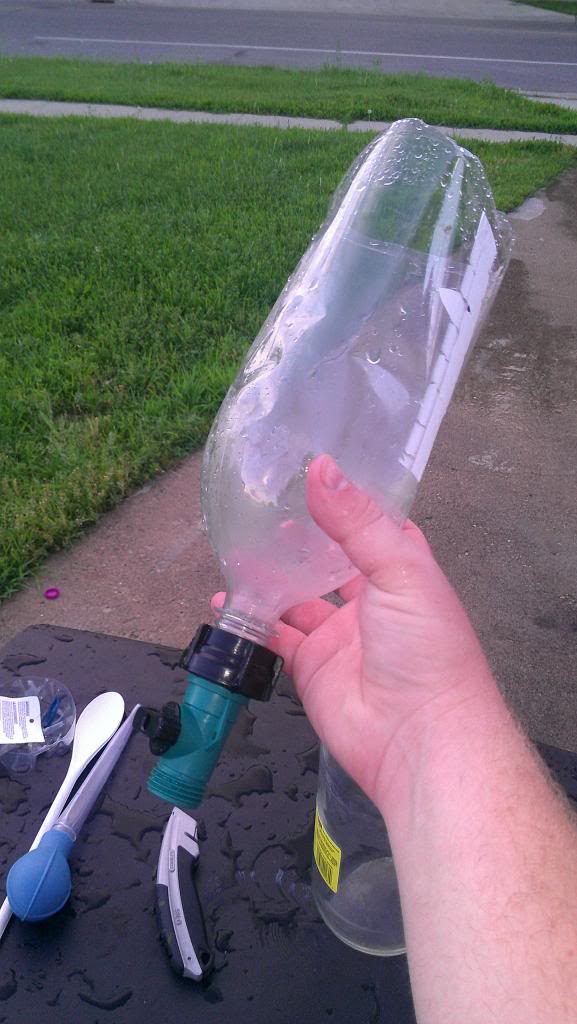
My first attempt happened on 7/10/2013. The one product I was unable to find was the Roebic brand drain cleaner. I substituted with Zep Crystal Heat Drain Opener as pictured below:

Zep.jpg


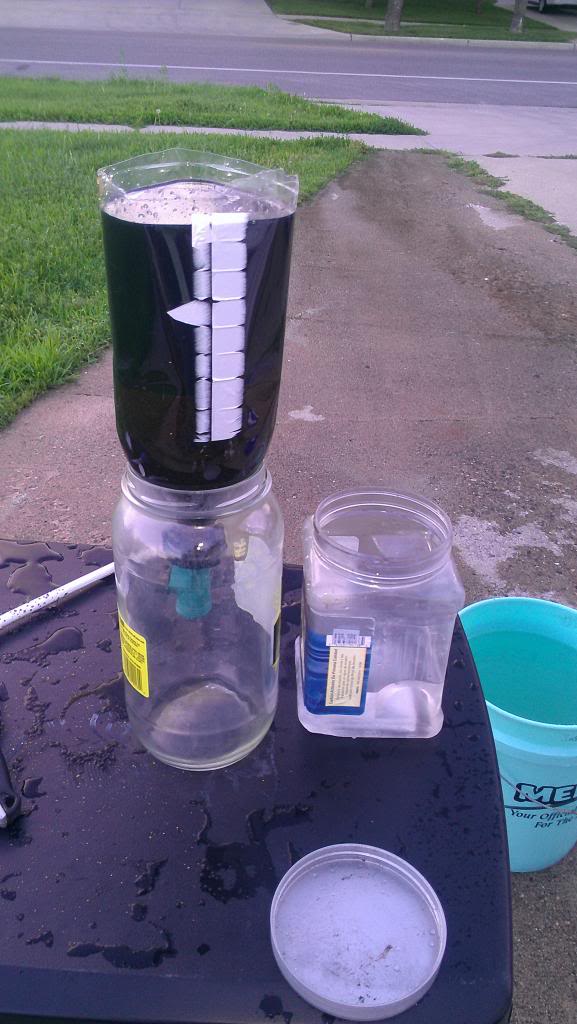
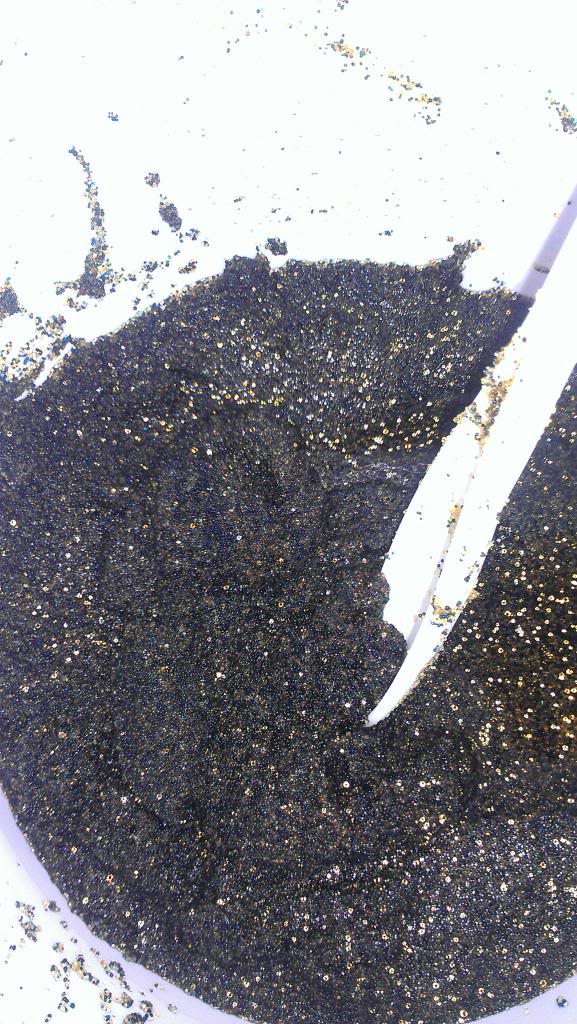
I followed the directions as they were written. However the two resins never separated. They seemed to stack on top of each other with no gap in the liquid Lye solution. I attempted the turkey baster method, but it was hard to get it all. When I was done the directions say the brown colored stuff was the stuff to go to the acid. It was supposed to turn purple, but it never did.

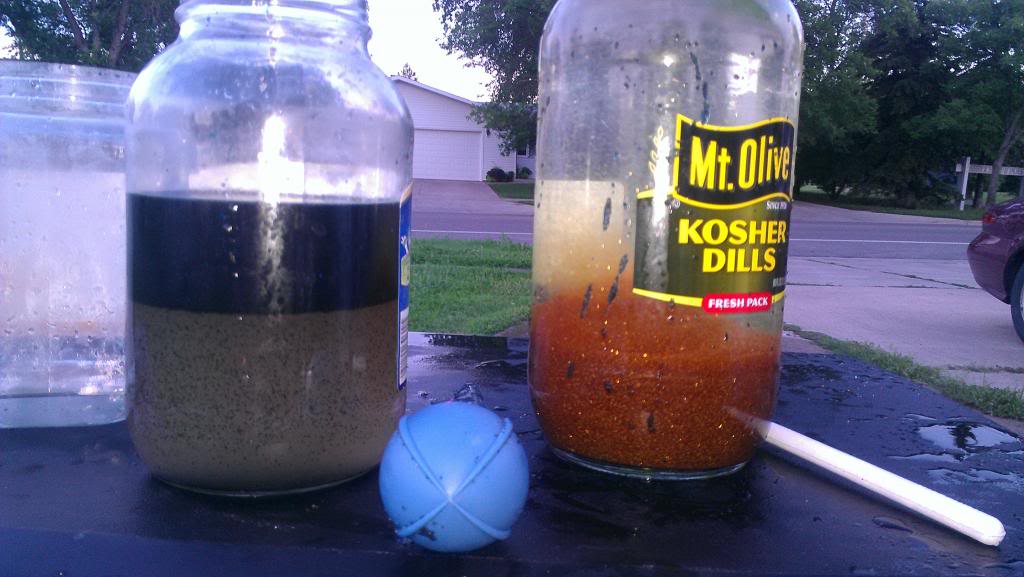
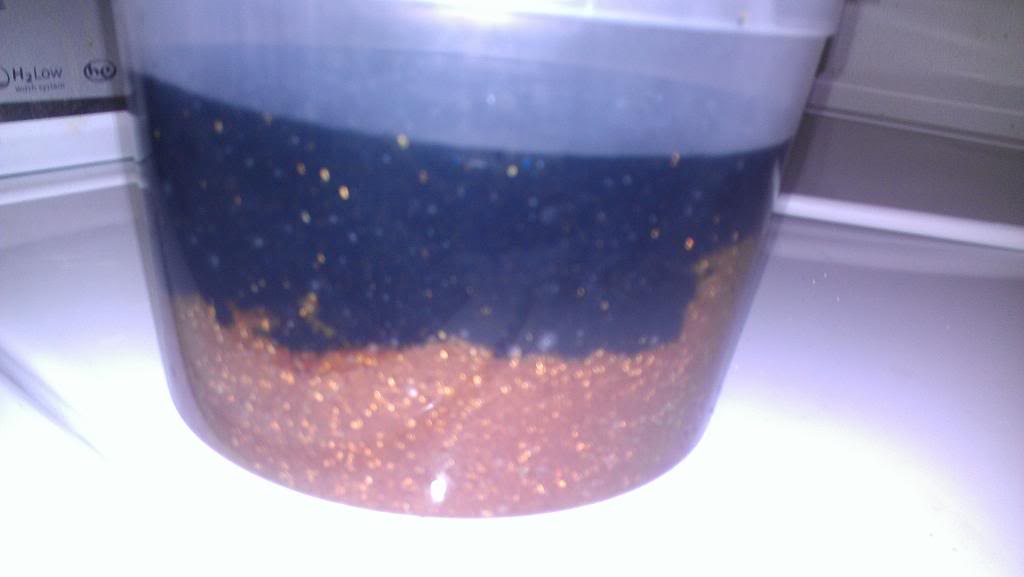
My mistake was the drain opener substitution. It is not 100% Lye and had some other caustic chemicals in it as well as aluminum shavings. due to the contamination, the test was aborted and 2 pounds of resin wasted...

Next step is to go to Tractor Supply and get the Roebic brand 100% Lye and do another attempt next week. Through some searching I finally found a local place that carries it.

Anyone know of any other places that carry this specific brand?

Do you know of any other brand that works just as well? (include store to get it at)

Please feel free to add your experiences and thoughts to this thread.
 
Last edited:

redfishbluefish

Stay Positive, Stay Productive
View Badges
Joined
Mar 22, 2012
Messages
11,704
Reaction score
25,720
Location
Sayreville, NJ
Rating - 0%
0   0   0
I too regenerate DI resin. What makes to so much simpler is to use a separatory funnel to separate the two resins. I made my own by taking a gallon plastic milk jug and cutting off the bottom. I found a short hose and valve at the local car parts store that almost fit the threads on the milk jug. Put the sodium hydroxide/ DI resin slurry in this and once it separates, carefully open the valve and draw off the “sinking portion” (cationic portion). Leave the remaining floating portion (anionic portion) in the sodium hydroxide for an hour while you first was the cationic portion and than placing it in the hydrochloric acid.


Once you’ve done it one or two times, you’re an expert….it becomes easier.


And I purchase my Roebic at Lowes.
 
OP
OP
cdness

cdness

2006 - Present
View Badges
Joined
Jul 15, 2009
Messages
3,988
Reaction score
165
Location
West Fargo, ND
Rating - 0%
0   0   0
Lowes is closer to me than TSC so I think I'll check there first. Thanks for the tip. I tried Ace Hardware, Home Depot (where others said it would be but wasn't) and Menards. At menards it was getting late so I figured the Zep looks like the same stuff... Boy was I wrong :(

Glad to hear others are doing this. It gives me additional confidence that it is something that can be done and can be done efficiently.

Do you do large batches at once or smaller batches just enough to fill the DI canisters?
 

AZDesertRat

5000 Club Member
View Badges
Joined
Feb 25, 2009
Messages
5,090
Reaction score
1,324
Location
Phoenix AZ
Rating - 0%
0   0   0
Out of curiousity have you tried better reef specific DI resins like Spectrapures MaxCap and SilicaBuster varietes?
I too have higher than normal CO2 in my water here in Phoenix. When I was using fresh mixed bed nuclear grade DI resin from Resin Depot, Buckeye, AWI, BRS and other sources I could not get better than 150 gallons per properly packed 20 oz vertical cartridge no matter what I tried. I even took my new 75 GPD Dow Filmtec RO membrane down the street to Watts Premier and they bench tested it for me and found it was performing at 97.9% rejection rate so it was not the membrane.

I installed a second DI canister and installed a MaxCap followed by a SilicaBustercartridge in the two canisters. I installed tees and ball valves between the two DI's to be able to draw TDS samples with my handheld.

I made 830 actual measured gallons before my first MaxCap cartridge started showing any signs of TDS at which point I changed the MaxCap cartridge only. At just over 1000 gallons it started to register 1-2 TDS at which point I changed it again. The original SilicaBuster was still showing 0 TDS on the handheld TDS-4TM. I made an additional 1100 gallons before the MaxCap was showing 1-2 again and I first started to see any signs of TDS just on start up from the SilicaBuster so I changed it at that time also.

So I figure I got 2930 gallons out of 3 MaxCaps and 1 SilicaBuster where I would have gone through 19.5 nuclear grade mixed bed refills in that same time. Needless to say I sold the remaining resin I had on hand from the group buy (We divided it up into 20 oz refills and sealed them all with a seal a meal vacuum device and stored it in a refrigerator to keep it fresh so it was not bad resin) and have never used anything but the MaxCap and SilicaBuster to this day. That was over 9 years ago now and I could look in my log book tonight and see how many cartridges I have used in that time but can easily say it has been less than 15 or 20 cartridges. It has also been a big "green" move since I have put that much less resin in the trash or landfill, much like recharging it does.

Another thought is, have you tried separate cation and anion cartridges to make it easier to recharge? One thing I have heard over the years is they use heat in the manufacturing process of DI resins which is hard to duplicate at homeand you can never recharge it back to 100% efficiency without that step in the process. Working in a surface water treatment plant for years I never had the desire to work around chemical when I got home so never tried recharging myself but I guess many do.
 
OP
OP
cdness

cdness

2006 - Present
View Badges
Joined
Jul 15, 2009
Messages
3,988
Reaction score
165
Location
West Fargo, ND
Rating - 0%
0   0   0
Hey AZ, actually I did use the MaxCap and Silica Buster cartridges in my last setup per your recommendation. I bought the MaxCap setup with the dual DI add-on with TDS meters after each. I went through the initial cartridges in it within 3 months. The extra capacity replacements lasted just slightly longer. When I changed to MaxCap I also changed to a Spectrapure 90 GPD membrane and new restrictor tube.

To be 100% honest, it didn't add much more life to the resin than the regular mixed bed stuff... I gave it a good shot though and while it did its job, and did it well, it didn't last long enough for me to keep buying the resin that way.

My plan is to use the dual DI system still. I'll keep testing until the first DI shows a TDS of 1 or 2. Then I will put the cartridge from bank 2 into bank 1 and put a new cartridge into bank 2. Rotating like this will always keep a good resin at the final polish of the water supply...
 

redfishbluefish

Stay Positive, Stay Productive
View Badges
Joined
Mar 22, 2012
Messages
11,704
Reaction score
25,720
Location
Sayreville, NJ
Rating - 0%
0   0   0
Here's my recommendation if you have a CO2 problem (typical to wells in our area of NJ). First run your water through your RO unit into a container (55 gallon drum comes to mind). Set up a simple bubbler ( the kind you find on fresh water tanks). Bubble the water for a day (or longer). Pump the water through the DI resin.


The bubbler will "release" the CO2 from the water and save your anionic resin from being prematurely consumed.
 
Last edited:

AZDesertRat

5000 Club Member
View Badges
Joined
Feb 25, 2009
Messages
5,090
Reaction score
1,324
Location
Phoenix AZ
Rating - 0%
0   0   0
CO2 degassing columns do work amazing well in most instances where high CO2 is present. The downside is you need to either gravity feed or pump the degassed RO water through the now disconnected or physically separated DI canister rather than using house or booster pump pressure to push it through the resin since it is at atmospheric pressure in a bucket or trash can.
 
OP
OP
cdness

cdness

2006 - Present
View Badges
Joined
Jul 15, 2009
Messages
3,988
Reaction score
165
Location
West Fargo, ND
Rating - 0%
0   0   0
I actually built a degassing column which is part of my RODI rebuild. I need to put up the build thread. Feel free to critique the design. Finished product is below:

1373593526597.jpg

1373593563942.jpg


It is about 4 feet tall total with an 8 inch top section. The air bubbler and ro pine feed through the top and go all the way to the bottom of the tower. It is built with 1 1/2" standard PVC...
 
OP
OP
cdness

cdness

2006 - Present
View Badges
Joined
Jul 15, 2009
Messages
3,988
Reaction score
165
Location
West Fargo, ND
Rating - 0%
0   0   0
I have not fully tested it. I need to see what it does. It will be mounted well above the Di resin and the buckets are in the floor so gravity is my friend. I tried it with full tap pressure and it soaked me. I'm hoping it works fine under the low pressure of the RODI unit...
 

Chompers

Active Member
View Badges
Joined
Apr 2, 2011
Messages
174
Reaction score
3
Location
Orlando
Rating - 0%
0   0   0
I've been saving my resin for several years, and redfishbluefish has been my inspiration to finally recharge it. Very much like redfishbluefish's separator, I used a brine shrimp hatchery that I had built (and never used). The hatchery holds about four gallons, so I was able to process all of my resin in one batch.

I ran into the same problem with the resins not separating. I found that all of the resin sank. In other threads, users had all of the resin float until the cation became totally consumed and then sank. Since mine all sank, I rationalized that I needed to increase the NaOH density (similar to floating an egg in a brine solution). I drained out some of the solution and increased the density (added more lye), and then added it back to the batch. That did the trick as the anion began to float. I let it separate for an hour and then drained off the cation into a colander lined with window sheer (filter material). I saved the lye solution to see if it could also be recycled (more on that later).

Life has gotten in the way of my recharging project, so the resin sits in separated bags for now. The anion portion is finished and I just need to soak the cation in the HCl. I wasn't in a race against time since I was more interested in the recharging experience and the learning aspect. Time wise, I don't have too much time involved however, it did run over the course of a weekend. I would do a little bit and then walk away to let it do its own thing. In the future when I am more proficient with it, I am certain the process will not take too much time.
 
OP
OP
cdness

cdness

2006 - Present
View Badges
Joined
Jul 15, 2009
Messages
3,988
Reaction score
165
Location
West Fargo, ND
Rating - 0%
0   0   0
Well I did a second run, this time attempting the drain on the 2-liter bottle method to save time...

IMAG1216_zpsf3fa7f06.jpg

IMAG1217_zpsdf81c1d3.jpg

IMAG1217_zpsdf81c1d3.jpg


I used the Roebic Lye sold by Lowes this time. It is the exact same type as shown in the how-tos linked on the original post.

Here is a pic of the two resins after separation. I already rinsed the cation and added the HCL mixture (Muriatic Acid and RODI) in the jar. Note it did not turn purple as stated in the how-tos...

IMAG1219_zps2d69922f.jpg


Here is the resin in the mixing container after the hour to regenerate and rinsing with RODI

IMAG1221_zps0b0b0978.jpg


Mixed:
IMAG1222_zpsd9d3a1ef.jpg


Packed:
IMAG1223_zps1d817b08.jpg


This is the TDS reading after 10 minutes of running water through the new cartridge. You can see it is still reading 1 for the TDS. It started at the level of my RO water (4 - 6 TDS) and slowly went down to 1 after 10 minutes. I don't think I got it rinsed 100%.
IMAG1225_zpsda078311.jpg


After 20 minutes it started to run at 0 TDS. I only did a single cartridge with the first time through so I bypassed the second DI chamber of my RODI unit. I intend on adding the second one in, but I need to regenerate more resin first.
IMAG1226_zps5badec80.jpg


So with that said I have some thoughts and questions:

** This is a feasible option to increase the life on the DI resins purchased. It is cost effective and to be totally hones, time effective as well.

** While the chemicals are dangerous, with proper gloves there is very little risk. This was the second attempt, but I didn't get anything on my skin that burned.

** 2-liter pop bottle necks are fragile and will break causing you to spill lots of lye and resin all over your driveway. I recommend finding a different solution than the 2-liter bottle (see question below)

** Doing this in your front yard or driveway makes people stare as they drive by. Officers tend to slow down and look at you funny as well. I bet it looks like I am doing something I shouldn't be so take that into consideration when starting this project.

Questions:

1. Anyone who has done this before, do you know why my cation never turned to purple? I am wondering if that part never regenerated or if it doesn't always turn purple... It was still as brown as it was when I separated the cation and anion resins when I mixed it back together.

2. Anyone know of a good container with a drain valve that would work better than the 2-liter bottle? I would like to have a reliable valve that won't bust the bottle threads.
 
Last edited:

revhtree

Owner Administrator
View Badges
Joined
May 8, 2006
Messages
47,740
Reaction score
86,888
Rating - 100%
1   0   0
Nice documentation!
 

AZDesertRat

5000 Club Member
View Badges
Joined
Feb 25, 2009
Messages
5,090
Reaction score
1,324
Location
Phoenix AZ
Rating - 0%
0   0   0
If you are recharging color changing resins, the resin is colored with dyes which will not be regenerated so you will not get back to the original purple color which was actually the dye not the plastic resin beads coloration.
 
OP
OP
cdness

cdness

2006 - Present
View Badges
Joined
Jul 15, 2009
Messages
3,988
Reaction score
165
Location
West Fargo, ND
Rating - 0%
0   0   0
Thanks Rev!

AZ, This is what threw me off on the color changing:

"
17. Carefully add the acid-water mix to the cation resin in the 3 QT container. This negates the lye and charges the resin. Some of the resin should change color almost instantaneously.
18. Stir the cation resin. Most of it should change color
"
It was from the first link in the original post. I waited and waited even attempting to make the acid stronger in the cation, but no color change for me...
 

Chompers

Active Member
View Badges
Joined
Apr 2, 2011
Messages
174
Reaction score
3
Location
Orlando
Rating - 0%
0   0   0
I had the same result with the cation but the anion turned back to almost black. I think we have a different type of resin since the original threads were years ago. My new resin has brown and dark purple mixed together, so I think we are actually on the right track.
 

Eric B

Well-Known Member
View Badges
Joined
Oct 21, 2009
Messages
549
Reaction score
27
Location
Atlanta, GA
Rating - 0%
0   0   0
Wow I use to recharge my resin 20 years ago and didn't find it to difficult, but I worked at a large chemical plant and had access to HCL and pure caustic soda as we had 5000 gallon tanks of this stuff so I was able to get as much as often as I needed it. :bigsmile:

I did regenerate a bunch of batches and I can say the more you do at one time the easier it was as it became like an assembly line. Cdness I think I ended up using an old brine shrimp hatchery and was the easiest and least messy way I found because I still lived with my parents at that time and my was not happy if I made a mess. LOL The water here in Georgia where I live now is very good only in the mid 40's coming straight out of the tap and DI resins last a long time. Good luck!
 
OP
OP
cdness

cdness

2006 - Present
View Badges
Joined
Jul 15, 2009
Messages
3,988
Reaction score
165
Location
West Fargo, ND
Rating - 0%
0   0   0
If anyone wants to send me your used resins, I will gladly use them as practice and keep adding to the writeup. I am going to do another batch soon.
 

Being sticky and staying connected: Have you used any reef-safe glue?

  • I have used reef safe glue.

    Votes: 125 88.7%
  • I haven’t used reef safe glue, but plan to in the future.

    Votes: 8 5.7%
  • I have no interest in using reef safe glue.

    Votes: 5 3.5%
  • Other.

    Votes: 3 2.1%
Back
Top