


How to: Building an aquarium stand
When starting my new cabinet build I noticed that there is a lot of threads to show off aquarium stands but very few showing the building process in any detail. I decided to document my recent cabinet build to hopefully inspire a few people to build their own who might not think they possess the carpentry skills. I am definitely no carpenter and I've build a few decent cabinets now. There is nothing better than a guest in you're home commenting on how nice your aquarium cabinet is before they know you built it yourself!
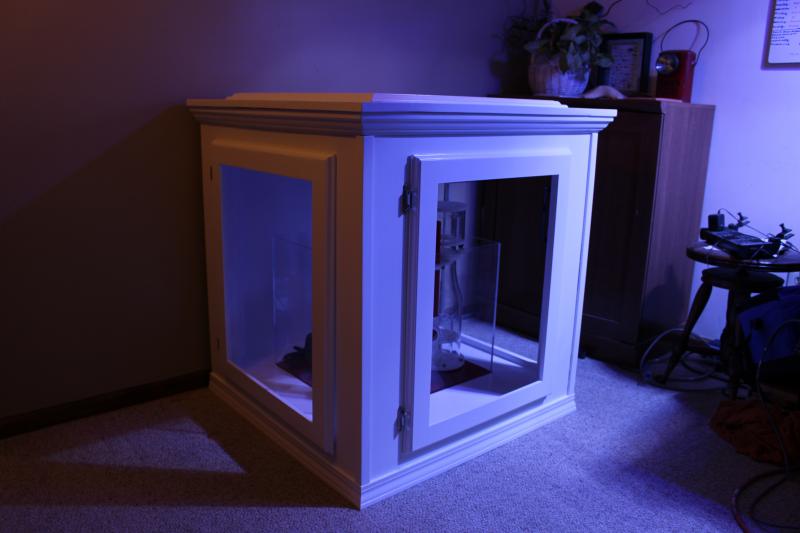
Finished Product
Materials used
spf 2x4's
1x6 Poplar lumber (frame)
1x3 poplar lumber (doors)
3/4" plywood (oak used here but most 3/4 ply will do. Ideally marine grade if money is not an issue)
1" Poplar corner moulding
Pine base moulding
Pine crown moulding
Poplar trim moulding
zinzer 123 primer
Benjamin Moore Advanced paint (natural ivory)
Tools used
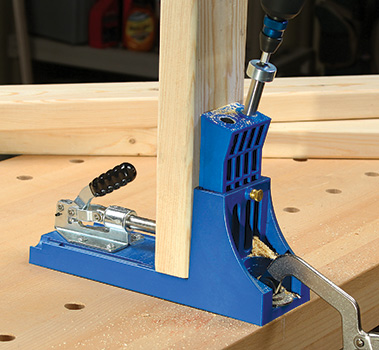
Kreg pocket hole jig
Mitre saw
Table saw
Drill
Jigsaw (for cutting out hole for plumbing)
Brad nail gun
Router (For profiling doors)
Orbital sander
Lots of 120 and 150 grit sand paper
Various clamps
Wood glue
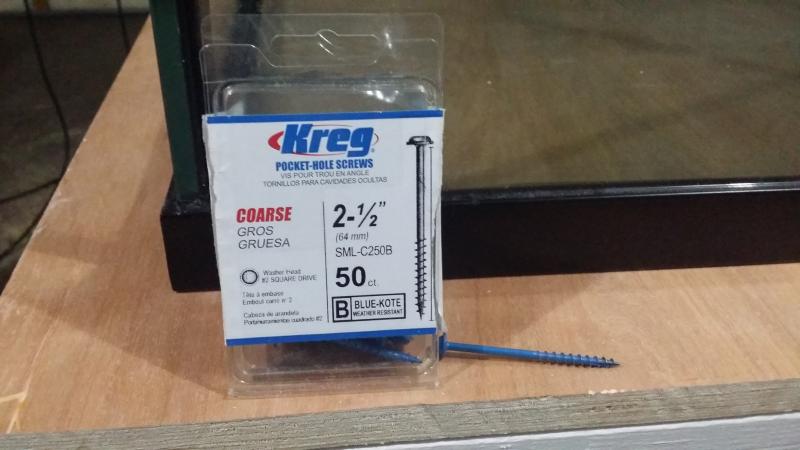
2 1/2" course threaded kreg screws (For 2x4's)
1 1/4" fine threaded kreg screws (For 1x hardwood)
1 1/2" deck screws (For fastening plywood)
Lots of caulk and wood filler
6" High density foam paint rollers
Decent quality paint brush for moulding
Building the frame
The frame should be the simplest part of the entire build but it never ends up being that way for me. Getting the frame as square as possible is crucial for stability; it also makes the rest of the build go much smoother when it comes to fitting everything.
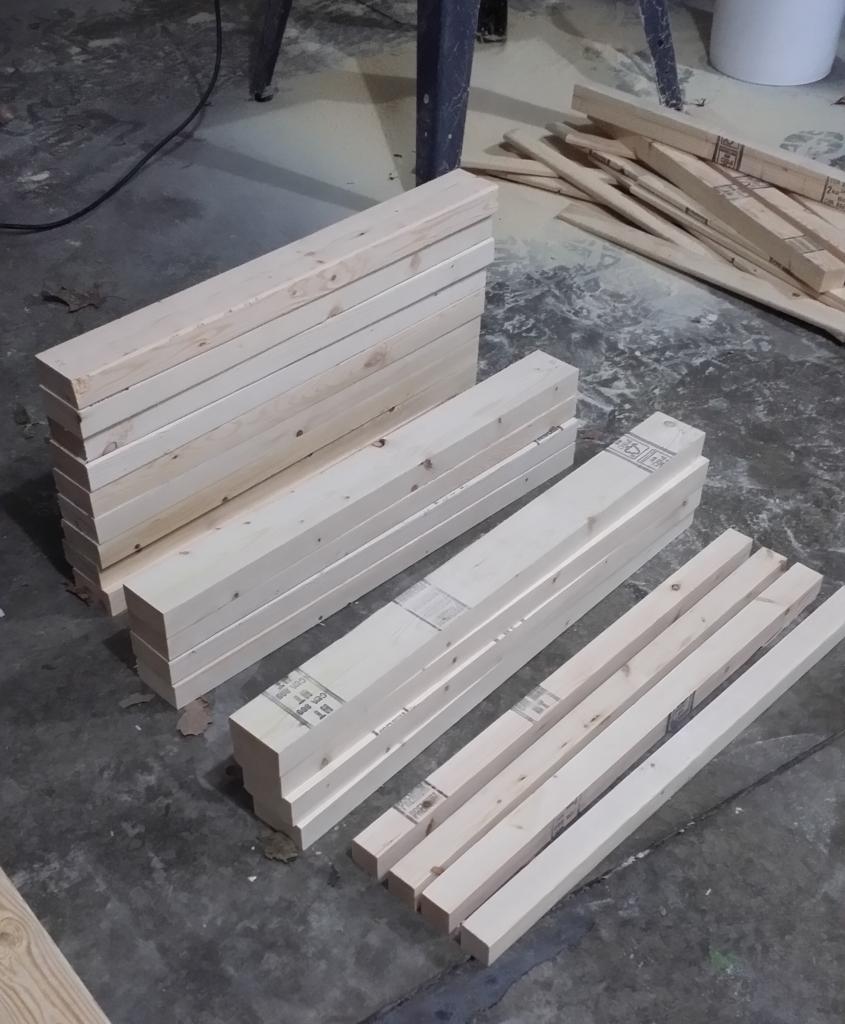
I started this build by cutting all the framing 2x4's to size using a mitre saw. cutting them all prior to assembly allowed me to ensure they were all the exact same length to help keep things stayed square. I then ripped all 2x4's down to exactly 3" wide on the table saw. This wasn't necessary but I find them easier to work with when they are square instead of having the rounded corners. Ripping 1/4" off each side of the 2x4's gives a nice square 3"x1 1/2" board.
I also ripped four 2x4's down to 1 1/2" to be used as half of the "L" shaped legs making them exactly 3"x3"
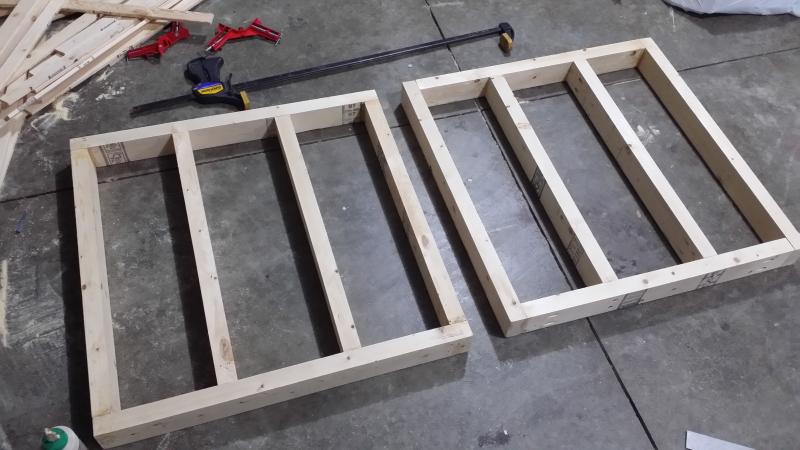
Next I assembled the top and bottom frames. Building the frames by clamping two of the boards to the corner edge of a table saw helps to keep them square. I found it easier than using a carpenders square. I used a kreg pocket hole jig and 2 1/2" course thread kreg screws to assemble the entire frame. It makes things extremely simple. When adding the middle braces be mindful of where your drain and return plumbing need to go.
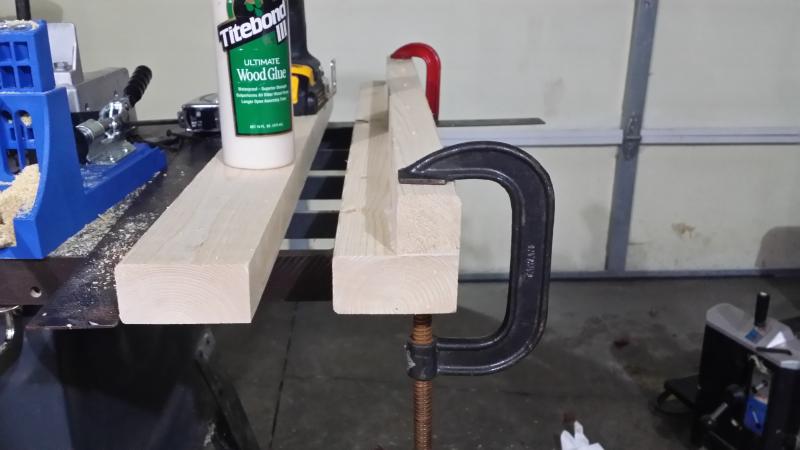
Next I assembled the legs I previously cut to length. I used plenty of wood glue and a counter sunk 1 1/2" deck screw every couple inches.
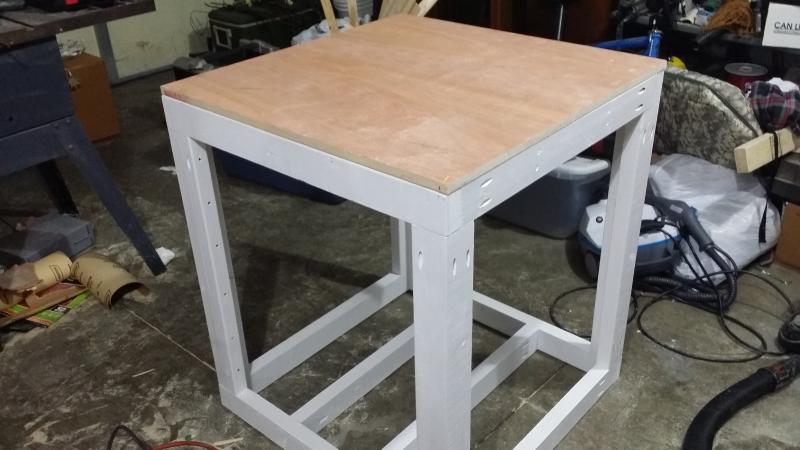
Next I attached the legs to one of the frames again using pocket screws and wood glue. I used a carpender square to ensure the legs were at a right angle with the frame.
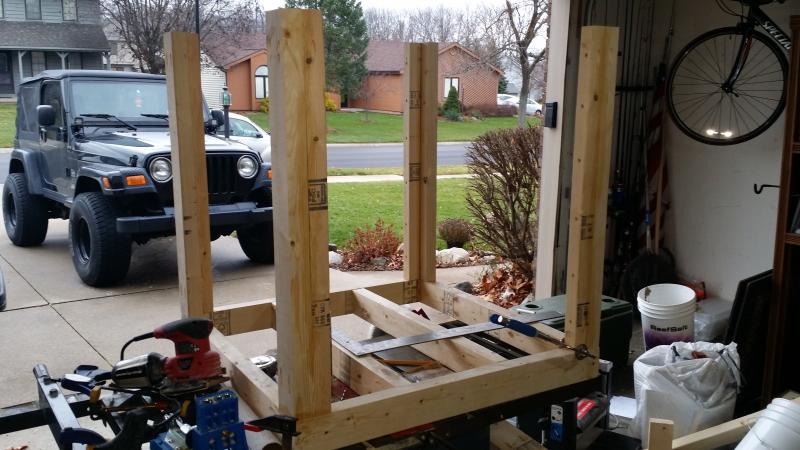
I then attached the other end of the legs to the top frame in the same way.

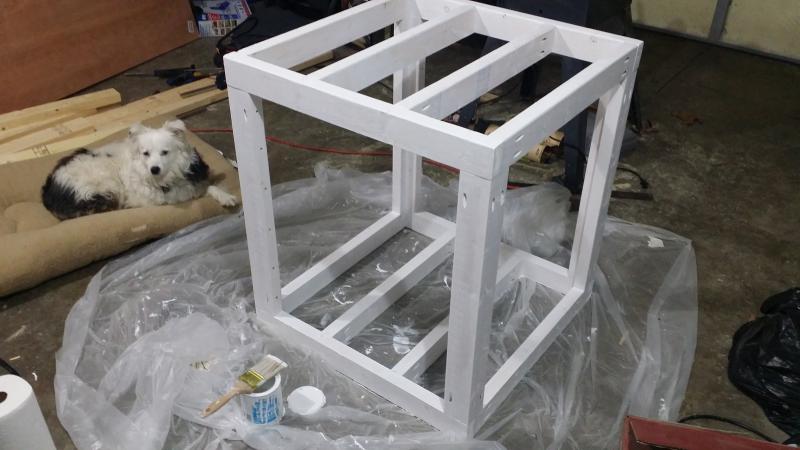
Next I primed the entire frame with 2 coats of zinzer 1,2,3. I only used this because I already had it. From what I've read kilz oil based primer seems to be prefered.
Next I cut and installed 3/4" plywood on the top and bottom platforms of the cabinet using 1 1/2" wood screws. I used a quick square to mark where the legs would be on the bottom shelf and cut them out using an orbital saw.

I then filled all of the screw holes with wood filler and sanded both pieces of plywood with an orbital sander.
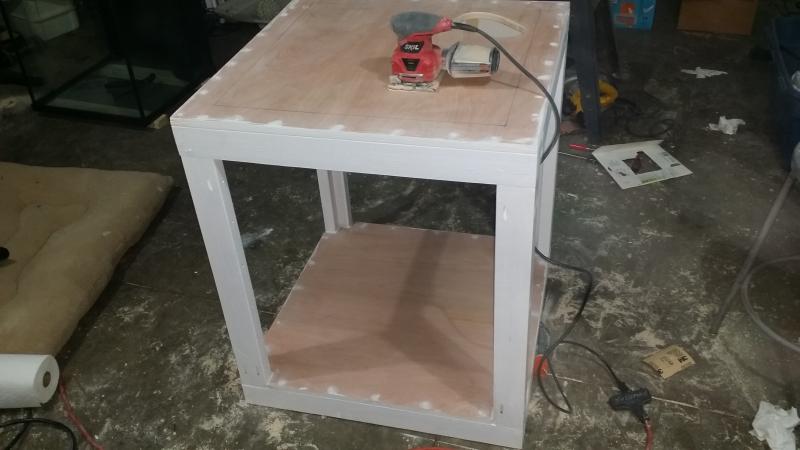
I then cut another Piece of 3/4" plywood for the back of the cabinet since this cabinet is going againt a wall. I also cut a hole in the top piece of plywood where my plumbing needed to come through the stand.
Skinning the frame
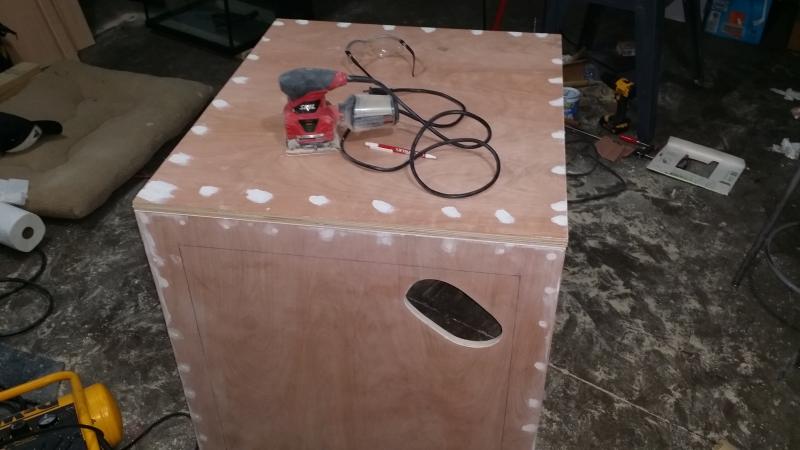
The majority of the people I see building stands use plywood to skin their frame, cutting a hole out in the middle where the doors should go. I find it much easier and better looking to use 1x lumber, especially if the stand is going to be stained and not painted. For this cabinet I used 1x6 poplar lumber. I simply cut two vertical boards the height of the frame, and two horizontal boards the width of the frame minus the width of the vertical boards. I quickly drilled pocket holes using the kreg jig, clamped them together and glued and screwed them with 1 1/4" fine threaded kreg screws. After the first frame is together and you know what you're doing it goes quick.
I find that the easiest way to attach the faces to the frame is by using wood screws where the moulding will be so that none of them show. I also use plenty of wood glue and clamp them till dried.
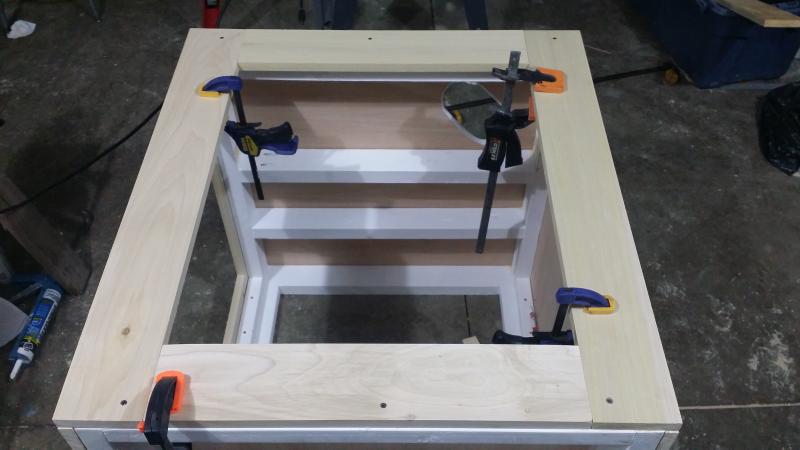
All 4 faces attached.

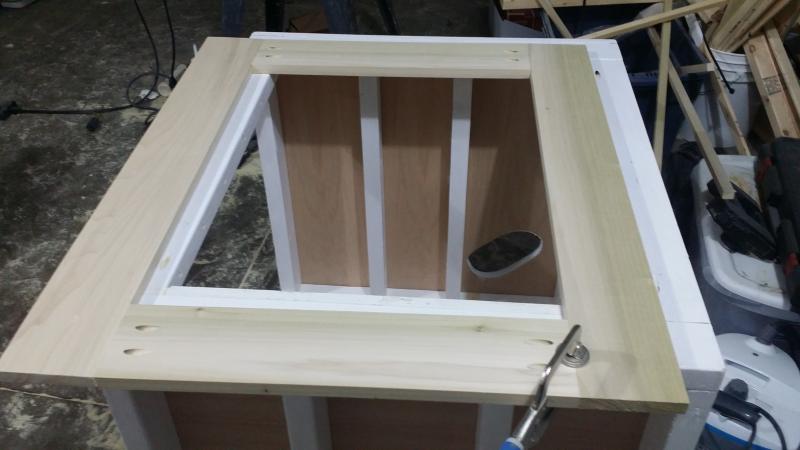
Next I built a top frame to go around the tank so that the aquarium sits down in the stand.


Normally I would just screw the top face down to the top of the stand and then brad nail crown moulding around it permanently attaching it to the cabinet. However, Being that this is a cube stand and already measured 30"x30" I needed to be able to remove the top face and moulding in order to fit through standard doorways. Do overcome this I attached the crown moulding directly to the top cabinet face using brad nails and wood glue. The whole assembly just slips right over the aquarium and fits snug around the cabinet so that it can be removed at any time. I also added trim moulding around where the tank will sit which you can't see in this photo but is clearly seen in the finished product photos.

When starting my new cabinet build I noticed that there is a lot of threads to show off aquarium stands but very few showing the building process in any detail. I decided to document my recent cabinet build to hopefully inspire a few people to build their own who might not think they possess the carpentry skills. I am definitely no carpenter and I've build a few decent cabinets now. There is nothing better than a guest in you're home commenting on how nice your aquarium cabinet is before they know you built it yourself!
Finished Product

Materials used
spf 2x4's
1x6 Poplar lumber (frame)
1x3 poplar lumber (doors)
3/4" plywood (oak used here but most 3/4 ply will do. Ideally marine grade if money is not an issue)
1" Poplar corner moulding
Pine base moulding
Pine crown moulding
Poplar trim moulding
zinzer 123 primer
Benjamin Moore Advanced paint (natural ivory)
Tools used
Kreg pocket hole jig
Mitre saw
Table saw
Drill
Jigsaw (for cutting out hole for plumbing)
Brad nail gun
Router (For profiling doors)
Orbital sander
Lots of 120 and 150 grit sand paper
Various clamps
Wood glue
2 1/2" course threaded kreg screws (For 2x4's)
1 1/4" fine threaded kreg screws (For 1x hardwood)
1 1/2" deck screws (For fastening plywood)
Lots of caulk and wood filler
6" High density foam paint rollers
Decent quality paint brush for moulding
Building the frame
The frame should be the simplest part of the entire build but it never ends up being that way for me. Getting the frame as square as possible is crucial for stability; it also makes the rest of the build go much smoother when it comes to fitting everything.
I started this build by cutting all the framing 2x4's to size using a mitre saw. cutting them all prior to assembly allowed me to ensure they were all the exact same length to help keep things stayed square. I then ripped all 2x4's down to exactly 3" wide on the table saw. This wasn't necessary but I find them easier to work with when they are square instead of having the rounded corners. Ripping 1/4" off each side of the 2x4's gives a nice square 3"x1 1/2" board.
I also ripped four 2x4's down to 1 1/2" to be used as half of the "L" shaped legs making them exactly 3"x3"

Next I assembled the top and bottom frames. Building the frames by clamping two of the boards to the corner edge of a table saw helps to keep them square. I found it easier than using a carpenders square. I used a kreg pocket hole jig and 2 1/2" course thread kreg screws to assemble the entire frame. It makes things extremely simple. When adding the middle braces be mindful of where your drain and return plumbing need to go.


Next I assembled the legs I previously cut to length. I used plenty of wood glue and a counter sunk 1 1/2" deck screw every couple inches.

Next I attached the legs to one of the frames again using pocket screws and wood glue. I used a carpender square to ensure the legs were at a right angle with the frame.

I then attached the other end of the legs to the top frame in the same way.

Next I primed the entire frame with 2 coats of zinzer 1,2,3. I only used this because I already had it. From what I've read kilz oil based primer seems to be prefered.

Next I cut and installed 3/4" plywood on the top and bottom platforms of the cabinet using 1 1/2" wood screws. I used a quick square to mark where the legs would be on the bottom shelf and cut them out using an orbital saw.


I then filled all of the screw holes with wood filler and sanded both pieces of plywood with an orbital sander.

I then cut another Piece of 3/4" plywood for the back of the cabinet since this cabinet is going againt a wall. I also cut a hole in the top piece of plywood where my plumbing needed to come through the stand.

Skinning the frame
The majority of the people I see building stands use plywood to skin their frame, cutting a hole out in the middle where the doors should go. I find it much easier and better looking to use 1x lumber, especially if the stand is going to be stained and not painted. For this cabinet I used 1x6 poplar lumber. I simply cut two vertical boards the height of the frame, and two horizontal boards the width of the frame minus the width of the vertical boards. I quickly drilled pocket holes using the kreg jig, clamped them together and glued and screwed them with 1 1/4" fine threaded kreg screws. After the first frame is together and you know what you're doing it goes quick.

I find that the easiest way to attach the faces to the frame is by using wood screws where the moulding will be so that none of them show. I also use plenty of wood glue and clamp them till dried.

All 4 faces attached.

Next I built a top frame to go around the tank so that the aquarium sits down in the stand.


Normally I would just screw the top face down to the top of the stand and then brad nail crown moulding around it permanently attaching it to the cabinet. However, Being that this is a cube stand and already measured 30"x30" I needed to be able to remove the top face and moulding in order to fit through standard doorways. Do overcome this I attached the crown moulding directly to the top cabinet face using brad nails and wood glue. The whole assembly just slips right over the aquarium and fits snug around the cabinet so that it can be removed at any time. I also added trim moulding around where the tank will sit which you can't see in this photo but is clearly seen in the finished product photos.

Last edited by a moderator:


") Nice job on the stand.
Nice job on the stand.


