bean animals dead silent failsafe overflow......

Troylee

all about the diy!!!!!
View Badges
Joined
Jan 15, 2010
Messages
18,337
Reaction score
14,264
Location
Vegas baby!!!!
Rating - 0%
0   0   0
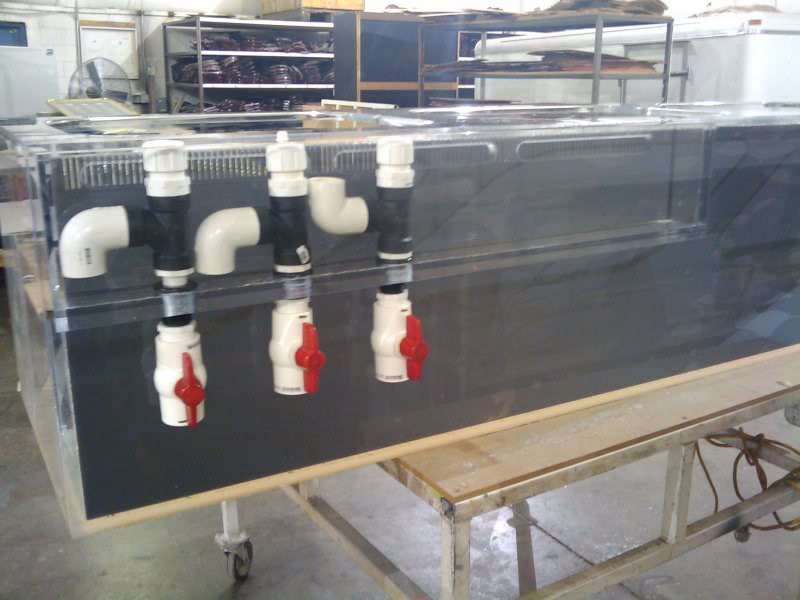
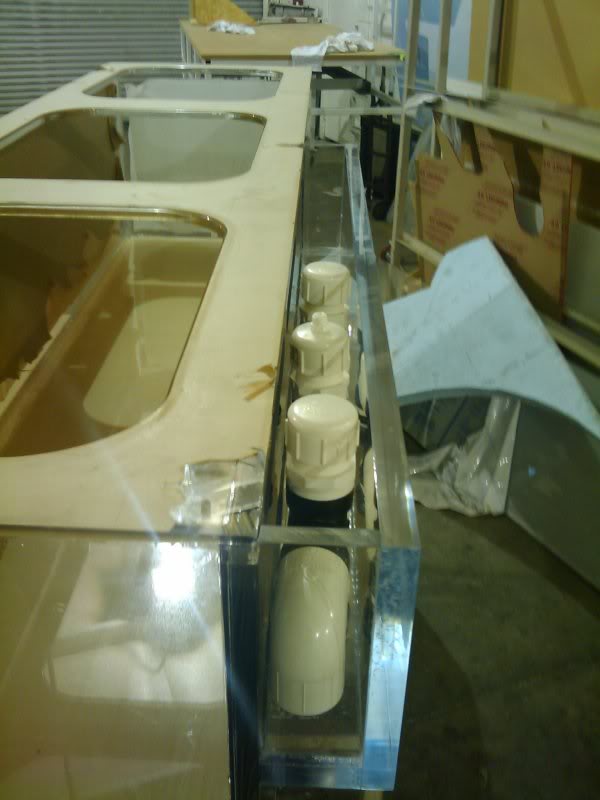
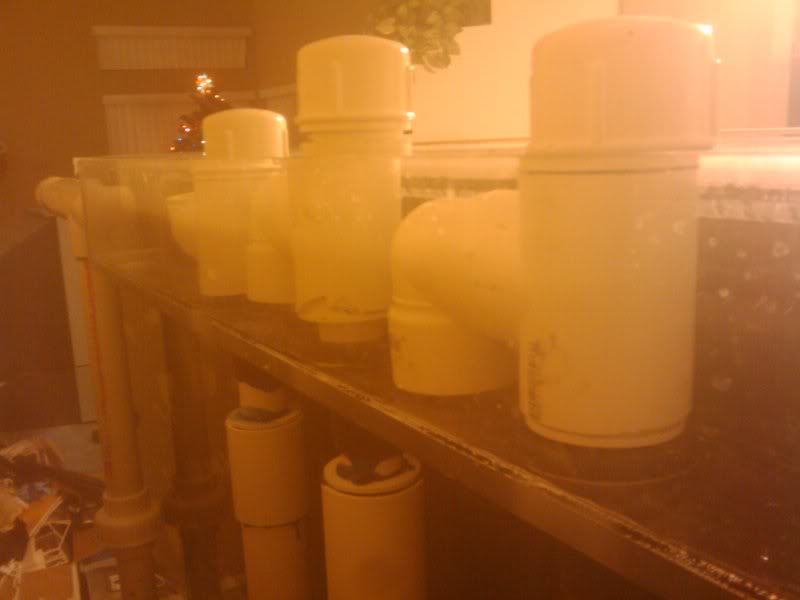
i can by no means take credit for this, but i can tell you from exp. on all my personal tanks and a bunch of others i have built that it is by far the best overflow out there....Not only is it dead silent as he claims, but it is a set and forget system that is fool proof and no way possible for any mishaps or floods......i have never done the internal myself because it takes up valuable real estate in the tank, but done my share of externals.... here is a link to his design with great diagrams and all the info you could ever want or need.....also here is a couple pics of my personal tanks running them external for reference....please feel free with any questions.....btw. i pull 2000+ gallons on a single 1" bulkhead with no sound at all...;) ask anyone thats seen my tanks in person there amazed how quiet it is....
BeanAnimal's Bar and Grill - Silent and Fail-Safe Overflow System
66.jpg

60.jpg

2009-12-11182729.jpg
 

Aku

Community Member
View Badges
Joined
May 9, 2010
Messages
30
Reaction score
0
Location
Fort Collins, CO
Rating - 0%
0   0   0
Nice. I'm just about to start drilling my tank for a c2c/bean animal setup. At first, the plumbing piece looks a little intimidating, but after looking at it for a while doesn't seem so bad. Thanks for the pics!
 

Wy Renegade

Zs and Ps/PE collector
View Badges
Joined
Feb 5, 2009
Messages
3,785
Reaction score
156
Location
Wyoming
Rating - 0%
0   0   0
Very nice Troy, I would like one please (yes - the whole acrylic tank thing w/ the bean animal's external overflow system). I'd like it built in an L shape please.

***snaps alert*** oh man, I'm sorry, was I daydreaming again?! LOL
 
OP
OP
Troylee

Troylee

all about the diy!!!!!
View Badges
Joined
Jan 15, 2010
Messages
18,337
Reaction score
14,264
Location
Vegas baby!!!!
Rating - 0%
0   0   0
To bad your not closer to Vegas... That tank is going for sale lol... If anyone needs some help with one let me know there simple as can be and very effective... Combined with anthony calflos, c2c it is by far more suppierior to any other design by surface skimming efficantly and quiet...;)
 
OP
OP
Troylee

Troylee

all about the diy!!!!!
View Badges
Joined
Jan 15, 2010
Messages
18,337
Reaction score
14,264
Location
Vegas baby!!!!
Rating - 0%
0   0   0
Nice work! I think you could have used thicker acrylic....:tongue:

Most of all people say the same thing lol... But when you slit a tank down the whole back the euro no longer supports anything, so To take the pressure off the back and prevent failure, you must use 3/4" or 1" acrylic for the external box, it takes alot stress!!!;)
 

rng_pw

Well-Known Member
View Badges
Joined
Jun 11, 2008
Messages
612
Reaction score
2
Rating - 0%
0   0   0
nice overflows. i built mine really similar and they are dead silent. very easy to build also.

ricky
 
OP
OP
Troylee

Troylee

all about the diy!!!!!
View Badges
Joined
Jan 15, 2010
Messages
18,337
Reaction score
14,264
Location
Vegas baby!!!!
Rating - 0%
0   0   0
i have never had this problem... you have 2 choices one is just a slit "wier" which is the best for surface skimming but allows snails and fish into the overflow, for this reason i use a comb to stop anything from making it back there....i never had a problem with one clogging thou.....i guess if it did you would just need to scrub the comb with a brush of some sorts.....
 

110reef

Active Member
View Badges
Joined
Jul 3, 2008
Messages
292
Reaction score
2
Location
Baton Rouge, LA
Rating - 0%
0   0   0
i have never had this problem... you have 2 choices one is just a slit "wier" which is the best for surface skimming but allows snails and fish into the overflow, for this reason i use a comb to stop anything from making it back there....i never had a problem with one clogging thou.....i guess if it did you would just need to scrub the comb with a brush of some sorts.....

I had this problem quite a bit while I had my byropsis outbreak, the byropsis would grow quickly enough to clog the slits, sometimes in as little as a day, forcing the water level higher. I did have to scrub the teeth often, but if you aren't there for some reason, it would be nice to have another layer of protection. Luckily, the tops of my overflows are still a little below the top rim of the tank, so even with fully clogged teeth, the tank will not overflow to the ground. May be something to consider when you build these to allow a little space above the teeth for cloggage.
 
OP
OP
Troylee

Troylee

all about the diy!!!!!
View Badges
Joined
Jan 15, 2010
Messages
18,337
Reaction score
14,264
Location
Vegas baby!!!!
Rating - 0%
0   0   0
All my overflows are slit 1.5" down from the top.... Which gives me about a 1" down waterline so I always have lead room... Thank gawd I have never had to deal with byropsis.... Never had any algae problems to be honest.... Just a red cyano outbreak one time that I think came from a bad batch of salt since a couple other local reefers had the same salt with the same problem around the same time....
 

Typhon

Force of Nature
View Badges
Joined
Dec 10, 2009
Messages
329
Reaction score
260
Location
Charlotte, NC
Rating - 100%
2   0   0
I wonder what difference is between this design and the standard durostand? Only difference I can see if there is a reverse durostand just in case the other 3 clog?
 

110reef

Active Member
View Badges
Joined
Jul 3, 2008
Messages
292
Reaction score
2
Location
Baton Rouge, LA
Rating - 0%
0   0   0
I wonder what difference is between this design and the standard durostand? Only difference I can see if there is a reverse durostand just in case the other 3 clog?
The difference is that the primary overflow is a siphon, no noise, no air entrainment, just water. The second is a standard overflow with an air vent, but it has a very light load so that the flow is low and hence it won't suck air into the water stream and therefore will be silent too. The third is an emergency backup, normally not in use.

Looks to me that the trick is adjusting the siphon overflow so that the second overflow only has a slight flow.
 

dwl

New Member
View Badges
Joined
Mar 24, 2009
Messages
5
Reaction score
0
Rating - 0%
0   0   0
I have a couple of questions.

Are your plumbing pieces above the bulkheads glued or screwed or just pressed on? With almost zero clearance front to back how would you do any service to these 3 drains?

Also, since there are 3 drain lines going into your sump, what, if anything do you do for filter socks? Do you just not use them, or do you have multiple socks (1 for each drain line, or do you put all 3 lines into 1 sock?

Thanks.
 
OP
OP
Troylee

Troylee

all about the diy!!!!!
View Badges
Joined
Jan 15, 2010
Messages
18,337
Reaction score
14,264
Location
Vegas baby!!!!
Rating - 0%
0   0   0
Everything is glues except the top cap it is just pressed on... Also I don't glue them into the bulkhead so I can just remove the whole durso from the overflow and then pop the top cap for cleaning.... I have been running them for along time and never had to clean them.... The way it works is one is a full sphion one is just a extra drain if the shphion can't handle all the flow.... The third is a emergency drain that's why it is pointed up, it only comes into action if the other 2 drains clog and the water raises in the display the third kicks in as a full sphion and prevents flooding.... So with that said I run the sphion with a valve the other 2 don't need valves just leave them straight pipes wide open... By adjusting your sphion it controls the flow to both drains... The third should never come into play unless your pump was off sometimes it will kick in untill the sphion burps on the first drain...with that said I would run a filter sock only on the first drain your main sphion if that's your flavor.... I don't use socks.... Just to add do not tie all 3 drains together they have to Be seperate to work properly...;)
 

Typhon

Force of Nature
View Badges
Joined
Dec 10, 2009
Messages
329
Reaction score
260
Location
Charlotte, NC
Rating - 100%
2   0   0
Oh.. I see

Thanks for the explanation.

The difference is that the primary overflow is a siphon, no noise, no air entrainment, just water. The second is a standard overflow with an air vent, but it has a very light load so that the flow is low and hence it won't suck air into the water stream and therefore will be silent too. The third is an emergency backup, normally not in use.

Looks to me that the trick is adjusting the siphon overflow so that the second overflow only has a slight flow.
 

AD87

Active Member
View Badges
Joined
May 18, 2009
Messages
319
Reaction score
147
Rating - 100%
4   0   0
Is there any reason why your drains are located to the far left of you overflow and not the middle. Would located them to the middle be better get the same amount of water draw for both sides equally?
 
OP
OP
Troylee

Troylee

all about the diy!!!!!
View Badges
Joined
Jan 15, 2010
Messages
18,337
Reaction score
14,264
Location
Vegas baby!!!!
Rating - 0%
0   0   0
i do it to the far left so it can drain straight down into my sump in the first chamber... i pipe them straight down into the sump with no restrictions like 90s.... your overflow surface skims the entire tank and those drains will pull all the water out of your overflow in a hurry.... if you run a stock durso with the airhole in top, put your finger over it for a second and watch how quick your tank drains lol....i have always ran my sumps counter clockwise just out of habbit.... i always have the return pump on the right side when looking at it, no reason really just habbit....;)
 
Back
Top