My current DIY project x3 NEW

Poseidon

2500 Club Member
View Badges
Joined
Apr 7, 2007
Messages
3,258
Reaction score
37
Location
Swartz Creek, MI
Rating - 0%
0   0   0
Here is my current DIY project, it is still in the early stages:
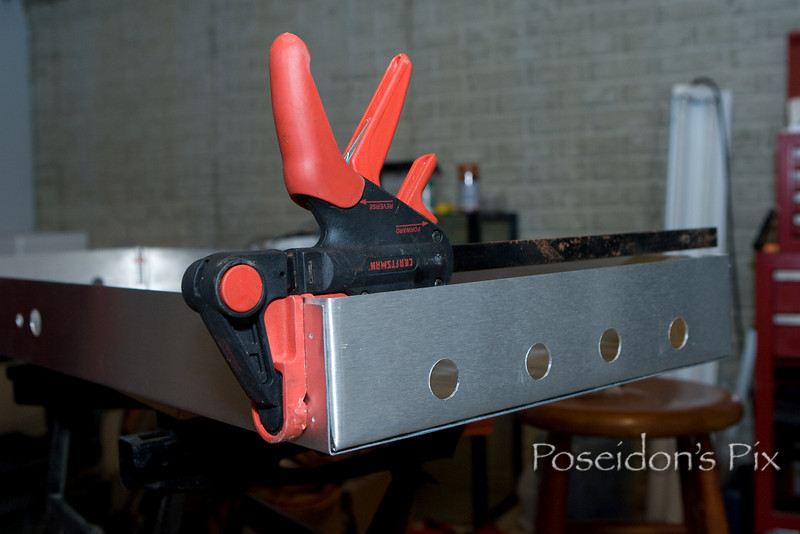
417357871_6C46p-L-1.jpg


417357752_r52b2-L-1.jpg


417358208_xdbuZ-L-1.jpg


417358452_GP4uE-L.jpg


Any Guesses?

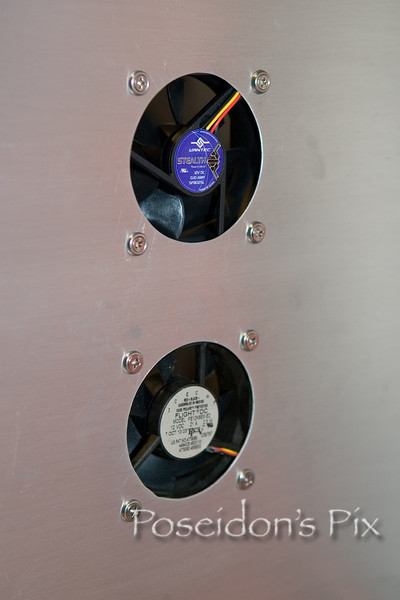
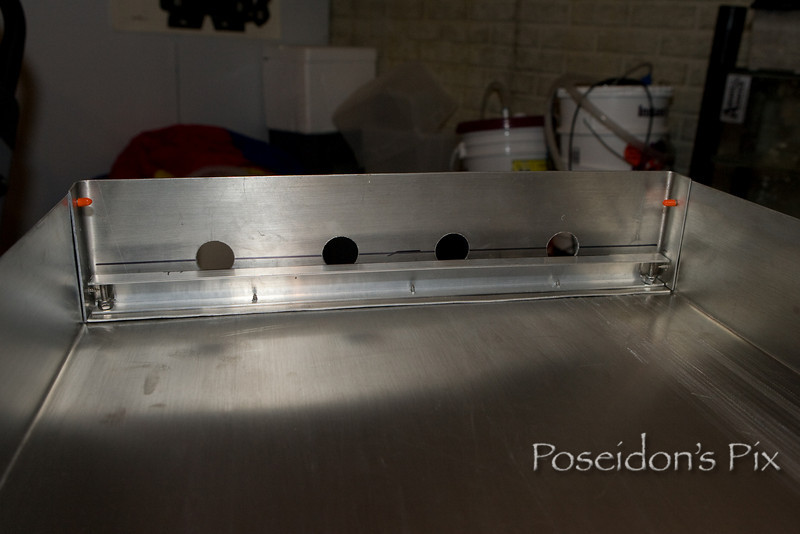
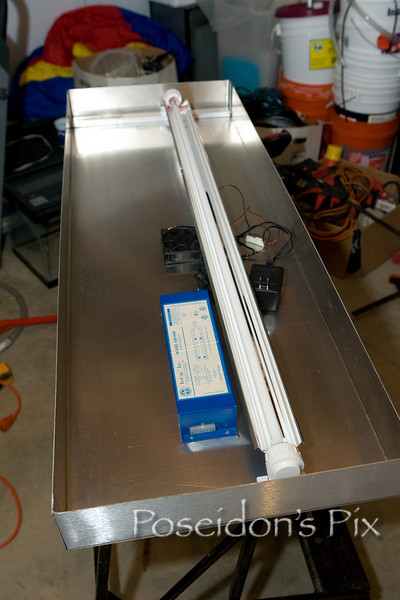
This should give it away....
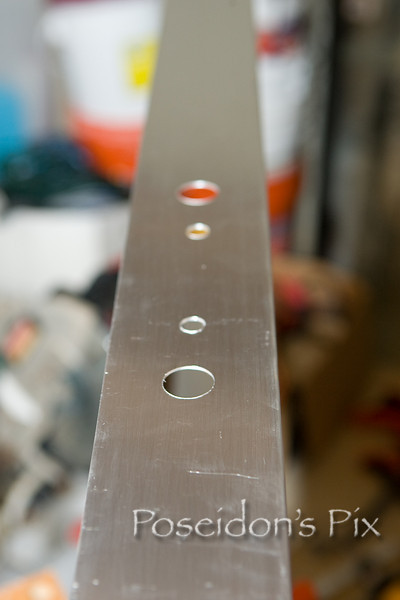
417358734_tYyyt-L-1.jpg


Vent holes:
417358873_S6EiW-L-1.jpg


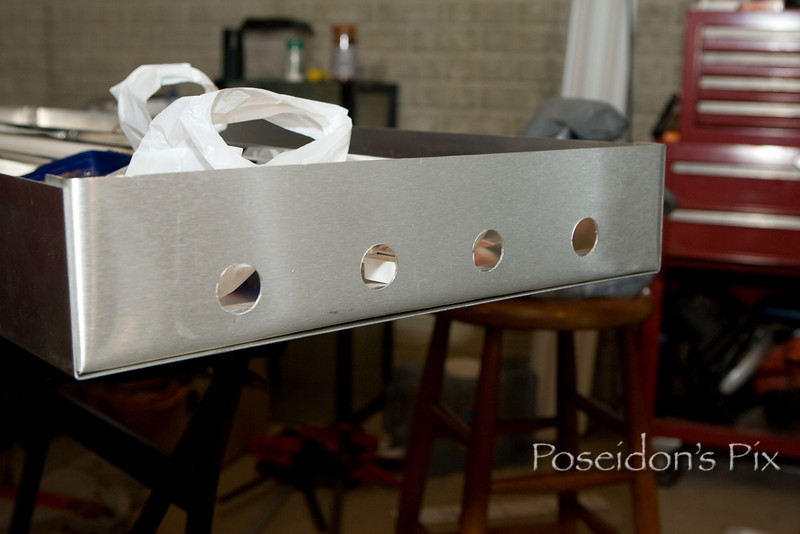
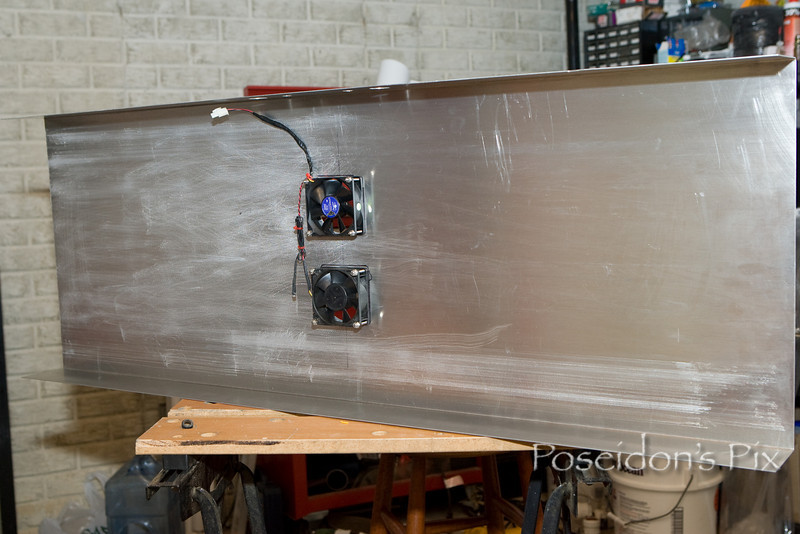
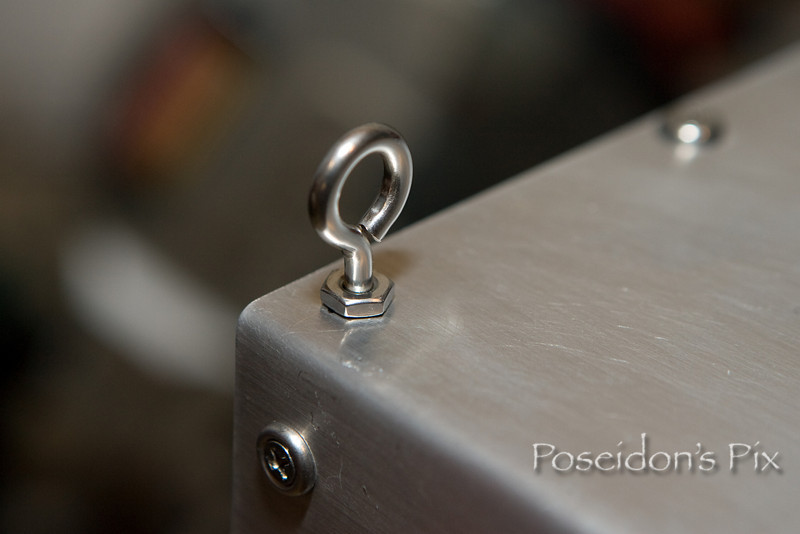
Nothing has been attached yet, but that will happen today I think! I have stainless steel hardware for all the screws and nuts, and I am going to add a thin black fabric to the vents, so that light doesn't leak out so much.

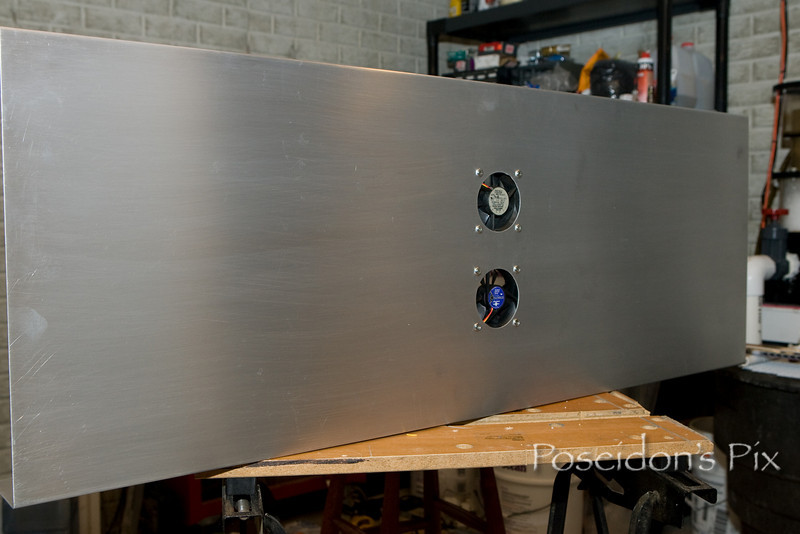
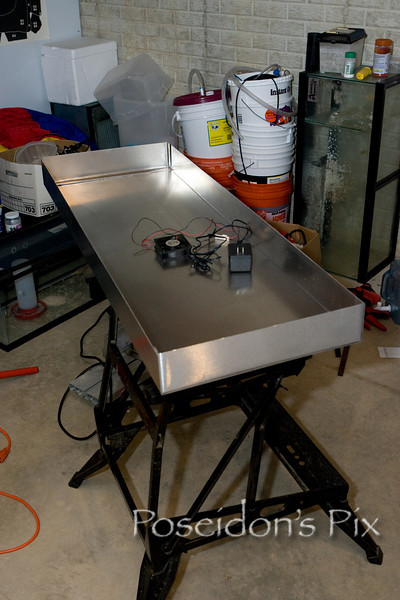
The fixture will be suspended over my tank with sun lifts, and it will have 2 3" fans for active cooling. I'll post more pictures later... (When I have more to show!)
 
OP
OP
Poseidon

Poseidon

2500 Club Member
View Badges
Joined
Apr 7, 2007
Messages
3,258
Reaction score
37
Location
Swartz Creek, MI
Rating - 0%
0   0   0
I hope I don't get a reaction... I have used stainless in Al before and never had an issue. I do know that you usually can NOT use Al screws with Al sheet, they tend to "gall" I think that is the right word, they get fused together.

I'm going to make a list of the last few items I need, and go shopping!
 

JuniorMC8704

Super Moderator
View Badges
Joined
Jul 25, 2007
Messages
3,302
Reaction score
55
Location
Michigan (48154)
Rating - 0%
0   0   0
Mike, check out the hanging kits from sunlight supply.

You could get a set of single steel cables that come down and are fully adjustable.

they are strong enough to hold my 48" 8 bulb tek fixture i just ordered.
 

revhtree

Owner Administrator
View Badges
Joined
May 8, 2006
Messages
47,786
Reaction score
87,379
Rating - 100%
1   0   0
Dude this is going to be cool!
 
OP
OP
Poseidon

Poseidon

2500 Club Member
View Badges
Joined
Apr 7, 2007
Messages
3,258
Reaction score
37
Location
Swartz Creek, MI
Rating - 0%
0   0   0
I think those are the Sun lifts aren't they Jr? I'm just home from doing some running, I picked up another 80mm fan from a computer store, a ridiculously cheap hole saw set from Harbor freight, some black mesh from JoAnn's, and more stainless steel screws from Lowes.

I'm going to watch a little of the UM game and off to the basement!
 

AugustWest

Pew Noster
View Badges
Joined
Oct 4, 2008
Messages
30
Reaction score
0
Location
New Berlin, WI
Rating - 0%
0   0   0
for a sec i thought you were in my basement - that or you stole my wife's treadmill and the stack of stuff that she keeps on it. :snicker:


very nice DIY!
 
OP
OP
Poseidon

Poseidon

2500 Club Member
View Badges
Joined
Apr 7, 2007
Messages
3,258
Reaction score
37
Location
Swartz Creek, MI
Rating - 0%
0   0   0
Well, I am making progress.... You would think that I would learn to draw up a plan before starting, but NO! I decide to redesign, and re-evaluate my design as I go, this results in several do overs, and LOTS and LOTS of trips to the hardware store. Anyway, here is my pitiful progress so far today:

417673033_hwSNQ-L.jpg

Fans, 1 IceCap 3", one "Stealth" fan.

417672655_5WYfo-L.jpg

Fans from the bottom, you can also see my PRACTICE attempt at "brushing" the Al sheet. I decided against the palm sander method after about 2 minutes of this.

417673774_k3gAw-L.jpg

Another shot of the FANS! LOL!!! Actually this image is meant to show the "brushed" finish. I was at it for about an hour, maybe 90 minutes. This was a messy process, and took WAY more time then I thought it would. I ended up adding a little water to the process, to keep the Al from floating around in the air, and landing in my sump. So far I am happy with the finish for the most part.

417673362_ZgbMw-L.jpg

This is the back wall, the larger holes are for the switches, the smaller ones, the power cords. I have grommets to keep the cords from getting cut by the Al.

417675033_RvmUj-L.jpg

These clamps really came in handy. This is how I attached the sides the top.

417675407_Zf8Do-L.jpg

A shot of one of the ends. Originally that channel was supposed to be an upside down U, but the screws that hold the sides on were in the way. (Failure to plan on my part.) So I ended up rotating the channel 90 degrees, this made the mounting for the standoff farther apart... Yup, to far. Now I have to add an Al plate to each end so that the standoffs will have something to mount too.

417675739_8jWCW-L.jpg

Finally! A mounting spot! This is in each corner, and will be where I attach the sun lift too. I am thinking of going with 4 instead of 2, just to make leveling the fixture easier.

Well.... I am done for tonight. I feel like I accomplished very little, I had hoped to hang the fixture tonight, guess that will have to wait until tomorrow.
 

JuniorMC8704

Super Moderator
View Badges
Joined
Jul 25, 2007
Messages
3,302
Reaction score
55
Location
Michigan (48154)
Rating - 0%
0   0   0
what did you use to make the holes?

BTW, there is a really easy way a doing "brushed" aluminum.

the sanding blocks for finishing drywall, and a straight edge, they work perfect.

this will keep the lines nice and straight.

the other option is a bit more challenging, but a grinding wheel or buffing wheel with a fine grit sand paper. that would be for the circled look that im sure you know what im talking about.

i used the sanding block on the back of an Ipod and it worked awesome.
 
OP
OP
Poseidon

Poseidon

2500 Club Member
View Badges
Joined
Apr 7, 2007
Messages
3,258
Reaction score
37
Location
Swartz Creek, MI
Rating - 0%
0   0   0
The large holes were a 3" hole saw that I picked up at Harbor Freight for about $3.99. I know they are less then ideal, but I thought I could get 2 holes out of it. (Almost made it.) The second hole I made has a flat spot...

The smaller holes I used a spade bit for, that worked pretty good. I'll try that with the sanding block, and straight edge.
 

AugustWest

Pew Noster
View Badges
Joined
Oct 4, 2008
Messages
30
Reaction score
0
Location
New Berlin, WI
Rating - 0%
0   0   0
looking good - i can tell you that you have the fans in the the right spot. i have a oak hanging fixture i made w/ 3x80W T5s on an IC660 and a 2x96W CF (planning on adding 2 more 80W T5s in place of the CFs one day). i have two 3.5" fans (one on each end) and the bulbs do get pretty hot in the middle. my lights are open on the bottom but i do have some plate glass on top the tank that helps w/ spashes. i do like your design a little better. are you putting plexi on it or leavign it open?

yeah had pretty much the same tredmill and oddly enough the same toolbox.
 
OP
OP
Poseidon

Poseidon

2500 Club Member
View Badges
Joined
Apr 7, 2007
Messages
3,258
Reaction score
37
Location
Swartz Creek, MI
Rating - 0%
0   0   0
I know that the bulbs actually get hottest at the endcaps, at least mine do, but the reflectors act as a heat sink there. I am banking on the WHOLE thing being made out of Al acting as a heat sink, will keep everything cool.

Also, with the fans in the middle, they will cool the ballasts that will be located on either side of the fans. I am also hoping to get the AC to DC wall wart inside the fixture that runs the fans, that way, 2 plugs, 1 into each timer for dawn to dusk effect.
 

AugustWest

Pew Noster
View Badges
Joined
Oct 4, 2008
Messages
30
Reaction score
0
Location
New Berlin, WI
Rating - 0%
0   0   0
i went w/ the extension cable and have the ballasts in the stand (sump is behind the stand). the ic660 really doesn't heat up much at all. how many bulbs and wht length are you putting in there?
 
OP
OP
Poseidon

Poseidon

2500 Club Member
View Badges
Joined
Apr 7, 2007
Messages
3,258
Reaction score
37
Location
Swartz Creek, MI
Rating - 0%
0   0   0
There will be 6 bulbs, all 46.5" 54W. I will be driving 4 on an IceCap 660, and the other 2 on an IceCap 430. So far my bulb choice is:
2x Geismann Pure Actinic
2x Geismann Aquablue + (White)
1 Actinic Plus
1 UVI 75/25

All will be in individual reflectors, a couple a TEK 2's the others are IceCaps.
 
Back
Top