380/500 Gallon Build

OP
OP
foxvalleypcgeek

foxvalleypcgeek

Active Member
View Badges
Joined
Jan 17, 2015
Messages
356
Reaction score
145
Location
Wisconsin
Rating - 0%
0   0   0
Mr. FedEx just came by the shop a little bit ago with more goodies for me! Him and MR. UPS are my heroes this week! All this Jebao stuff seems to be decent stuff, especially with the low price tags. This system has costed a few pennies already, so if I can save some money I am all for it. As long as they don't operate like the junk AC poweheads I got off of eBay last time around. Never again with the reverse startups and tons of racket and falling off of the glass.


gallery_1_2_1580635.jpg


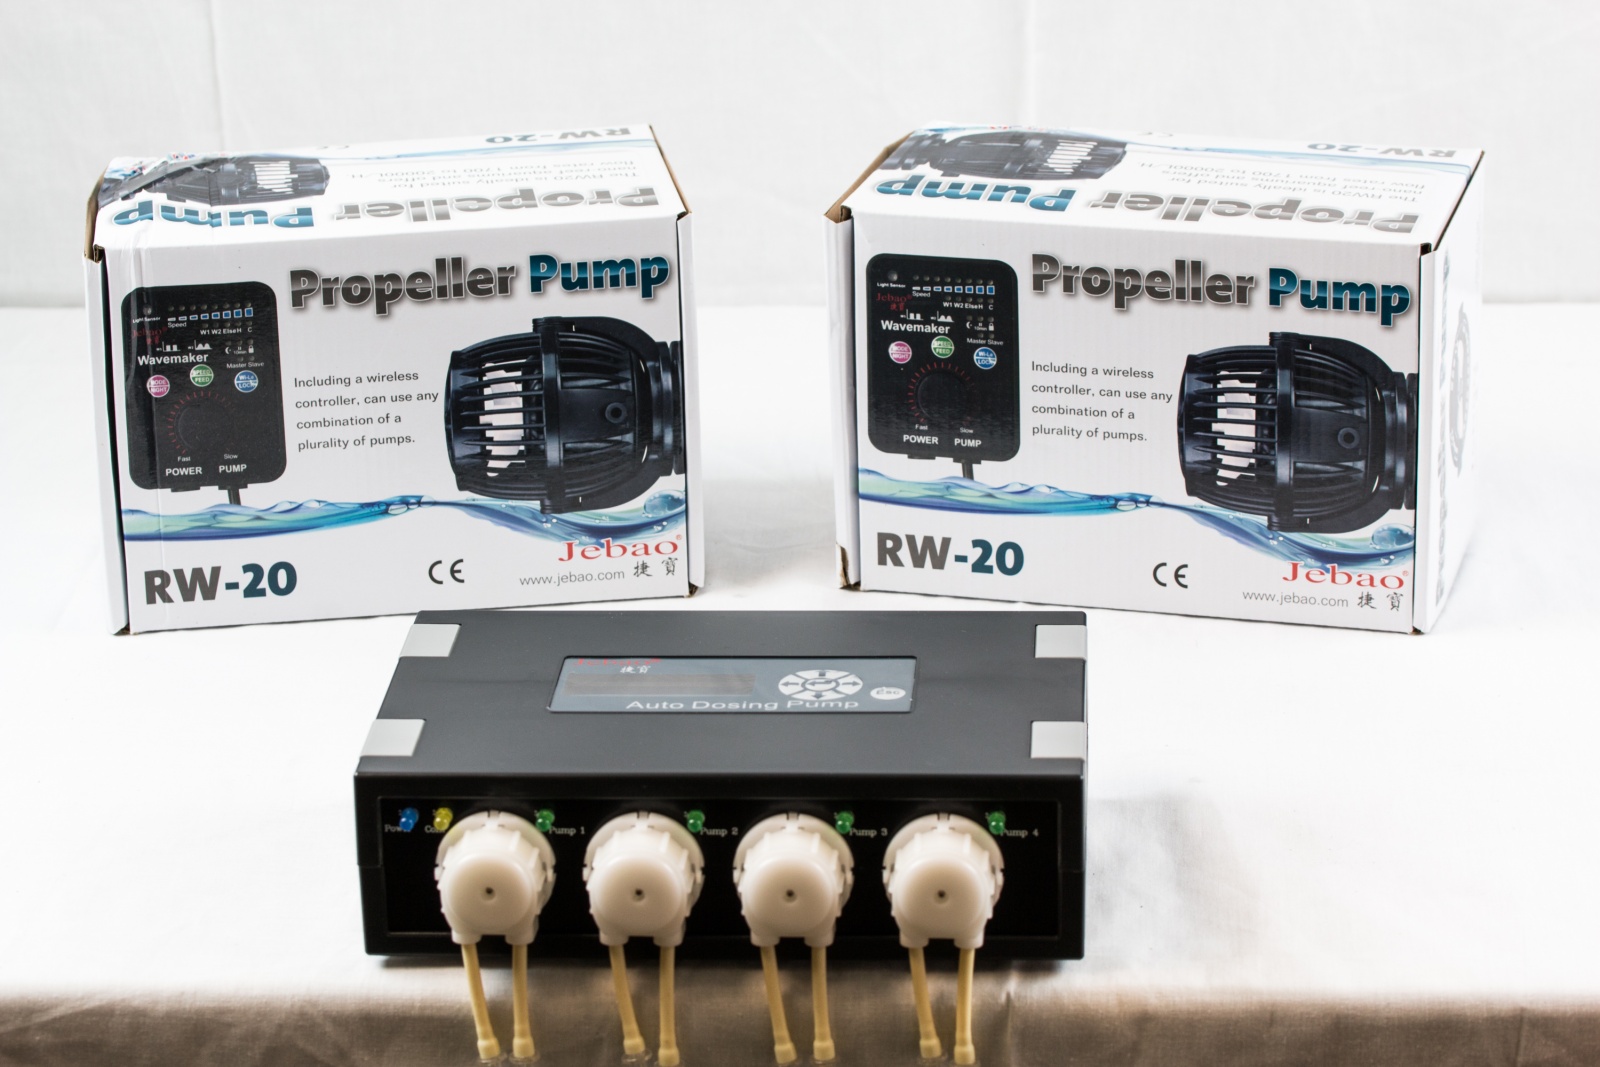
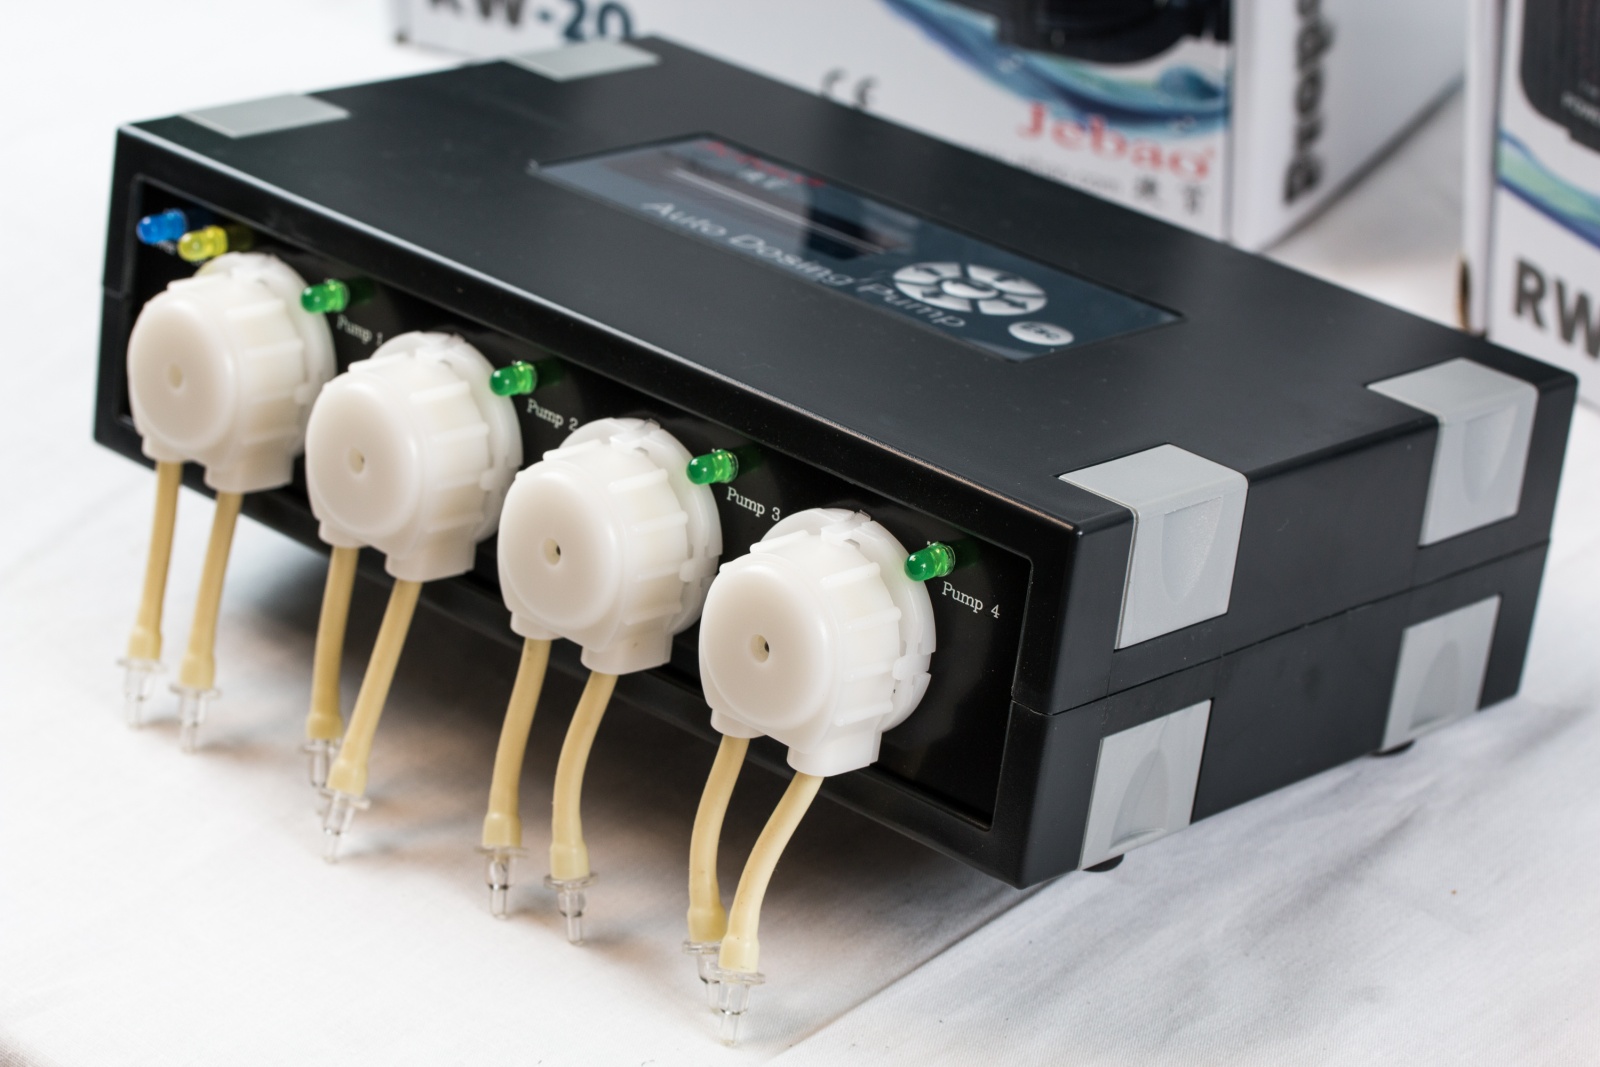
The only thing I dont like about the dosing pump is its too smart and controls itself. I would rather have it be stupid and have the Apex control it like everything else. But $97 for 4 dosing heads is hard to pass up. If it doesn't work out, but I think it will be just fine, I will go back to the BRS dosers.


gallery_1_2_1607862.jpg


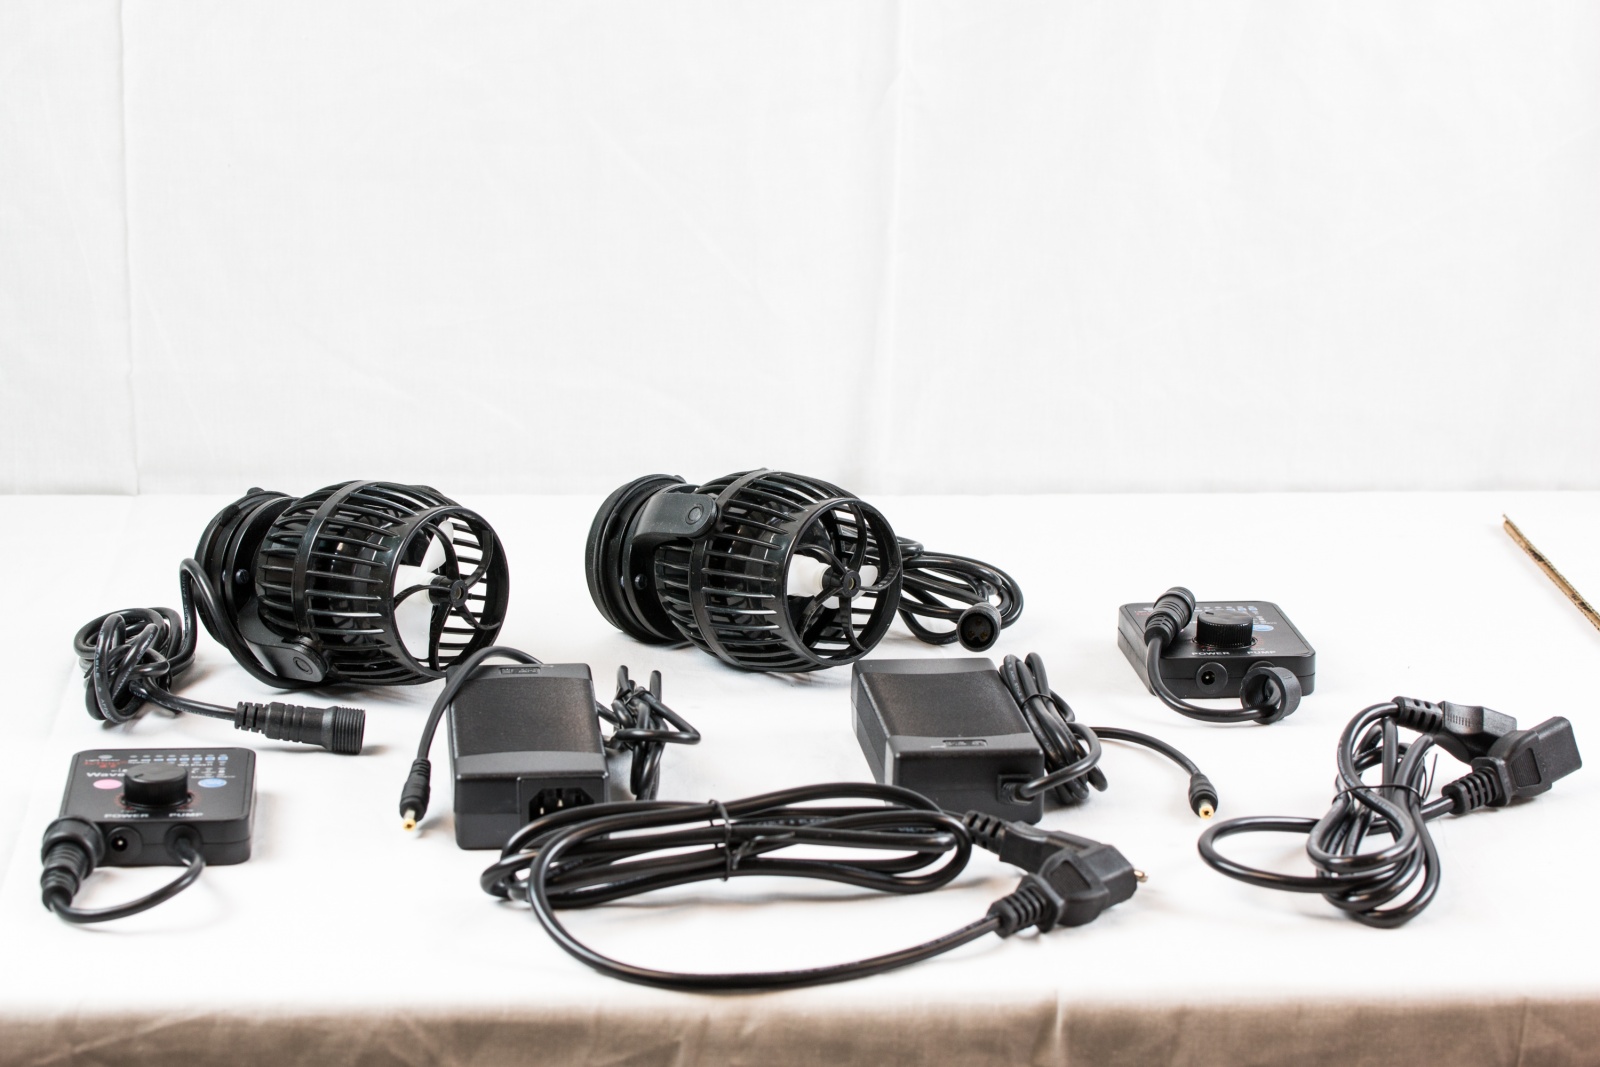
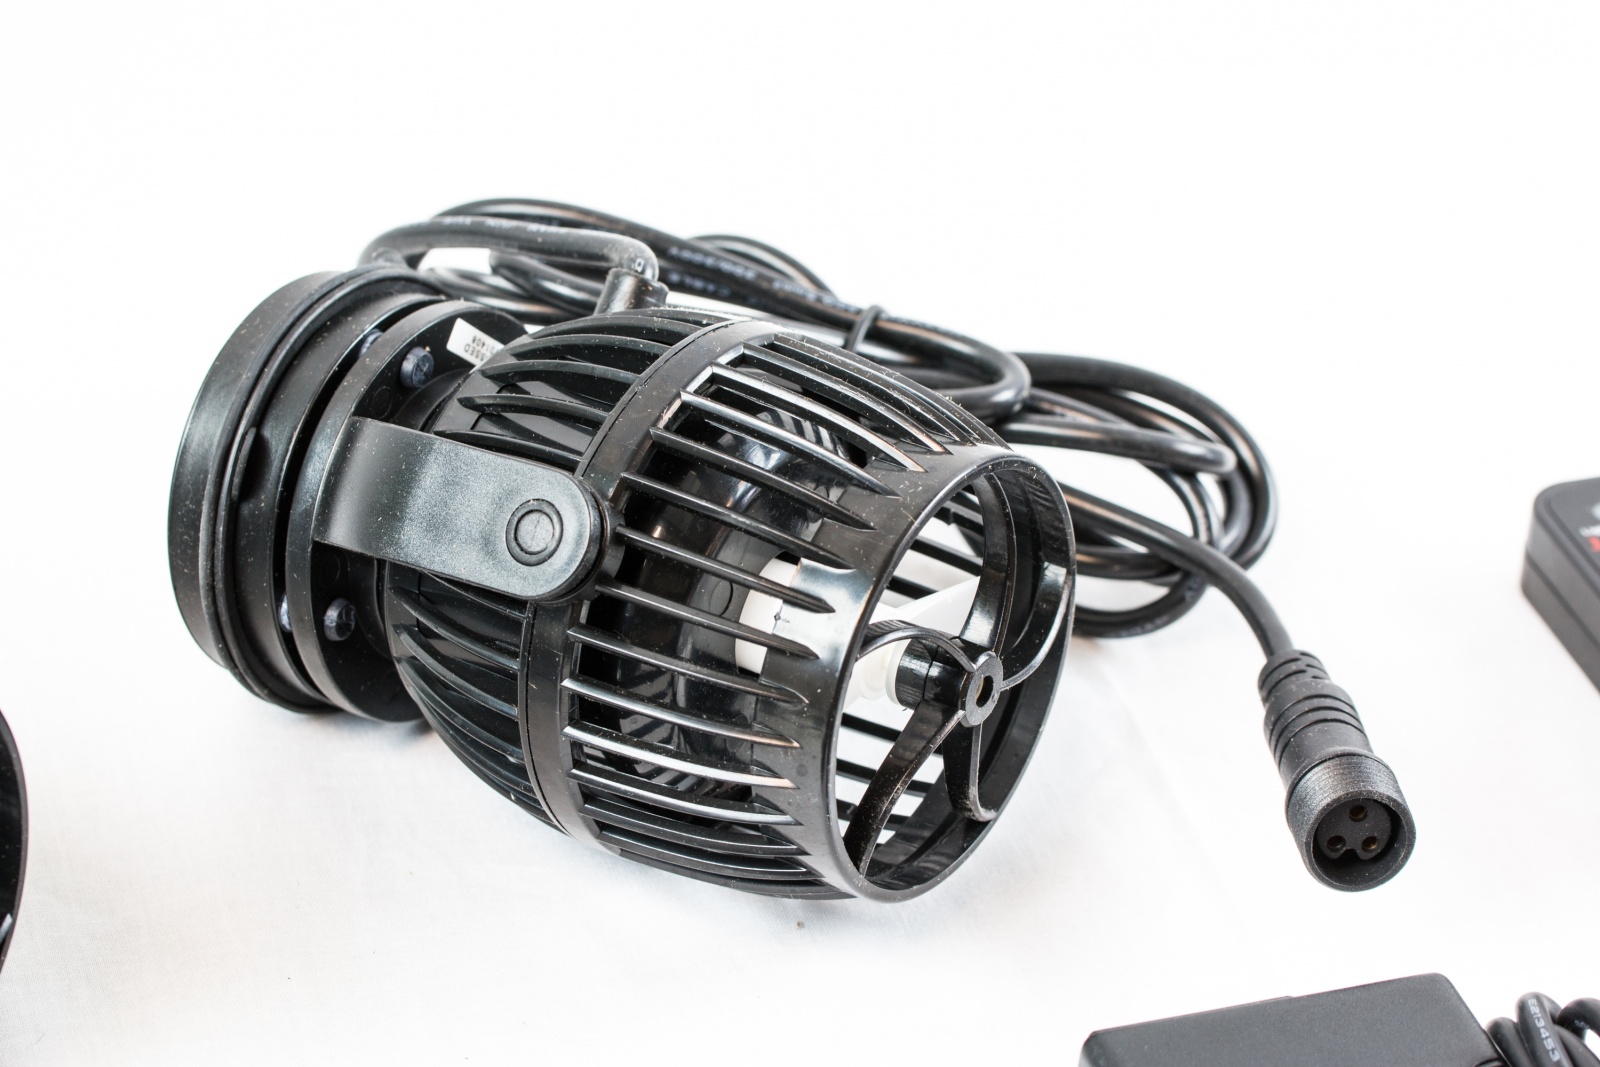
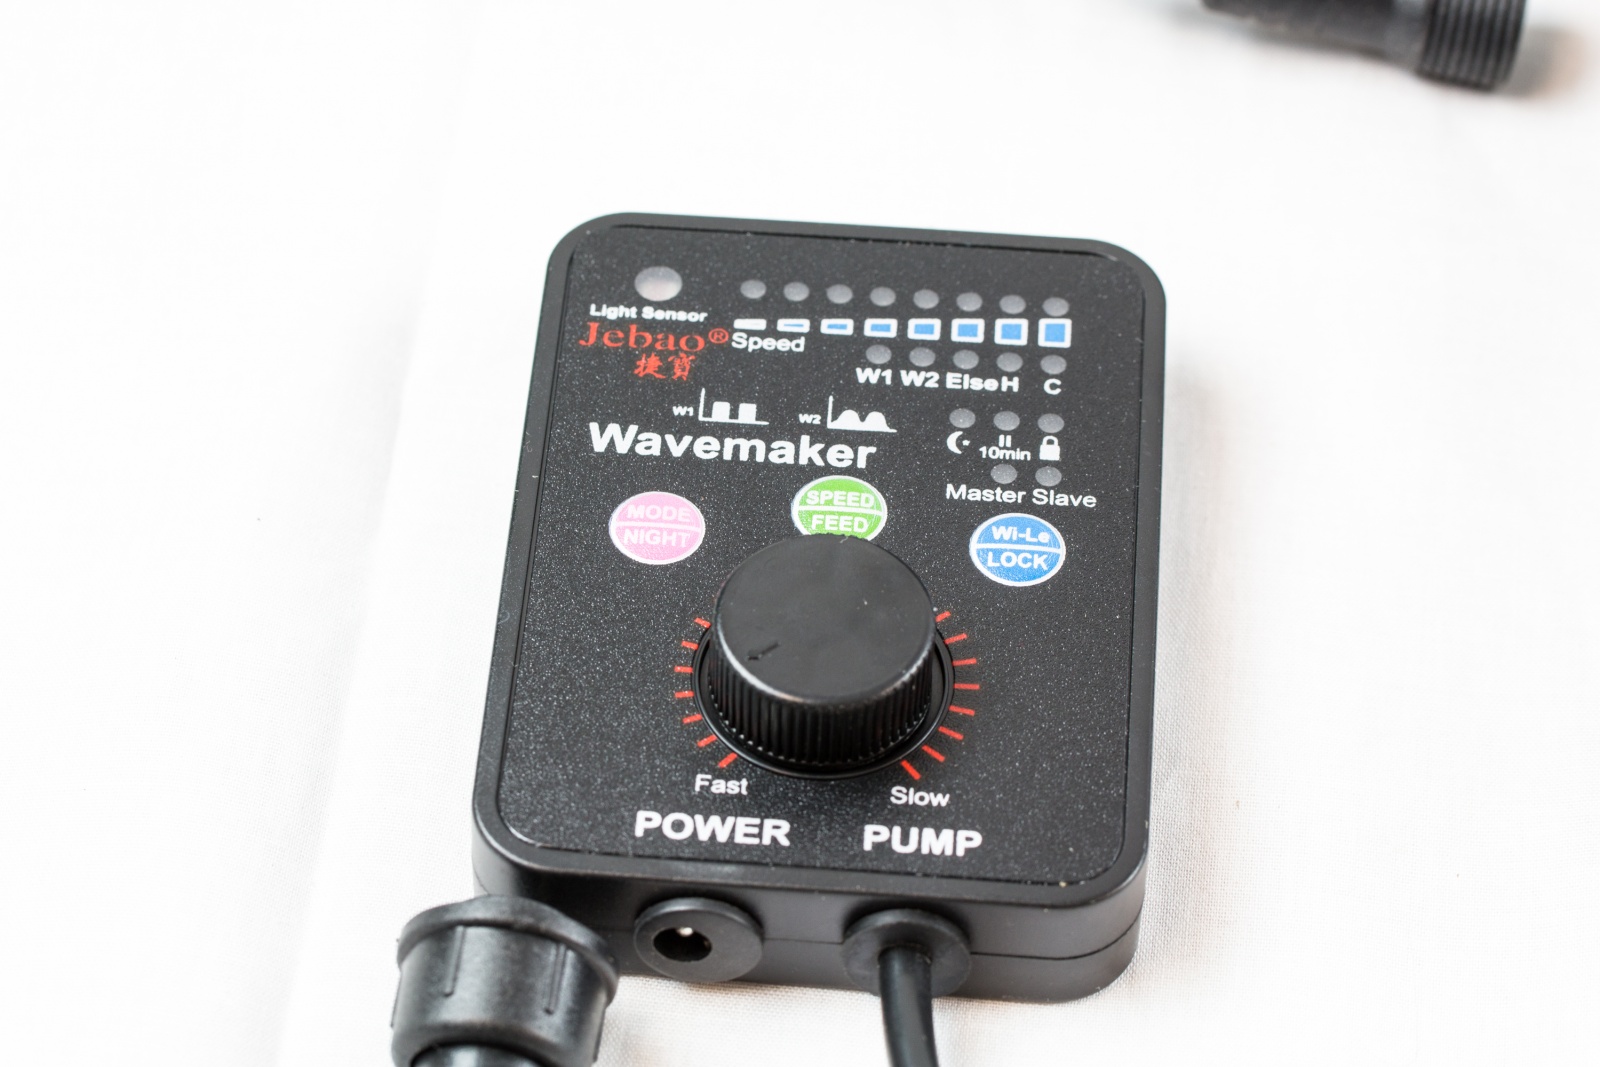
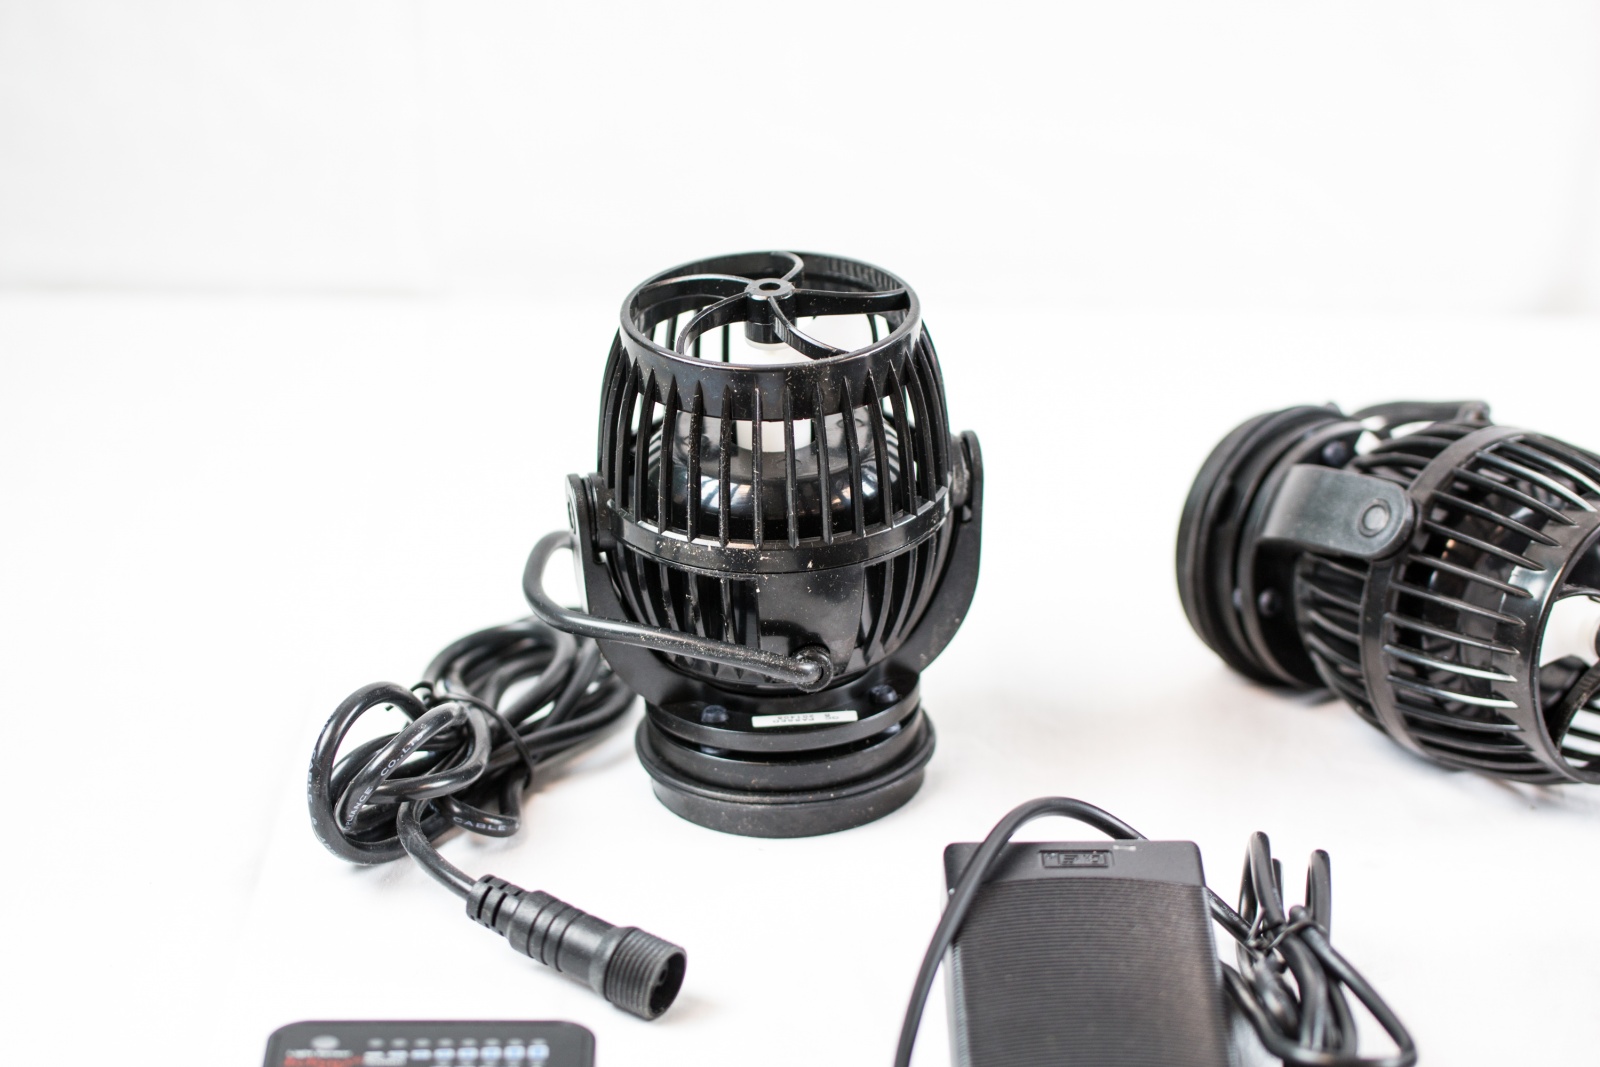
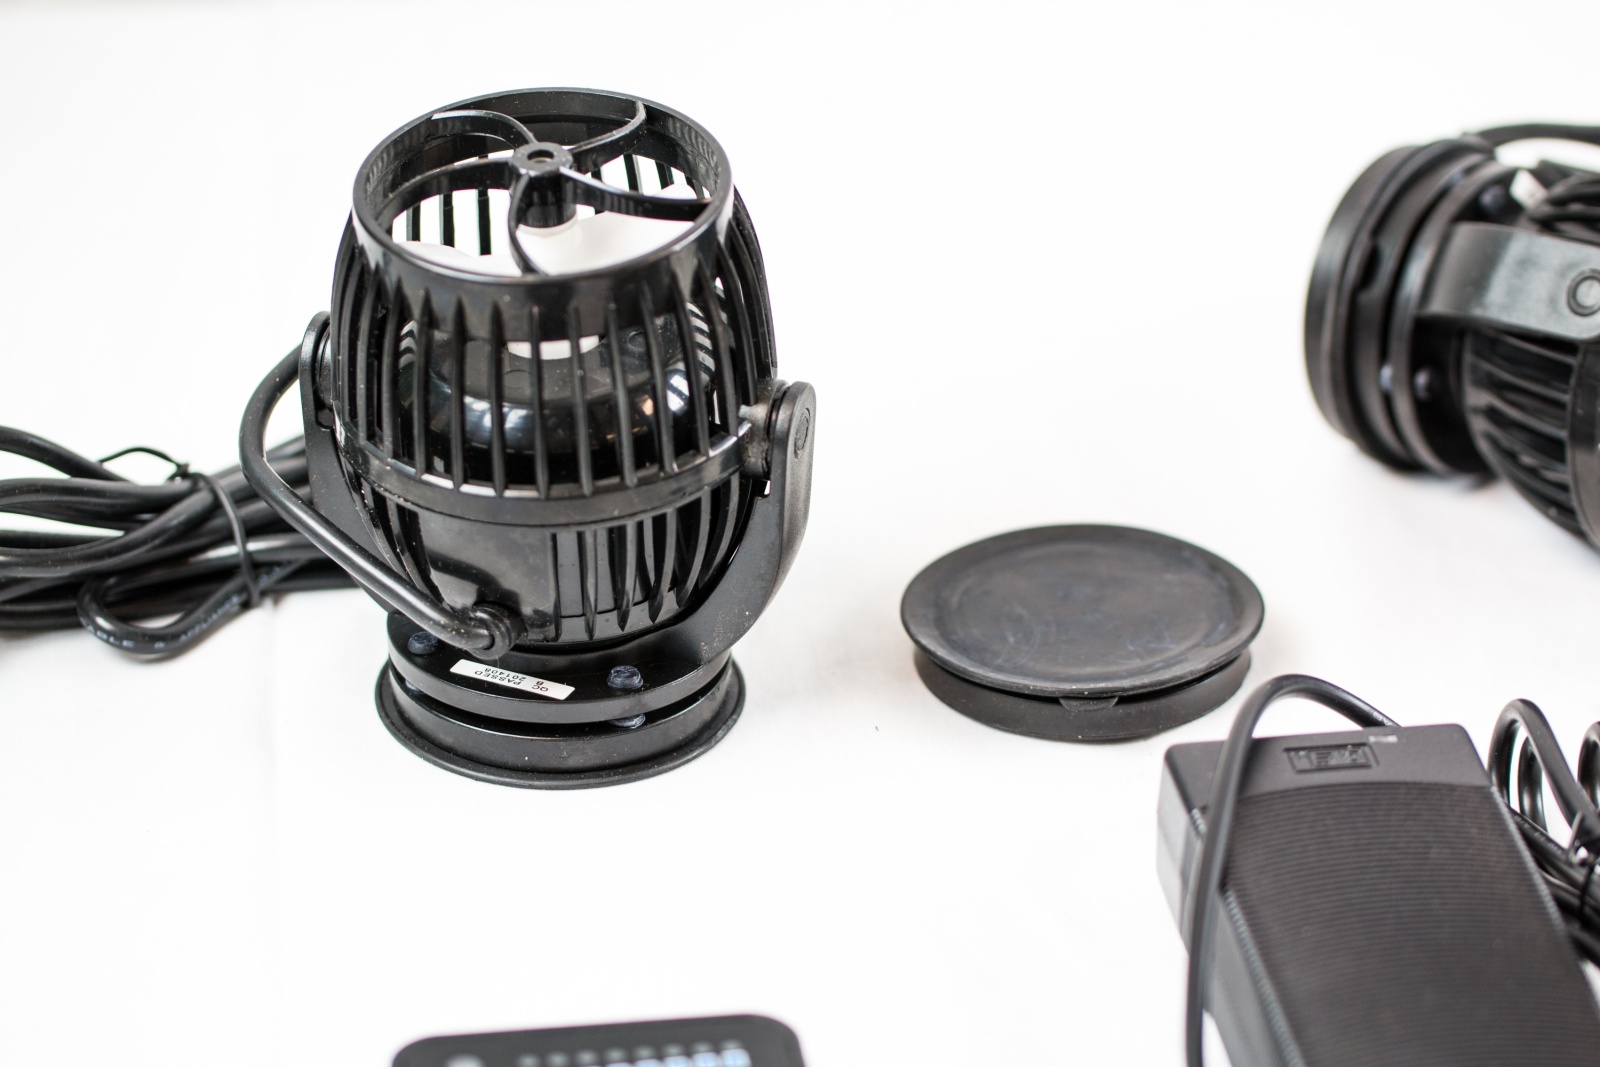
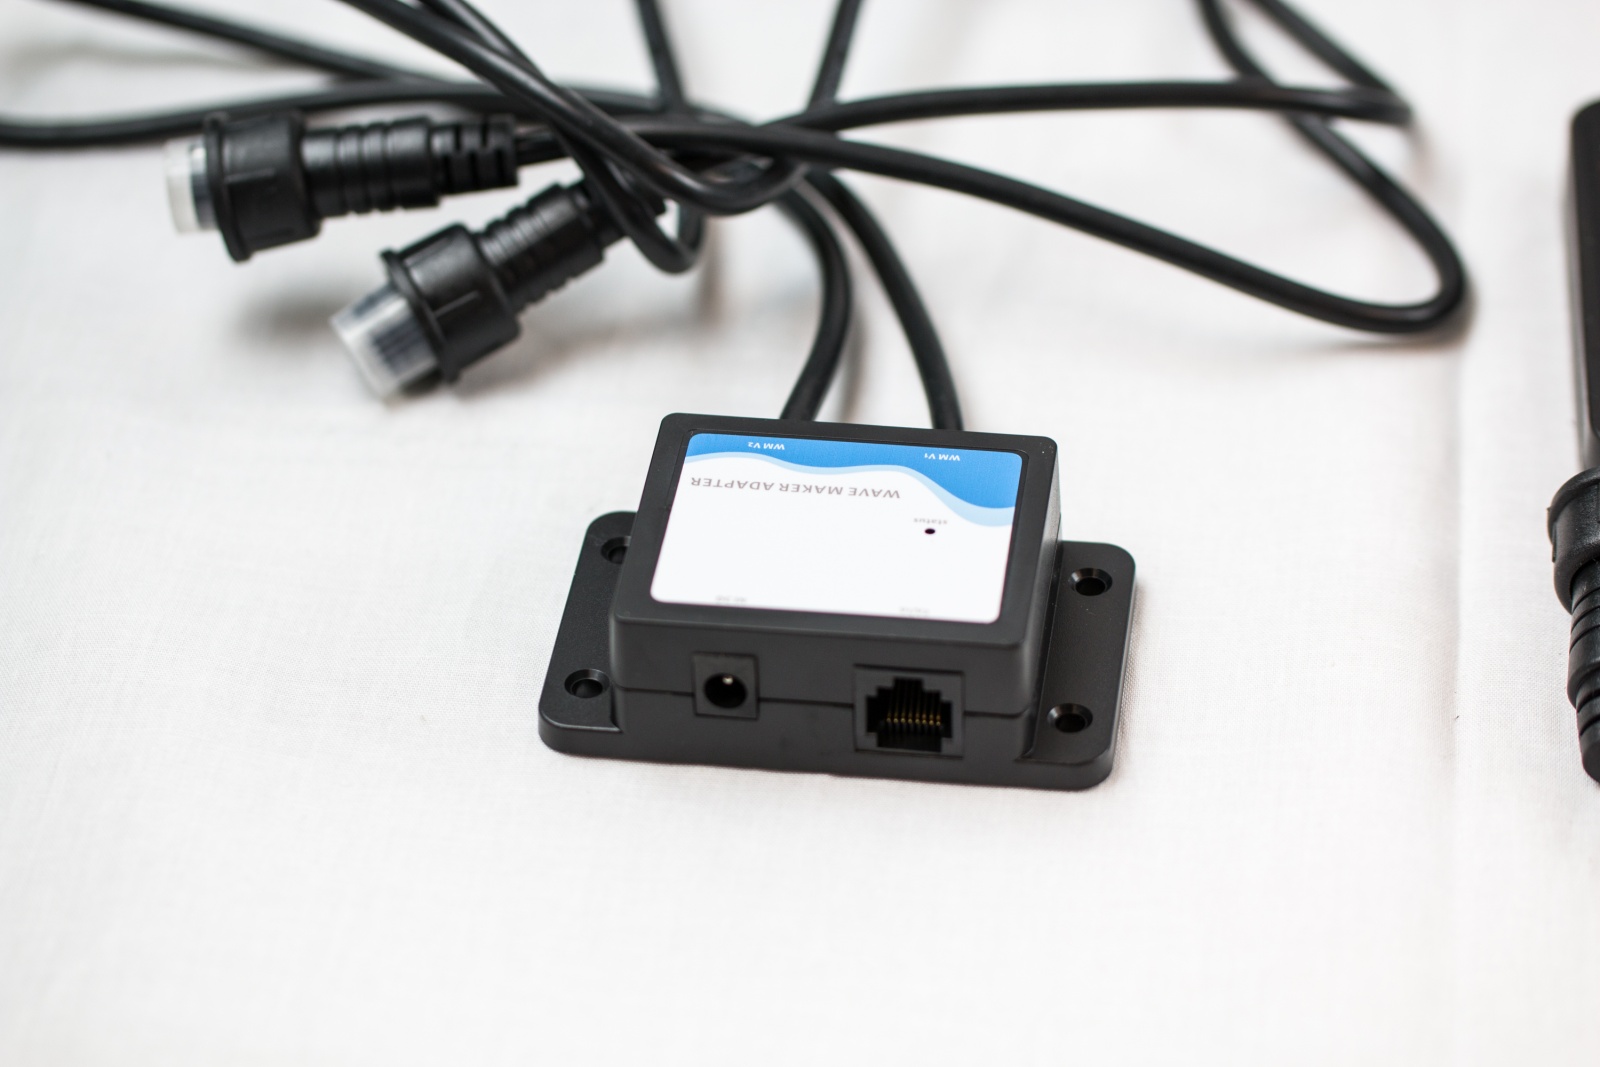
Two RW-20s are probobly not enough but a good starting point. I could have done a DIY apex controllable mod on these as well but I opted for the already made adapter to connect them. I need a VDM module however to hook them up as my lights have all mine used up.


gallery_1_2_1803991.jpg


gallery_1_2_1152323.jpg


gallery_1_2_554834.jpg


gallery_1_2_1298710.jpg


gallery_1_2_1133140.jpg


gallery_1_2_555167.jpg
 

bigmiker32

Community Member
View Badges
Joined
Nov 14, 2014
Messages
27
Reaction score
5
Rating - 0%
0   0   0
Cracking build so far!!
Love the photo shoot for each piece of equipment :)
 
OP
OP
foxvalleypcgeek

foxvalleypcgeek

Active Member
View Badges
Joined
Jan 17, 2015
Messages
356
Reaction score
145
Location
Wisconsin
Rating - 0%
0   0   0
Got the lights all finished between last night and this morning. Three pronged extension cord heaven it was. And our dog Chloe even helped!


gallery_1_1_2463867.jpg


gallery_1_1_85878.jpg


gallery_1_1_574295.jpg


gallery_1_1_2174362.jpg


Now I need an EB8 module to put up there for the lights to take up. All 8 outlets will be used up for the lights alone.


I also noticed a crack in the stock tank when I went downstairs to recalibrate the conductivity probe. It was a little wet underneath on the stand supporting the tank. Sure enough a crack originating from the bulkhead and traveling upwards an inch or two. So that is todays first project when I get home from the shop. I needed one for my turtle to go in, so I will patch this one up for him. A new, fresh one for the fishies.


gallery_1_1_1619127.jpg


Got a couple of bins as well to go in the stock tank. One small container to rig up for the floats to chill inside of to keep air bubbles out of the conductivity probe, and the one with all the holes will be used for aeration again like I did on the previous setup. I put bioballs in there which are submerged (key word there, submerged), so its not like a wet/dry. Filter sockas as well and the water all drains out of there and creates excellent aeration, not that the skimmer doesnt already.


gallery_1_1_641213.jpg


gallery_1_1_641213.jpg
 
OP
OP
foxvalleypcgeek

foxvalleypcgeek

Active Member
View Badges
Joined
Jan 17, 2015
Messages
356
Reaction score
145
Location
Wisconsin
Rating - 0%
0   0   0
Here is the high tech box for the four probes to hang out inside of and avoid air bubbles. It seems to work well, conductivity probe has settled down. Drilled a few small holes in the bottom. Ya I forgot to take the **** label off of it.


gallery_1_1_1378067.jpg


Swapped out the hammerhead impeller for the barracuda as its still more then enough and cuts electricity down ~100 watts (1 third).


gallery_1_1_1896387.jpg


Completed the lights and it sure is bright in the house when I turn them up with the Apex. The GF is already complaining its too much. However they whould never be at 100% like I tested them at.


gallery_1_1_55124.jpg


gallery_1_1_1314243.jpg


Got started on the quarantine tanks, well just one right now. Later on the currently running 29 will be going on the bottom. Or I may put another 20 from out in the shed on the bottom. I think I would rather have just 2 tanks to deal with though in here.


gallery_1_1_407002.jpg


The 29 has an XP3 canister filter on it, a little big lol.


gallery_1_1_1399803.jpg
 
OP
OP
foxvalleypcgeek

foxvalleypcgeek

Active Member
View Badges
Joined
Jan 17, 2015
Messages
356
Reaction score
145
Location
Wisconsin
Rating - 0%
0   0   0
Also got the plumbing finished minus some support. You will notice a cardboard wrapping paper role under the return line lol.


gallery_1_1_1422973.jpg


One of the drains T's off into the other room to feed that, however I don't know how much water will make the turn into there. Figured it was worth a shot to feed the 65 stock tank for a refugium in there.


gallery_1_1_801498.jpg


Working out pretty good this time. There is more in this room then before and i can reach everything from the center walkway.


gallery_1_1_929945.jpg


The new stock tank has the bulkhead drilled up higher. The lower section is angled a lot and I never like it much. I think it had something to do with it cracking as well. Now I am just above the first ridge and its much straighter.


gallery_1_1_1602800.jpg


Hung a piece of 2X10 to mount the dosing pump. The 4 containers containing the dosing ingredients will be under the blue water barrels.


gallery_1_1_882963.jpg


gallery_1_1_1049731.jpg
 
OP
OP
foxvalleypcgeek

foxvalleypcgeek

Active Member
View Badges
Joined
Jan 17, 2015
Messages
356
Reaction score
145
Location
Wisconsin
Rating - 0%
0   0   0
I can now finish the lights with all 8 outlets and the extra 4 channels. Still need one more VDM for the jebao pumps to run off of yet.


gallery_1_2_107371.jpg
 

discoreefer

Community Member
View Badges
Joined
Aug 31, 2014
Messages
37
Reaction score
0
Location
USA
Rating - 0%
0   0   0
Awesome project, thanks for sharing the details/pics. Do you for see any issues with excess humidity?
 
OP
OP
foxvalleypcgeek

foxvalleypcgeek

Active Member
View Badges
Joined
Jan 17, 2015
Messages
356
Reaction score
145
Location
Wisconsin
Rating - 0%
0   0   0
[video=youtube_share;37-veEd5Zjc]http://youtu.be/37-veEd5Zjc[/video]

[video=youtube_share;OEaV3_iPBpk]http://youtu.be/OEaV3_iPBpk[/video]
 
OP
OP
foxvalleypcgeek

foxvalleypcgeek

Active Member
View Badges
Joined
Jan 17, 2015
Messages
356
Reaction score
145
Location
Wisconsin
Rating - 0%
0   0   0
Looks like a few wires make up the lighting. 8 dimming channels however the 8th one is loose in the rj45 plug so i have to cut it off and crimp another. Other then that all ready to tidy up.

f0c3b09e76ce4d1517835e3fc08a1676.jpg
 
OP
OP
foxvalleypcgeek

foxvalleypcgeek

Active Member
View Badges
Joined
Jan 17, 2015
Messages
356
Reaction score
145
Location
Wisconsin
Rating - 0%
0   0   0
Adjusted my white on/off times so they are on longer, but there is an overlap between the first row turning on whites and the last row turning on blues. I duno how to explain it lol.


Blue White
On Off On Off
8:30 20:30 9:30 19:30
9:00 21:00 10:00 20:00
9:30 21:30 10:30 20:30
10:00 22:00 11:00 21:00


Then the blues from row 1-4


gallery_1_1_13171.png


Whites from row 1-4


gallery_1_1_13627.png


And one with them all overlapped


gallery_1_1_94647.png


I have it all peaking at 80% which I will probobly have to adjust some to get the look I want but I will start there. Obviously If I put the whites higher then the blues its going to look whiter, and if I put the blues higher then the whites it will look bluer.
 
OP
OP
foxvalleypcgeek

foxvalleypcgeek

Active Member
View Badges
Joined
Jan 17, 2015
Messages
356
Reaction score
145
Location
Wisconsin
Rating - 0%
0   0   0
Hung the dual reactor on the wall and put Rox 0.8 carbon in both sides.


gallery_1_1_108159.jpg


Redid the wires for the probes now that the PVC pipe is there. Ran the wires accross theback side and down the pole. Looks much better. And I am getting multiple uses out of the poles :)


gallery_1_1_1912856.jpg


Pic of the lights firing up this morning.


gallery_1_1_1440200.jpg


5 gallon buckets for calcium and alkalinity. Should last for quite a while. Drilled a small hole in the lid and run the tubing down through. Going to get some of the acrylic rod from BRS to reach down to the bottom better as the tubing likes to curl up.


gallery_1_1_770213.jpg
 

joekool

Mixed Reefer
View Badges
Joined
Nov 28, 2013
Messages
2,553
Reaction score
1,077
Location
Sarasota, Florida
Rating - 0%
0   0   0
I like how you are going so far looks like your really getting everything ready. I saw your light graph I have a two hour high noon effect at about 15% higher. It helps my corals grow nice. I would also shoot for a normal high of 65% with the three watt LEDs with a 29 to 30" tank. This is what I do and certainly not telling you to do what I'm saying. Just my experience with led lighting in similar fixtures with a mixed reef mostly SPS.
 
OP
OP
foxvalleypcgeek

foxvalleypcgeek

Active Member
View Badges
Joined
Jan 17, 2015
Messages
356
Reaction score
145
Location
Wisconsin
Rating - 0%
0   0   0
I like how you are going so far looks like your really getting everything ready. I saw your light graph I have a two hour high noon effect at about 15% higher. It helps my corals grow nice. I would also shoot for a normal high of 65% with the three watt LEDs with a 29 to 30" tank. This is what I do and certainly not telling you to do what I'm saying. Just my experience with led lighting in similar fixtures with a mixed reef mostly SPS.

I actually dropped them down to 70% already just because it looks so bright. The tank is only 24" high as well.
 
OP
OP
foxvalleypcgeek

foxvalleypcgeek

Active Member
View Badges
Joined
Jan 17, 2015
Messages
356
Reaction score
145
Location
Wisconsin
Rating - 0%
0   0   0
Got a Hanna phosphate checker. Not really a fan of the packets and trying to get it all into the small opening of the vial. Just for the fun of it I tested the 29 that has been up and running for the last 3 years with no maintenance done to it at all.


gallery_1_2_447933.jpg


Also put the mur-lok bulkheads into the top of the containers to house the dosing ingredients. The acrylic tubing is perfect!


gallery_1_1_580471.jpg


gallery_1_1_528744.jpg


gallery_1_1_2842160.jpg


gallery_1_1_1720606.jpg


I have one more 5 gallon bucket to put down there yet for vinnegar or vodka or a combination of both. The magnesium is the small little gallon jug.
 

thejuggernaut

Active Member
View Badges
Joined
Oct 16, 2010
Messages
376
Reaction score
26
Location
Houston
Rating - 0%
0   0   0
Haha, she doesn't mind. Her only comment was it will look silly because its too big for the room. If it fits, its not too big! The other wall would be better as its much longer but that is a bad idea with how the floor joists are positioned. Plus I already have my holes in the floor there from the 210.

My wife says the same thing about my little 120. But she also says that she doesn't like allot of meat or cheese on her burger. I just tell her she is un-American and that there is no such thing as too much money or too much horsepower.
 

joekool

Mixed Reefer
View Badges
Joined
Nov 28, 2013
Messages
2,553
Reaction score
1,077
Location
Sarasota, Florida
Rating - 0%
0   0   0
Looking good so far.

When was the tank going to be ready. Looks like your ready for it.

Trick with my wife when buying stuff for the tank is I tell her that one of the fish or corals I brought home was for her, that I picked it out for her. She likes it then lol.
 
OP
OP
foxvalleypcgeek

foxvalleypcgeek

Active Member
View Badges
Joined
Jan 17, 2015
Messages
356
Reaction score
145
Location
Wisconsin
Rating - 0%
0   0   0
Looking good so far.

When was the tank going to be ready. Looks like your ready for it.

Trick with my wife when buying stuff for the tank is I tell her that one of the fish or corals I brought home was for her, that I picked it out for her. She likes it then lol.
It has been 5 weeks. I was told 6-8 weeks for the tank to be ready.
 

Algae invading algae: Have you had unwanted algae in your good macroalgae?

  • I regularly have unwanted algae in my macroalgae.

    Votes: 44 35.2%
  • I occasionally have unwanted algae in my macroalgae.

    Votes: 27 21.6%
  • I rarely have unwanted algae in my macroalgae.

    Votes: 9 7.2%
  • I never have unwanted algae in my macroalgae.

    Votes: 10 8.0%
  • I don’t have macroalgae.

    Votes: 31 24.8%
  • Other.

    Votes: 4 3.2%
Back
Top