380/500 Gallon Build

foxvalleypcgeek

Active Member
View Badges
Joined
Jan 17, 2015
Messages
356
Reaction score
145
Location
Wisconsin
Rating - 0%
0   0   0
I made a thread over this past weekend on the previous setup I had with a 210 and it's been gone for two years now, but am looking to start up again. Tomorrow I am taking a little tour of a local aquarium manufacturer (Custom Aquariums) here in Neenah, WI. Looking to have either a 380 or a more recently 500 gallon made, but that may be just over the top in our house.

Link: https://www.reef2reef.com/forums/member-tanks/188241-some-my-tank-progression.html

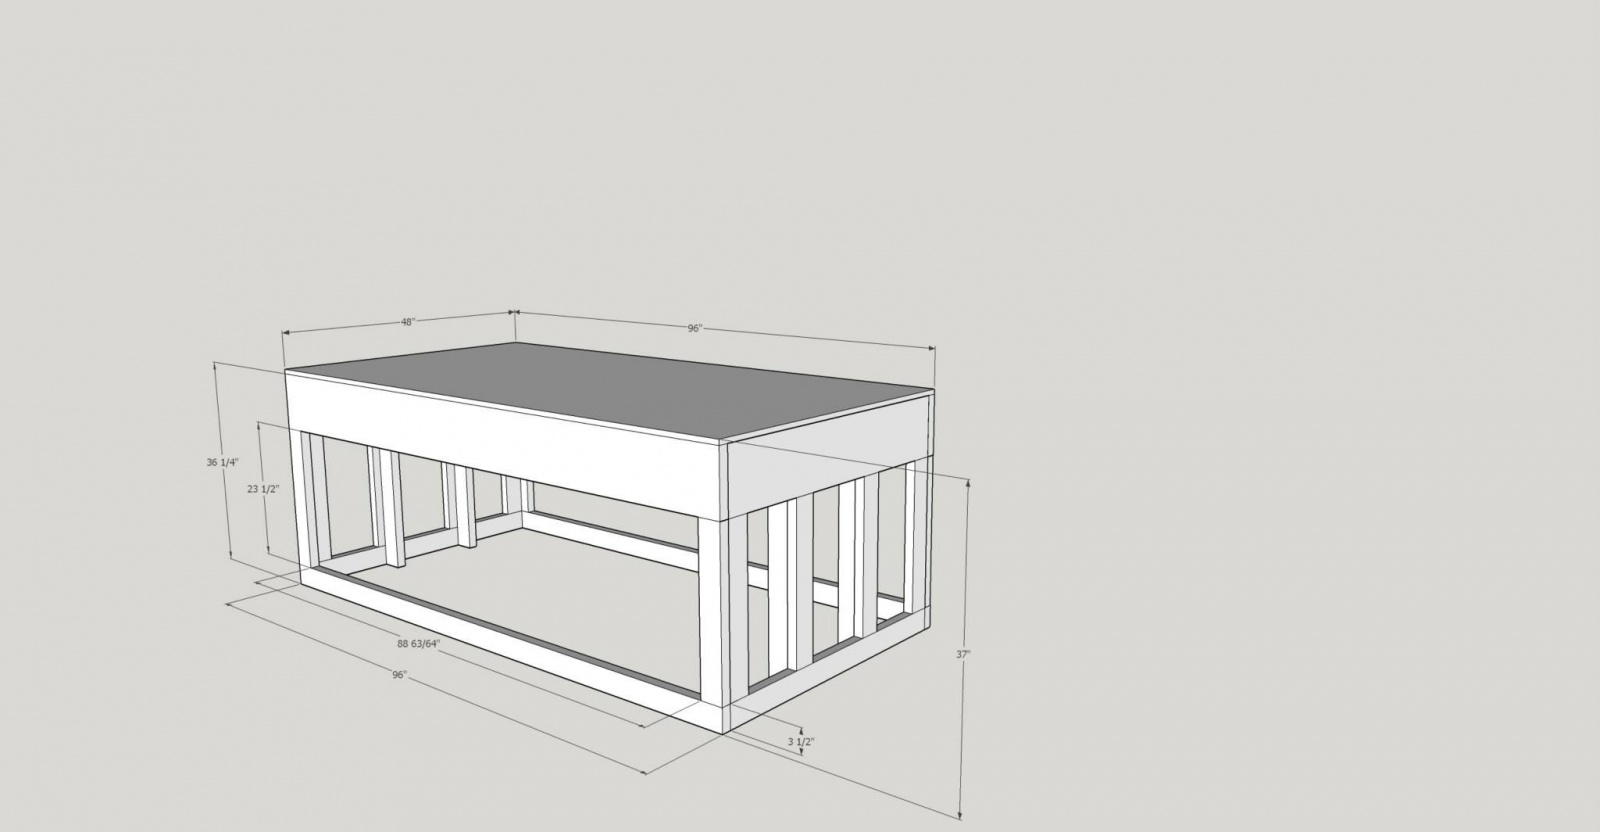
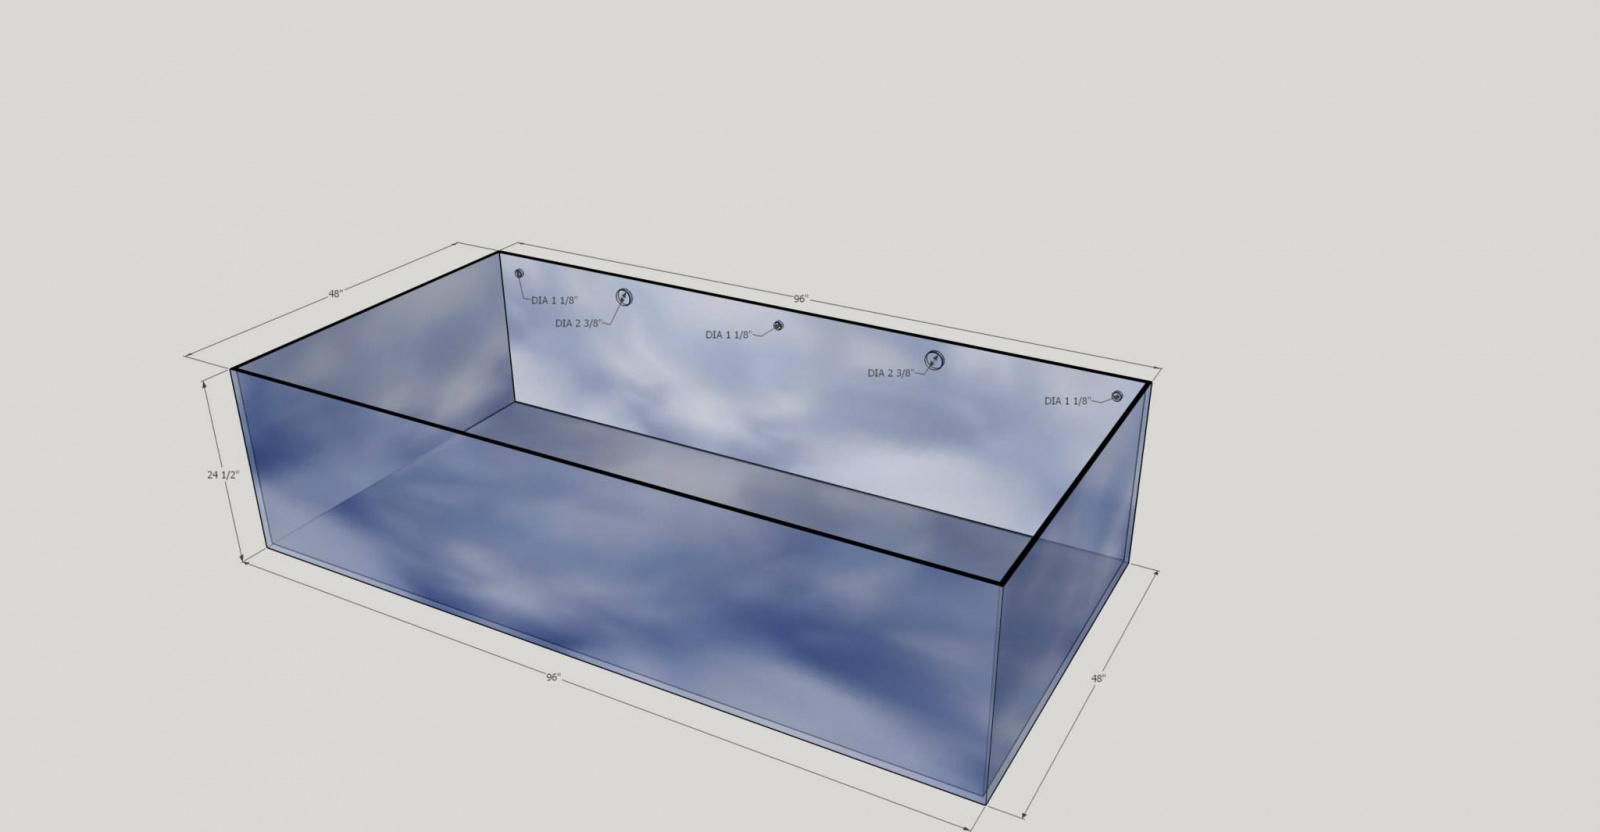
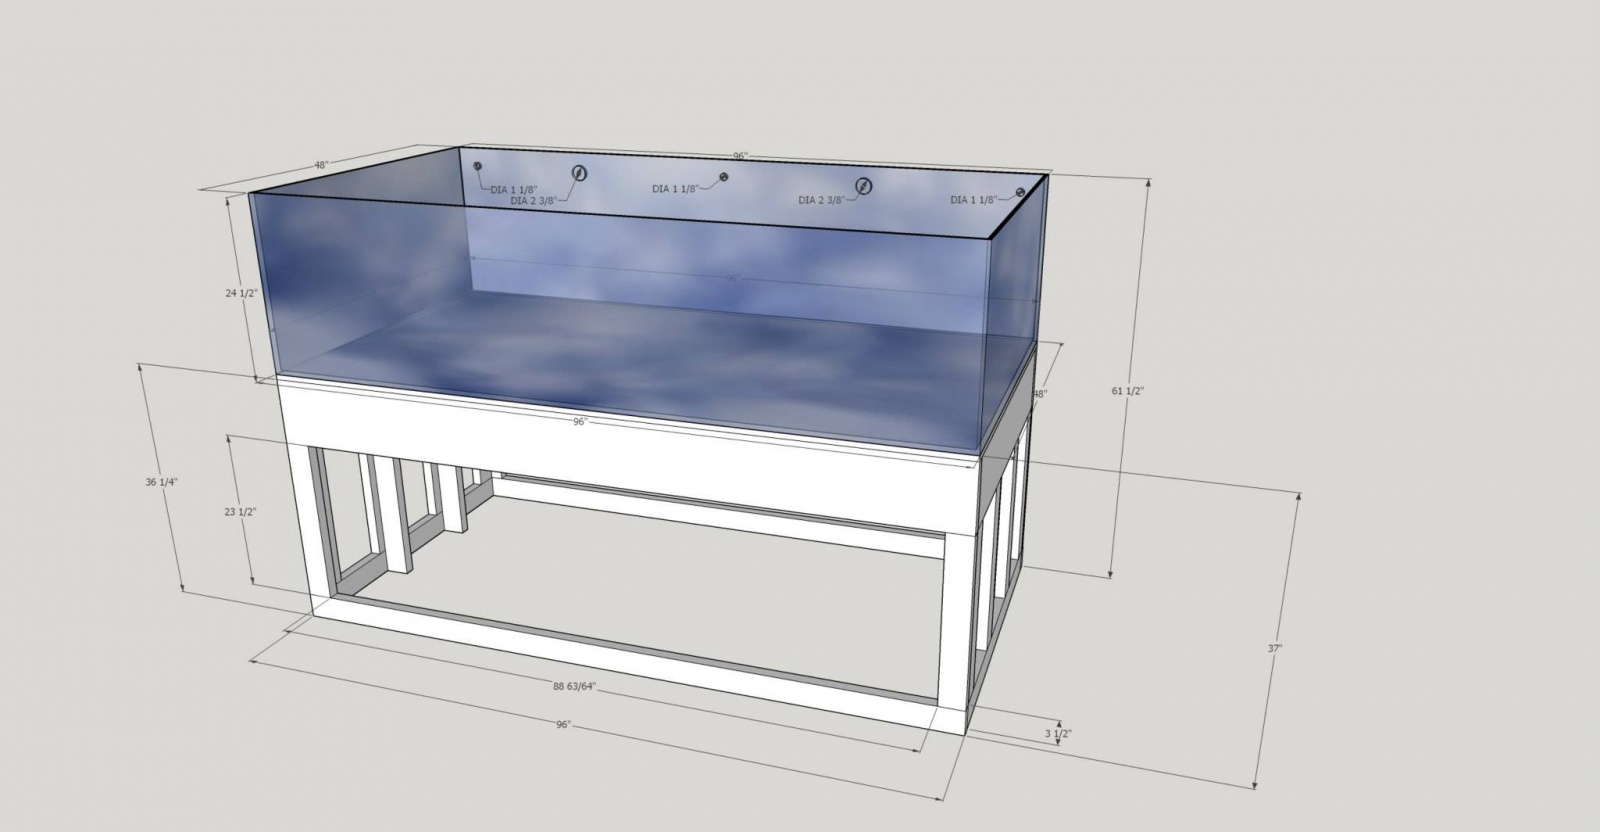
The 380 is 72x48x24 and the 500 is 96x48x24. I prefer the shallower height after not liking the ~30" on the 210.

10410675_786081504778878_8156703812763879795_n.jpg
10428027_786081528112209_4797733374276641680_n.jpg
10931450_786081544778874_3399404224237772648_n.jpg


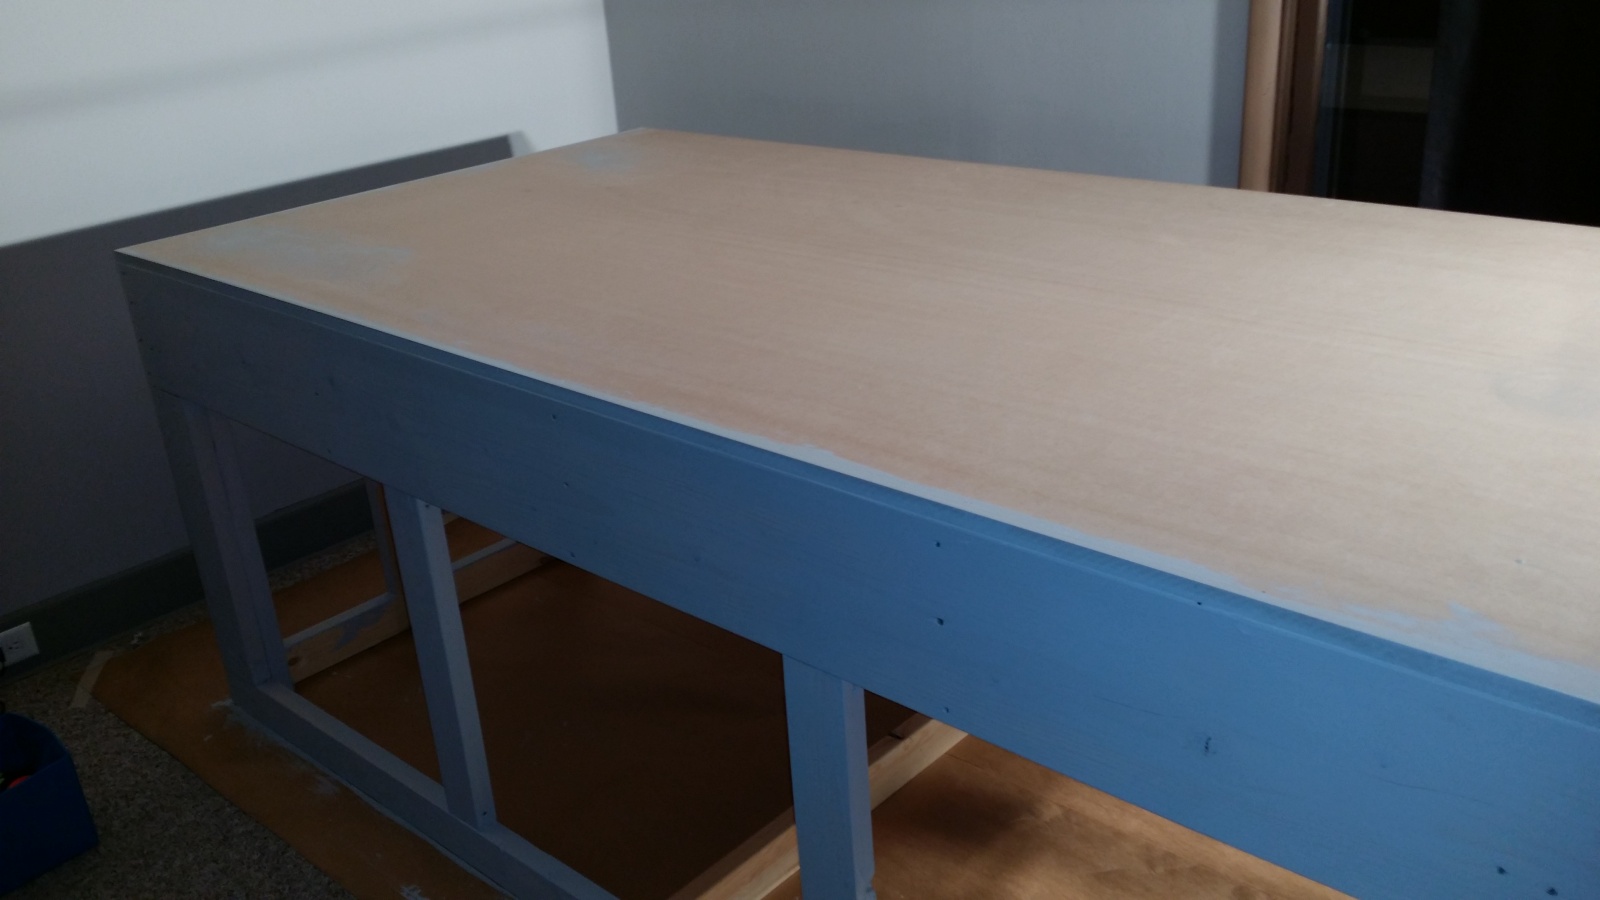
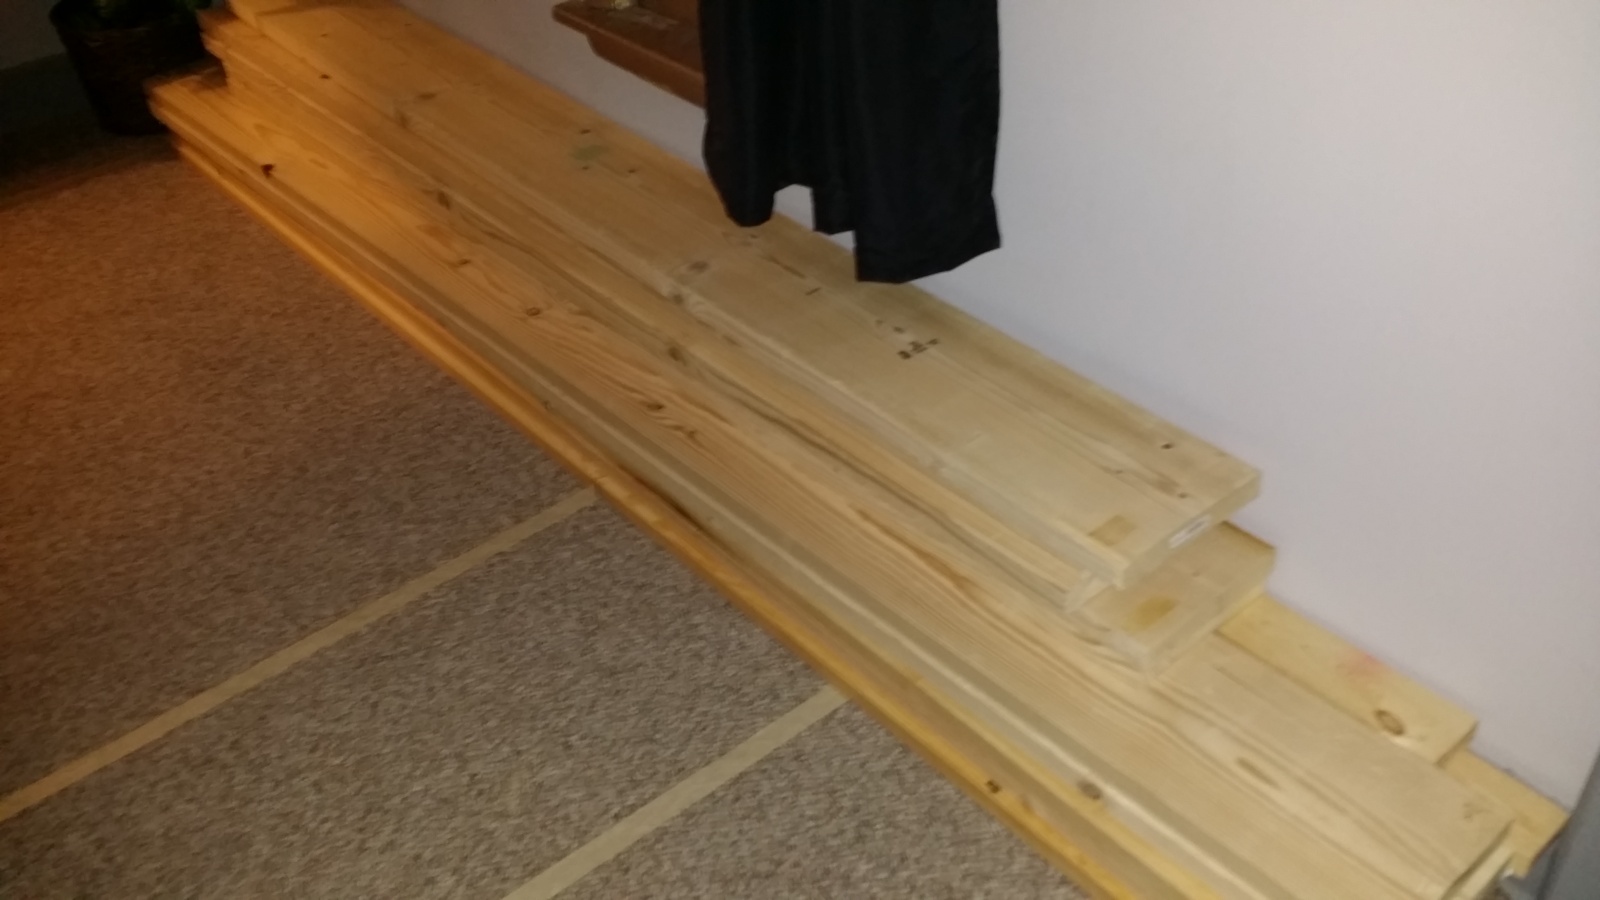
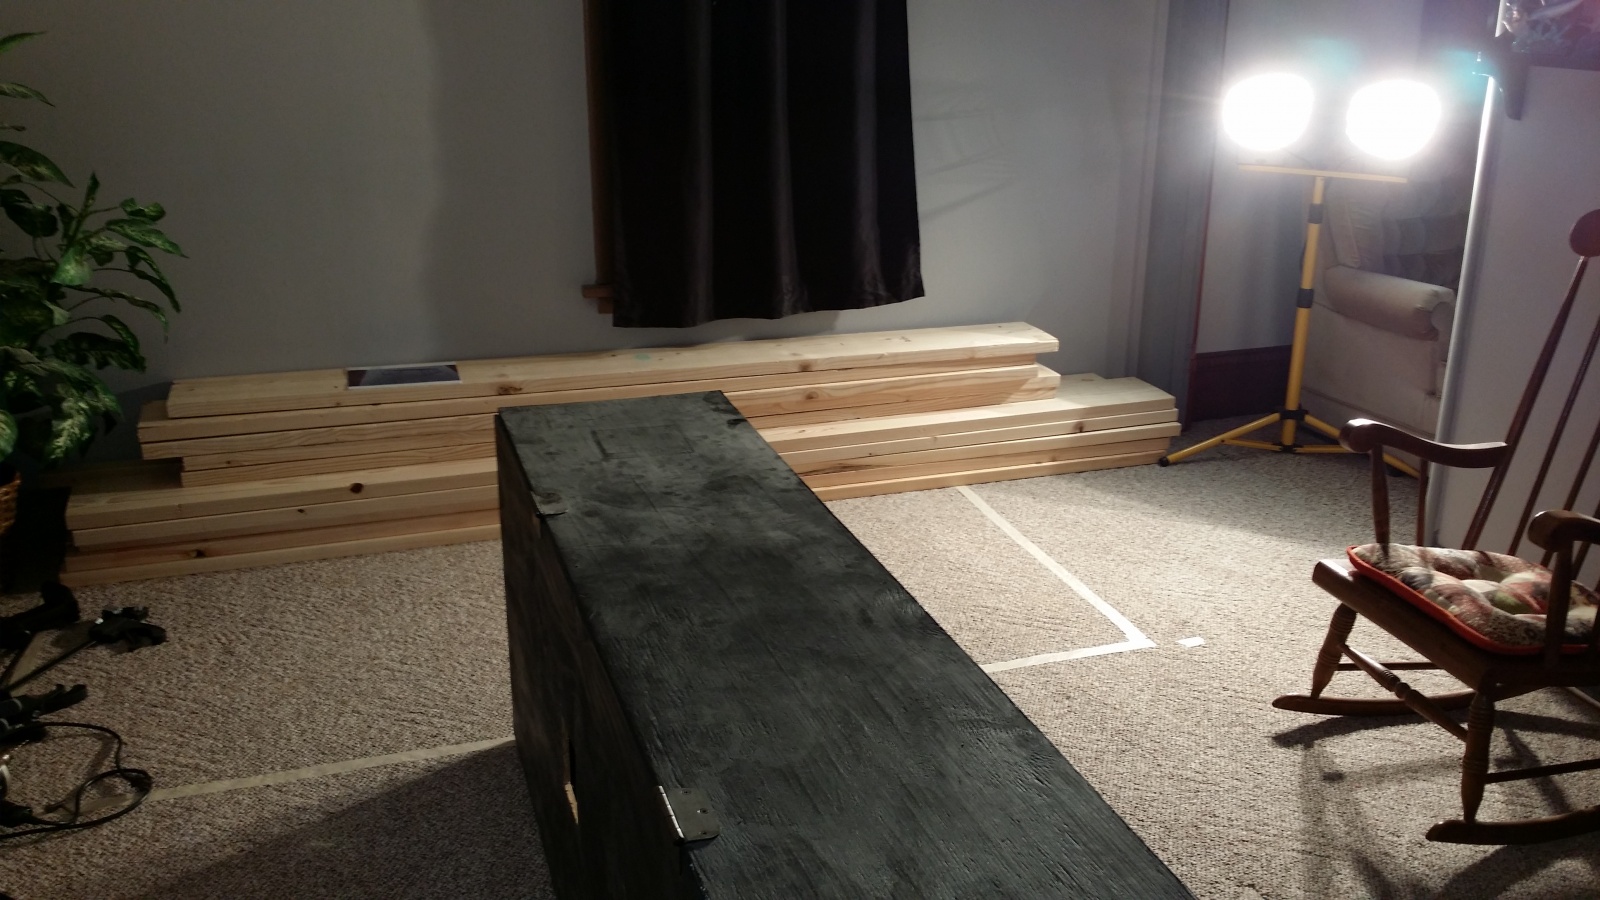
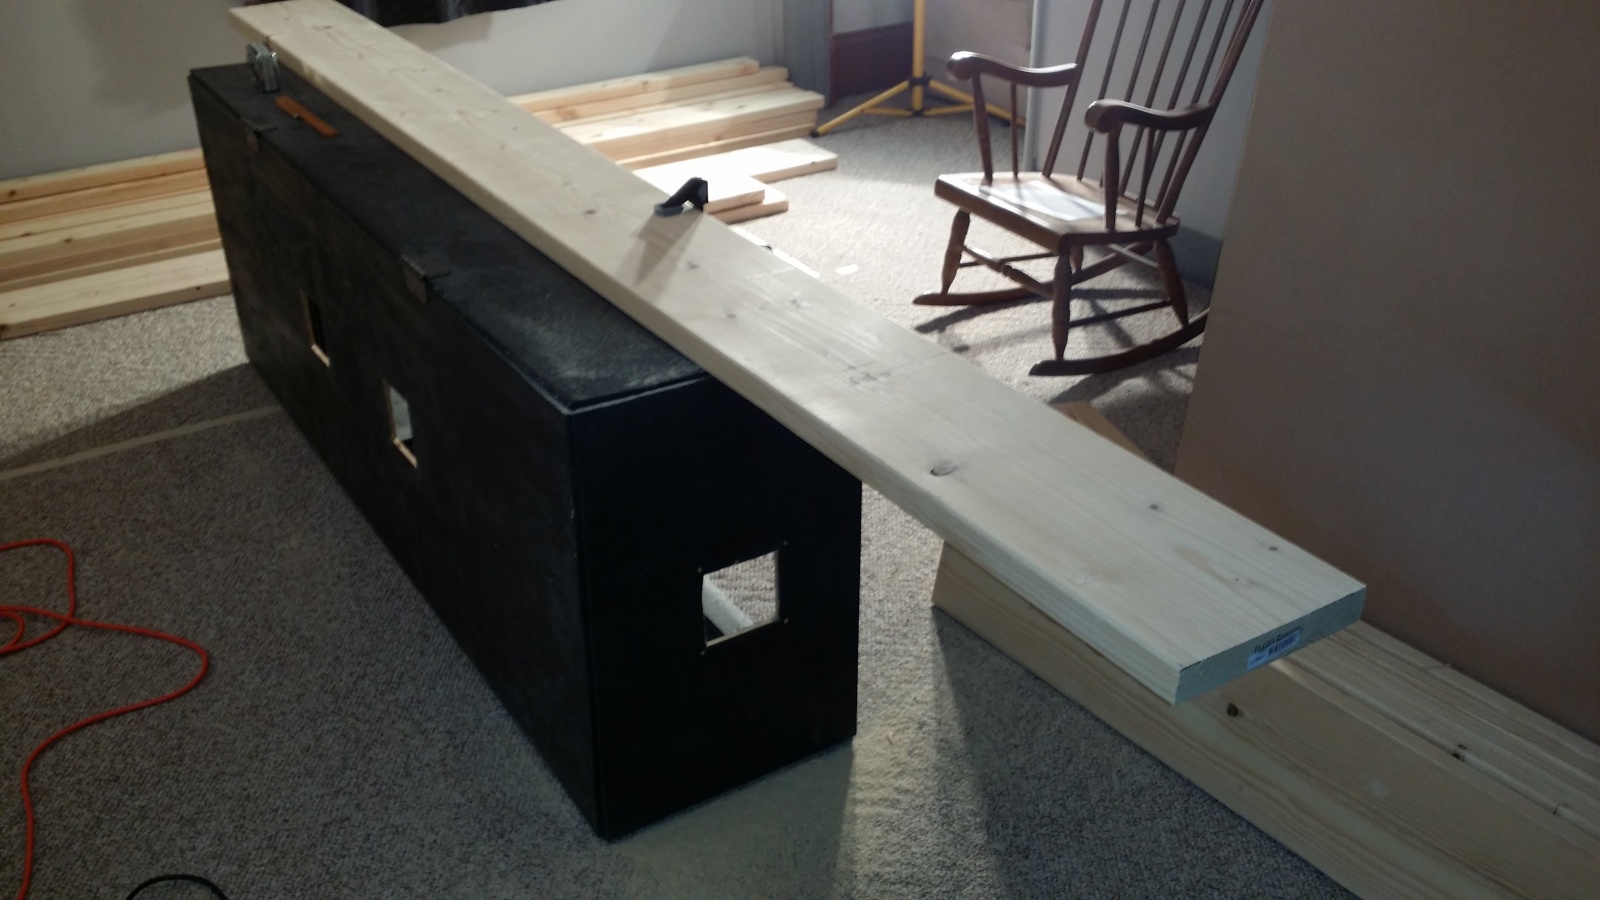
Last night we mapped the tank out with some masking tape. The wall is 12 feet long that it would be going on. I left ~1 foot on the far end up against the wall to be able to get in there if need be for pumps, cleaning and what not (I think I left less with the 210). And then there is about 3 feet on the other end by the walkway going into the living room. The girlfrined says thats not enough room, but I beg the differ lol. Its still about 3 feet of room. And there is another door way to both the living room/kitchen and the kitchen/dining room as well. Still have the plumbing holes drilled through the floor under the carpet up against the wall. I just fold it back a tad and good to go.

So now the decision is to go with the 380 or the 500 that is stuck in my head now. The 500 is the cheapest $ per gallon and I like getting a good deal as its not really that much more. But then again another light would be needed, bigger return pump, more circulation, etc.
 
OP
OP
foxvalleypcgeek

foxvalleypcgeek

Active Member
View Badges
Joined
Jan 17, 2015
Messages
356
Reaction score
145
Location
Wisconsin
Rating - 0%
0   0   0
Decided to go with the 500 gallon with actual outside dimensions of 97x49x24. Looking around 10 weeks for the aquarium to be made, possibly sooner. Six weeks was mentioned as they are more caught up now, but no guarantees. The most exciting part is getting enough people together to pick it up from the manufacturer (5 minutes away), which gave me 10% off the entire oreder since they are not delivering it. Free shipping is not really free, what a surprise there haha. And then getting it into the house. I can rent 10 industrial suctions cups from them for a $500 refundable deposit which may be a good idea. The tank is glass with an anodized aluminum frame, rather then plastic.

Here are some sketchups i did of the stand and tank, but they are a little off. But you still get the idea.

gallery_1_1_8619.jpg

gallery_1_1_25035.jpg

gallery_1_1_6100.jpg

gallery_1_1_2484.jpg

gallery_1_1_61236.jpg


Went to Lowes Thursday night and picked up the wood for the stand as well as a pair of 6X4's for down in the basement to be held up by jack posts.

gallery_1_1_489520.jpg


Got a sheet of MDF for putting on the top, which I know is not ideal for this type of environment but with some sealant should be just fine. Plywood was a problem because it only comes in 96x48 and I needed 97x49. This MDF sheet is exactly the size I need it to be!

gallery_1_1_2263003.jpg


The girlfriend picked out some way too expensive stain for the stand. We got Cape Cod Gray as it matches are two tone gray room this will be in.

gallery_1_1_1217600.jpg


And here is the lumber back at home in the room which it will be built. Have to built it inside the room as it will not fit through a doorway. Too **** cold outside too right now, so there will be sawdust everywhere to clean up!

gallery_1_1_1259303.jpg


I think the next thing I will work on is getting the jack posts and the 6x4s in place downstairs in the basement. The tank is also on the exterior wall, which supports the floor joists directly below. The tank will span across 6 2X10s which actually are 2x10 as its such an old house. The two 6x4 posts will then be going along the back and the front of the tank to help support the ~4,600 pounds when this is full.
 

TJ's Reef

Valuable Member
View Badges
Joined
Oct 26, 2013
Messages
2,454
Reaction score
289
Location
Everett, WA
Rating - 0%
0   0   0
Going to be a Monster of a build, VERY COOL and will be following along for sure. If the Girlfriend starts to get overwhelmed just show her Bill Wanns lil 20,000 gallon Reeftank and she will calm right down or at least stop giving you the 'Look'.... lol


Cheers, Todd
 
OP
OP
foxvalleypcgeek

foxvalleypcgeek

Active Member
View Badges
Joined
Jan 17, 2015
Messages
356
Reaction score
145
Location
Wisconsin
Rating - 0%
0   0   0
Haha, she doesn't mind. Her only comment was it will look silly because its too big for the room. If it fits, its not too big! The other wall would be better as its much longer but that is a bad idea with how the floor joists are positioned. Plus I already have my holes in the floor there from the 210.
 
OP
OP
foxvalleypcgeek

foxvalleypcgeek

Active Member
View Badges
Joined
Jan 17, 2015
Messages
356
Reaction score
145
Location
Wisconsin
Rating - 0%
0   0   0
Last night we got the wood all cut up except for the cross support on the top. Not sure on what the length will be exactly so waiting to do that until the rest is all assembled. Just cut everything up in the dining room and made a mess to dust and vacuum up but much better then going out in the cold. Used my old 210 canopy to clamp the board down to and cut away. I knew there was a reason I still had that thing laying around :dance:


Today it should be all put together and probobly get a start on staining it as well.


gallery_1_1_2570842.jpg


gallery_1_1_1863377.jpg


gallery_1_1_1099392.jpg


gallery_1_1_154784.jpg
 

A_CoupleClowns

Active Member
View Badges
Joined
Jan 22, 2015
Messages
184
Reaction score
73
Location
MN
Rating - 0%
0   0   0
Funny I am building the stand for our 400g today too. We are in MN so I hear you on that cold thing.

Wish I could saw in the house.... LOL!
 

SeahorseKeeper

Where's the mysis?
View Badges
Joined
May 27, 2012
Messages
12,799
Reaction score
3,962
Location
Nags Head
Rating - 0%
0   0   0
This going to be a great build! Looking forward to your progress! :)
 
OP
OP
foxvalleypcgeek

foxvalleypcgeek

Active Member
View Badges
Joined
Jan 17, 2015
Messages
356
Reaction score
145
Location
Wisconsin
Rating - 0%
0   0   0
Thanks guys!

Now after an entires day of work with the stand we have made good progress on it! This thing is huge and heavy. Added in two front legs and 2 back legs for some extra support. As well as needing the front legs anyways to put doors on the stand. There is no bottom inside of it at this point, and I don't plan on it as all equipment will be in the basement.


And here is the progress:


gallery_1_1_1445577.jpg


gallery_1_1_2279018.jpg


gallery_1_1_596101.jpg


gallery_1_1_422020.jpg


I see the stain looks blue in the phone pics, its a light gray and definitely needs a couple of coats. But we called in quits for the day.


gallery_1_1_352136.jpg


gallery_1_1_359329.jpg


At this point you can really start to see how big of a footrint this tank takes up. It is huge!
 

A_CoupleClowns

Active Member
View Badges
Joined
Jan 22, 2015
Messages
184
Reaction score
73
Location
MN
Rating - 0%
0   0   0
Wow now that its up you can really see the size, that is massive!!! Good work!
 

eg8r210

Well-Known Member
View Badges
Joined
Nov 25, 2012
Messages
743
Reaction score
307
Location
Minneola, FL
Rating - 0%
0   0   0
I am a bit confused...If the stand is too big to fit through a door way how will you get the tank in?
 

joekool

Mixed Reefer
View Badges
Joined
Nov 28, 2013
Messages
2,553
Reaction score
1,077
Location
Sarasota, Florida
Rating - 0%
0   0   0
Funny question but if the stand won't fit through the door? Will the tank???

I also would recommend using reeflo pumps for this tank. They are great and energy efficient. Such as a hammer head gold.

Do you have it all planned out already? Would be cool to see your list of equipment.

Wow 4000 pounds of water plus everything else. Thinking final weight is going to be close to 2.5 tons. Hope you engineered your floor for that. Hate for something bad to happen to your awesome new tank or your house, safety of family etc.

Sure you thought of these things but incase you didn't. Just saying.

Best of luck
Slainte Joseph
 

A_CoupleClowns

Active Member
View Badges
Joined
Jan 22, 2015
Messages
184
Reaction score
73
Location
MN
Rating - 0%
0   0   0
With the tank on its side it will fit right through the door :wink:

Not the stand though. I am doing it the same way, building the stand right in the house for our 96x36x27h.
 
OP
OP
foxvalleypcgeek

foxvalleypcgeek

Active Member
View Badges
Joined
Jan 17, 2015
Messages
356
Reaction score
145
Location
Wisconsin
Rating - 0%
0   0   0
Correct. The tank is 97x49x24. On its side it's only 24 to go through a doorway. I will be using a hammerhead/barracuda on this. I had one on my 210 previously.
 

joekool

Mixed Reefer
View Badges
Joined
Nov 28, 2013
Messages
2,553
Reaction score
1,077
Location
Sarasota, Florida
Rating - 0%
0   0   0
You used a hammer head on a 210 holly cow. Or did you just mean reeflo pump. I have a super dart/ snapper gold. Love these pumps.

Hope you have some strong friends. Glad I don't live close to you too lol.

Following along bud.
 
OP
OP
foxvalleypcgeek

foxvalleypcgeek

Active Member
View Badges
Joined
Jan 17, 2015
Messages
356
Reaction score
145
Location
Wisconsin
Rating - 0%
0   0   0
You used a hammer head on a 210 holly cow. Or did you just mean reeflo pump. I have a super dart/ snapper gold. Love these pumps.

Hope you have some strong friends. Glad I don't live close to you too lol.

Following along bud.
Sort of. there were a few tanks plumbed in with the 210. The 12 feet of head and branching off to other tanks in the basement as well worked out perfect. getting the tank in the house is the hard part lol. I dont have enough friends haha.
 
OP
OP
foxvalleypcgeek

foxvalleypcgeek

Active Member
View Badges
Joined
Jan 17, 2015
Messages
356
Reaction score
145
Location
Wisconsin
Rating - 0%
0   0   0
Today was a productive day getting the basement fish room cleaned up and in a lot better shape. Previously I left it dirty and was a mess. The paint is so old that it would sometimes fall off of the boards above and land in the stock tank below. Should be no more of that this time around, as I scrubbed it all down, including the walls and painted it all with some leftover paint I found from when we did the dining room 4 years ago.


Also took a trip down to Milwaukee to get some salt on a weekend special. Kind of a long trip (3 hours total) for some salt but felt like going to see what has changed in the store as its been a couple of years. Best Fish is by far the best fish store I have ever been too.


This should be enough to get me started.


gallery_1_1_2750793.jpg


It was getting quite dusty with the shop vac on all the concrete. Also worked on removing everything from the room such as the RO unit, and my rigged up board haning from the celing which electronics were previously mounted to.


gallery_1_1_666761.jpg


Here was the wall of the sistern room before:


gallery_1_1_1254666.jpg


And after some paint:


gallery_1_1_1133732.jpg


Working on doing the ceiling:


gallery_1_1_1780763.jpg


A little bit of the paint that fell off while srubbing it with a brush. Vacummed this up a few times.


gallery_1_1_1149195.jpg


Painted the other wall in between the orignal basement and, then on the other side of that wall is the newer basment from when the house was added on.


gallery_1_1_1644242.jpg


Jack posts and 6X4's all put up supporting the floor joists. Nice and level so they are perfectly vertical.


gallery_1_1_1835249.jpg


And an idea of what it should look like minus any equipment. Have to make a support stand to raise the blue barells off the ground. Figured it was a good time to get them off of the workbench where they were used before.


gallery_1_1_865628.jpg


And the stand is completely done with stain, except for the skinning of it, which could be a challenge as I never do haha. Also leveled out **** near perfect after jacking up the floor.


gallery_1_1_1680326.jpg
 
OP
OP
foxvalleypcgeek

foxvalleypcgeek

Active Member
View Badges
Joined
Jan 17, 2015
Messages
356
Reaction score
145
Location
Wisconsin
Rating - 0%
0   0   0
Put together a stand for the blue barrels this morning to get them off the ground. Have to add some extra bits on the top to support them better as I made it a little bigger then intended. I dont see them moving at all but you never know, and I dont want one to fall through when its full. And then of course paint that as well so it matches.


I will tie them both together rather then seperate like they are now and put a float in there to keep them full, rather then me carying buckets to them to fill them like I did in the past.


gallery_1_1_2208372.jpg


gallery_1_1_109192.jpg


The smaller brute can you see back in the corner is the top-off water, and the larger one to the right is the salt water. Its full to the brim with salt water from over 2 years ago when I had the system up and running. Has had a pump running in there the entire time.


I will do just like before and have auto water changes. Small amounts but every single day.
 
Back
Top