75 gal rimless Planet Aquarium build

Jimbo662

2500 Club Member
View Badges
Joined
Oct 1, 2013
Messages
4,749
Reaction score
2,147
Location
Austin, Tx
Rating - 0%
0   0   0
Well, now that I’m actually starting the “build†process I guess I need to start documenting my progress. I'm in the middle of trying to sell my house so I'm planning to get all the set up work done while I’m still in the house so that all I have to do when I move is set it up.


Equipment:

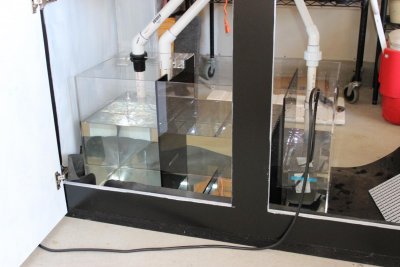
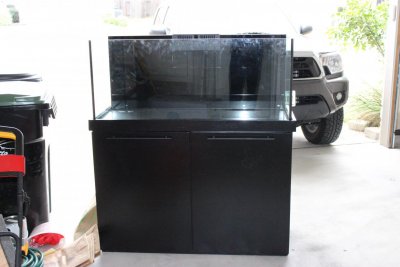
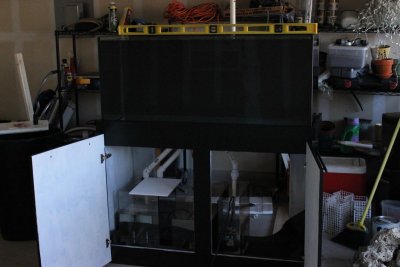
75g Planet Aquarium Rimless w/external overflow

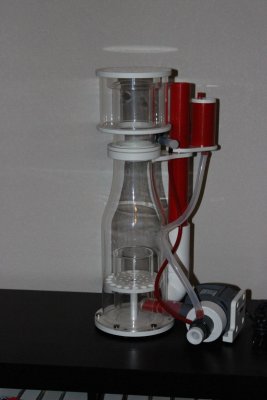
Vertex Omega 130 skimmer

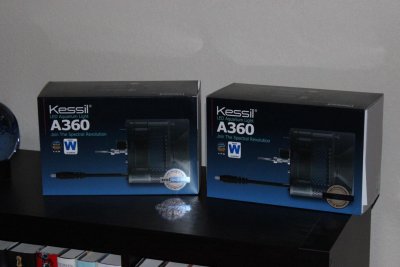
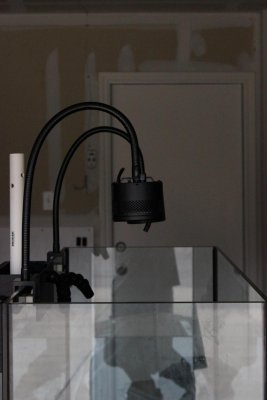
2 - Kessil A360W-E lights

2 – Vortech MP40w ES
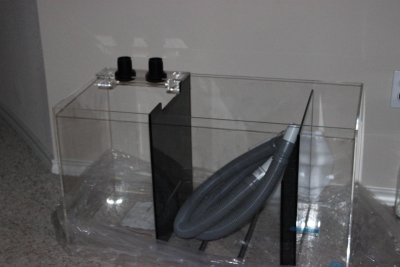
Eshopp R200 Sump

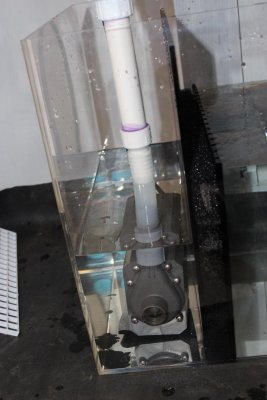
Danner Mag 18 return pump

Tunze Osmolator top off

Will hopefully get an Apex before tank is ready tenants

I’ll be working on the plumbing next week while the temps
are warmer!
 

Attachments

  • IMG_0326.jpg
    IMG_0326.jpg
    89.3 KB · Views: 1,763
  • IMG_0323.jpg
    IMG_0323.jpg
    94 KB · Views: 1,432
  • skimmer.jpg
    skimmer.jpg
    93.1 KB · Views: 1,432
  • IMG_0324.jpg
    IMG_0324.jpg
    91.2 KB · Views: 1,498
Last edited:
OP
OP
Jimbo662

Jimbo662

2500 Club Member
View Badges
Joined
Oct 1, 2013
Messages
4,749
Reaction score
2,147
Location
Austin, Tx
Rating - 0%
0   0   0
Made a little progress today while we've got some great weather!

Made some rubble racks to sit in the drain / return section of the sump. When it's time to clean it should be much easier.


I got started on the plumbing. My original thought was to use flexible PVC for the drains and braided tubing for the return. I hadn't realized how short the distance would be from bottom of the tank to the sump and discovered neither one will be flexible enough with the short sections I would have to use. I decided to hard plumb it instead. Gotta make another run to Lowe's tomorrow to pick up some more stuff.


The rock and sand came in. This time I ordered the Fiji dry rock and special grade Agri - live sand. The rock has dead stuff on it. What do I need to do with it? Just rinse it off really good?


Next big purchase is going to be an Apex once I get moved.
 

Attachments

  • IMG_0330.jpg
    IMG_0330.jpg
    92.1 KB · Views: 1,393
  • IMG_0333.jpg
    IMG_0333.jpg
    91.9 KB · Views: 1,339
  • IMG_0331.jpg
    IMG_0331.jpg
    95 KB · Views: 1,331
  • IMG_0332.jpg
    IMG_0332.jpg
    94.9 KB · Views: 1,336
Last edited:
OP
OP
Jimbo662

Jimbo662

2500 Club Member
View Badges
Joined
Oct 1, 2013
Messages
4,749
Reaction score
2,147
Location
Austin, Tx
Rating - 0%
0   0   0
I'm not even close to that point yet. I'm selling my house (hoping to close by Jan 31st) so I won't be setting it up until after the move.
 
OP
OP
Jimbo662

Jimbo662

2500 Club Member
View Badges
Joined
Oct 1, 2013
Messages
4,749
Reaction score
2,147
Location
Austin, Tx
Rating - 0%
0   0   0
Well, wasn't able to get any work done the last two days due to the flu!!! I got the brackets in for the lights and a finnex titanium heater.
 

Attachments

  • IMG_0334.jpg
    IMG_0334.jpg
    98.7 KB · Views: 1,270
OP
OP
Jimbo662

Jimbo662

2500 Club Member
View Badges
Joined
Oct 1, 2013
Messages
4,749
Reaction score
2,147
Location
Austin, Tx
Rating - 0%
0   0   0
Plumbing is done! Did the dry fit and everything looked great. Cemented the two drain lines and they fit almost perfectly. Got half way done with the return and realized I put one of the 45 on backwards...thank goodness Lowe's is only 5 min away! Water test starts on Saturday!!!

IMG_0337.jpg
 
OP
OP
Jimbo662

Jimbo662

2500 Club Member
View Badges
Joined
Oct 1, 2013
Messages
4,749
Reaction score
2,147
Location
Austin, Tx
Rating - 0%
0   0   0
WOOHOO!!!! No leaks! Filled the tank / sump and turned on the pump. It took about an hour to get the gate valve tuned in just right. All three connections are leak free! On my last tank I redid the plumbing 4 times!!!! This thing is soooo quiet...I plumbed the drains with the herbie method. All I hear is the trickle of water going into the overflow. Right now the pump is a little loud because I've got it connected with the braided poly and it's vibrating up the return line. As soon as I get the silicon tubing that'll get changed out.
 

Attachments

  • IMG_0338.jpg
    IMG_0338.jpg
    91.5 KB · Views: 1,252

M&M

Active Member
View Badges
Joined
Jun 10, 2011
Messages
419
Reaction score
618
Location
Chicago
Rating - 0%
0   0   0
Looks like beginning of a great build, definitely subscribed :)
 

EW_Fish

Valuable Member
View Badges
Joined
Apr 26, 2011
Messages
1,975
Reaction score
749
Location
Chesterfield, VA
Rating - 0%
0   0   0
Man that is the smartest idea with the egg crate and rock. I will be using this in my setup. looks good so far. Will tag along
 
OP
OP
Jimbo662

Jimbo662

2500 Club Member
View Badges
Joined
Oct 1, 2013
Messages
4,749
Reaction score
2,147
Location
Austin, Tx
Rating - 0%
0   0   0
I had to make one small adjustment. The return line ended up slightly short and was causing the pump to be too close to the back wall. I had a piece of PVC stuck between it and the wall so that it wouldn't suck up to the wall. I lengthened it about an inch and got the pump in the perfect spot. Also added the silicon tubing. The overflow box is not very deep so the bubbles that were being created by the water overflowing into it were getting sucked down the main drain causing bubbling noise in the pipes. I took everything off the main drain so that now it's just the bulkhead at the bottom and I raised the water level in the overflow box. Now all you hear is the trickle of the water and a low hum of the pump.
 

Attachments

  • IMG_0347.jpg
    IMG_0347.jpg
    88.6 KB · Views: 1,206
  • IMG_0349.jpg
    IMG_0349.jpg
    90.7 KB · Views: 1,225
OP
OP
Jimbo662

Jimbo662

2500 Club Member
View Badges
Joined
Oct 1, 2013
Messages
4,749
Reaction score
2,147
Location
Austin, Tx
Rating - 0%
0   0   0
Got the Apex all set, finally figured out how to program late last night. This morning I attached the lights to the top of the board to test and see if my programming skills are any good. This is a temporary set up until I get a cabinet to mount everything in.
 

Attachments

  • IMG_0353.jpg
    IMG_0353.jpg
    86.5 KB · Views: 1,170
OP
OP
Jimbo662

Jimbo662

2500 Club Member
View Badges
Joined
Oct 1, 2013
Messages
4,749
Reaction score
2,147
Location
Austin, Tx
Rating - 0%
0   0   0
WOOHOO!!!! The lights came on right on time! Now to work on pump / skimmer / vortechs!
 
OP
OP
Jimbo662

Jimbo662

2500 Club Member
View Badges
Joined
Oct 1, 2013
Messages
4,749
Reaction score
2,147
Location
Austin, Tx
Rating - 0%
0   0   0
I picked up a bathroom cabinet at Ikea to house all the electronics.
 

Attachments

  • IMG_0354.jpg
    IMG_0354.jpg
    94.2 KB · Views: 1,209
  • IMG_0355.jpg
    IMG_0355.jpg
    97.1 KB · Views: 1,229
OP
OP
Jimbo662

Jimbo662

2500 Club Member
View Badges
Joined
Oct 1, 2013
Messages
4,749
Reaction score
2,147
Location
Austin, Tx
Rating - 0%
0   0   0
Planning to do a mix of sps, lps and softies. Fish will be on the smaller side and hopefully non-jumpers!
 

Funlad3

Active Member
View Badges
Joined
Jul 1, 2012
Messages
266
Reaction score
193
Location
Chicago
Rating - 0%
0   0   0
I love mixed reefs. So much color, and then the contrast between softies and SPS is just fantastic. Good luck, and I can't wait to see how everything comes along!
 
OP
OP
Jimbo662

Jimbo662

2500 Club Member
View Badges
Joined
Oct 1, 2013
Messages
4,749
Reaction score
2,147
Location
Austin, Tx
Rating - 0%
0   0   0
Finally got moved and settled in the new place this week and started working on the tank. I need to get two kessil extension cables so I can finish the wires on the lights.

IMG_0365.jpg


Got everything installed either in or on the equipment box and already realize I need a larger box. Anyone know of something I can buy off the shelf? I'm using a bathroom cabinet that I found at Ikea.

IMG_0360.jpg


Everything is in the sump except the ATO reservoir.

IMG_0362.jpg


I added a breakout box along with window / door magnets to turn on the lights inside the cabinet. I had some Ecoxotic LED strips leftover from my planted tank and attached them to the roof inside the cabinet.

IMG_0364.jpg


Today will be adding the sand and working on scaping and attaching my RODI in the washroom.
 

Davesgt

Happy Happy Happy
View Badges
Joined
Jun 10, 2012
Messages
2,369
Reaction score
619
Location
Kingsport, TN
Rating - 0%
0   0   0
Very awesome build so far! ill be watching this!
 
OP
OP
Jimbo662

Jimbo662

2500 Club Member
View Badges
Joined
Oct 1, 2013
Messages
4,749
Reaction score
2,147
Location
Austin, Tx
Rating - 0%
0   0   0
Making progress...got the RO/DI hung and making water.

IMG_0369.jpg
IMG_0371.jpg
 

Algae invading algae: Have you had unwanted algae in your good macroalgae?

  • I regularly have unwanted algae in my macroalgae.

    Votes: 8 34.8%
  • I occasionally have unwanted algae in my macroalgae.

    Votes: 4 17.4%
  • I rarely have unwanted algae in my macroalgae.

    Votes: 3 13.0%
  • I never have unwanted algae in my macroalgae.

    Votes: 3 13.0%
  • I don’t have macroalgae.

    Votes: 5 21.7%
  • Other.

    Votes: 0 0.0%
Back
Top