Austin's Build

austinl

Active Member
View Badges
Joined
Dec 22, 2013
Messages
324
Reaction score
117
Location
Toronto, Canada
Rating - 0%
0   0   0
Austins 70 Gal Custom Miracles and Elite Aquatics Sump

Hello all from the great White North,

Thought it was time to start a build thread after seeing so much inspiration from other members tanks here on the forum. This will be my first adventure in salt water as I used to do planted freshwater tanks previously and had multiple tank running at once housing rainbows and African Cichlids.

46gal.jpg


My tank will be a custom made tank from Miracles, and will measure 40x24x18 with an external overflow. The stand is being built by myself and will be finished in a high gloss white and if all goes well.

As for equipment here is a my current list which may or may not change

Aqua Illumination Hydra 52 with Apex Wireless Controller
Vertex 150 ( bought already )
Vertex Dosing Pump
Ecotech Radion MP40
Ecotech Battery Backup
Neptune Apex with Lab grade PH/Temp Probe/Display and EB8
Apex WXM Module
Tunze 3155 ATO

And from one of the sponsors

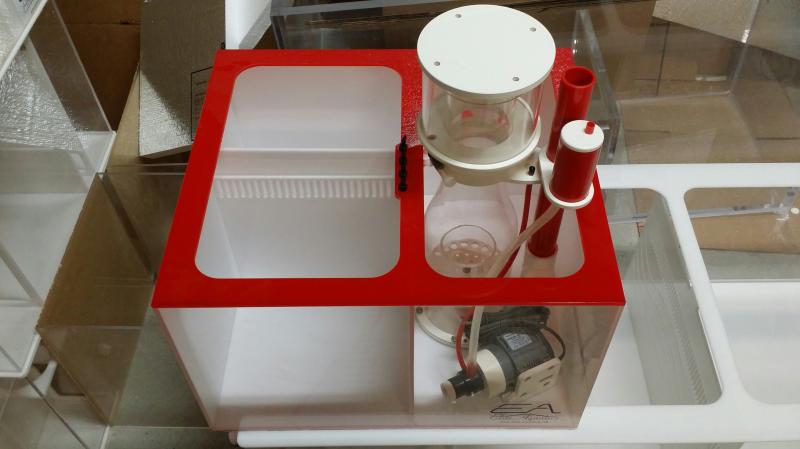
Elite Aquatics Sump , ATO and Dosing Containers.


My stocking plan is listed below and would like to hear your guys input on the list, and any changes you would make, what works what doesn’t etc etc.


Fish Stocking List


2 x Black & White Ocellaris Clownfish - Tank-Bred (Amphiprion ocellaris var.)
or
2 x Amphiprion Percula (True Percula Clownfish)


1 x Paracheilinus carpenteri (Carpenter's Flasher Wrasse)
1 x Paracheilinus cyaneus (Blue Flasher Wrasse)


1 x Pseudanthias bartlettorum (bartletts anthias)
1 x Pseudanthias rubrizontaus (Tricolor, redbelted anthias)


Depending on available stock 1 of the below
1 x Ctenochaetus Flavicauda (White Tail Bristletooth Tang) — 1st Choice
or
1 x Ctenochaetus Strigosus (Yellow Eye Tang)
or
1 x Ctenochaetus Tominiensis (Bristletooth Tomini Tang)


May not add this as it nips at corals
1 x Centropyge loricula (Flame Angelfish)


I look forward to hearing your guys comments and I will keep adding as I get new equipment and progress.

Thanks

Austin


Now onto the pictures.


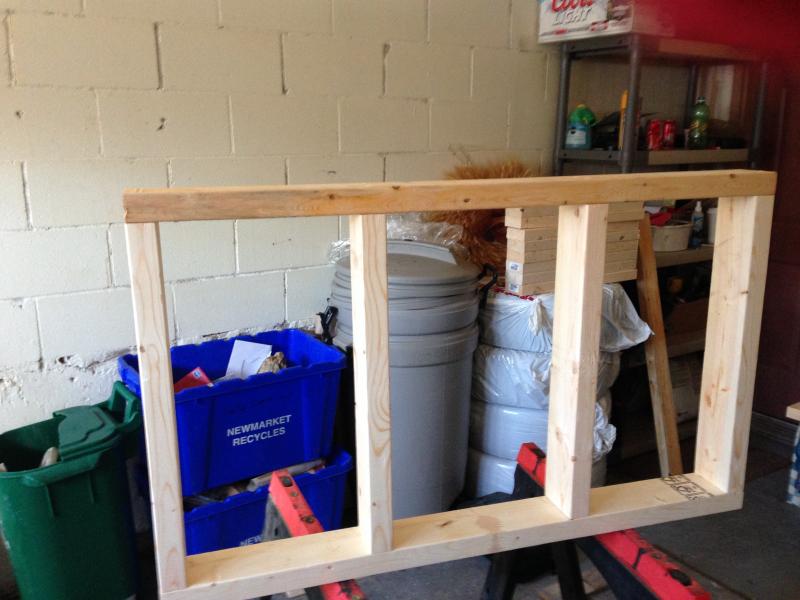
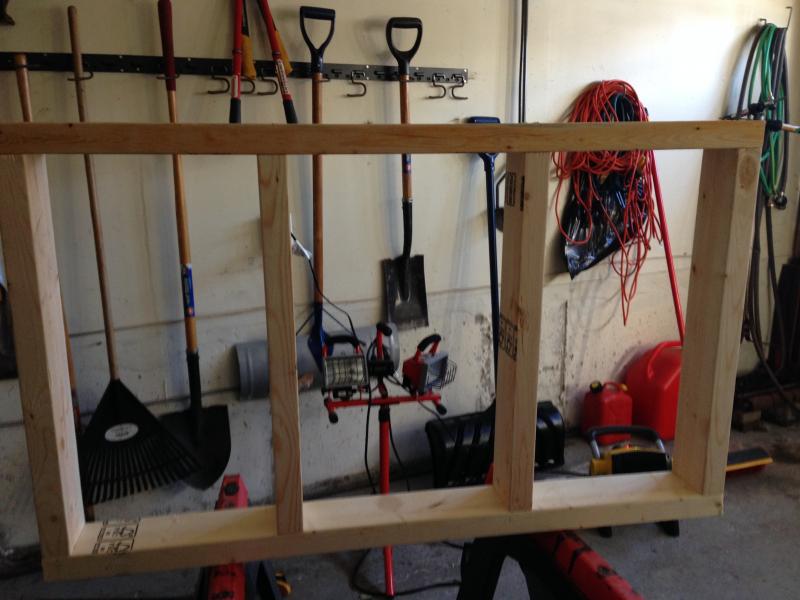
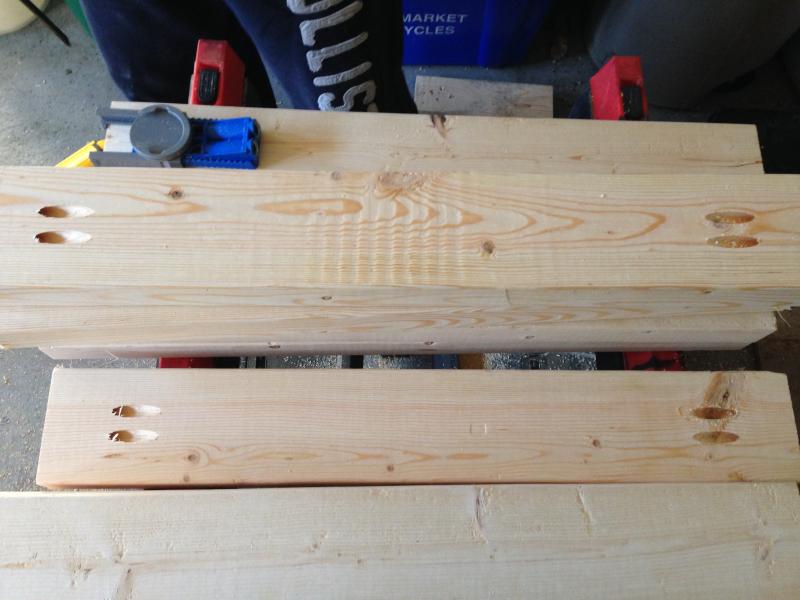
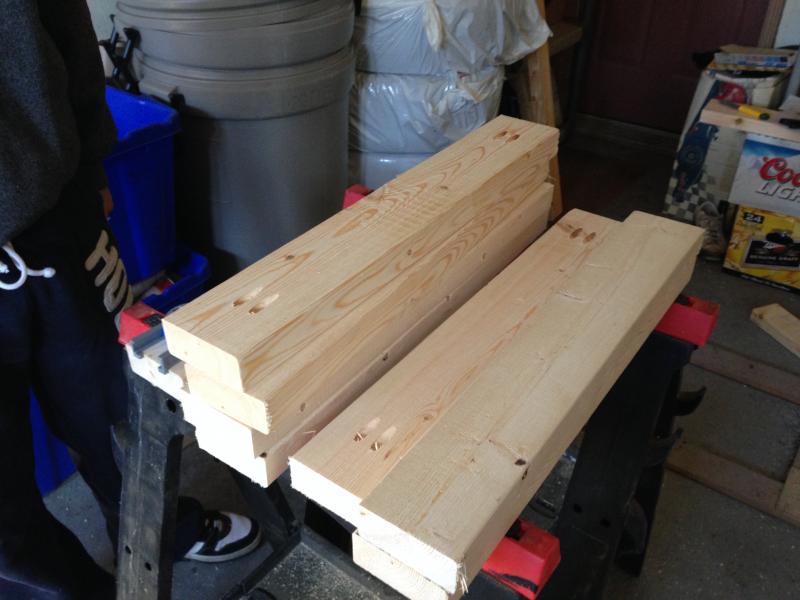
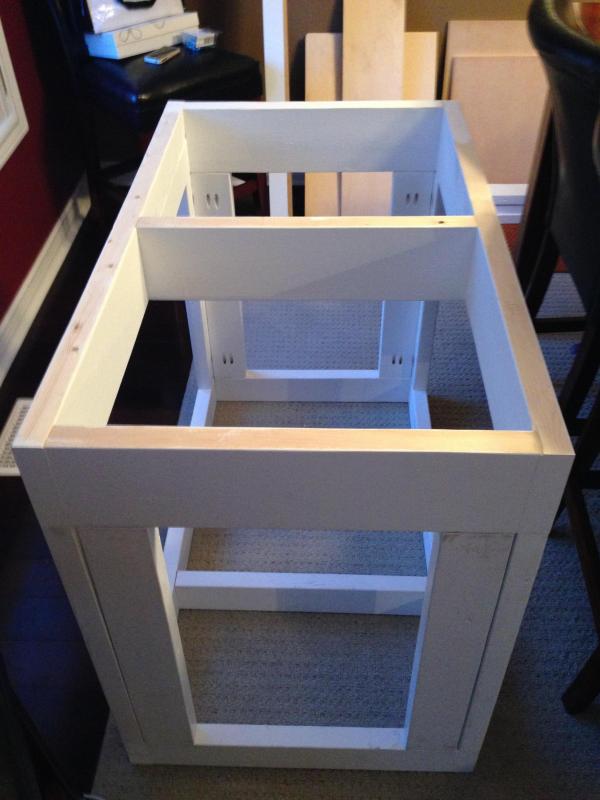
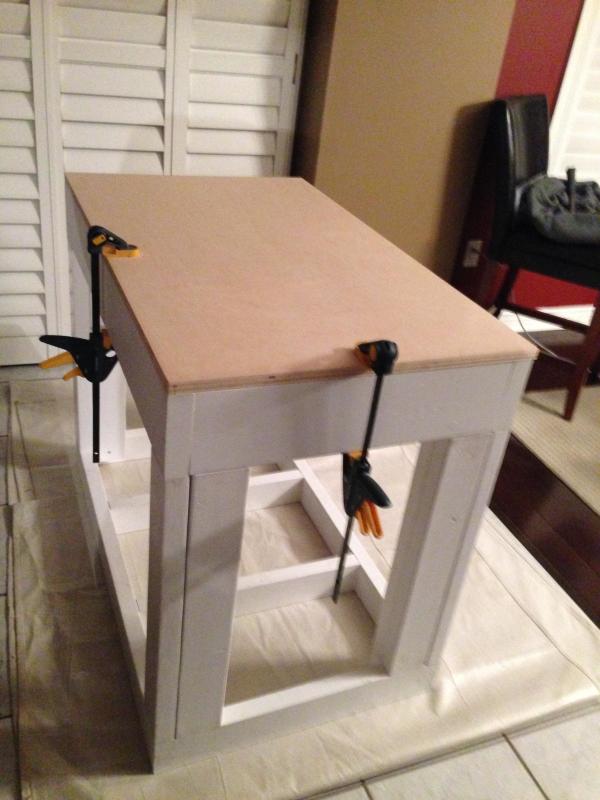
Stand building shots


Sump from Elite Aquatics


Aquascaping


Front Shot


Left Side


Right Side


Rocks Curing


46gal.jpg
 
Last edited:

jason g

Well-Known Member
View Badges
Joined
Dec 4, 2013
Messages
602
Reaction score
137
Location
Fresno, CA
Rating - 0%
0   0   0
Nice looking stand you got going there. I wish I had the skills and patients to DIY work. Your freshwater tank looks great too, welcome to Saltwater its insane. I myself am addicted. :)
 
OP
OP
austinl

austinl

Active Member
View Badges
Joined
Dec 22, 2013
Messages
324
Reaction score
117
Location
Toronto, Canada
Rating - 0%
0   0   0
Just a quick update, have started skinning my stand and used the top to test how the finish will come out, as I am trying to get a high gloss white finish to match a coffee table I have in my house.

I think it came out pretty good as you will see in the photo, I used Kilz primer and then switched to a melamine paint and then top coated it with a water based varathane. After which i wet sanded to 1500 grit and then used some automotive polishes to remove all the micro scratches and then added a wax to the top.


Check out the reflection of my Vertex 150 on the top. ( a little grainy I will bust out the better camera later )

IMG_1184.jpg
 
OP
OP
austinl

austinl

Active Member
View Badges
Joined
Dec 22, 2013
Messages
324
Reaction score
117
Location
Toronto, Canada
Rating - 0%
0   0   0
Couple of updates from today.

Skinning is under way and everything has been primed and 1 coat of paint has been applied to everything except for the door to the sump area. I am thinking of maybe doing a smoked glass door instead of the wood door so the nice sump I am getting from Elite Aquatics doesn't go unseen.

I have also painted my plumbing red to match the sump, I will get some pictures of those later but you can see them in one of the photos of the stand.

Hopefully these photos show the high gloss look i am going for better than my other ones.


stand1.jpg
stand2.jpg
stand3.jpg
stand4.jpg
 
OP
OP
austinl

austinl

Active Member
View Badges
Joined
Dec 22, 2013
Messages
324
Reaction score
117
Location
Toronto, Canada
Rating - 0%
0   0   0
Todays Update,

I finished the last coats of paint today so while it dries ( no one like's watching paint dry ) I have some time to kill so I thought I could go into detail on how I got the gloss finish on the top, which is what I am doing on the whole stand.


During construction of the stand I decided to prime and paint all the internal pieces before assembling it to make it easier and not have to paint from inside the cabinet.
Once it was all dry, I glued and screwed all the pieces together.

Next are the steps I did for the top which will be the same for the rest of the cabinet.

Depending on the wood you select you may not need to do all these steps.

I sanded the wood up to a 400 Grit to get a nice smooth surface. ( This was probably overkill )

I then applied two coats of Kilz Primer doing a light sand of 400 grit sand paper between coats to knock down any raised grains on the wood.
Next up was 3 coats of a Brilliant White Melamine paint again sanding between each coats very lightly with 400 grit sand paper.

Next up was the part I was kind of worried about, the top coat. I opted to use a water based Varathane, the reason was very low VOC / Odors as I would have to be doing this inside due to the time of year ( snow and cold ) also made clean up easy and it dries fairly quickly ( good and bad as it sets up quickly so work fast ).

The best tools/brushes I found for applying this took a bit of trial and error as the Varathane sets up quickly. I used a special low nap 4" roller and then back brushed it with a 3" foam brush. When I tried using a regular brush it left a lot of brush strokes and I think this was due to how fast the water based Varathane sets plus a little too much working of the product by me.

Once I found the best combo of tools I put on 5 coats of the Varathane, now that may seem like a lot but being water based and how fast it sets you can re-coat in 2 hours, between each coats I again sanded with 400 grit sand paper very lightly to remove any imperfections, as you keep adding layers the Varathane kind of melts/melds together provided you haven't let it cure for too long.

Once I had a thick enough coating I let it set for 3 days....now I will say that you can let it set longer and while I was researching I saw varying reports on how long to wait before trying to "Rub out the Finish" as they call it.

As this was a test and you wouldn't see it once the tank is on top I decided on 3 days curing time.

At this point it kind of seems like your working backwards. In order to get an even and glossy finish you actually have to sand the gloss away temporarily. I started with a 600 grit Wet Sand paper and a bucket with soapy water, working in small sections I sanded it down until I saw very little gloss left. I then switched to a 1500 grit Wet Sand paper to get the rest of the glossy parts. One thing I will say is work slowly and clean the section your working on with a clean rag as you want to make sure you don't go through all the Varathane and hit the paint layers. ( Be careful on edges / corners as they are the easiest to burn through )

At this point if all has gone well you should have a dull looking finish.

Once done with the Wet Sanding I switched to my Porter Cable Random Orbital which I use for car detailing and some Meguiars automotive polishes. First I used a firm Orange pad and a heavy/medium cut polish following the instructions on the package for two passes ( basically the whole piece done twice ) followed by a wipedown with a micro fibre cloth. At this point you can start seeing the gloss return. The next step was with a softer blue pad and a Finer Polish ( again 2 passes ) following the same instructions on the package and wipedown again. At this point its looking really good.

I finished it off using a soft black pad and a glaze ( very little cutting power ) followed by another wipedown and the final step was hand waxing.


I will try to get some photos of this process when I start working on the remaining pieces to better illustrate what I just wrote however its really hard to see with a white finish.
 
OP
OP
austinl

austinl

Active Member
View Badges
Joined
Dec 22, 2013
Messages
324
Reaction score
117
Location
Toronto, Canada
Rating - 0%
0   0   0
Update


Varanthane is almost done one last coat before I let it cure for a couple days. As I said earlier I will try and get photos of the "Rubbing out" on the finish but might be hard with white.

Until then, blue print of the tank I am waiting on.

Tankdrawing.jpg
 
OP
OP
austinl

austinl

Active Member
View Badges
Joined
Dec 22, 2013
Messages
324
Reaction score
117
Location
Toronto, Canada
Rating - 0%
0   0   0
Todays Update


All Varathaning has been completed and now just waited for it to cure, should start the rubbing out process on Monday I think.


Ordered some of the equipment today.

AI Hydra 52 and Controller
Vertex Libra Dosing Pump
Tunze ATO
Sicce 4 return pump


My Macro rocks have been curing for about 2 weeks in my brute with some live rock I picked up and looks like they have cycled as Ammonia/Nitrites are back down to 0 and Nitrates are just about 0 as well.


Which brings me to a question.


How would you fill the below scape with corals?
 

Attachments

  • scape1.jpg
    scape1.jpg
    94.6 KB · Views: 595
Last edited:
OP
OP
austinl

austinl

Active Member
View Badges
Joined
Dec 22, 2013
Messages
324
Reaction score
117
Location
Toronto, Canada
Rating - 0%
0   0   0
Not sure why the photo in the last post is upside down so lets try that again.


What corals would you place if this was your scape?


OP
OP
austinl

austinl

Active Member
View Badges
Joined
Dec 22, 2013
Messages
324
Reaction score
117
Location
Toronto, Canada
Rating - 0%
0   0   0
Big Update


I got a new camera to document my progress and ultimately take some nice photos of my fish and corals, traded in some of my old DSLR stuff lens/camera body and some point and shoots i wasn't using and a HD camcorder.

Here is my new toy. An Olympus OM-D E-M5

Olympus_OM-D_E-M5.jpg


Also received my shipping information on my Elite Aquatics stuff which should arrive Friday so look for some pictures with my new toy :)


Today was a productive and busy day, the stand is now 95% done, all that is left is mounting the door and some drilling for plumbing and equipment that I plan to mount in the stand.


As promised i tried to get some shots as I went through the sanding and buffing stages I documented earlier when I did the top of the stand so here goes.


This is what the stand looked like after the 5 coats of Varathane.


Next step was to sand with 600 Grit wet sand paper, the goal here is to basically take all the gloss away, what you will see is some small flecks of gloss left, you have to be careful not to go too far back down to paint so this is where I switched to 1500 grit paper.


After using the 1500 grit wet sand paper you should be left with a dull scratchy finish like below.


Next was on to polishing, I wasn't able to get any really good photos here of each step as it was really hard to see via a camera but basically with each pass your making finer and finer scratches until you get the gloss back.


Once all the polishing is done you should be left with a nice mirror like finish as seen below.

Top Reflection


Side Reflection


Until the next update
Happy Reefing
 
OP
OP
austinl

austinl

Active Member
View Badges
Joined
Dec 22, 2013
Messages
324
Reaction score
117
Location
Toronto, Canada
Rating - 0%
0   0   0
New Goodies!!!

I like it when the UPS/Fed EX guys show up with presents.


A big thanks to Elite Aquatics!! Received my sump and goodies today, as well I received some plumbing parts and some nice Ecotech equipment.

Now that my stand is 95% done time to start figuring where to put all the equipment (hopefully I have enough space)


stunreefer

Reef Hugger
View Badges
Joined
Dec 1, 2007
Messages
2,853
Reaction score
654
Location
Under Da Sea
Rating - 0%
0   0   0
Excellent pictures and documentation. Should be a great aquarium, keep up the good work. Fantastic name, too ;)

-Austin L.
 

rockinzebra457

Well-Known Member
View Badges
Joined
Mar 2, 2011
Messages
693
Reaction score
81
Location
Florida
Rating - 0%
0   0   0
Wow thats really nice. I really like the sump and was thinking about getting that skimmer. Let me know how it works for you.
 
OP
OP
austinl

austinl

Active Member
View Badges
Joined
Dec 22, 2013
Messages
324
Reaction score
117
Location
Toronto, Canada
Rating - 0%
0   0   0
Excellent pictures and documentation. Should be a great aquarium, keep up the good work. Fantastic name, too ;)

-Austin L.


Thanks for the compliments, working on my photography skills so any pointers you may have in post processing would be great or any tips at all really from a photo winner like you :)

As for the name I kinda like it :)

I saw yours floating around one day when I was reading the forum but forgot where I saw it (probably one of those great photo threads)
 
OP
OP
austinl

austinl

Active Member
View Badges
Joined
Dec 22, 2013
Messages
324
Reaction score
117
Location
Toronto, Canada
Rating - 0%
0   0   0
Wow thats really nice. I really like the sump and was thinking about getting that skimmer. Let me know how it works for you.

Will do, I had the skimmer running for a few days when I cleaned it up and it ran great and really good reviews so pretty sure it will be a rock solid piece.
 
OP
OP
austinl

austinl

Active Member
View Badges
Joined
Dec 22, 2013
Messages
324
Reaction score
117
Location
Toronto, Canada
Rating - 0%
0   0   0
Another wonderful delivery from Fed Ex.....only a few remaining pieces left to get.

Also picked up a new lens for my camera a 17mm 1.8 which translates to a 35mm with my camera. Still working on my photo skills

20140213-untitled-2.jpg
20140213-untitled.jpg


Also still looking for some input on my proposed stocking list so any help / advice would be great.


2 x Black & White Ocellaris Clownfish - Tank-Bred (Amphiprion ocellaris var.)
or
2 x Amphiprion Percula (True Percula Clownfish)


1 x Paracheilinus carpenteri (Carpenter's Flasher Wrasse)
1 x Paracheilinus cyaneus (Blue Flasher Wrasse)


1 x Pseudanthias bartlettorum (bartletts anthias)
1 x Pseudanthias rubrizontaus (Tricolor, redbelted anthias)


Depending on available stock 1 of the below
1 x Ctenochaetus Flavicauda (White Tail Bristletooth Tang) — 1st Choice
or
1 x Ctenochaetus Strigosus (Yellow Eye Tang)
or
1 x Ctenochaetus Tominiensis (Bristletooth Tomini Tang)


1 Purple Tang
 

DSP

Valuable Member
View Badges
Joined
Jun 10, 2013
Messages
1,423
Reaction score
34
Location
Arkansas
Rating - 0%
0   0   0
Very nice build man! Love the clean setup! My new tank is almost the exact same dimensions 36x24x18 lol, Are you gunna be using a single hydra 52 on yours?definately subscribing to this build!
 
OP
OP
austinl

austinl

Active Member
View Badges
Joined
Dec 22, 2013
Messages
324
Reaction score
117
Location
Toronto, Canada
Rating - 0%
0   0   0
Very nice build man! Love the clean setup! My new tank is almost the exact same dimensions 36x24x18 lol, Are you gunna be using a single hydra 52 on yours?definately subscribing to this build!

Thanks DSP,

Great tank size you have there I almost did the 36 but opted for a bit more length.


The plan is for one Hydra 52 which should work with the aquascape I am planning as I wont have anything up agains the glass at this point.
 
OP
OP
austinl

austinl

Active Member
View Badges
Joined
Dec 22, 2013
Messages
324
Reaction score
117
Location
Toronto, Canada
Rating - 0%
0   0   0
Quick weekend update,


I have the final large pieces to my system, all thats left is some little plumbing parts and the long wait for the tank to arrive lol. I also took the time to setup my Hydra 52 over my brute to start propogating some coraline and keep alive the live rock I got from a friend.


20140215-untitled-2.jpg
 

Being sticky and staying connected: Have you used any reef-safe glue?

  • I have used reef safe glue.

    Votes: 125 88.7%
  • I haven’t used reef safe glue, but plan to in the future.

    Votes: 8 5.7%
  • I have no interest in using reef safe glue.

    Votes: 5 3.5%
  • Other.

    Votes: 3 2.1%
Back
Top