Acrotrdco's Zero Edge Rimless PPG Starphire 65G

acrotrdco

Active Member
View Badges
Joined
Feb 23, 2011
Messages
129
Reaction score
42
Location
Hong Kong
Rating - 0%
0   0   0
Guys,

I've met the R2R superman @ MACNA 2010 but never had the time to actually register here, so hi everyone :)

Now let me introduce myself a little :)

Background

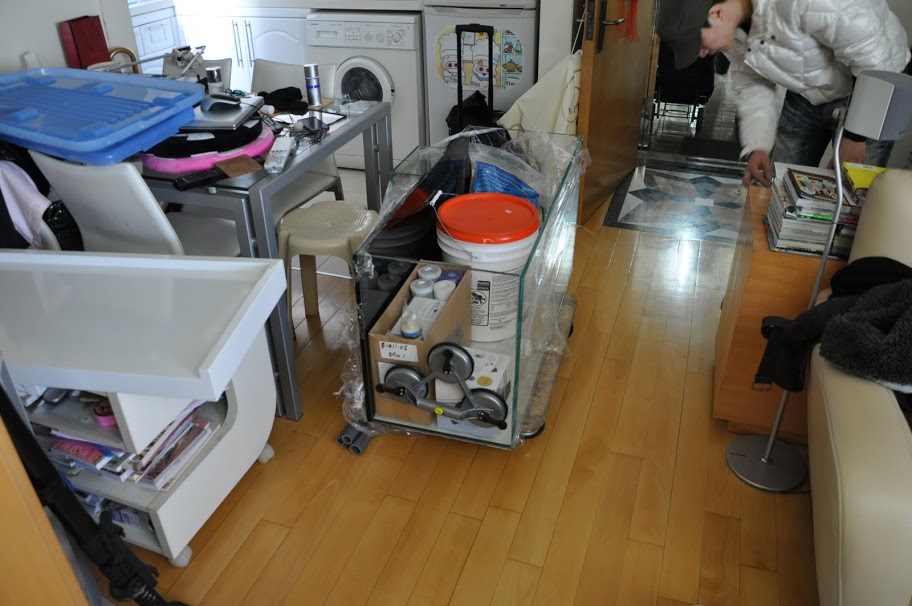
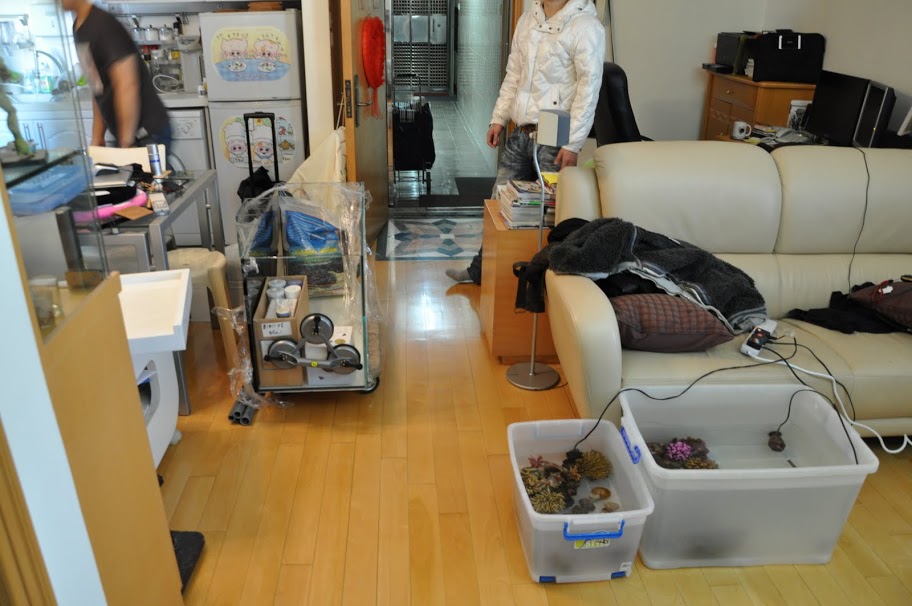
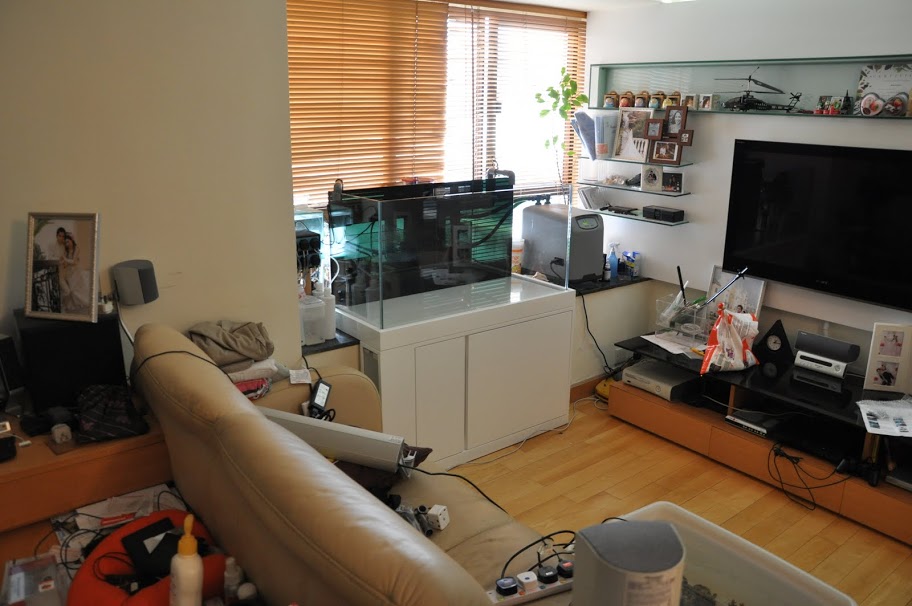
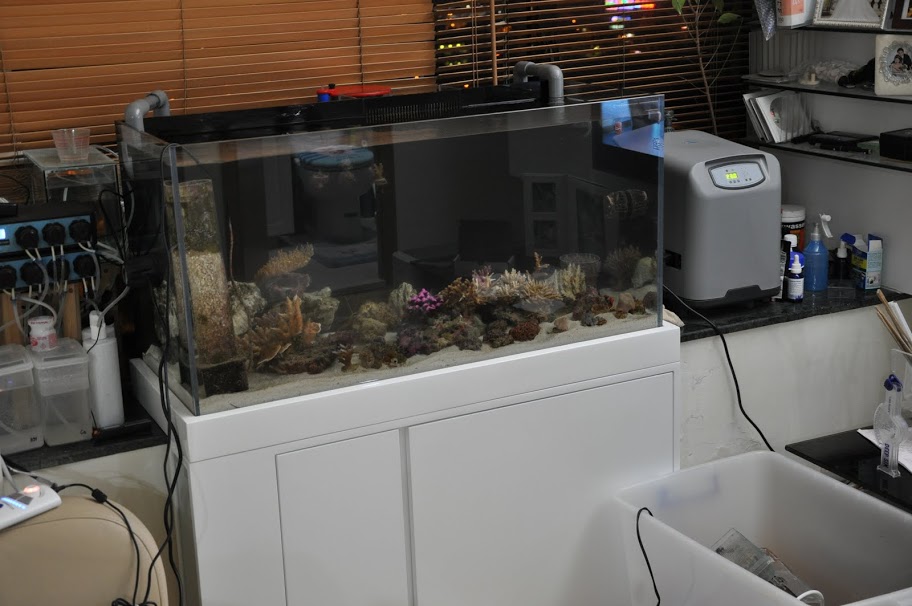
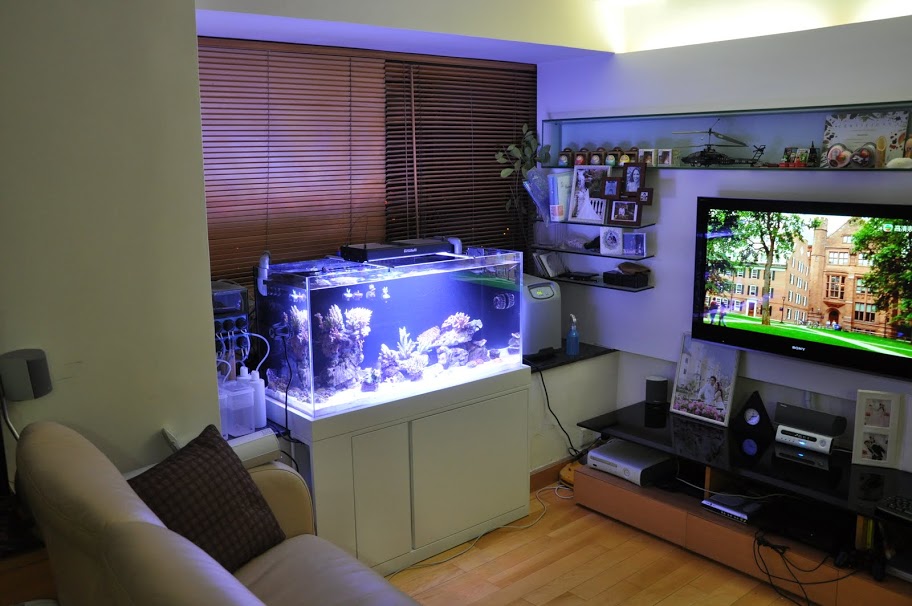
Living in the crowded suburbs of Hong Kong, my apartment located on the 21st floor of a residential skyscaper, is relatively small and the only room I could fit an aquarium would be the over-sized window sill measuring some 2'x7', here's some images of my current living room, and my old 20g nano-reef tank.

img0778h.jpg


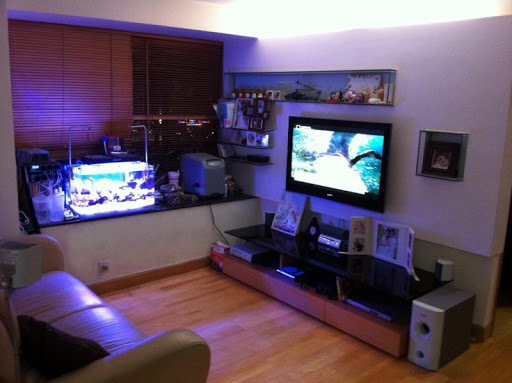
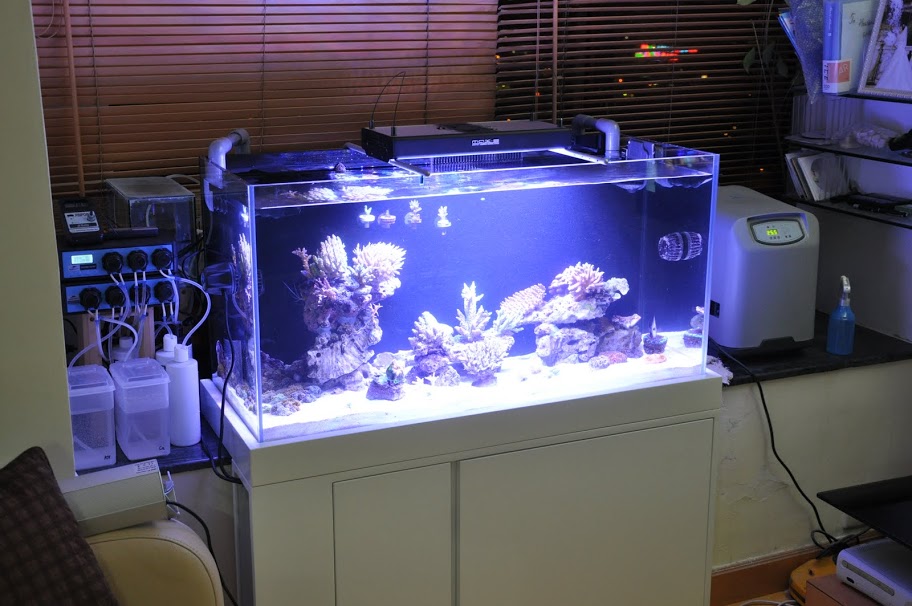
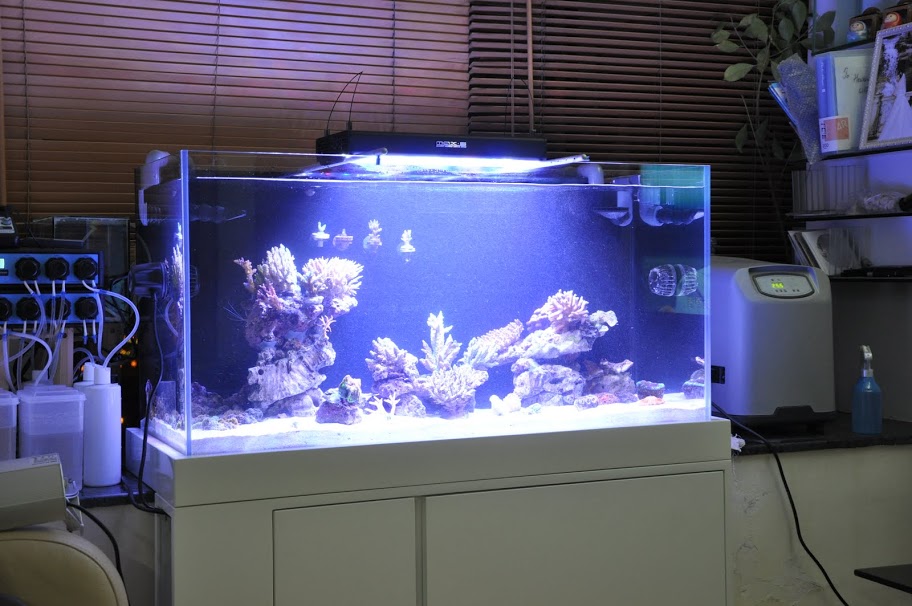
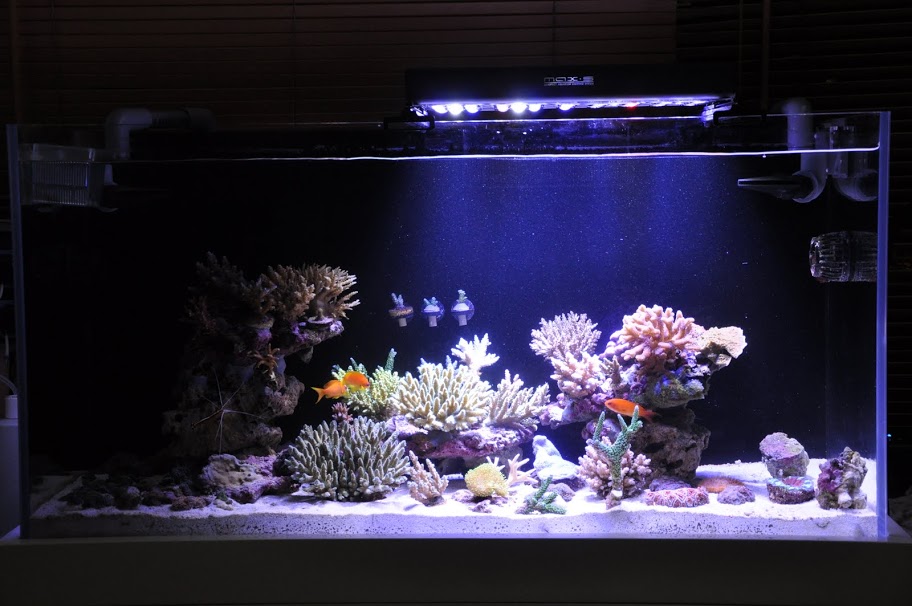
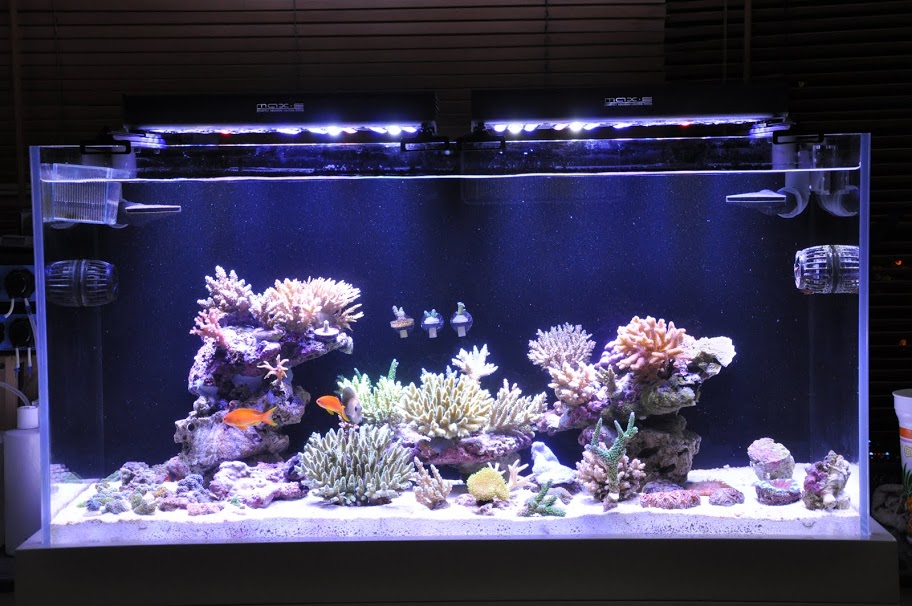
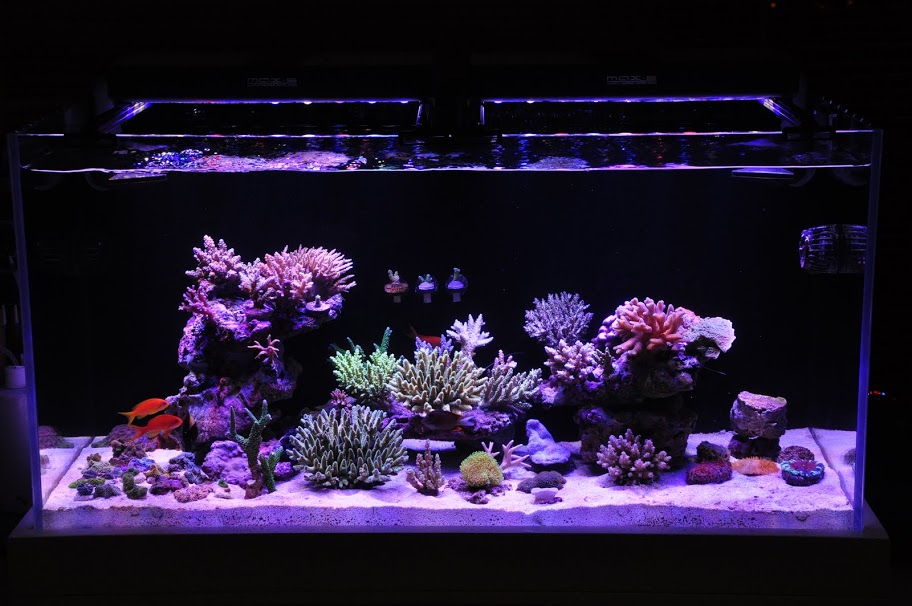
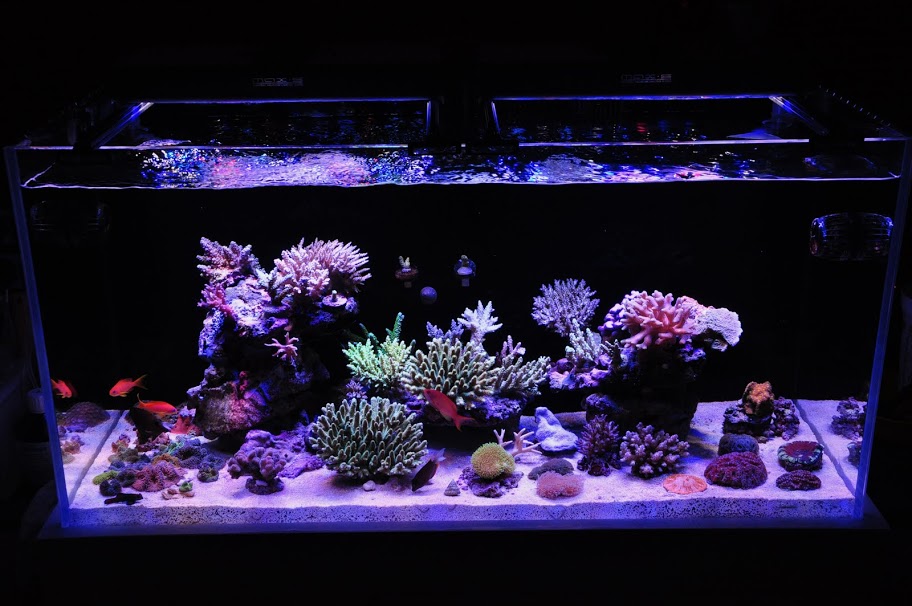
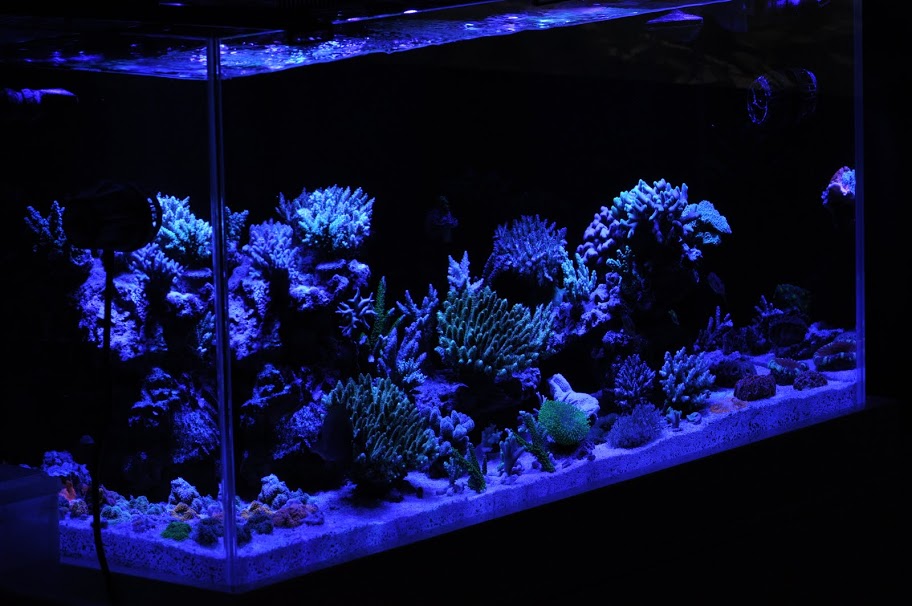
I've always wanted to build a large SPS dominated tank like most of the experienced folks here, but due to my limited budget, all I could build is a 65g SPS dominated tank, an upgrade from my old 20g nano-reef.

Looking out from my window and this is what you'll see:

windowyt.jpg


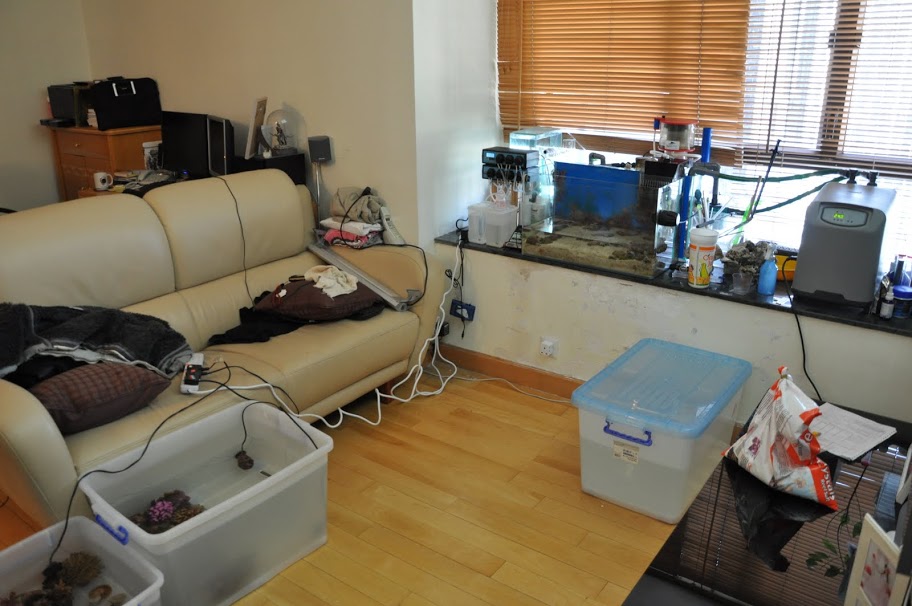
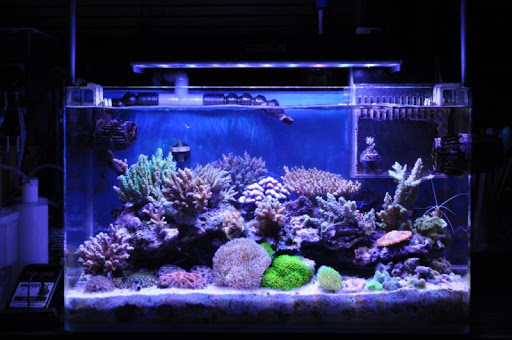
And this was my old tank, a 20g nano-reef tank:
15off.jpg


Design Phase

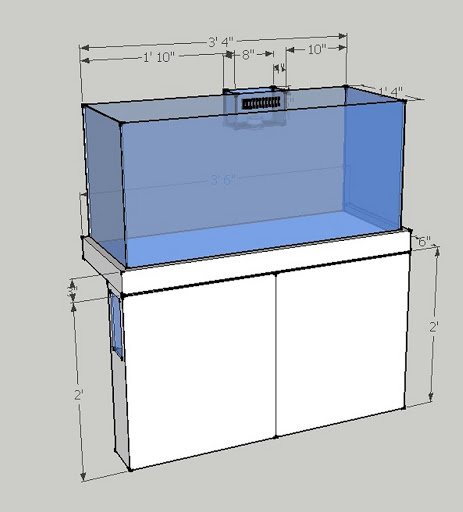
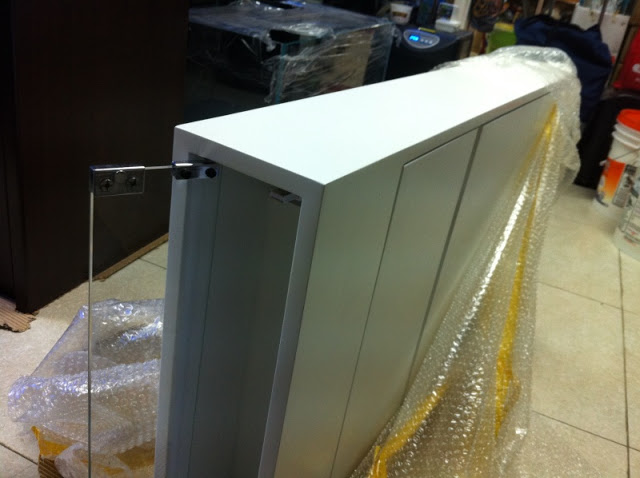
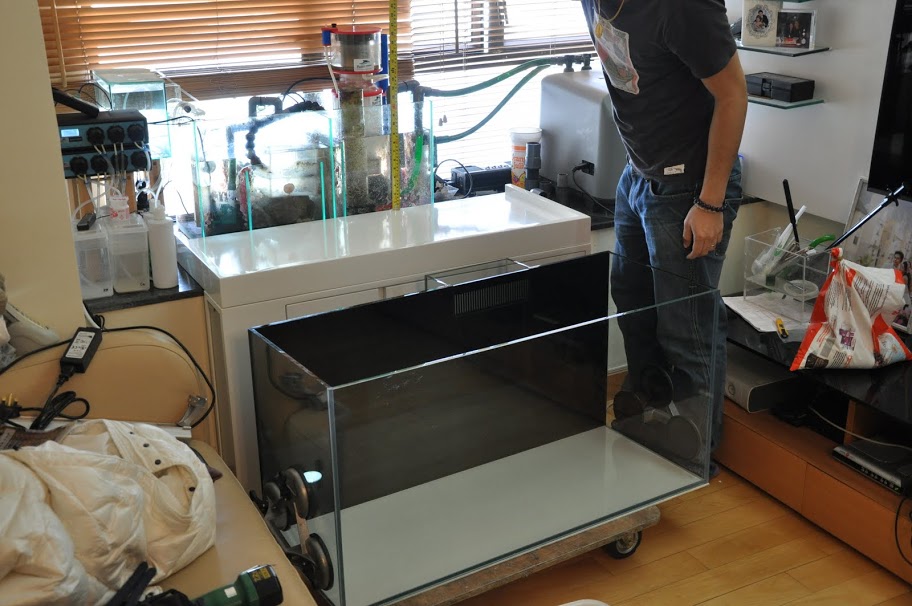
Working with the limited space I've got, the only possible way to put a 65G tank is to utilize some of the space on the over-sized window sill. However, even with a 65g tank, it weights from 500 lbs and I worried if the window sill can actually sustain such a weight, therefore a special stand must be made to distribute some of the weight to the floor instead of having the sill take on the full weight.

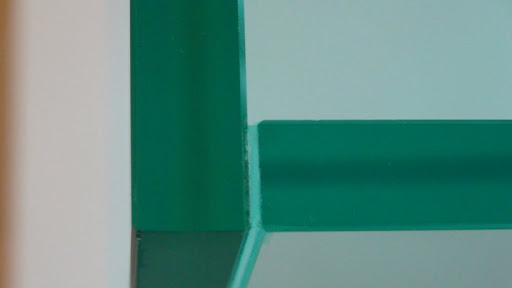
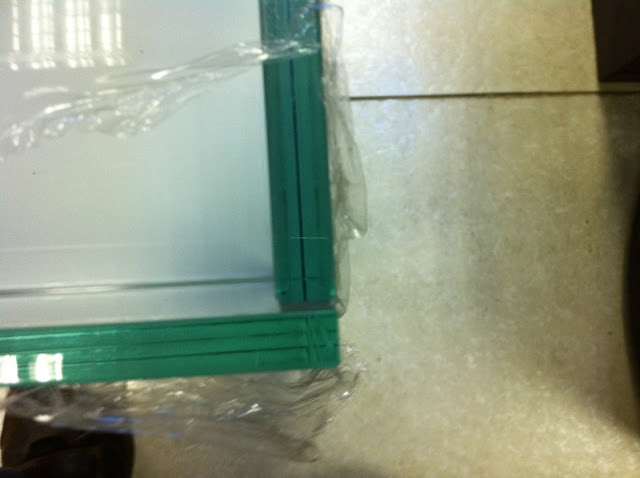
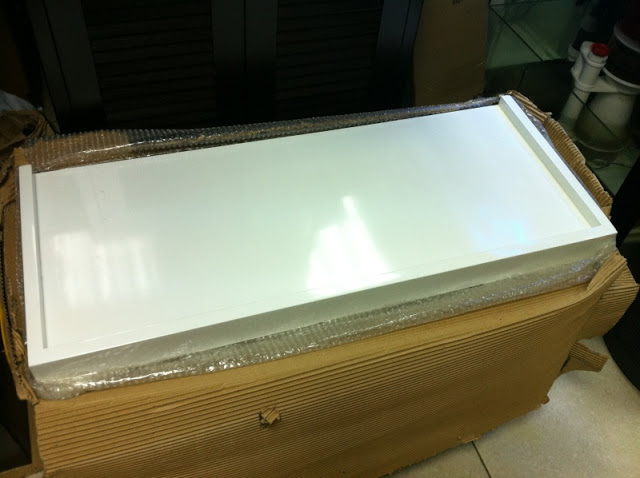
This is what I've come up with:
gallery274610991556.jpg


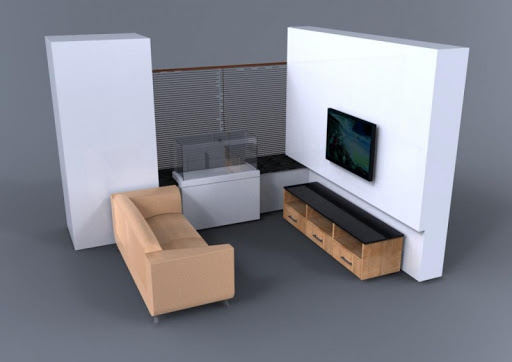
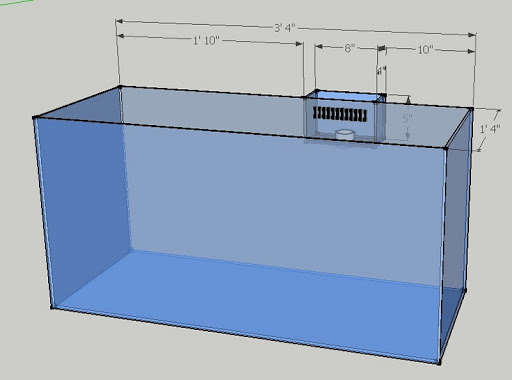
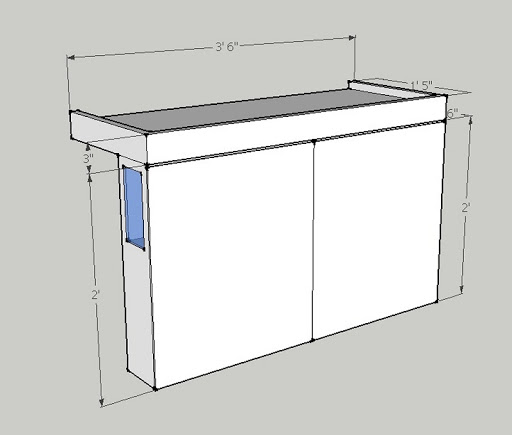
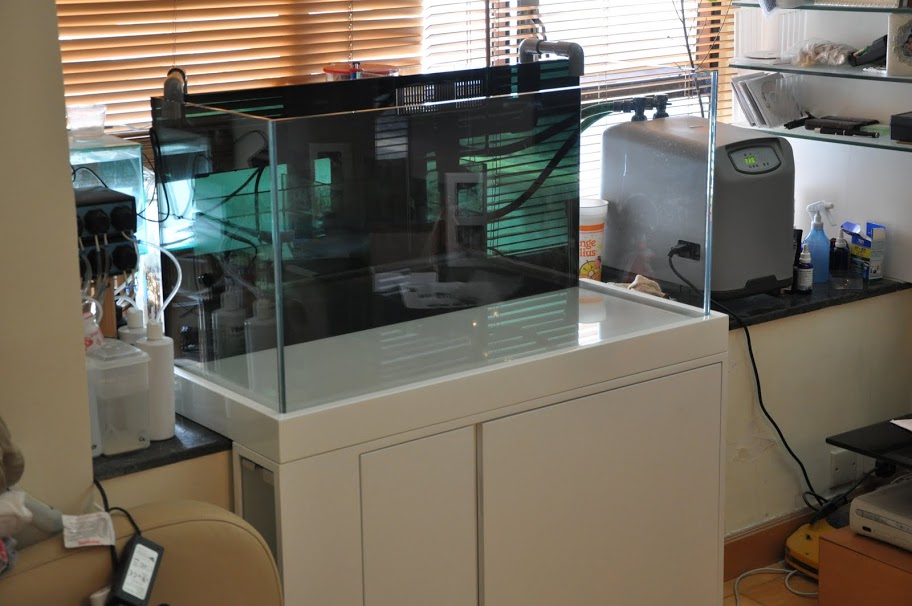
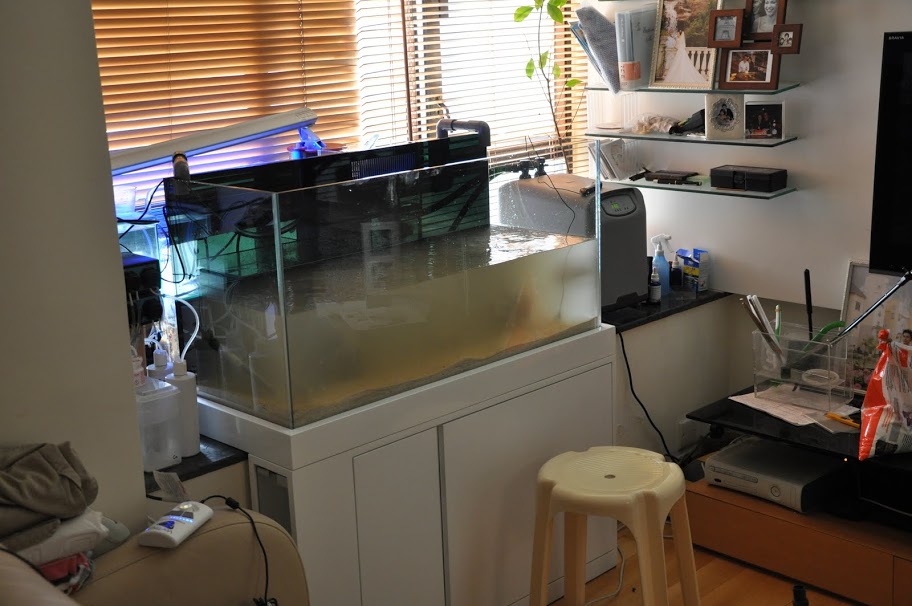
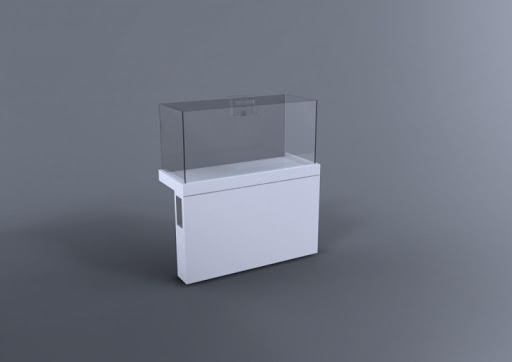
The tank and stand alone would look something like this:
gallery274610945729.jpg
 
Last edited:
OP
OP
acrotrdco

acrotrdco

Active Member
View Badges
Joined
Feb 23, 2011
Messages
129
Reaction score
42
Location
Hong Kong
Rating - 0%
0   0   0
Display Tank and Stand

Since I'll be reusing the current 28" sump (also placed on the window sill), and most of the current equipments I'm using on my 20g, I'll only need to build a new display tank with the special stand.

The DT and stand would have the following dimension:

gallery27461098454.jpg


gallery274610914149.jpg


gallery27461091947.jpg


Craftmanship and Material

The new DT will be made using PPG Starphire ultra clear (low-iron) glass. Holding a piece of the sample glass and you can see how clear it is.

ppgsample.jpg


The new DT will be rim-less, using the so-called "closed injection zero edge" method to make sure no silicone sealent is visible from the edges, as seen on the following photos taken on a local reefer's tank built with this technique from the same vendor:

craftsmanship3.jpg


craftsmanship2.jpg


craftsmanship5.jpg


Looking from the side of his tank, you can even see through the entire 6' glass panel!

craftsmanship4.jpg


Aquascape

Since I'll be using all the live rocks (with SPS already attached) from the current nano-reef tank in this new tank, I'll need to design some base rocks for my new tank, then attach the old live-rocks using coral epoxy underwater in the new tank.

I've been looking around for aquascape ideas, and I like the simplistic / minimalist approach so the aquascape of my new tank will be nothing more than 2-3 small columns.

Some of the base rocks I've made:

dsc1629.jpg


Equipment[/SIZE][/COLOR]

I'll be re-using most of my current equipments:

Filtration: NP Biopellets (1st and 2nd Generation), using a small BM reactor.
Skimmer: BM 150 Pro
Flow: 2x EcoTech Marine's Vortech MP10w ES running Anti-Sync on Reef Crest
Lighting: 2x Maxspect G2-160w LED Custom Color
Water Cooler: Teco TR10
Return Pump: NewJet 3000 (3000 L/h or ~ 790 gallon/h)
Calcium Reactor: Nil - will be using dosing pump instead.
Dosing pump + additives: BM 3+4 heads dosing pump, dosing Ca (Kent Turbo Calcium), KH (Sodium Bicarbonate), Mg (Kent Tech-M), Sr (Kent), Trace Element (Seachem), K (Brightwell) and other KZ additives (SP, Xtra, Spur2, B-Bal, KZ Stylo-Pocci Glow, etc.)
pH Meter: American Marine pH meter
Computer: Nil - will be adding one later when budget allows.
 
Last edited:
OP
OP
acrotrdco

acrotrdco

Active Member
View Badges
Joined
Feb 23, 2011
Messages
129
Reaction score
42
Location
Hong Kong
Rating - 0%
0   0   0
Tank and Stand

The tank and its stand finally arrived at the shop after waited for 2 months! I was really impressed by the craftsmanship, they look exactly as I've thought, if not better :D

Here're some photos:

The DT, still wrapped in cling.
img08450.jpg


Looking through the edge of the PPG Starphire, you can the bottom of the tank. Oh and the closed injection edges, good stuff.
img0847mw.jpg


Bottom part of the stand, this is where I'm going to put the 2x MP10wES drivers.
img0851n.jpg


And the top part.
img0852v.jpg


The next step would be to move the tank in and move everything over from my old tank.
 
OP
OP
acrotrdco

acrotrdco

Active Member
View Badges
Joined
Feb 23, 2011
Messages
129
Reaction score
42
Location
Hong Kong
Rating - 0%
0   0   0
Installation

After a whole weekend of hardwork, the new tank was up and running!

Some photos:

The tank finally arrived!
DSC_2481.JPG


New tank, stand, and buckets of corals from my old tank:
DSC_2482.JPG

DSC_2483.JPG


Stand already in place, preparing to put the tank up.

DSC_2488.JPG


It's done! Plumping and DT is set, all that's left is to put the stuff from the old tank back into it.
DSC_2491.JPG

DSC_2492.JPG


All the live sand from the old tank went back in, along with water from the old tank.
DSC_2493.JPG
 
OP
OP
acrotrdco

acrotrdco

Active Member
View Badges
Joined
Feb 23, 2011
Messages
129
Reaction score
42
Location
Hong Kong
Rating - 0%
0   0   0
Rockworks

Took me a whole day to put everything back into the tank.
DSC_2494.JPG


Spend the next day setting up the rockworks, and setting everything else!
DSC_2517.JPG

DSC_2522.JPG


Dual MP10w ES in the side panel of the stand. Gotta love anti-sync mode.
DSC_2528.JPG


Looking back at the design images, and the final product, I was pretty impressed with myself too LOL.
 
OP
OP
acrotrdco

acrotrdco

Active Member
View Badges
Joined
Feb 23, 2011
Messages
129
Reaction score
42
Location
Hong Kong
Rating - 0%
0   0   0
Installing Optics

As you can see from the previous photos, the center section of my new tank has over 16" of water, so in order to get enough light to penetrate the water optics must be used, so I've ordered a set of optics.

The idea is to put lens on the center bulbs only, and leave the remaining bulbs alone, so there're still light for the sides.

This is what it looks like when you take away the reflector sheet:
DSC_2807.JPG


This is the optics kit:
DSC_2808.JPG


Installing lens on the center bulbs:
DSC_2809.JPG


Completed!
DSC_2812.JPG


This is what it looks like after installing the optics:
DSC_2825.JPG


Compare with the previous appearance:
DSC_2500.JPG
 
Last edited:
OP
OP
acrotrdco

acrotrdco

Active Member
View Badges
Joined
Feb 23, 2011
Messages
129
Reaction score
42
Location
Hong Kong
Rating - 0%
0   0   0
Installing Second Fixture

After looking at the tank lit by only one fixture, I felt that it didn't have enough coverage for the entire 40", so I ordered a second fixture.

It had exactly the same configuration, using a mix of Semi LED and Cree LED to achieve the color I wanted, including full blue spectrum from 400nm all the way to 500nm, as well as a set of optics.

post-2746-1285175448_thumb.jpg

p.s. there's a typo in this sheet, it's 405nm violet not 503nm, 503 is cyan.

Since I want to keep both edges of my tank dimmer so I can keep ricordea's, acan's and scoly's, I didn't want to install the full set of lens, only the 5 groups in the middle for each fixture will have lens installed, the rest will be using only a flat protector (except the red bulb - color mixing isn't that great if no lens were used).

This is what it looks like after installing the optics kit and lens. Left one is the old one and right one is the new one.
DSC_2861.JPG


First one goes in! I'm using a slower shutter speed so you can clearly see how the light penetrates through the water.
DSC_2864.JPG


Second one goes in.
DSC_2867.JPG


Now adjusting the right shutter speed, aperture and white balance, this is what it looks like (with the 8x 15w bulbs turned off):
DSC_2920.JPG


And this is what it looks like with only blue. The cyan color from the Cree XP-E Blue is very obvious as you can see from the photo:
DSC_2928.JPG
 
OP
OP
acrotrdco

acrotrdco

Active Member
View Badges
Joined
Feb 23, 2011
Messages
129
Reaction score
42
Location
Hong Kong
Rating - 0%
0   0   0
Photos of my Corals and Fishes

FTS:
DSC_2931.JPG


Some of my fishes:
DSC_2942.JPG

DSC_2957.JPG


Some photos of my corals:
DSC_2976.JPG


DSC_3011.JPG

DSC_3018.JPG


DSC_3046.JPG


DSC_3048.JPG


DSC_3053.JPG


DSC_3062.JPG


DSC_3080.JPG


DSC_3087.JPG


DSC_3096.JPG


Dsc_3102.jpg


DSC_3120.JPG
 
Last edited:
OP
OP
acrotrdco

acrotrdco

Active Member
View Badges
Joined
Feb 23, 2011
Messages
129
Reaction score
42
Location
Hong Kong
Rating - 0%
0   0   0
PAR Measurement

I was always wondering what kind of PAR I would be getting after installing the optics, I could only speculate until I borrowed a PAR meter.

First of all, some measurements. My tank is 20" tall, the stand covered the bottom 1", so visible height is 19". The sand bed is about 1.5" thick, water is about 1.5" from the top of the tank, so there's about 17" of water.

DSC_3181.JPG


The following photos were taken with all lights turned on.

Water surface:
DSC_3182.JPG


About 3" deep:
DSC_3184.JPG


7" deep:
DSC_3185.JPG


8" deep:
DSC_3186.JPG

DSC_3187.JPG


10" deep:
DSC_3188.JPG

DSC_3189.JPG


13" deep:
DSC_3192.JPG

DSC_3193.JPG


15" deep:
DSC_3195.JPG


16" deep:
DSC_3196.JPG


Since it was really hard to take photos while measuring PAR with the meter and my hands were wet, that's all the photos I've taken. However I've measured all around my tank, and here's an overall PAR measurements.

Keep in mind that:

1. I've only installed optics on the center 5 groups of LEDs because I want to keep the sides dimmer for softies and LPS, right now they're on the bottom with about 100-200 PAR, perfect!

2. These are rounded up numbers, and have an error margin of +/- 100-200 PAR, due to water current, position of the bulb above it (with or without optics) and any obstruction from the rocks / corals nearby.

3. These numbers are for reference only, and aren't hardly accurate enough for anything else.

Overall.jpg
 
Last edited:

cmcneil

coral junkie
View Badges
Joined
Jun 3, 2010
Messages
669
Reaction score
2
Location
St.Petersburg,Florida
Rating - 0%
0   0   0
That is an amazing setup you have there.I love how clean everything is.that tank looks like it is built superbly.you did the right thing by building the stand like you did since I doubt the window sill could handle the weight properly.those are some great PAR numbers too,LEDs are really coming along at a rapid pace and us reef keepers get great power savings with them :)
 

JGoslee

Moderator
View Badges
Joined
Jul 9, 2006
Messages
3,498
Reaction score
14
Location
Philadelphia, Pa
Rating - 0%
0   0   0
Welcome to Reef2Reef!

Awesome looking tank! I've been thinking about purchasing two of the G2-160's for my tank. How long do you keep the 15 watt LEDs on each day and do you like the way it looks with all the lights on?
 
OP
OP
acrotrdco

acrotrdco

Active Member
View Badges
Joined
Feb 23, 2011
Messages
129
Reaction score
42
Location
Hong Kong
Rating - 0%
0   0   0
That is an amazing setup you have there.I love how clean everything is.that tank looks like it is built superbly.you did the right thing by building the stand like you did since I doubt the window sill could handle the weight properly.those are some great PAR numbers too,LEDs are really coming along at a rapid pace and us reef keepers get great power savings with them :)

Thanks :) Yeah I was worried about the weight, besides without the current stand, the depth of the tank has to be reduced to just 12", that's really just too little room to work with.

I'm also quite impressed with the PAR readings from these fixtures, I'm going to post more photos on the growth of my SPS under these LED as well as improvement on their coloration.

WOW! Nice setup! Well thought out. Love the clean look and also the window view you have.

Welcome to R2R!

Thanks Paul :)

Nice! You have a great view with a view. :)

Thanks :)

Welcome to Reef2Reef!

Awesome looking tank! I've been thinking about purchasing two of the G2-160's for my tank. How long do you keep the 15 watt LEDs on each day and do you like the way it looks with all the lights on?

Answering your question, here's my photoperiod:

Blue and Violet: 13 hours, 12:00pm noon to 1:00am
Blue + 3w white (blue:white ratio 3:2): 9 hours, 2:00pm to 11:00pm
All on, including 8x 15w white (blue:white ratio 2:3): 5 hours, 4:00pm to 9:00pm

Very nice tank....I am trying to downsize to something around this size

Cool, what's the current size of your tank?
 

Viva'sReef

Valuable Member
View Badges
Joined
Jan 23, 2009
Messages
1,776
Reaction score
839
Location
Brighton, Mi
Rating - 100%
2   0   0
My display is not huge, but is a 120g display, a fishroom behind the wall with also a 60g shallow frag tank, and a custom 110g sump that feeds both display and frag tank.
 
OP
OP
acrotrdco

acrotrdco

Active Member
View Badges
Joined
Feb 23, 2011
Messages
129
Reaction score
42
Location
Hong Kong
Rating - 0%
0   0   0
More Photos!

Here's a shot taken just now with only blue/violet bulbs on:

DSC_3906.jpg


And a few more other shots:

DSC_3312.JPG

DSC_3717.jpg

DSC_3720.jpg

DSC_3731.jpg

DSC_3764.jpg


DSC_3907.jpg

DSC_3909.jpg

DSC_3927.jpg

DSC_3920.jpg


DSC_3450.JPG

DSC_3454.JPG

DSC_3460.JPG
 
OP
OP
acrotrdco

acrotrdco

Active Member
View Badges
Joined
Feb 23, 2011
Messages
129
Reaction score
42
Location
Hong Kong
Rating - 0%
0   0   0
My Favorite SPS

Now some micro shots on my favorite piece, tri-color purple tip teal green acro:
DSC_3528.jpg

DSC_3541.jpg

DSC_3549.jpg


Top down micro shots:
DSC_3586.jpg

DSC_3590.jpg

DSC_3597.jpg
 

Being sticky and staying connected: Have you used any reef-safe glue?

  • I have used reef safe glue.

    Votes: 134 88.2%
  • I haven’t used reef safe glue, but plan to in the future.

    Votes: 9 5.9%
  • I have no interest in using reef safe glue.

    Votes: 6 3.9%
  • Other.

    Votes: 3 2.0%
Back
Top