
hey gang")
new to reef2reef but have lurked for a long time
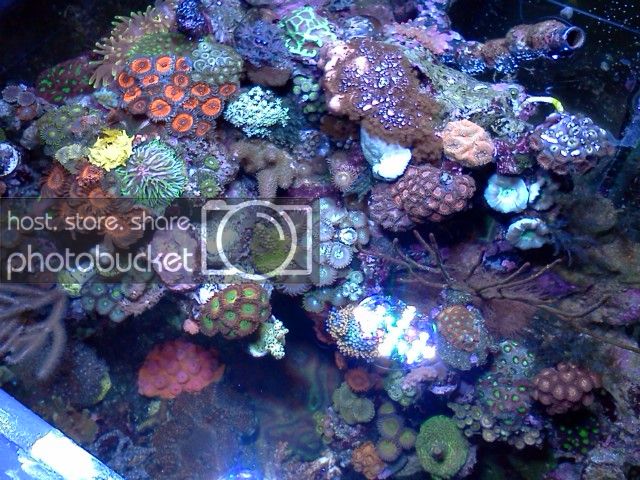
we will start with a new build that we under took at the beginning of spring, our last display was a 75g bonsai cube that ran well for its first year but then we ran it into some issues with it. the first issue was digitate hydroids....usually harmless but in our case where the tank was a high nutrient system that housed alot of nps corals they would not die off and we ended up with our whole tnk covered in them , every paly and every coral covered. we decided to restart the tank and i got sentimental on some corals so after scraping off what i could we rebuilt it and added back the corals i thought would be fine.....well nope 1 mth later and we were completely full again i was going to deal with it slowly then we got hit with more bad luck , i added a female flame wrasse and flane angel to out tank that brought with him a violent starin of ich , within a week we were out half of our fish and on the day we spent a bunch of money and set up a qt tank our achilles tang died.....we were fed up and decided to finish with the treatment and let the tank sit fallow , 3 mths later i just said you know what we have multiple tanks with corals in them and decided to shut down our display.
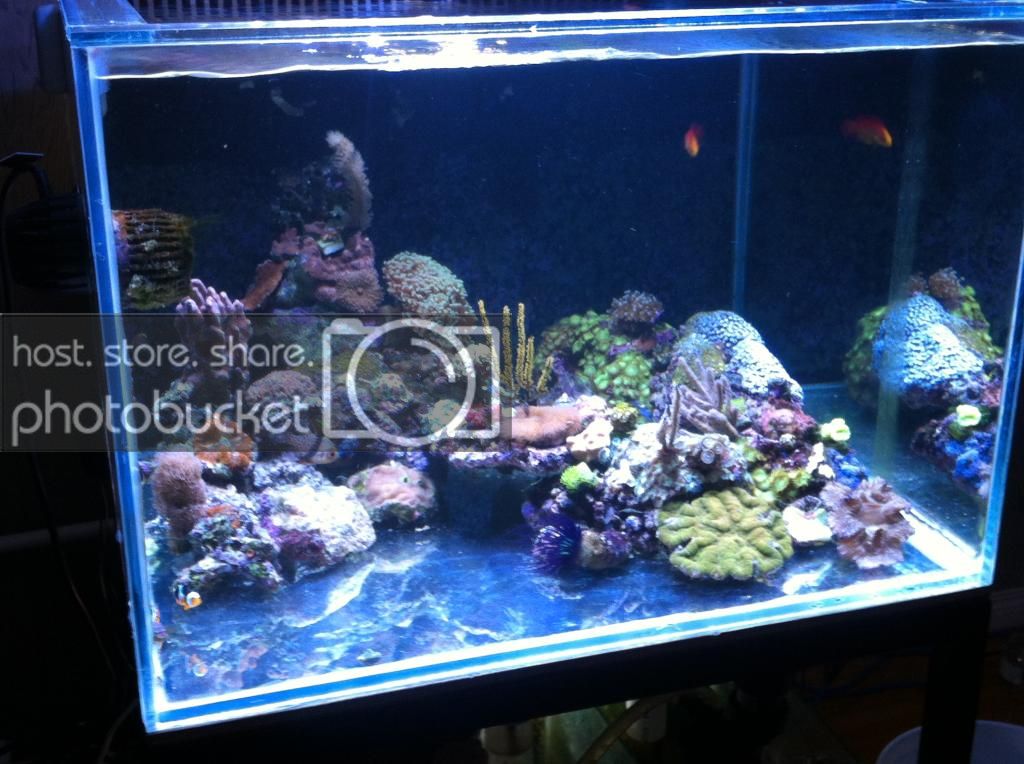
went from this (25g bonsai):
to this:
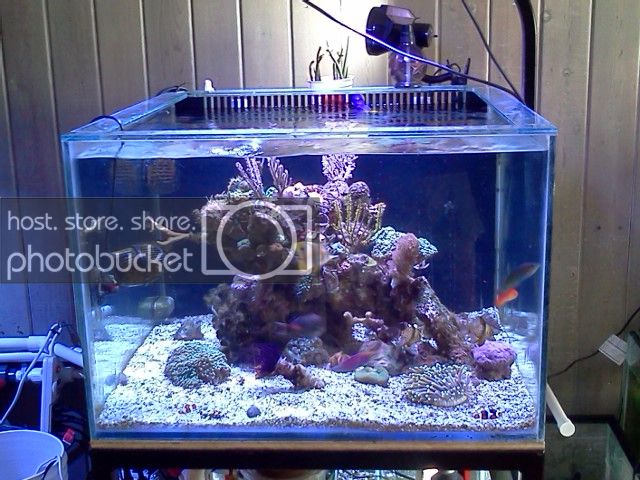
to this:
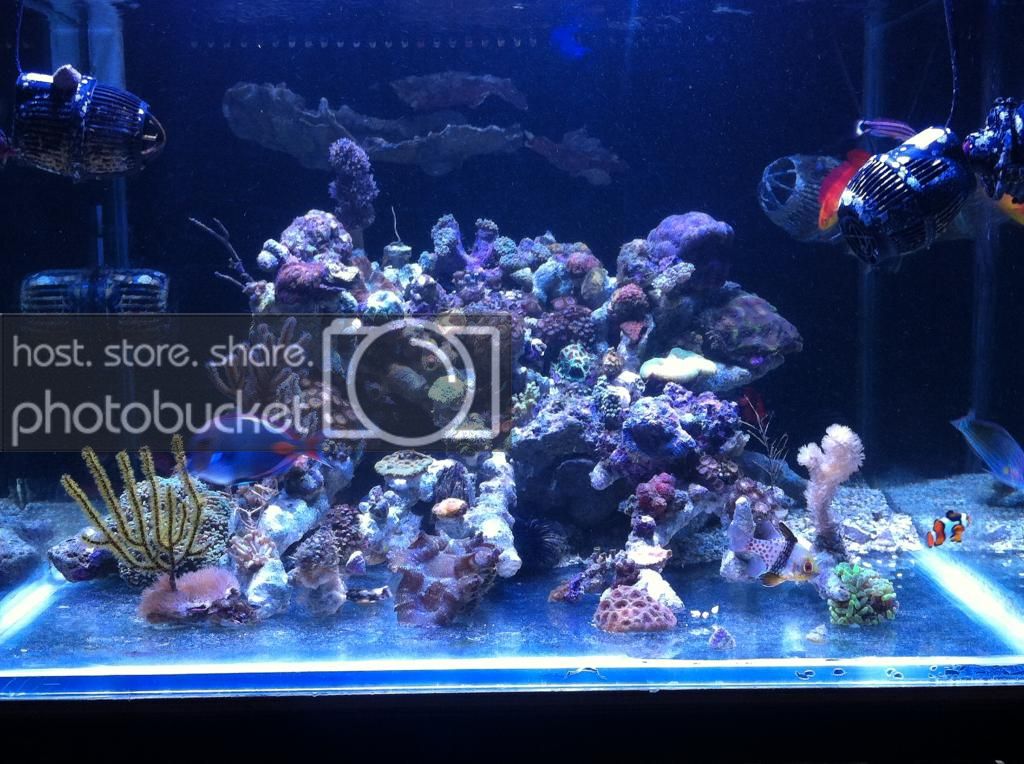
to this:
almost 2 years later and display-less we are finally doing another small tank
heres the thread im just going to copy and paste this untill i am up to date, this is a thread that has both me and my wife posting, i hope you all enjoy
cheers
denny( reefwars)
so since we shut down our last tank my wife for the last year has been after me to set up another display tank. with our frag systems still running and work busy for us both we just didnt have any mojo
near the beginning of summer one of my co-workers and friend was planning to set up a small frag tank for himself to prop some sps , he made it all the way to the lighting stage then realized he doesnt have frags lol the offer was there to buy a small stylish shallow tank and included a already made stand and light :mrgreen:
so we bought the setup with no real plans in mind and brought it home the following weekend.
me and ruth talked about what we wanted to do for the design and we agreed we would do another theme tank and just needed to settle on a theme. her last tank was a nano waterfall tank where water flowed over three panes of glass into a moat so she wanted to do something along the lines of a waterfall theme , i wanted to do the island volcanoe theme i had always liked.
so we met half way and settled on a tank that would house a vertical structure in the center of the tank that rose out of the water and on top of the tank in the back corner we would build a water fall. this is to be a mixed reef with all our nice zoas around the islands water edge and select sps pieces and lps etc to fill the rest of the tank fish ...TBD
so it began.......
the idea is to have water lines which are fed via the return pump to feed the waterfall and to have a few lines that ran over the island. the water that flows over the island ( 3 outputs ) will collect into some basins in which we will grow some corals in
we will try to keep this updated and log as much as we can as this will be a pretty interesting build
so here's what we got , we are actually already running with fish and corals but we will start this from the beginning as all good stories start
next up ....the set-up
enjoy!!!
denny:biggrin:
new to reef2reef but have lurked for a long time
we will start with a new build that we under took at the beginning of spring, our last display was a 75g bonsai cube that ran well for its first year but then we ran it into some issues with it. the first issue was digitate hydroids....usually harmless but in our case where the tank was a high nutrient system that housed alot of nps corals they would not die off and we ended up with our whole tnk covered in them , every paly and every coral covered. we decided to restart the tank and i got sentimental on some corals so after scraping off what i could we rebuilt it and added back the corals i thought would be fine.....well nope
1 mth later and we were completely full again i was going to deal with it slowly then we got hit with more bad luck , i added a female flame wrasse and flane angel to out tank that brought with him a violent starin of ich , within a week we were out half of our fish and on the day we spent a bunch of money and set up a qt tank our achilles tang died.....we were fed up and decided to finish with the treatment and let the tank sit fallow , 3 mths later i just said you know what we have multiple tanks with corals in them and decided to shut down our display.went from this (25g bonsai):

to this:

to this:

to this:

almost 2 years later and display-less we are finally doing another small tank
heres the thread im just going to copy and paste this untill i am up to date, this is a thread that has both me and my wife posting, i hope you all enjoy
cheers
denny( reefwars)
so since we shut down our last tank my wife for the last year has been after me to set up another display tank. with our frag systems still running and work busy for us both we just didnt have any mojo
near the beginning of summer one of my co-workers and friend was planning to set up a small frag tank for himself to prop some sps , he made it all the way to the lighting stage then realized he doesnt have frags lol the offer was there to buy a small stylish shallow tank and included a already made stand and light :mrgreen:
so we bought the setup with no real plans in mind and brought it home the following weekend.
me and ruth talked about what we wanted to do for the design and we agreed we would do another theme tank and just needed to settle on a theme. her last tank was a nano waterfall tank where water flowed over three panes of glass into a moat so she wanted to do something along the lines of a waterfall theme , i wanted to do the island volcanoe theme i had always liked.
so we met half way and settled on a tank that would house a vertical structure in the center of the tank that rose out of the water and on top of the tank in the back corner we would build a water fall. this is to be a mixed reef with all our nice zoas around the islands water edge and select sps pieces and lps etc to fill the rest of the tank
fish ...TBDso it began.......
the idea is to have water lines which are fed via the return pump to feed the waterfall and to have a few lines that ran over the island. the water that flows over the island ( 3 outputs ) will collect into some basins in which we will grow some corals in
we will try to keep this updated and log as much as we can as this will be a pretty interesting build
so here's what we got , we are actually already running with fish and corals but we will start this from the beginning as all good stories start
next up ....the set-up
enjoy!!!
denny:biggrin:


