Foam Wall Instructable - A Full How-to, Step-by-Step Guide

sam.basye

Active Member
View Badges
Joined
May 22, 2016
Messages
192
Reaction score
130
Location
Lynchburg, Va
Rating - 0%
0   0   0
Foam Wall Instructable- A Full How-to, Step-by-Step Guide


26g bowfront

First things first, you need to realize that you need a foam wall in your tank!
They are relatively easy to make and can transform your tank into one that all of your friends are envious of.

DISCLAIMER: I am responsible for any awesome foam walls that may result from this guide. I am not responsible, however, if it turns out looking like crap... :)

A foam wall can be a great way to really take your aquarium to the next level. It can provide a large backdrop to hide ugly power cords and equipment, incorporate caves and tunnels for fish, a very porous substrate for beneficial bacteria, and unlimited mounting solutions for corals.

For the purpose of the instructable, I have used a Deep Blue 2.5 gallon glass tank for this step-by-step guide.
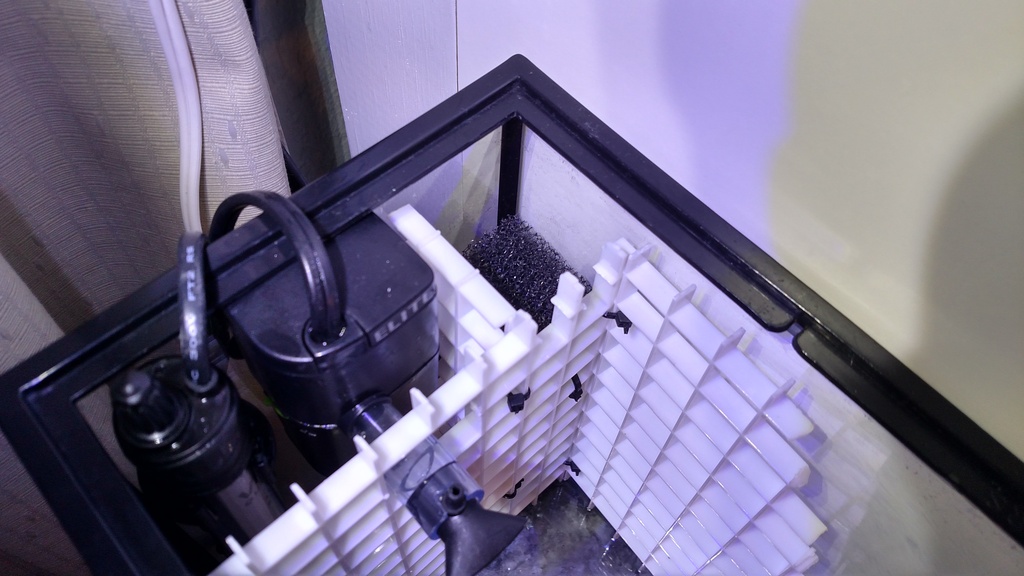
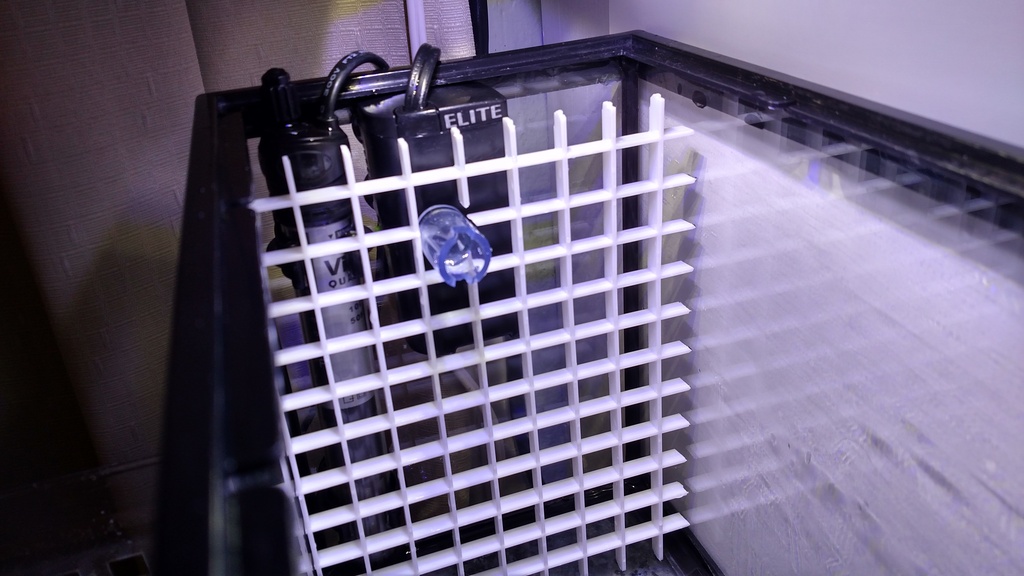
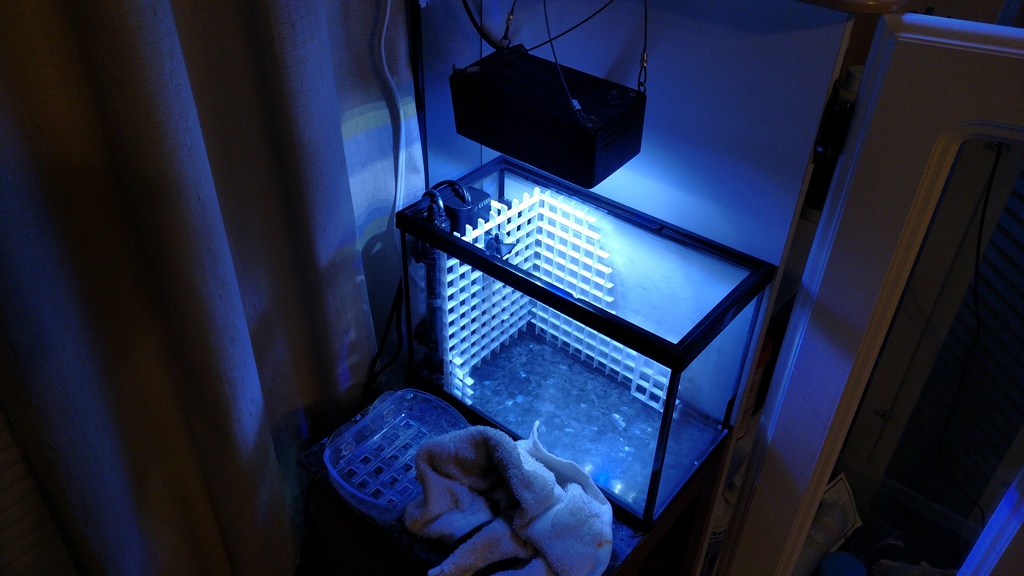
I will be creating a foam wall covering one short side and half of the long side. There will also be room for an overflow filter, powerhead, and heater: All-In-One concept.
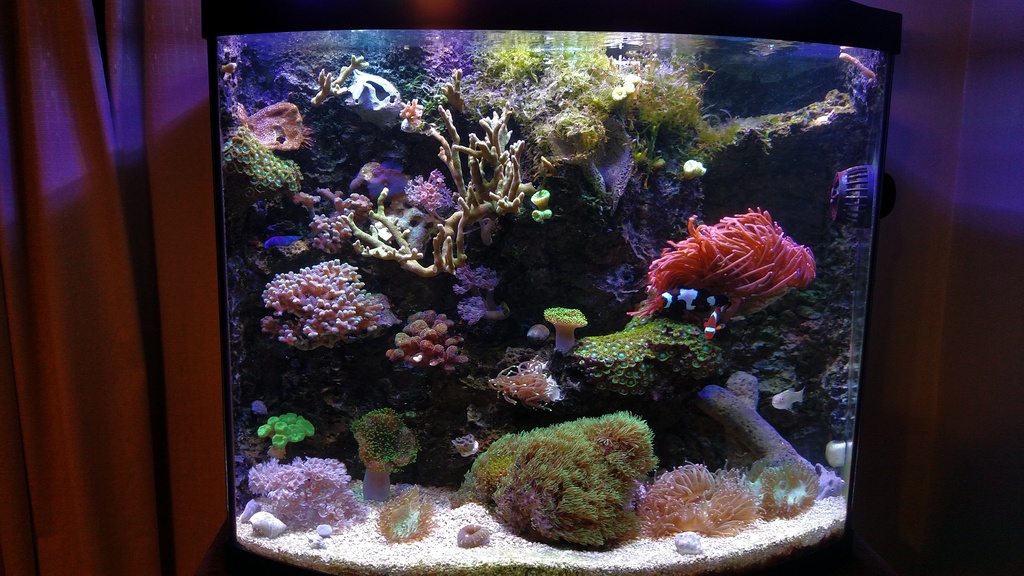
I will also be throwing in some pictures of my 2 yr old 26g foam wall build.

Here we go!

Step 1: Designing your Dream Wall

First thing you will need to do is come up with a design that will suit you needs for the tank.
Sometimes it is a good idea to draw out each wall of your tank after you come up with a design so you don't forget your plans.

Some things you may want to consider when designing you wall:

What is the reason for building the wall? Just want a realistic background or do you want to hide equipment or even make an All-In-One tank?

Does my tank have plastic rim around the top? This adds a 1/2" that will block the wall from sliding right in. Plan accordingly and think how to maneuver it in place. A center brace can also pose an issue.

What materials do I have already that I can incorporate into the wall to save some money? Have any extra rock, sand, eggcrate, epoxy, or equipment laying around?

How much is this project going to cost me? Consider what you already have on hand and the cost of materials.

What materials will be needed:

Eggcrate light diffuser ~$13
Rock - Lace rock ~$2.50 /lb
Pond Foam ~$8
Zip ties - cheap
Contact cement/epoxy ~$4
Silicone ~$4
Sand - optional
Shells or barnacles - optional

What tools will be needed:

Wire cutter
Sharp knife
Drill or Dremel
Gloves
Trash bag

Step 2: Start Building!

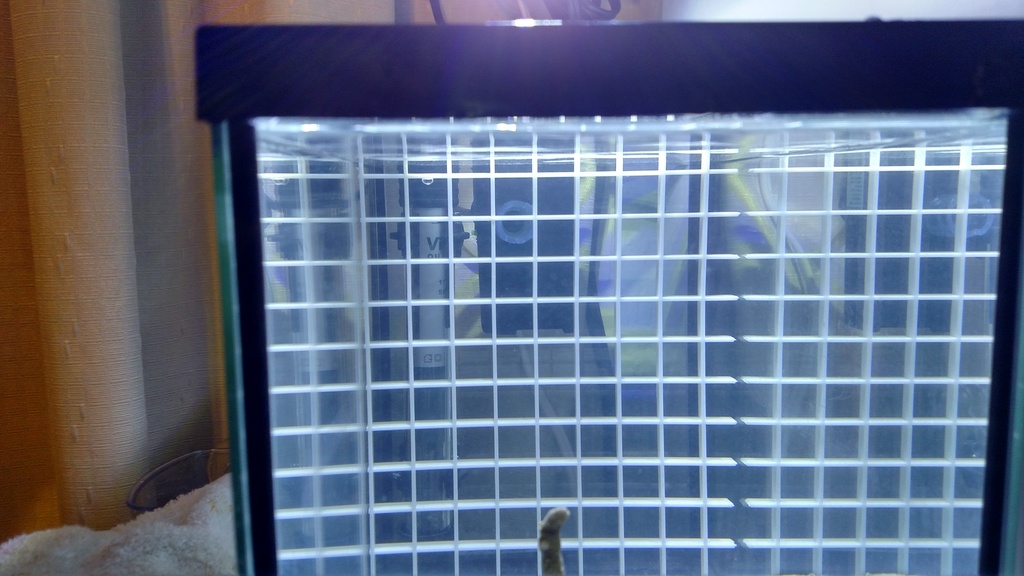
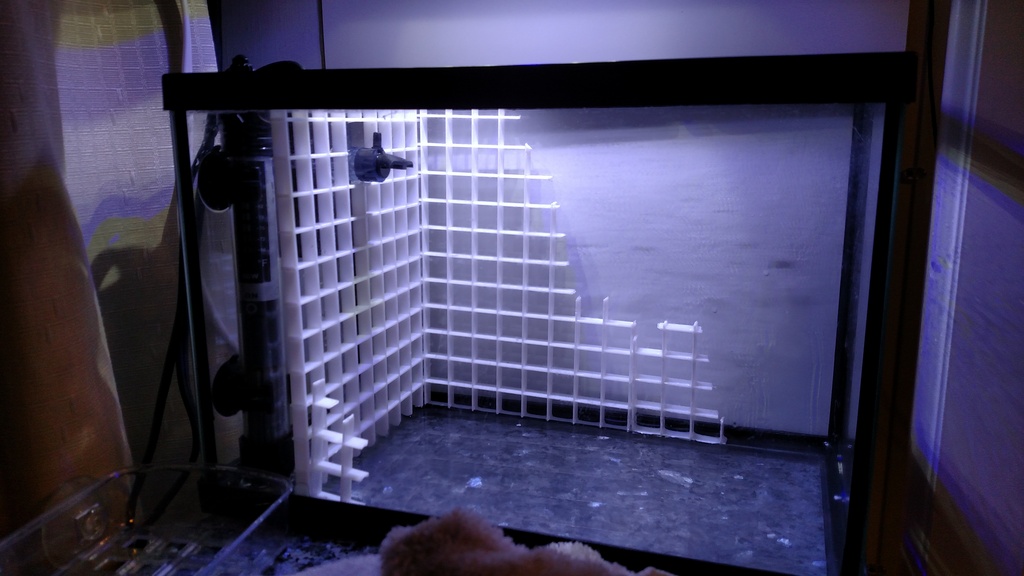
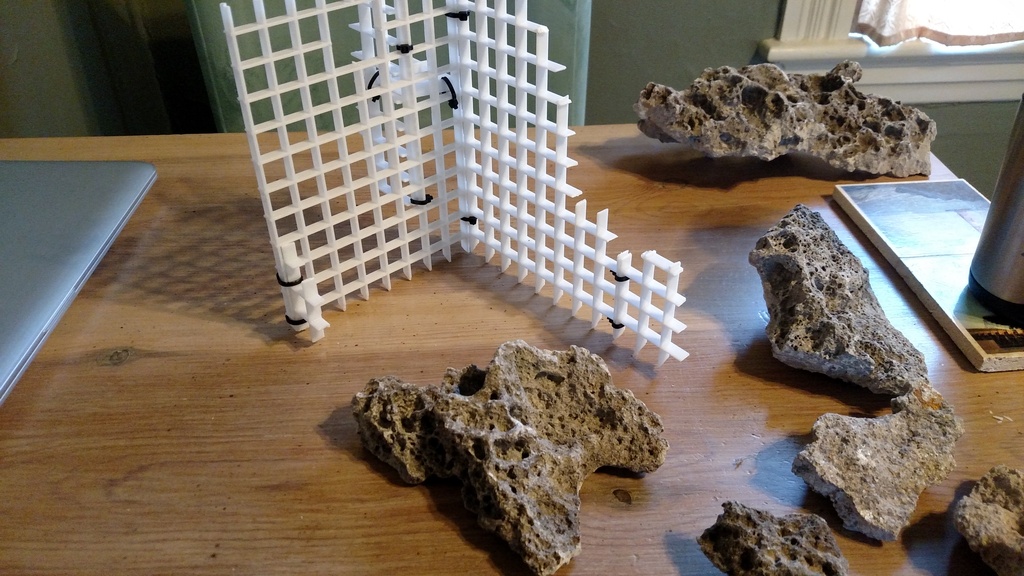
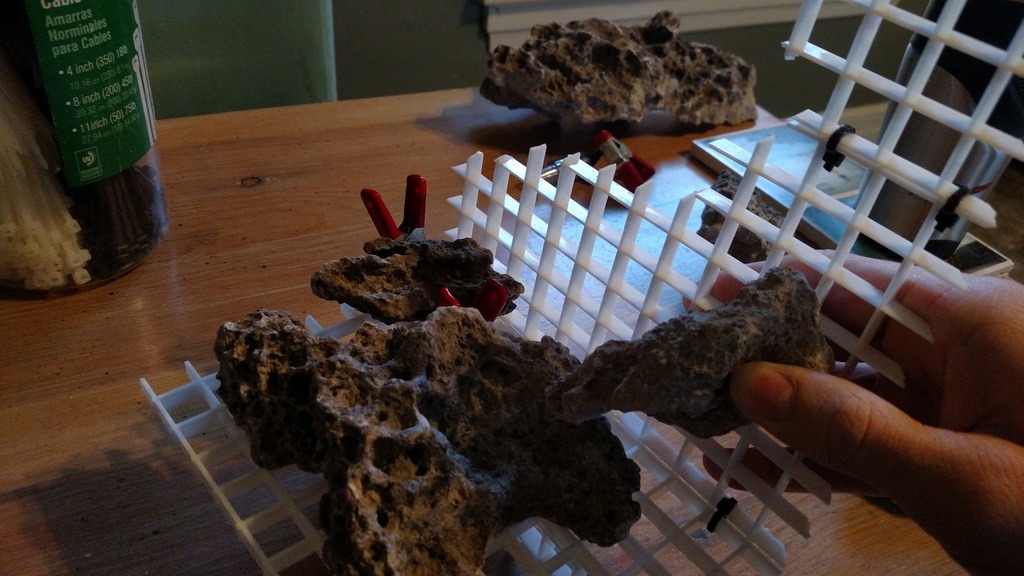
First grab your eggcrate and start cutting it to fit the back wall of your tank. (Marking the eggcrate with a sharpie where you want to cut is helpful.)
You can use the wire cutter to cut the eggcrate if working with small sections, but a Dremel with a cutoff disc will speed up the process; especially for large tanks.


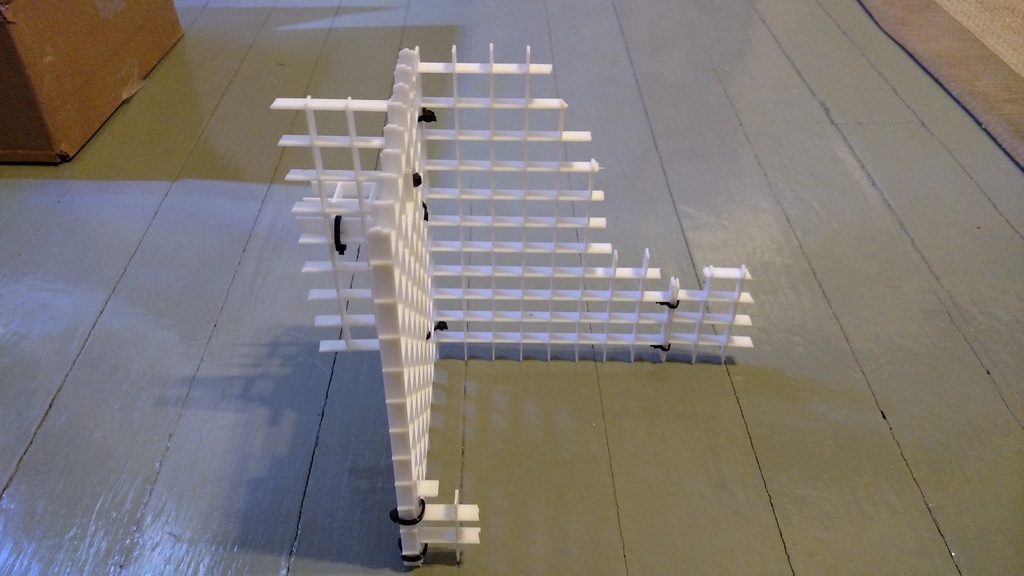
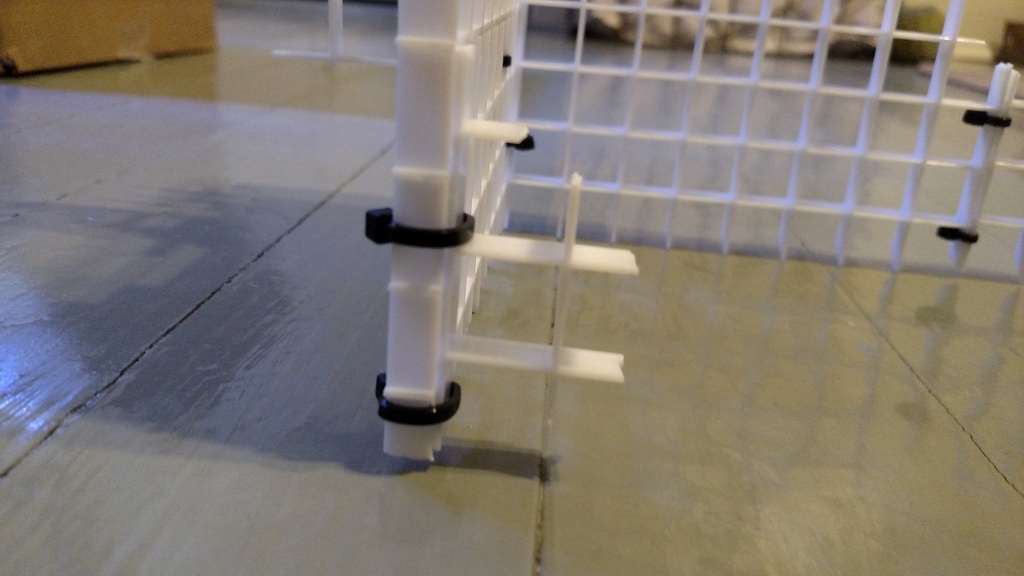
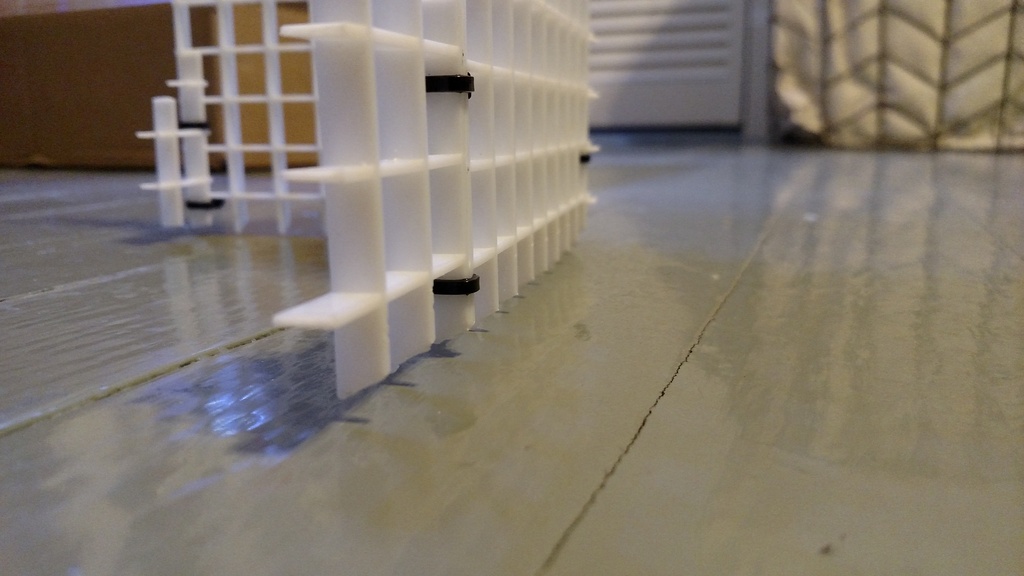
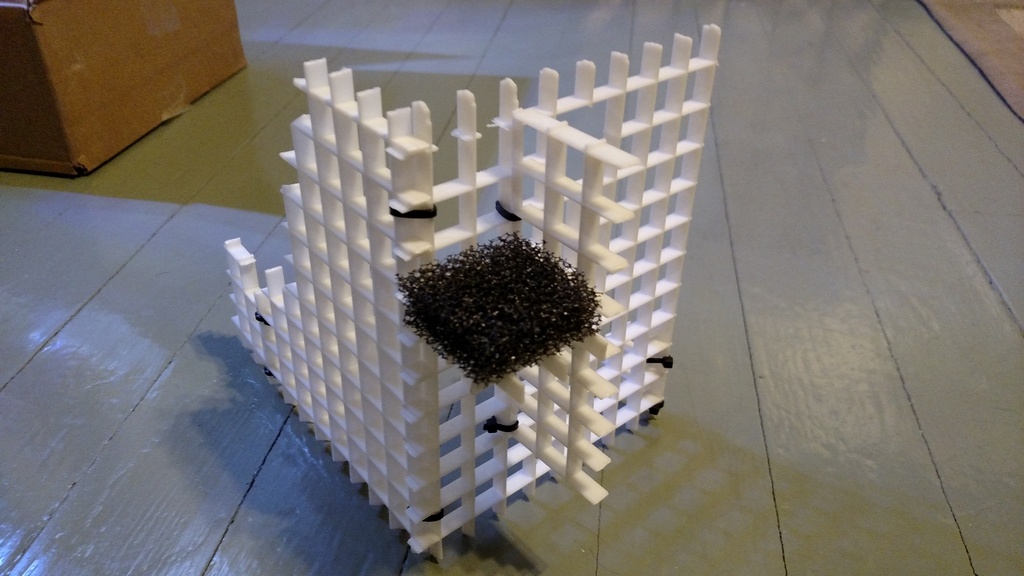
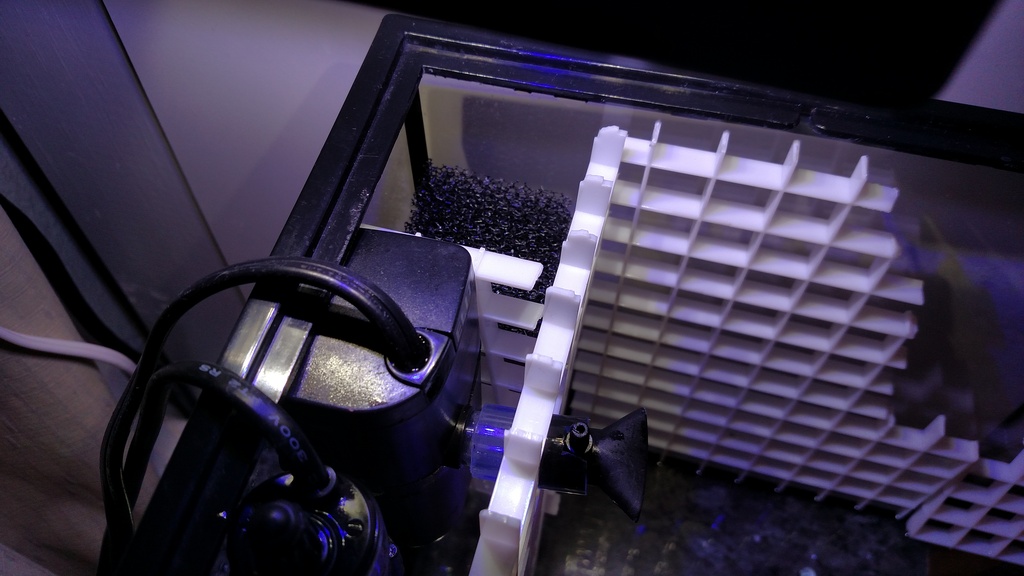
If you want to make bump outs, curves, corners, etc. you're going to need to join separate pieces of eggcrate with zip ties.


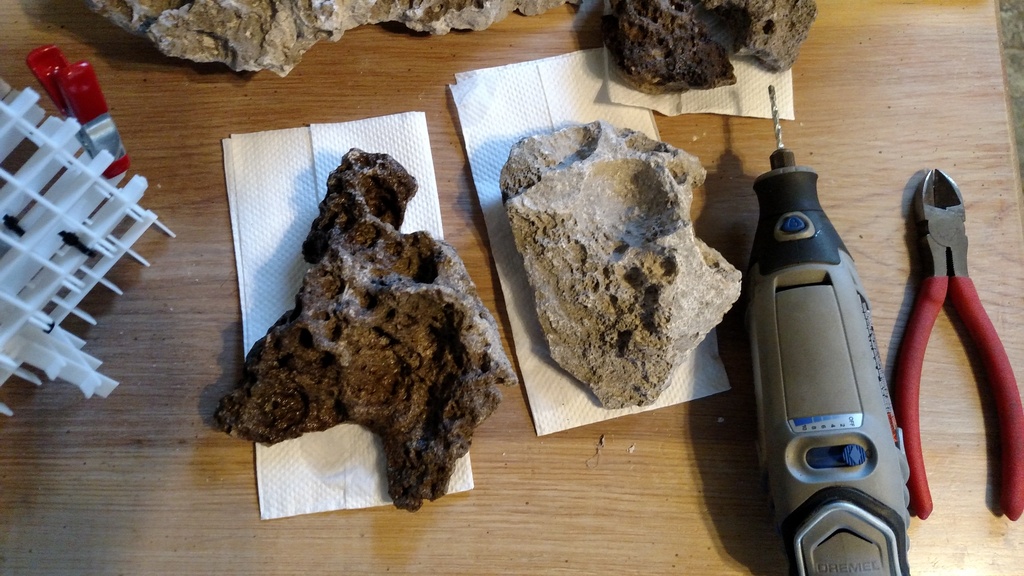
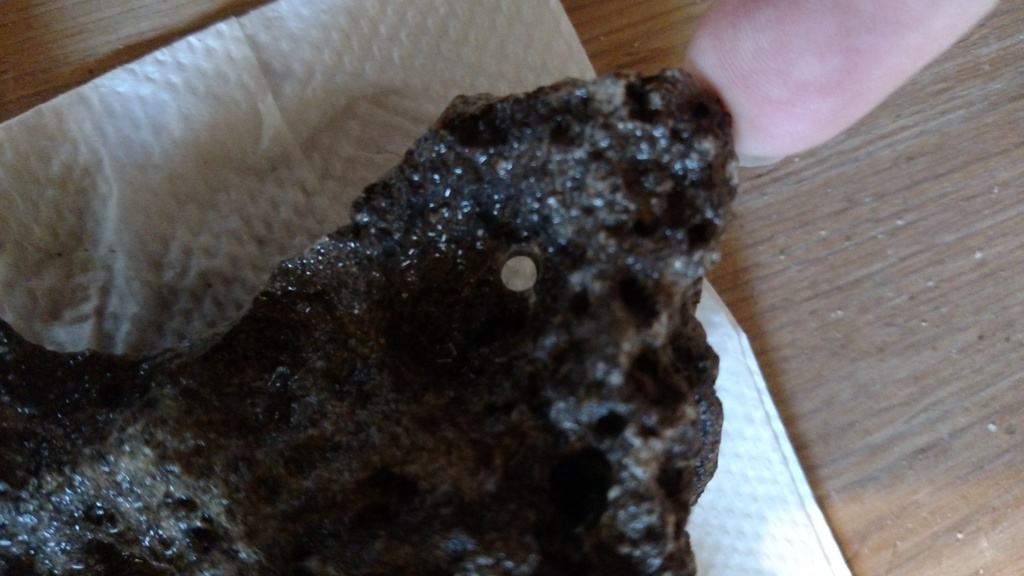
Next, once you have all you eggcrate set up how you like, you will need to attach the real rock to the wall. The best way to do this is to use a masonry bit and drill holes in the rock near the edges touching the eggcrate.


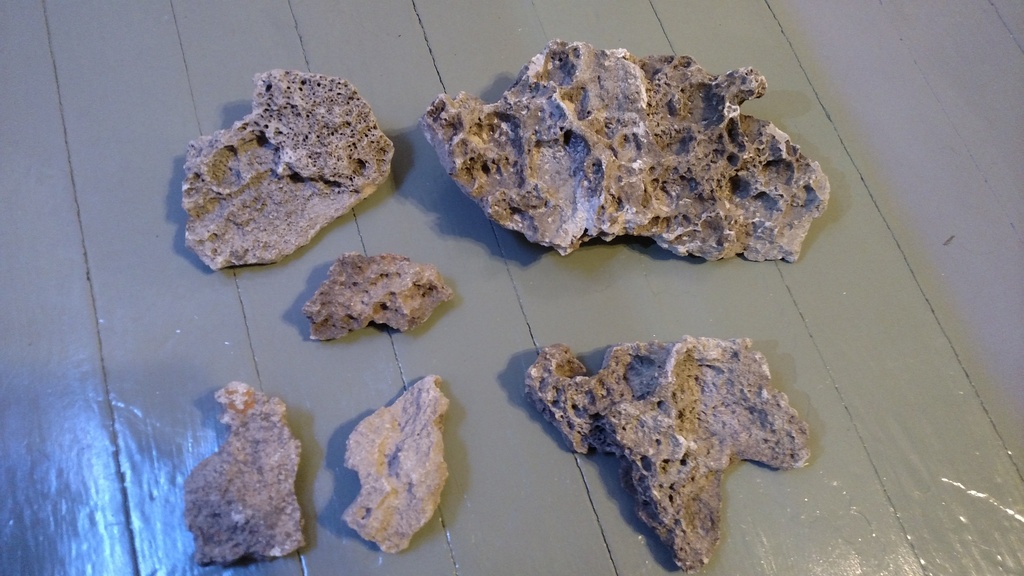
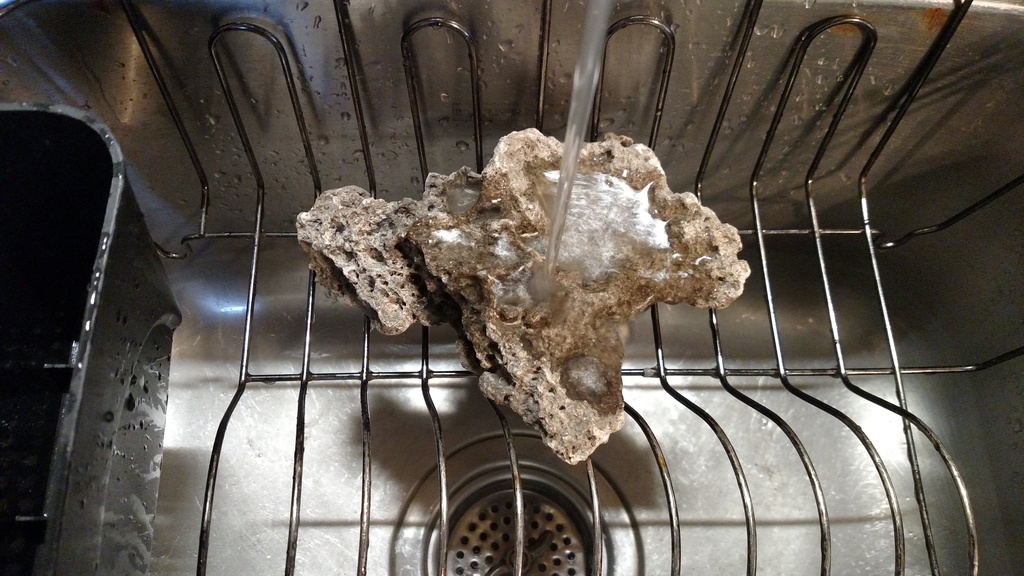
Rinse the rock first


Warning: Drilling lace rock smells like drilling teeth if you've ever had a cavity filled. Lol
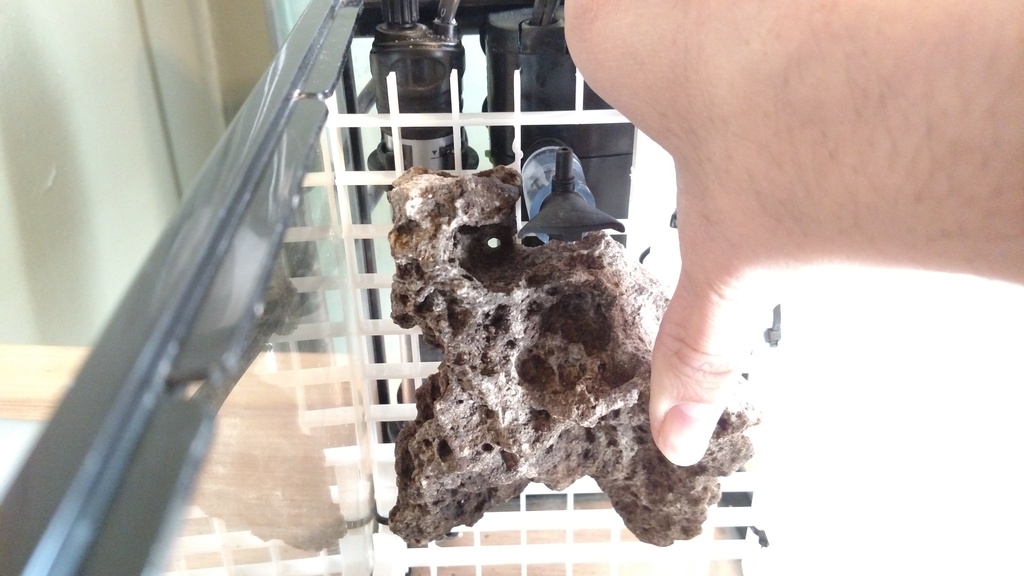
You can also use multiple zip ties and just loop it around the whole rock, you will just have to cut it off after the foam is dry and the rock is secure.


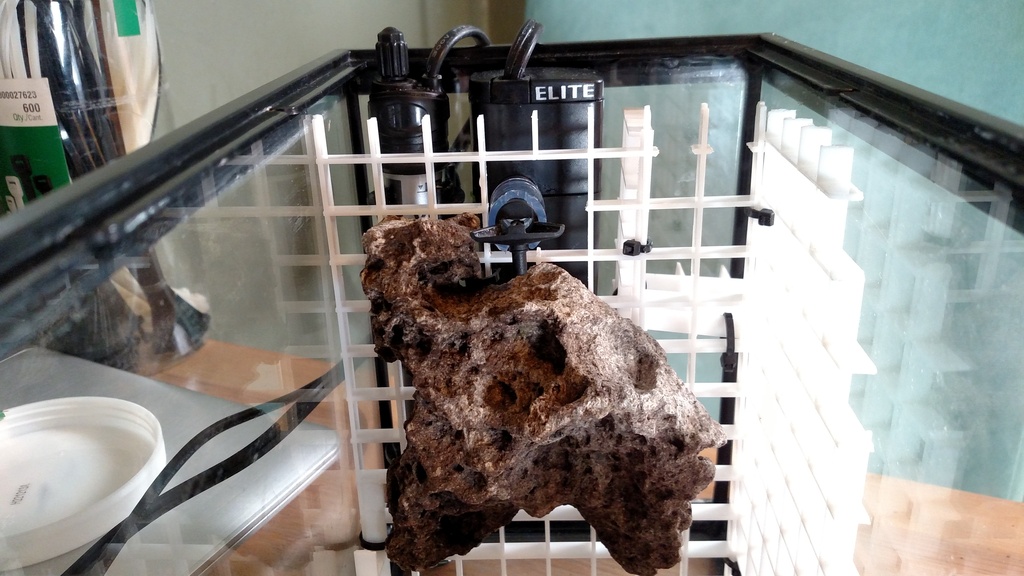
The rock doesn't need to be tightened all the way, just snug.


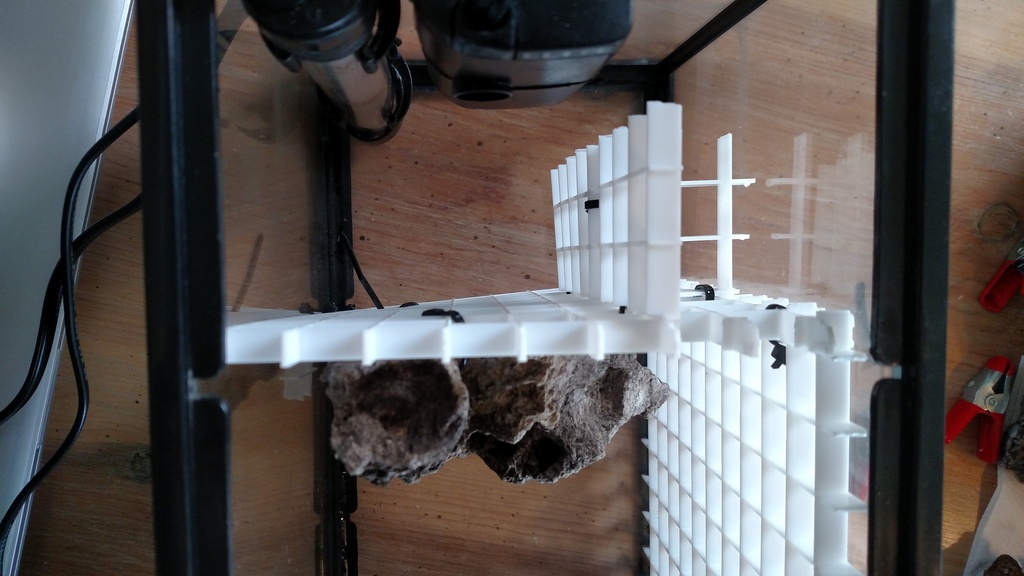
NOTE: over tightening the zip ties may lead to warping of the eggcrate as it flexes due to over tightening.


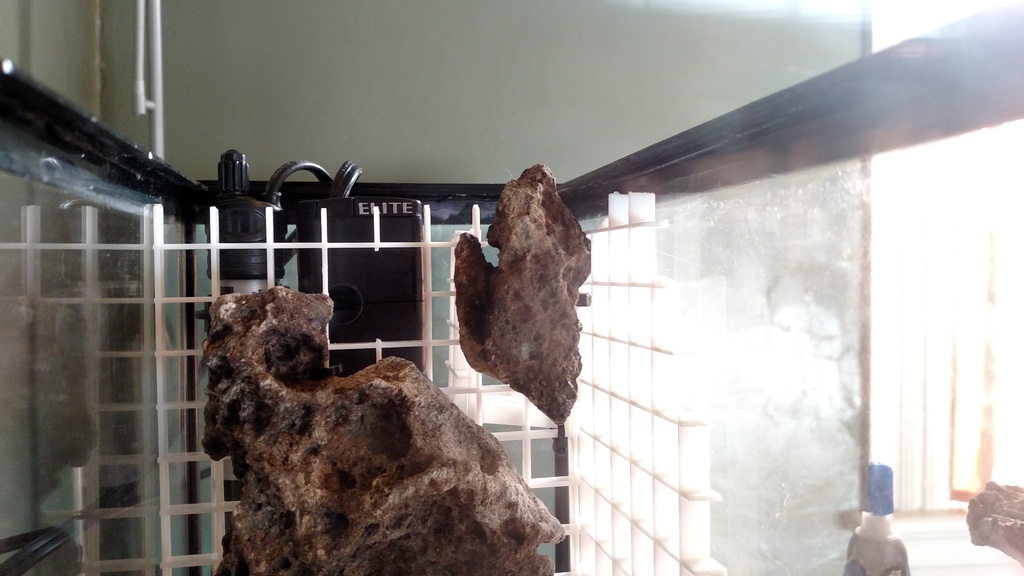
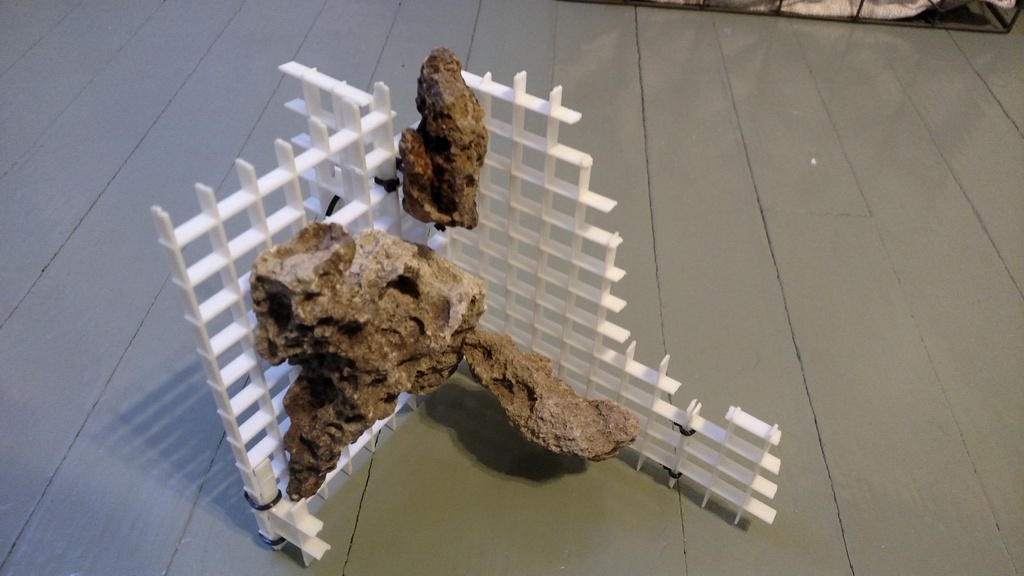
More rock is better as it adds additional texture and shape to the wall making it look much more natural. From a designing perspective, you want the rocks to flow with one another.


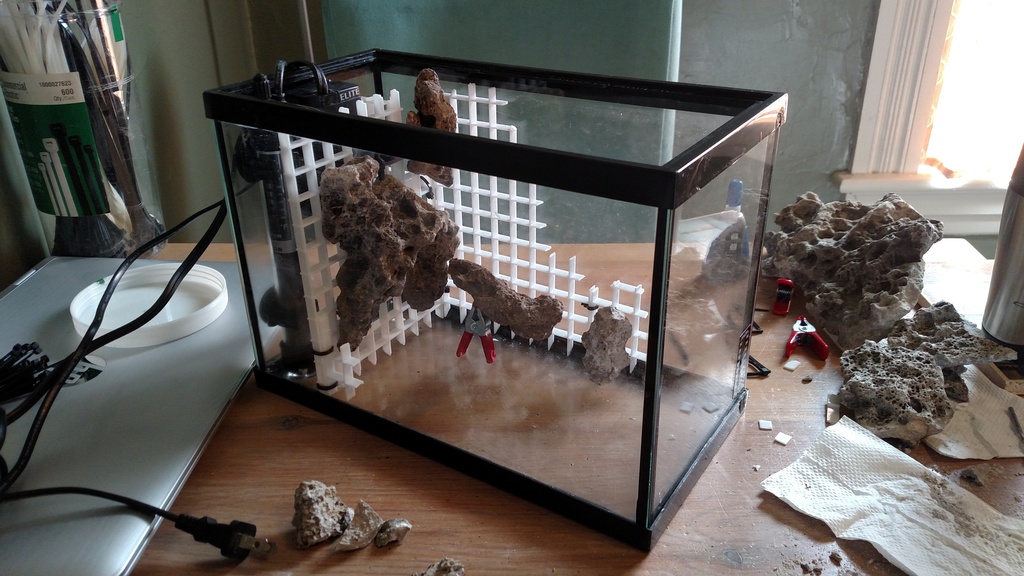
If you lay the eggcrate flat on the floor, the rock can just be set on top and foamed around. Once dry, the rock will be stuck in place without having to use zip ties. This method isn't my first choice since you can't move the eggcrate until the foam is dry. This method also doesn't work if the wall your designing isn't flat, like this AIO build.

Again, don't over tighten the zip ties. You want them walls to be straight as an arrow!

Other things you can do is incorporate bottles in the wall or pvc pipe to create caves.
Barnacle clusters are also a great addition.
 
Last edited by a moderator:
OP
OP
sam.basye

sam.basye

Active Member
View Badges
Joined
May 22, 2016
Messages
192
Reaction score
130
Location
Lynchburg, Va
Rating - 0%
0   0   0
Step 3: Foaming!


Now that we have secured the rock to the eggcrate, it's time to foa.... whoa, not so fast!

Get those gloves on! This stuff is nasty, so don't get it on anything you don't want it on; like hands, clothes, tank, etc. It won't come off.


I have tried 3 different brands of foam:
Touch 'n Foam: Landscrape
Beckett Waterfall Foam Sealant
Great Stuff Pond and Stone

All were about equal. I went with the new great stuff pond foam for this build since it was the cheapest.


Stick a trash bag under what your foaming. It won't stick to the bag and it will protect what's underneath.


Also, make sure you have your sand and crushed coral ready to go when you start foaming.


Okay, ladies and gentlemen, grab your foam!
The key to getting a natural looking rock-like foam wall is to do small, manageable sections at a time.
NOTE: Apply the foam in irregular patterns as to avoid getting unnatural straight lines across the wall.


Next, put the can down and start sprinkling some crushed coral on the freshly applied foam to add texture. Then sprinkle sand for color.
You can also add whole shells while it is still wet for an added touch.


After about 5 min, an outer skin will form that is dry to the touch.
You will then press on the foam to flatten and press out the air inside. This allows it to lay flatter and be less buoyant.

Now it's time to press it flat


All flattened


Do this process for the entire wall. Remember... irregular patterns.

I have created a couple videos to help highlight how to apply the foam and how to press it out!


Don't worry about the foam bubbling on the backside of the wall since you will be cutting it off anyways.


Do Not get foam on the rocks other than the edges because it won't come off.


You can elect to foam directly to the glass or the eggcrate already in position, but this is not recommended.

Once everything dries, 24 hours, get out a sharp kitchen knife (be careful or this could be you!) and start cutting off the excess foam from the backside of the wall so it sits flush against the glass. Only use an old (sharp) knife since you will be cutting the occasional coral rubble which can dull/ruin a nice blade.


The preferred option is to get your Dremel out with a cutoff wheel. This will make easy work with a large tank. You will need the corded version, the battery ones suck and die fairly quickly.
It is okay if you cut the zip ties if they stick out after the wall has dried. The rocks aren't going anywhere.


NOTE: be careful when you get to the ends of the wall not to cut too much foam off because it may not sit flush with the glass and will require more silicone to fill the gap.


Now you can test fit the wall. Be careful not to scratch the glass.


Step 4: Sealing, Covering and Attaching your Wall


Next we have the optional sealing of the wall. You may or may not decide to do this.
The main purpose is to add color to the wall or to seal it off completely to try and make it last longer. This is done after the wall is fully dried.

They heat gun was used to thin the 2-part epoxy to get more out of it.


I personally have used 2 part epoxy and contact cement. The epoxy doesn't go very far and will get very expensive having to buy a lot of it, but it dries clear. The contact cement will cover a larger area, but will dry an opaque yellow. I have heard of automotive fiberglass resin working as well.
Again, small sections at a time. After applying a thin layer of adhesive, sprinkle sand or rock dust or more crushed coral over the area of application. This does two things: makes the wall blend better, and further seals the foam.


Once it's all dry, I wait 24 hours, it's time to stick that bad boy to the glass!


This can be difficult... depending on how you designed the wall, it may be impossible to get it in without breaking it. I had to break and refoam my 26g wall because I didn't think about the 1/4" rim around the top of the tank.
With this tank, I was able to drop the short side in first, then bring the long edge down , rotate it, and slide it back.

Once you have it in place, time to get the aquarium safe silicone out.
If you can find black, get that, otherwise clear will work.
I silicone all the places the foam wall meets the glass (that you can reach) so no critters can make it behind the wall from the display.
This helps keep the wall in place so it doesn't move. Don't forget to do the bottom of the wall as well.

NOTE: I don't bother siliconing the flat backsides of the wall to the glass, I see this as an unnecessary and potentially messy step. Plus this makes the wall very difficult to remove if need be.


The AIO concept for this tank really only works if the display is sealed off from the chambers allowing water in the display to overflow to the back, so I silicone the edges of the entire display.
I also looked for any gaps in the wall that would allow water to pass through and filled them with silicone.
Now if your wall isn't perfectly straight anymore, find something to prop it to the glass when siliconing. I used a couple sharpies to brace the wall and make it flush while I applied the silicone. After 24 hours, I removed the pens and the wall is now flush.


Cured silicone can be removed from the glass with a sharp razor blade if you accidentally get some on the glass.
 
OP
OP
sam.basye

sam.basye

Active Member
View Badges
Joined
May 22, 2016
Messages
192
Reaction score
130
Location
Lynchburg, Va
Rating - 0%
0   0   0
Step 5: The Finishing Touches


Now that we have your wall exactly where, and how you want it, it's time to finish it off and get ready to get it wet!

For my All-In-One concept, I needed a way to return the overflow water back to the display and was planning on using my mini Elite filter. I chose this filter because it is small and has an adjustable flow rate.
I used some clear tubing to extend the output and still utilize the discharge nozzle.
I cut two notches out of the tubing so the nozzle can be flipped to provide surface agitation or downward flow with the ability to attach an airline.

Next, I had to drill a hole for the tube to fit. This exposed some of the tube and it didn't look natural, so I wiped some silicone on it and tossed it around in the sand/crushed coral cup so it blends well. You can't even tell there is a tube there now!


Wash your sand before adding so you don't have to deal with this.. lol


Something that will also make your tank look better is applying window tint (20% or darker) to the glass where the eggcrate is visible through the glass. Looks much cleaner this way. Tape the tint to the glass and use a sharpie to outline the edge of the wall and cut out with scissors. Get the glass a little wet and stick it on there!


Install your equipment and start filtering the water. I initially fill with tap water to cycle until it's clear, then drain and add RO water for a day or two. Then you're ready for salt!


Now you can sit back, relax, and enjoy your newly created aquascape!


Homemade LED box light.


[URL=http://s845.photobucket.com/user/sambasye/media/IMG_20161127_201813715_zpsxplrgh6x.jpg.html%5D%5BIMG%5Dhttp://i845.photobucket.com/albums/ab11/sambasye/IMG_20161127_201813715_zpsxplrgh6x.jpg%5B/IMG%5D%5B/URL]

[URL=http://s845.photobucket.com/user/sambasye/media/IMG_20161127_213819_zps5ow2ur5y.jpg.html%5D%5BIMG%5Dhttp://i845.photobucket.com/albums/ab11/sambasye/IMG_20161127_213819_zps5ow2ur5y.jpg%5B/IMG%5D%5B/URL]

[URL=http://s845.photobucket.com/user/sambasye/media/IMG_20161127_201951195_zpsoale7lzr.jpg.html%5D%5BIMG%5Dhttp://i845.photobucket.com/albums/ab11/sambasye/IMG_20161127_201951195_zpsoale7lzr.jpg%5B/IMG%5D%5B/URL]

[URL=http://s845.photobucket.com/user/sambasye/media/IMG_20161127_200751685_zpsm3cy23a5.jpg.html%5D%5BIMG%5Dhttp://i845.photobucket.com/albums/ab11/sambasye/IMG_20161127_200751685_zpsm3cy23a5.jpg%5B/IMG%5D%5B/URL]

[URL=http://s845.photobucket.com/user/sambasye/media/IMG_20161127_200713338_zpsy0hirsgr.jpg.html%5D%5BIMG%5Dhttp://i845.photobucket.com/albums/ab11/sambasye/IMG_20161127_200713338_zpsy0hirsgr.jpg%5B/IMG%5D%5B/URL]

[URL=http://s845.photobucket.com/user/sambasye/media/IMG_20161127_201800683_zpseawwjhwq.jpg.html]


Please feel free to ask questions so this thread can help anyone who desires to create their very own foam wall. :)


Sam[/URL][/URL][/URL][/URL][/URL][/URL]
 
Last edited:

Bluefish9

Active Member
View Badges
Joined
Oct 27, 2016
Messages
286
Reaction score
343
Rating - 0%
0   0   0
Lol I saw this in "another forum"... there were no replies. Then I came here where people are actually polite. While Im not happy people didn't reply in the other one... Im happy to see it wasnt just me having that experience.

Great job by the way. Its nice to see a change from the ordinary, and I love seeing peoples diy projects.
 

Zoaeasy

Active Member
View Badges
Joined
Sep 19, 2015
Messages
456
Reaction score
293
Location
Calgary
Rating - 0%
0   0   0
Thanks this is great . I am going to use this to cover my overflow box! BTW how do I sticky this thread, anyone?
 
OP
OP
sam.basye

sam.basye

Active Member
View Badges
Joined
May 22, 2016
Messages
192
Reaction score
130
Location
Lynchburg, Va
Rating - 0%
0   0   0
Lol I saw this in "another forum"... there were no replies. Then I came here where people are actually polite. While Im not happy people didn't reply in the other one... Im happy to see it wasnt just me having that experience.

Great job by the way. Its nice to see a change from the ordinary, and I love seeing peoples diy projects.

Bluefish, it sad isn't it...

I recently started participating over here and quickly realized it really is full of nice, froendly people, like they advertise.
I decided to post the same thing over there just to see the difference in participation, and obviously because it's informational. There are some very knowledgeable people, but it's too bad no one is all that friendly.
Thanks!
 

HowardJ02

Active Member
View Badges
Joined
Oct 25, 2016
Messages
345
Reaction score
218
Location
Indiana
Rating - 0%
0   0   0
Thanks everyone!

I'm going to use the 2.5 as a frag.. heheheh
Against my wife's wishes. Lol

I've got a butt load of frags coming today!

Fyi, for more pictures and updates, my 26g build can be found here:

https://www.reef2reef.com/index.php?threads/274672/

I've got 14 coming today! Haha!
That LC live sale was fun! Can't wait to see what we both got!

They'll look great in that little frag tank!
 
OP
OP
sam.basye

sam.basye

Active Member
View Badges
Joined
May 22, 2016
Messages
192
Reaction score
130
Location
Lynchburg, Va
Rating - 0%
0   0   0
I've got 14 coming today! Haha!
That LC live sale was fun! Can't wait to see what we both got!

They'll look great in that little frag tank!
Haha, I have the 13 I bought and the $400+ prize pack!
God was looking out for me - I told the wife I won $400+ worth of coral and neglected to say I bought $170 worth. Hahaha
 

HowardJ02

Active Member
View Badges
Joined
Oct 25, 2016
Messages
345
Reaction score
218
Location
Indiana
Rating - 0%
0   0   0
Haha, I have the 13 I bought and the $400+ prize pack!
God was looking out for me - I told the wife I won $400+ worth of coral and neglected to say I bought $170 worth. Hahaha
Lol! Congrats on that by the way! Anxious to see what's in there!:D
 

revhtree

Owner Administrator
View Badges
Joined
May 8, 2006
Messages
47,725
Reaction score
86,764
Rating - 100%
1   0   0
Very cool and thanks for sharing!
 
OP
OP
sam.basye

sam.basye

Active Member
View Badges
Joined
May 22, 2016
Messages
192
Reaction score
130
Location
Lynchburg, Va
Rating - 0%
0   0   0
Here's all but 3 frags in the 2.5

They look great under the shimmering led in the small space!

I may have rushed the process a little trying to get it salty for the new stuff today..

I drained the RO water from the 2.5 into a bucket and added salt. Then I siphoned 2.5g from the 26 down to the 2.5. Then I added the newly mixed saltwater to the 26.
The frags never opened in the 2.5 and when the skimmer came on this morning, it's micro bubbles galore!! The skimmer is going nuts, yet nothing is going into the cup! Everything is fine, but rather irritating..
Running carbon to try and get things back to normal.


lthary

Community Member
View Badges
Joined
Nov 6, 2016
Messages
46
Reaction score
25
Rating - 0%
0   0   0
Super cool! Very mad [emoji35] I have not seen this like a month ago when i set up my tank!
 

Clear reef vision: How do you clean the inside of the glass on your aquarium?

  • Razor blade

    Votes: 124 59.0%
  • Plastic scraper

    Votes: 62 29.5%
  • Clean-up crew

    Votes: 75 35.7%
  • Magic eraser

    Votes: 36 17.1%
  • Other

    Votes: 62 29.5%
Back
Top