Scott26's 90 Gallon Wave Front Build

scott26

Active Member
View Badges
Joined
Oct 27, 2009
Messages
202
Reaction score
51
Location
Nevada
Rating - 0%
0   0   0
Scott26's 90 Gallon Wave Front Build (LOTS OF PICTURES)

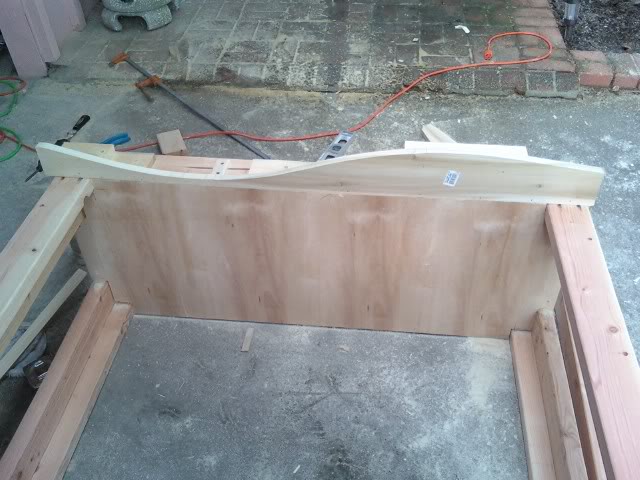
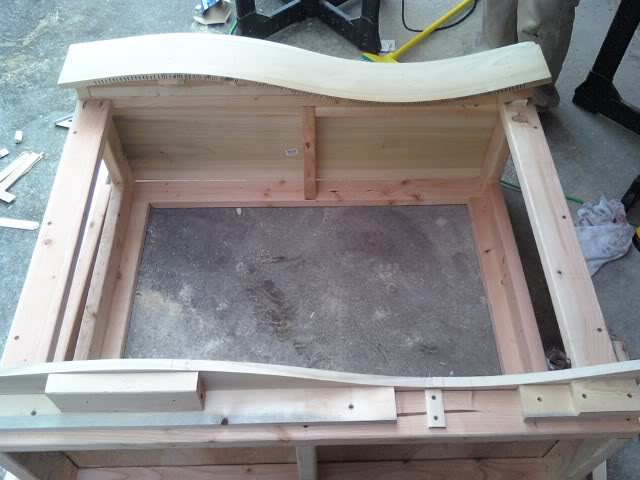
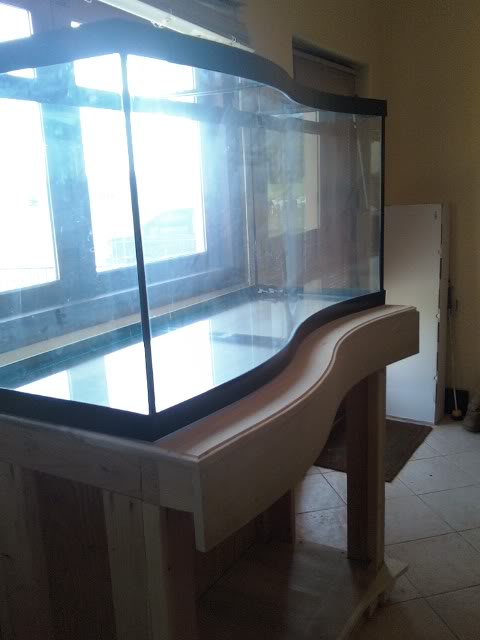
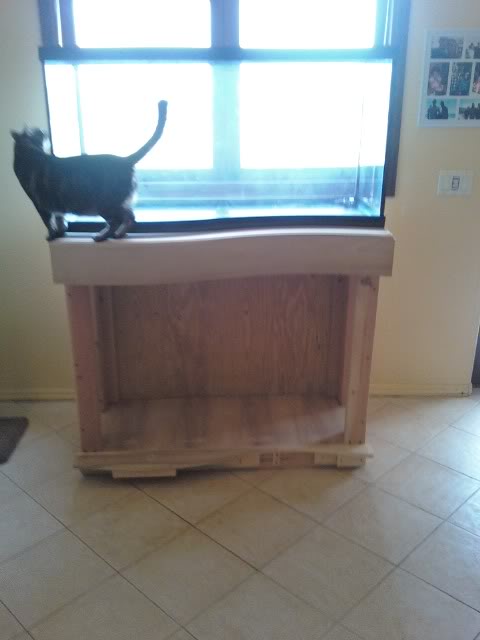
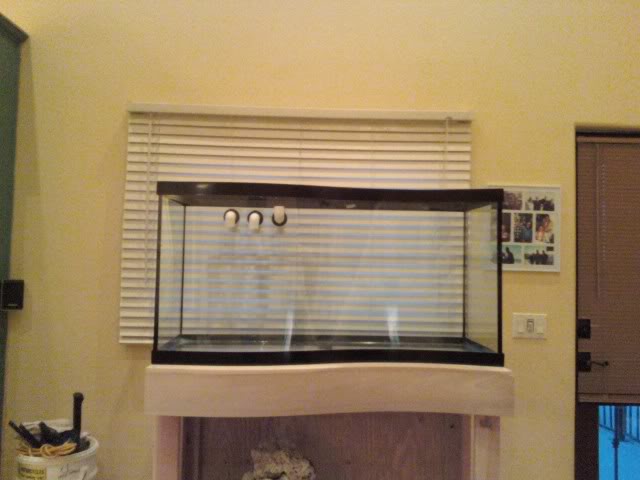
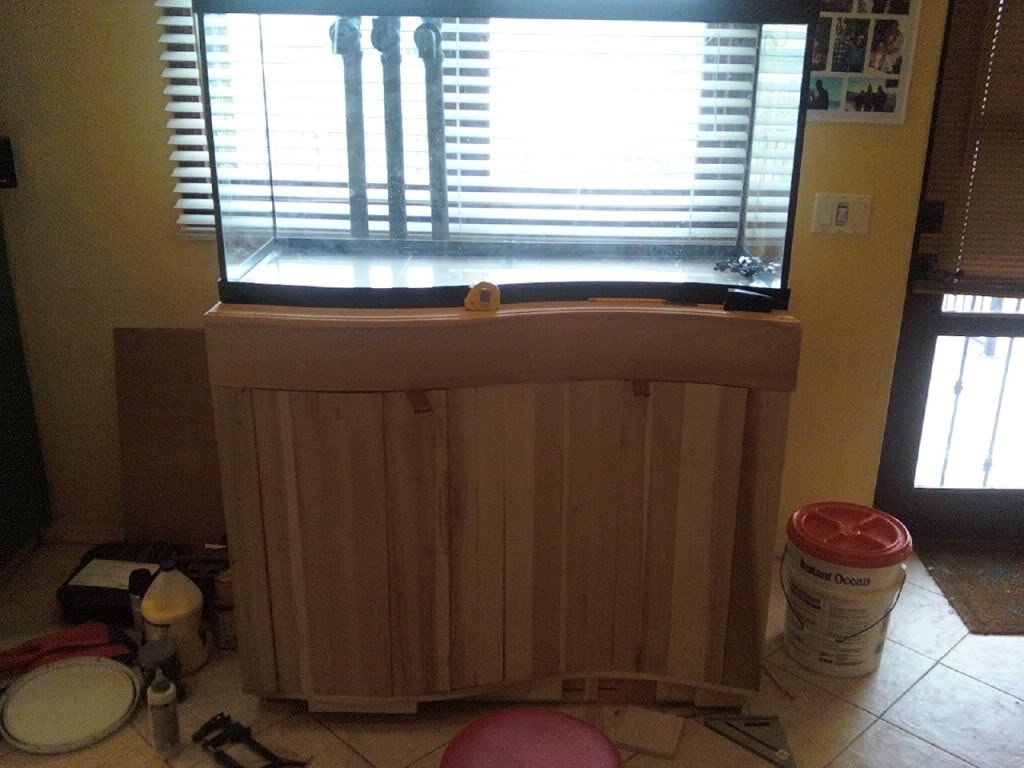
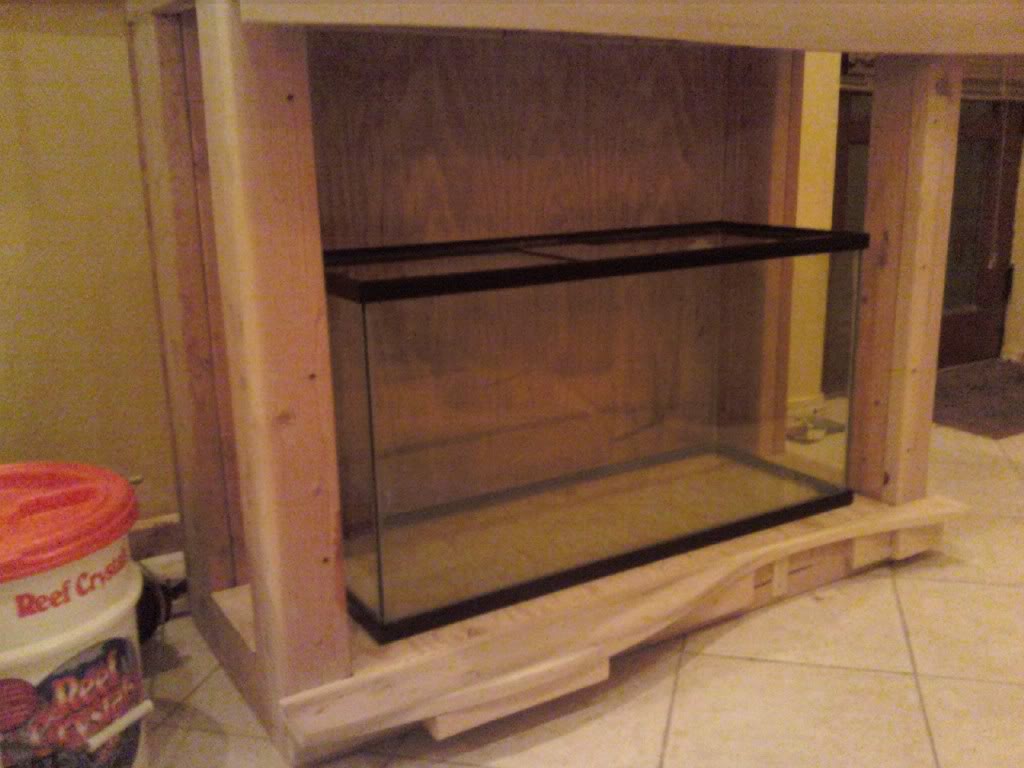
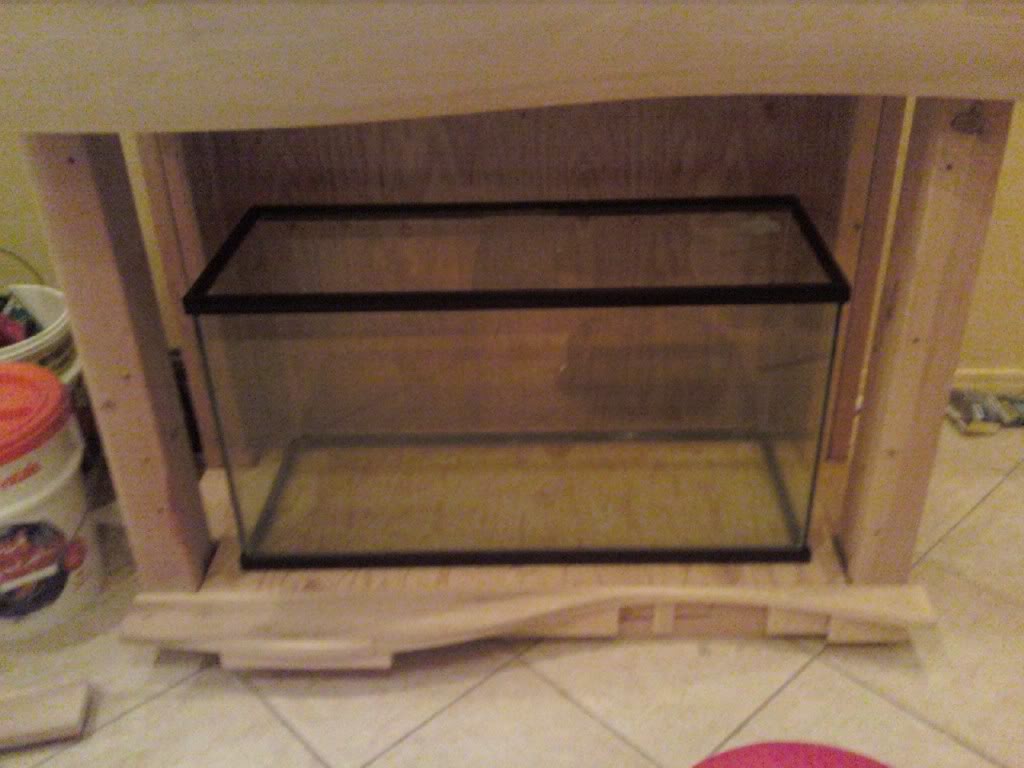
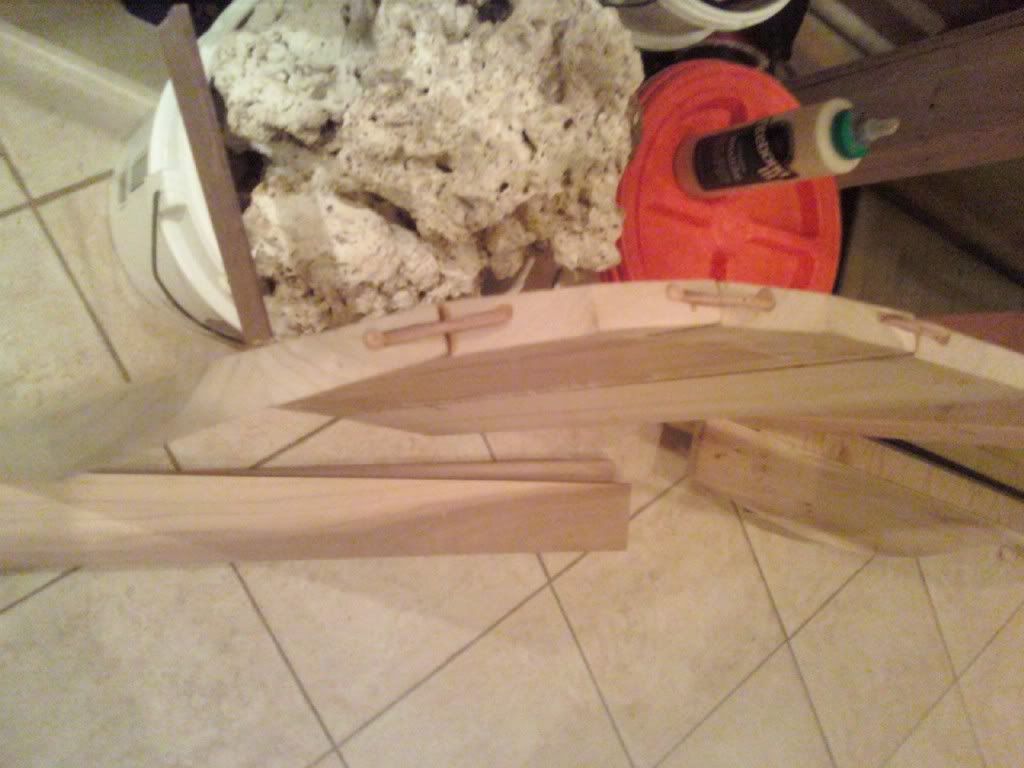
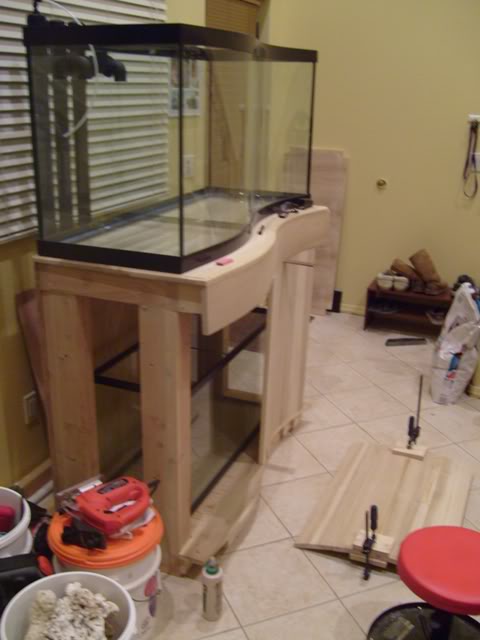
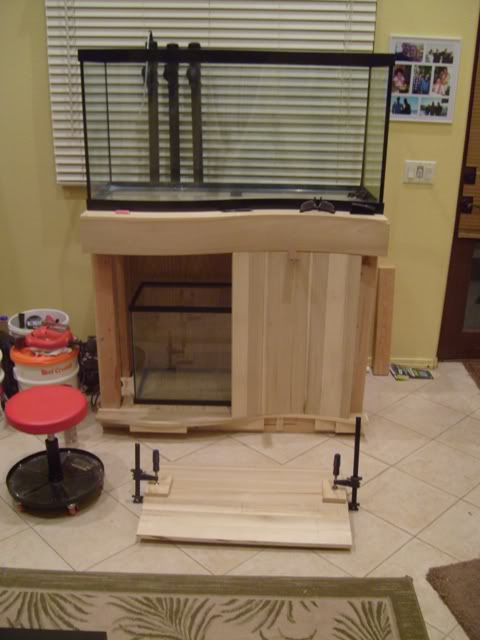
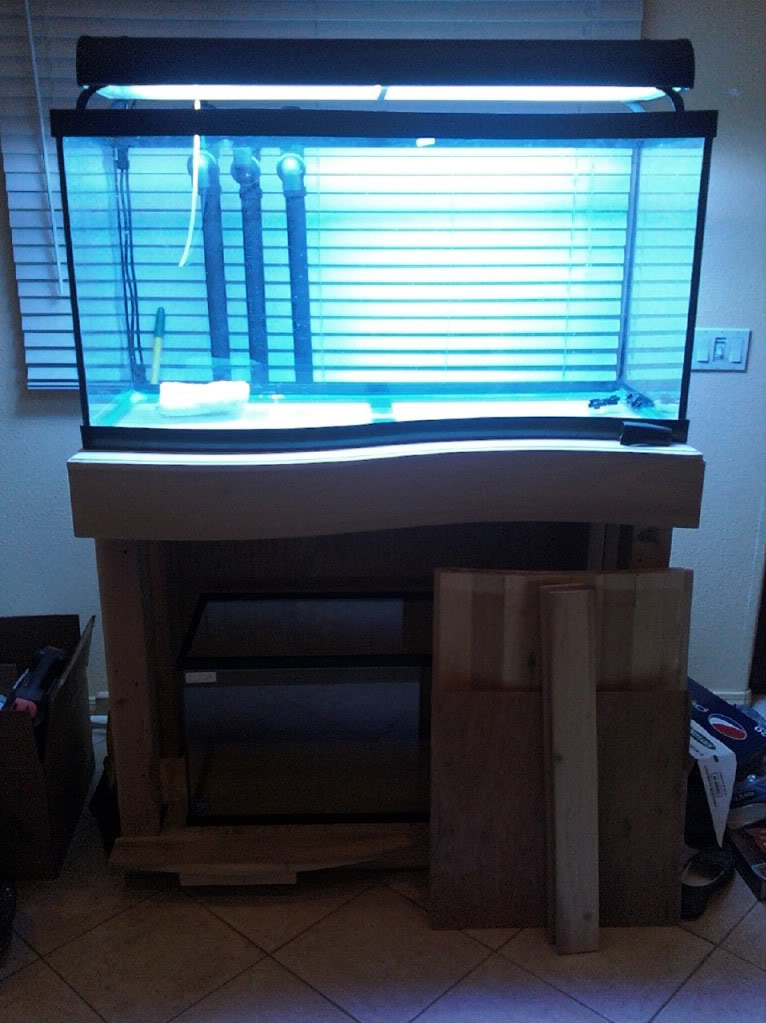
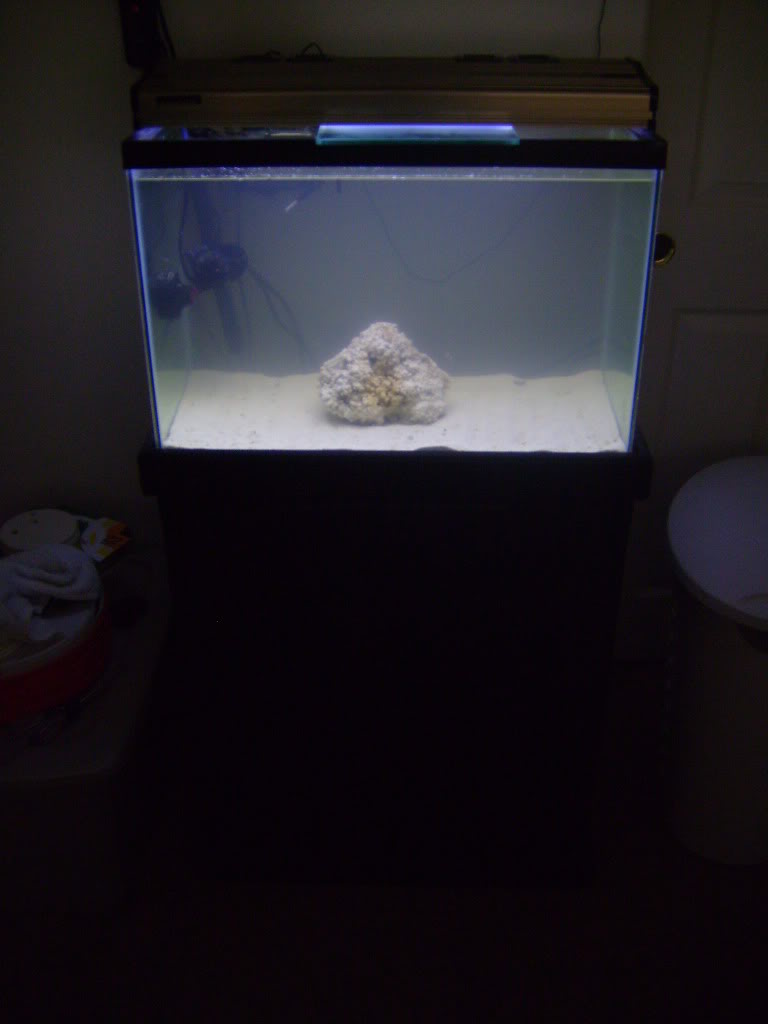
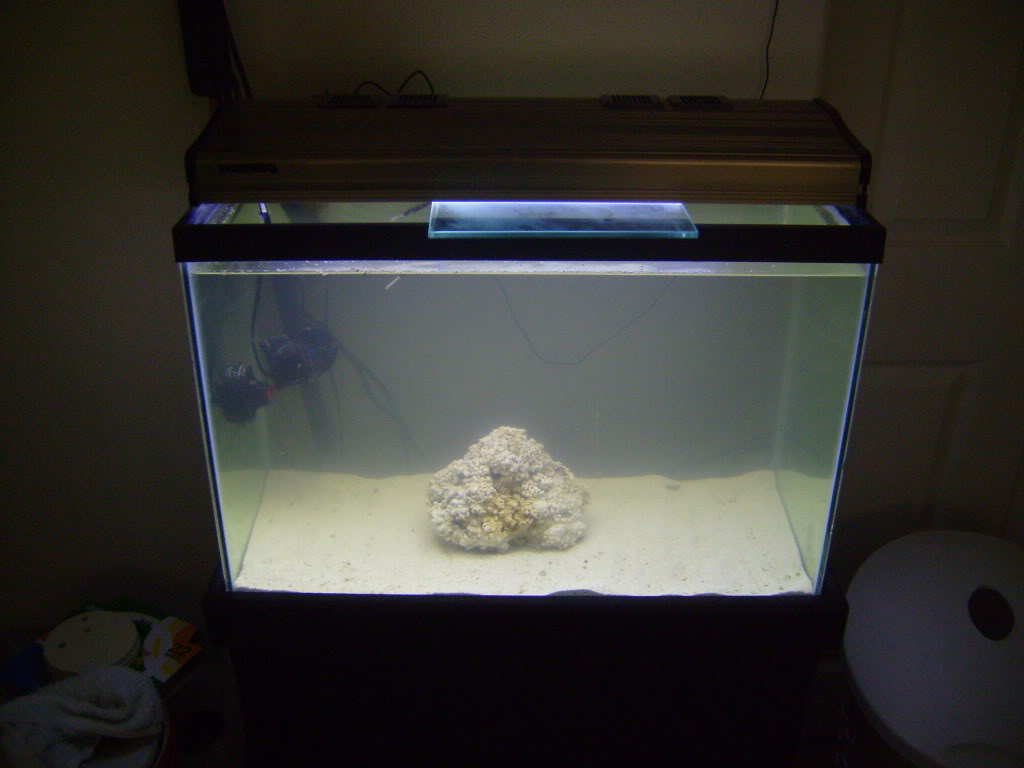
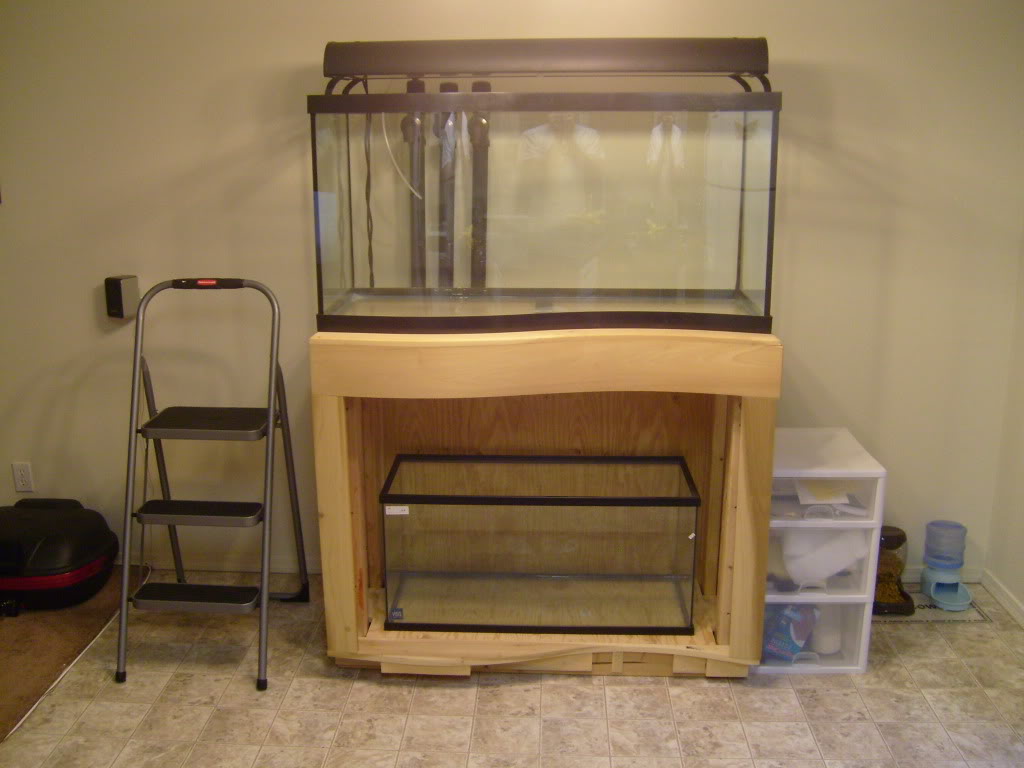
I have been building this tank for about 1 year now and finally got it cycling never really posted up any of the work I had done to it on this forum though so when I get a chance I will post of a step by step with A LOT of pictures of the progress I have had over this build.

Keep you eyes peeled.
 
Last edited:
OP
OP
scott26

scott26

Active Member
View Badges
Joined
Oct 27, 2009
Messages
202
Reaction score
51
Location
Nevada
Rating - 0%
0   0   0
Now if any of these post seem outdated or like I am moving very fast it is because this was done over a 1 year time from March of 2010.

Let me know if I leave anything out that you would like some more detail on I would be happy to elaborate.

WARNING : THERE WILL BE A LOT OF PICTURES!!!!!!
 
OP
OP
scott26

scott26

Active Member
View Badges
Joined
Oct 27, 2009
Messages
202
Reaction score
51
Location
Nevada
Rating - 0%
0   0   0
It all started with a great purchase off craigslist I got this:
90 Gallon Aquarium
40 Gallon Sump
20 Gallon QT
24" Light PC Fixture
20 Gallon Stand
40 LBS. Base rock

All for 75.00

0228001821.jpg


0228001816.jpg


0228001654.jpg


Then came the stand thanks to a friend I was able to figure out how to build a stand with a curve in it like his.
0307001028c.jpg


0307001028a.jpg


0307001028b.jpg


0307001028.jpg


0307001608.jpg


0307001600.jpg


Then came time to drill the aquarium after reading up on the Bean Animal style overflow system I figured it was the best system for me mainly because of all the failsafes. You can read up on it at this link Silent and Failsafe Overflow System - Reef Central Online Community it is alot of reading but very useful info.
Here are some pics of it set up. I didn't get a chance to take any pics while drilling sorry.

0320000657.jpg


0320000655.jpg


0320000656.jpg


There is still alot more to come.
-Scott
 
Last edited:

fsu1dolfan

2500 Club Member
View Badges
Joined
May 9, 2008
Messages
2,642
Reaction score
53
Location
South Florida
Rating - 0%
0   0   0
Wow i love the custom design of the stand...looks like a lot of measuring and getting it precise!! $75 is a nice deal for what you got too. Cant wait to see more!
 
OP
OP
scott26

scott26

Active Member
View Badges
Joined
Oct 27, 2009
Messages
202
Reaction score
51
Location
Nevada
Rating - 0%
0   0   0
Well I was able to get some more stuff done time to post it up I got the tank drilled as you can tell from the earlier pictures and I got most of the upper piping all fitted. After that I painted the PVC flat black to make it a little less noticable from the top since I am planning on having an open top aquarium with no canopy... at least for now.

0322002111.jpg


I was also able to get the doors started and mostly finished with the help of my friend again. What we did was we cut about five 5" strips of wood in half to make about 10 smaller strips we then beveled the edge on one side of each to make it a little easier for the curve of the door to form. After we got the doors shimed in placed from the front we got some fiber glass cloth and fiber glass resin and with the doors in place we applied it to the back to make the doors keep thier form after we take the shims out.

It turned out pretty well I will still need to get the small cracks that are left filled with wood filler to really hide any noticable differance.

I also still need to buy one more piece of wood in order to get the middle finished.

0323000625.jpg


0322002112.jpg


I also renforced the stand with 4 additional 2x4 supports in each corner so there are now 3 2x4's in each corner.

0322002112a.jpg


I am going to tap the open channel standpipe cap to 3/8 pipe in order to get a jhon guest fitting to be able to fit in it.

-Scott
 
OP
OP
scott26

scott26

Active Member
View Badges
Joined
Oct 27, 2009
Messages
202
Reaction score
51
Location
Nevada
Rating - 0%
0   0   0
Wow i love the custom design of the stand...looks like a lot of measuring and getting it precise!! $75 is a nice deal for what you got too. Cant wait to see more!

The stand was by far the most involved it took a good amount of money around $400 after everything and a lot of hours keep looking out for further posts of the massive work involved. :D
 
OP
OP
scott26

scott26

Active Member
View Badges
Joined
Oct 27, 2009
Messages
202
Reaction score
51
Location
Nevada
Rating - 0%
0   0   0
Not alot of progress but I was able to drill and tap the open channel standpipe to accept a 3/8 male pipe by 1/4 compression fitting in order to get my air line to go to the inside of the overflow box. I also put a 90 on the top of the standpipe to make it so there is a sharper turn down.

0325001738.jpg


I still need to get the one piece of wood for the doors to finish those off which I should be able to do soon if I find the money for it. :)

I also got a quote from a local glass shop it will only be $20 for the overflow box to be cut out for me then prolly $5 or $10 for a tube of silicone.
 
OP
OP
scott26

scott26

Active Member
View Badges
Joined
Oct 27, 2009
Messages
202
Reaction score
51
Location
Nevada
Rating - 0%
0   0   0
Okay well I have been able to get some more done on the stand.

Started out by going over to my friends place to biscuit in a door panel since I didn't have enough wood to fill the above hole. Got there and bisected the doors but it was to difficult to try and put them together with clamps because it was a curve it would never be able to tighten so when I got home I just put them in the stand and shimmed them in place to hold it while the glue dried it is not a really tight fit like the others but I will just fill it with some more glue to make it strong and then some wood filler to make it look good.

0330001809.jpg


I also was able to sell the above 40 gallon critter cage (my sump) to a guy around my area for 100 bucks so I just made back my purchase price with a 25 dollar profit! lol. But after I got that money I stopped by Wet Pets our LFS and picked up a cheap 40 gallon for a sump. It has a center brace on top which I don't like so I may remove it I don’t see why they added it to such a small tank, seems kind of pointless to me.

I also had to redo the bottom board that holds the sump because I sanded top and it had started to peel since it was just plywood. So I just used another piece of scrap that I had left over from my canopy build on my 55 gallon. And since my friend let me barrow his biscuit cutter was able to biscuit them together and make a new bottom piece.

It's really starting to look like a real aquarium now. :)

0330002049.jpg


0330002027.jpg


I also reinforced the doors some more so that they can hold their shape easier I used the biscuit tool and cut into the top and bottom on the doors where they join at in order to put a biscuit there so that they keep their form. I will jigsaw off the extra biscuit later and sand it smooth. This step sure does make these doors nice and strong. :)

0330002112.jpg


I am going to have to get some good pictures up with my real camera later today hopefully so that way you guys can see them in better detail of this project. Wish I would have been using that from the beginning. Oh well.
 

Monroereef

Well-Known Member
View Badges
Joined
Feb 20, 2011
Messages
576
Reaction score
182
Location
Monroe, NJ
Rating - 0%
0   0   0
That is one awesome stand. It always surprises me how innovative people get in this hobby.
 
OP
OP
scott26

scott26

Active Member
View Badges
Joined
Oct 27, 2009
Messages
202
Reaction score
51
Location
Nevada
Rating - 0%
0   0   0
[FONT=&quot]Okay I was able to get a little bit more done last night after I gave the biscuits time to dry over night. I have now cut off the extra with a jigsaw to get it down a good amount. I then used a planer to get the unlevel doors to be around the same height (since some boards were higher than others by around 1/8” and would hit the top wave.) at least enough to sand smooth that way they are all uniform and the same and I don’t have to run them trough a table saw which was going to be a little difficult with a large curve like this :).[/FONT]
[FONT=&quot] [/FONT]
[FONT=&quot]Pics[/FONT]
[FONT=&quot] [/FONT]
[FONT=&quot]
0401000621.jpg
[/FONT]
[FONT=&quot] [/FONT]
[FONT=&quot]
0401000620.jpg
[/FONT]
[FONT=&quot] [/FONT]
[FONT=&quot]You can see I have the doors clamped with a piece of wood the reason I did that is because I put to much of a curve in with the biscuits so the doors don’t match the curve of the top and bottom wood which was bothering me so since they doors still had cracks in them from where they are connected with biscuits I used some wood and clamps and put glue down the cracks and used clamps to get them to bend back I will let them dry today before I work with them again.[/FONT]
[FONT=&quot] [/FONT]
[FONT=&quot]Also I thought it would be good to get some full tank shots and stand shots also one with me in it to give you guys some perspective on how large the aquarium and stand are. Now remember I am a pretty tall guy standing at 6'2" so the overall height of the aquarium setup fits me pretty good so I don't have to bend down anymore. :D[/FONT]
[FONT=&quot] [/FONT]
[FONT=&quot]Pics[/FONT]
[FONT=&quot] [/FONT]
[FONT=&quot]
S7001473jpg2.jpg
[/FONT]
[FONT=&quot] [/FONT]
[FONT=&quot]
S7001465jpg2.jpg
[/FONT]
[FONT=&quot] [/FONT]
[FONT=&quot]
S7001463jpg2.jpg
[/FONT]
[FONT=&quot] [/FONT]
[FONT=&quot]
S7001462jpg2.jpg
[/FONT]
 
OP
OP
scott26

scott26

Active Member
View Badges
Joined
Oct 27, 2009
Messages
202
Reaction score
51
Location
Nevada
Rating - 0%
0   0   0
Well I moved during this entire process so I was able to take the Nova Extreme Light off the 55 gallon and put it on the 90 to see what it is going to look like. I still have to finish up the doors which are taking the longest but here are some progress pics.

0404002009.jpg


0404001300.jpg
 

akabryanhall

2500 Club Member
View Badges
Joined
Jun 17, 2009
Messages
2,925
Reaction score
182
Rating - 0%
0   0   0
Wow, this is going to look so nice when all is said and done! It already looks awesome, definitely tagging along!
 
OP
OP
scott26

scott26

Active Member
View Badges
Joined
Oct 27, 2009
Messages
202
Reaction score
51
Location
Nevada
Rating - 0%
0   0   0
[FONT=&quot]Well I finally have something to update about... been a while.[/FONT]
[FONT=&quot] [/FONT]
[FONT=&quot]I have finally got my 20 gallon QT tank set up in my office to house any sick critters. It was a little unexpected since I did have my fish that were left over from my 55 gallon in my 10 gallon in the garage. However a nice heat wave came through and toasted one of the two remaining clownfish so I grabbed the last one and all the crabs that I have in there and put them in my 20 gallon that had been running for about 2 months now.[/FONT]
[FONT=&quot] [/FONT]
[FONT=&quot]
S7001477.jpg
[/FONT]

[FONT=&quot] [/FONT]
[FONT=&quot]
S7001478.jpg
[/FONT]

[FONT=&quot] [/FONT]
[FONT=&quot]Next I finally got an opportunity to finish up the last plank on the left side door since I didn't use enough wood when I fiber glassed the back of it. The only thing that worked in the end was to just cut the right bevel I went with a 7 degree and then just glued it on. Took a while but now it is looking finished at least the doors. I still need to trim the tops so that they are all flush and so that there is a about a 1/16 inch gap on top and bottom so the doors close smooth. I got to sanded them down a bit as well to get the glue off.[/FONT]
[FONT=&quot] [/FONT]
[FONT=&quot]
S7001488.jpg
[/FONT]

[FONT=&quot] [/FONT]
[FONT=&quot]I was also sick of having all my spare parts laying around in my sump and around the display tank so I got a storage cabinet from wal-mart. Worked out pretty well might need to get a bigger one later depending on how many more chemicals I will need to put in there.[/FONT]
[FONT=&quot] [/FONT]
[FONT=&quot]
S7001487.jpg
[/FONT]

[FONT=&quot] [/FONT]
[FONT=&quot]If you can't tell this aquarium is rather tall about 6'6" over all so it is a little tough even for me at 6'2" to get into the aquarium. So I got a step stool from Costco in order for me to be able to reach the bottom from now on.[/FONT]
[FONT=&quot] [/FONT]
[FONT=&quot]
S7001486.jpg
[/FONT]

[FONT=&quot] [/FONT]
[FONT=&quot]And this is what it looked like since we last left off.[/FONT]
[FONT=&quot] [/FONT]
[FONT=&quot]
S7001485.jpg
[/FONT]

[FONT=&quot] [/FONT]
[FONT=&quot]Now for the good NEWS! I got a skimmer a rather nice one too I think especially for the price. I was going to go for a Coarlife Super Skimmer since I had one in the past on my 55 gallon but have been hearing a lot of negative things about them. Then I was going to go with a Eshoppes until I got offered a ASM G2 Skimmer from a local reefer on centralcoastreefkeepers.com. I ended up with the skimmer that has a Sedra 5000 pump, at least that is what we think it is but the sticker has been taken off so we can't be to sure, it also has a mesh mod done to it. I also got a spare pump a Sedra 3500 almost brand new since it was switched out for the 5000 originally. Not only that but it also came with two spare propeller shafts as well as a spare needle wheel impeller. All this for $125 bucks I think I made out pretty well on this deal
clip_image001.gif
. I am going to be doing the Gate Valve mod to this skimmer once I get the valve and plumbing parts since it will greatly improve the way to adjust the skintamite. Any way pictures now.[/FONT]

[FONT=&quot] [/FONT]
[FONT=&quot]
S7001491.jpg
[/FONT]

[FONT=&quot] [/FONT]
[FONT=&quot]
S7001493.jpg
[/FONT]

[FONT=&quot] [/FONT]
[FONT=&quot]
S7001495.jpg
[/FONT]

[FONT=&quot] [/FONT]
[FONT=&quot]
S7001497.jpg
[/FONT]

[FONT=&quot] [/FONT]
[FONT=&quot]
S7001498.jpg
[/FONT]

[FONT=&quot] [/FONT]
[FONT=&quot]Some in the sump shot this is where is will sit.[/FONT]
[FONT=&quot] [/FONT]
[FONT=&quot]
S7001501.jpg
[/FONT]

[FONT=&quot] [/FONT]
[FONT=&quot]
S7001499.jpg
[/FONT]

[FONT=&quot] [/FONT]
[FONT=&quot]And finally some full tank shots.[/FONT]
[FONT=&quot] [/FONT]
[FONT=&quot]
S7001502.jpg
[/FONT]

[FONT=&quot] [/FONT]
[FONT=&quot]
S7001503.jpg
[/FONT]

[FONT=&quot] [/FONT]
[FONT=&quot] [/FONT]
 
OP
OP
scott26

scott26

Active Member
View Badges
Joined
Oct 27, 2009
Messages
202
Reaction score
51
Location
Nevada
Rating - 0%
0   0   0
Well I was able to get some more stuff done on the aquarium this weekend.

I went to the Home Depot and picked up a sheet of 1/2" birch plywood for my sides since it looks pretty similar to the poplar. I also picked up a sheet of 1/16" of door skin for the back of the doors to hide all that fiberglass material.

I cut the siding out of the full sheet and have enough left over to redo the back of the aquarium stand since I don't really like the scrap plywood that is on there now.

Siding
SidePanels.jpg


I then put the door skins on and screwed them in place with some small wood screws I think I am going to have to come up with another idea to hold down the door skin because the screws are pretty noticeable at least they are not as bad as the fiber glass that was there.

Left Side Door
LeftSideDoorSkin.jpg


Right Side Door
RightSideDoorSkin.jpg


I also picked up a gate valve, an elbow, a tee, and a foot of 1 1/4" PVC for a gate valve mod on my ASM G2 Skimmer also since OSH was having a no sales tax event I saved some cash.

Gate Valve Set Up
GateValveSetUp.jpg


Before Valve
NoGateValveSkimmer.jpg


After Valve
SkimmerWithGateValve.jpg


And this is about it for this weekend I am going to get a dermal and notch out some wood on the bottom panel so I can get the side panels on next.
 
OP
OP
scott26

scott26

Active Member
View Badges
Joined
Oct 27, 2009
Messages
202
Reaction score
51
Location
Nevada
Rating - 0%
0   0   0
[FONT=&quot]I have been working on some of the final touches of getting the siding on the 90 gallon. I will post pictures of that up later since I don't have any of those right now. But I was able to snap a few pics of some other things I was doing.[/FONT]
[FONT=&quot] [/FONT]
[FONT=&quot]I will start off with a sort of off topic pic of my 20 gallon QT tank that I have set up now with my Clownfish and a assortment of crabs in it. They are all looking really good and I added that other Korallia Nano to the tank yesterday to give it some more flow as you can see by the sand being blown up a little bit.[/FONT]
[FONT=&quot] [/FONT]
[FONT=&quot]
0616001635.jpg
[/FONT]

[FONT=&quot] [/FONT]
[FONT=&quot]I also was able to trim the front of the wave on top it was hanging over since we installed it and since I was able to barrow a dermal I got it cut off and sanded it down to follow the curve through.[/FONT]
[FONT=&quot] [/FONT]
[FONT=&quot]
0617001845a.jpg
[/FONT]

[FONT=&quot] [/FONT]
[FONT=&quot]
0617001845.jpg
[/FONT]

[FONT=&quot] [/FONT]
[FONT=&quot]I still have more sanding to do! :( (I am getting really tired of sanding)[/FONT]
[FONT=&quot] [/FONT]
[FONT=&quot]And finally I had to sand down the side of the top 2x4's in order to make the siding sit flush against the top piece. It was off by about 1/16 of an inch so it took a while to sand down but now that it is done the sides fit on perfect and all the ugliness will be covered up by the sides. I also had a little bit of help from the dermal here as well. :D[/FONT]
[FONT=&quot] [/FONT]
[FONT=&quot]
0617001845b.jpg
[/FONT]

[FONT=&quot] [/FONT]
[FONT=&quot]I am going to do some more work later today which will involve finishing putting the sides on then filling the cracks where the top and sides meet and also fill any other holes I can find.[/FONT]
 

High pressure shells: Do you look for signs of stress in the invertebrates in your reef tank?

  • I regularly look for signs of invertebrate stress in my reef tank.

    Votes: 42 31.3%
  • I occasionally look for signs of invertebrate stress in my reef tank.

    Votes: 31 23.1%
  • I rarely look for signs of invertebrate stress in my reef tank.

    Votes: 27 20.1%
  • I never look for signs of invertebrate stress in my reef tank.

    Votes: 34 25.4%
  • Other.

    Votes: 0 0.0%

New Posts

Back
Top