Back in the summer of 2013 I started a 150 gallon build. It had only been up for a short time when Aiptasia (from old dry rock, of all things) took over. I got frustrated and said the heck with this, I am going to start over. I had always wanted a tank built into a wall, so I decided no better time than now. Moved all the fish into a 30 gallon cube, as a temporary home, and started planning my build. The tank build quickly morphed into a man-cave and took nearly 2-years to complete. The follow is a little of the build-out process. I am posting here so others may get some ideas for their future builds, just like I got by lurking and following other build threads here on Reef2Reef.

Navigation
Install the app
How to install the app on iOS
Follow along with the video below to see how to install our site as a web app on your home screen.
Note: This feature may not be available in some browsers.
More options
You are using an out of date browser. It may not display this or other websites correctly.
You should upgrade or use an alternative browser.
You should upgrade or use an alternative browser.
Xingu's In Wall 180
- Large Build
- Thread starter Xingu
- Start date
- Tagged users None


OP
OP
Most of the time was spent converting an old bedroom in my basement. I has some specific things I wanted to incorporate, rock wall, barn wood and some sort of wainscot. I decided to do individual walls with a different treatment.
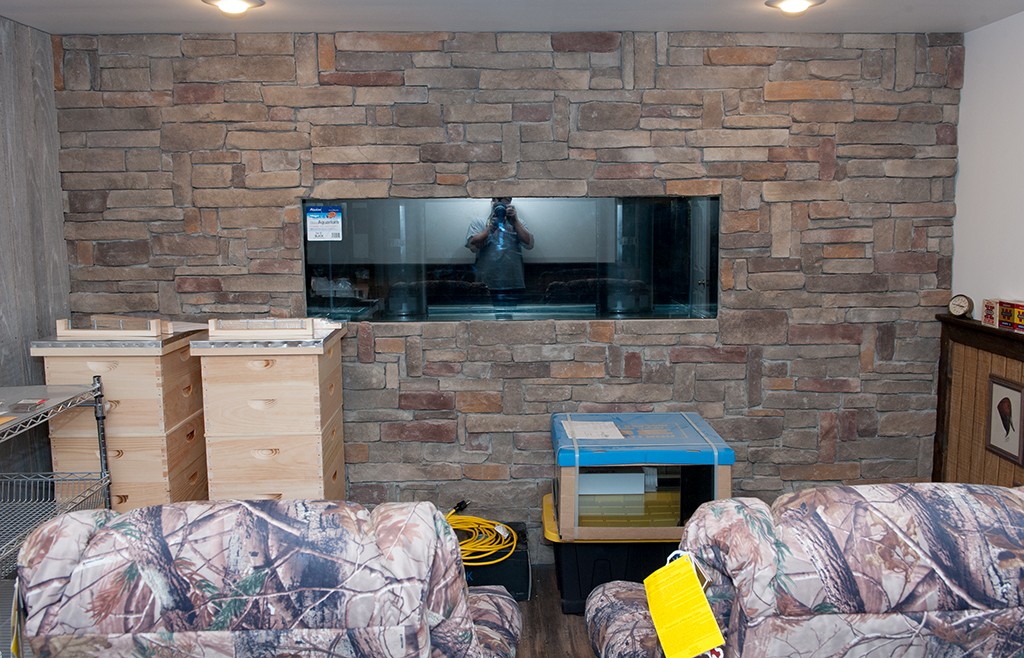
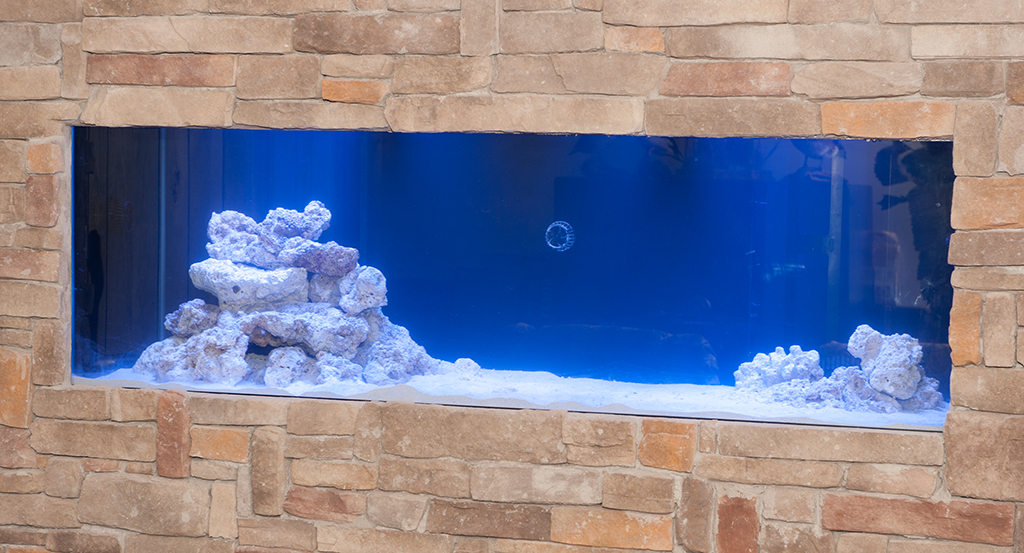
This was right after the last stone was put into place. Neither I or the contractor friend that did most of the work had ever done stone work, so we learned on the fly and it took at least twice as long as it should have.
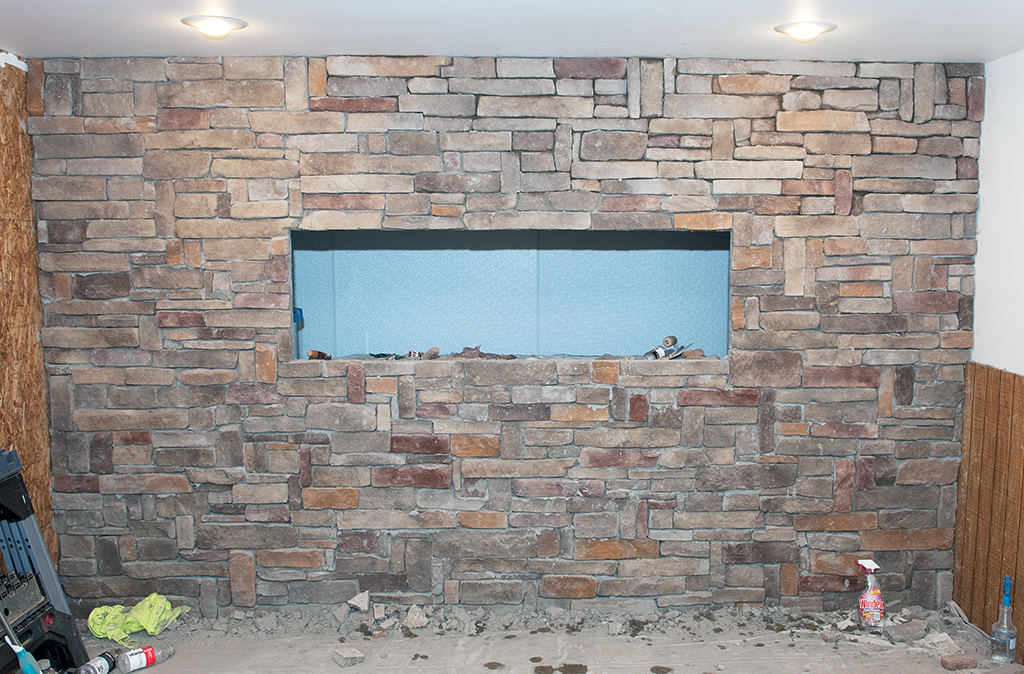
This was right after the last stone was put into place. Neither I or the contractor friend that did most of the work had ever done stone work, so we learned on the fly and it took at least twice as long as it should have.
OP
OP
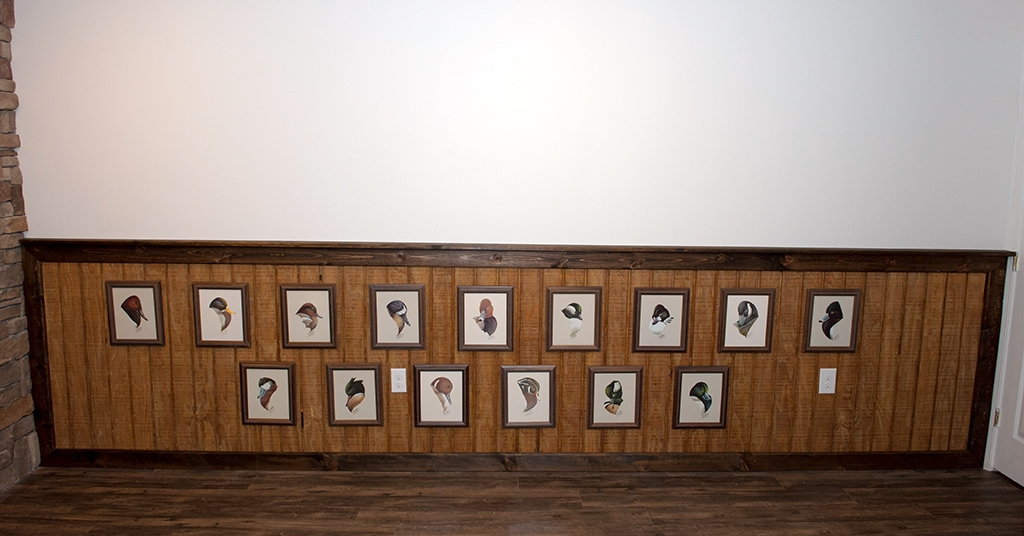
These photos give a better idea of what the room looks like.
The barn wood is rough cut red oak that came from a local Amish mill. It was fresh wood when I first got it. I set it outside and let it weather for more than a year until it looked like what you see in the photo. As long as you have time, this is a lot cheaper than buying weathered barn wood (unless you have access to an old barn).
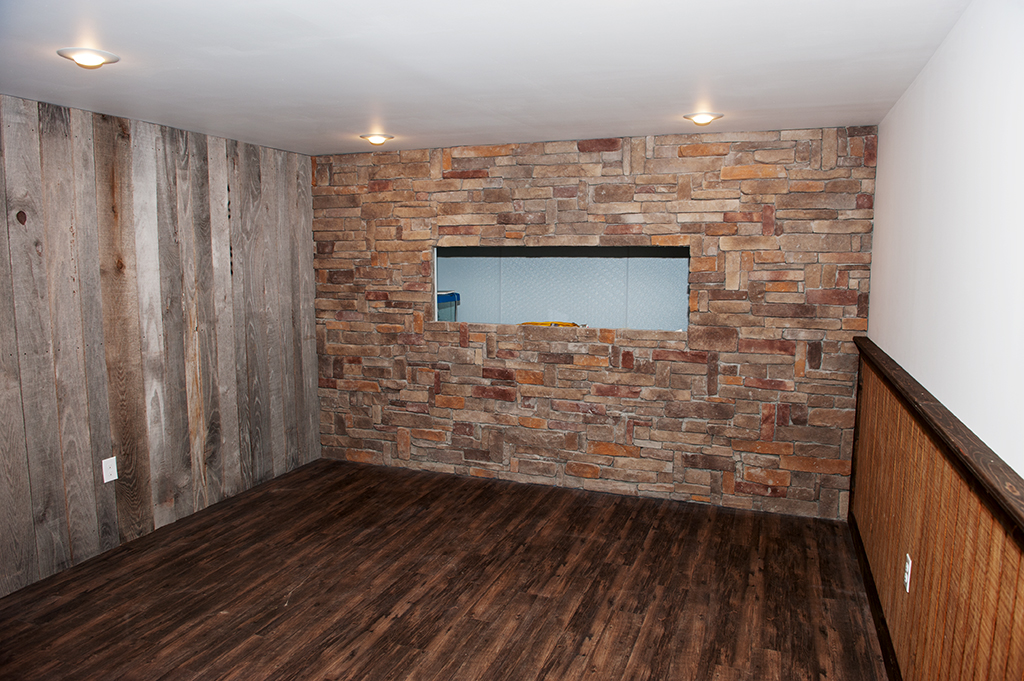
I went to the big box lumber store to select the wainscot and nothing caught my eye. Everything was to finished or fancy. Was on my way out the store and noticed some T1-11 siding that had the rough look and wider boards I was looking for. My contractor buddy stained it and and the contrasting shelf and trim pieces. It was exactly what I had pictured and it wasn't overly expensive. That is a win-win in anyone's book. The floor is a supposed waterproof laminate that snaps together like a normal tongue and groove wood floor. I hope I never find out if it is waterproof or not.
The barn wood is rough cut red oak that came from a local Amish mill. It was fresh wood when I first got it. I set it outside and let it weather for more than a year until it looked like what you see in the photo. As long as you have time, this is a lot cheaper than buying weathered barn wood (unless you have access to an old barn).
I went to the big box lumber store to select the wainscot and nothing caught my eye. Everything was to finished or fancy. Was on my way out the store and noticed some T1-11 siding that had the rough look and wider boards I was looking for. My contractor buddy stained it and and the contrasting shelf and trim pieces. It was exactly what I had pictured and it wasn't overly expensive. That is a win-win in anyone's book. The floor is a supposed waterproof laminate that snaps together like a normal tongue and groove wood floor. I hope I never find out if it is waterproof or not.

- Joined
- Mar 10, 2016
- Messages
- 1,525
- Reaction score
- 1,192
Wow, amazing build already. Following.
OP
OP
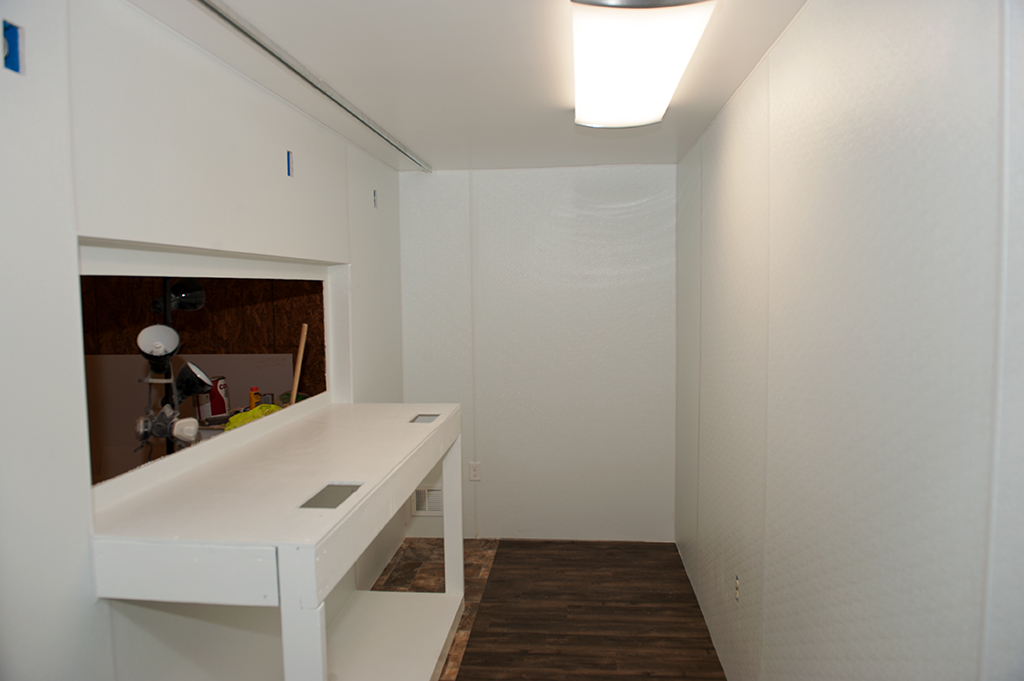
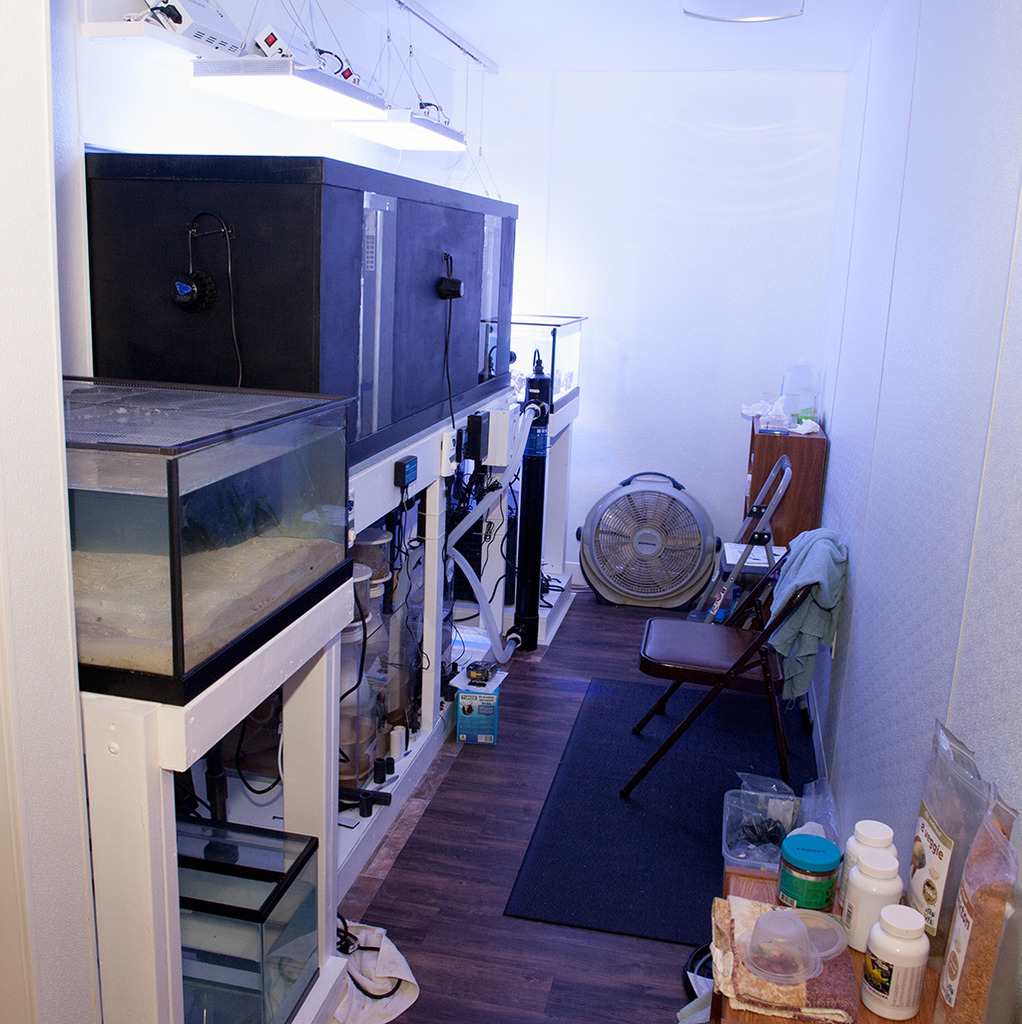
The actual fishroom portion is about 5 foot wide and is accessible from my utility room. I made sure there was an air register in the room and the area where I am standing for this photo is an open doorway. The hope was air would move and humidity would not be a problem. Seems like it worked (knocks on wood). The walls and ceilings were framed and were covered in green board, like you would use around the shower in your bathroom. The walls were then covered in FRP which is a water resistant fiberglass material. You would see this in commercial kitchens and bathrooms. If anything gets on it, you can just wipe it off with a moist cloth and it doesn't matter if it gets wet. All of this was done knowing that this would be a wet environment. I wanted to limit the chance of any mold forming if there were a spill or if humidity became an issue. The stand is built into the wall and is 40" tall which makes a good viewing height when seated in the room. Building this from scratch, I was able to put the electrical outlets where I wanted them. The track on the ceiling is pocket door track. The kit came with rollers that I was able to use to mount the lights. I can slide them wherever I need them.

OP
OP
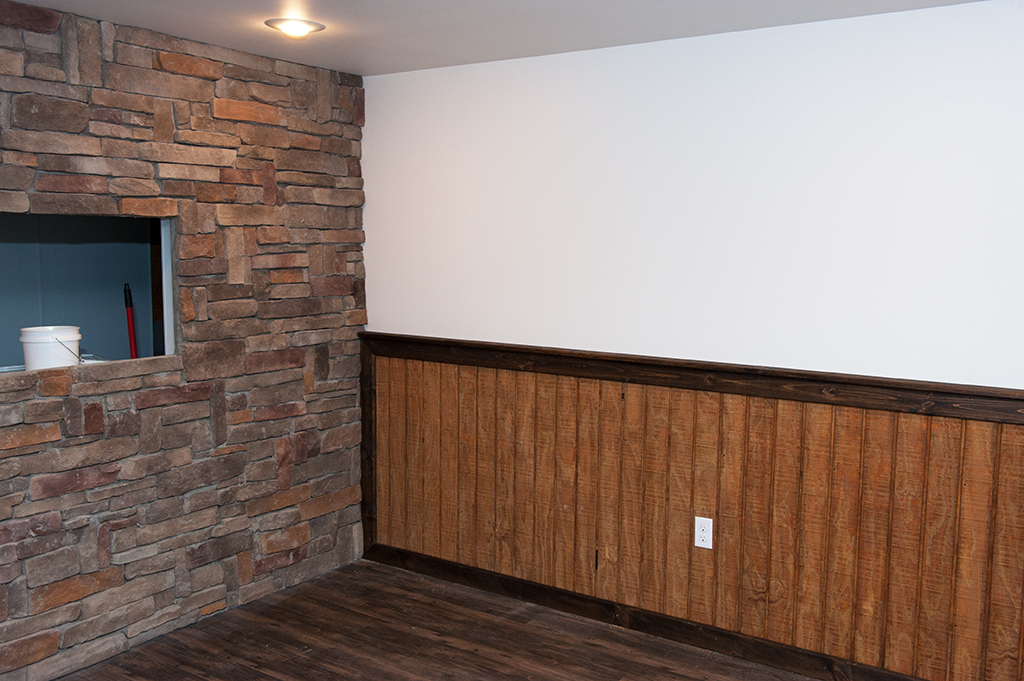
I owned these prints for about 10 years and never had a place to hang them. My original plan was to hang them on the wall. I had a couple of them leaning against the wainscot and decided they contrasted perfectly. I am really happy how they came out.
My wife was happy when the construction portion of the room was complete. I could finally get all the other things that I was accumulating out of her way. This was right after we got the 180 on the stand.
My wife was happy when the construction portion of the room was complete. I could finally get all the other things that I was accumulating out of her way. This was right after we got the 180 on the stand.
OP
OP
I was finally able to start figuring out my plumbing, Winter of 2015. The plan was to have a 30 gallon cube on one side serve as a frag tang and a matching 30 gallon cube on the other side serve as a refugium. It is a single system with everything dumping into a common sump. I went with 2 smaller skimmers with my thought being I would always have a skimmer running when I take one out to clean it. It has worked out fairly well, one will skim well for awhile and then the other one seems to take over after a week or two. This gives me a perfect opportunity to remove the one that isn't skimming well and clean it. All the water passes thru the chiller on the return trip back to the tanks. I have outlets on the common return line that feed all the tanks. The only thing I would change is I should have used 1½" pipe for the common return line. The 1" that I used restricts the flow too much.
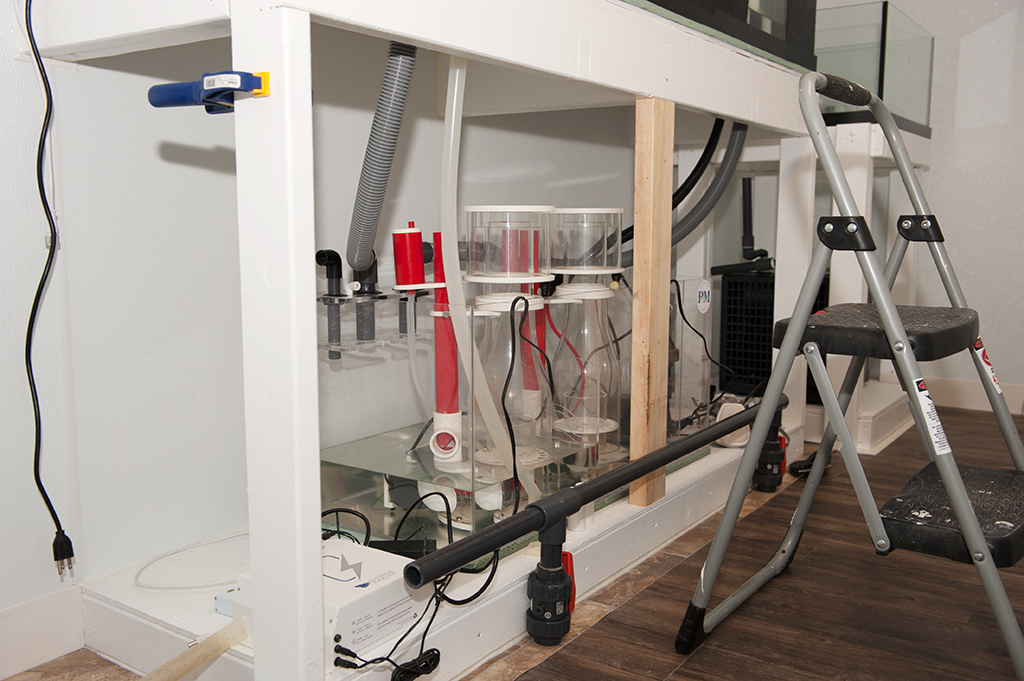
Leak testing most of the system. Lights are hung. UV sterilizer yet to be installed. No leaks!
Leak testing most of the system. Lights are hung. UV sterilizer yet to be installed. No leaks!
OP
OP
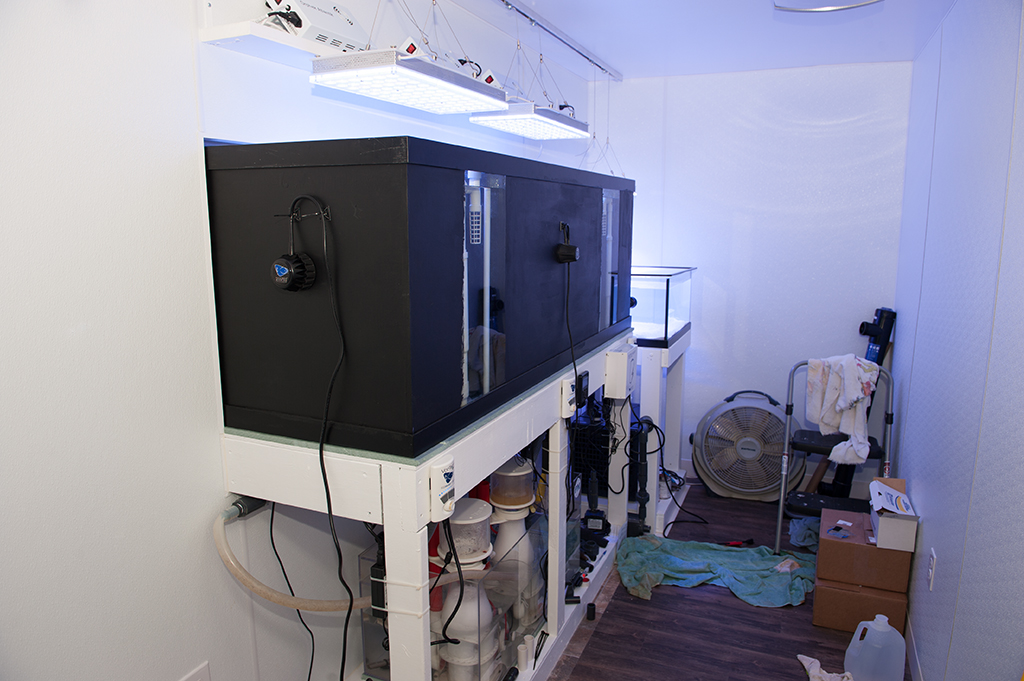
This is probably October 2015. Tank is cycling. This is also the point that I admitted to myself that I am not an aquascaper. One day I will do more than piles and walls.
At this point both 30 gallon cubes are up and running, the UV sterilizer is online and the ATO is installed. I leave the fan running all the time to help move the air out of the room. Evaporation is probably a little higher because of that, but humidity is not an issue. I have a dehumidifier installed just outside the doorway and it rarely comes on. When I first started the tank, I was using a Mag 18 as the return pump. I was not happy with the flow and switched it out with a Mag 24. Flow increased slightly, but not as much as I thought it should. This was when I realized I should have used 1½" pipe. The Mag 24 was loud, so for the first time I tried a DC pump. I will never go back. It is so much quieter in the fishroom and you cannot hear anything in the mancave. It is peaceful watching the tank now.
At this point both 30 gallon cubes are up and running, the UV sterilizer is online and the ATO is installed. I leave the fan running all the time to help move the air out of the room. Evaporation is probably a little higher because of that, but humidity is not an issue. I have a dehumidifier installed just outside the doorway and it rarely comes on. When I first started the tank, I was using a Mag 18 as the return pump. I was not happy with the flow and switched it out with a Mag 24. Flow increased slightly, but not as much as I thought it should. This was when I realized I should have used 1½" pipe. The Mag 24 was loud, so for the first time I tried a DC pump. I will never go back. It is so much quieter in the fishroom and you cannot hear anything in the mancave. It is peaceful watching the tank now.

OP
OP
Was finally able to move the fish out of their temporary 30 gallon home of 2 years.
These are the photos I took when they were in the 150. The draw back of having a tank built into the wall is that the remote flash I use over the tank, when taking photos, does not always get the wireless signal. So, no new fish photos.
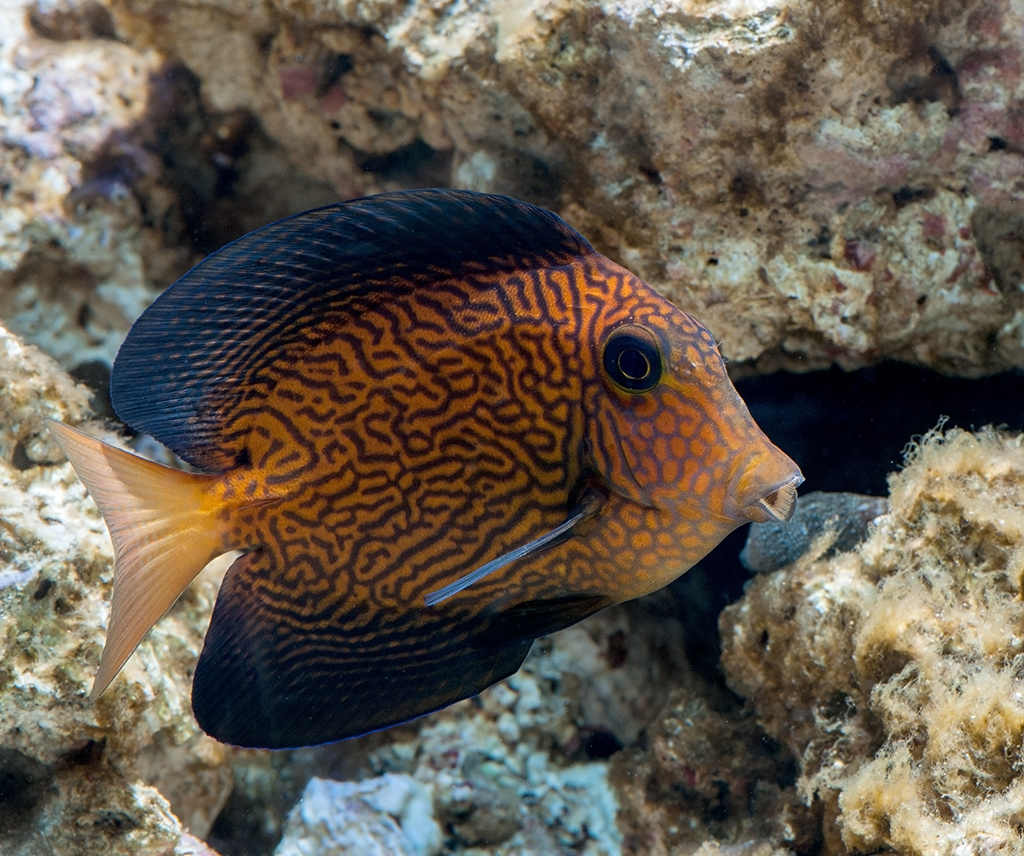
This guy is now in his adult form.
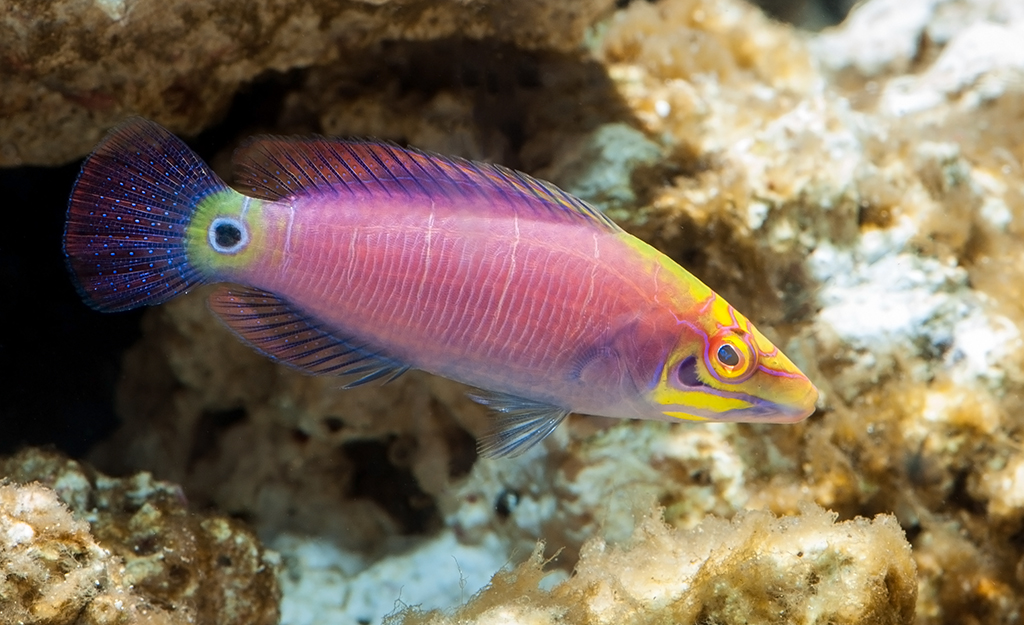
The wrasse was just happy to have more room.
I was down to 1 Anthias when I took the 150 down. I had a group of 10 or 12 when I started. This fish is my Achilles heel. I have never been able to keep them. I have tried large groups and individual fish, no luck. This one didn't survive long enough to see the new 180.
These are the photos I took when they were in the 150. The draw back of having a tank built into the wall is that the remote flash I use over the tank, when taking photos, does not always get the wireless signal. So, no new fish photos.
This guy is now in his adult form.
The wrasse was just happy to have more room.
I was down to 1 Anthias when I took the 150 down. I had a group of 10 or 12 when I started. This fish is my Achilles heel. I have never been able to keep them. I have tried large groups and individual fish, no luck. This one didn't survive long enough to see the new 180.
Looks like a well thought out build. Great work!
Random but I remember you from the avatar and great photography. In my FW days I bought a 40L from you when I was in CCA. Small world!
Random but I remember you from the avatar and great photography. In my FW days I bought a 40L from you when I was in CCA. Small world!
OP
OP
Around Christmas of 2015 the tank developed an extremely bad case of hair algae. It was the type that looks like little green afros and it was everywhere in the display tank. None in either of the 30 cubes. I did not despair this time, after all it wasn't aiptasia. Algae I can deal with. I added GFO/Carbon to a reactor and did larger, more frequent water changes.
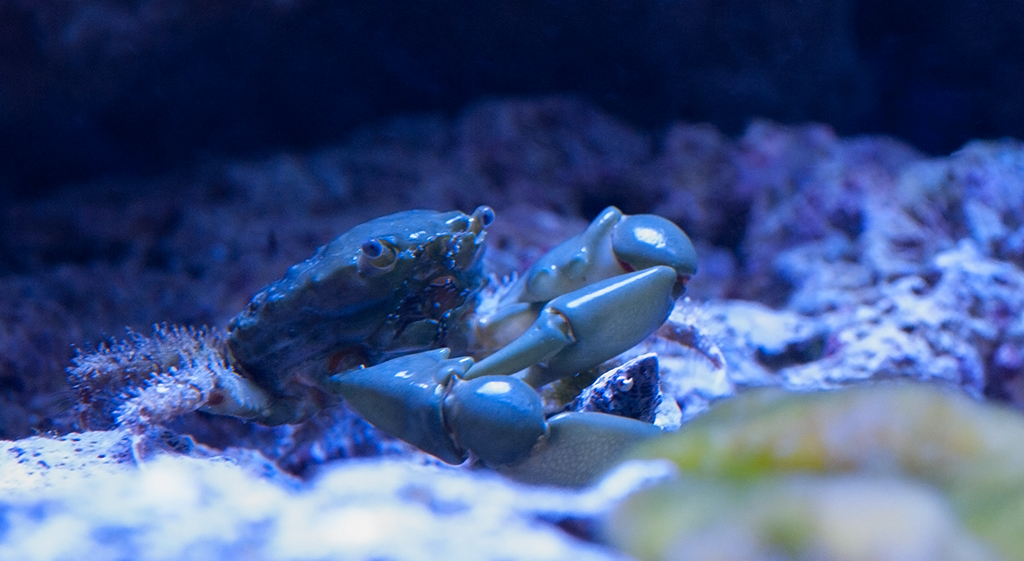
I also got a small army of Emerald Crabs and as of today, you have to look closely to find any algae in the tank.
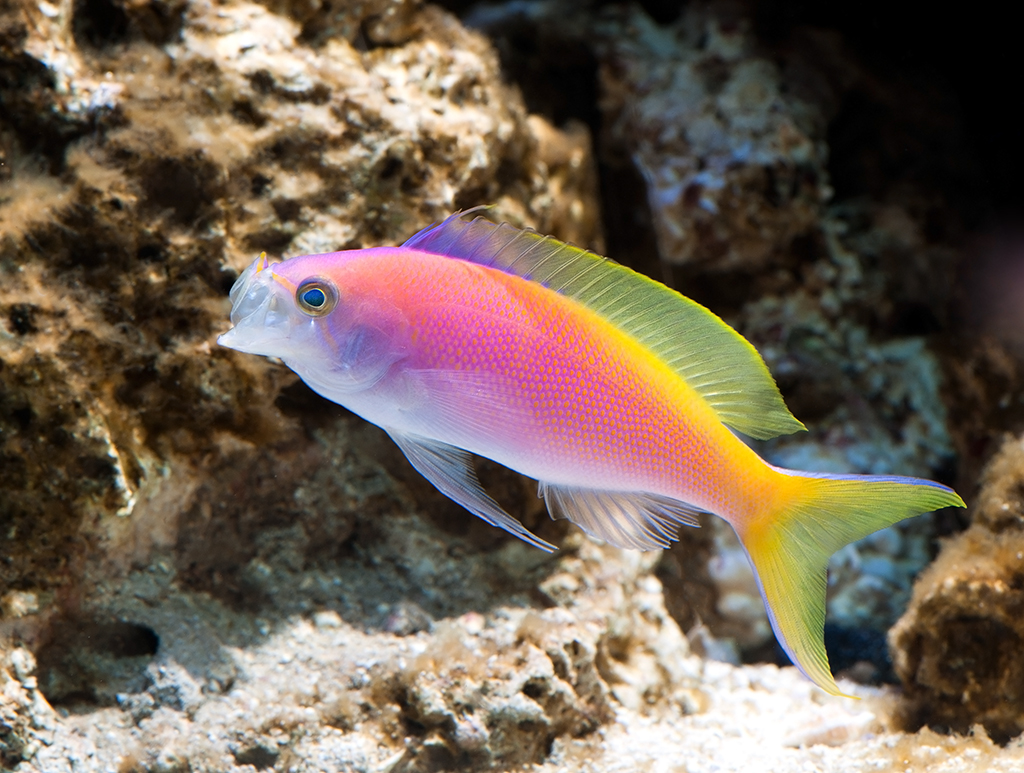
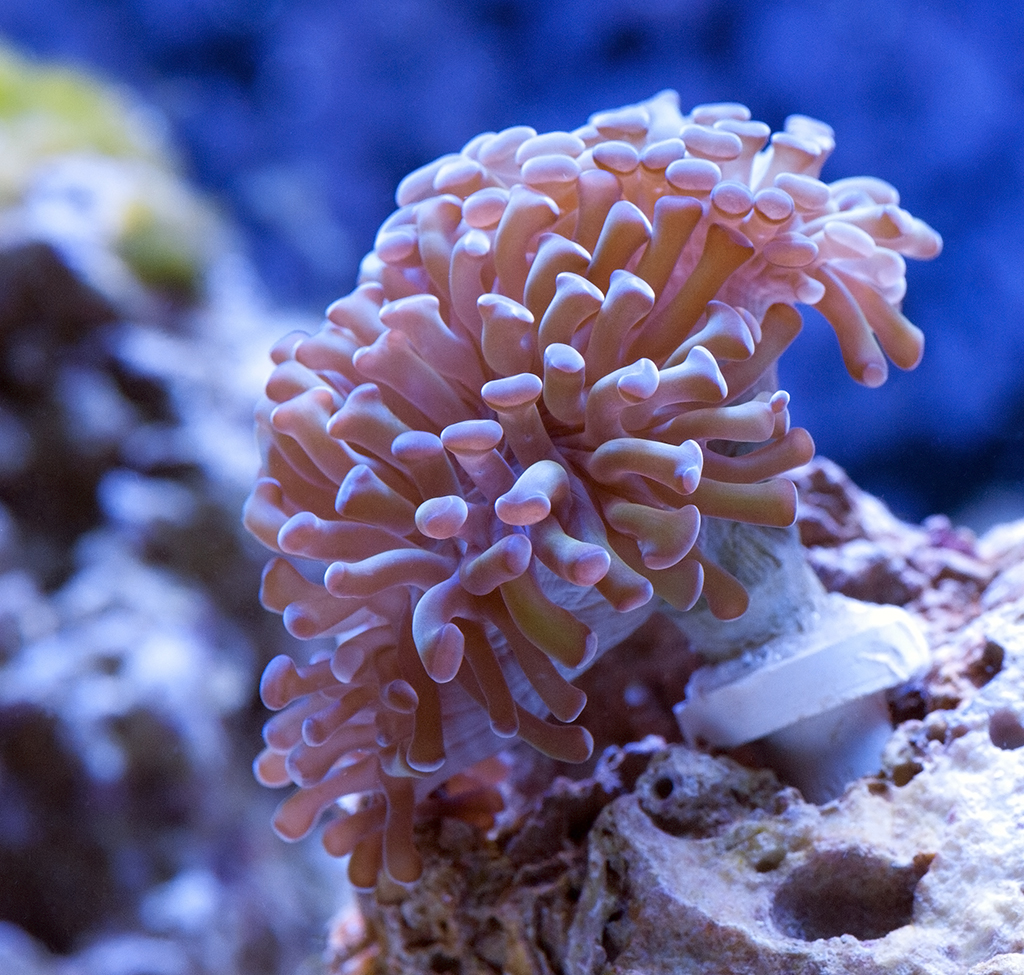
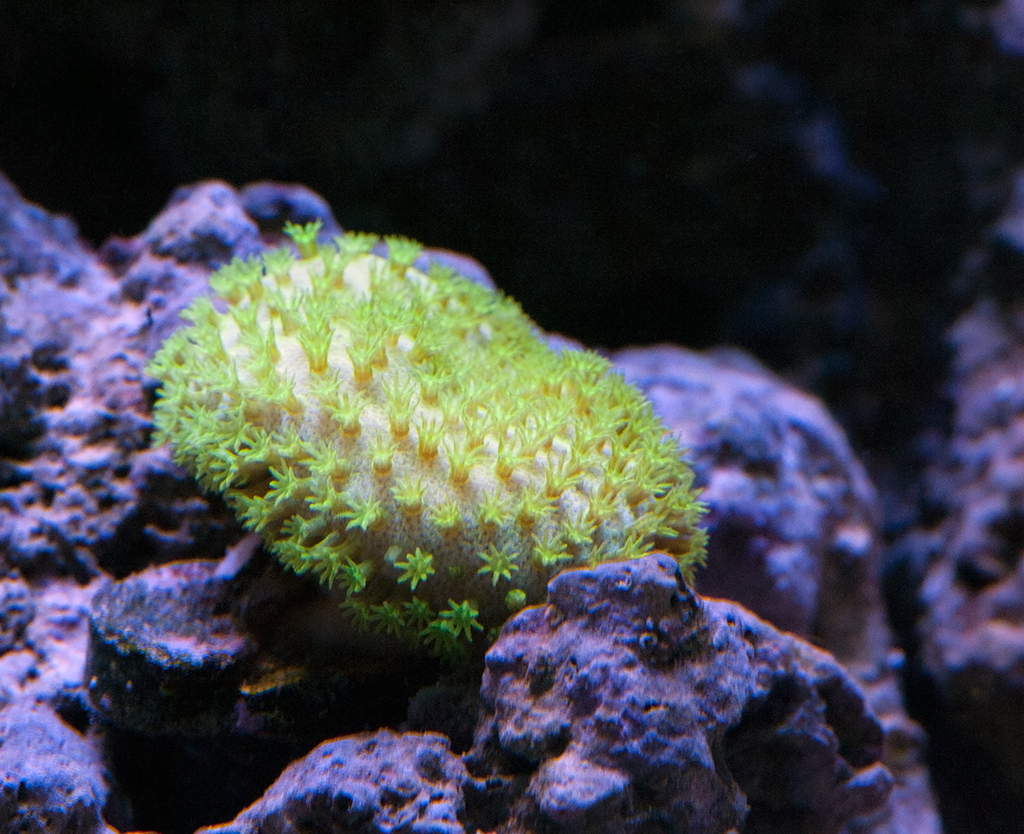
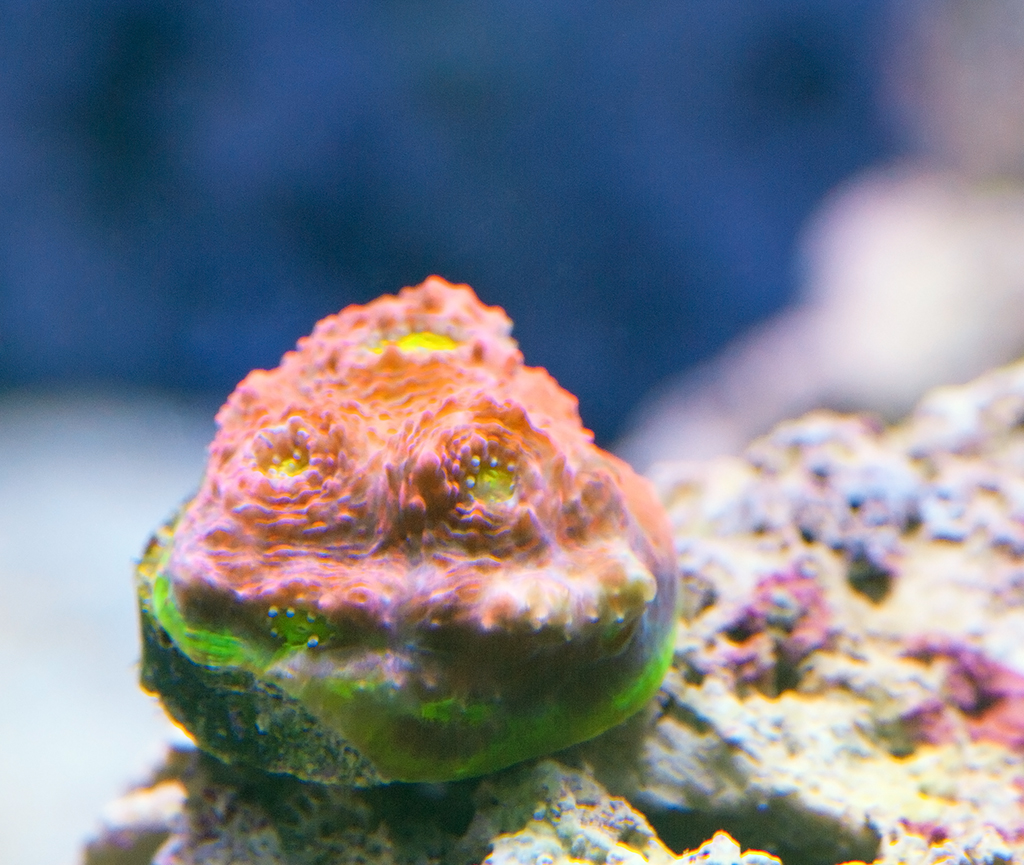
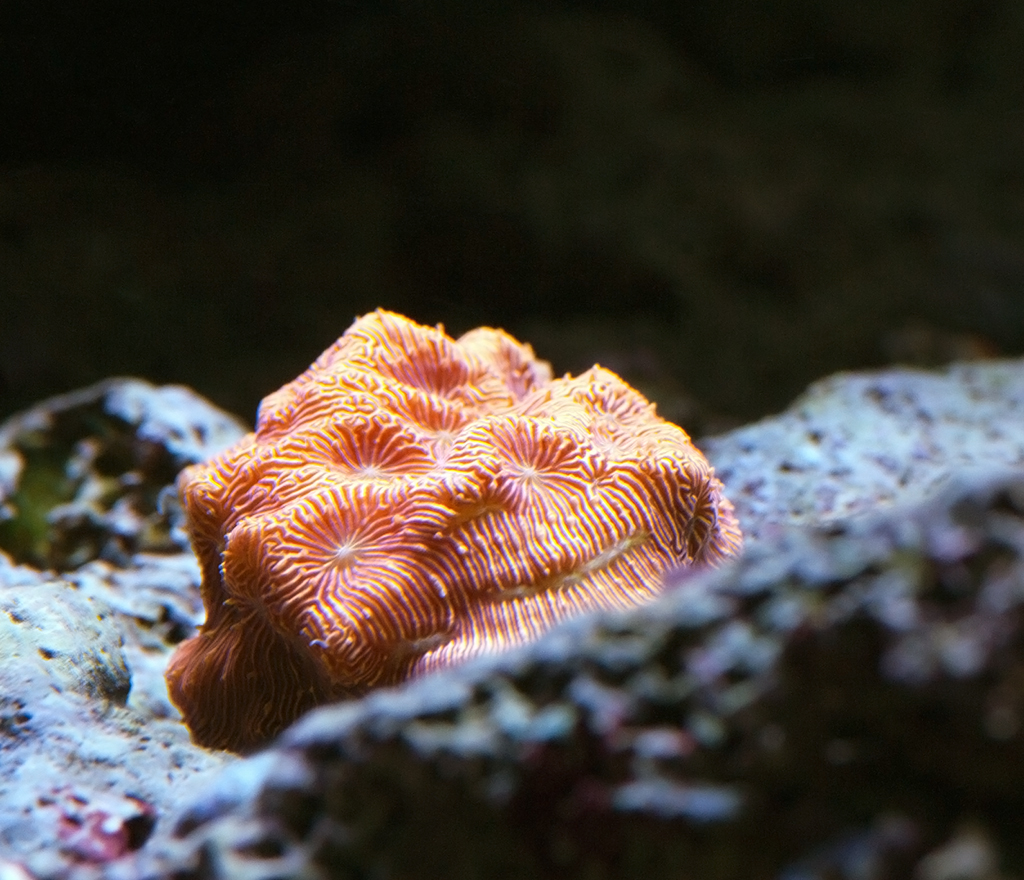
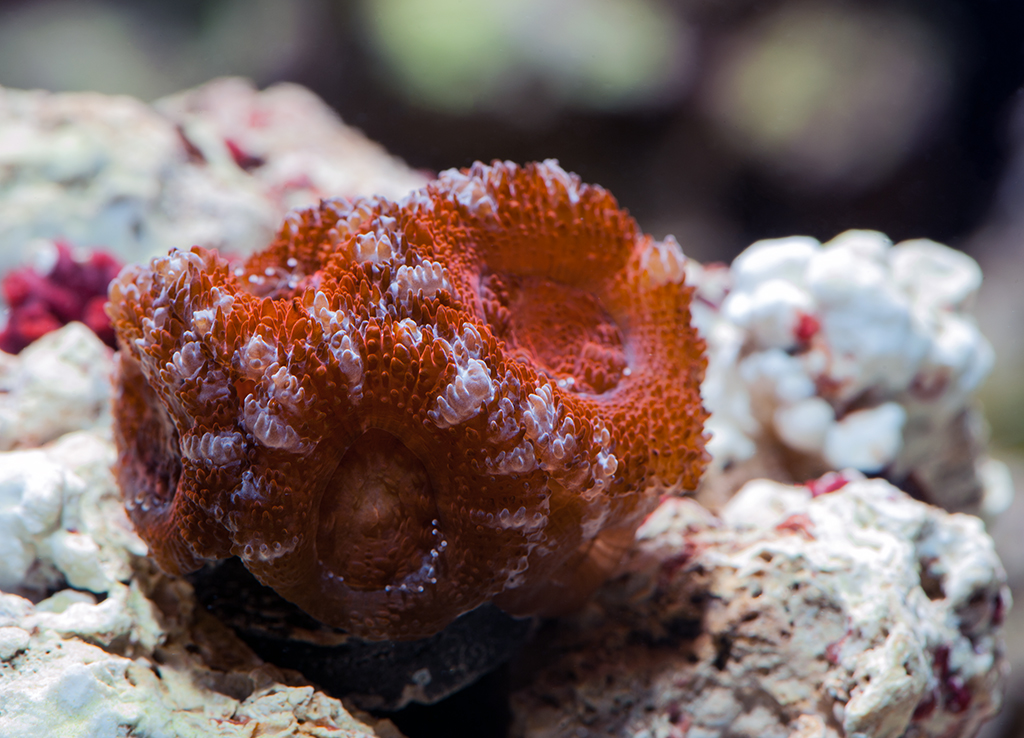
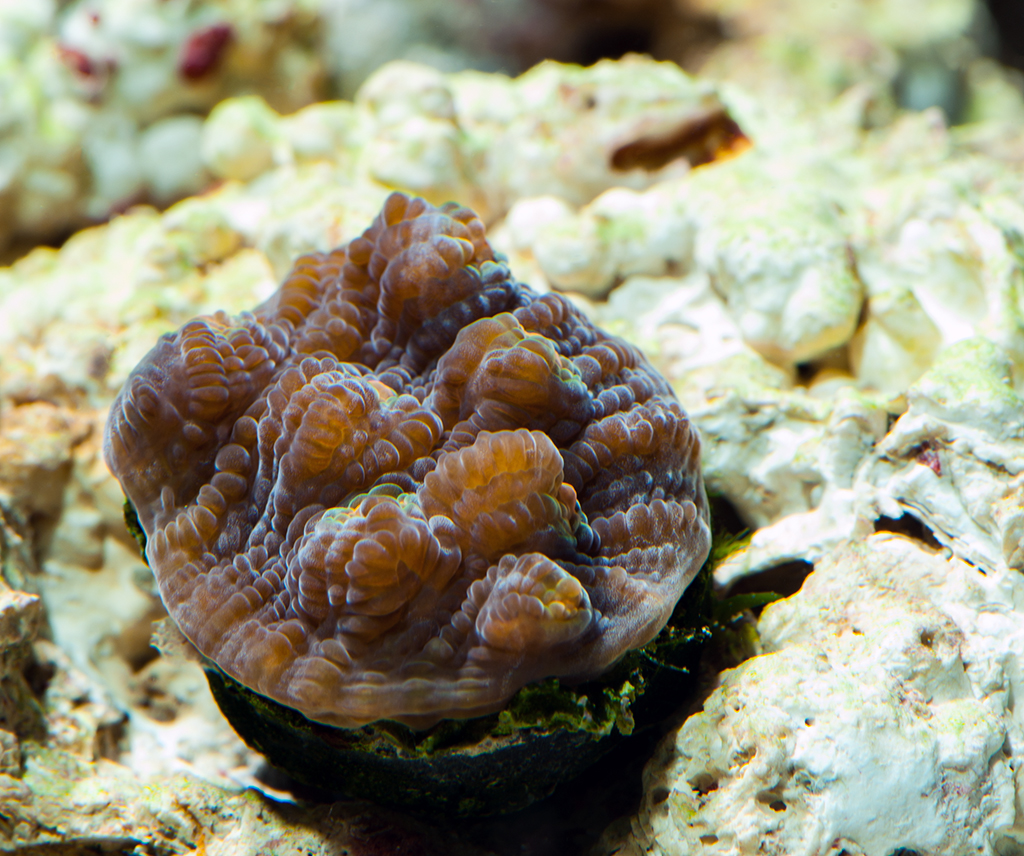
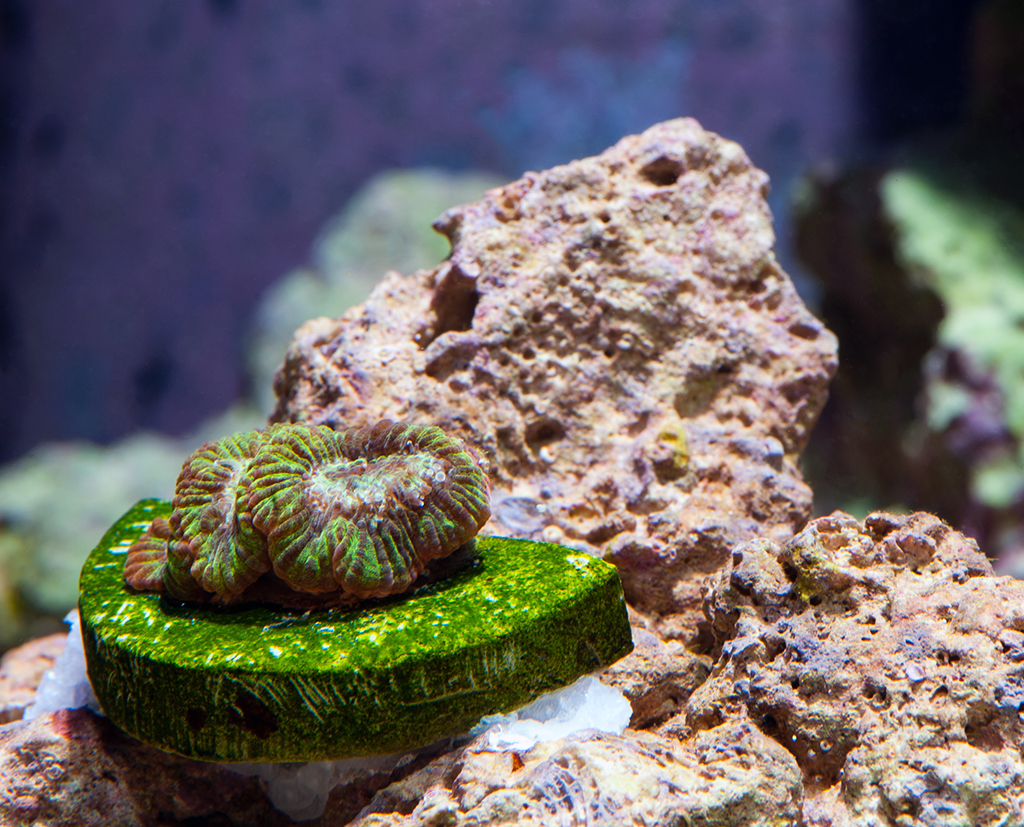
I also started adding frags to the tank. I started keeping marine fish in the 80's, but did very little with corals. This is really my first dedicated reef tank, so I will learn a lot of do's and dont's as these frags grow out.
I also got a small army of Emerald Crabs and as of today, you have to look closely to find any algae in the tank.
I also started adding frags to the tank. I started keeping marine fish in the 80's, but did very little with corals. This is really my first dedicated reef tank, so I will learn a lot of do's and dont's as these frags grow out.

OP
OP
Looks like a well thought out build. Great work!
Random but I remember you from the avatar and great photography. In my FW days I bought a 40L from you when I was in CCA. Small world!
Thanks. Trying to photograph under LED lights has been kicking my butt. Every time I think I figure it out, the colors end up looking way off. I do like a challenge though.

OP
OP
During this entire process I was able to find a local club, Southern Maryland Marine Aquarium Society (SMMAS). Small club with a lot of great guys and gals willing to provide advice or lend a helping hand when needed. I have also found that fish/reef clubs are a great place to buy and trade for equipment and frags.
The tank will be an ongoing work in progress and I will try to update this thread as things grow out and change. Thanks for following along.
The tank will be an ongoing work in progress and I will try to update this thread as things grow out and change. Thanks for following along.

revhtree
Owner Administrator
View Badges
Staff member
Super Moderator
Reef Squad
Partner Member 2024
Excellence Award
RGB
Photo of the Month
Article Contributor
R2R TV Featured
Hospitality Award
Article Administrator
Black Friday Sponsor
Partner Sponsor 2023
Industry Professional
My Aquarium Showcase
- Joined
- May 8, 2006
- Messages
- 47,739
- Reaction score
- 86,873
Wonderful job!
Amazing Tank! I am just in the planning/design process of an in wall tank. This will help out. Thank you and I am following.
It's a awesome build thread. You mention you built fish room within area with a register but do you have a return? Without a return to remove old air it will not cool roomThe actual fishroom portion is about 5 foot wide and is accessible from my utility room. I made sure there was an air register in the room and the area where I am standing for this photo is an open doorway. The hope was air would move and humidity would not be a problem. Seems like it worked (knocks on wood). The walls and ceilings were framed and were covered in green board, like you would use around the shower in your bathroom. The walls were then covered in FRP which is a water resistant fiberglass material. You would see this in commercial kitchens and bathrooms. If anything gets on it, you can just wipe it off with a moist cloth and it doesn't matter if it gets wet. All of this was done knowing that this would be a wet environment. I wanted to limit the chance of any mold forming if there were a spill or if humidity became an issue. The stand is built into the wall and is 40" tall which makes a good viewing height when seated in the room. Building this from scratch, I was able to put the electrical outlets where I wanted them. The track on the ceiling is pocket door track. The kit came with rollers that I was able to use to mount the lights. I can slide them wherever I need them.
I learned this from my AC guy when my brand new house had hot bedrooms in summer (builder put only one return for entire second floor)
Similar threads

- Replies
- 12
- Views
- 461


