Basic Underwater Photography in Aquariums
@Jay Hemdal c.2021
@Jay Hemdal c.2021
Aquarists often have difficulty photographing animals in their aquariums. Not only do they have the same problems as other photographers (flash reflection off the glass, issues with white balance, fast moving subjects, etc.) they have the added difficulty of distortion caused by much thicker viewing panels (often with fingerprints or scratches on the surface). In some cases, the answer is to photograph the subject animal in a special photo tank (Axelrod 1970). I have used photo tanks “from-the-side” as well as "top down". However, they only work for small specimens and anesthesia to keep the fish calm is often required. Additionally, there are still problems with surface glare from the flash.
Another method that should be explored is the use of underwater cameras inside aquariums. While this technique has the obvious benefits of no issues with glare from the exhibit glazing, and closer proximity to the subject, it also has a different drawback; backscatter (when the flash hits particles in the water) is worsened in underwater photos. This can be minimized by avoiding disturbing any detritus and by not feeding the tank before taking underwater shots. Image editing software can be used to remove any particle "flares" that might remain. One other problem with in-tank underwater photography is the vantage point – often obliquely from above the subject. While this can be used for its novel effect, you wouldn't want to have every image shot from this angle.
In my attempts to produce better images through technology, (as opposed to trying to improve any possible artistic talent I might have!) I’ve purchased a succession of underwater cameras over the years:
Early attempts:
My first attempts at in-tank underwater photography relied on small film cameras; first the Minolta Weathermatic 110 and later the SeaLife 35mm. The minimum focus distance on both of these cameras was too long to be of any real use inside most aquariums. Later, I purchased a 3.2 megapixel Canon ELPH in a waterproof case. This allowed for barely tolerable results as the housing was bulky and the camera had relatively low resolution.
10 megapixel Pentax Optio W60:
This camera is water resistant to 14 feet without a special housing. Costing only $100 used on Ebay, it gives fairly good results, and doubles as a good small camera for above water snapshots. The water resistant latch for the battery and memory card is not very strong or secure. Be careful not to bump it while underwater, to avoid a possible leak. Pentax has come out with newer, improved versions of this camera.
Cryptic sponges photographed by placing an
Optio W60 under some live rock in a sump and blindly pressing the shutter.
Portrait of a longnose hawkfish cropped from a larger image taken with a Optio W60
Nikon AW100 Coolpix camera:
The Nikon is a $320 camera that is waterproof to 10 meters and shock-proof from 1.5 m. Its 16 megapixel sensor and image stabilization holds some promise towards my meeting my goal of "better images through better equipment". The AW100 took a little bit of getting used to - having the lens opening in the upper left corner of the camera meant that my finger sometimes strayed into the shot. The close proximity of the flash and the lens (common to many pocket cameras) means that red-eye and backscatter can be more of an issue than with a camera having a remote strobe.
This camera can focus as close as 1 cm from the lens in Macro mode – but because the flash is off to one side, extreme close-ups may not be lighted properly, and may show strong shadows.
The GPS function of this camera is just a novelty for me now - but who knows, it may have some use while on collecting trips or other outdoor excursions.
The Nikon AW100 can also take 1080p hd video, here is a short underwater video of flashlight fish in a public aquarium exhibit:
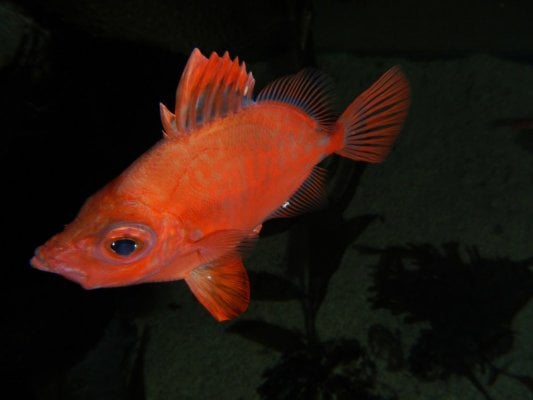
Boarfish photographed in its exhibit with a Nikon AW100
Nikonos:
Seeing the glut of reasonably priced Nikonos film cameras for sale on EBay, I succumbed to temptation and through a series of purchases, amassed a full set of working set of gear including two cameras, three lenses and a strobe. My presumption was that the outstanding quality of this equipment would off-set the drawback of using non-digital camera equipment. This turned out to be false, the results I could obtain with the Nikonos equipment was better than the Pentax Optio, but not nearly as good as the Nikon AW100. The cost and delay in film processing relegated my Nikonos gear into storage then for sale back on EBay.
Nikonos V film camera and strobe.
Top-down image of a reef tank taken with a Nikonos V film camera.
Other cameras:
There are many other cameras available that can be used for in-tank underwater photography. The following is an older list of some that may be suitable:
| Camera Model | Features | Original street price |
| Sea & Sea DX-1G | 10mp Digital Camera w/housing | $995 |
| Sealife SL708 DC1200 | Digital Camera and strobe 200’ rating | $740 |
| Panasonic DMC-TS3 | 12.1 MP Digital Camera 40’ rating | $289 |
| SeaLife Mini II SL330 | 9MP Digital Camera, 130’ rating | $230 |
| Pentax Optio WG-1 | 14mp Digital camera 33’ rating | $198 |
| Intova IC-12 | 12mp Digital Camera 180’ rated housing | $170 |
| Vivitar 8400 | 8.1 MP 2.4" LCD Digital Camera 33’ rating | $92 |
| Bell & Howell Splash WP5 | 12mp Digital Camera 10’ rating | $59 |
| Olympus TG-5/6 | 12mp, 4K video, 50’ rating | $400 |
Top-down image of some brown Montipora with rapid tissue necrosis, Olympus TG-5
Same perspective, 24 hours later, showing progression of the disease.
Hints and tips:
In-tank photography can often best be done while diving (in large tanks). Beware that there is sometimes a time rating and well as a depth rating for underwater cameras; such as: “15 feet for 1 hour”. You might exceed this time during long dives.
When first submerging a camera, brush off any air bubbles that might be adhering to the outside of the lens.
Actinic lights and blue LEDs can cause severe fringing in the image. I usually turn these lights off before filming; although Photoshop can partially correct this (see sample images).
In-tank shots taken while standing next to the tank make it very difficult to frame your image. One solution is to “shoot from the hip” and just take a picture in the general direction of the subject. Then, in post-processing, you can crop the image to align the subject where you want it to be.
Setting the flash on partial power will illuminate the subject, while causing the background to become dark – a good technique for highlighting a fish (as in the boarfish image above).
After use, soak the camera in deionized water, then air dry. Never let saltwater dry on a camera, it can damage the O-rings. Do not rinse the camera under a faucet; the force of the water can unseat the O-rings, causing a flood.
Post-processing is important. People sometimes feel that retouching a photo is akin to lying, and that may be the case if you’re a newspaper photographer. However, if your goal is to create a better image of an animal for a specific use and editing the image helps accomplish that, then post-processing is a valid tool.
Don't be afraid to think outside the box. In one shot, I wasn't able to hold the camera at the proper angle, so I made the shot with the camera upside-down and then just flipped the image in Photoshop.
Blue chromatic aberration on Acropora Blue tinged edge mostly removed in Photoshop caused by blue LED lighting – close up.
References:
Axelrod, H.R. 1970. Photography for Aquarists. TFH Publications, Neptune, New Jersey.
Hemdal, J.F. 2006. Advanced Marine Aquarium Techniques. TFH Publications, Neptune, New Jersey.
Top down, underwater image of a 2000-gallon reef. Straight from an Olympus TG-5, no post-processing.