For a while I have thought that I would have to learn HomeBridge (for a HomeBridge version “how-to” please refer to @blazeby's R2R article) to be able to use Siri to control my Neptune Apex. But this changed after Apple in 2018 bought WorkFlows and renamed it to Shortcuts.
First, I sincerely appreciate @afhtan, who in Aug 2017 published an article called “Guide: How to control Neptune Apex using Google Home” in the R2R forum here. He did all the hard work including using Wireshark to sniff Apex messages. It is now an open Pandora's Box and makes possible all voice-assist tools to talk to Apex.
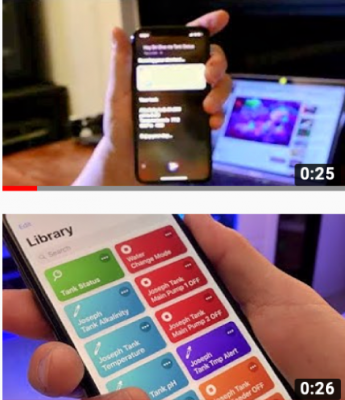
Before a detailed step-by-step of how I make SCA (Siri Control Apex) work, here are two YouTube clips I posted a while ago, here and here, to give you some idea of SCA. I'm sorry that it has taken me much longer than expected to publish “SCA how-to” article that I had promised.

Part I: Write Apex
Let’s start with the easy one--“write” Apex first. Yes, it is actually more steps if we try to “read” Apex, which I will addressed in Part II in this article.
Step 0: Build your environment
Install Shortcuts (Fig. 1). It is a free APP that you can easily install from the Apple APP store.
As addressed in Afhtan’s article, the Apex controller will follow your command if the following message is received.
Step 2: Get access to Apex and issue your command
In the Shortcuts design, unlike simply opening a command line window and issuing a command, you need first (fig.3) to wrap your password in Text format and use a Base64 Encode library. Then put them into your URL. (Note: I omitted my Apex password and my Apex URL, but it should be straightforward by following Afhtan's provided Apex command example.)
And that is it. You just completed your first Shortcuts.
Don’t forget to give your new Shortcuts a name and an icon. I won’t cover this in detail here but there are a lot of YouTube videos that cover it.
Step 3 Put all your new Shortcuts into one
Ok, now you have your first Shortcuts ready, but usually we would like Siri to do multiple things with a single command. For that, you may use Step 2 to create as many Shortcuts as you need first. For example, when I do a water change, I want (a) all wavemakers to stop and all reactors to stop, (b) two main pumps to stop, and (c) a LED light in sump to turn ON. For (a), I decide to use Apex feeder mode to trigger them off, so all I need to do is a Shortcut to turn ON feeder mode. (Note: If you are not familiar with Apex’s programming logic, please check the Apex user manual). You can use step 2 to easily get this done. For (b), and (c), I create a few more Shortcuts to turn pumps OFF and LED ON separately.
Once all these Shortcuts are ready, simply create a “water change mode” Shortcut to put all of them into one Shortcut. (see Fig. 5). You can also add a “Show Result” (Fig. 6) library to allow Siri say something reflect the results.
Step 4: Train your Siri to recognize your new Shortcuts
Once I put all Shortcuts into one “Water Change Mode” Shortcuts, I would like to train my Siri to recognize my voice. To do so, please go to Name and Icon set-up page, under Siri Phrase (Fig. 7), train your Siri to recognize your vocal commands.
That's it. Now you can ask Siri to issue command(s) to manage your Neptune Apex. My water change mode YouTube video is available here.
Part II: Read Apex
As mentioned, Read Apex is a few steps more when compare to Write Apex. However, step 0 to step 2 are exactly the same.
Step 3: Parsing your target value by Regex
There may be many better approaches to find the value you are looking for: I choose parsing and retrieving from Apex HTML message. Let’s take tank's ORP value as an example.
By checking the entire Apex HTML message, I found my tank's ORP value 429 is located in a particular section (Fig. 8).
Step 4: Let Siri tell you the value
Please refer to Step 3 to get other Apex probe values (PH, Temp, etc..). Now you can create new Shortcuts such as “Tank Status”, add “Run Shortcuts” library, map those Shortcuts you created in Step 3, and follow with a “Set Variable” library to give the variable a name (e.g. ORP), and at the end, add a “Show Result” to reflect the results. (Fig.10)
Don’t forget to train your Siri to recognize your new Shortcuts command as Step 4 in Part I.
That's it. Here is a YouTube video of my tank status.
~~~~~~~~~~~~~~~~~~~~
Note from the Editor: This article was written by someone for whom English is not his first language. I have tried to improve its readability, but I'm limited by not being an expert either on Apex or computer programming. Any errors are likely mine. All images are courtesy of @shih87.
~~~~~~~~~~~~~~~~~~~~
We encourage all our readers to join the Reef2Reef forum. It’s easy to register, free, and reefkeeping is much easier and more fun in a community of fellow aquarists. We pride ourselves on a warm and family-friendly forum where everyone is welcome. You will also find lots of contests and giveaways with our sponsors.
~~~~~~~~~~~~~~~~~~~~
Author Profile: @shih87
@shih87 is one of our forum members living in Taiwan. The build thread for his beautiful high-tech tank can be found here.
First, I sincerely appreciate @afhtan, who in Aug 2017 published an article called “Guide: How to control Neptune Apex using Google Home” in the R2R forum here. He did all the hard work including using Wireshark to sniff Apex messages. It is now an open Pandora's Box and makes possible all voice-assist tools to talk to Apex.
Before a detailed step-by-step of how I make SCA (Siri Control Apex) work, here are two YouTube clips I posted a while ago, here and here, to give you some idea of SCA. I'm sorry that it has taken me much longer than expected to publish “SCA how-to” article that I had promised.
Let’s start with the easy one--“write” Apex first. Yes, it is actually more steps if we try to “read” Apex, which I will addressed in Part II in this article.
Step 0: Build your environment
Install Shortcuts (Fig. 1). It is a free APP that you can easily install from the Apple APP store.
Figure 1

Step 1: Understand Apex command
As addressed in Afhtan’s article, the Apex controller will follow your command if the following message is received.
Figure 2

If you would like to understand more detail about state option 0, 1, and 2, please refer to Afhtan’s article (here is that link again.)
Step 2: Get access to Apex and issue your command
In the Shortcuts design, unlike simply opening a command line window and issuing a command, you need first (fig.3) to wrap your password in Text format and use a Base64 Encode library. Then put them into your URL. (Note: I omitted my Apex password and my Apex URL, but it should be straightforward by following Afhtan's provided Apex command example.)
Figure 3

Last step in the Shortcuts design is just simply call “Get Contents of URL” library (Fig. 4) and select “POST” method (default), and don’t forget to change Authorization from “Basic” to “Base64 Encode” in the header section.
Figure 4

And that is it. You just completed your first Shortcuts.
Don’t forget to give your new Shortcuts a name and an icon. I won’t cover this in detail here but there are a lot of YouTube videos that cover it.
Step 3 Put all your new Shortcuts into one
Ok, now you have your first Shortcuts ready, but usually we would like Siri to do multiple things with a single command. For that, you may use Step 2 to create as many Shortcuts as you need first. For example, when I do a water change, I want (a) all wavemakers to stop and all reactors to stop, (b) two main pumps to stop, and (c) a LED light in sump to turn ON. For (a), I decide to use Apex feeder mode to trigger them off, so all I need to do is a Shortcut to turn ON feeder mode. (Note: If you are not familiar with Apex’s programming logic, please check the Apex user manual). You can use step 2 to easily get this done. For (b), and (c), I create a few more Shortcuts to turn pumps OFF and LED ON separately.
Once all these Shortcuts are ready, simply create a “water change mode” Shortcut to put all of them into one Shortcut. (see Fig. 5). You can also add a “Show Result” (Fig. 6) library to allow Siri say something reflect the results.
Figure 5

Figure 6

Figure 6
Step 4: Train your Siri to recognize your new Shortcuts
Once I put all Shortcuts into one “Water Change Mode” Shortcuts, I would like to train my Siri to recognize my voice. To do so, please go to Name and Icon set-up page, under Siri Phrase (Fig. 7), train your Siri to recognize your vocal commands.
Figure 7

That's it. Now you can ask Siri to issue command(s) to manage your Neptune Apex. My water change mode YouTube video is available here.
Part II: Read Apex
As mentioned, Read Apex is a few steps more when compare to Write Apex. However, step 0 to step 2 are exactly the same.
Step 3: Parsing your target value by Regex
There may be many better approaches to find the value you are looking for: I choose parsing and retrieving from Apex HTML message. Let’s take tank's ORP value as an example.
By checking the entire Apex HTML message, I found my tank's ORP value 429 is located in a particular section (Fig. 8).
Figure 8

The rest is straightforward. I first run a “Make HTML from Rich Text” library in Shortcuts to dump all HTML messages to Shortcuts; and then convert <BR> to space for some text clean up; at the end, run a Regex in “Match Text” library to get my ORP value (Fig. 9).
Figure 9

Step 4: Let Siri tell you the value
Please refer to Step 3 to get other Apex probe values (PH, Temp, etc..). Now you can create new Shortcuts such as “Tank Status”, add “Run Shortcuts” library, map those Shortcuts you created in Step 3, and follow with a “Set Variable” library to give the variable a name (e.g. ORP), and at the end, add a “Show Result” to reflect the results. (Fig.10)
Figure 10

Don’t forget to train your Siri to recognize your new Shortcuts command as Step 4 in Part I.
That's it. Here is a YouTube video of my tank status.
~~~~~~~~~~~~~~~~~~~~
Note from the Editor: This article was written by someone for whom English is not his first language. I have tried to improve its readability, but I'm limited by not being an expert either on Apex or computer programming. Any errors are likely mine. All images are courtesy of @shih87.
~~~~~~~~~~~~~~~~~~~~
We encourage all our readers to join the Reef2Reef forum. It’s easy to register, free, and reefkeeping is much easier and more fun in a community of fellow aquarists. We pride ourselves on a warm and family-friendly forum where everyone is welcome. You will also find lots of contests and giveaways with our sponsors.
~~~~~~~~~~~~~~~~~~~~
Author Profile: @shih87
@shih87 is one of our forum members living in Taiwan. The build thread for his beautiful high-tech tank can be found here.