• Dane's DIY A̶I̶O̶ Lagoon Build Thread & Progression •

Alemoki

Active Member
View Badges
Joined
Dec 19, 2018
Messages
224
Reaction score
387
Location
South Africa
Rating - 0%
0   0   0
Well...I'm getting bored:rolleyes:

So I'm doing what I do best when that happens and I'm starting a new project!

Plan is to have a very basic AIO aquarium but for it to be as DIY as possible. I'm wanting to keep easy SPS in the setup and to grow it nice and dense. Tank will be barebottom with a PVC board and flow will be cranked right up. Light is a strong DIY that my mate and I have been building and the rest I'll figure out as I go along.

I guess let's see where this goes ;Bookworm

So far I've only done a bit of the tank dimensional design and a cost and equipment list.

Will update this thread as I progress along
 

Pickwun

Active Member
View Badges
Joined
Jan 10, 2020
Messages
247
Reaction score
620
Location
Jenks
Rating - 0%
0   0   0
Step 1: measure the distance between the walls of your living room.
Step 2: build aquarium to fit those dimensions. I recommend keeping the height below 24" so you can just step over to get to the stuff in the middle.
 

ScottR

Surfing....
View Badges
Joined
Feb 12, 2019
Messages
8,365
Reaction score
28,238
Location
Hong Kong
Rating - 0%
0   0   0
Step 1: measure the distance between the walls of your living room.
Step 2: build aquarium to fit those dimensions. I recommend keeping the height below 24" so you can just step over to get to the stuff in the middle.
I believe that’s called a swimming pool....
 
OP
OP
Alemoki

Alemoki

Active Member
View Badges
Joined
Dec 19, 2018
Messages
224
Reaction score
387
Location
South Africa
Rating - 0%
0   0   0
Step 1: measure the distance between the walls of your living room.
Step 2: build aquarium to fit those dimensions. I recommend keeping the height below 24" so you can just step over to get to the stuff in the middle.
A huge shallow lagoon would be cool;)
 
OP
OP
Alemoki

Alemoki

Active Member
View Badges
Joined
Dec 19, 2018
Messages
224
Reaction score
387
Location
South Africa
Rating - 0%
0   0   0
This is the plan so far

Tank is going to be 600x500x300 (human measurements;Joyful;Hilarious ) including the rear chamber. So will be a bit smaller usable footprint obviously.

Some quick pics of the CAD design just to test aesthetics.
Tank All Round.PNG


And the back chambers will be a very simple design.

Back View.PNG


Will likely build myself a media basket with floss and media for the first compartment on the right, skimmer in the middle and return on the left.
 
OP
OP
Alemoki

Alemoki

Active Member
View Badges
Joined
Dec 19, 2018
Messages
224
Reaction score
387
Location
South Africa
Rating - 0%
0   0   0
So plans have changed!

I now have a collection of nems gathering in my frag tank which need a forever home and I cannot keep them in the frag tank as they are walking over everything..ugh

So it's time to build them a setup. This however means I will not be doing the original planned setup, however I will be keeping with some of the original ideas.

This has now become my lockdown project as South Africa has now been put into a nationwide lockdown for 21 days.

As of now I have a tank
800mm x 600mm x 300mm

IMG_20200327_062952.jpg


It has textured abs sheet lined onto the floor and back panel.

Today I built the steel stand and cut the wood for the top. Currently 3D printing some feet for the adjustable leveling bolts and hopefully I can spray the stand soon. Some pics below.

IMG_20200327_141351.jpg

the initial design

IMG_20200327_100916.jpg

steel all cut to size

IMG_20200327_141343.jpg

the frame all welded together

IMG_20200327_174531.jpg

finally the entire frame with wood top


After spraying and assembly of everything it's just a matter of filling and throwing on my aquaclear which I've had sitting around for a while, a heater and then lighting.

For lighting, I will be building a DIY led. For two years now a buddy and I have been developing our own DIY led lights and this light will be an iteration of that.
Here are some pics of the version we made for his tank.

IMG-20200112-WA0025.jpg
IMG-20200112-WA0022.jpg


I will update this thread again once something exciting happens.

And please stay safe and keep smart during these times!
 
OP
OP
Alemoki

Alemoki

Active Member
View Badges
Joined
Dec 19, 2018
Messages
224
Reaction score
387
Location
South Africa
Rating - 0%
0   0   0
Today I spray painted the frame with white ramcoat and started working on getting the light built.

IMG_20200329_163602.jpg


Unfortunately I'm missing some pieces I will need to complete the light during lockdown but my mate will begin work soldering the boards together etc. In the meantime I'm working on the body of the light.

IMG_20200329_163918.jpg


Tomorrow I will be fitting the wooden top to the frame and putting the setup in place. Then there's not much more I can do!!!
 
OP
OP
Alemoki

Alemoki

Active Member
View Badges
Joined
Dec 19, 2018
Messages
224
Reaction score
387
Location
South Africa
Rating - 0%
0   0   0
Well the tank is in place on its stand and ready to go. Yay! But alas I cannot do anything now until I get my led light finished.

IMG_20200330_094059.jpg


I managed to finish the body of the light, my mate will start with the circuitry soon and then after this lockdown I will hopefully be able to put it all together and get my nems into the system!

Here is the finished light body

IMG_20200330_132303.jpg


And a sneak peak at my nems that will be heading over to this system once it's completed...

P1050217.JPG
 
OP
OP
Alemoki

Alemoki

Active Member
View Badges
Joined
Dec 19, 2018
Messages
224
Reaction score
387
Location
South Africa
Rating - 0%
0   0   0
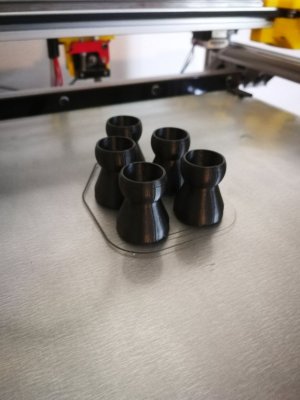
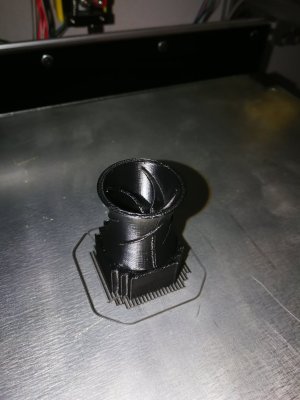
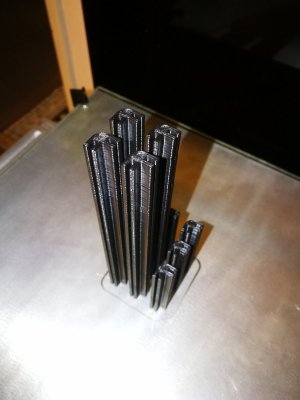
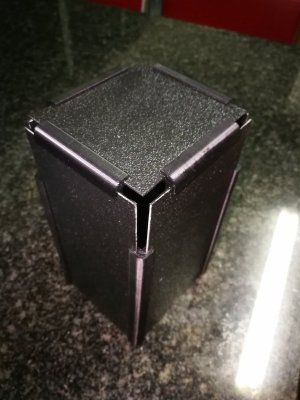
I have done a few prints for parts in this system which I'll add below. Basically a few bits of locline and a flow eductor. This will connect onto my hailea HX6530 submersible which I'm converting into a canister filter type deal. I also printed some slotting to join ABS sheets to make a media box to fit on the HX6530.

IMG_20200331_152325.jpg
IMG_20200331_173125.jpg
IMG_20200401_075312.jpg
IMG_20200401_184824.jpg


I then printed some parts to make my hanging kit for the lights and popped those guys in place.
IMG_20200401_202323.jpg


Finally I sorted out all the plugs and installation of all components today and have filled the tank up with RODI and salt and it is now mixing overnight. I will be doing the transfer in the next two days and will be stealing the light off my frag tank (hydra 26 non-hd) until I can get my DIY light finished.

IMG_20200402_173040.jpg


Here it is mixing, I promise it's not that brown colour in person.

IMG_20200331_152325.jpg IMG_20200331_173125.jpg IMG_20200401_075312.jpg IMG_20200401_184824.jpg
 
OP
OP
Alemoki

Alemoki

Active Member
View Badges
Joined
Dec 19, 2018
Messages
224
Reaction score
387
Location
South Africa
Rating - 0%
0   0   0
And it's filled...
IMG_20200403_193105.jpg
P1050363.JPG


Using my hydra 26 from my frag tank temporarily until I get the DIY light finished. For now all softy frags are in here with the nems.
 
OP
OP
Alemoki

Alemoki

Active Member
View Badges
Joined
Dec 19, 2018
Messages
224
Reaction score
387
Location
South Africa
Rating - 0%
0   0   0
Bare bottom or did you put a little bit of sand in there?
Hi there

It's a barebottom tank, I siliconed in a piece of textured black abs sheeting on the bottom and back panel. It looks a bit white now as there are a few micro bubbles and a slight amount of precipitant from mixing the salt in the previous night.
 
OP
OP
Alemoki

Alemoki

Active Member
View Badges
Joined
Dec 19, 2018
Messages
224
Reaction score
387
Location
South Africa
Rating - 0%
0   0   0
Quick update, the nems have been ticked off on and off for the last few days. Been nail biting and stressful but I think they all fine. My inferno still acting weird and hiding under a rock but I will leave him be for the time being as he's still open to an extent.

The tank has now also had an aquaclear 70 added with more media and some polishing foam and cloth. Water is much clearer now and I took some pics tonight!

I'm loving the black ABS bottom for these pictures!

P1050401.JPG
P1050396.JPG
P1050394.JPG


Glad I bought those red mushrooms last year as they have really turned into some beauts!
 

DvgyCpT

New Member
View Badges
Joined
Feb 11, 2020
Messages
22
Reaction score
82
Location
Cape Town, South Africa
Rating - 0%
0   0   0
That came out tops bru, was going to ask you where'd you get the light support frame tubing? Checked your ig feed. Definitely prefer the option to mount light higher off the tank.

Also keen to see your diy led
Coral looking fresh
 
OP
OP
Alemoki

Alemoki

Active Member
View Badges
Joined
Dec 19, 2018
Messages
224
Reaction score
387
Location
South Africa
Rating - 0%
0   0   0
That came out tops bru, was going to ask you where'd you get the light support frame tubing? Checked your ig feed. Definitely prefer the option to mount light higher off the tank.

Also keen to see your diy led
Coral looking fresh
Hey bud!

I made the light poles myself actually. We have a pipe bender in the workshop so we bent them up and slotted them into a larger diameter pipe with a bolt to lock them in place.

I have upped my light intensity from what it was over the frag tank and set to acclimate for the nems as they were used to the light being closer that side.

The DIY light will unfortunately only be done after lockdown which is a real bummer and I really am missing having an extra tank to hold my stony corals! Ugg

Hope you keeping well though. Your tank needs to be up and running soon!
 

DvgyCpT

New Member
View Badges
Joined
Feb 11, 2020
Messages
22
Reaction score
82
Location
Cape Town, South Africa
Rating - 0%
0   0   0
Ahhh that's well made bud, probably gana do something similar. Always great having workshop to do bits like that.

The lockdown has me short on some bits and bobs for the build, but will get as much done by end of lock down hopefully. Tired of looking at empty glass case lol

Also need to start a build thread here lol
 
Back
Top