3,000 Gallon Indoor/Outdoor Aquarium DIY Build

OP
OP
TheWildWillauers

TheWildWillauers

Community Member
View Badges
Joined
Jun 25, 2020
Messages
30
Reaction score
412
Rating - 0%
0   0   0
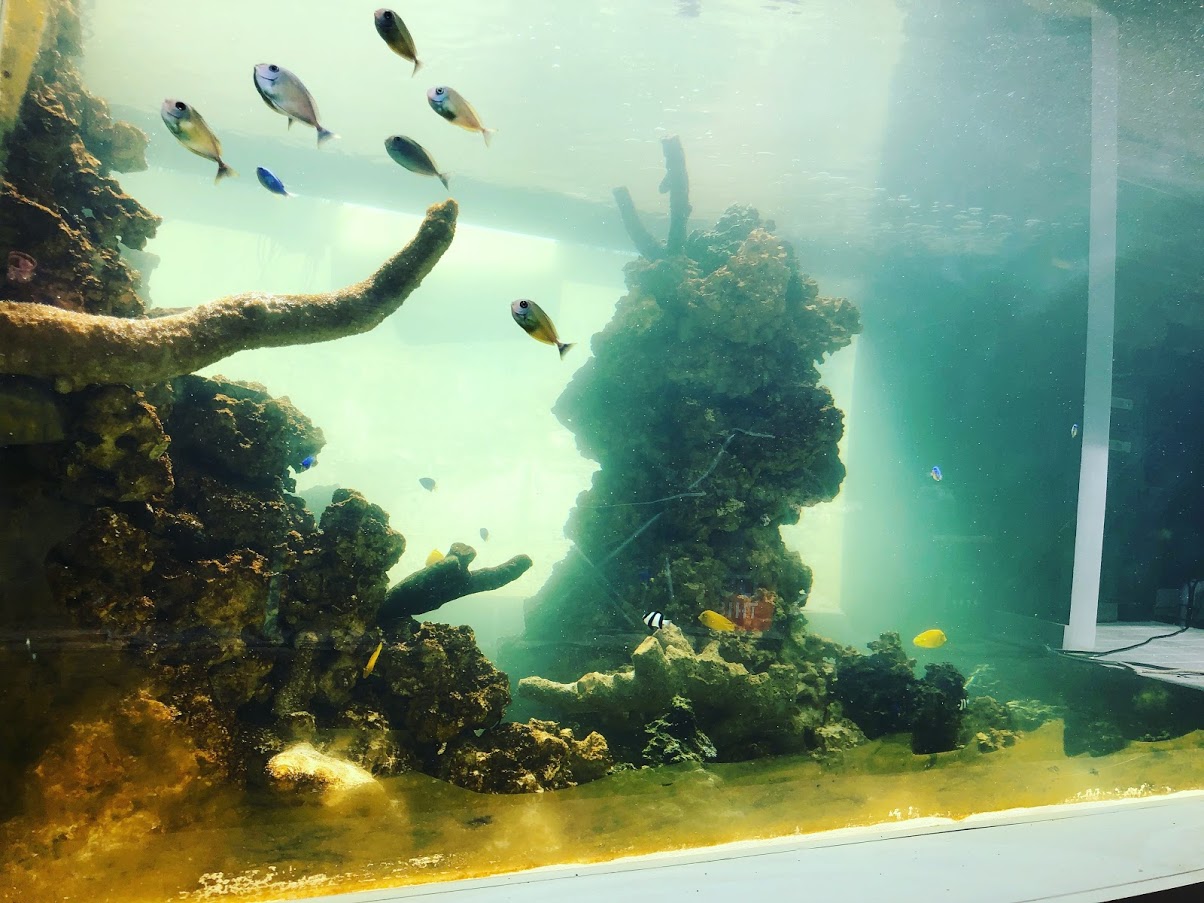
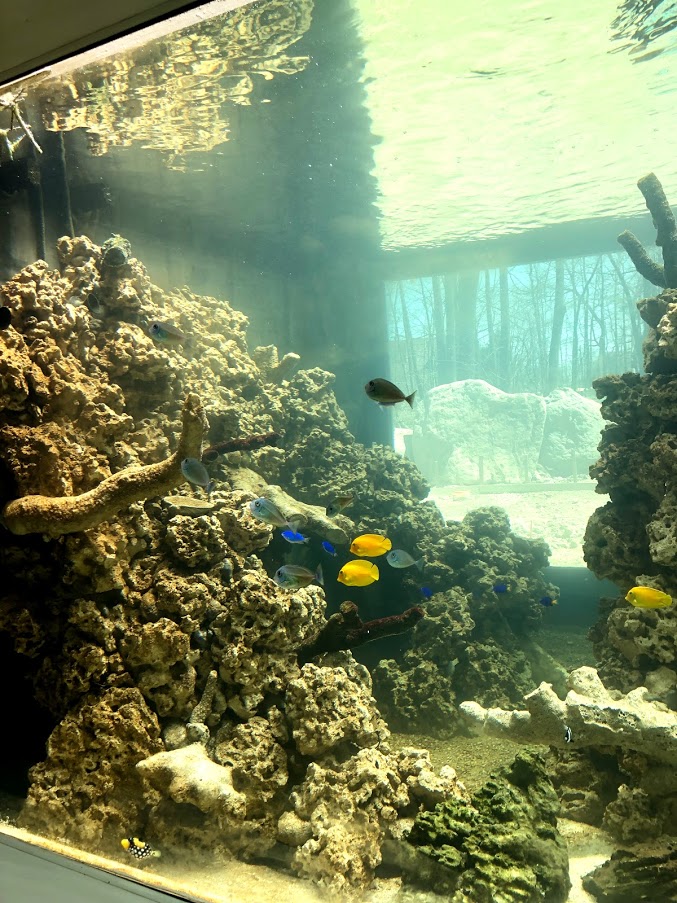
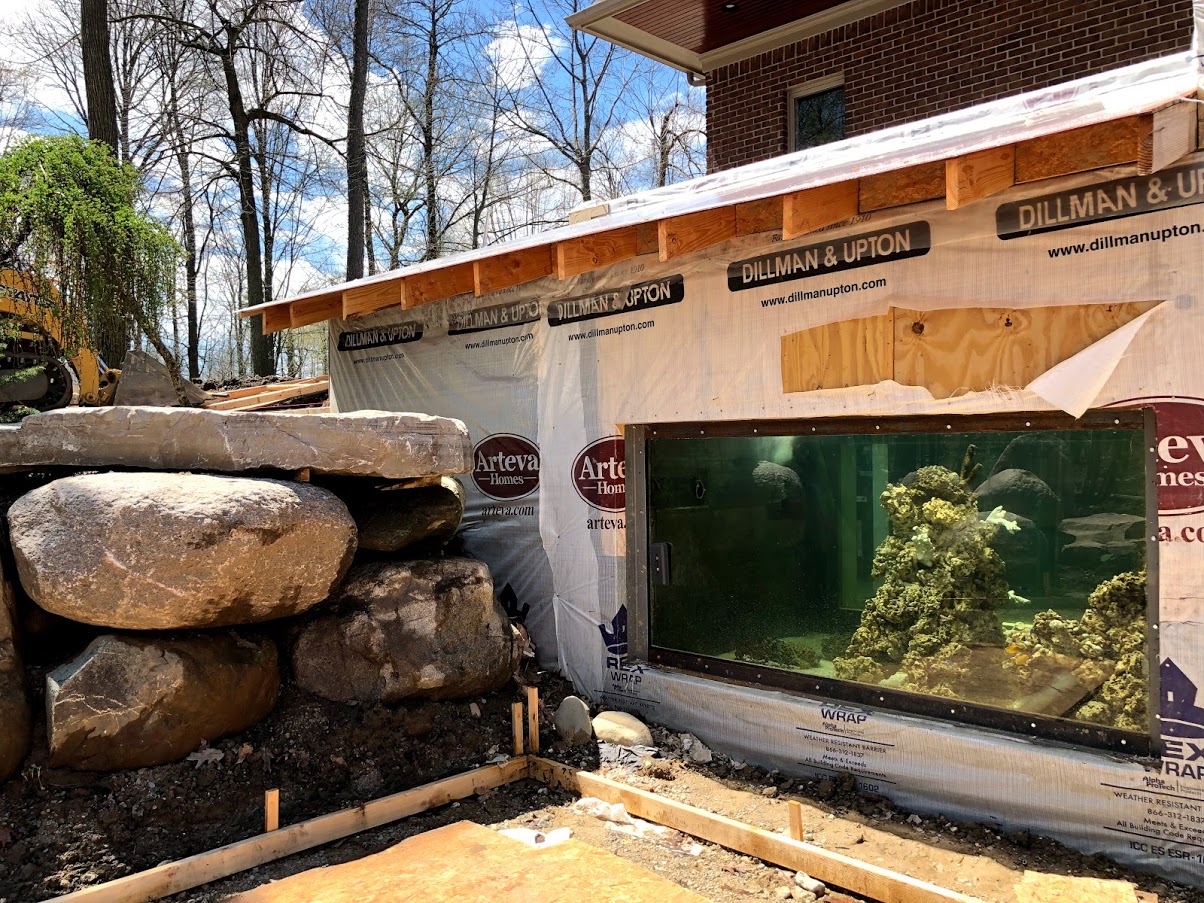
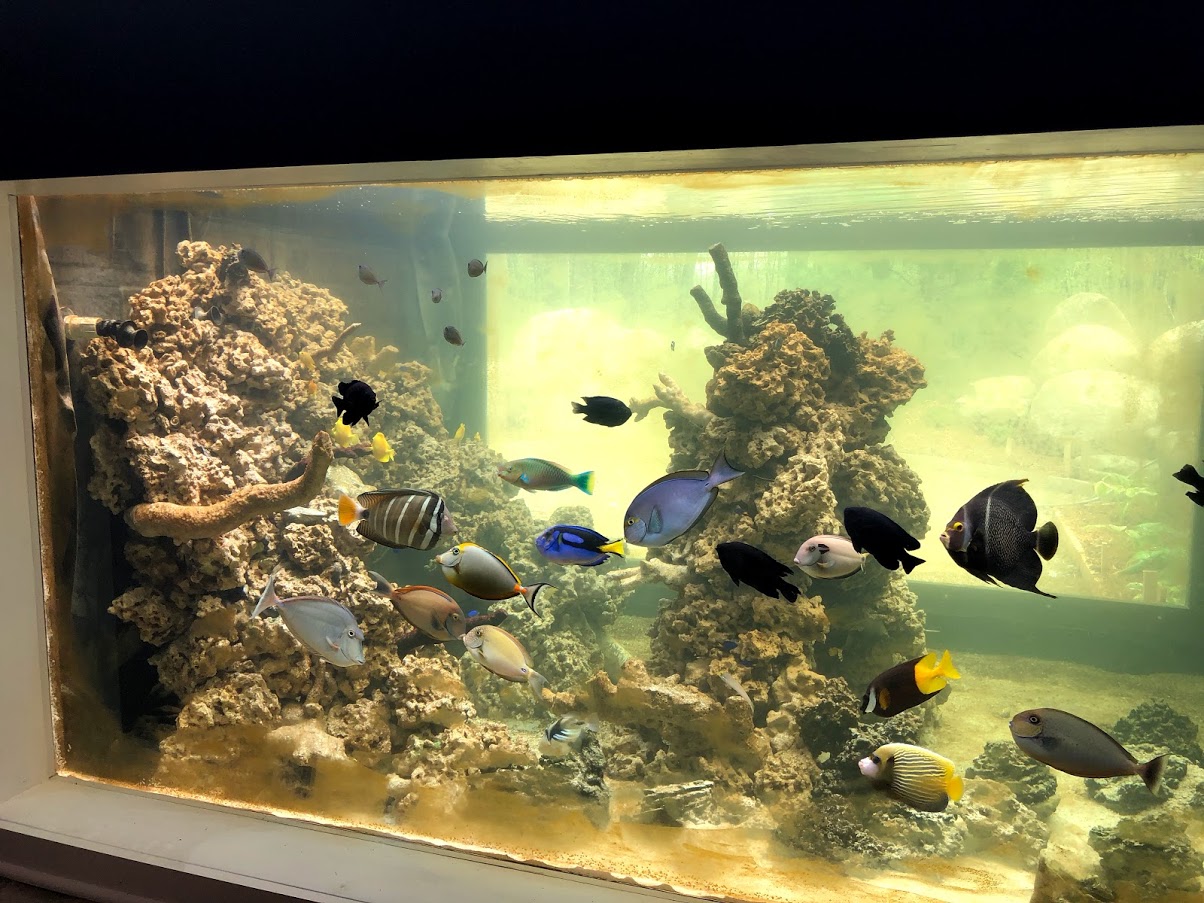
WOW! This looks epic! Where are you in southern Michigan? Lots of reefers over in the Ann Arbor and Metro area. I'm so surprised you're able to heat this with a 1kW heater. Must get a lot of help from the radiant solar energy. Very cool. I'm definitely following along on this!

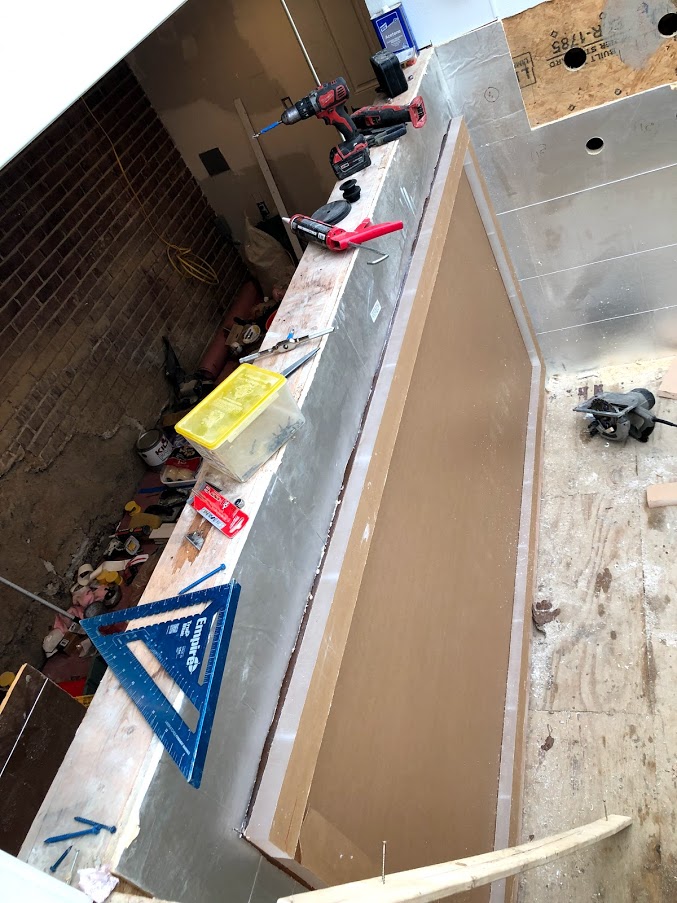
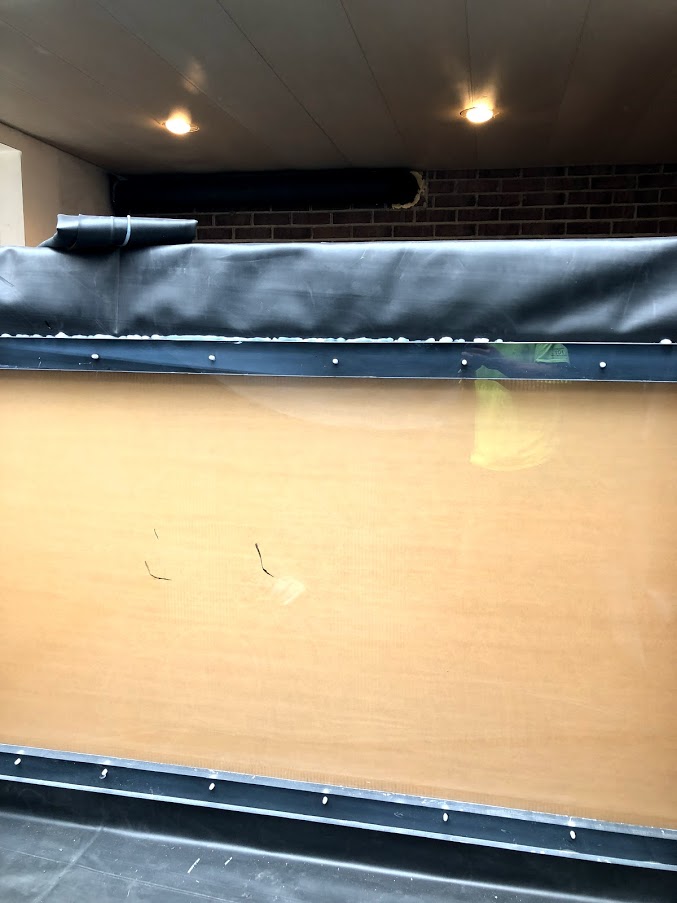
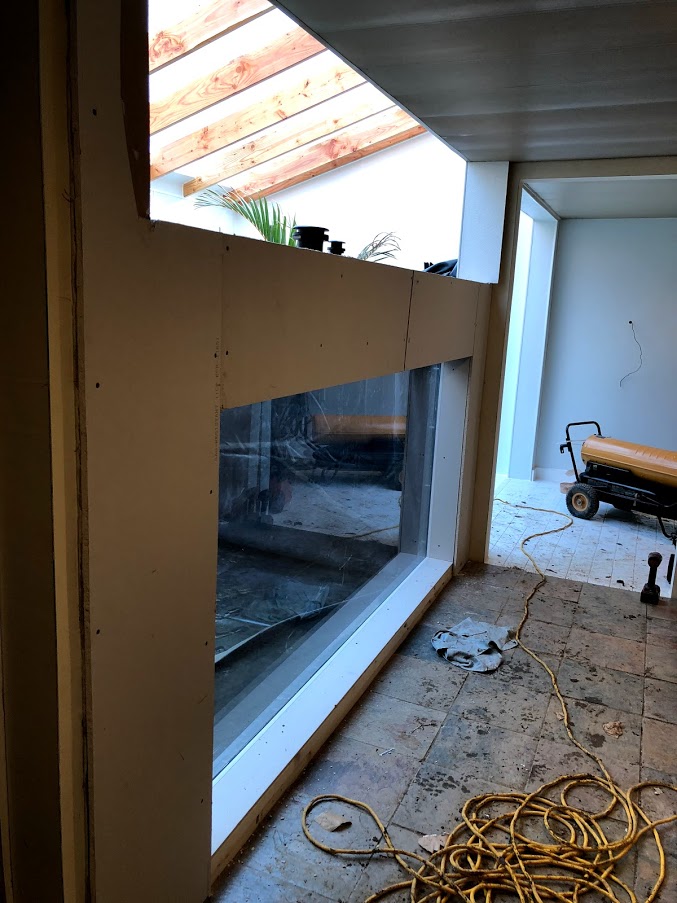
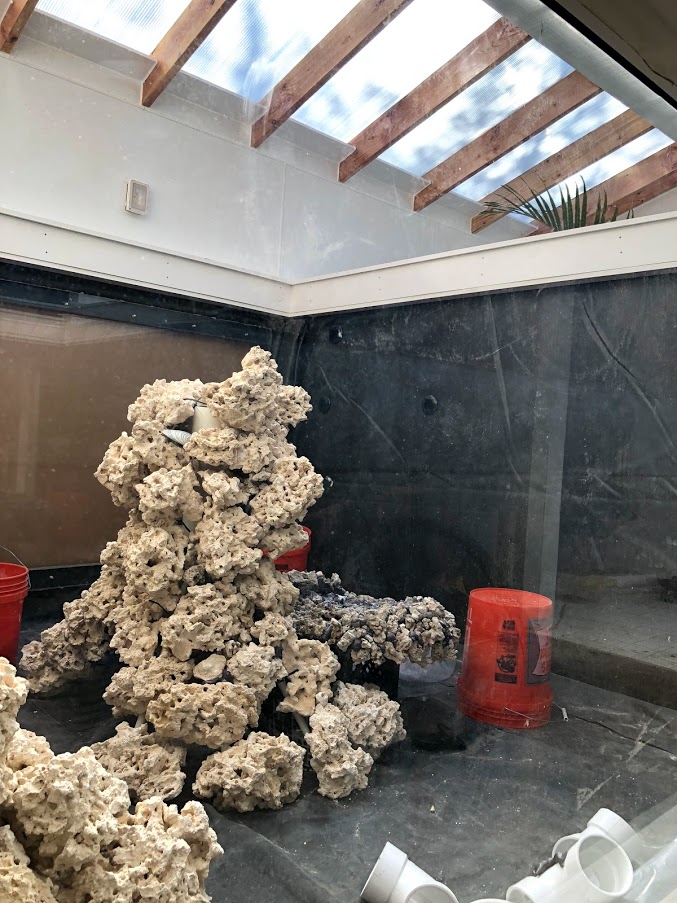
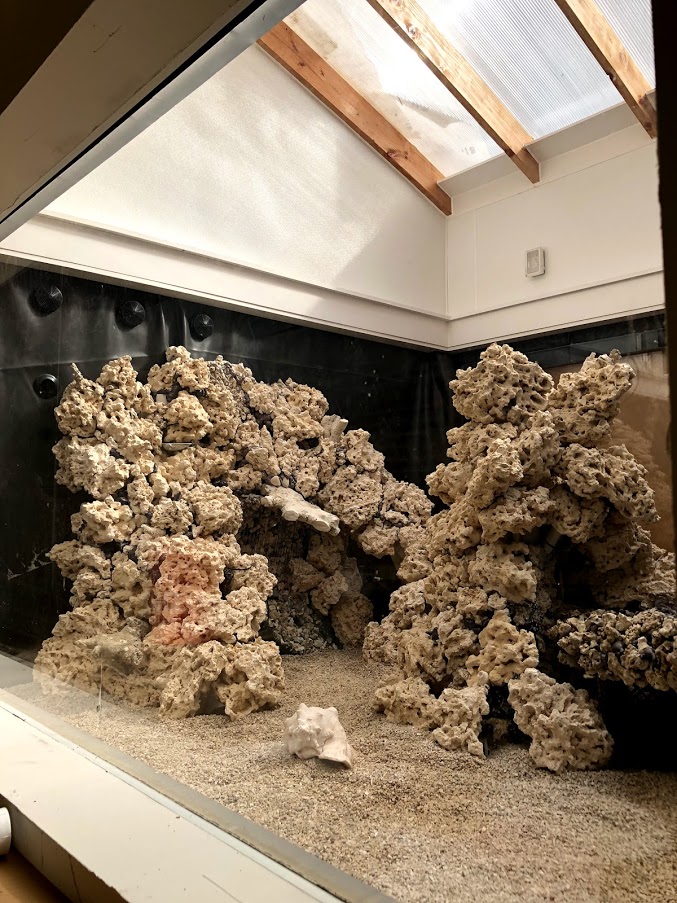
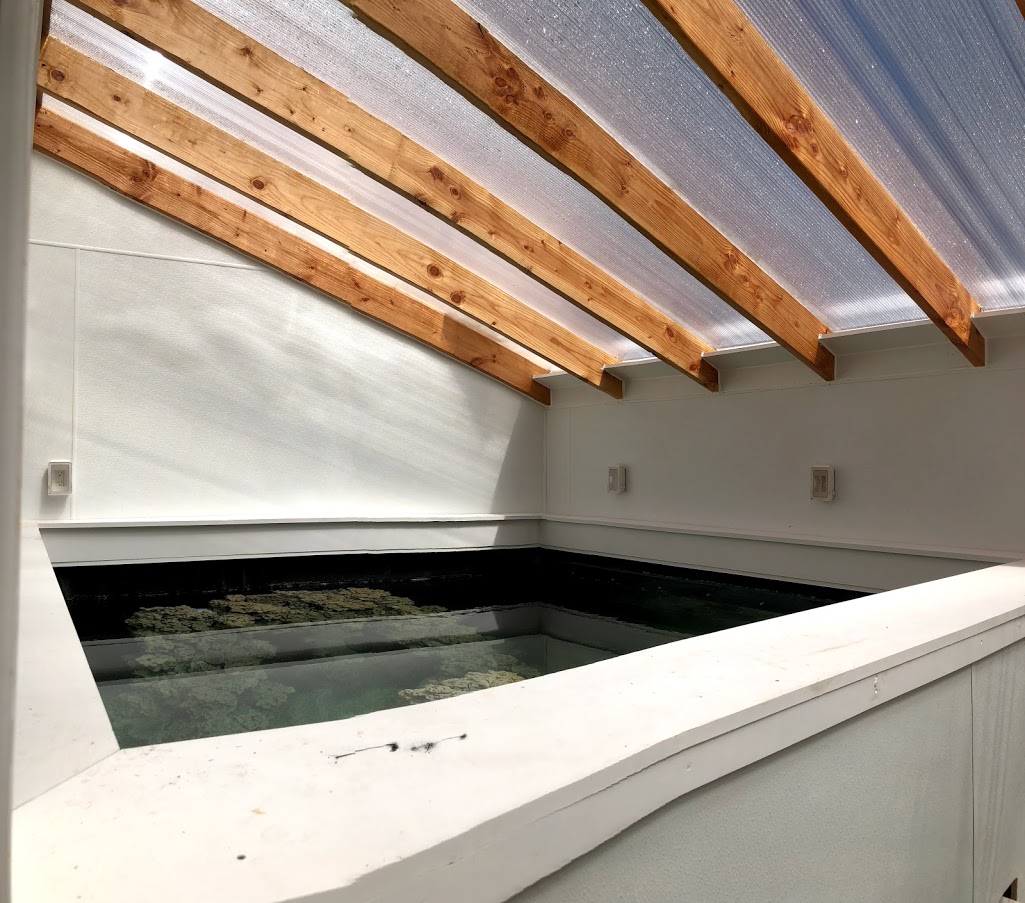
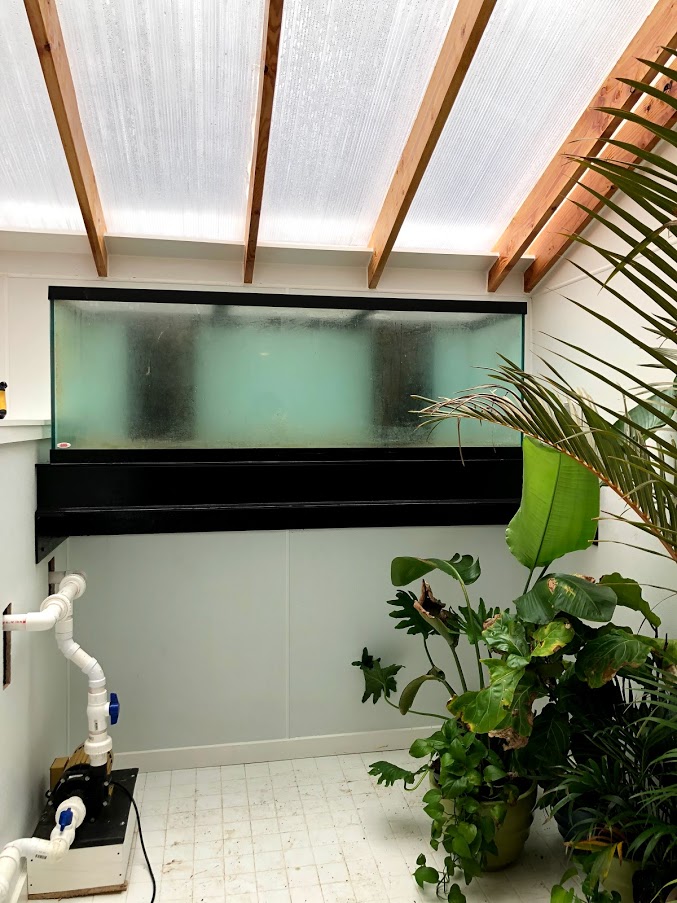
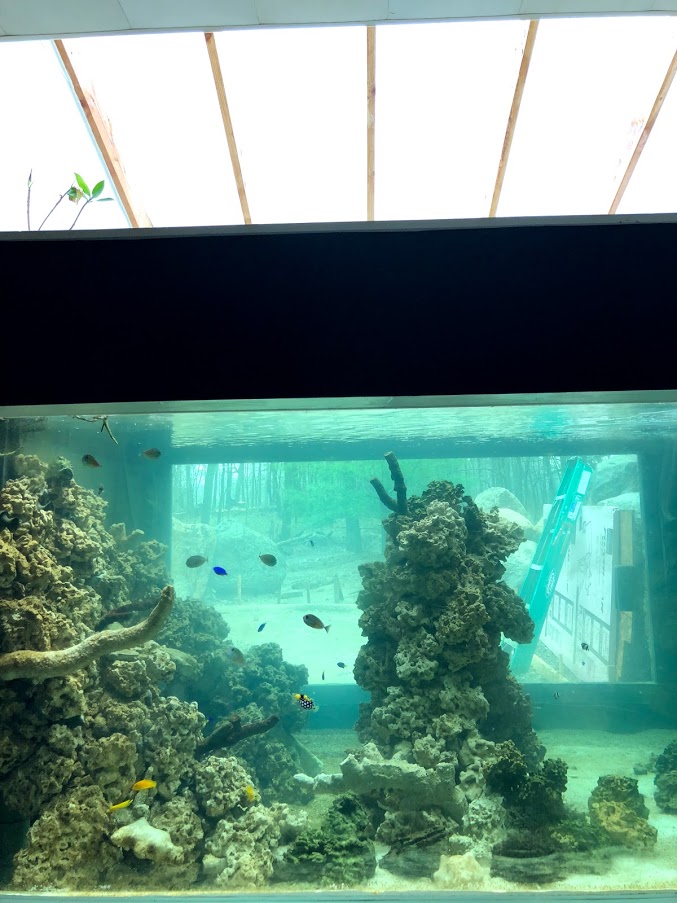
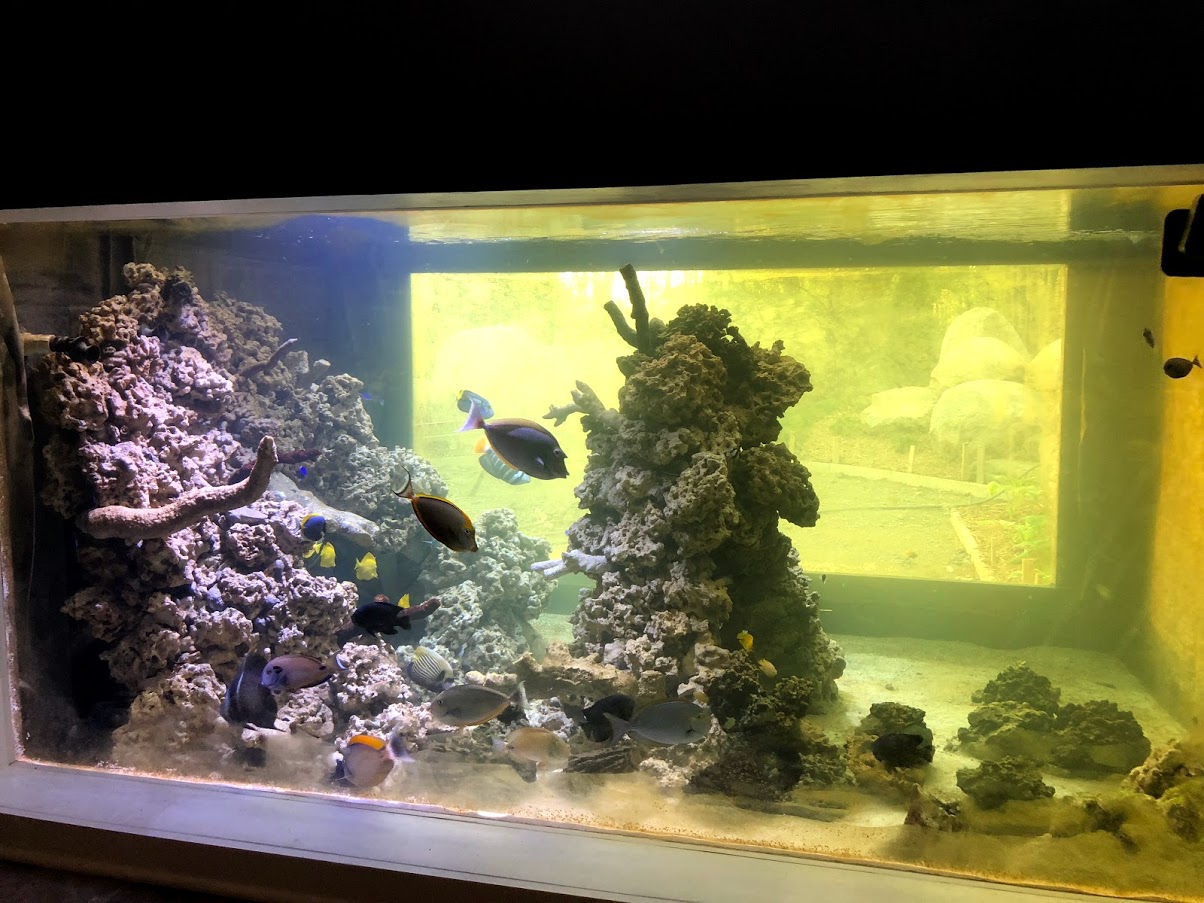
Having the outdoor viewing area is such a good idea. I do a lot less on my reef in the summer because I want to be outside so much more. This makes both possible!

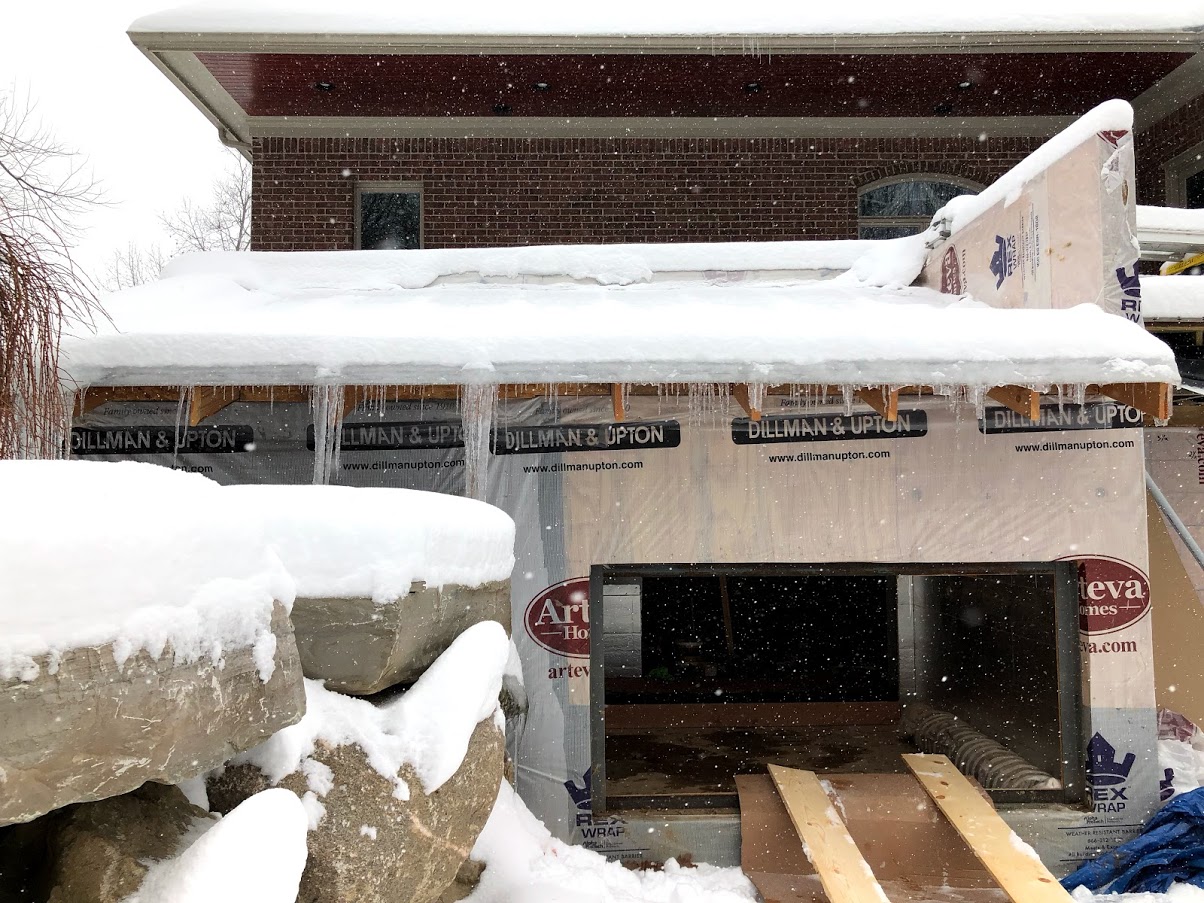
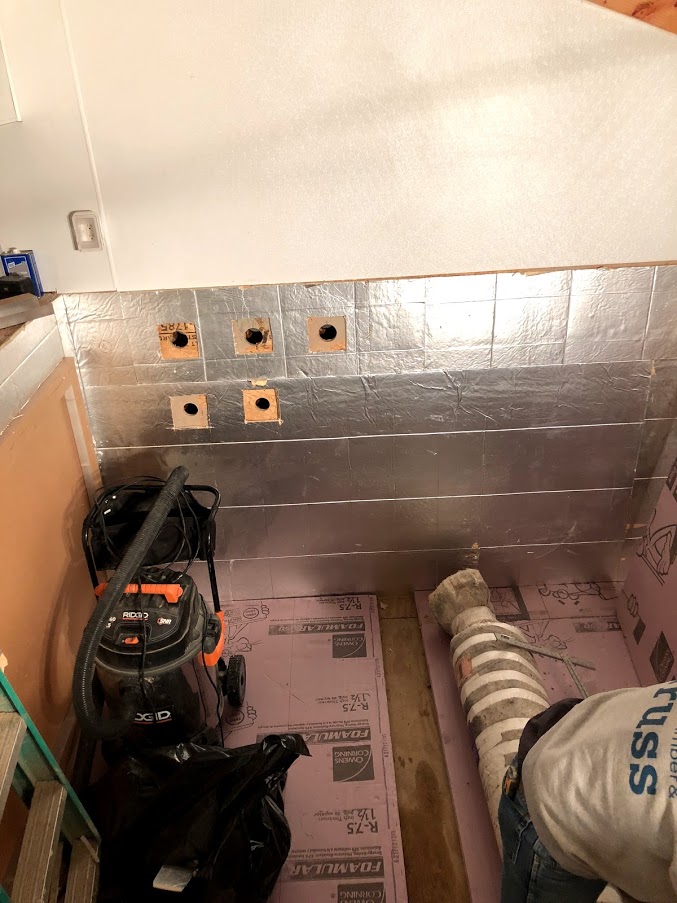
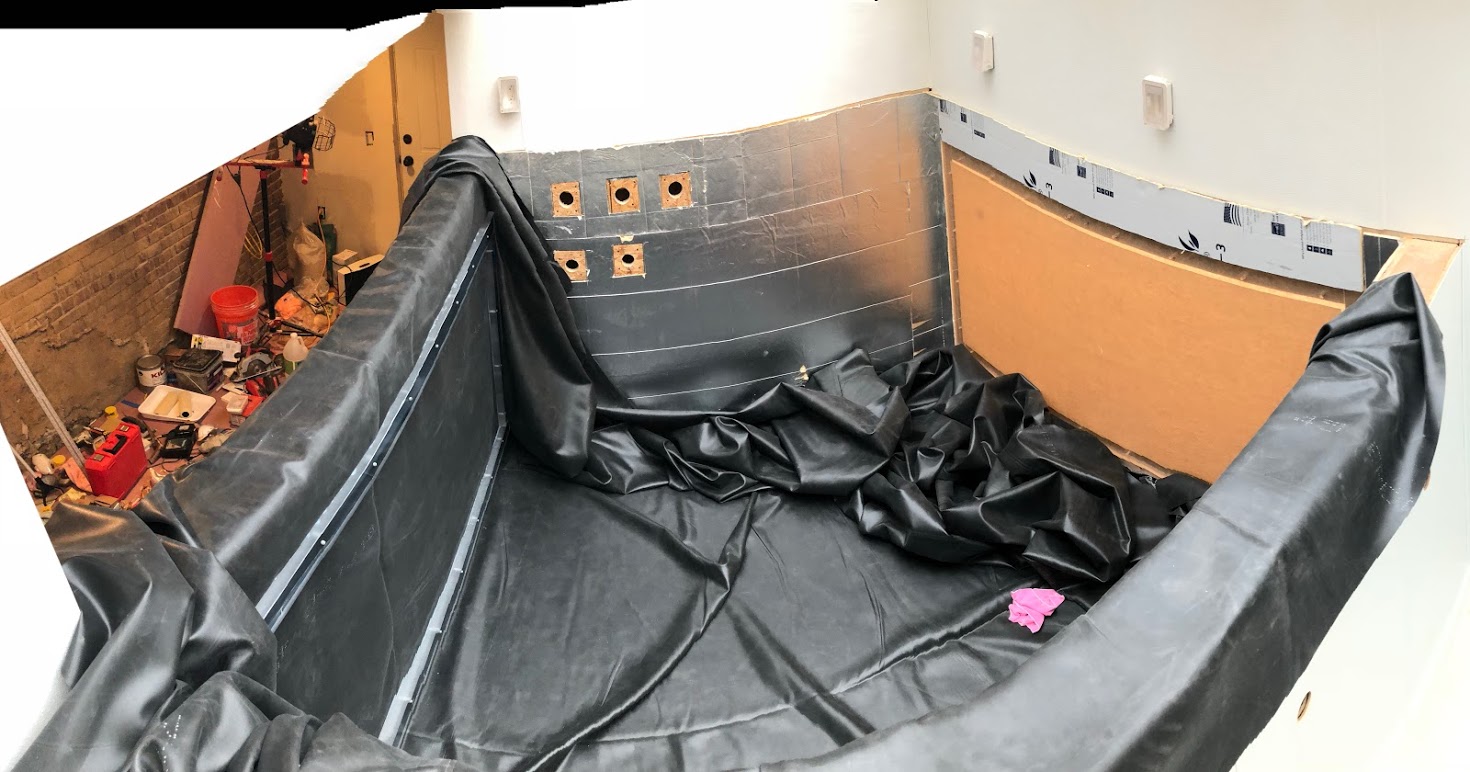
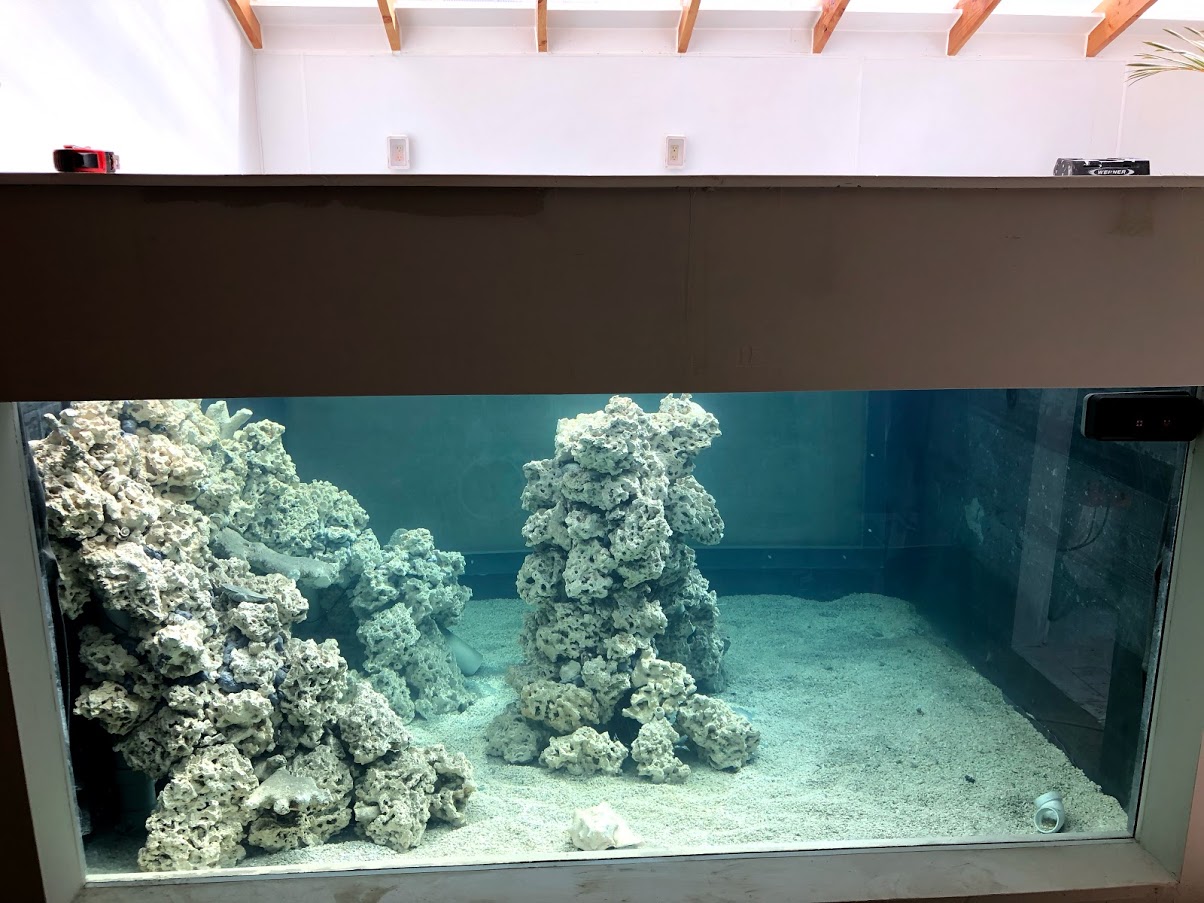
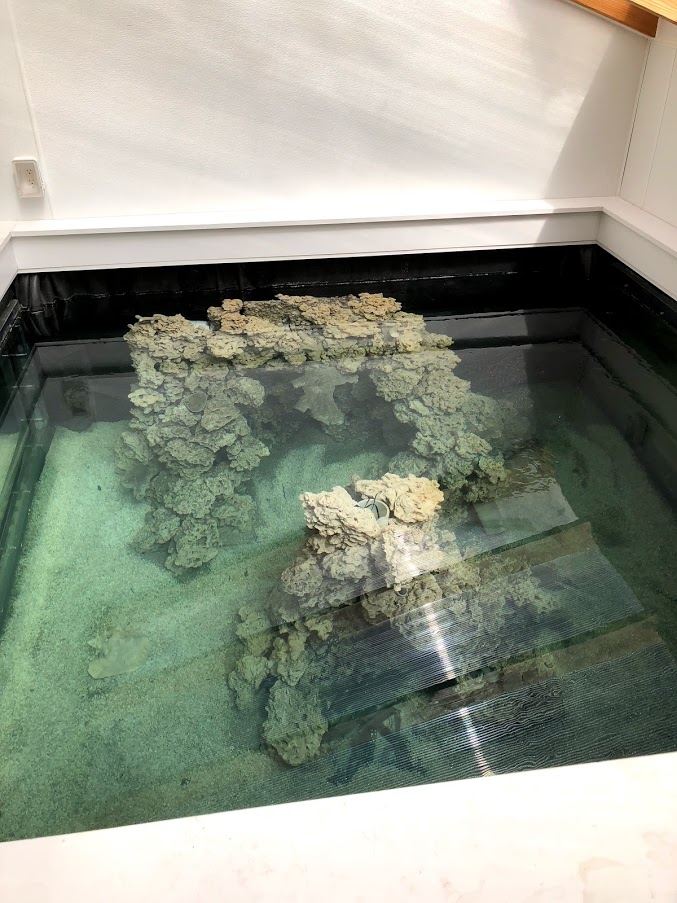
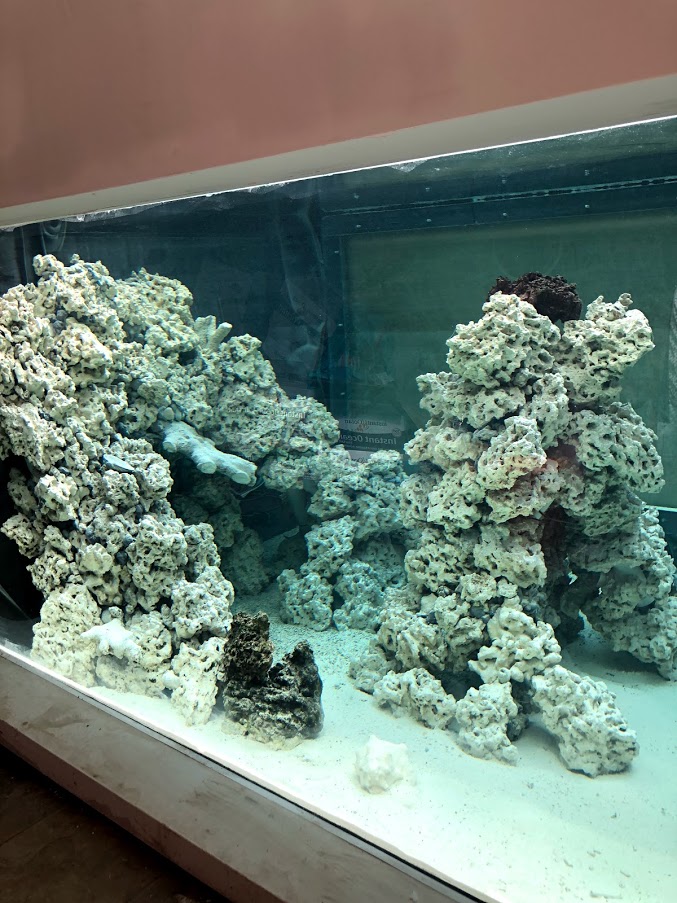
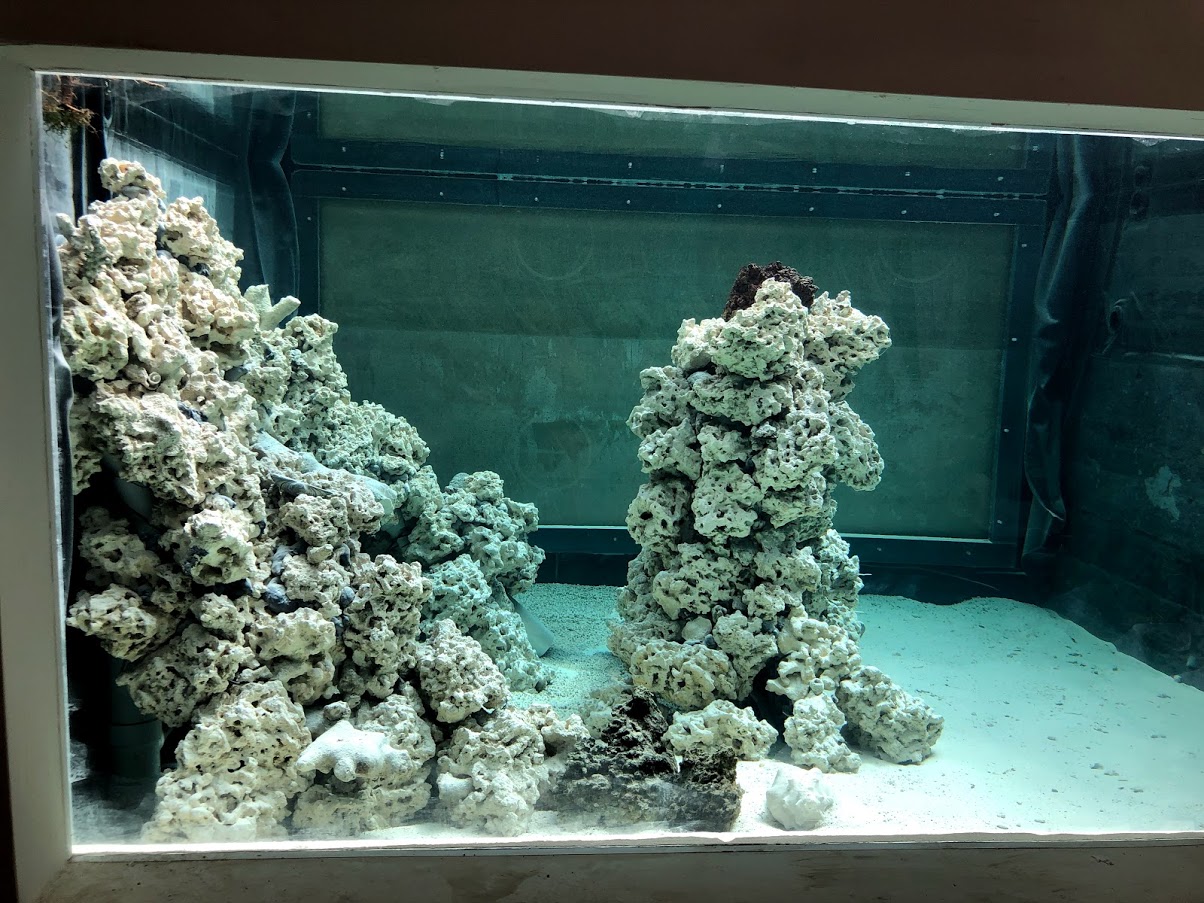
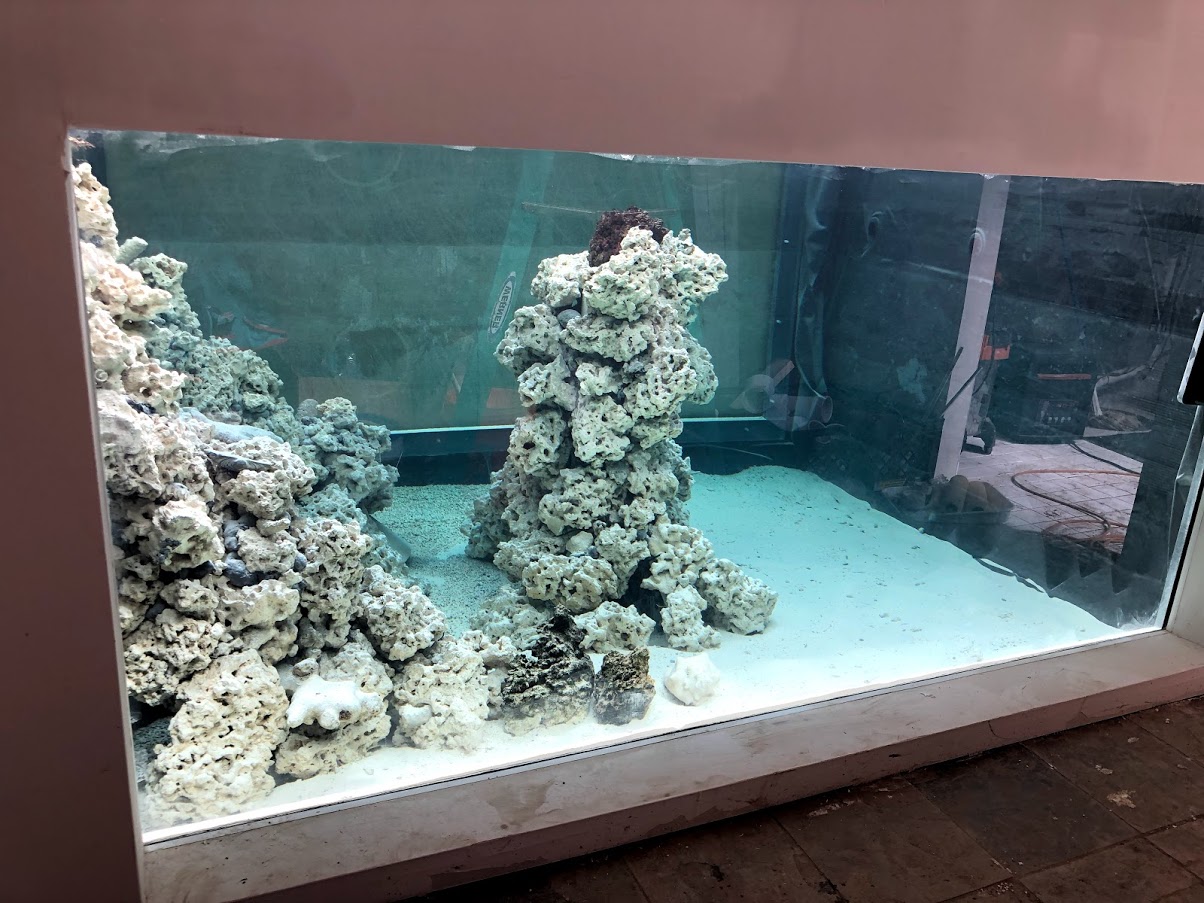
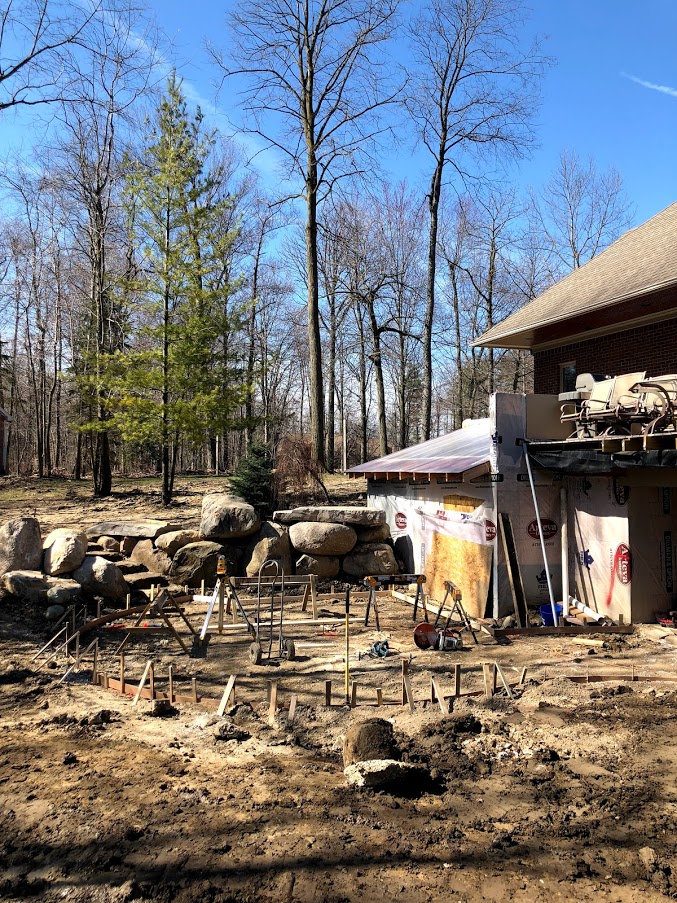
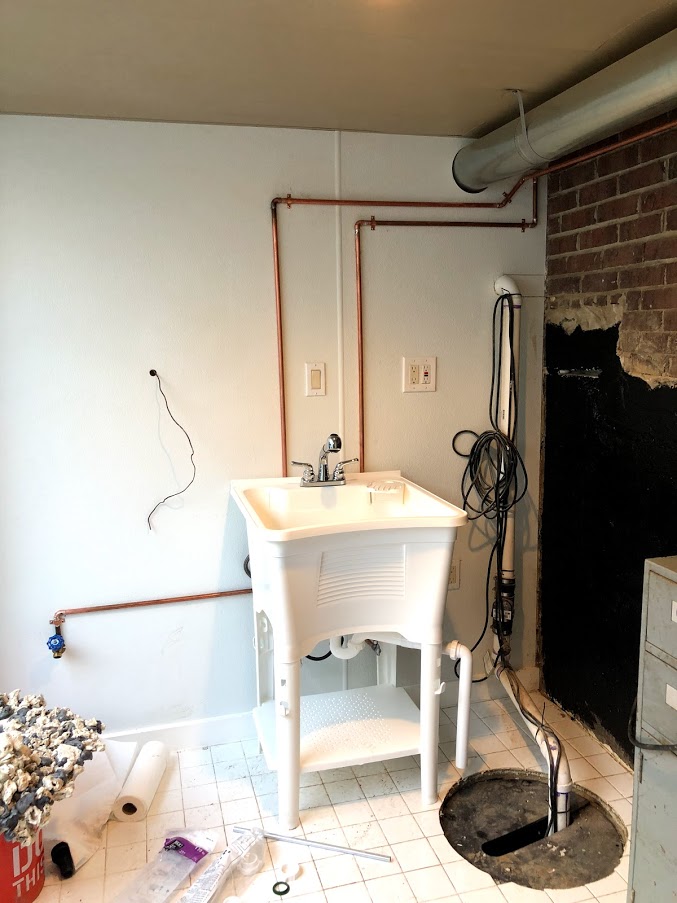
Thank you! We are in metro-Detroit, northern Macomb county. I wasn't too sure how the heater would be able to handle this system neither, but so far so good! Even though in the summer it probably only gets maybe 5-6 hours of direct sunlight it is still enough to keep the room in the 60s during the day. I also believe the sheer volume of water helps to keep the system very stable. I've seen that people that have greenhouses often will have drums of water stacked to help prevent temperature swings in the winter.

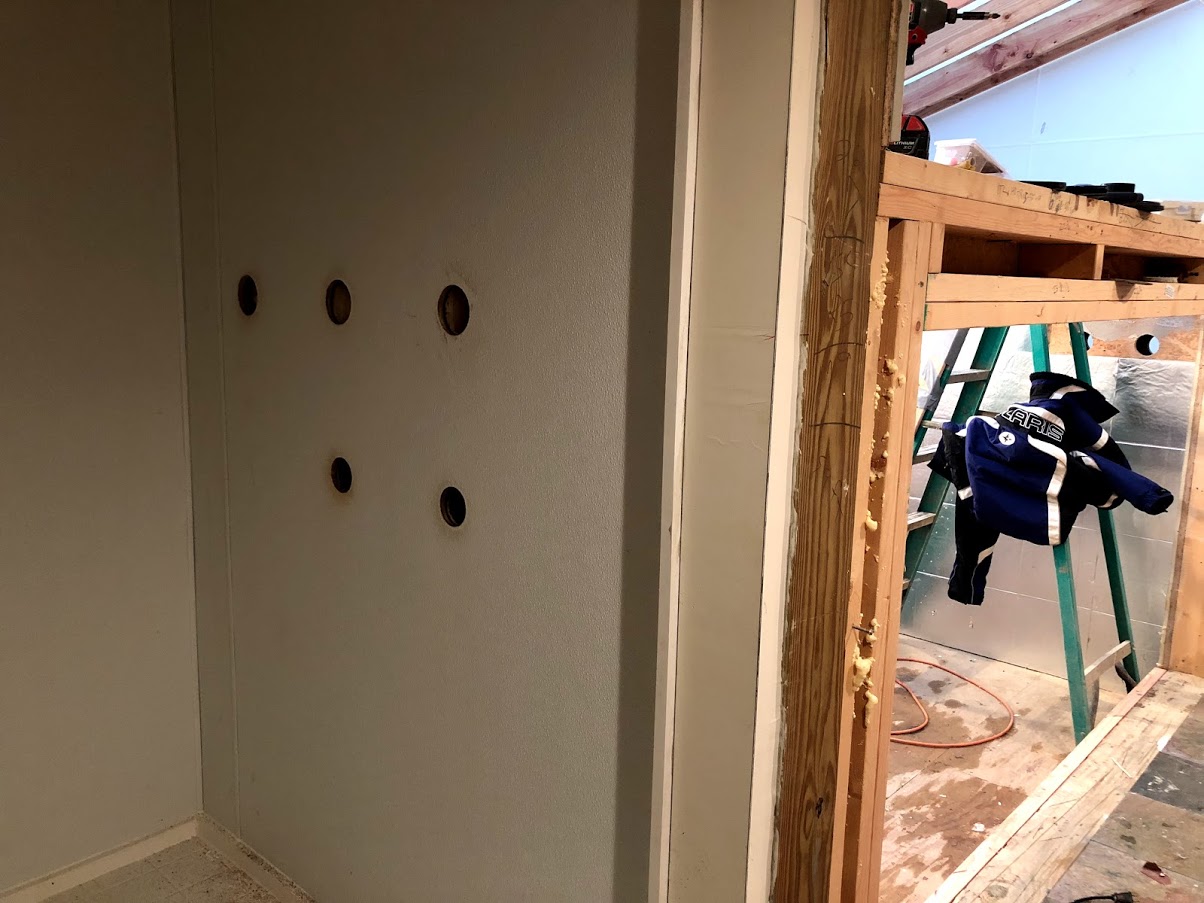
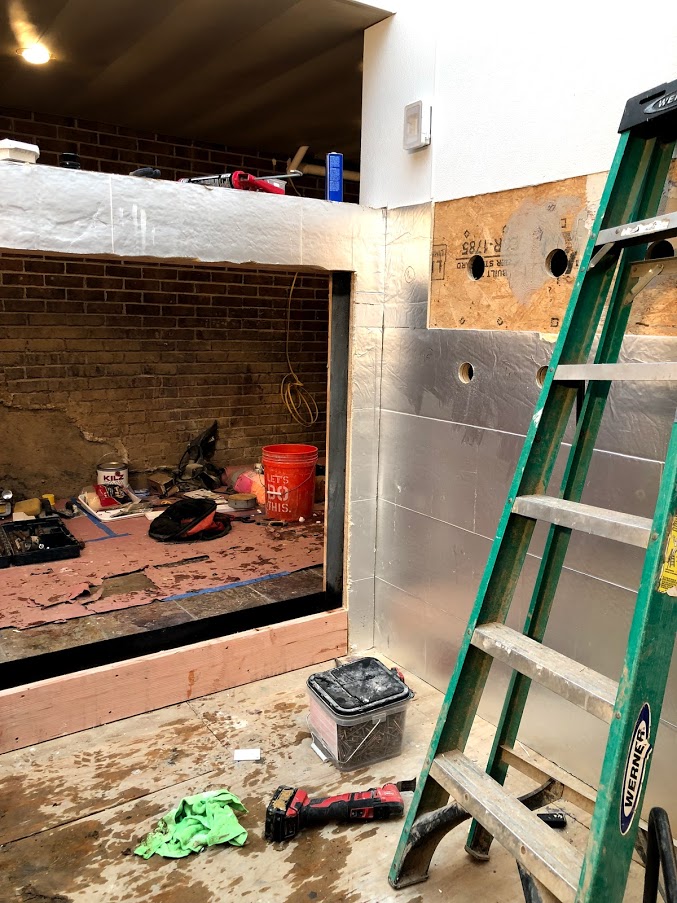
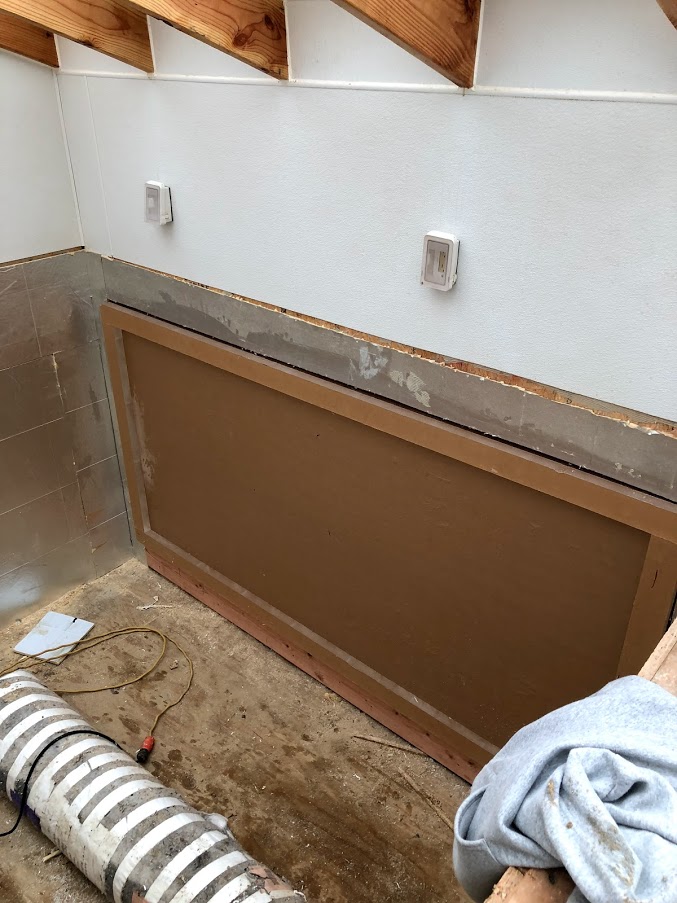
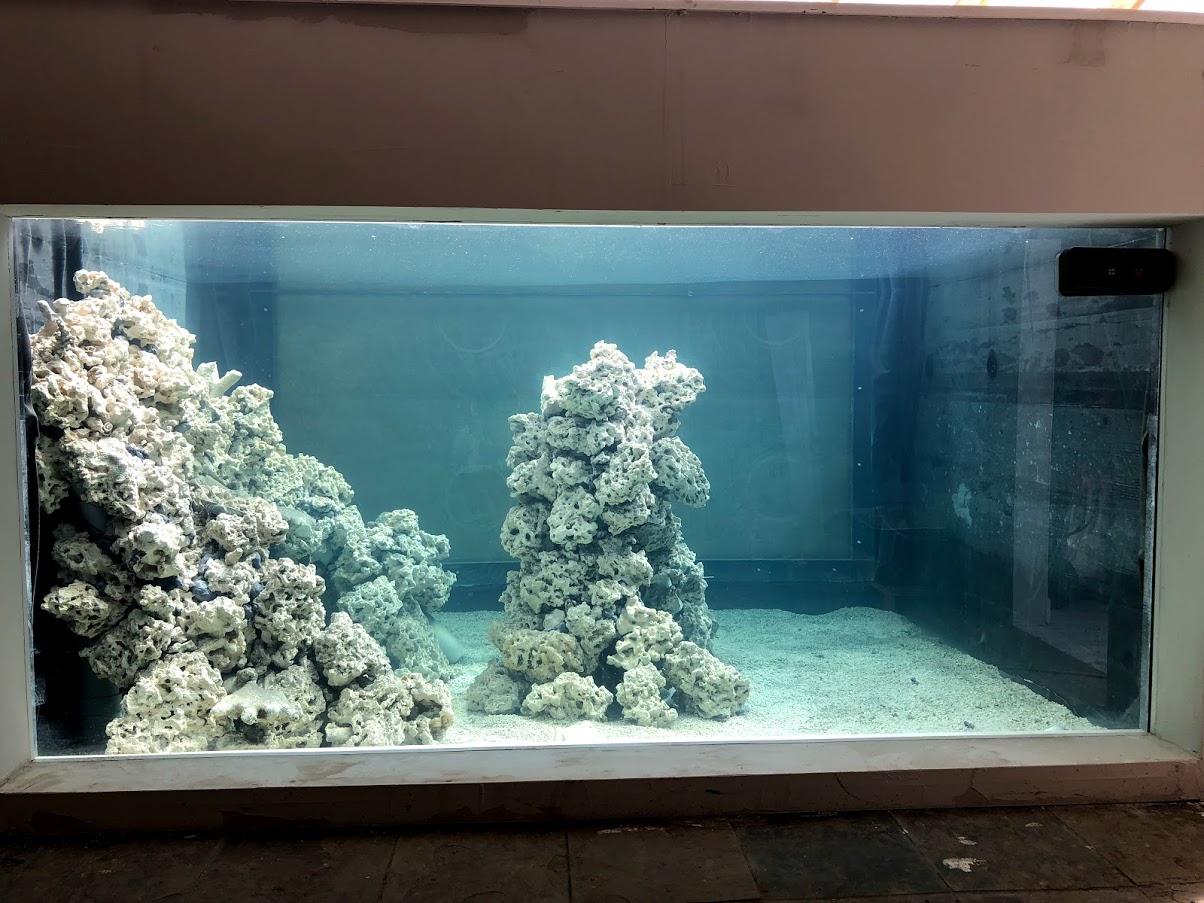
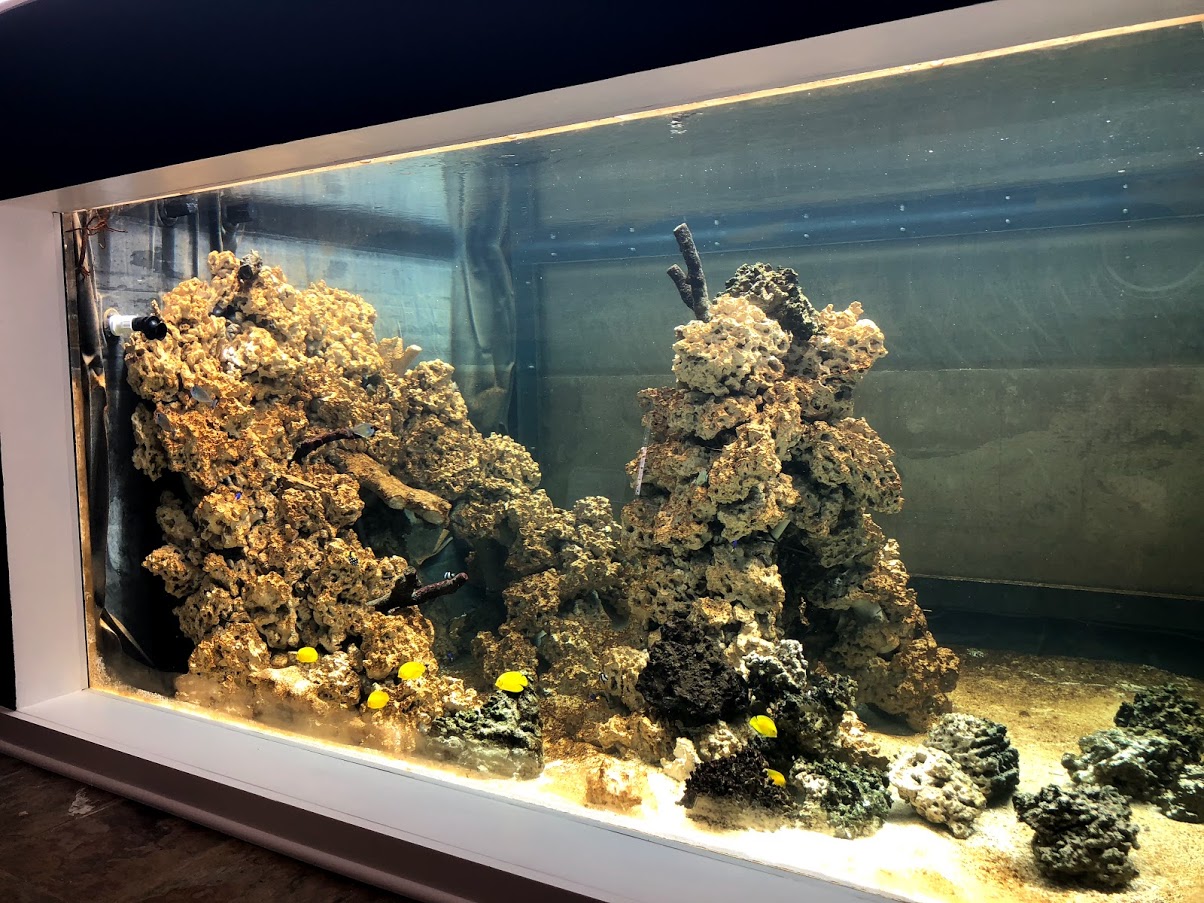
I must admit, the outdoor viewing panel can really only be enjoyed at certain times of the day depending where the sun is (mornings, high-noon, dusk, and night), anywhere in between the reflection off the acrylic makes it difficult to view. But I still really enjoy being able to take a breather to watch the fish as I'm doing yard work or to be outside in the fresh air relaxing and watching the fish. Like you said, us Michiganders don't really like to squander the nice weather! lol

Absolutely amazing! Welcome to the forum! I’ll be watching this thread!!

Thank you!
 
OP
OP
TheWildWillauers

TheWildWillauers

Community Member
View Badges
Joined
Jun 25, 2020
Messages
30
Reaction score
412
Rating - 0%
0   0   0
-drilled the overflow/return holes. In hindsight, I wish I would have drilled more overflow holes to be able to increase the GPH that flows through the sump
lAWKD2L.jpg


ygsNWte.jpg


-Getting ready to prep the acrylic
Pap79o1.jpg


-Threading the acrylic frame that will help create the gasket
KxKth1e.jpg


-L channel steel frames the openings
M8C9HYZ.jpg


-The inside viewing panel in place along with its acrylic gasket frame
M5Uap0u.jpg


-The outside viewing panel
DefXVf1.jpg


-Getting ready to unroll the liner. We lines the bottom with 2" insulation panels
MKeVuwH.jpg


-Here you can see we've removed the acrylic frame to allow for placing the liner. You can see the acrylic panel has been pre-drilled along with the L channel steel frame
44ftJfH.jpg


XhR7QU5.jpg


-Unrolling the liner was a huge pain. Very cumbersome.
Huv67Vf.jpg
 
OP
OP
TheWildWillauers

TheWildWillauers

Community Member
View Badges
Joined
Jun 25, 2020
Messages
30
Reaction score
412
Rating - 0%
0   0   0
-Finally once the liner was in place we carefully punctured the liner to allow for the bolts to enter through and into the acrylic frame
88fkMqD.jpg


-Applying silicone to the inside of the acrylic frame to help create a better seal once the bolts are tightened
fzf6VWR.jpg


PTFBJdn.jpg


HYvwkJ8.jpg


-Inside panel completed
LH1aLWL.jpg


-Liner removed
hq09Xhd.jpg


CwoyHRZ.jpg


-Moment of truth :eek:
Rs8a3p9.jpg


iSx2Ayf.jpg
 
OP
OP
TheWildWillauers

TheWildWillauers

Community Member
View Badges
Joined
Jun 25, 2020
Messages
30
Reaction score
412
Rating - 0%
0   0   0
Yesterday my wife/lifeguard and I cleaned the tank so we can get some better videos and pictures. Our friends and family have been telling us that we should start a youtube channel for all of our projects and big upcoming ones so we threw this together! Worst case we'll have some embarrassing home videos to watch down the road haha


Cell

10K Club member
View Badges
Joined
Apr 20, 2019
Messages
14,287
Reaction score
21,948
Rating - 0%
0   0   0
Amazing concept. Now I'm dreaming of a new patio area...
 

McPuff

Valuable Member
View Badges
Joined
Dec 11, 2018
Messages
1,330
Reaction score
1,521
Location
Plymouth, MI
Rating - 0%
0   0   0
You can get some clear screen (1/4") from BRS and then window frames from Home Depot. Those make excellent tops and they won't droop into the water.

Your French angel is incredible. It's one of my favorite fish but I won't consider one again unless I have a much bigger tank (& without coral). Do you have, or have you considering adding, an Arothron puffer? Would be a great addition. :0)
 
OP
OP
TheWildWillauers

TheWildWillauers

Community Member
View Badges
Joined
Jun 25, 2020
Messages
30
Reaction score
412
Rating - 0%
0   0   0
Amazing concept. Now I'm dreaming of a new patio area...

You wont regret it! ;)

Great build, can't wait to see you feed the shark.

Thank you! Hopefully I can get some good video of him eating, he never likes to cooperate

No words. Just epic! (Also, I don't think your tank is big enough for tangs :))

Haha, thank you! That's what I am trying to convince my wife lol ;)

Simply awesome! :)

Thank you!

You can get some clear screen (1/4") from BRS and then window frames from Home Depot. Those make excellent tops and they won't droop into the water.

Your French angel is incredible. It's one of my favorite fish but I won't consider one again unless I have a much bigger tank (& without coral). Do you have, or have you considering adding, an Arothron puffer? Would be a great addition. :0)

I like that idea, I have used their clear screen for some of my other builds and really liked how clean it looked.

I really love that French, they move around so gracefully. He is just about lost any hint of the last juvenile markings even though he is pushing 12" in length. One day I would love to be able to pair him up with another.

I have had a black dogface puffer, I loved that guy, they really do have the personalities of dogs! Unfortunately I lost him years ago in a tank crash. He did do a number on the acrylic in the previous tank from swimming with his teeth against it so I am cautious to try again, but I really think they are such a cool species.

Great video...

May I suggest 3 things for cleaning:

Spare air-Look up scuba spare air
Get a scuba weight belt
Find a larger scraper...

I bet you could cut the time down by 70%!

I just looked up the spare air, that is awesome, I definitely need to invest in one along with a weight belt. I cannot believe how difficult it is to work against the buoyancy of just a few feet!

I haven't had much luck finding larger scrapers. I wonder if I could make a nice wide and sturdy one with an acrylic blade. The one I use is a plastic, but I wonder how acrylic scraping on acrylic would work. I suppose I can test it out on scrap pieces to make sure it doesn't scratch.
 
OP
OP
TheWildWillauers

TheWildWillauers

Community Member
View Badges
Joined
Jun 25, 2020
Messages
30
Reaction score
412
Rating - 0%
0   0   0
We let the tank sit full of water for a few days to monitor for any leaks or failures. Once we made sure everything was good, we drained it to make way for more work. Luckily we have well water.

-drywalling
jFsJVZb.jpg


-finally to the fun stuff; aquascaping, like I mentioned previously the skeleton of the structures are PVC and eggcrate
s4d75kE.jpg


3A15HJE.jpg


VfKLRhk.jpg


MBNqfHQ.jpg


Bqd0zvn.jpg


s7cuWws.jpg
 
OP
OP
TheWildWillauers

TheWildWillauers

Community Member
View Badges
Joined
Jun 25, 2020
Messages
30
Reaction score
412
Rating - 0%
0   0   0
On to the plumbing

-building the sump
hNMyoCc.jpg


r6XYuUo.jpg

(In hindsight I wish I would have had the sump on the refugium side of the tank to allow for a larger sump and more room to work with)

-circulation plumbing. This had to be changed a few times because of faulty bulkhead sealing because of course right where we had pre-drilled the plywood was where there was a joint in the liner. This was probably the most frustrating step of the build having to fill and drain about a foot of water each time to test for leaks
OqrhMNe.jpg


-once the bulkheads were sealed we could finally finish filling the tank
jQP90hF.png

-the sand/rocks really yellowed the water

-couple of days running carbon cleared the water up
m2RKaVl.jpg


js3wFa2.jpg


f5SpTxs.jpg


BaOrGi8.jpg


Na0eKTh.jpg


ZB0Vfjw.jpg


EVyIuw9.jpg


zHFWttx.jpg


I wish the sand would have stayed this white!!!
 
OP
OP
TheWildWillauers

TheWildWillauers

Community Member
View Badges
Joined
Jun 25, 2020
Messages
30
Reaction score
412
Rating - 0%
0   0   0
Finally time to add salt
ZE483sU.jpg


-seeding the tank with live rock from the other tank
GBagS0V.jpg


dQpmobk.jpg


KbBtzk2.jpg


-quarantining some Naso sp. that were labeled "Unicorn Tangs". Im not sure exactly what they are, I am between Naso hexacanthus and Naso caeruleacauda. I will post some more updated/detailed pictures for you guys to weigh in on
AXhMeTQ.jpg


-first inhabitants!
UB1gjOt.jpg


-few weeks later we added the unidentified unicorn tangs (looking back now I cant believe how small these guys were, they've grown like weeds!)
En1KWCY.png


hMsK5n6.jpg


-painting the gallery
24agvRl.jpg


-a few more fish added
DToIcHb.jpg


-refugium installed
ltEPS4j.jpg


1593654802233.png
 
OP
OP
TheWildWillauers

TheWildWillauers

Community Member
View Badges
Joined
Jun 25, 2020
Messages
30
Reaction score
412
Rating - 0%
0   0   0
Hats off to the heros of DIY!! There is something sooo satisfying about just learning and doing it yourself, the exact way you want it done.

Could not have said it better myself, although during the process Im sure we all are kicking ourselves at times, it all eventually pays off. I think the process of imagining and implementing is sometimes just as fun as the final product, probably why DIYers never truly have a completed project haha
 
OP
OP
TheWildWillauers

TheWildWillauers

Community Member
View Badges
Joined
Jun 25, 2020
Messages
30
Reaction score
412
Rating - 0%
0   0   0
-Panorama of the absolute mess the yard became
NGQ1Tm2.jpg


3mEcebZ.jpg


-Finishing up the plumbing the maintenance room
ijuRfVS.jpg


-The water became pretty unsightly after a month or so of cycling
nekusgx.jpg


r4LBYHH.jpg


1dfOAbI.jpg


7JsW6qJ.jpg


OIQINCd.jpg


-Finally moved the fish into their new home! This was a huge pain in the butt to catch them all and transfer them. I dont know who was more stressed during the process; me or the fish!
bZCcpdE.jpg


NnremMn.jpg


r2cfIZ0.jpg
 

Being sticky and staying connected: Have you used any reef-safe glue?

  • I have used reef safe glue.

    Votes: 35 85.4%
  • I haven’t used reef safe glue, but plan to in the future.

    Votes: 1 2.4%
  • I have no interest in using reef safe glue.

    Votes: 2 4.9%
  • Other.

    Votes: 3 7.3%
Back
Top