450 Gallon Display Tank and Fish Room

Bo.

Impatient as always
View Badges
Joined
Feb 25, 2020
Messages
1,913
Reaction score
9,406
Location
Albuquerque
Rating - 0%
0   0   0
U
Painting done. Tile is down. Electrical outlets, exhaust fan, and HVAC returns all finished. Hope to grout the tile today and then waiting on tank to be ready for pickup. I have a dedicated space 6ft long against the side wall for the sump. I am having troubles deciding on what to buy. My 220gal has the Emerald 39 but I know that will be too small for this new tank. Any suggestions? The tank will have two external overflow boxes with 6 total 1.5" drains. I would like to put two return pumps in for redundancy and will have 4 total loc line returns. Other water flow in tank will be achieved with Gyres.
20210604_193253.jpg
i
20210604_193304.jpg
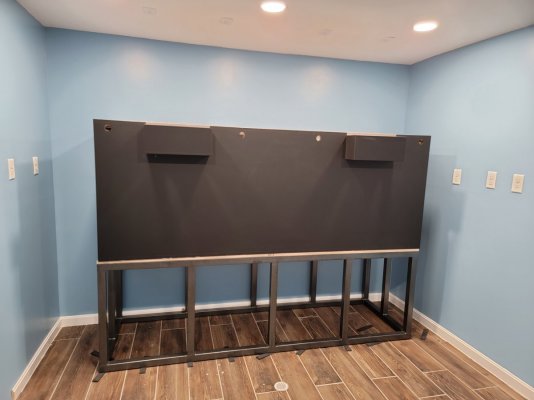
Use the 220 for a sump... You already have it!
 

mehaffydr

Valuable Member
View Badges
Joined
Feb 20, 2013
Messages
1,866
Reaction score
5,552
Location
Harvest Alabama
Rating - 0%
0   0   0
I am using a rubermaid stock tank and it is working great. My tank has only been running a couple months but so far I like it. I thin I am going to get another stock tank and tie them together with a 4" PVC line but still working on that idea.
 
OP
OP
M

MarkDarnell

Community Member
View Badges
Joined
Sep 12, 2014
Messages
83
Reaction score
125
Location
Gettysburg PA
Rating - 0%
0   0   0
Update.

Tank and stand were finished last week and picked up on Friday. Shout out to Midwest Custom Aquarium in Minnesota for their customer service! Chris is fantastic and extremely helpful with any and all questions I had and gave great advice on some particular questions I had regarding overflows and returns. Tank dimensions are 96"W x 36"T x 30"D. The sides are all 1" acrylic, top and bottom are 3/4" acrylic. Lid openings are recessed mitered in and made with polycarbonate with a feeding hole in one lid as well.

20210617_153048.jpg


I called Chris just last week to confirm everything would be ready for pick up. I explained my sump dilemma and he suggested I consider one of his offerings. He was able to fabricate one of his standard sumps for me at a cheaper price and much better product than some other sumps I was considering. And I only gave him one week to do it! Sump ended up being 5ft x 2ft wide and 20in deep. 4-7" filter socks, massive center section for skimmer and other goodies and then a pump return section for drop in pumps, or I can use bulkheads and do an external (still undecided on this). The sump was made with 1/2" acrylic where most name brands are only 3/8". I am very happy with this choice.

20210619_192546.jpg


We got it all loaded and headed home.
20210617_154133.jpg

20210617_161642.jpg


We got home late Friday night and Saturday morning we got everything put into place. Advice to future large tank purchases, make sure you measure your doorways before fabrication. Our tank with the overflows ended up being 35.5" and the door frame is only 35" on a 36" door. We had to do some cutting and subsequent repair to get it in the house. Then we had to turn the tank on its side and lift it up thru the viewing hole to the fish room. Lots of blood, sweat, and friends to help and we got it in.
20210619_115816.jpg
20210619_115912.jpg
20210619_124957-jpg.2227014
20210619_133036.jpg
 

Attachments

  • 20210619_124957.jpg
    20210619_124957.jpg
    105.1 KB · Views: 871

mehaffydr

Valuable Member
View Badges
Joined
Feb 20, 2013
Messages
1,866
Reaction score
5,552
Location
Harvest Alabama
Rating - 0%
0   0   0
My last tank a 225 gal. which was custom built 5' x 3' x 24" was from Midwest Aquariums. Very nice tank I had it set up for probably 15 years. Just took it down last fall.
 
OP
OP
M

MarkDarnell

Community Member
View Badges
Joined
Sep 12, 2014
Messages
83
Reaction score
125
Location
Gettysburg PA
Rating - 0%
0   0   0
My last tank a 225 gal. which was custom built 5' x 3' x 24" was from Midwest Aquariums. Very nice tank I had it set up for probably 15 years. Just took it down last fall.
I was very impressed with Chris. Didn't get to meet him unfortunately as he was away in NY, but he has been wonderful to work with. This is my first acrylic tank, still reading all the do's and dont's.
 
OP
OP
M

MarkDarnell

Community Member
View Badges
Joined
Sep 12, 2014
Messages
83
Reaction score
125
Location
Gettysburg PA
Rating - 0%
0   0   0
Built the sump and water change vessels stand this week. Simple 4x4 legs with 2x6 frame. Found 3/4" Oak Plywood at Lowes cheaper than anything else. Still paid over $60 for one sheet of it. Crazy prices.
20210624_115414.jpg


Painted it all gloss white except for the legs.
Working on plumbing next. I ordered two MP60 and 2 additional Kessil A360X. I am looking for Vectra L2 return pumps, but it seems everyone is out of them.
20210625_164231.jpg
 

Oberst Hajj

Well-Known Member
View Badges
Joined
Dec 23, 2012
Messages
978
Reaction score
852
Location
Colorado
Rating - 0%
0   0   0
Built the sump and water change vessels stand this week. Simple 4x4 legs with 2x6 frame. Found 3/4" Oak Plywood at Lowes cheaper than anything else. Still paid over $60 for one sheet of it. Crazy prices.
20210624_115414.jpg


Painted it all gloss white except for the legs.
Working on plumbing next. I ordered two MP60 and 2 additional Kessil A360X. I am looking for Vectra L2 return pumps, but it seems everyone is out of them.
20210625_164231.jpg
I really like having my sump and reservoirs raised up off the floor. Mine are much higher up, allowing me to store boxes/buckets of salt under it.

Any reason you did not paint the legs? With how nice your fish room is looking, are they going to bother you later on not being "finished"?
 
OP
OP
M

MarkDarnell

Community Member
View Badges
Joined
Sep 12, 2014
Messages
83
Reaction score
125
Location
Gettysburg PA
Rating - 0%
0   0   0
I really like having my sump and reservoirs raised up off the floor. Mine are much higher up, allowing me to store boxes/buckets of salt under it.

Any reason you did not paint the legs? With how nice your fish room is looking, are they going to bother you later on not being "finished"?
Definitely excited to not have to bend over anymore with it raised up. I plan on putting a remote refugium above the sump so I couldn't go too high. I also didnt want to go too high and not be able to dump the salt in the mixing container on the other side also.

With pressure treated Lumber, you have to wait for it to dry some before you paint. I will eventually paint them. Probably wait a few weeks though.
 

LBReefer

Well-Known Member
View Badges
Joined
Jun 22, 2016
Messages
995
Reaction score
741
Location
Long Beach
Rating - 0%
0   0   0
What an incredible build. Are you in the trades or just extremely handy?

I really liked your choice of alternating which circuit the boxes were on. I wish I'd thought of that.
 
OP
OP
M

MarkDarnell

Community Member
View Badges
Joined
Sep 12, 2014
Messages
83
Reaction score
125
Location
Gettysburg PA
Rating - 0%
0   0   0
What an incredible build. Are you in the trades or just extremely handy?

I really liked your choice of alternating which circuit the boxes were on. I wish I'd thought of that.
My father was a master carpenter and handyman. From about age 10, I would work with him on the weekends. Started out picking up trash on jobsites and sweeping floors, carrying Lumber, etc. Progressed into actually swinging hammers and using power tools. We built so many different things, I learned alot. Once out of HS, I went a different route and started working for an electrical distributor but never forgot all he taught me.

For the electrical stuff, I wired it like you would a kitchen with the alternate circuitry. I am self taught in that trade, along with asking my contractors a ton of questions over the past 25 years :)

A ton of planning went into this tank build. Once I'm done, I bet I will think of something I should have done differently. I'm sure others are the same, but the minute I started in the hobby, I started planning my dream build in my head.
 
OP
OP
M

MarkDarnell

Community Member
View Badges
Joined
Sep 12, 2014
Messages
83
Reaction score
125
Location
Gettysburg PA
Rating - 0%
0   0   0
Started aquascaping this weekend. Used Marco rocks, superglue and accelerant, and then the Marco cement. Worked flawlessly.
20210704_080823.jpg


20210705_082506.jpg


Once we get the tank ready and running, we will remove the rocks from the 220 gallon and stack in the middle, creating some more caverns and caves. I will probably get more dry rock and make some arches too.

Next up gravel rinse.
 

ReapersReef

New Member
View Badges
Joined
Apr 15, 2021
Messages
14
Reaction score
31
Location
San marcos
Rating - 0%
0   0   0
Started aquascaping this weekend. Used Marco rocks, superglue and accelerant, and then the Marco cement. Worked flawlessly.
20210704_080823.jpg


20210705_082506.jpg


Once we get the tank ready and running, we will remove the rocks from the 220 gallon and stack in the middle, creating some more caverns and caves. I will probably get more dry rock and make some arches too.

Next up gravel rinse.
I love this whole thread. Congratulations, you're almost there!!!
 

Being sticky and staying connected: Have you used any reef-safe glue?

  • I have used reef safe glue.

    Votes: 134 88.2%
  • I haven’t used reef safe glue, but plan to in the future.

    Votes: 9 5.9%
  • I have no interest in using reef safe glue.

    Votes: 6 3.9%
  • Other.

    Votes: 3 2.0%
Back
Top