5 Feet, 110 Gallons of Fun

cvrle1

Well-Known Member
View Badges
Joined
Sep 13, 2018
Messages
851
Reaction score
976
Rating - 0%
0   0   0
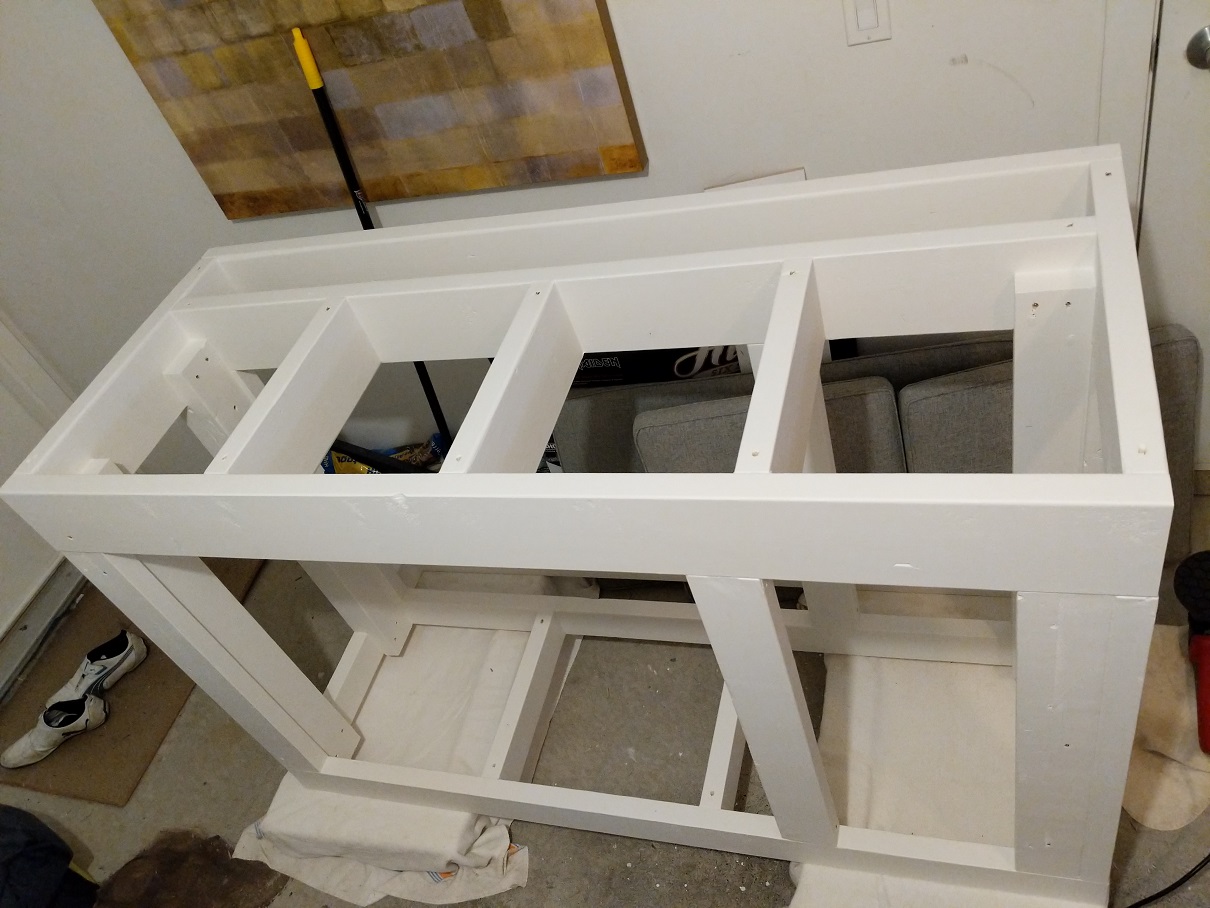
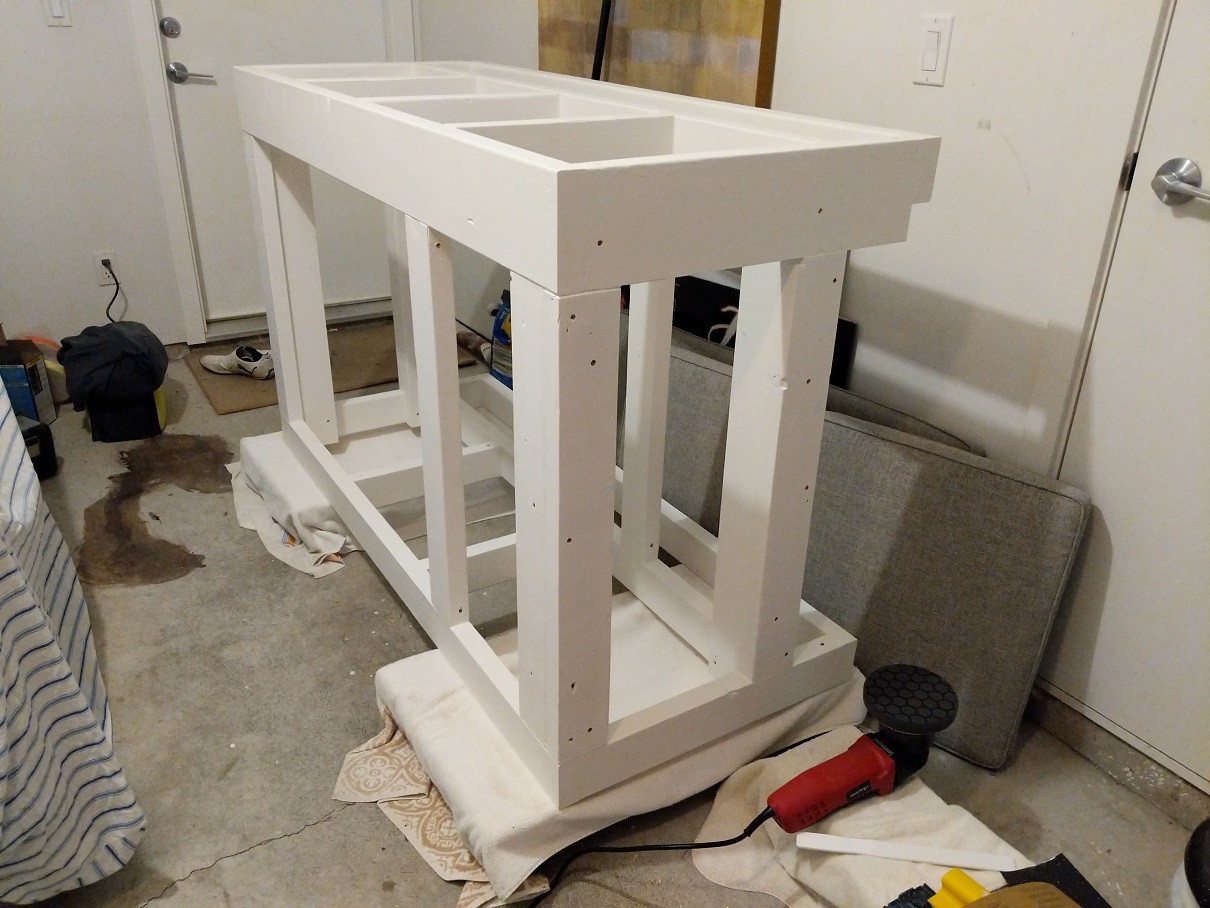
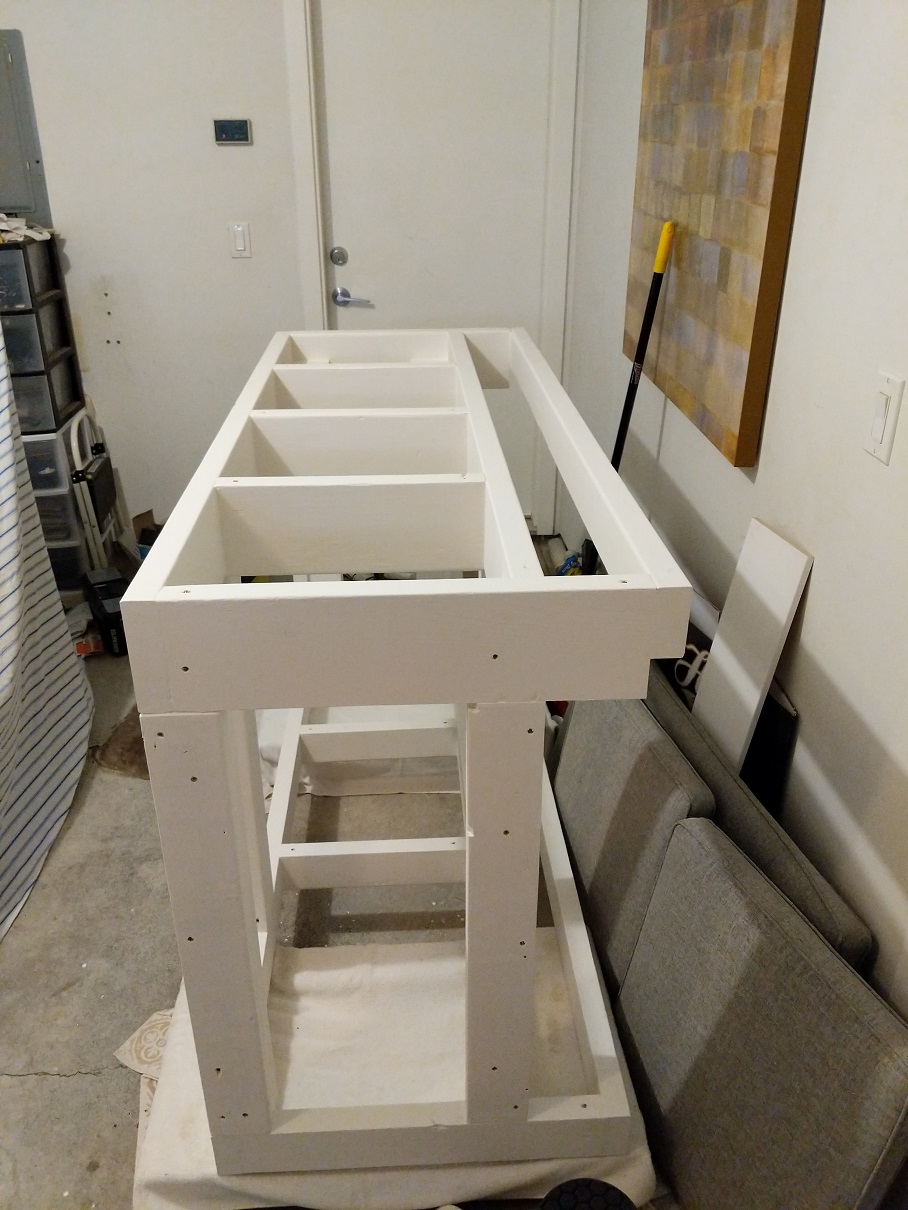
Hello everyone, I figured it would be good to start my own build thread for several reasons. I got a lot of ideas and help from various folks on R2R, so I would like to pay it back even a bit if I can. Also, it would be neat to see progress for myself and how things evolve and change.

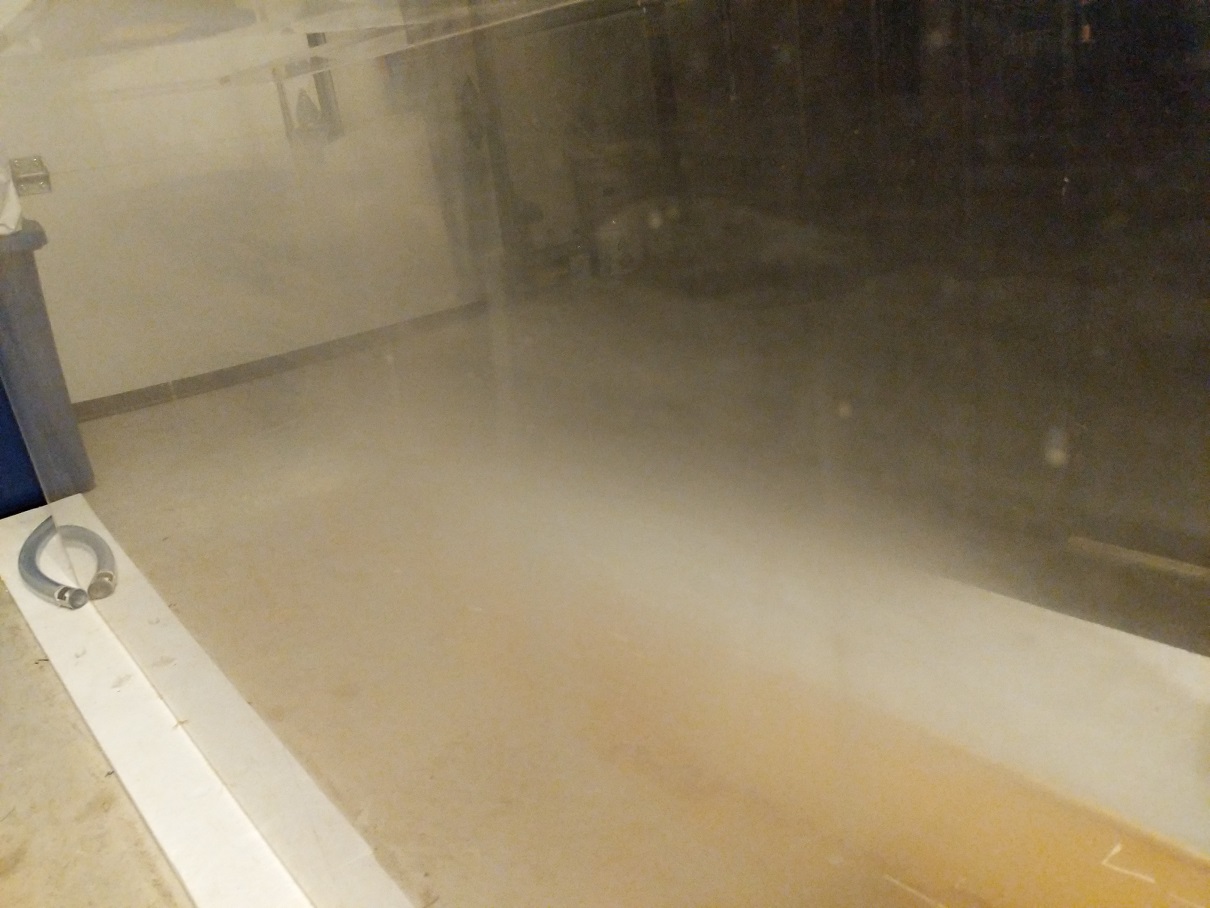
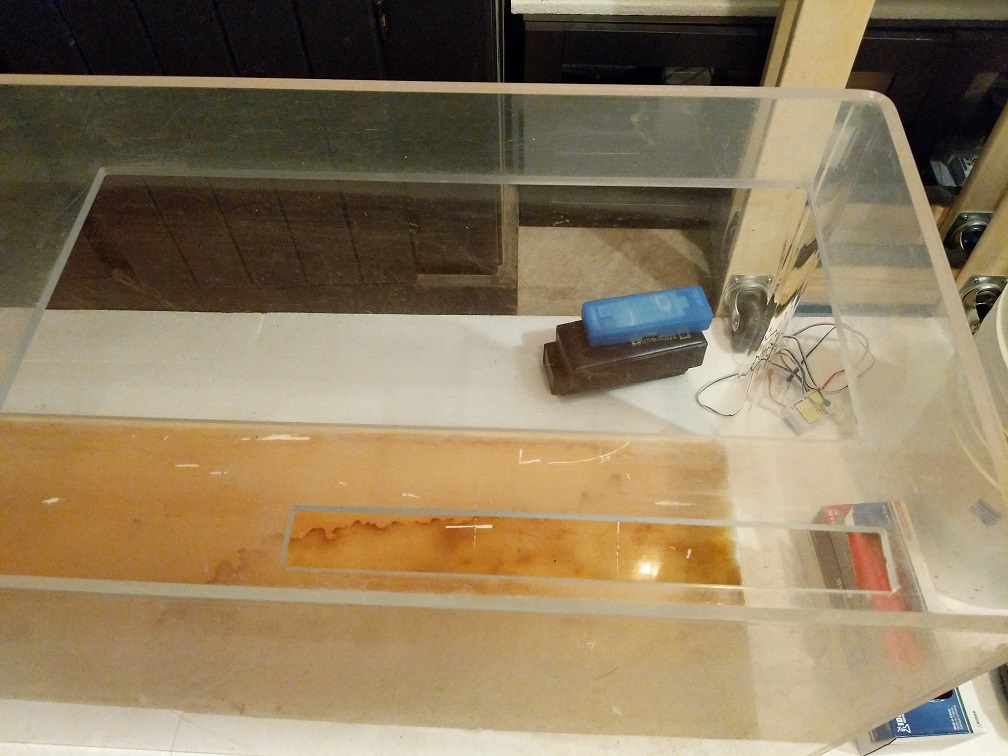
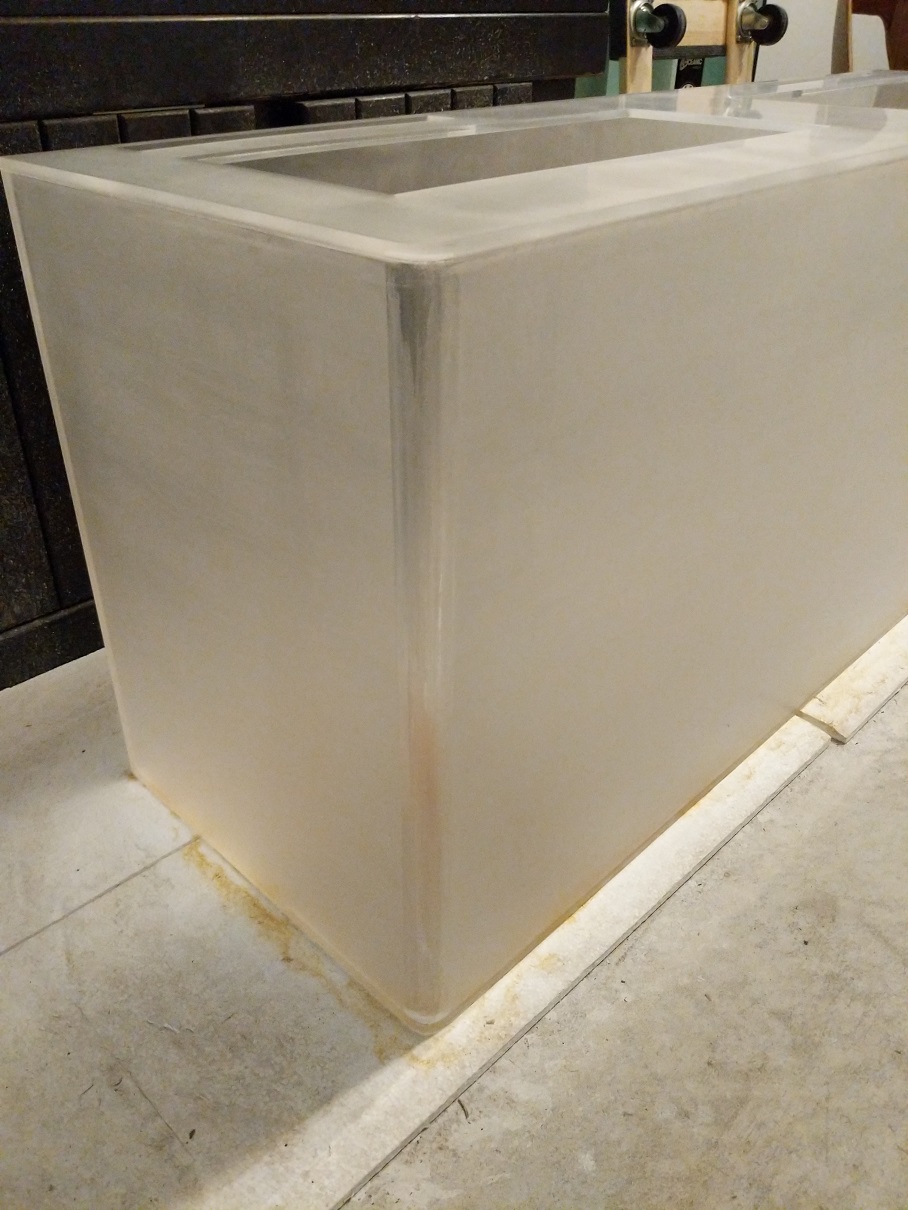
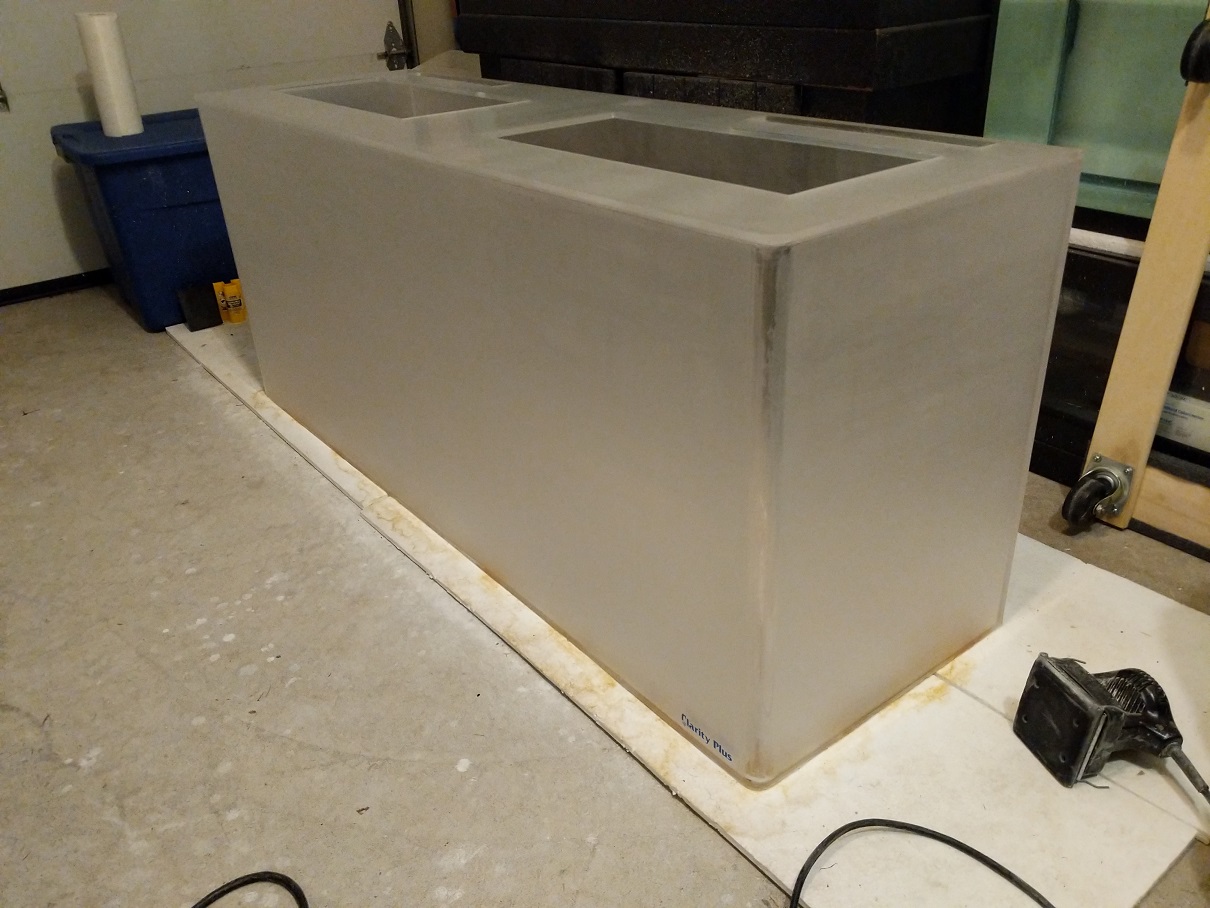
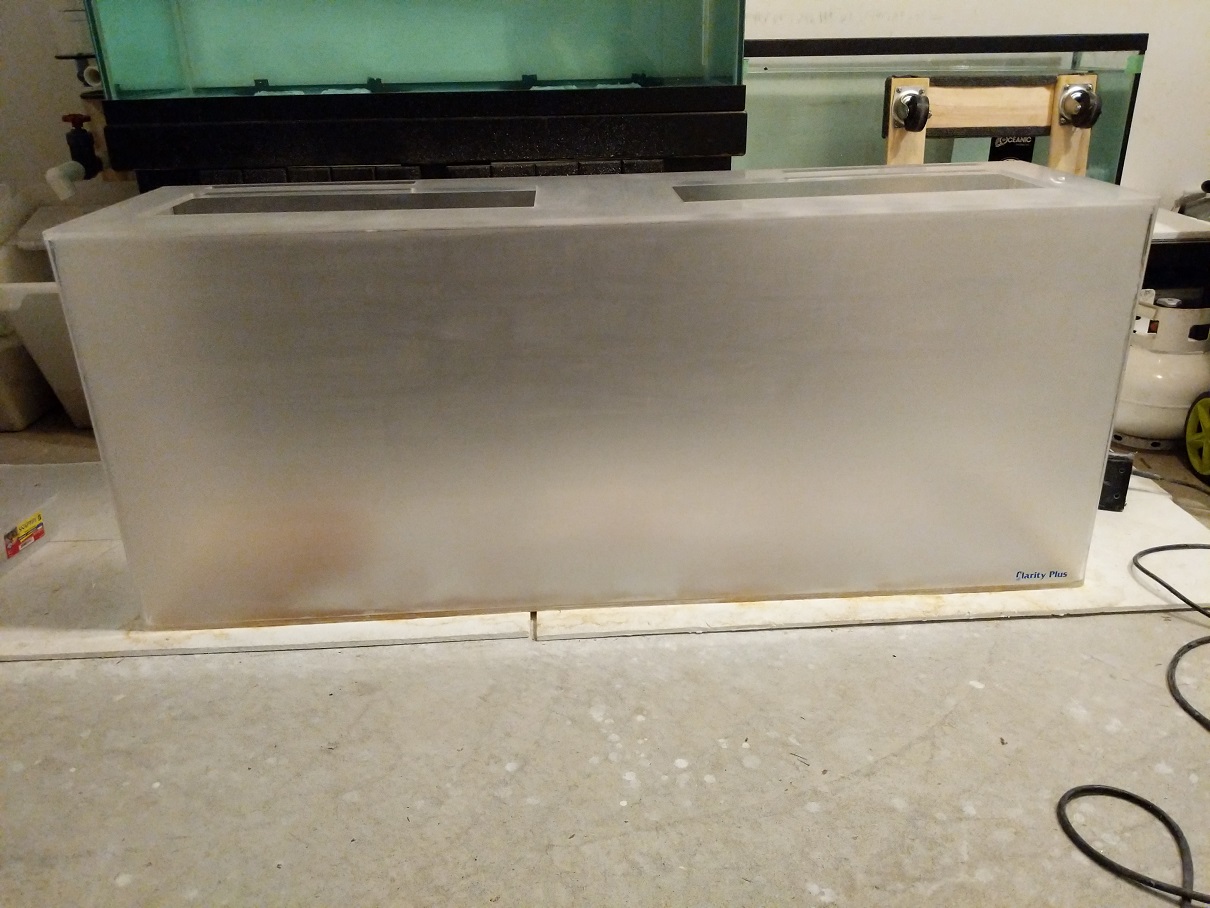
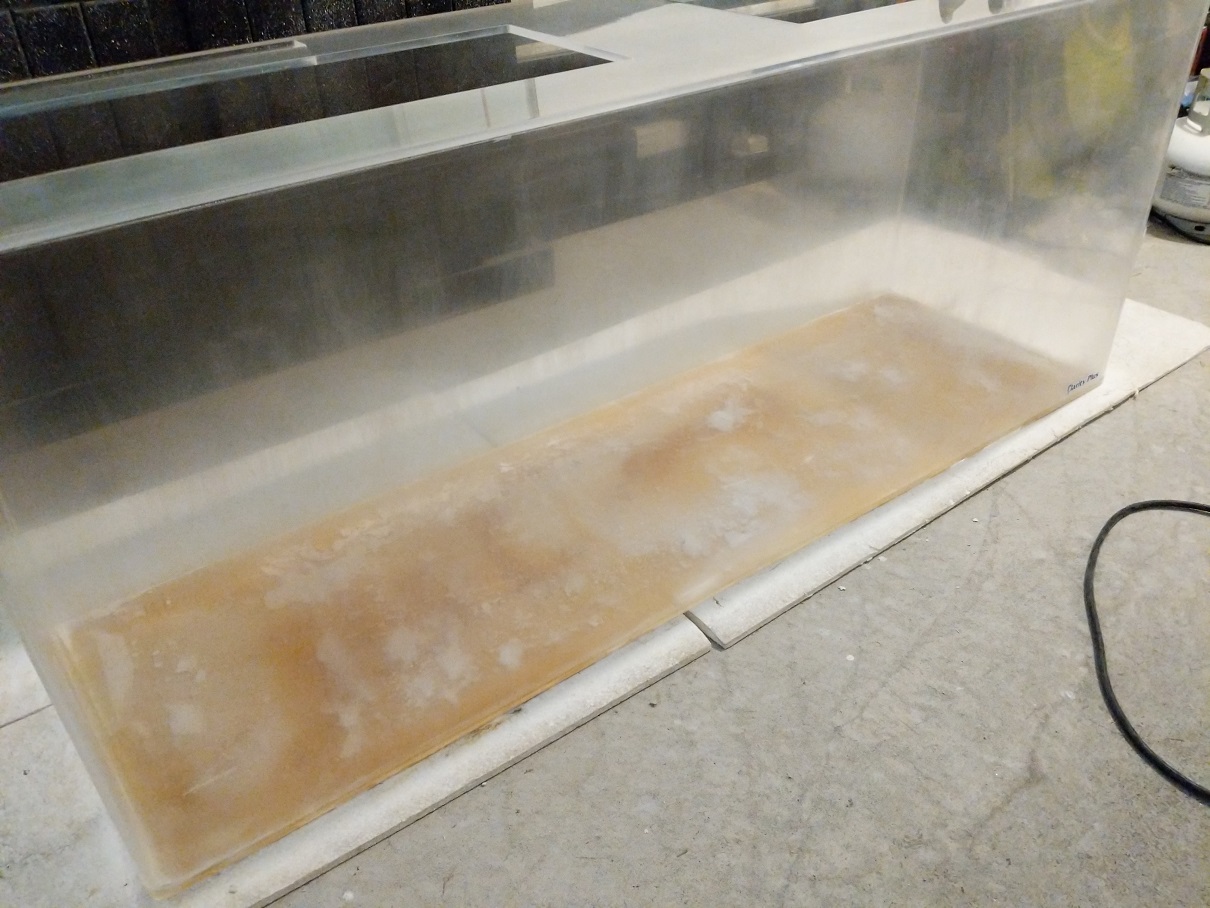
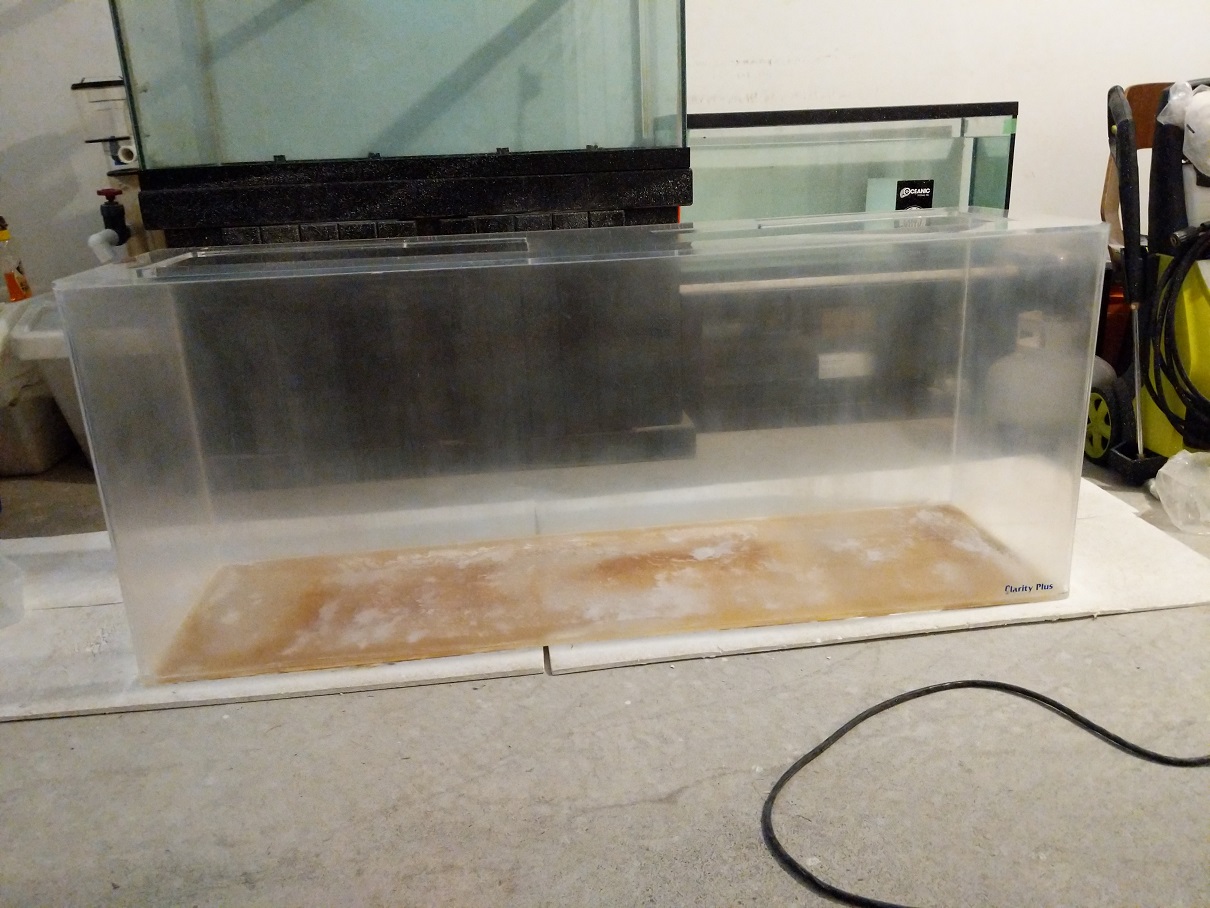
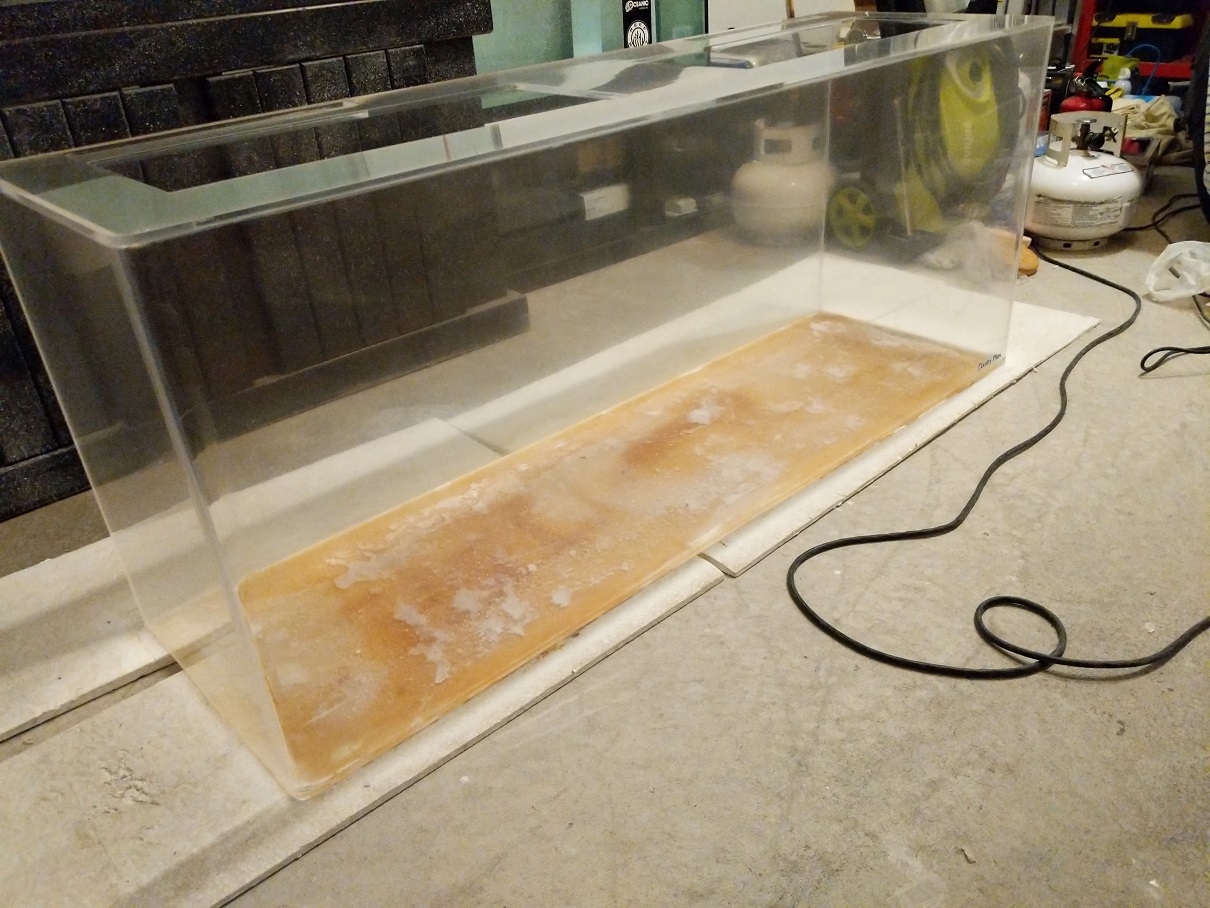
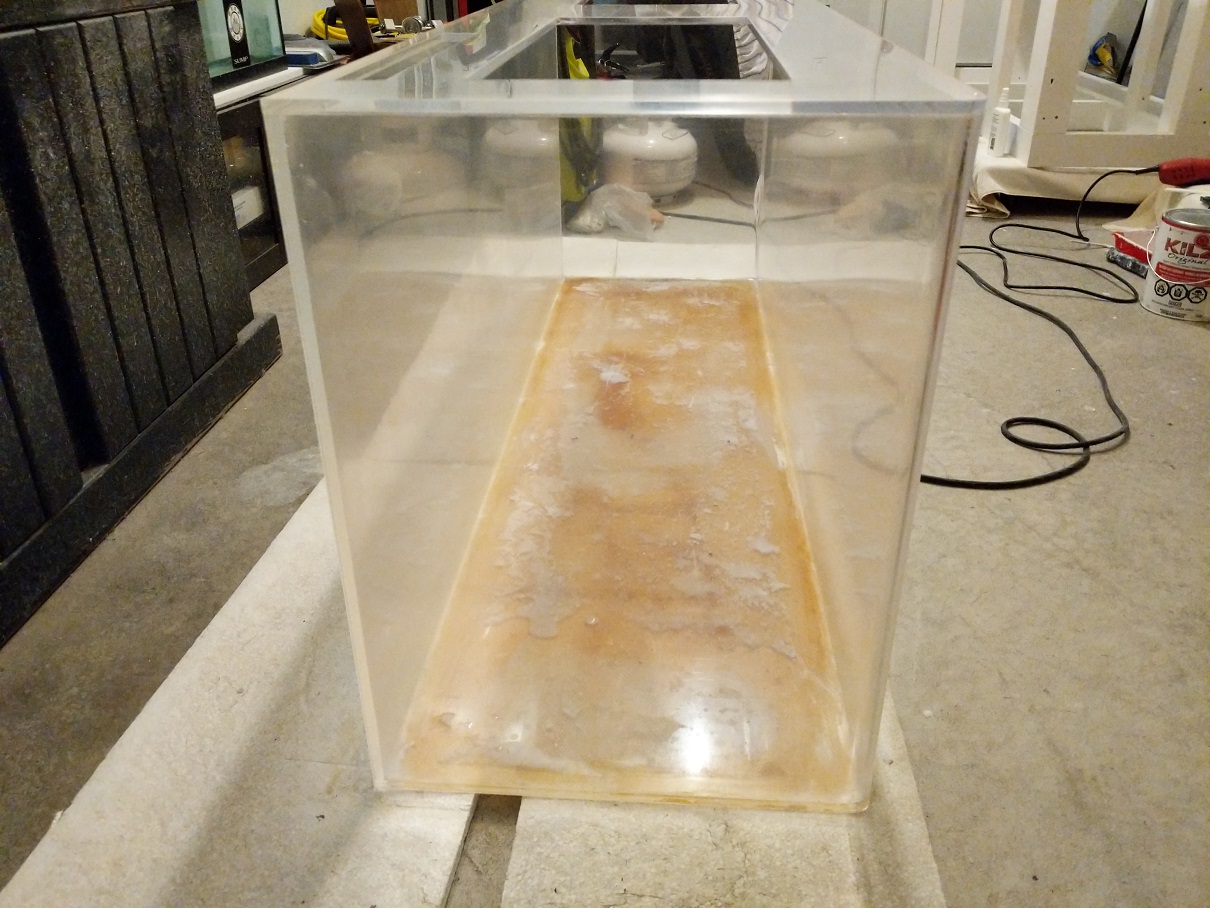
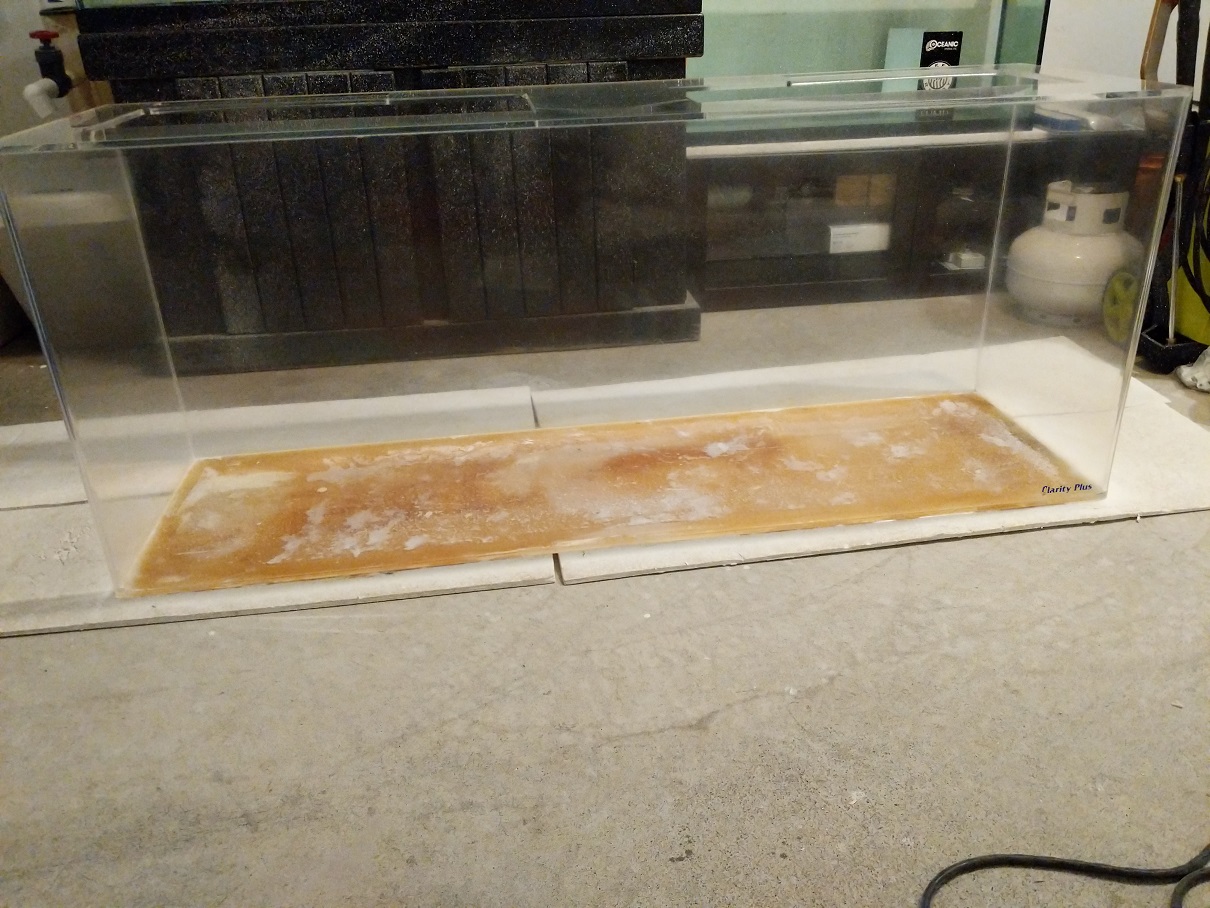
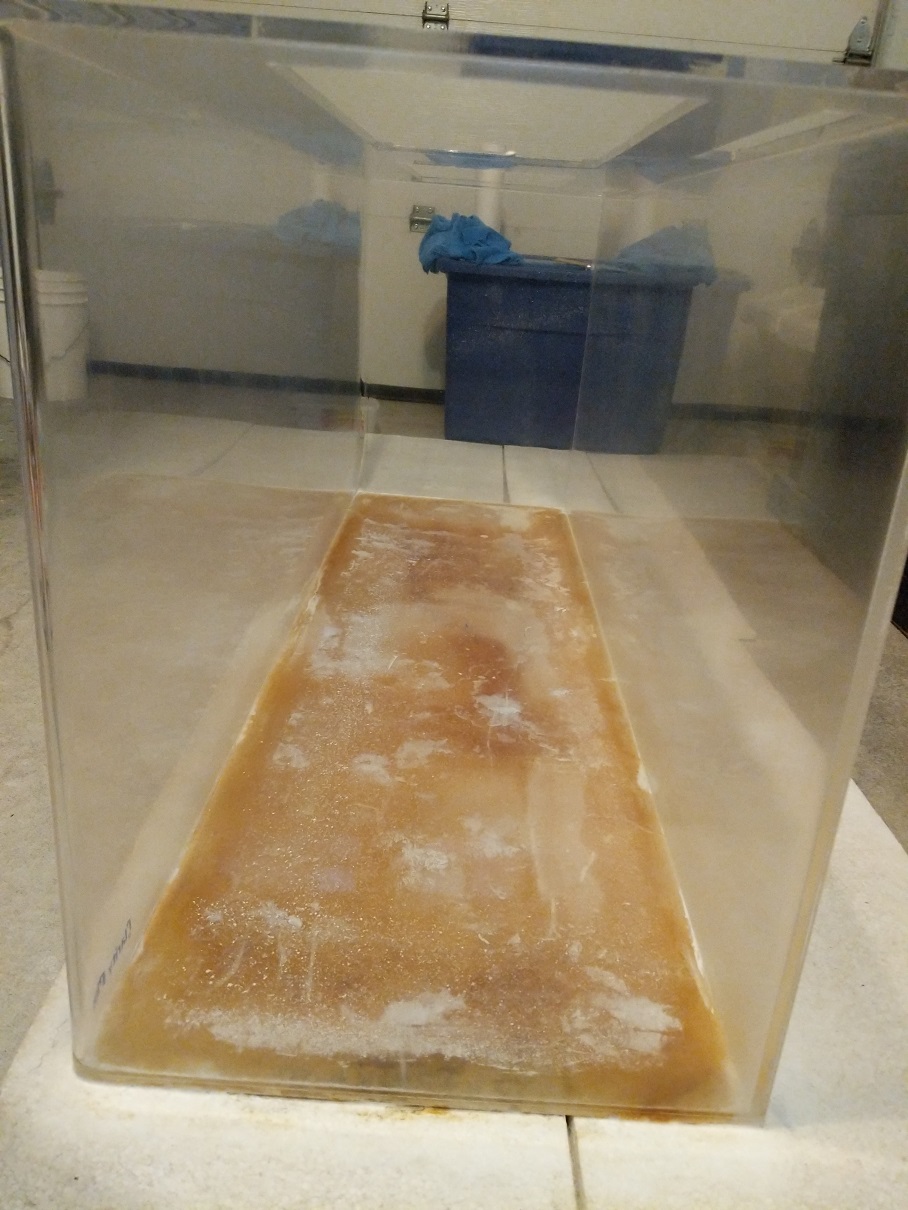
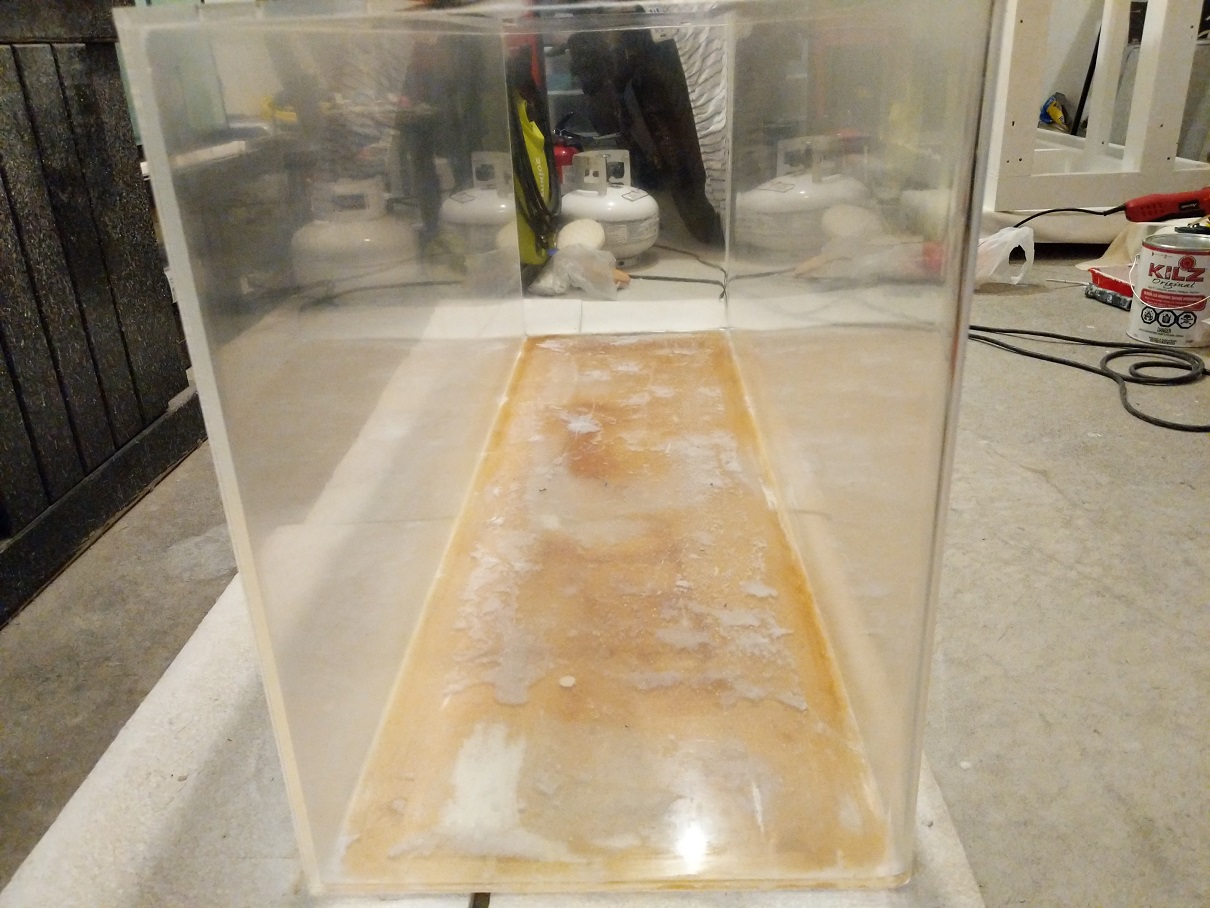
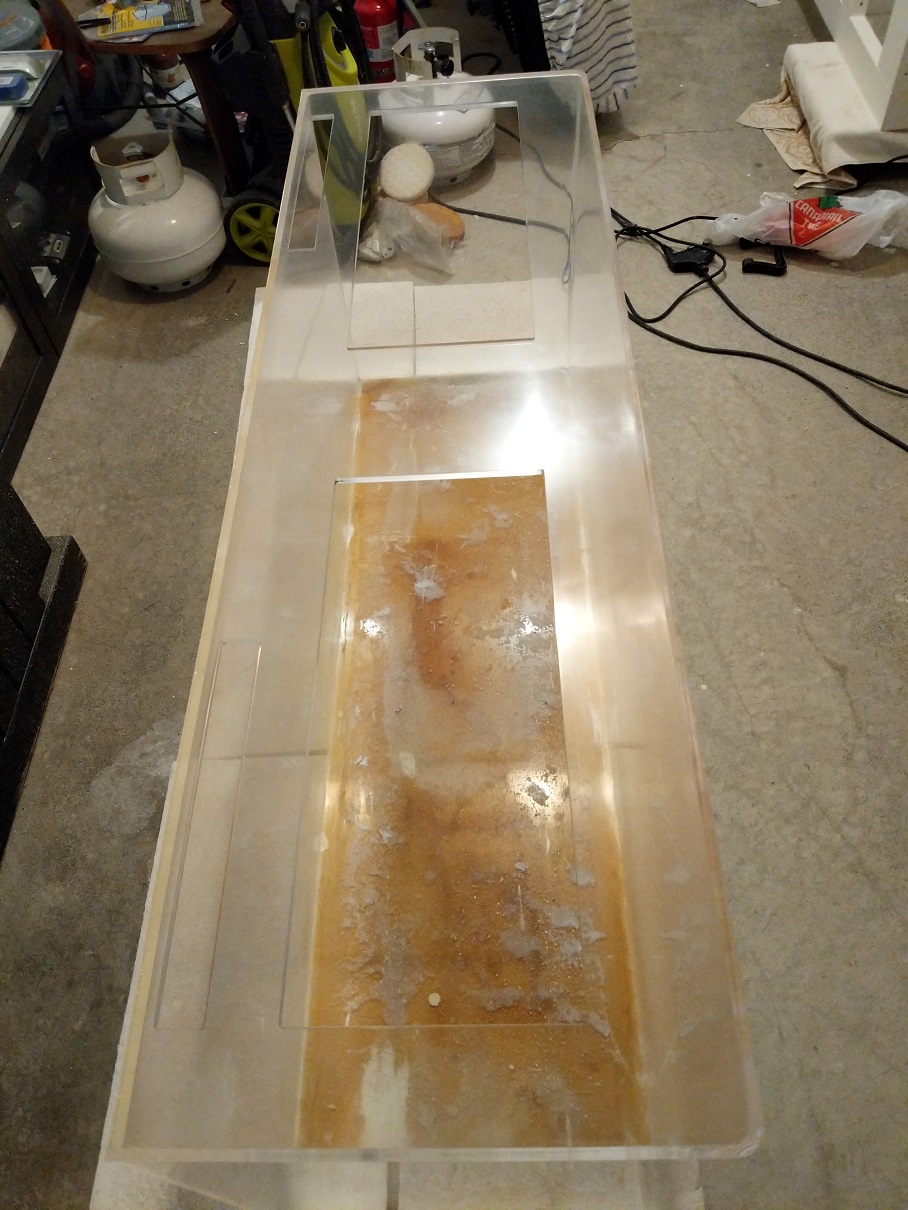
I picked up acrylic (5 foot x 18" x 24") 110 gallon tank several months ago. This is what it looked like when I got it

bcARESa.jpg

eyz0O3Q.jpg

zyHzpxG.jpg


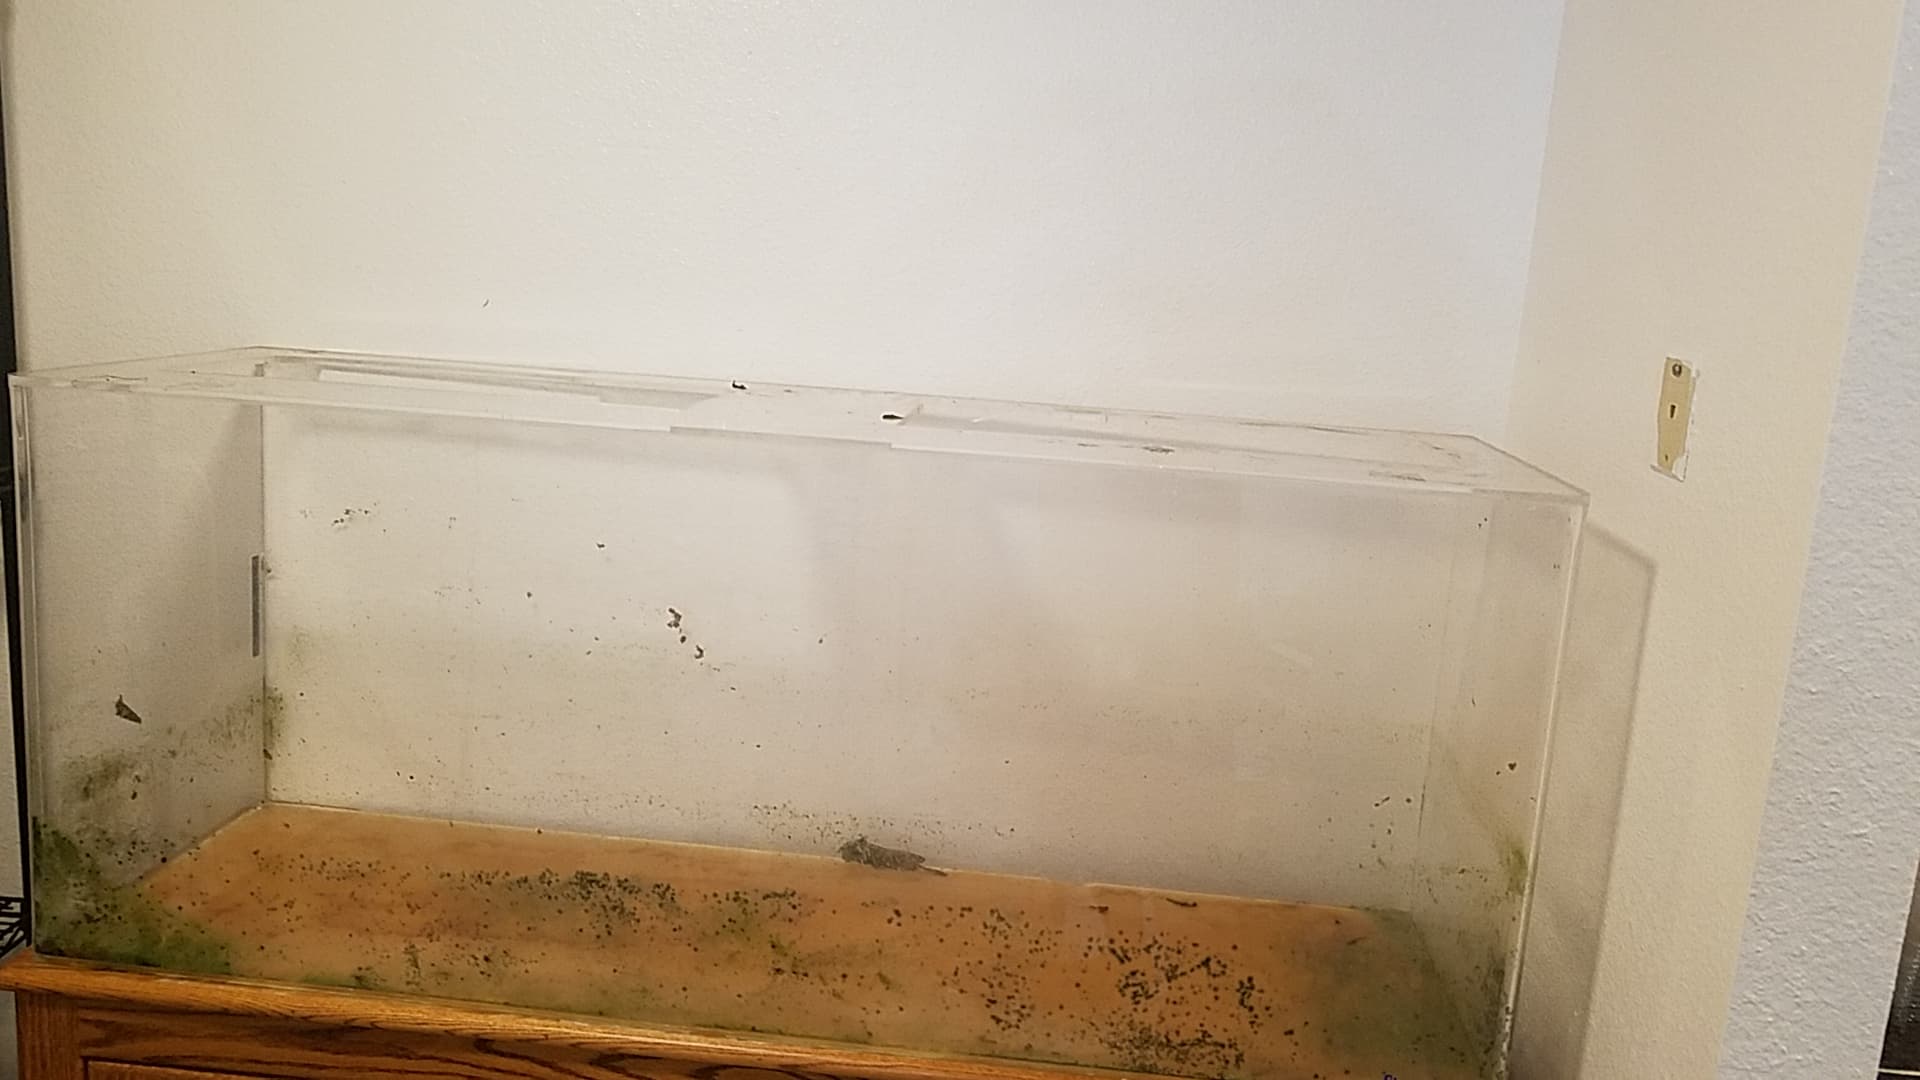
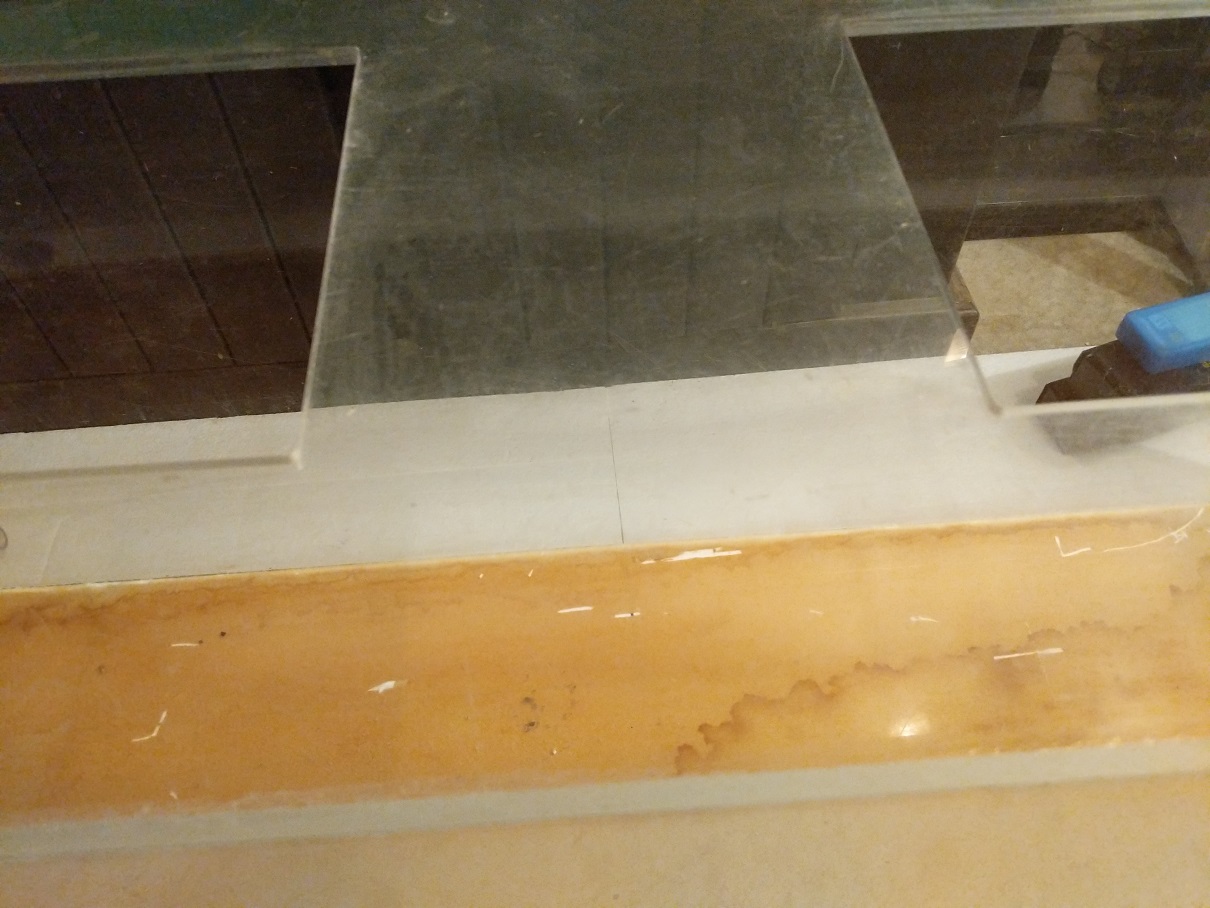
As you can see it was in a somewhat rough shape, but all seams were looking good and it held water fine. After week long water test I cleaned up algae with Mr Clean eraser. This stuff is magic. I could now see what I was actually working with.

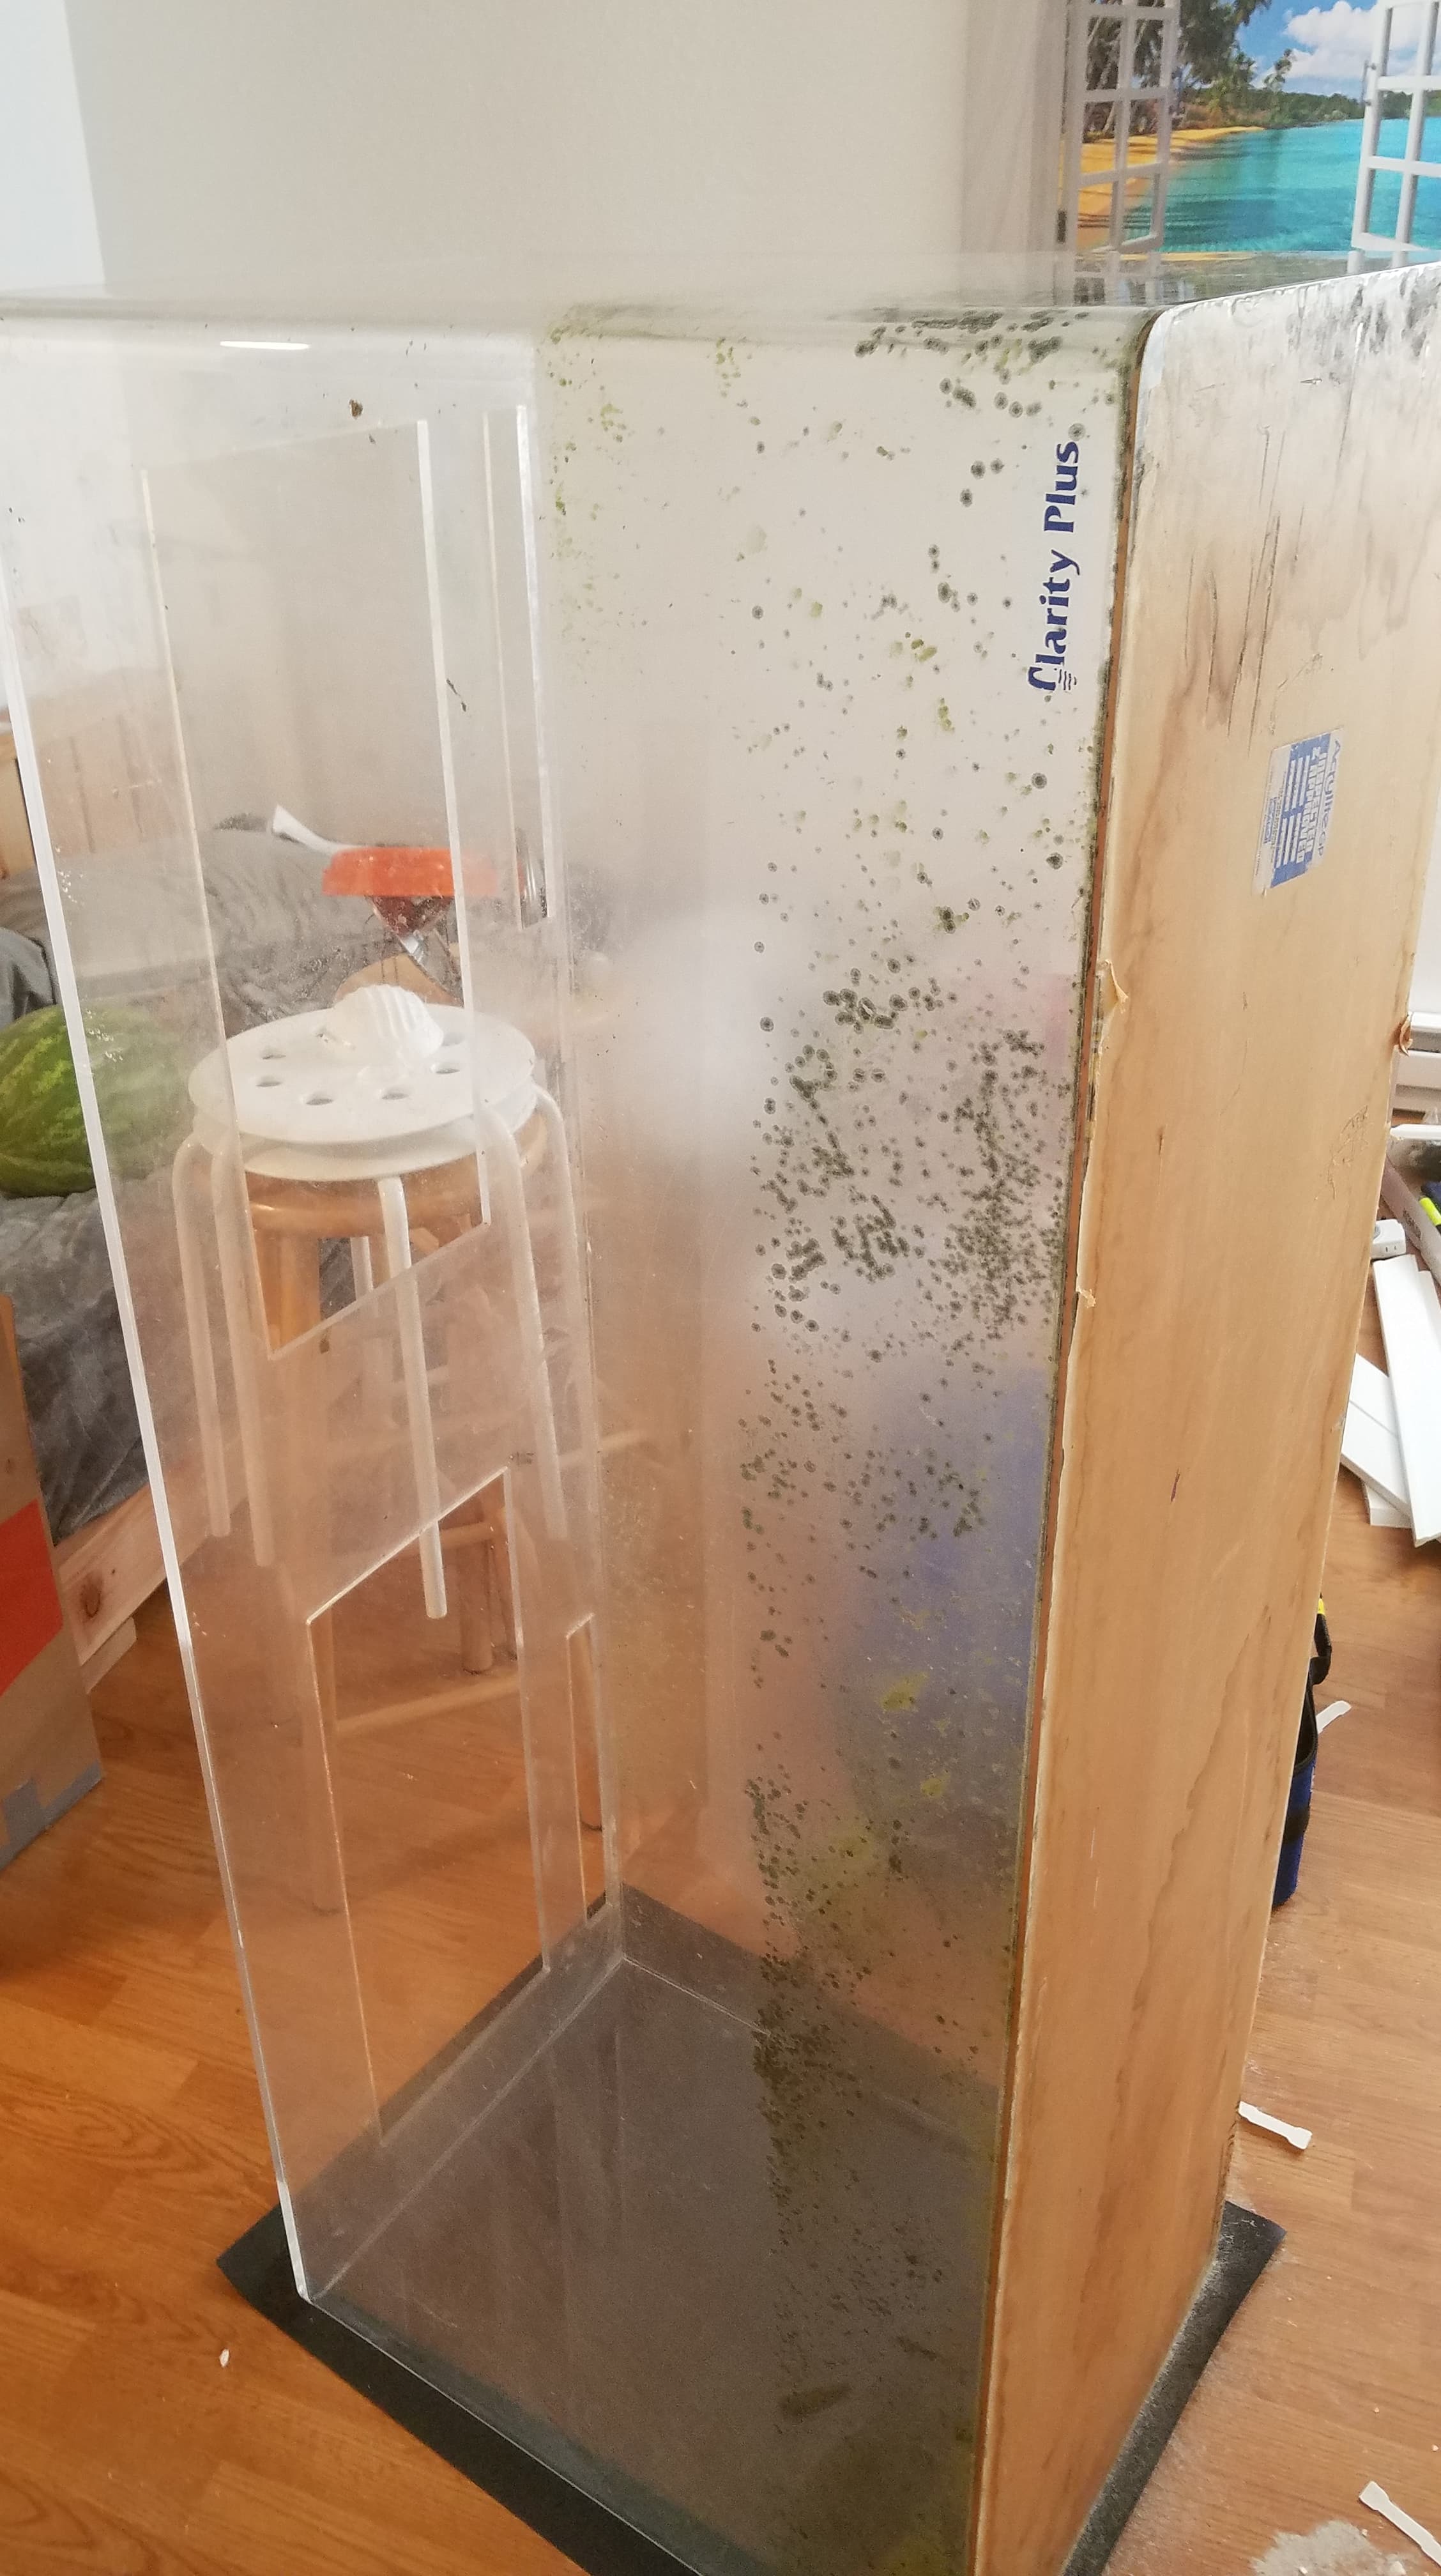
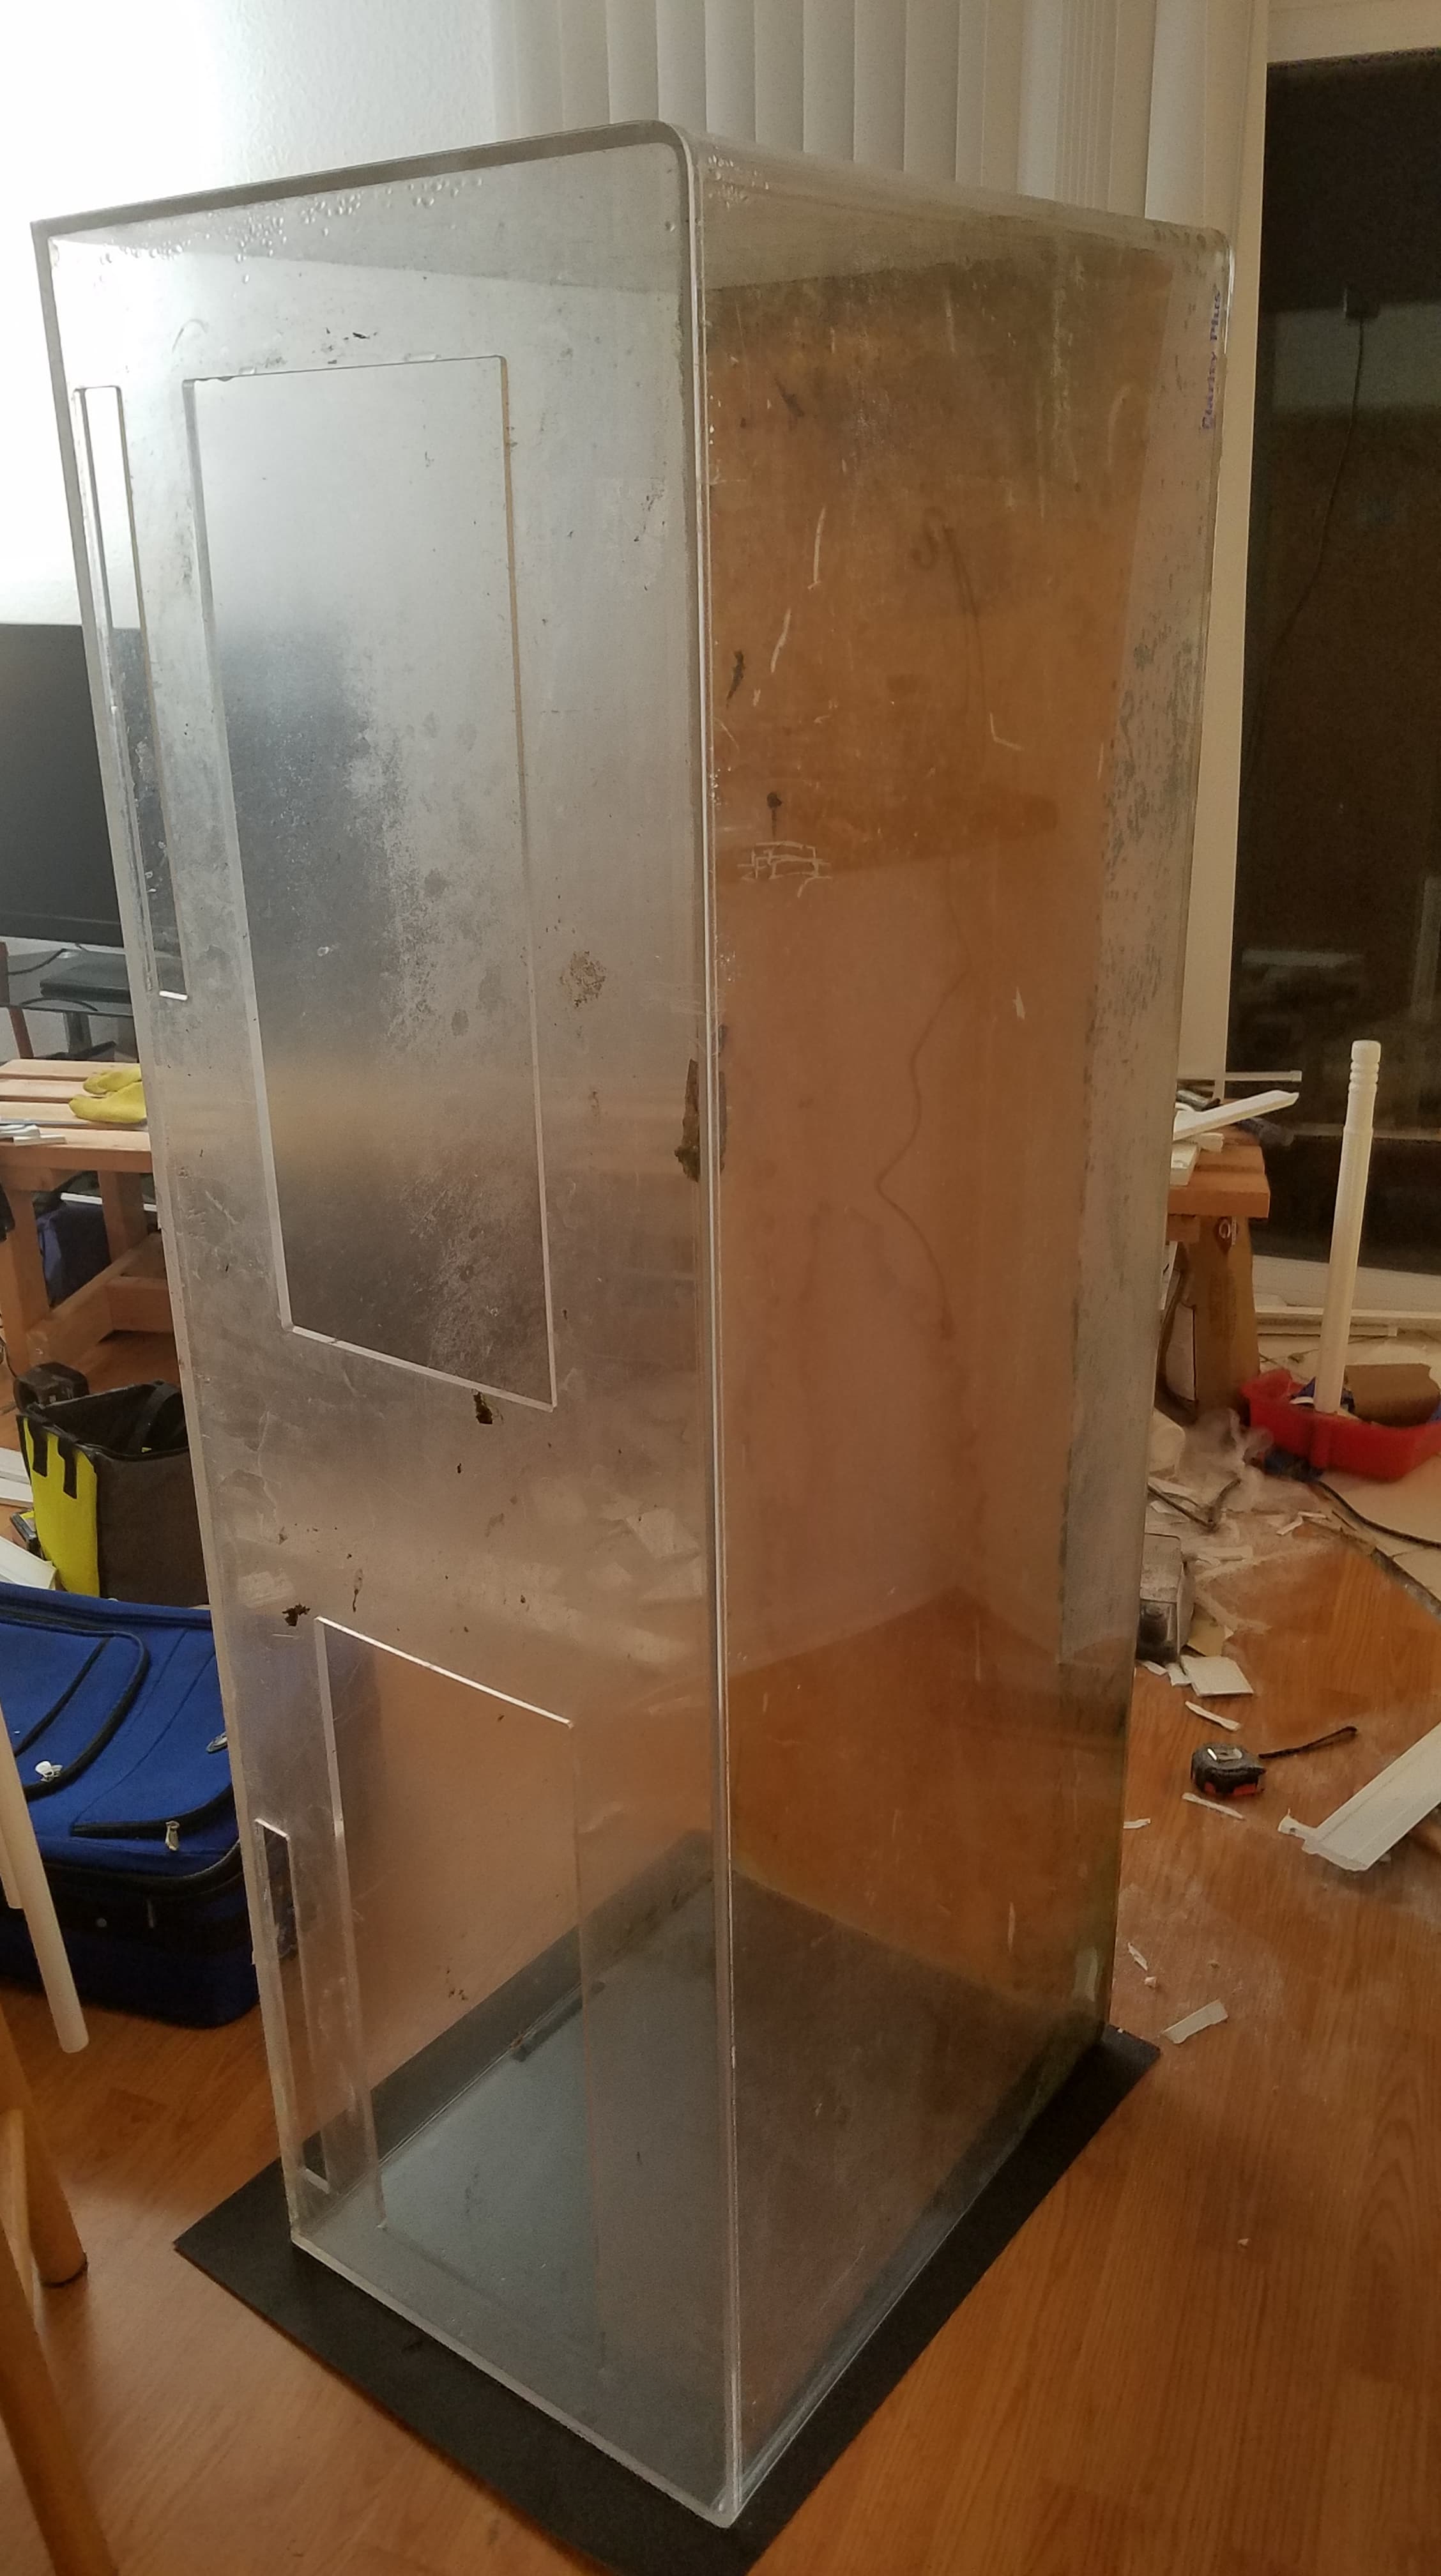
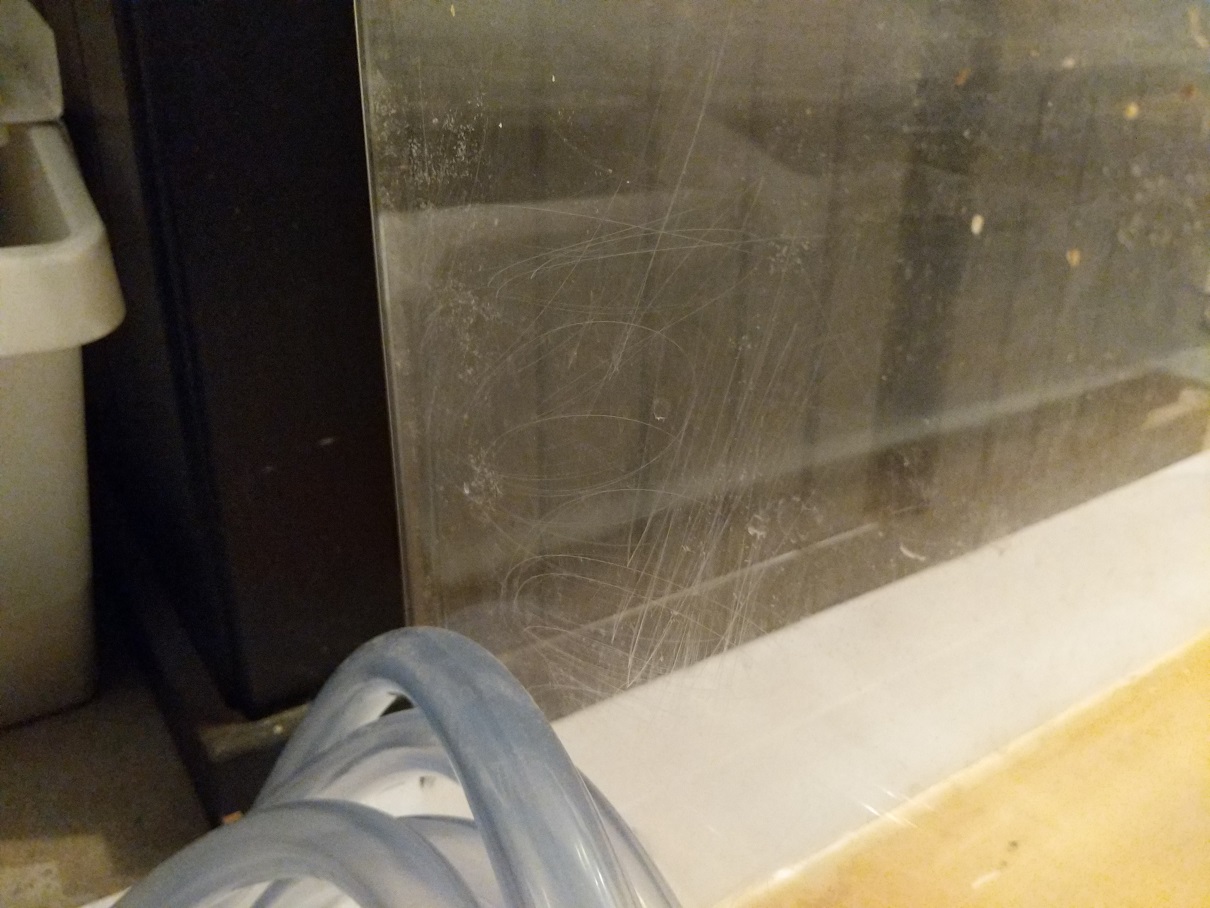
I am guessing PO tried to buff out scratches, used higher grit sand paper and then gave up.
R4xndzt.jpg

lJlXMbY.jpg

wKzbfsx.jpg


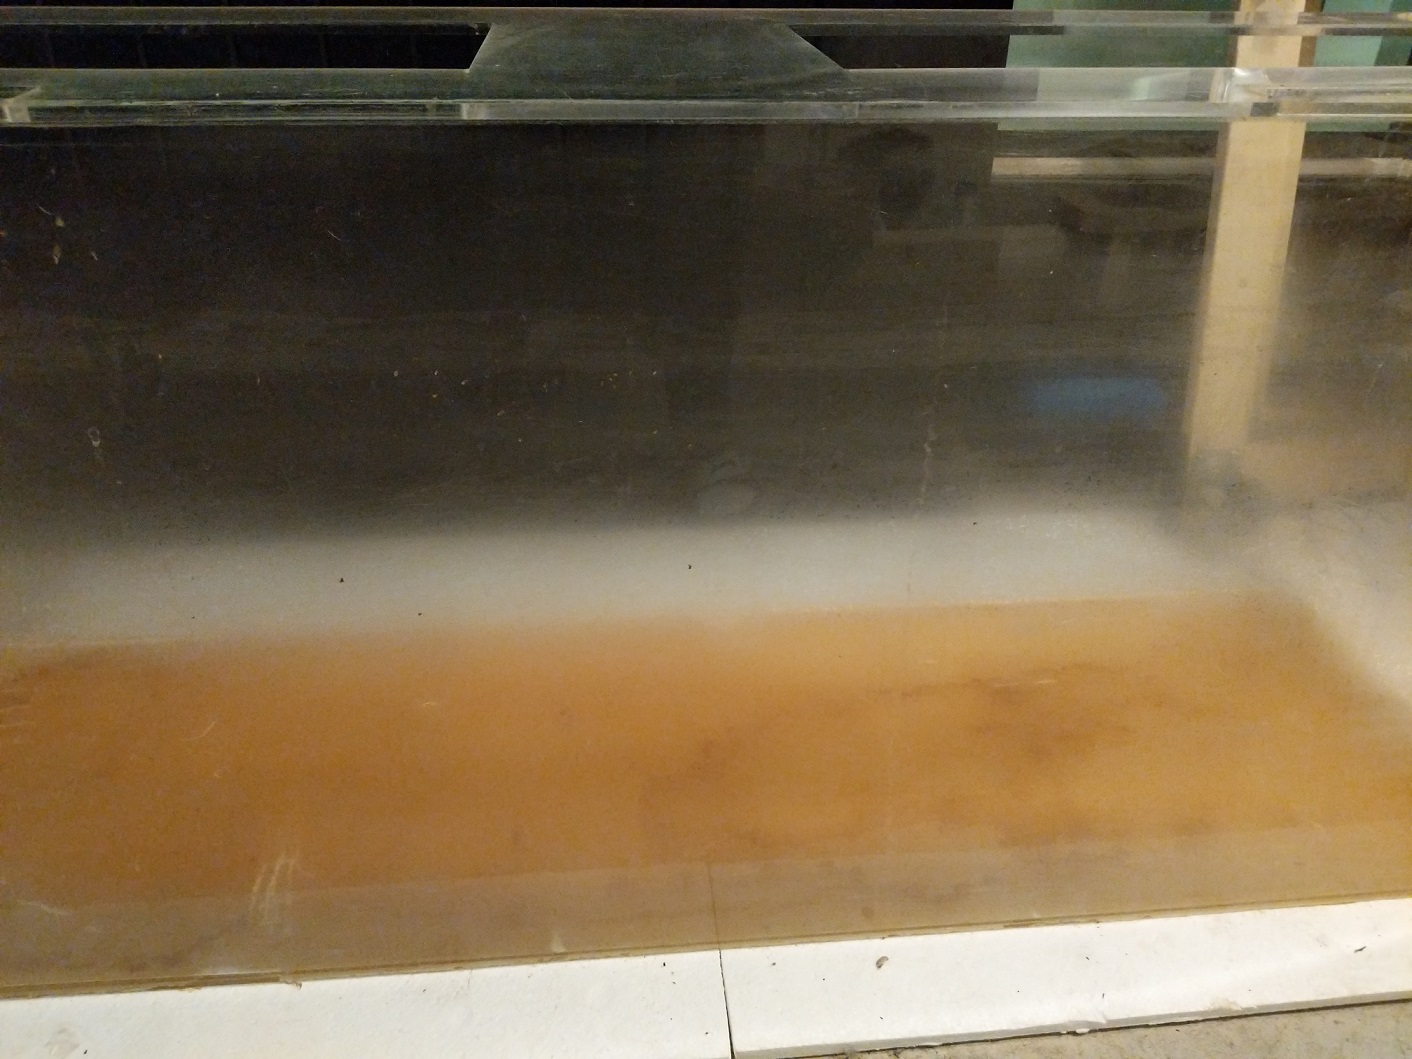
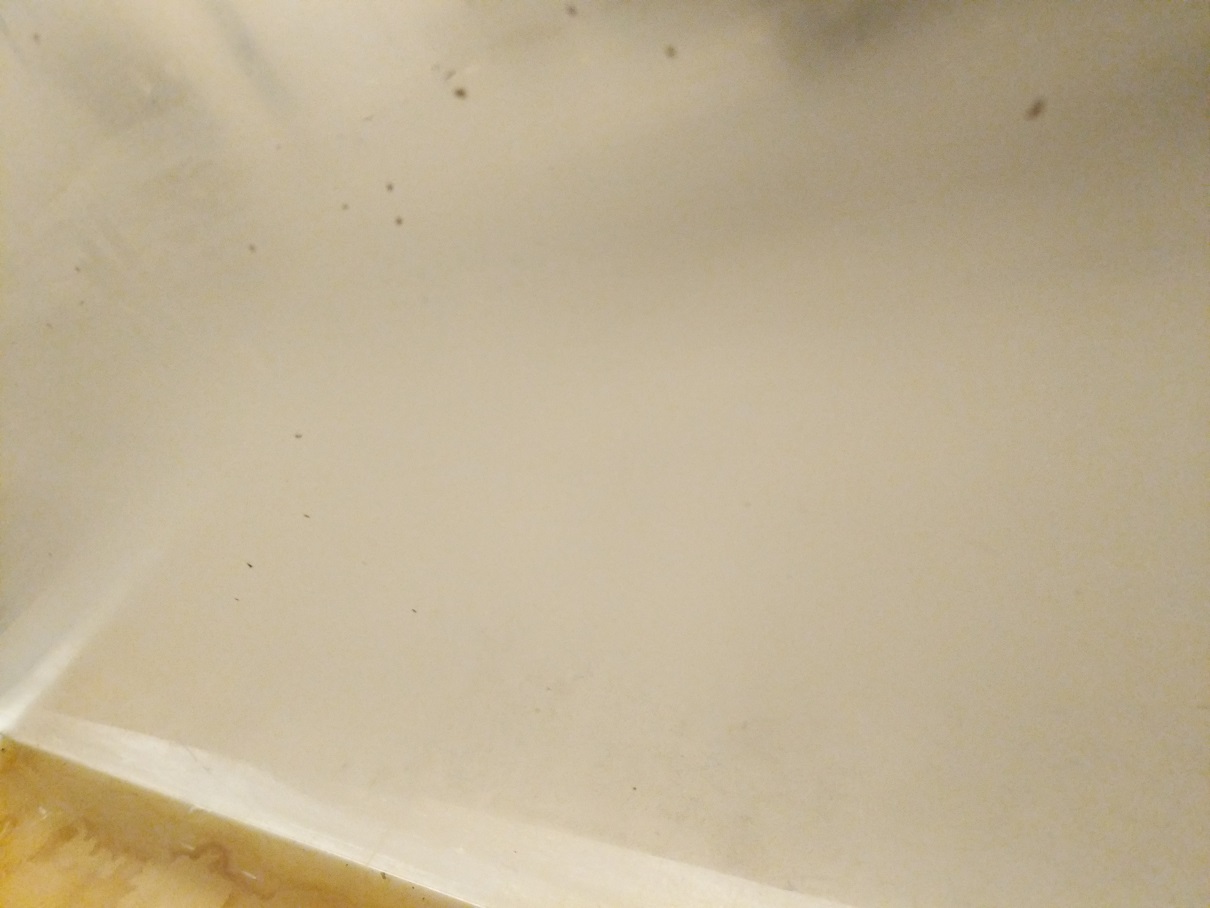
Lots of scratches everywhere.
NvqWq39.jpg

Ti1tafL.jpg

b4Ebg1X.jpg
 
OP
OP
cvrle1

cvrle1

Well-Known Member
View Badges
Joined
Sep 13, 2018
Messages
851
Reaction score
976
Rating - 0%
0   0   0
I knew I would have to sand the whole tank down and then buff/polish. Kicker was, I never did anything of this sort before, so I spend several weeks of research, asking question on R2R and varoius other forums. It was actually @slief video on polishing scratches out of acrylic aquarium that I found on RC that got me thinking about this to begin with. If you havent seen these videos, and plan on doing polishing, you should watch them for sure


Since scratches were all over, I decided to sand down whole tank inside and out. I started with 400 grit sandpaper and used palm sander for the whole job. This thing was dang loud! I had to use ear plugs or else I wouldnt be able to hear anything for weeks.

Sanding outside was nice and easy and quick, however inside was a lot harder due to the brace on the top. It was hard to get in and properly sand it down, as I couldnt get good grip on the sander. It wanted to fly all over the place, so that wasnt fun.

Here is what tank looked like after 400 grit
qZGi5nL.jpg

jIrZUKz.jpg

Zu2ICI5.jpg


Needless to say I was freaked out at this point, and thought to myself more than once what the heck have I done.

I went 400, 600, skipped to 1000 because I got different sand paper and their 800 felt rougher than 600 I used, 1200, 1500 and finally 2000. This took several weeks, as I was doing this after work. Since sander was really loud, I didnt want neighbors to complain, so I only did few hours every day or 2.

This is what it looked like after 2000 grit
kEWgipd.jpg


I could at least somewhat see inside it, so I was happy to see it was clearing up as grit progressed. Next up was polishing and buffing...
 
OP
OP
cvrle1

cvrle1

Well-Known Member
View Badges
Joined
Sep 13, 2018
Messages
851
Reaction score
976
Rating - 0%
0   0   0
Another thing I never did was buff/polish. Not just acrylic, but anything at all. Again I spent about a week reading up various forums, watched videos and so on. I decided I will use Novus 3, 2 and 1 for this final step. I ended up getting a really good deal on dual action polisher, and bought Chemical Guys cutting, polishing and finishing pads.

I started off with Novus 3 and used Medium/Heavy cutting pad. I had DA at speed 2 out of 6. This is what tank looked like once it was done
pp6OUFf.jpg

5Pp4Dxn.jpg

6CTNKsl.jpg


I was really shocked to see this much of a difference, and definitely didnt expect it. I could still see light scratches from sander, but felt good about it, knowing I still have Novus 2 to use.

I used Novus 2 with same pad as with Novus 3 (new pad, but same type). After Novus 2, all the scratches were gone, and tank was looking really good. Again I wasnt expecting this
wQ3IJUa.jpg

Xitwo4v.jpg


Finally, I used Novus 1 twice. 1st time it was with Light/Medium polishing pad and then with finishing pad. I felt that after 1st run, there was still some novus 2 left behind, so I wanted to use softer pad. After Novus 1, it looked great to me at least (all dirt is splatter from sanding and polishing on the black stand behind the tank)
zK0XDDs.jpg

qVn0Y2d.jpg

hMZpxDx.jpg

D081Otq.jpg


There is a bit of hazing when I look through some panels, but I will take it. Once it is filled with water, it wont be visible at all, and considering what it looked like when I started this journey, I am extremely happy with how it turned out.

Next up, building a stand.
 
OP
OP
cvrle1

cvrle1

Well-Known Member
View Badges
Joined
Sep 13, 2018
Messages
851
Reaction score
976
Rating - 0%
0   0   0
I decided to use @RocketEngineer tried and true template for my stand build. There is a massive thread on RC with info on it, and it was discussed on R2R several times as well.


Since it was a 5 foot tank, I decided to go with 2x6s for the top frame. Height of the stand is 37.5". That should give me plenty of room underneath to fit skimmer and all other goodies that will be needed, as well as do maintenance when needed. At 1st my plan was to use 40G breeder for sump, however I got IceCap 36XL sump. Issue now was that tank width is 18" but sump is 24". I had to modify my plans, and came up with this in the end

fxc9BgQ.jpg

YnfDXGO.jpg

uzj94LZ.jpg

L8iRRvx.jpg


I extended top and bottom frame to 24" so that sump can fit at the bottom, and added 2 off centered vertical supports. These are mostly for doors or however I decide to skin, and to be able to separate equipment from the sump. I still havent decided how that will all work out, so that is TBD for sure. I will leave back completely opened for air circulation, and will leave opening between 18-24 inches at the top open as well. It will give me lots of room for plumbing and other things that need to move between DT and sump. Sides will be skinned, so only opening that will be visible will be that one at the top. I caulked all the joints inside and outside with Alex Plus Acrylic Latex and primed it with 2 coats of Kilz Original. Plan is to start skinning it this weekend. Will post up as it progresses.
 
OP
OP
cvrle1

cvrle1

Well-Known Member
View Badges
Joined
Sep 13, 2018
Messages
851
Reaction score
976
Rating - 0%
0   0   0
WOW! Nice work!! What a lot of effort you've put into this already!

Thanks, yeah it took quite a bit of time to get it all done so far, but I think it was time well spent. I dont mind learning how to do something and doing it, as long as I know it is not all for naught. It was quite gratifying when I saw tank in the end, and how much better it looked than when I started this whole process. Since it took me few months to get all of this done it took patience and going slow, which is always a must for successful reef tank. So that will help as well for next steps once actual setup starts.

Now that tank is done, i will focus on stand and get that done. Need to get these out of the garage, as they are taking up too much room haha.
 
Last edited:

xxkenny90xx

2500 Club Member
View Badges
Joined
Apr 2, 2019
Messages
4,654
Reaction score
6,040
Rating - 0%
0   0   0
Awesome work! I have the same size tank ( FYI 60x18x24 actually comes out to 112 gallons) and I love its dimensions. I tried the novus system without sanding and was suprisingly very happy with the results!
 
OP
OP
cvrle1

cvrle1

Well-Known Member
View Badges
Joined
Sep 13, 2018
Messages
851
Reaction score
976
Rating - 0%
0   0   0
Awesome work! I have the same size tank ( FYI 60x18x24 actually comes out to 112 gallons) and I love its dimensions. I tried the novus system without sanding and was suprisingly very happy with the results!

It is a great size for tank, I just wish it was 24" deep as well. I did measure it and it came out to 59" somehow (maybe my tape measure is incorrect and I lost an inch somewhere), so I guess thats where the 2 gallon difference is haha.
 

xxkenny90xx

2500 Club Member
View Badges
Joined
Apr 2, 2019
Messages
4,654
Reaction score
6,040
Rating - 0%
0   0   0
Huh, that's odd, mines 60" exactly. You know, I had a 120g for a while that was 4'x2'x2' and I definately prefer the extra foot in length over the extra width that the 120 had. 5' is the perfect size imo. Lol and I also built my own oversized stand to fit a 40b sump
 
Last edited:
OP
OP
cvrle1

cvrle1

Well-Known Member
View Badges
Joined
Sep 13, 2018
Messages
851
Reaction score
976
Rating - 0%
0   0   0
I started working on light mount for the Noopsyche K7 Pro IIs that I will be using. I bought aluminum square tubing for this build. I cut tubing at 45 degree angles and used flat corner braces to connect it all together.


pl9WiVp.jpg

FATOtwZ.jpg


1573974984493.png

Unfortunately few cuts werent perfect, so there is a gap between the 2 pieces when I connected them. I wanted to make sure that my angles were a perfect 90 degrees.

aXy8Svi.jpg

L1BE2fz.jpg


Not a huge deal as I will use aluminum rods and braze it to fill in the gaps. Once it is primed and painted it shouldnt be visible. I also put 5 pieces of flat aluminum across. This will be used as light mounts.

lbDkwxV.jpg


Finished mount, for now

5VDsPXA.jpg

1ZfUpSE.jpg


I actually plan on making this whole thing have adjustable height. I have a plan in my head, so we'll see if it works out. Should be pretty simple to do, so will update once I have more in next few days.
 
Last edited:
OP
OP
cvrle1

cvrle1

Well-Known Member
View Badges
Joined
Sep 13, 2018
Messages
851
Reaction score
976
Rating - 0%
0   0   0
Finally have an update. Weather has been crappy and cold last few months, and since I do most of the work in the garage, it was cold. That prevented me from doing much. I finished light mount, or at least have it 99% done.

As can be seen above, I made a frame using square aluminum tubing and didnt lineup some of the corners perfectly. I used Blue Demon Triple Play Low Temp Aluminum-Zinc Brazing Rod and MAP gas to fill in the gaps that can be seen above, and to braze legs to the whole structure.

Since I never did this before, there was a lot of reading and watching of youtube videos. Really important thing that absolutely has to be done to get this to creat proper hold is to make sure that aluminum tube is up to the temp. If it is not, and you melt the rod onto it, it will not stick at all, and will create for really weak connection. Few pieces I had to break off several times as I couldnt get one side to braze properly. Once I figured out how much I need to heat up the tube, it was really easy and fast work from there.

Once it was all done, I painted it black, mostly to cover imperfections in brazing as much as possible

IMG_20200210_132430.jpg

IMG_20200210_132437.jpg

IMG_20200210_132445.jpg

IMG_20200210_132451.jpg

IMG_20200210_132504.jpg

IMG_20200210_132509.jpg

IMG_20200210_132531.jpg


As you can see, there are legs inside of legs. Unpainted legs are brazed to the frame, and then I created another set of legs and base that top frame goes into (all black part). This will allow me to move whole top frame up and down about 5 inches. I wanted to have option of moving it, so that when I start figuring out PAR and height I should place lights at, I can play around with height and see which one works the best. I just have to drill few holes to hold it at various heights. Finally, I plugged square tube ends at the bottom with plastic caps.

Also, light mounts (aluminum bars) where NP lights are mounted can be removed via screws, so if I decide to use different lights I would just have to space those bars around in new position. Then again i can play with height and re-adjust as necessary. I also made sure that I have enough space so that I can mount a single T5 fixture on each side, if/ when time comes for that
 

xxkenny90xx

2500 Club Member
View Badges
Joined
Apr 2, 2019
Messages
4,654
Reaction score
6,040
Rating - 0%
0   0   0
That looks awesome! Very professional
 
OP
OP
cvrle1

cvrle1

Well-Known Member
View Badges
Joined
Sep 13, 2018
Messages
851
Reaction score
976
Rating - 0%
0   0   0
Thanks, truth be told black paint along with primer and clear covered a lot of imperfections. You can still see goops of extra brazing material and so on. When I take into consideration it was 1st time I did this, I am really happy with how it turned out. Next one will be better haha.
 
OP
OP
cvrle1

cvrle1

Well-Known Member
View Badges
Joined
Sep 13, 2018
Messages
851
Reaction score
976
Rating - 0%
0   0   0
wow, your hands(as we usually say in Russia) are made of golden - it means that you've done so cool and professional )

Thanks. I was actually born and raised in Serbia, and we have very similar saying, so I know exaclty what you mean :)

Very cool. Tagging along.

Thanks, unfortunatley there hasnt been too much movement last several months. I did few minor things here and there, but nothing big enough to report. Plan is to finish skinning the stand shortly and get EMS overflow. Once overflow comes in, things should pick up again.
 
Back
Top