75 gallon w/ detailed cost breakdown

Bayareareefer18

Valuable Member
View Badges
Joined
Apr 8, 2018
Messages
2,238
Reaction score
2,158
Rating - 0%
0   0   0
LOL, I'm worried about that but hopefully, by posting here I can keep accountable for it. I knew it was going to cost money going in since it's not my first tank. Still, I'm a bit shocked how much more certain parts have been -- specifically plumbing! On the other hand I've actually enjoyed the documentation process and going to the spreadsheet.
A good friend of mine told me to plan on spending double of what you are expecting lol.

I also diyd most of my 75 build. Starts to add up real quick when you start getting equipment. Then there's the livestock...oh don't even want to think about that.

Was eyeing some pretty sweet $400 gold torches at my lfs yesterday lol
 

Will Milberger

Aggie Aquarist
View Badges
Joined
Jun 29, 2016
Messages
436
Reaction score
620
Location
Kurten, Texas
Rating - 0%
0   0   0
LOL, I'm worried about that but hopefully, by posting here I can keep accountable for it. I knew it was going to cost money going in since it's not my first tank. Still, I'm a bit shocked how much more certain parts have been -- specifically plumbing! On the other hand I've actually enjoyed the documentation process and going to the spreadsheet.

I got a PB4 for my RKL and plumbing and with $15 off in codes and points, it was still $246 and no pipe.
 
OP
OP
Bob2bob

Bob2bob

Active Member
View Badges
Joined
Apr 25, 2018
Messages
145
Reaction score
135
Rating - 0%
0   0   0
A good friend of mine told me to plan on spending double of what you are expecting lol.

I also diyd most of my 75 build. Starts to add up real quick when you start getting equipment. Then there's the livestock...oh don't even want to think about that.

Was eyeing some pretty sweet $400 gold torches at my lfs yesterday lol
:eek: I'm a little scared of that. I think prices have really shot up on livestock recently. I'm hoping to only get sustainably raised fish and coral too so I'm expecting to pay for that nicety
 
OP
OP
Bob2bob

Bob2bob

Active Member
View Badges
Joined
Apr 25, 2018
Messages
145
Reaction score
135
Rating - 0%
0   0   0
I got a PB4 for my RKL and plumbing and with $15 off in codes and points, it was still $246 and no pipe.
Not sure I'm following but you mean all your connectors were that much? even after discounts and points from the RKL?

My water station plumbing was : $256 ($143.70 for the specialty items: Spigot/Vinyl tubing/Cepex ball valves x 3/Ratchet clamps/uniseals and $112.97 for home depot plumbing which was elbows/unions/pipes)

My tank setup station plumbing was: $222.35 ($189.20 for specialty items: gate valves x2/silicone tubing/Cepex valves x3/Ratchet clamps/Wye check valve and $33.15 for home depot plumbing which was unions/pipe/cement/primer/reducers)

and holy! that close to $500 on plumbing alone :eek:

Hard plumb they said! It'll be fun they said! It's better they said!
 

Will Milberger

Aggie Aquarist
View Badges
Joined
Jun 29, 2016
Messages
436
Reaction score
620
Location
Kurten, Texas
Rating - 0%
0   0   0
Not sure I'm following but you mean all your connectors were that much? even after discounts and points from the RKL?

My water station plumbing was : $256 ($143.70 for the specialty items: Spigot/Vinyl tubing/Cepex ball valves x 3/Ratchet clamps/uniseals and $112.97 for home depot plumbing which was elbows/unions/pipes)

My tank setup station plumbing was: $222.35 ($189.20 for specialty items: gate valves x2/silicone tubing/Cepex valves x3/Ratchet clamps/Wye check valve and $33.15 for home depot plumbing which was unions/pipe/cement/primer/reducers)

and holy! that close to $500 on plumbing alone :eek:

Hard plumb they said! It'll be fun they said! It's better they said!

Really beginning to rethink this redo of mine. :)
 
OP
OP
Bob2bob

Bob2bob

Active Member
View Badges
Joined
Apr 25, 2018
Messages
145
Reaction score
135
Rating - 0%
0   0   0
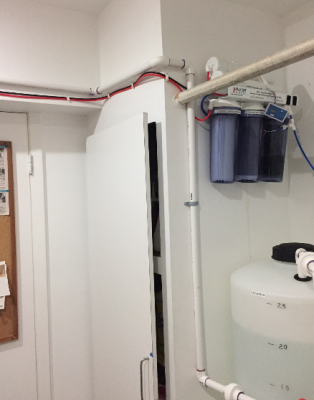
Water station, part 2

After about 73 trips to home depot, I was finally able to finish the water station. I'm quite happy with the end results. I'm especially pleased to learn that my big fear of needing a bigger pump due to the distance, vertical height travel, small pipe and 17 elbow connectors were misguided. The Panworld 40 is more than sufficient enough to move saltwater into the tank!

After dry fitting everything, I took it apart into sections (usually separated by unions) to primer/cement up.
Screen Shot 2018-05-21 at 10.13.01 AM.png

You can see just how many sections there were and it took me about a can of primer and about a can and a half of cement to finish it all up. Several hours of work as well. In the end, I made two mistakes. Once I glued a union on but forgot to keep the cover and somehow even with all my notes and pictures I glued one section to the wrong piece. A couple of cuts and trips to home depot fixed that right up.

so here it goes:
Screen Shot 2018-04-30 at 11.32.51 AM.png

Screen Shot 2018-05-21 at 10.41.12 AM.png
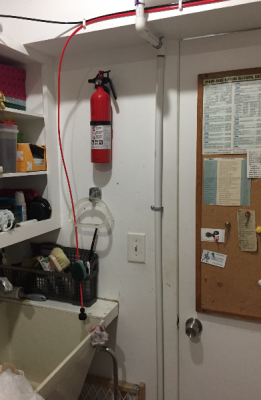
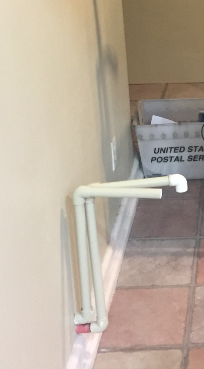
From the water station it goes up the wall and around the door.
Screen Shot 2018-05-21 at 10.41.33 AM.png
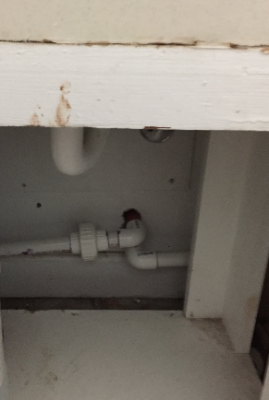
then down the other side of the laundry room door under the sink. Where I hook up the RODI.
Screen Shot 2018-05-21 at 10.43.22 AM.png
Then it goes through the laundry wall into a guest bathroom (rarely used). You can also see a second line I ran that can send water from the tank into the sink for easy water changes.
Screen Shot 2018-05-21 at 10.44.51 AM.png
Through the bathroom and around the corner. Again, the second line is for draining water from tank to sink in laundry room.
Screen Shot 2018-05-21 at 10.45.05 AM.png
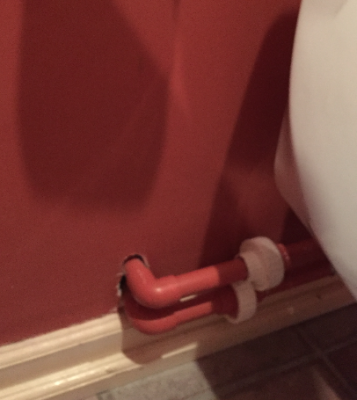
Then out of the bathroom in the living room where the tank is.
Screen Shot 2018-05-21 at 10.47.00 AM.png
And finally 17 elbows and a bunch of unions later out the wall to the tank side.
Screen Shot 2018-05-21 at 10.49.51 AM.png
Into the sump. You can see a small pump I have for taking water out of the tank. I was able to move 20 gallons of saltwater in just a couple of minutes. Likewise with draining. The ambition behind it all is that I can know have super easy water changes allowing me to keep a regular cadence and not feel overwhelmed by tank maintenance.

Screen Shot 2018-05-21 at 10.53.52 AM.png


All in all the water station cost me $756.24. I'd have had to get the RODI anyways so you can take out $225 if you are thinking about how much extra this would cost you. I also had a relatively high cost of plumbing since I used 6 cepex ball valves and had a pretty far distance from the station to the tank. If you were closer to your tank and used either fewer ball valves (certainly possible with a different design) or used the standard home depot versions you could take off another couple hundred dollars.
 
Last edited:
OP
OP
Bob2bob

Bob2bob

Active Member
View Badges
Joined
Apr 25, 2018
Messages
145
Reaction score
135
Rating - 0%
0   0   0
Plumbing the tank:
Now that I finally finished the water station, I was able to get to the actual tank! In order to lower cost's a little I reduced the glass-holes overflow which is 1.5" down to 1" which helped me out a bunch on the specialty items like gate valves.

Screen Shot 2018-05-21 at 3.10.17 PM.png


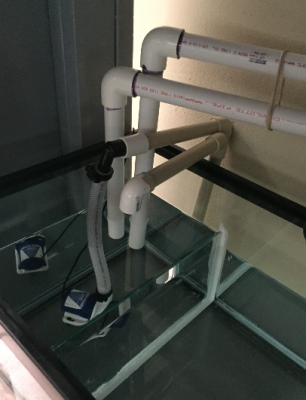
You can see how it all comes together in the back. There are two return drains with gate valves attached that lead into the sump. The return is a Danner 700 pump that I actually had from a previous tank. I'm a bit concerned about only having one pump for now but there are enough unions on the return that if I want to change the setup to have two pumps in the future I can. The return has a wye check valve for redundancy if the return ever turns into a drain on a power outage but there should be enough room in the sump to handle it either way. Also added a cepex ball valve to it though not sure that was necessary. If I ever use the manifold I guess it will allow me to clean the wye valve easily.

Screen Shot 2018-05-21 at 3.10.32 PM.png

You can see I also added a manifold with room for two things in the future though there is no plan to have anything in the middle section of the sump outside of marine pure and chaeto for now.

Unclear realization:
I didn't realize it when I started but by going with the glass-holes overflow which was the cheaper option originally I think I ended up spending more money because instead of getting a bean overflow and using just one gate valve I ended up using two gate valves. Again, I'm not sure if this is true or false but I think it is. I'd also have the quieter bean system in place.

Equipment:
Screen Shot 2018-05-21 at 3.24.59 PM.png


All in all, plumbing the tank up added another $448.65 to the cost of setup. It could definitely be done cheaper if you didn't get the specialty plumbing parts (gate valves/cepex ball valves/wye check valve) which were the largest cost.
 
OP
OP
Bob2bob

Bob2bob

Active Member
View Badges
Joined
Apr 25, 2018
Messages
145
Reaction score
135
Rating - 0%
0   0   0
Light Fixture:

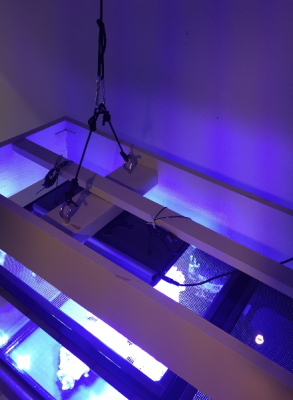
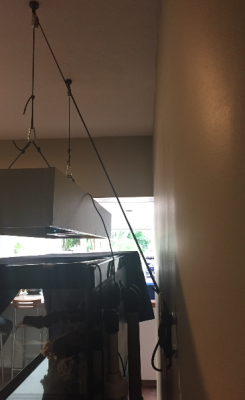
Finished building my light fixture over the weekend which was the last piece of this build before filling her up and cycling. Years ago I had seen a sweet pulley system that housed some lights over a tank and always wanted a similar setup which was my inspiration here. Probably a bit overthought out, to be honest, but I do like the results. It allows me to raise the lights for any maintenance and I can also play around with different heights of keeping my lights.

Final product:
Screen Shot 2018-05-28 at 10.17.23 AM.png


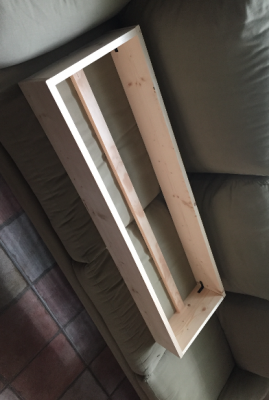
First, I built the shell that will hold my lights -- going with two RapidLED Corona's. Has all the features with built-in WiFi, controllability and nice app. They're still expensive at $419 a piece but significantly cheaper than most other LED options that I would consider. Lighting is far and away, the most expensive part of the setup.

Screen Shot 2018-05-28 at 10.18.09 AM.png
The box was built to both hide the fixtures and also help prevent some bleeding of lights into the surrounding room. I didn't make the lip large enough to do much of this last part but it certainly helps a little and prevents you from looking directly at the LEDs. The bar down the middle will act as a way of holding the lights and also gives some support.

Next, and not pictured, I painted it the same color as the wall and stand and added three coats of poly to it. I also added to pieces of 2x4 to give both added strength and let me attach some way overkill hardware for hanging it.

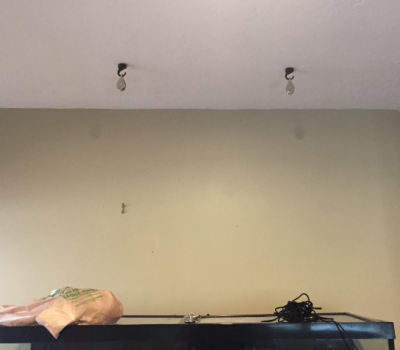
Then I added some pulleys to the roof via some heavy duty ceiling drillers which were fairly easy to install.
Screen Shot 2018-05-28 at 10.18.21 AM.png

And then after watching a bunch of youtube vids on knot tying (ended up using an angler's knot), I attached the whole system:
Screen Shot 2018-05-28 at 10.17.43 AM.png


Here's a detail of the light from above. The bolt's used go all the way through the 2x4's and the paracord is rated at 130 lbs.
Screen Shot 2018-05-28 at 10.17.56 AM.png

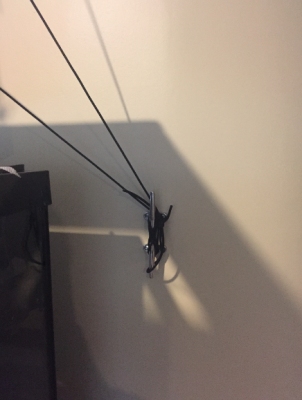
I used an anchor on one side but I'm going to get a second anchor to make it easier to adjust either side individually.
Screen Shot 2018-05-28 at 10.44.45 AM.png Screen Shot 2018-05-28 at 10.44.35 AM.png


All in the light fixture cost me an additional $91.39 for materials: wood, polyurethane, paracord, and hardware (pulleys/ceiling anchors/etc) and the lights cost me $838 (2 * $419). I'll probably spend another $10 as well for a second anchor.

Overall, the tank is now over 3k ;Inpain but is ready for water and the cycle. I still need a heater (or two) and maybe one more wavemaker plus some test kits.

Screen Shot 2018-05-28 at 10.40.00 AM.png
 
OP
OP
Bob2bob

Bob2bob

Active Member
View Badges
Joined
Apr 25, 2018
Messages
145
Reaction score
135
Rating - 0%
0   0   0
Quick update: small leak disaster, started cycle, patience is hard.

Once I was able to finish the light fixture I filled the tank with saltwater from my mixing station -- it really makes it super easy and I'm really happy with it so far. After about an hour of it being filled, I noticed that I had some water coming out of the bottom rim on the backside and it really freaked me out. I couldn't pinpoint the leak but it was clearly coming from one area. Zoomed to home depot and picked up a few 44-gallon brutes and emptied the water into them so I could inspect more. Still couldn't find the leak but I put a proverbial ton of clear silicone on the inside seam, outside of the rim and bottom of the tank seam as well. I also took the opportunity of the tank being empty to add a few more shims and level her up since I think she was off kilter a bit. I prayed to the tank gods and refilled her up. So far so good and I haven't noticed any leaks. Keeping a close eye on it ;Pompus and my fingers crossed.

Equipment update: I picked up two finnex 300 watt heaters for an additional $63.98 from BRS. 1 in the fuge and 1 in my saltwater mixing station which will usually be off unless I'm doing a water change in the next day or so. I figure this way it can also act as a backup if my first one breaks.

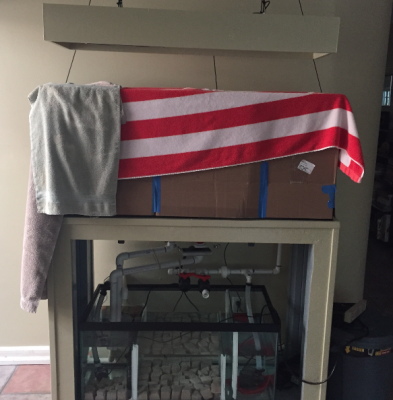
About a week ago, I added an entire bottle of Bio-Spira to the tank and covered her up with towels/cardboard. I'm a bit concerned that I missed a step with adding my own ammonia first or adding a fish but hopefully, I'm just being impatient. My Nitrites and Nitrates are still reading 0 and my ammonia is somewhere between 0 and 25. Does anyone have any thoughts on what this number is? And if this seems normal on day 5. I have been "ghost" feeding for the last 5 days as well -- not more than a moderately sized pinch a day though. Should I increase that?

Screen Shot 2018-06-06 at 11.28.02 AM.png

I have it at 15 ppm but it is not easy to figure out these API kits.

Here's a "tank" shot while cycling:
Screen Shot 2018-06-06 at 11.27.53 AM.png
One of the BRS vids on the ULM series advised to do it slowly and for the first month cover the display to ensure algae does not grow there. I plan to keep it covered for the month, then introduce a pair of clowns (assuming my cycle has completed by then) and chaeto to the bottom then do another month without display lights and then on the third month ill add display lights slowly. After that's complete I'll plan on adding corals and more fish.
 
OP
OP
Bob2bob

Bob2bob

Active Member
View Badges
Joined
Apr 25, 2018
Messages
145
Reaction score
135
Rating - 0%
0   0   0
Does anyone know if I need to add ammonia to my tank to get the cycle to work? I added the bottle of Bio-spira but starting to think I missed a step...;Facepalm it's showing pretty much .15ppm which is the same it has been for the last 6 days since a day after adding the bio-spira
 
OP
OP
Bob2bob

Bob2bob

Active Member
View Badges
Joined
Apr 25, 2018
Messages
145
Reaction score
135
Rating - 0%
0   0   0
It's been a month since adding water, bio-spira and ghost feeding. @Brew12 (thanks again!) gave me confidence that the cycle seems to have completed or at the very least be at a place to support a fish or two with its bacteria. Planning on getting a pair of clowns whenever I have a free hour in the next week or so.

This got me thinking on my eventual wishlist and I added more fish than I expected. Wondering if anyone has any thoughts on this list:

2 clowns
1 royal gramma
3 bartlett anthias
1 yellow tang
1 coral beauty Or flame angel
1 lawnmower blenny
1 wrasse (fairy or flasher?)

I gather that there's a lot of thoughts that 75 might be too small for a yellow tang and I'm on the fence with that one. Even without it though I'd be at 9 fish and worried that that is too much. I plan to take my time adding everything slowly maybe over the next 18 months 1 every 2 months or so.
 
OP
OP
Bob2bob

Bob2bob

Active Member
View Badges
Joined
Apr 25, 2018
Messages
145
Reaction score
135
Rating - 0%
0   0   0
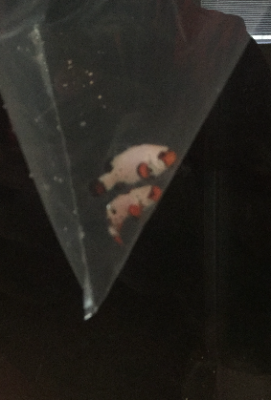
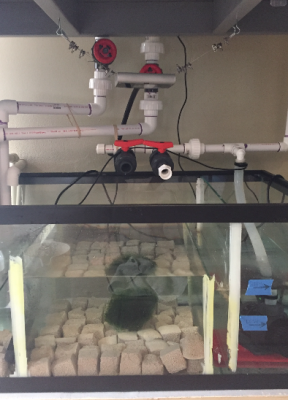
Added two clown fish today:D! Also added a ball of chaeto to the fuge.

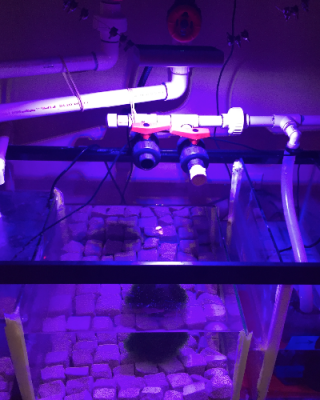
The plan is now to run the tank with no display lights for the next month while slowly ramping up the fuge light from 1 hour a day to 8. At that point, I'll start to add my display lights as well, again slowly ramping them to 8 hours a day. Following the BRS slow and steady approach which I'm hoping really lets me get ahead of any potential algae issues.

The clownfish are supposedly bullet hole clowns (though really it's all a name nowadays) and I'm super nervous but keeping an eye on them. Should be fine but first fish in this tank got me anxious.

In the bag acclimating temp.
Screen Shot 2018-07-06 at 6.49.05 PM.png
After a few hours acclimating, in the tank
Screen Shot 2018-07-06 at 6.49.12 PM.png

Fuge with chaeto in it:
Screen Shot 2018-07-06 at 6.49.21 PM.png
and with light on:
Screen Shot 2018-07-06 at 6.49.45 PM.png
Full tank shot:
Screen Shot 2018-07-06 at 6.49.34 PM.png


The 2 designer clowns were $35 each after tax, or $70 together., which seems pretty cheap from what I've seen online. I think that's partly due to being in Miami where I think a lot of these clowns are bred. I paid $5 for chaeto, which feels bad since I've thrown so much of it away in past tanks and I'm sure many local aquarists are doing the same thing. Need to make more local aquarist friends is the lesson ;)
Screen Shot 2018-07-06 at 6.53.23 PM.png


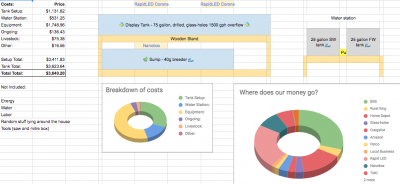
That brings the grand total to: $3640
Screen Shot 2018-07-06 at 6.50.55 PM.png
 

Bayareareefer18

Valuable Member
View Badges
Joined
Apr 8, 2018
Messages
2,238
Reaction score
2,158
Rating - 0%
0   0   0
Exciting stuff. It's been fun now getting to the point of actually seeing fish in the tank. I too started with two small clowns and have added a few more since. Testing water params tank is keeping up beautifully with added bio load
 
OP
OP
Bob2bob

Bob2bob

Active Member
View Badges
Joined
Apr 25, 2018
Messages
145
Reaction score
135
Rating - 0%
0   0   0
Great build!

thanks Larry looking forward to following yours

Exciting stuff. It's been fun now getting to the point of actually seeing fish in the tank. I too started with two small clowns and have added a few more since. Testing water params tank is keeping up beautifully with added bio load

It's really cool getting to watch your build since its a few steps ahead of mine! How long did you wait to add the next set of fish? It's early yet and I'm still a bit concerned with my clowns. One (smaller of the two) seems to be doing ok and the other seems to be not looking great. Kind of laying on it's side with the other swimming real close to it. Just checked and there's no ammonia in the tank. Thinking of dumping another bottle of Bio-spira in the tank.
 

Bayareareefer18

Valuable Member
View Badges
Joined
Apr 8, 2018
Messages
2,238
Reaction score
2,158
Rating - 0%
0   0   0
thanks Larry looking forward to following yours


It's really cool getting to watch your build since its a few steps ahead of mine! How long did you wait to add the next set of fish? It's early yet and I'm still a bit concerned with my clowns. One (smaller of the two) seems to be doing ok and the other seems to be not looking great. Kind of laying on it's side with the other swimming real close to it. Just checked and there's no ammonia in the tank. Thinking of dumping another bottle of Bio-spira in the tank.
I waited a week then added a tail spot blenny and a flame hawk. Wasn't planning the flame hawk yet but when I saw how red this one was I had to take it. Week after that added royal grammar and a yellow clown goby. Might be a little fast but everything is really stable. All fish are happy
 
OP
OP
Bob2bob

Bob2bob

Active Member
View Badges
Joined
Apr 25, 2018
Messages
145
Reaction score
135
Rating - 0%
0   0   0
It's been about 75 days since filling the tank with water and it's finally at a place I feel comfortable with, the cycle is definitely finished, the rock is starting to look alive and everything I've put in it so far is doing good with 1 exception.

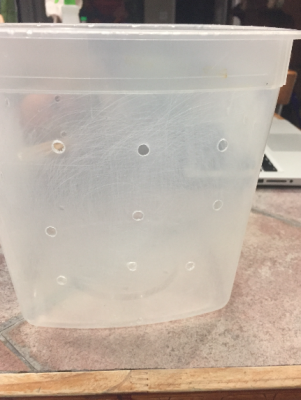
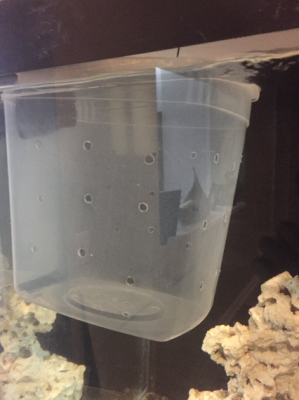
One of my two Bullet hole clownfish died the day after I got the pair from an LFS here in Miami. More about that in this thread. I'm still not clear on what did the lil one in but I think it was a combination of things -- stress from moving several times with different salinity levels (and other things), new tank, etc. The store did credit me but still sucks. The other fish is doing great and it has been 38 days now. About 2 weeks after the first fish died, we added a second clown -- this one from a different LFS. We chose the largest black clownfish we could find - also ORA and tank bred. Not as pretty as the designer but really nice in it's own way. Kept it in a clear container with a lot of drilled holes and an air stone for two days in the display so that they could get used to each other. I wouldn't say they've definitely paired but they seem to be getting along just fine.

Homemade fish thing:
Screen Shot 2018-08-13 at 5.18.36 PM.png
Screen Shot 2018-08-13 at 5.18.44 PM.png

Chaeto has been growing slowly in the sump and looks to have about doubled or so in the 38 days I've had it. Will weigh it once I do my first cut and start tracking that as well.

Last week I began using the display lights. I have two RapidLED Corona's which I've really enjoyed so far. Currently, have them at just over 40% and am slowly increasing the intensity now that we've added corals.

Speaking of corals :)

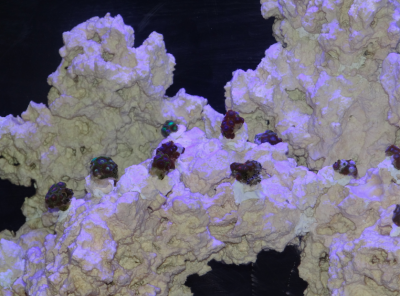
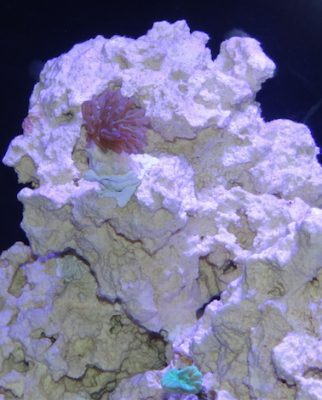
Started off at a LFS and got three tiny frags for $58 that included an orange ricordea ($25) about the size of a quarter, a candy cane ($15) with 1 head that looks to be close to splitting and a fairly small hammer of 1 branch ($15). They've looked good for the last week so yesterday I went to a local garage seller who was selling Zoa's for between $5-10 a frag (usually with 5-15 polyps per frag) and I went a little crazy. We added another quarter sized ricordea (this time yellowish, $15) and 11 Zoa frags ($65). I placed all the Zoa's on one big rock I have that can be viewed from both the front and the side and I'm now the proud keeper of a freshly started Zoa garden.

I have no idea how to take aquarium photos so bear with me:

Zoa placement, can't wait for them to fill in over the next few years:
zoas (8:13:18).png


From the side, You can also see the Ricordea and the 2 clownfish.
side shot (8:13:18).png

front shot (8:13:18).png

The small hammer on a different island
hammer (8:13:18).png
And a FTS, I still need to come up with a solution to store my ATO container and the birds nest of wires:
FTS (8:13:18).png


Next step will probably be to add a fairly small CUC. I'm just starting to feel like the tank is producing enough algae that a handful of crabs won't starve. The chaeto seems to be working quite well -- and I'm feeding twice a day (flakes in the morning and brine at night.)

All in now we're at $3884. BRS, RapidLED and Home Depot are the recipients of most of that but they are slowly going down now that the build and setup are for the most part over with.

Screen Shot 2018-08-13 at 5.17.03 PM.png
 
OP
OP
Bob2bob

Bob2bob

Active Member
View Badges
Joined
Apr 25, 2018
Messages
145
Reaction score
135
Rating - 0%
0   0   0
Everything's been doing great, i.e. corals look good and fish seem happy. I have started to get some algae so I added a small CUC.

5 margarita snails (was told that these can flip themselves back over) - $5 ($1 each)
1 Mexican Turbo snail - $3
1 Emerald Crab - $3

Wanted to start slow with them to make sure they have plenty of food and don't starve but after a few days they seem to be making some progress but there is still plenty of algae. I will likely go ahead and double the margarita snails if that continues.

The emerald crab is already my favorite creature in the tank, so much personality and fun to watch. Here's a gif (https://media.giphy.com/media/jnUJIgAXgic7k8TvwW/giphy.gif):
giphy.gif
 
OP
OP
Bob2bob

Bob2bob

Active Member
View Badges
Joined
Apr 25, 2018
Messages
145
Reaction score
135
Rating - 0%
0   0   0
CUC has been doing WORK. Just 6 snails (5 marg's and 1 turbo) and an emerald crab but algae is on the retreat in just a few days.

Added some more Zoa's to by growing garden so now I have 20 different kinds. They are all from two local garage sellers in S. Florida so I've been able to keep costs relatively cheap. Of all the frags, only 1 is mysteriously not doing well so i've tried moving it around for now. Most are of unknown names (though all are beautiful ;)) but the last seller I went to was big on naming so was able to add:

Fruit Loops
Utter Chaos
Cat Eyes
Ghetto Bob Marleys
Cornbread Rainbow Infusion
Armor of Gods
Bam Bams

I'm most likely done with the Zoa's for now and will try and get some more variety going forward. Would really like a few more Euphyllia and potentially...an easy SPS or two.

Some pics from before the new additions and just a day after the CUC was added. Fewer algae right now.

A fire and ice
Screen Shot 2018-08-29 at 2.47.18 PM.png


Either a Mean green or a green bay packer, I forget which one is which but have both.
Screen Shot 2018-08-29 at 2.47.07 PM.png


Better pictures of the coming garden, a lot more crowded and colorful with the new additions now
Screen Shot 2018-08-29 at 2.46.31 PM.png

Screen Shot 2018-08-29 at 2.46.31 PM.png
Screen Shot 2018-08-29 at 2.48.31 PM.png


And an artsy shot pretending to be slick with a camera:
Screen Shot 2018-08-29 at 2.46.50 PM.png


Here's my livestock expenses so far, $330 on fish and coral, more on coral than anything else because I only have two clowns for now:
Screen Shot 2018-08-29 at 2.45.45 PM.png
 

Algae invading algae: Have you had unwanted algae in your good macroalgae?

  • I regularly have unwanted algae in my macroalgae.

    Votes: 43 35.0%
  • I occasionally have unwanted algae in my macroalgae.

    Votes: 27 22.0%
  • I rarely have unwanted algae in my macroalgae.

    Votes: 9 7.3%
  • I never have unwanted algae in my macroalgae.

    Votes: 9 7.3%
  • I don’t have macroalgae.

    Votes: 31 25.2%
  • Other.

    Votes: 4 3.3%
Back
Top