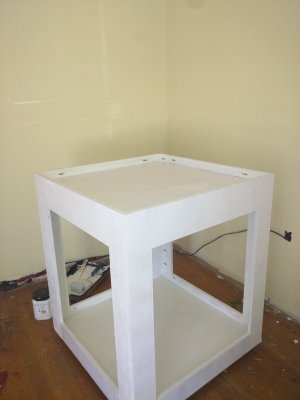
93 Cube for under a grand. It can be done... I think. UPDATED GRAND TOTAL! :)

OP
OP
dantimdad

dantimdad

7500 Club Member
View Badges
Joined
Jun 24, 2009
Messages
9,577
Reaction score
41,635
Location
Hartselle Alabama
Rating - 0%
0   0   0
BTW, I got an amazing deal on a sliding compound miter box that was delivered Wednesday. Finally got to test it out today. Square out of the box! I don't know how I waited this long to get a slider.

\m/
 
OP
OP
dantimdad

dantimdad

7500 Club Member
View Badges
Joined
Jun 24, 2009
Messages
9,577
Reaction score
41,635
Location
Hartselle Alabama
Rating - 0%
0   0   0
Thanks. It WILL happen! :D

I kicked around the idea of doing this a few years ago with a 110 long that was cracked but the cost of the panel was prohibitive at the time.

When this tank came up, it was time.
 
OP
OP
dantimdad

dantimdad

7500 Club Member
View Badges
Joined
Jun 24, 2009
Messages
9,577
Reaction score
41,635
Location
Hartselle Alabama
Rating - 0%
0   0   0
If you don't mind me asking does the 1k budget include livestock or is it purely based on equipment? Sorry I might have missed reading that part.
It's all the way to my first fish and coral. Even if it's donated. :D
 
OP
OP
dantimdad

dantimdad

7500 Club Member
View Badges
Joined
Jun 24, 2009
Messages
9,577
Reaction score
41,635
Location
Hartselle Alabama
Rating - 0%
0   0   0
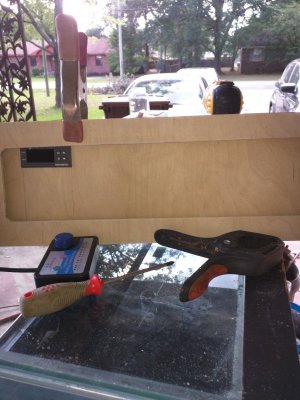
Whilst waiting on glued up panels to dry for the bench, I decided to sneak in a bit of work on the cube.

Well, "Nobody" and "I don't know" struck again and I am missing about 75% of my spring clamps so I am waiting on more glue to dry! ;Rage

Guess what this is the start to:

IMG_20180908_130257.jpg
 
OP
OP
dantimdad

dantimdad

7500 Club Member
View Badges
Joined
Jun 24, 2009
Messages
9,577
Reaction score
41,635
Location
Hartselle Alabama
Rating - 0%
0   0   0
OK, so, no guesses.

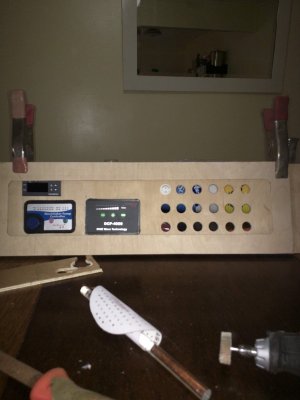
Here it is:

IMG_20180908_155749.jpg

The ink bird controller is more straight than it looks in the pic.

The powerhead and pump controller and the switches will all be mounted there.

The trim ring will hide the lighting. ;Stig

I have to build a box coming off the back to cover the back of the switches, outlets and the wiring.

It will be modular from the stand so it can be removed to be repaired/expanded.
 
OP
OP
dantimdad

dantimdad

7500 Club Member
View Badges
Joined
Jun 24, 2009
Messages
9,577
Reaction score
41,635
Location
Hartselle Alabama
Rating - 0%
0   0   0
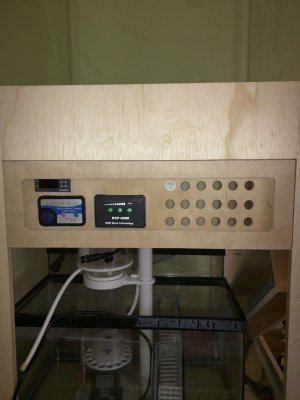
So here is everything (well, only one switch) test mounted. I have no clue why the controllers look crooked in the photo.

switch_panel.jpg

The switches had to be modified slightly to fit in a round hole. They had a notch to line them up I guess. Also, the specs on the site said 25mm mounting hole. LOL! They would have fallen through. Digital calipers said 19.38 mm Happen to have a forstner bit that was 19.39mm. :cool:

If I still had my car stereo templates from yesteryear, it would have turned out much better. But, for hand work with a jig saw and dremel, I am pretty happy with it.

Now, on to the box for the outlets. It's going to be really boring. ;Sorry
 

NY_Caveman

likes words, fish and arbitrary statistics
View Badges
Joined
Sep 8, 2017
Messages
17,008
Reaction score
108,390
Location
New York
Rating - 0%
0   0   0
So here is everything (well, only one switch) test mounted. I have no clue why the controllers look crooked in the photo.

switch_panel.jpg

The switches had to be modified slightly to fit in a round hole. They had a notch to line them up I guess. Also, the specs on the site said 25mm mounting hole. LOL! They would have fallen through. Digital calipers said 19.38 mm Happen to have a forstner bit that was 19.39mm. :cool:

If I still had my car stereo templates from yesteryear, it would have turned out much better. But, for hand work with a jig saw and dremel, I am pretty happy with it.

Now, on to the box for the outlets. It's going to be really boring. ;Sorry

Looks great to me, but I couldn’t build a stick out of a dowel rod.
 

Brew12

Electrical Gru
View Badges
Joined
Aug 14, 2016
Messages
22,488
Reaction score
61,032
Location
Decatur, AL
Rating - 0%
0   0   0
So here is everything (well, only one switch) test mounted. I have no clue why the controllers look crooked in the photo.

switch_panel.jpg

The switches had to be modified slightly to fit in a round hole. They had a notch to line them up I guess. Also, the specs on the site said 25mm mounting hole. LOL! They would have fallen through. Digital calipers said 19.38 mm Happen to have a forstner bit that was 19.39mm. :cool:

If I still had my car stereo templates from yesteryear, it would have turned out much better. But, for hand work with a jig saw and dremel, I am pretty happy with it.

Now, on to the box for the outlets. It's going to be really boring. ;Sorry
That is turning out really nice!
 
OP
OP
dantimdad

dantimdad

7500 Club Member
View Badges
Joined
Jun 24, 2009
Messages
9,577
Reaction score
41,635
Location
Hartselle Alabama
Rating - 0%
0   0   0
Outlet panel roughed out:

outlet_panel_one.jpg
outlet_panel_two.jpg

Will go ahead and temporarily mount the outlets, wire them up, then remove them for sanding/painting.

Still have to figure out how to mount it to the switch panel that it will tolerate the weight of all the cords and still be removable.

Hmmmmm.....
 
OP
OP
dantimdad

dantimdad

7500 Club Member
View Badges
Joined
Jun 24, 2009
Messages
9,577
Reaction score
41,635
Location
Hartselle Alabama
Rating - 0%
0   0   0
Ok figured out how to mount the outlet panel. It'll be mounted with L brackets and T nuts with star knobs so it's easily removable yet plenty strong.

Here is a shot of test fitting the switch panel to the stand. Worked out just like I wanted. Flush to the frame so the beauty panel covers it.

switch_panel_in_stand.jpg

Last update for today. Gotta get laundry done and make home made chicken soup. I am a bit under the weather and it's my cure all. :D
 
OP
OP
dantimdad

dantimdad

7500 Club Member
View Badges
Joined
Jun 24, 2009
Messages
9,577
Reaction score
41,635
Location
Hartselle Alabama
Rating - 0%
0   0   0
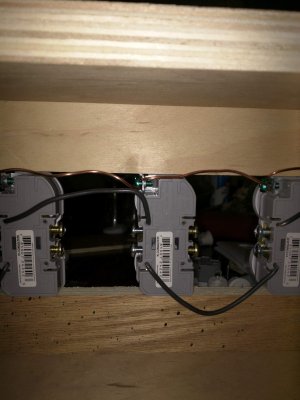
I know I said last update, but, laundry and soup are going and I decided to work on the wiring some more:

wiring_one.jpg

All the outlets share a common (-) and GND. The (+) will be switched. Yes, I put the black wire as (-) and should have put white. ;Facepalm

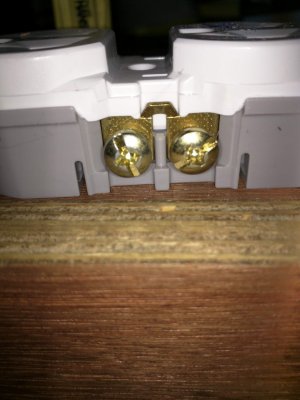
I thought I would share something some of you may not know. If you cut the little tab in between the screws on an outlet, you can switch them individually. I have used this before, but not this many in one place and not on an aquarium.

outlet_connection.jpg

And, finally, this is how my fiancé realized I have way too many tools:

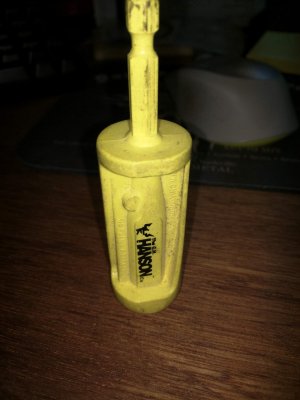
sharpener.jpg

That, my friends, is a pencil sharpener that chucks in the drill. Yes, I use a power tool to sharpen pencils. Arrr, arrr, arrr!!!


:)
 
OP
OP
dantimdad

dantimdad

7500 Club Member
View Badges
Joined
Jun 24, 2009
Messages
9,577
Reaction score
41,635
Location
Hartselle Alabama
Rating - 0%
0   0   0
OK so I HAVE to get the work done on the 150 this weekend!

I am also going to redo the way the carport shop is setup so we can get a car in one bay of it. LOL.

I might be able to get the cube stand painted, but, I am not holding my breath. :(

I have to say, it was nice bringing my bigger table saw here and moving the vintage one to the shop tonight. Productivity will go way up.

TS3612 FTW!
 
OP
OP
dantimdad

dantimdad

7500 Club Member
View Badges
Joined
Jun 24, 2009
Messages
9,577
Reaction score
41,635
Location
Hartselle Alabama
Rating - 0%
0   0   0
OK so the table saw is tuned up and waxed. Cutting like it was new even at the age of 18. :)

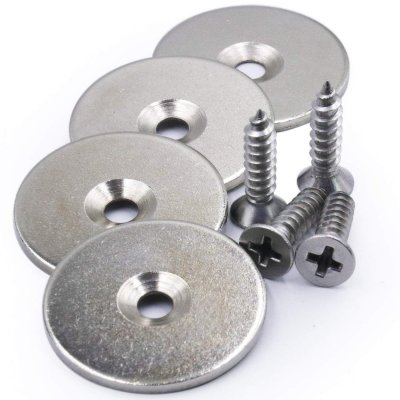
The stand is painted and I decided to use the magnets from the laundry hamper project that never materialized for the beauty panels on the stand:

magnets.jpg

1.25" n52 magnets 2 per side at the top. That oughta hold 'em!

stand1.jpg

Next up... Drilling and plumbing. Can't wait!
 
OP
OP
dantimdad

dantimdad

7500 Club Member
View Badges
Joined
Jun 24, 2009
Messages
9,577
Reaction score
41,635
Location
Hartselle Alabama
Rating - 0%
0   0   0
Just random stuff today.

The dial indicator for setting up tools came in and I measured the saw's arbor run out, fence alignment and trunnion alignment. Now, I did these with a tri square before so I am pretty proud of my setup. They were all within .005. The arbor was less than .001! It should have worn more than that in 18 years and probably 20 miles worth of wood, aluminum, pvc, acrylic and even sheet metal through it. I have used it as a disc sander, molder and run many, many dados. This saw was the last model built for ridged by Emerson in America. I actually fed my family several times using this saw to work whilst laid off. What a great piece of equipment.

Having to do another coat of paint on the stand and the control panel. I am going to flip it upside down and put a coat underneath as well. Never have before but, after seeing the underside of the old stand, I am going to from now on.

The lighting I was going to use for the cabinet was puny and in no way daylight... looked like a dungeon! I am ditching them and going with something DIY from the parts stash. So, I am not sure if I should count the $17.50 or not. LOL.

No biggie. I am not in a hurry with this as the floors still have to be sanded and finished and the trim back in before water goes in.

Oh, we had waffled on whether or not to paint the beauty panels and the benches. Last night, the decision has been made it will all be stained to match the nano cube. I picked up the panels along with the poplar to edge a router table extension wing for the table saw. Building that will make all future projects involving the router, much easier.
 
Back
Top