ADA 90P Ratkiller Copycat Build

WifeOfRatkiller

Community Member
View Badges
Joined
Aug 25, 2022
Messages
27
Reaction score
30
Location
San Diego
Rating - 0%
0   0   0
Build Confession: I am a hobby plagiarist and anything that Ratkiller does I can do too! (Just smaller....and with fewer wet sleeves)

ItemNameDetails
TankADA 90P48 gallon
SumpCustom cube (21 x 21 x 21)40 gallon (25 gallon fill volume)
OverflowModular Marine800 gph custom white acrylicz, 1/2" bean animal
Display FlowEcoTech MP10 MP40x 4 x 2 (right top front/left bottom back)
Return Plumbing1/2"
Return FlowEcotech VortechS2
Manifold plumbing1/2" 1"1/2" 1" Cepex valves
Manifold FlowEcotech VortechS2 M2
FiltrationClariseaSK5000
Algae ReactorPaxBellumARID n18
SkimmerReef OctopusElite 200 INT 150 INT
LightingRadion G3XR15 x 2
DosingGeo's ReefCR618 with Platinum Blue DC pump (silent)
Carbon Doser CO2 Control
Misc.UVPentair Smart 18W
ControllerApex A2 (pH x 2 & temp), EB8, EB4, 2 x FMM
TestingHanna (PO4), Salifert (Ca2+, KH, NO3)

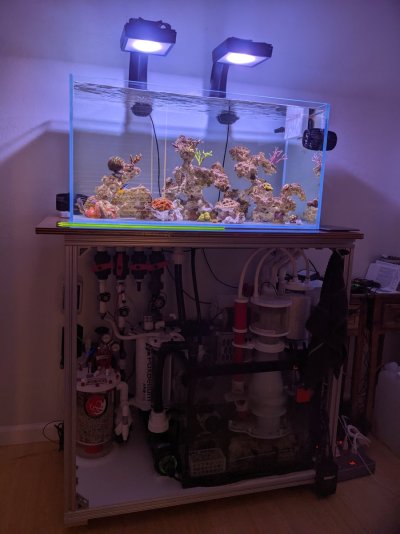
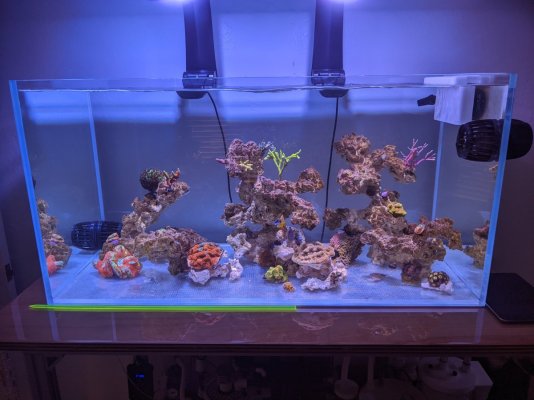
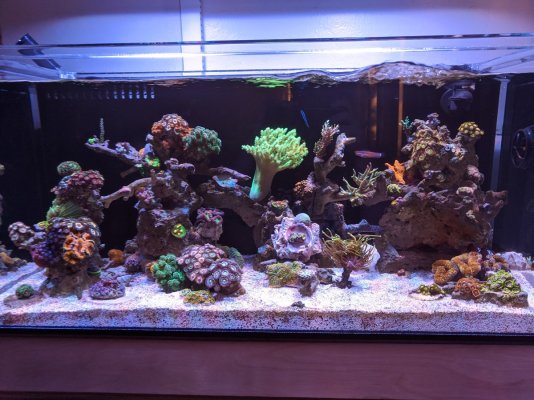
Tank #4 (48 gallon) Current FTS (JUL-2023)

PXL_20230723_231628615.jpg


PXL_20230723_231559039.jpg


FTS (SEP-2022):

WoRK60_FTS0922_1.jpg

WoRK60_FTS0922_3.jpg

The Ratkiller aspirational-I'll-get-there-someday-but-not-get-my-armpits-wet tank - 130-ish 165 gallon (whoops!) Starfire custom in-wall, 300 gallon total system volume of gloriousness and basketball sized Tort colonies:
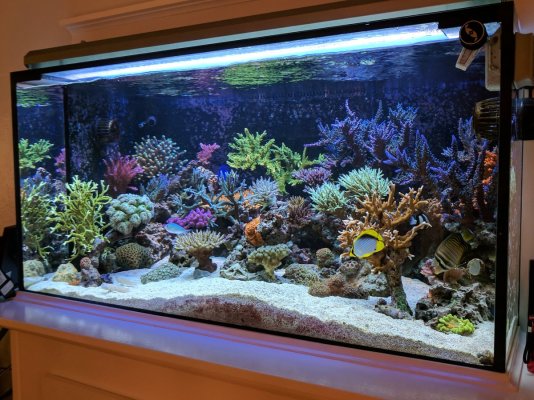
Ratkiller_125.jpg

Tank #1 (2017 to 2020: Illumin8's 8 gallon AIO TOTM on NanoReef) - loved this tank, upgraded for that fat, bloodthirsty, lightning maroon clown shark:
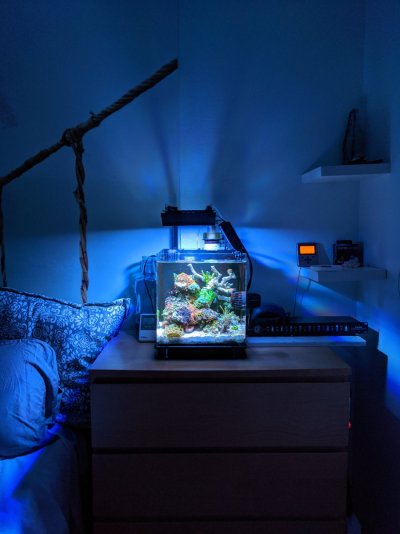
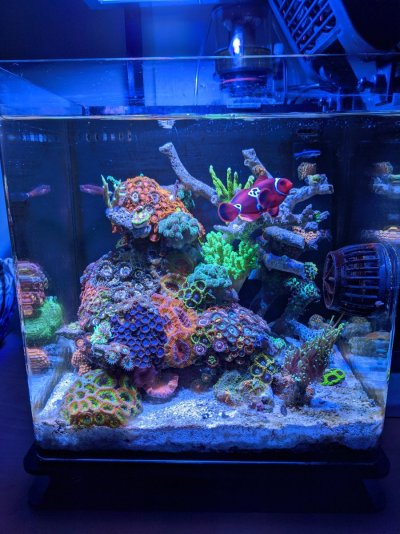
Illumin8_2.jpg Illumin8_1.jpg

Tank #2 (2020 to 2021 - semi-cursed 24 gallon acrylic AIO) - 3 x the fun of the 8 gallon and 3 x the blood drawn by the lightning maroon clown shark:
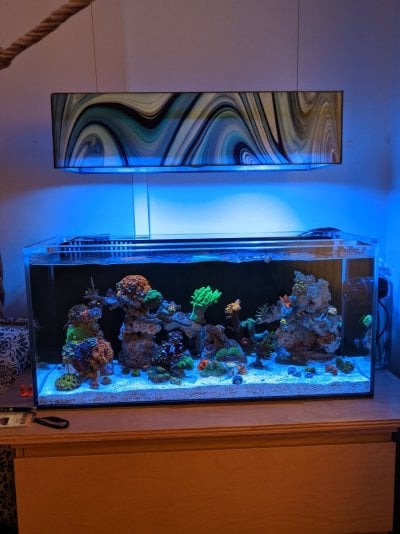
WoRK24_1.jpg
WoRK24_2.jpg WoRK24_3.jpg


Tank #3 (2021 to Aug 2022 36 gallon): Moar space! Moar coral! Moar I-really-need-a-sump-and-Ca-reactor......
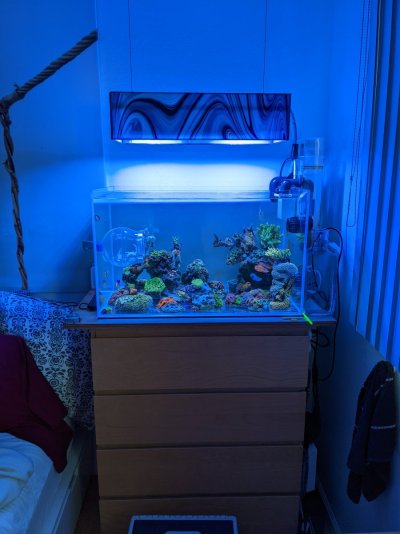
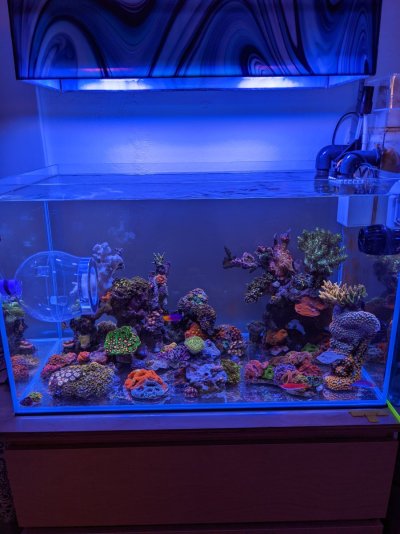
WoRK36_1.jpg WoRK36_2.jpg
(guess who the fish trap was for.... he got a sweet upgrade to an anemone tank all his own and still gets regular visits from his first source of human flesh)

Tank #4 (June 2022 to ??? 48 gallon w/ sump): Just getting started, so 4th time's the charm?

Remaining Tank #4 To-do List:
  1. Install MP40 thin spacers so the dang pumps quit jumping off the glass....
  2. Figure out a skin for the stand
    • Option 1: Magnet attached panels - plastic (PVC? Acrylic?) panels with wood veneer or MDF?
    • Option 3: Hinged MDF custom cabinet doors/panels
  3. Tear down the 36 gallon
  4. Move 48 gallon to final location
    • Remove Radion mounts - yay no cords visible through the back panel!!
    • Program current lights to 48 gallon schedule
  5. Build Apex and controller drawer insert
 
Last edited:

saltyhog

blowing bubbles somewhere
View Badges
Joined
Jan 2, 2014
Messages
9,392
Reaction score
25,023
Location
Conway, Arkansas
Rating - 0%
0   0   0
Beautiful tanks and great build in progress! So are tanks 1-3 decommissioned or are they still running. They are so nice I would have had a hard time taking them down!
 
OP
OP
WifeOfRatkiller

WifeOfRatkiller

Community Member
View Badges
Joined
Aug 25, 2022
Messages
27
Reaction score
30
Location
San Diego
Rating - 0%
0   0   0
Beautiful tanks and great build in progress! So are tanks 1-3 decommissioned or are they still running. They are so nice I would have had a hard time taking them down!
Thank you for the kind words, @saltyhog! Tanks 1 and 2 are decommissioned, and Tank 3 is soon to follow to make room for Tank 4. Wish there was time for maintenance and space for everything, especially that 8 gallon.
 
OP
OP
WifeOfRatkiller

WifeOfRatkiller

Community Member
View Badges
Joined
Aug 25, 2022
Messages
27
Reaction score
30
Location
San Diego
Rating - 0%
0   0   0
Tank Stand Build and Assembly - Part 1

The stand for the 48 gallon is made out of 15 Series 80/20 extruded aluminum from Grainger. This isn't the most cost-effective stand design, and Grainger isn't the least expensive vendor out there. However, Grainger delivers quickly (next day if the material is in stock) and they have an awesome return/exchange policy. Their selection of stainless steel hardware is awesome too.

Here is the parts list to date:

QtyDescriptionItem Number
11 13 *SINGLE,T-SLOT,4 FT29NZ78 (Mfg # 1515-48)
36INSIDE-CORNER BRACKET,15 SERIES5JRV5 (Mfg # 4332)
17 21 **BOLT ASSEMBLY,80/20, 15 SERIES,PK62RCU9 (Mfg # 3620-6)
45 HOLE - CENTER TAP BASE PLATE, QUAD5JRN5 (Mfg # 2140)
4DELUXE LEVELING FOOT,SINGLE5JRN4 (Mfg # 2200)

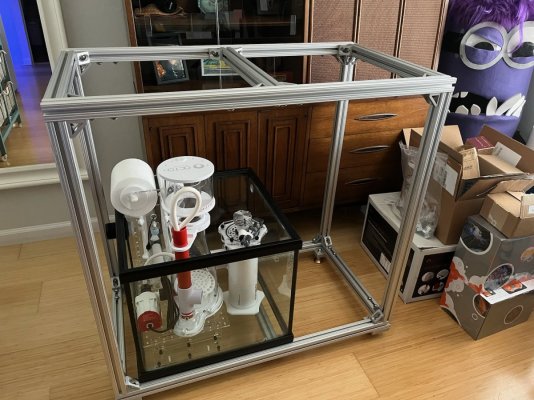
The stand is 22.5" x 40.0" x 38.0" (l x w x h) without the levelling feet or top installed. With the feet and the top, the stand is 41" tall.

Here is the stand with the sump set in place:

WoRK60_B1.jpg

All the aluminum was cut using a Miter saw (Diablo D1296L Carbide blade) squared up with a framing triangle because @Ratkiller 's Miter saw is slightly caddywompus. Followed these rough steps:

  1. Clamp bundles of 80/20 together based on required lengths - made sure to clamp these vertically and horizontally at both ends, and carefully line up one end of the supplied pieces so the eventual cuts are all the same length
    • 4 x Top/Bottom long pieces
    • 6 x Top/Bottom cross members
    • 4 x Uprights
  2. Measure and mark the cuts:
    • Top/Bottom long pieces = 40.0"
    • Top/Bottom cross members = 19.5" (was able to cut 2 from each 4 foot piece of 80/20 taking into account the overall dimensions of the stand and accounting for the 80/20's thickness)
    • Uprights = 35.0" (also had to account for the top and bottom thickness and the planned feet***)
  3. Clamp to the miter saw
  4. Cut!
On the first cut, the carbide blade was sprayed with WD-40 to reduce friction. The aluminum cut like butter! But what a mess... WD-40 sprayed everywhere (duh) and there were flaming hot shards of aluminum stuck to everything in a 3 foot radius around the saw. Cleaned that up and made the rest of the cuts with a dry blade and the shop vac nozzle lined up with the blade to suck up the aluminum shards.

Really wish there was a picture of the clamped pieces and the cutting process. It worked so much better than expected and resulted in a finished stand that was actually square! Bonus was that cutting the 80/20 with a miter saw was much less intimidating than most sites would lead you to believe.

Up next: Stand assembly. (an exercise in the 5 P's...)

* added a 40" cross member to mount the manifold and a 19.5" cross member to mount the drain gate valves
** needed MOAR connectors!
*** forgot that the feet add some additional height so now the stand is an inch taller than planned
 
Last edited:
OP
OP
WifeOfRatkiller

WifeOfRatkiller

Community Member
View Badges
Joined
Aug 25, 2022
Messages
27
Reaction score
30
Location
San Diego
Rating - 0%
0   0   0
Five months between updates is acceptable, right? :face-with-rolling-eyes:

  1. Don't forget to calibrate salinity checkers! Duh, right? Well 'nuff said; @Ratkiller and I still feel awfully dumb...
  2. Head pressure matters even for auxiliary pump/manifolds.
  3. Sand beds are the bomb.com!
  4. Trace element deficiencies are no joke.
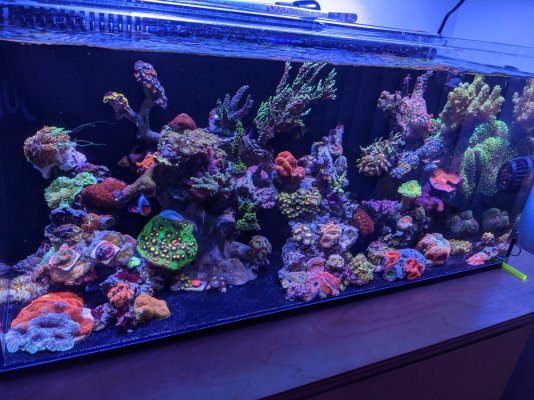
Updated FTS's

January 2023

PXL_20230114_235642964.jpg
PXL_20230114_235659545.jpg


Tang bomb!

Naso_02-11-2023_1.jpg


More February stuff incoming....
 

Gumbies R Us

Another Fish in the Sea
View Badges
Joined
Nov 10, 2022
Messages
9,940
Reaction score
19,127
Location
North Georgia
Rating - 0%
0   0   0
Five months between updates is acceptable, right? :face-with-rolling-eyes:

  1. Don't forget to calibrate salinity checkers! Duh, right? Well 'nuff said; @Ratkiller and I still feel awfully dumb...
  2. Head pressure matters even for auxiliary pump/manifolds.
  3. Sand beds are the bomb.com!
  4. Trace element deficiencies are no joke.
Updated FTS's

January 2023

PXL_20230114_235642964.jpg
PXL_20230114_235659545.jpg


Tang bomb!

Naso_02-11-2023_1.jpg


More February stuff incoming....
Tank is looking really good!!! love the progression of your tank!
 
OP
OP
WifeOfRatkiller

WifeOfRatkiller

Community Member
View Badges
Joined
Aug 25, 2022
Messages
27
Reaction score
30
Location
San Diego
Rating - 0%
0   0   0
@Ratkiller said the tank looked really good today, so it's definitely picture time! (Tippy top of the light peak. Thanks @SunnyX for posting your light schedule, it's awesome!)

2023-04-15_FTS1.jpg


Digi time:
2023-14-15_Digi.jpg


Zoas in full spectrum light. No windex here.
2023-04-15_Zoas.jpg


Currently everything looks good, and for once, SPS is actually growing? I have a horrible history with green digi, but look at those growth tips and that tiny encrusting blob at the bottom. :star-struck: So proud of this little digi!

Also currently dealing with high-ish nitrates (25ppm) that are stubbornly staying pegged no matter the volume/frequency of water changes. Rigged up the smallest Sulfur denitrator ever and might post about it when/if it brings the nitrates down to a reasonable level.
 
OP
OP
WifeOfRatkiller

WifeOfRatkiller

Community Member
View Badges
Joined
Aug 25, 2022
Messages
27
Reaction score
30
Location
San Diego
Rating - 0%
0   0   0
Yup, the SPS is growing:

March Miyagi Tort (should never be allowed to use a camera without my glasses...yeesh):
March_MiyagiTort.jpg


And now....
April_MiyagiTort.jpg


Red Sea Foundation FTW.... wow.
 
OP
OP
WifeOfRatkiller

WifeOfRatkiller

Community Member
View Badges
Joined
Aug 25, 2022
Messages
27
Reaction score
30
Location
San Diego
Rating - 0%
0   0   0
The Sulphur denitrifier works! What sort of witchcraft wonderous magic is this?!? I am flabbergasted...

2023-04-29_Nitrate.JPG


Taking pictures of the setup right meow.
 
Last edited:
OP
OP
WifeOfRatkiller

WifeOfRatkiller

Community Member
View Badges
Joined
Aug 25, 2022
Messages
27
Reaction score
30
Location
San Diego
Rating - 0%
0   0   0
Here's a quick schematic of the setup:

SulphurDenitrator.jpg


Parts list:
DescriptionSKUQty
AquaMaxx FR-SE Media Reactor232613 (BRS)1
EcoTech Versa VX-1212638 (BRS)2
Fluval UltraFlex airline tubingA114110 feet
John Guest 1/4" splitterPI2308S2
John Guest 1/4" stem to 1/4" barb elbowPI290808S8
Two Little Fishies ReBorn Media (Original size)N/A1 bag
Deltec Sulphur Media (5 lbs.)N/A1 bag

Took some "inguineur-ing" to connect the JG spiltters to the 1/2" hose barbs on the the AquaMaxx reactor. Seems like a 1/2" hose barb would have been straightforward, but nun-uh....they have a thread pitch that did not match anything my half-hearted interweb search turned up. Ended up with 1/4" RO line to two sizes of silicon tubing which works like a champ and isn't leaking yet. Win: tbd.

Once the connections between the reactor and the splitter were figured out, the rest of the setup was straightforward. Followed the schematic above. Here are some pictures of the resulting rat's nest:

2023-04-29_SulphurDenitrator_Recirc-Feed-Return.jpg


Then it was time to rinse the Sulphur media and Reborn in tap water followed by RO/DI and add to the reactor I followed the instructions here: http://reefkeeping.com/issues/2009-01/diy/index.php - Total system gallons x 0.006 x 4.22675 = cups of Sulphur media aka 61 x 0.006 x 4.22675 = 1.55 cups of Sulphur. I added an equal part of ReBorn to offset the pH drop in the chamber and hold the media down.

The original plan was to use the Geo's Reef CR618 purchased for this tank, but 1.5 cups of Sulphur media barely covered the CR618's media plate. AquaMaxx Media reactor to the rescue! Pretty sure AquaMaxx didn't plan for the HOB reactor to be used like this, but it works perfectly for this little bitty tank. They make a dedicated Sulphur denitrator, but I would have had the same issue with too little media for the reactor.

Here's just how little Sulphur and ReBorn were really needed. Just a wee bit different than @dca22anderson gigantor Sulphur reactor (Thank you @dca22anderson for the idea and the inspiration!)

2023-04-29_Aquamaxx_232613_SuphurDenitrator_1.jpg


Here's how it fits into the sump all nice and tidy behind the UV return:

2023-04-29_SulphurDenitrator_Sump.jpg


After it was set up, it was time to cycle the denitrifier. Worst part with this setup was getting the air out with the Versa pumps. The Versa's max speed of 200mL/min wasn't nearly enough. Instead I used one of the auxiliary ports on the manifold to get going and get the media fully fluidized. After all the air was out (24 hours later), the Versa pumps were installed.

The recirculating pump is set to 75mL/min which is enough to move the water through the chamber but keeps the Versa quiet. Anything above 80mL/min and the pump's whine is audible; adding a beefier recirc pump is a possible/probable upgrade.

The feed Versa was set originally to 4mL/min. Once the effluent smelled like rotten eggs and its Nitrates were 0, I increased by 2mL/min. Then repeated the process: smell for toots, test for nitrates, increase flow. That worked great until my Versa exploded....it ground to a halt (it's old), and needed to be replaced. While I was changing it over to a spare, I accidentally knocked the fitting out and let air into the tubing. The air reset the denitrifier's cycle. So set, smell, test, and adjust started all over again. Second time was the charm though!

Added the denitrifier on 11-MAR, restarted it due to being clumsy on 07-APR, and saw the first real drop in Nitrates on 16-APR. Dialed it up to 14L/day and Nitrates are right where I'd like them!

2023-04-29_Nitrate.JPG


Last bit of info, promise. The recommended feed rate for Sulphur denitrifiers is 3-4 L/hr per L of Sulphur media, meaning my feed rate for 1.5 cups of media would be 16.6mL/min to 33.3mL/min in Versa's mL/min units. Right now, the Feed Versa is set to 10mL/min (14L/day) so there is still room to increase the feed flow rate and reduce the Nitrates even more if needed.

Overall, this was straightforward to setup, and it worked! I'm almost as stoked as Super-Fat-Tang and Chunky-Possum-Wrasse: fish get to eat like they're at a buffet, and I get to maintain good water params. Win win!
 

High pressure shells: Do you look for signs of stress in the invertebrates in your reef tank?

  • I regularly look for signs of invertebrate stress in my reef tank.

    Votes: 42 31.3%
  • I occasionally look for signs of invertebrate stress in my reef tank.

    Votes: 31 23.1%
  • I rarely look for signs of invertebrate stress in my reef tank.

    Votes: 27 20.1%
  • I never look for signs of invertebrate stress in my reef tank.

    Votes: 34 25.4%
  • Other.

    Votes: 0 0.0%
Back
Top