Adding Sump to a Cobalt C-Vue

LiqrSicc

Community Member
View Badges
Joined
Jul 15, 2019
Messages
40
Reaction score
18
Rating - 0%
0   0   0
I've had my C-vue 40 gal running for almost a year and feel I need more water volume. Unfortunately we live in a second floor condo and the landlord does not approve a larger tank. The back and bottom glass can be drilled so I'm considering removing the false wall. Question is, would I have to worry about adding a eurobrace if I remove the wall? I'm not sure the wall acts as a structural base for this AIO. Any thoughts?
 

Big G

captain dunsel
View Badges
Joined
Jun 8, 2017
Messages
12,921
Reaction score
27,288
Location
Southern Oregon
Rating - 0%
0   0   0
Curious what you did to add the greater water volume. This question comes up from time to time. Did you add a eurobrace?
 
OP
OP
LiqrSicc

LiqrSicc

Community Member
View Badges
Joined
Jul 15, 2019
Messages
40
Reaction score
18
Rating - 0%
0   0   0
Curious what you did to add the greater water volume. This question comes up from time to time. Did you add a eurobrace?

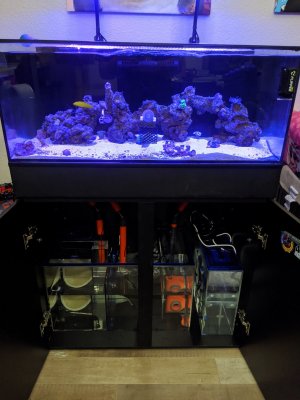
I'm adding a Trigger systems Sapphire 26 sump. I finally got everything I need for it and will be drilling and plumbing the tank this weekend.
 

Aquavaj

Well-Known Member
View Badges
Joined
Aug 16, 2018
Messages
657
Reaction score
377
Rating - 0%
0   0   0
I was considering this on my brand new one too but decided to keep it as an AIO for right now for simplicity sake. Would love to regain that depth from the sump area and the additional water volume.

Are you going single, dual or over the top return? I do wonder on the bracing too. I have a very slight bow on my front panel but not sure if the additional water from the sump area will create more pressure on the long panels.

Definitely keep us updated on the false wall removal and drilling.
 
OP
OP
LiqrSicc

LiqrSicc

Community Member
View Badges
Joined
Jul 15, 2019
Messages
40
Reaction score
18
Rating - 0%
0   0   0
I was considering this on my brand new one too but decided to keep it as an AIO for right now for simplicity sake. Would love to regain that depth from the sump area and the additional water volume.

Are you going single, dual or over the top return? I do wonder on the bracing too. I have a very slight bow on my front panel but not sure if the additional water from the sump area will create more pressure on the long panels.

Definitely keep us updated on the false wall removal and drilling.

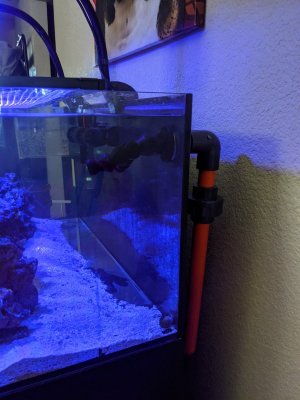
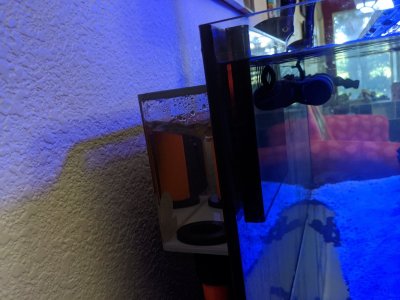
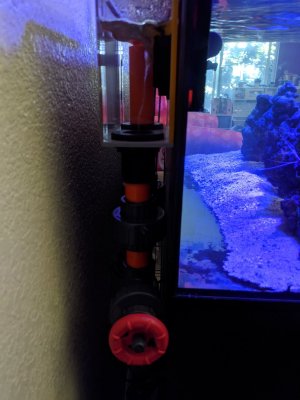
I ended up drilling the holes last week. I did this with the livestock still in the tank. What I did was drain the water in the sump, taped the areas that needed to be drilled, and drilled the holes. With the holes drilled I cleaned up the sump area then proceeded to remove the glass dividers and false wall by using a razor to cut the silicone.

Plumbing proved to be the hardest part since it was my first time. Being a perfectionist, my plumbing disappointed me and didn't work out as I expected. Got everything working but made the noob mistake of putting the gate valve up high by the overflow. It's noisy and I'm going to end up re-plumbing the main drain.
 
OP
OP
LiqrSicc

LiqrSicc

Community Member
View Badges
Joined
Jul 15, 2019
Messages
40
Reaction score
18
Rating - 0%
0   0   0
Here's a few pics:

IMG_20200613_185948.jpg IMG_20200613_190018.jpg IMG_20200613_190023.jpg IMG_20200613_190035.jpg
 

Aquavaj

Well-Known Member
View Badges
Joined
Aug 16, 2018
Messages
657
Reaction score
377
Rating - 0%
0   0   0
Did you have to drill new holes in the stand for the drains and return since they're on the ends of the tank?
 
OP
OP
LiqrSicc

LiqrSicc

Community Member
View Badges
Joined
Jul 15, 2019
Messages
40
Reaction score
18
Rating - 0%
0   0   0
This was my first time plumbing so I was a little overwhelmed and
Did you have to drill new holes in the stand for the drains and return since they're on the ends of the tank?

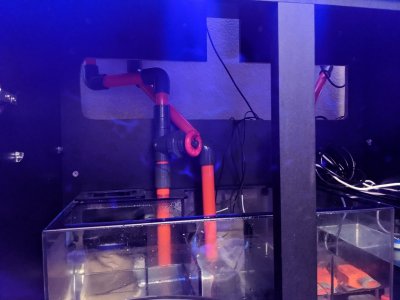
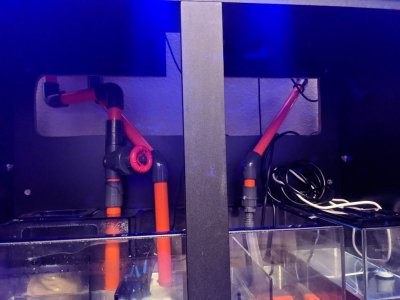
Yessir and that was the hardest part for me. I use a hole saw and made holes for the plumbing. It was a 2.5" hole saw so I thought it was big enough for the pipes. Well, I used 45deg elblows instead of 90deg so the pipes were angled and could not fit through the holes. I ended up taking a jigsaw and cutting out a big chunk out of the back wall of the cabinet. I'll try and get some pictures tomorrow when I re-plumb the drain pipes.
 
OP
OP
LiqrSicc

LiqrSicc

Community Member
View Badges
Joined
Jul 15, 2019
Messages
40
Reaction score
18
Rating - 0%
0   0   0
Here's a picture of the cutout I made in the back. I'm not impressed with my plumbing skills but at least now it's not so noisy.

IMG_20200618_180817.jpg IMG_20200618_180813.jpg
 
Back
Top