Following!

Navigation
Install the app
How to install the app on iOS
Follow along with the video below to see how to install our site as a web app on your home screen.
Note: This feature may not be available in some browsers.
More options
You are using an out of date browser. It may not display this or other websites correctly.
You should upgrade or use an alternative browser.
You should upgrade or use an alternative browser.
After all these years, Office nano build!
- Nano Build
- Thread starter Wiskey
- Start date
- Tagged users None


OP
OP
- Joined
- Sep 7, 2017
- Messages
- 734
- Reaction score
- 916
is that a setosa?
i've killed 3 so far, can't seem to keep them alive.
one day i will try another one.
J.
That looks like it actually! I was told it was a deep water acro, but that seems much more likely. I've never tried one, we will see.
Whiskey
OP
OP
- Joined
- Sep 7, 2017
- Messages
- 734
- Reaction score
- 916

- Joined
- Oct 26, 2016
- Messages
- 33
- Reaction score
- 19
following....
Daniel@R2R
Living the Reef Life
View Badges
Staff member
Super Moderator
Reef Squad
Partner Member 2024
Excellence Award
Photo of the Month
Article Contributor
Hospitality Award
Article Administrator
Reef Pumpkin Carver
R2R Secret Santa 2023
My Tank Thread
Following!
vetteguy53081
Well known Member and monster tank lover
View Badges
Partner Member 2024
Excellence Award
Reef Tank 365
RGB
Article Contributor
Tampa Bay Reef Keepers
West Palm Beach Reefer
Hospitality Award
Ocala Reef Club Member
305 Reef Club
Wisco Reefers
Midwest Reefer
Fish Medic
MAC of SW Florida
Rock Pool Reef Keepers
R2R Secret Santa 2023
My Tank Thread
My Aquarium Showcase
Creativity at its best

OP
OP
- Joined
- Sep 7, 2017
- Messages
- 734
- Reaction score
- 916
following....
Following!
Creativity at its best
Welcome aboard!!
Thank you,
Whiskey
OP
OP
- Joined
- Sep 7, 2017
- Messages
- 734
- Reaction score
- 916
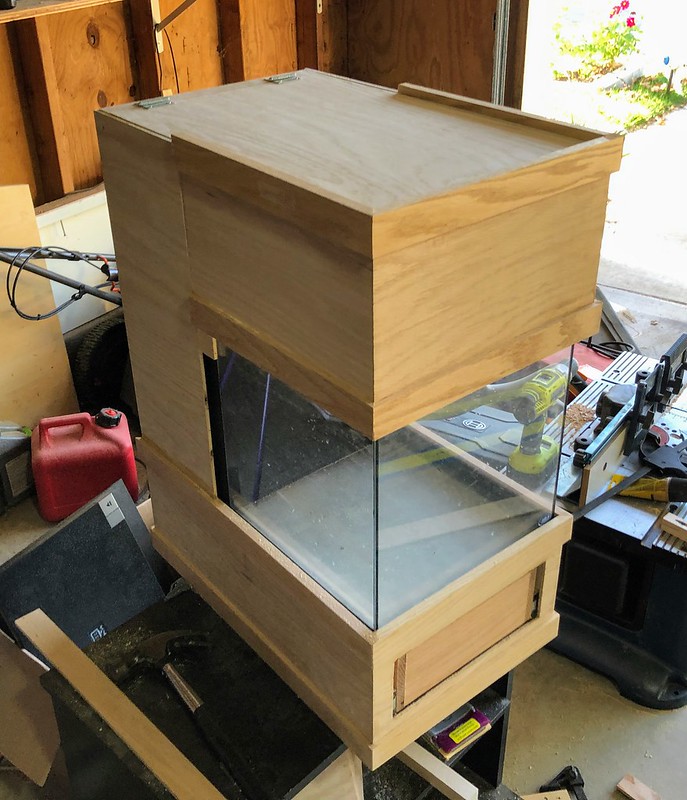
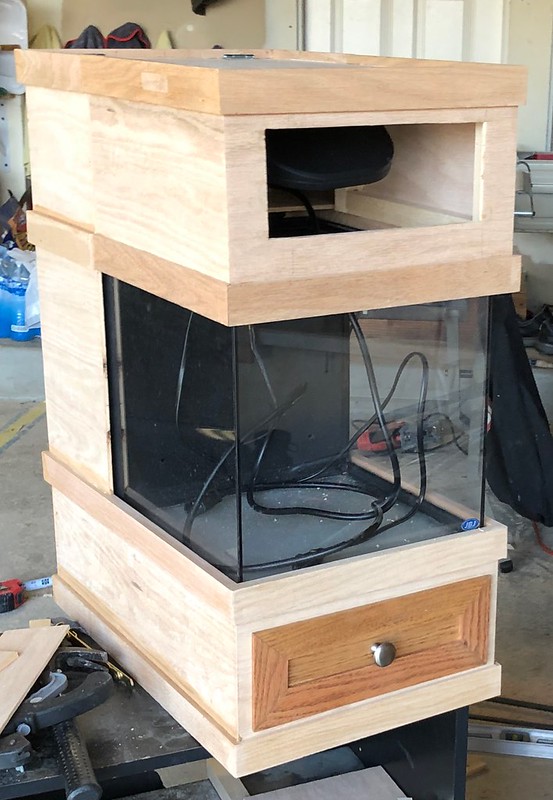
My Spanish class is over, so I have a little progress for everyone! I did a little work on the hood portion today. Here you can see the outside view:
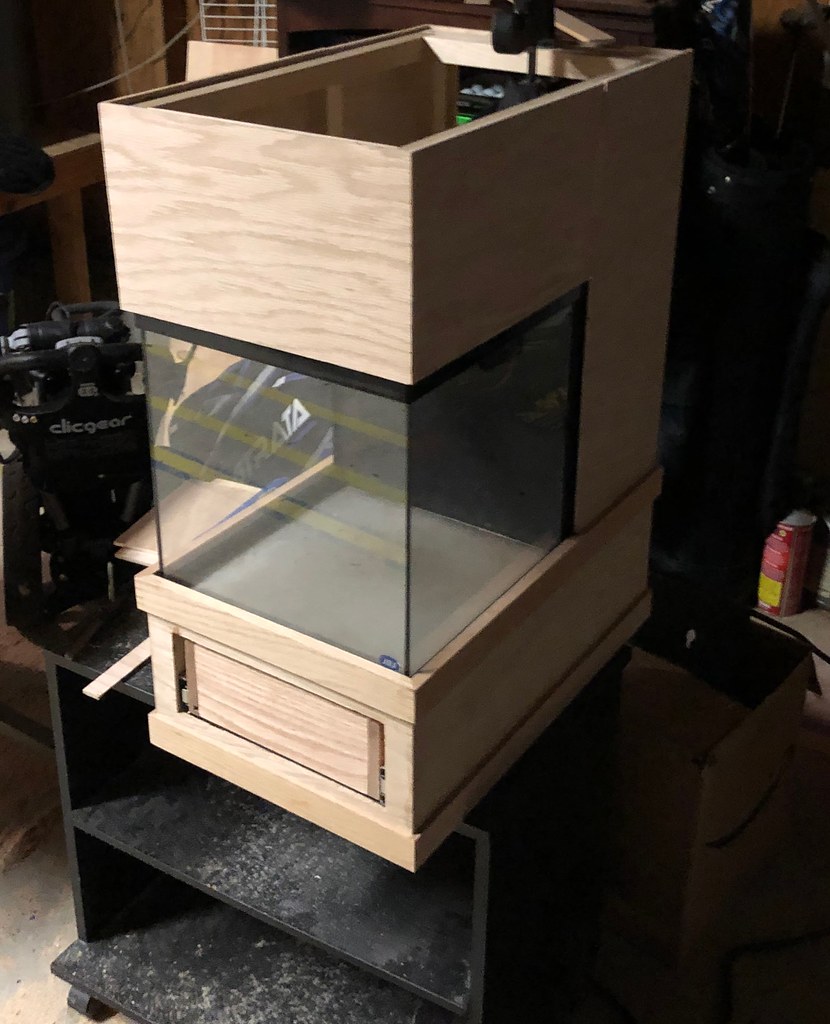 IMG_6320 by Wiskey2727, on Flickr
For the front, I’m not a big fan of wood sitting on the perpetually wet rim of the tank, so in the front I used this plastic screw to be the foot that contacts the front tank rim. It has the added benefit of being able to screw in and out to get the hood exactly level. It’s just a simple ¼ 20 plastic screw, I drilled and tapped the wood.
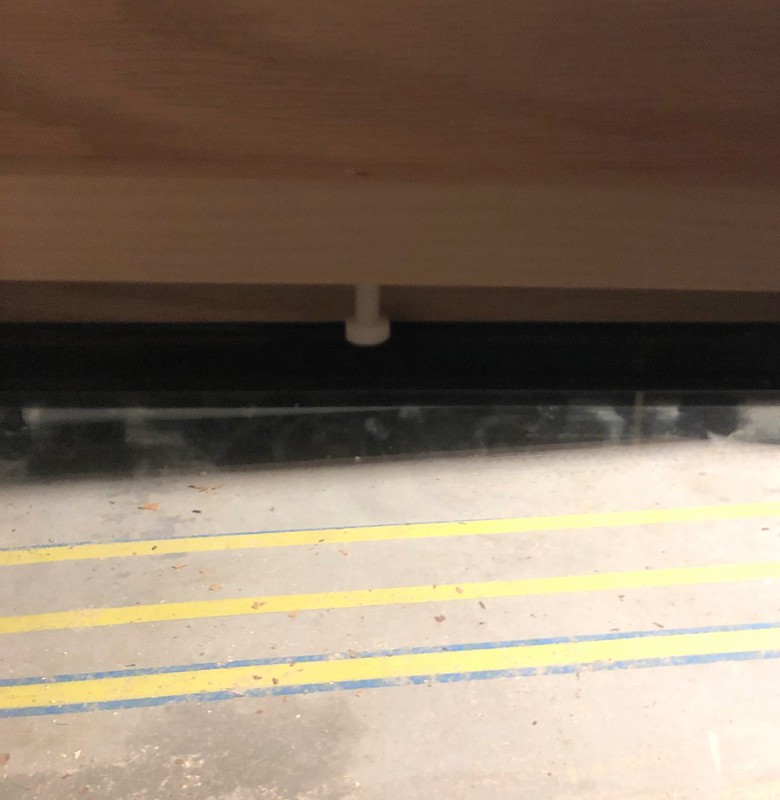 IMG_6321 by Wiskey2727, on Flickr
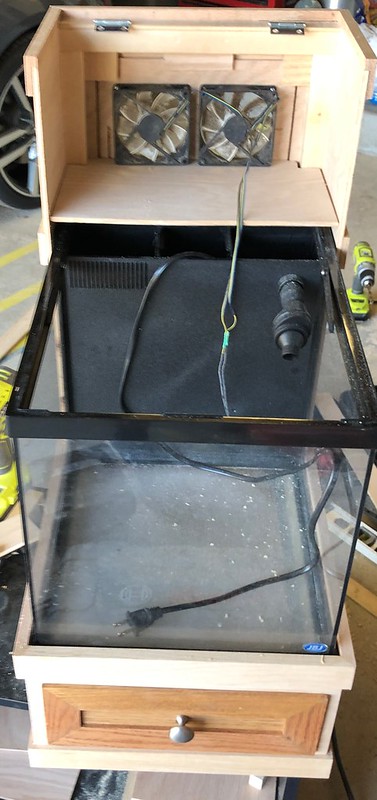
And here you can see how the hood will open, it will swing up more than 90 degrees giving me unfettered access to the filtration and tank. There will be a simple door on the front that will give me access for routine feeding.
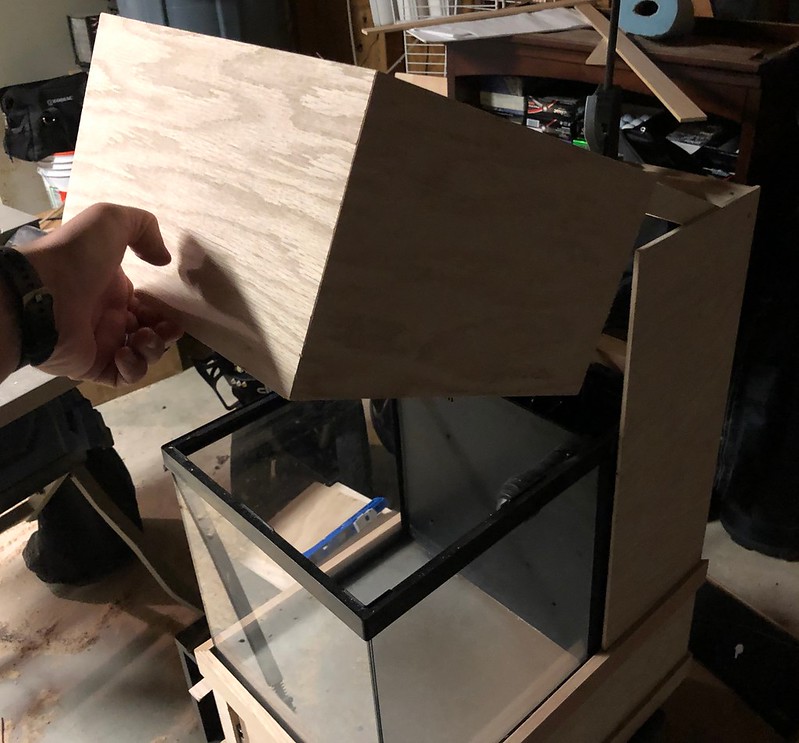 IMG_6322 by Wiskey2727, on Flickr
Whiskey
IMG_6320 by Wiskey2727, on FlickrFor the front, I’m not a big fan of wood sitting on the perpetually wet rim of the tank, so in the front I used this plastic screw to be the foot that contacts the front tank rim. It has the added benefit of being able to screw in and out to get the hood exactly level. It’s just a simple ¼ 20 plastic screw, I drilled and tapped the wood.
IMG_6321 by Wiskey2727, on FlickrAnd here you can see how the hood will open, it will swing up more than 90 degrees giving me unfettered access to the filtration and tank. There will be a simple door on the front that will give me access for routine feeding.
IMG_6322 by Wiskey2727, on FlickrWhiskey
Daniel@R2R
Living the Reef Life
View Badges
Staff member
Super Moderator
Reef Squad
Partner Member 2024
Excellence Award
Photo of the Month
Article Contributor
Hospitality Award
Article Administrator
Reef Pumpkin Carver
R2R Secret Santa 2023
My Tank Thread
Looks amazing!

Love what you´re doing with the stand! Clean, sharp and organized!
OP
OP
- Joined
- Sep 7, 2017
- Messages
- 734
- Reaction score
- 916
1 of 32 now, doesn't include frags(15?).
Wet your appetite, just some. I didn't mention the scleronephthya colonies, hahaha


Very nice!!!
Whiskey
OP
OP
- Joined
- Sep 7, 2017
- Messages
- 734
- Reaction score
- 916
is that a setosa?
i've killed 3 so far, can't seem to keep them alive.
one day i will try another one.
J.
I could have sworn I replied to this, but I must have gotten so lost in images that I forgot to. I think you are right! It was sold to me as a deepwater and I've never seen an orange one so I got it, but I think you have the correct ID.
It's already growing a little bit! I hope it does well.
Whiskey

OP
OP
- Joined
- Sep 7, 2017
- Messages
- 734
- Reaction score
- 916
OP
OP
- Joined
- Sep 7, 2017
- Messages
- 734
- Reaction score
- 916
Love what you´re doing with the stand! Clean, sharp and organized!
Thank you!
Whiskey
OP
OP
- Joined
- Sep 7, 2017
- Messages
- 734
- Reaction score
- 916
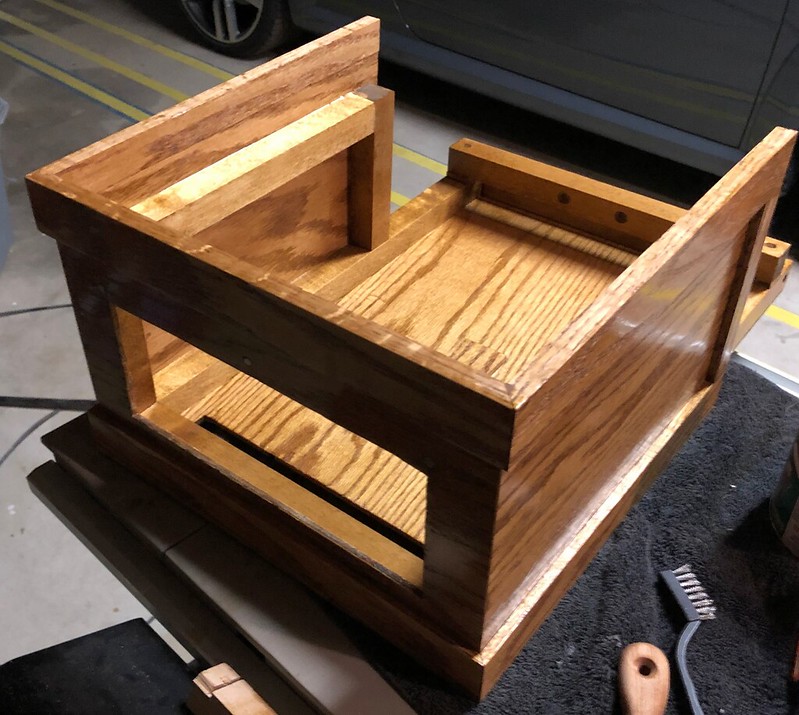
Just another small incremental update for everyone. I have the hood top on, and you can see some of the trim being installed. This is slow work because I'm routing it around the plywood edge so you don't see plywood edges anywhere on the build. I'm also cutting all the corners at 45 degrees. Two things that I've not had the capability to do on any other project so there is a bit of a learning curve there.
I'm really excited about this being a nice office tank that may attract people to the hobby that had not been exposed to it, like my freshwater one has done. I want the stand to show it off well, and for the system to look high end.
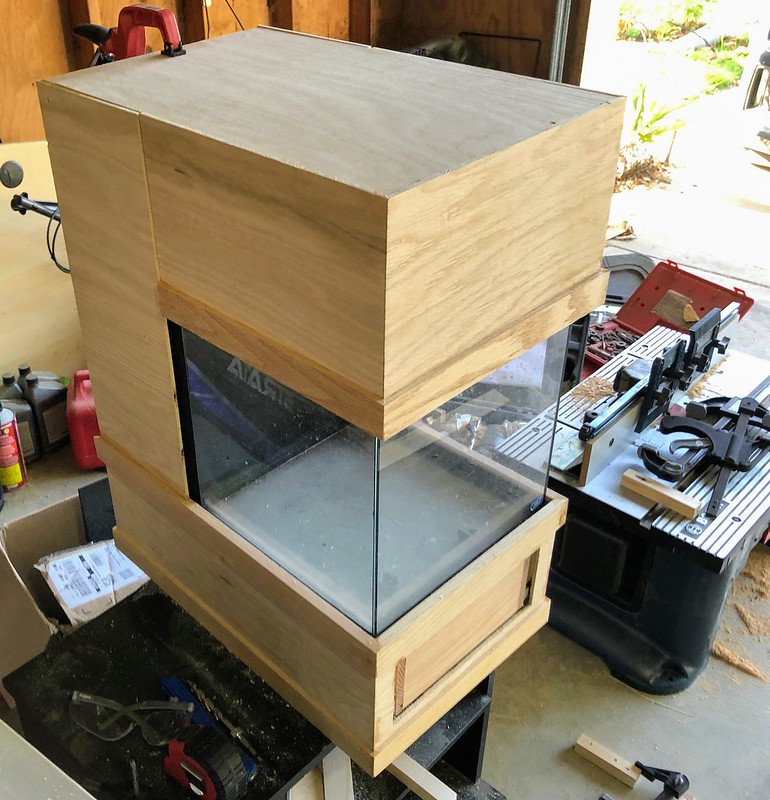 IMG_6350 by Wiskey2727, on Flickr
Whiskey
I'm really excited about this being a nice office tank that may attract people to the hobby that had not been exposed to it, like my freshwater one has done. I want the stand to show it off well, and for the system to look high end.
IMG_6350 by Wiskey2727, on FlickrWhiskey

OP
OP
- Joined
- Sep 7, 2017
- Messages
- 734
- Reaction score
- 916
I have another small update, I put some trim on, and you can see how I will do the top part of the hood. With everything that opens, and some ply warp from being in the garage before the stain I might have some trouble lining up the left, but we will see.
 IMG_6372 by Wiskey2727, on Flickr
Whiskey
IMG_6372 by Wiskey2727, on FlickrWhiskey
OP
OP
- Joined
- Sep 7, 2017
- Messages
- 734
- Reaction score
- 916
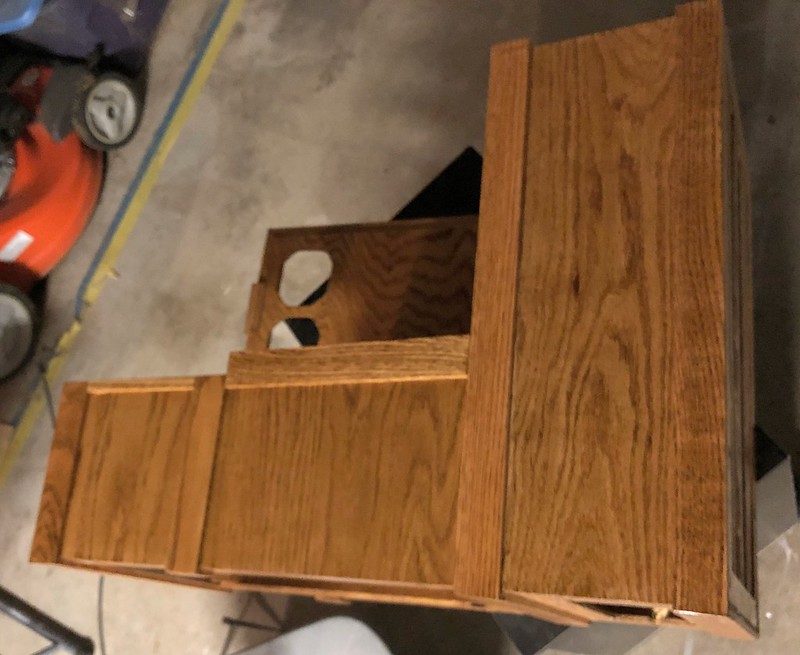
I have another minor update.
The back door is completed and installed, with fans. This is magnet mounted at the bottom to gain access to the APEX behind it:
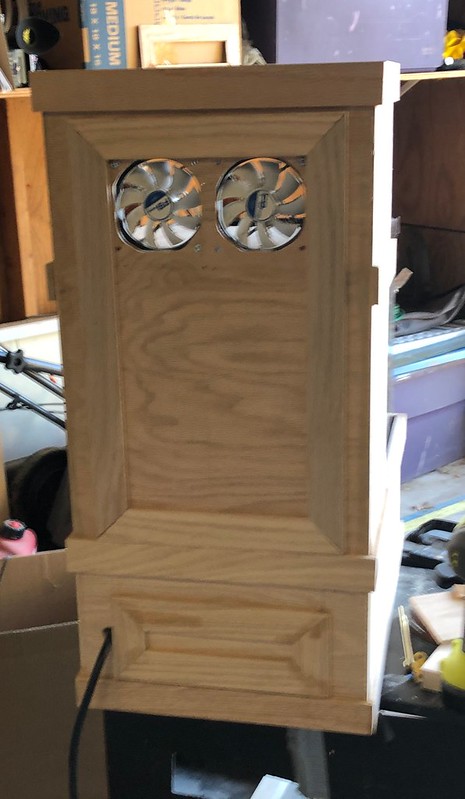 IMG_6393 by Wiskey2727, on Flickr
I made a little cover to keep light out of the back section, and prevent water from dripping on the APEX. This is also mounted by magnets:
 IMG_6394 by Wiskey2727, on Flickr
I cut the front door out of the hood section, and mounted the light:
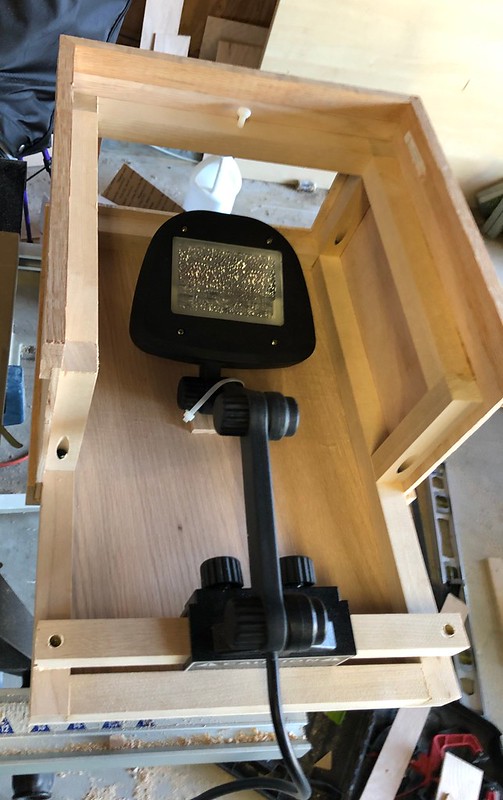 IMG_6395 by Wiskey2727, on Flickr
I also did a bunch more trim work, and put on a metric ton of wood filler:
 IMG_6396 by Wiskey2727, on Flickr
Whiskey
The back door is completed and installed, with fans. This is magnet mounted at the bottom to gain access to the APEX behind it:
IMG_6393 by Wiskey2727, on FlickrI made a little cover to keep light out of the back section, and prevent water from dripping on the APEX. This is also mounted by magnets:
IMG_6394 by Wiskey2727, on FlickrI cut the front door out of the hood section, and mounted the light:
IMG_6395 by Wiskey2727, on FlickrI also did a bunch more trim work, and put on a metric ton of wood filler:
IMG_6396 by Wiskey2727, on FlickrWhiskey
OP
OP
- Joined
- Sep 7, 2017
- Messages
- 734
- Reaction score
- 916
Sorry I've been short on updates lately,.. frankly there hasn't been much that's update worthy going on.
My work lately goes like this:
Varnish one side
Wait four hours
Turn
Varnish another side
Wait four hours
Turn
Varnish another side
Wait four hours
Turn
Varnish another side
--This is where it really gets exciting!--
Wait 24 hours
Lightly Sand
Varnish the first side again.
Etc, etc.
Here are some pictures of where we are right now:
 IMG_6456 by Wiskey2727, on Flickr
 IMG_6457 by Wiskey2727, on Flickr
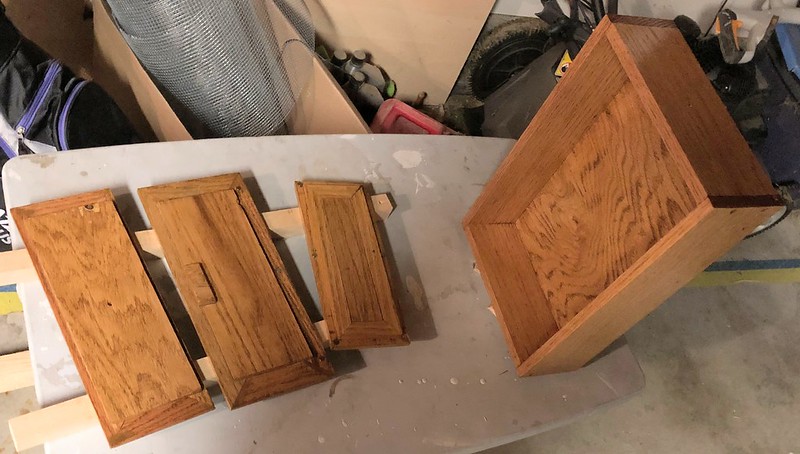 IMG_6458 by Wiskey2727, on Flickr
Whiskey
My work lately goes like this:
Varnish one side
Wait four hours
Turn
Varnish another side
Wait four hours
Turn
Varnish another side
Wait four hours
Turn
Varnish another side
--This is where it really gets exciting!--
Wait 24 hours
Lightly Sand
Varnish the first side again.
Etc, etc.
Here are some pictures of where we are right now:
IMG_6456 by Wiskey2727, on FlickrIMG_6457 by Wiskey2727, on FlickrIMG_6458 by Wiskey2727, on FlickrWhiskey
OP
OP
- Joined
- Sep 7, 2017
- Messages
- 734
- Reaction score
- 916
Welcome, and thank you!Following!! Keep up the good work!
I think the sealing process is finally done! Now I can move onto the fun part. Well.... as soon as I let it cure and off-gas for a week that is.
Whiskey
Similar threads

- Replies
- 8
- Views
- 515
- Replies
- 1
- Views
- 52


