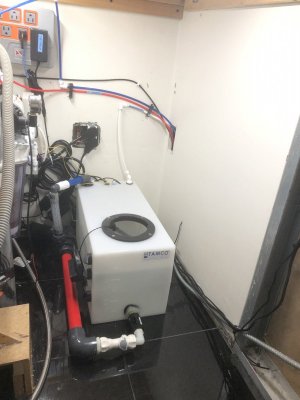
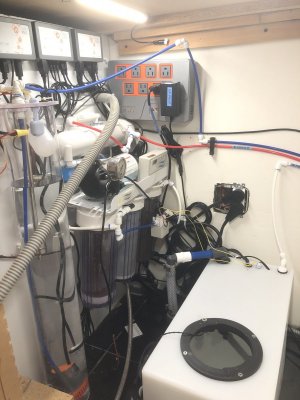
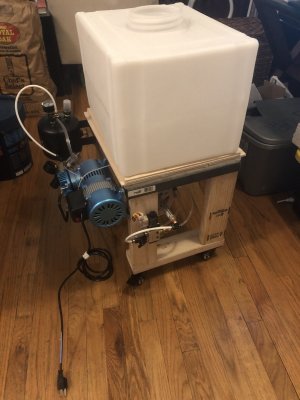
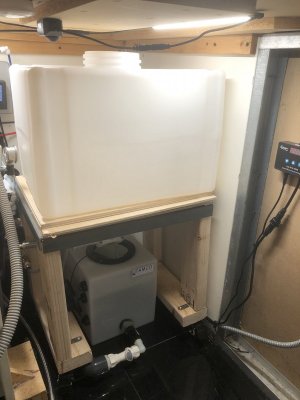
I have been wavering for months on whether this build warrants a R2R build thread but after pulling the trigger over the weekend on a pneumatically actuated salt doser setup for my mixing station, I knew that exchanging ideas and advice related to this project would be highly valuable for myself and others. Since this is my first post, I will provide a bit of background on myself and the build, then get into the fun stuff (scroll down to big bold line to skip to the fun stuff).
I have been following R2R silently for about seven years now, having spent dozens of hours perfecting hypothetical build designs for systems of all sizes that never came to fruition. I became so obsessed with the idea of a 400 gallon reef tank at one point in 2014 that I actually leased an apartment based (partially) on the fact that it had a PERFECT wall for an 8ft tank – concrete floors in a converted 19th century factory in downtown St. Louis so I knew the weight wouldn’t be a problem; the intended tank location was immediately next to the entry for maximum wow factor, and it backed up to the walk-in closet of the guest bedroom which would have been the fish room. Unfortunately, I quickly discovered that I did not want to live in St. Louis for more than a couple of years so I squashed that plan but continued to live vicariously through all of your awesome build threads.
I am an advanced open water diver and have been obsessed with water and the ocean my entire life. I’ve had several freshwater tanks throughout my life while acknowledging that I was settling for something far less than what I really wanted. I am not an engineer or computer programmer but I’m a lifelong project enthusiast who frequently got in trouble as a kid for taking apart the family computer just to see if I could put it back together. I self taught VBA, python, and a little C++ and R to design a pretty complex GIS program a few years back just for fun. My dad was an electrician long before I was born but I grew up holding the flashlight while he and his contractor friends fixed everything around their houses and places of work. In short - I just like to build s**t and, for someone who puts on a suit every day, I think I’m pretty good at it.
Fast forward to October 2019. I now live in a 1-bedroom apartment in lower Manhattan and still fall asleep reading through R2R on my iPad or watching BRS TV on a weekly basis. My girlfriend, who doubles as a lovely roommate and fish parent, gifted me with a 30 gallon all-in-one tank as a birthday present. She had NO idea what kind of chain reaction she set off. We set up and cycled the tank over about 8 weeks, added a clean-up crew and a couple of clowns and all was good going into Christmas. Unfortunately, one of the clowns brought in ich and with most of my prior research focused on equipment, I did not catch it early enough to save them. I tried reaching out to the LFS that sold us the live rock, sand, CUC, and clowns, but got no response. We left the tank empty of livestock for about six weeks while I was traveling for work and thinking about how to proceed. My lease strictly prohibits large aquariums but since we are on the ground floor of the building, I checked out the lateral supports in the basement and discussed the possibility of a larger tank with my landlord. He approved us for a display tank up to 100 gallons and I was off to planning my (mini) dream system.
COVID-19 era notwithstanding, I work crazy long and unpredictable hours (randomly ranging from 70-110 hours / week with a lot of last minute travel). This means my tank must be able to be remotely monitored and should be as automated as possible. I need to be able to put off almost any task for at least a few days becomes sometimes I’m only home long enough to shower and go back to the office or get on a flight. When I was living alone, this made me think getting a reef tank would just be irresponsible because I would never be able to keep up with maintenance or react to problems quickly enough. Now, however, if something were to come up that required a water test, water change, or other basic reaction, my girlfriend would be able to take care of things until I have the time to implement a longer term solution. On top of this, I’m a bit of an automation nerd and just like the idea of applying IFTTT methodology to everything that’s feasible / economical.
With all of this in mind, I reached out to several tank builders for quotes for a 100 gallon tank that fit the required footprint (48” x 21”) – more about this “requirement” later. I went through about 10 quotes (incl. one from Reef Savvy) and ultimately decided to go with Patrick at Coast to Coast aquariums for several reasons which I’m happy to get into if anyone is interested. Bottom line was VERY high quality tank, proximity (he’s in NJ), and lead time (~2 months at the time of the quote). By this time, it was mid-February and COVID-19 was heating up. I was traveling on the west coast and considering backing out of the build due to potential backordering of parts, but once I returned home and went through a couple of days of working from home, I needed a project...
BACKGROUND OVER - BUILD STARTS HERE
EQUIPMENT OVERVIEW:
DESIGN:
I have been using an app on my 12.9” iPad Pro called Shapr3D for all of the design and planning. Given the very little space that I have for everything, I had to plan it all down to the cm before pulling the trigger on anything. For example, I had an entire alternate plumbing plan where the skimmer was a few inches higher and all of the return plumbing was running externally. There’s very little room for error with a sump cabinet this tight. I have no “real” autoCAD experience but I love the app and would highly recommend for those looking to work an on iPad (not Mac, and not iPhone – requires apple pencil).
This design has been a work in progress for a few months of course but has not changed much at all in the last ~6 weeks. It has served as an incredibly valuable set of instructions while piecing everything together.
Note that I will likely move reactors from above the sump to the area to the right of the sump along with dosing containers.


STAND:
One of my girlfriend’s few requests for upgrading the tank was that we continue to use the same antique bar cabinet that was barely supporting our 30 gallon tank as the stand for the new tank. I reached out to a few local aquarium builders and carpenters about retrofitting the cabinet to support 1,500+ pounds and none were willing to take on the job for a reasonable price. I decided I would take it on myself and took off researching how to essentially build my own stand skeleton and use the existing cabinet as a skin such that it looked mostly like the original piece of furniture from the outside once finished.
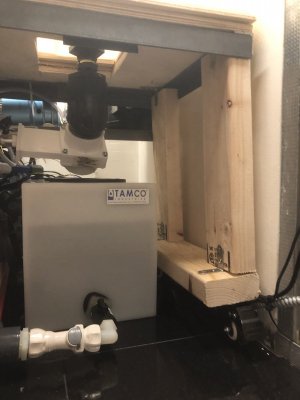
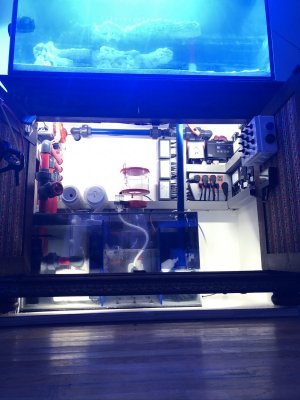
I used 1.5” x ¼” angle iron supported by 2x6 lumber around the perimeter to build legs for 5/8” sheet of birch upon which the cabinet’s original top would rest. I’m planning to place the tank on top of a sheet of foam, on top of the original cabinet top, but all of the weight gets distributed down through the 2x6’s, then dispersed across a piece of solid birch to make sure it was as evenly distributed as possible on the floor. I covered the inside with 1/8” plywood and we painted everything with white FlexSeal rubber plaint everyday for about 2 weeks to “rubberize” everything in the sump cabinet. I kept some on hand and painted the inside of the holes for plumbing, etc. to keep the clean look and keep from scratching plumbing or shorting out wiring on the plywood. Using the faces of the antique drawers with magnets superglued on the back attaching to the angle iron was completely unplanned but turned out awesome. I’m fairly confident and proud of the final solution but looking for any critique, suggestions, or questions before the tank actually gets here.
30 gallon birthday surprise:

picture of the original cabinet cracking under weight of the 30 gallon tank:


Walking home from Chinatown with lumber/plywood:

Destruction and rebuilding of antique cabinet:


Structural integrity test with a little help from a (terrified but trusting) friend:


PROGRESS TO DATE:
Before I dive into tons of detail about the mixing station and automation setup, here’s everything else cataloguing the build and bringing you up to date while I wait on the tank to ship (ETA mid to late May).
Peak ****show:


First plumbing test (left side):
Patching up the switch board to the breakout boards with 18 gauge thermostat wire (great for the breakout boards bc you can get it in a set of 8 with 8 different color wires):

FW test of the plumbing:

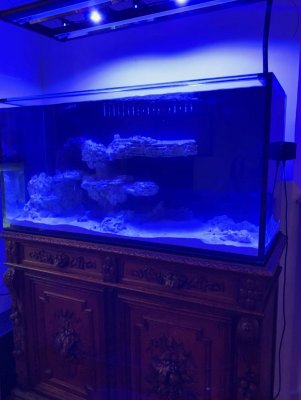
portrait/tall view (current state):

I have been following R2R silently for about seven years now, having spent dozens of hours perfecting hypothetical build designs for systems of all sizes that never came to fruition. I became so obsessed with the idea of a 400 gallon reef tank at one point in 2014 that I actually leased an apartment based (partially) on the fact that it had a PERFECT wall for an 8ft tank – concrete floors in a converted 19th century factory in downtown St. Louis so I knew the weight wouldn’t be a problem; the intended tank location was immediately next to the entry for maximum wow factor, and it backed up to the walk-in closet of the guest bedroom which would have been the fish room. Unfortunately, I quickly discovered that I did not want to live in St. Louis for more than a couple of years so I squashed that plan but continued to live vicariously through all of your awesome build threads.
I am an advanced open water diver and have been obsessed with water and the ocean my entire life. I’ve had several freshwater tanks throughout my life while acknowledging that I was settling for something far less than what I really wanted. I am not an engineer or computer programmer but I’m a lifelong project enthusiast who frequently got in trouble as a kid for taking apart the family computer just to see if I could put it back together. I self taught VBA, python, and a little C++ and R to design a pretty complex GIS program a few years back just for fun. My dad was an electrician long before I was born but I grew up holding the flashlight while he and his contractor friends fixed everything around their houses and places of work. In short - I just like to build s**t and, for someone who puts on a suit every day, I think I’m pretty good at it.
Fast forward to October 2019. I now live in a 1-bedroom apartment in lower Manhattan and still fall asleep reading through R2R on my iPad or watching BRS TV on a weekly basis. My girlfriend, who doubles as a lovely roommate and fish parent, gifted me with a 30 gallon all-in-one tank as a birthday present. She had NO idea what kind of chain reaction she set off. We set up and cycled the tank over about 8 weeks, added a clean-up crew and a couple of clowns and all was good going into Christmas. Unfortunately, one of the clowns brought in ich and with most of my prior research focused on equipment, I did not catch it early enough to save them. I tried reaching out to the LFS that sold us the live rock, sand, CUC, and clowns, but got no response. We left the tank empty of livestock for about six weeks while I was traveling for work and thinking about how to proceed. My lease strictly prohibits large aquariums but since we are on the ground floor of the building, I checked out the lateral supports in the basement and discussed the possibility of a larger tank with my landlord. He approved us for a display tank up to 100 gallons and I was off to planning my (mini) dream system.
COVID-19 era notwithstanding, I work crazy long and unpredictable hours (randomly ranging from 70-110 hours / week with a lot of last minute travel). This means my tank must be able to be remotely monitored and should be as automated as possible. I need to be able to put off almost any task for at least a few days becomes sometimes I’m only home long enough to shower and go back to the office or get on a flight. When I was living alone, this made me think getting a reef tank would just be irresponsible because I would never be able to keep up with maintenance or react to problems quickly enough. Now, however, if something were to come up that required a water test, water change, or other basic reaction, my girlfriend would be able to take care of things until I have the time to implement a longer term solution. On top of this, I’m a bit of an automation nerd and just like the idea of applying IFTTT methodology to everything that’s feasible / economical.
With all of this in mind, I reached out to several tank builders for quotes for a 100 gallon tank that fit the required footprint (48” x 21”) – more about this “requirement” later. I went through about 10 quotes (incl. one from Reef Savvy) and ultimately decided to go with Patrick at Coast to Coast aquariums for several reasons which I’m happy to get into if anyone is interested. Bottom line was VERY high quality tank, proximity (he’s in NJ), and lead time (~2 months at the time of the quote). By this time, it was mid-February and COVID-19 was heating up. I was traveling on the west coast and considering backing out of the build due to potential backordering of parts, but once I returned home and went through a couple of days of working from home, I needed a project...
BACKGROUND OVER - BUILD STARTS HERE
EQUIPMENT OVERVIEW:
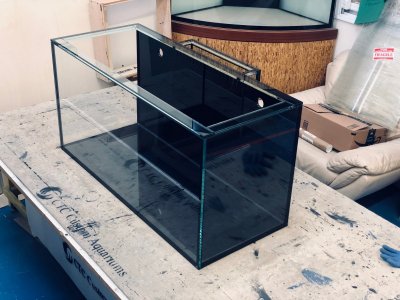
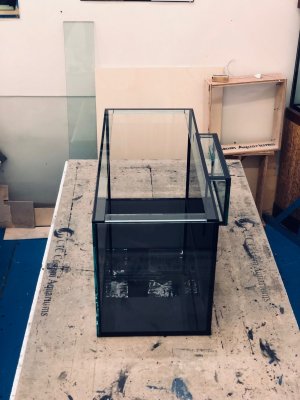
- Display Tank: 100 gallon C2C custom tank (48” x 20” x 24”) w/ 3 panels of starfire and black bottom/rear. Rear ~20” external overflow set up for bean animal
- Stand: DIY with 1.25”x1/4” angle iron, 2x6’s, and Canadian birch plywood
- Sump: Bashsea smart series 3015 (really wanted larger signature series but this is the only size I could make make sense for my sump cabinet size)
- Return Pump: Abyzz A100 (wanted dual returns but couldn’t make it work with sump size. I figured the most reliable option is best in the absence of redundancy). Also planning to run chiller, reactor manifold, and any future additions from this so I wanted extra flow capacity for growing room
- Mechanical filtration: ClariSea 5000 – hard plumbed into primary drain
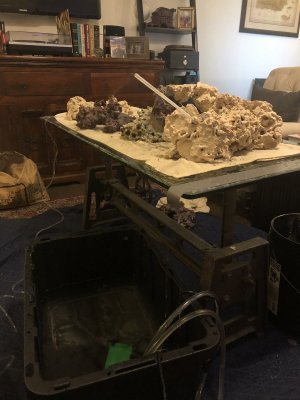
- Biological filtration: 4” bio block + ~100 lbs of live rock and TBD lbs of live sand. I am planning to use the ~40 lbs of rock from my established 30 gallon and I have an additional ~50 lbs of live rock in 5 gallon buckets with some small pieces from the established tank. Also added a bit of Dr. Tim’s to the buckets of new live rock though I’m not sure if this will be helpful at all.
- Skimmer: Reef Octo 150SSS (again, size was a big factor here, might upgrade this down the road if not performing)
- Flow: 2x Vortech MP40s
- Media Reactors: TBD
- Heater: 2x Cobalt Neotherm 300w
- Chiller: JBJ ¼ HP
- Additive Handling: Probably 2-part using the DOS, though I haven’t decided on this yet
- Lights: T5/LED hybrid – 4x ATI 48” (2x coral plus, 2x blue), 2x Kessil 360x, + Apex moon lights for fun… all mounted on aquatic life dimmable fixture
- ATO: Neptune ATK
- AWC: Neptune DOS
- Automation/monitoring systems: a lot, Centered around Apex but quite a bit of DIY… will list out later in the thread where relevant
DESIGN:
I have been using an app on my 12.9” iPad Pro called Shapr3D for all of the design and planning. Given the very little space that I have for everything, I had to plan it all down to the cm before pulling the trigger on anything. For example, I had an entire alternate plumbing plan where the skimmer was a few inches higher and all of the return plumbing was running externally. There’s very little room for error with a sump cabinet this tight. I have no “real” autoCAD experience but I love the app and would highly recommend for those looking to work an on iPad (not Mac, and not iPhone – requires apple pencil).
This design has been a work in progress for a few months of course but has not changed much at all in the last ~6 weeks. It has served as an incredibly valuable set of instructions while piecing everything together.
Note that I will likely move reactors from above the sump to the area to the right of the sump along with dosing containers.
STAND:
One of my girlfriend’s few requests for upgrading the tank was that we continue to use the same antique bar cabinet that was barely supporting our 30 gallon tank as the stand for the new tank. I reached out to a few local aquarium builders and carpenters about retrofitting the cabinet to support 1,500+ pounds and none were willing to take on the job for a reasonable price. I decided I would take it on myself and took off researching how to essentially build my own stand skeleton and use the existing cabinet as a skin such that it looked mostly like the original piece of furniture from the outside once finished.
I used 1.5” x ¼” angle iron supported by 2x6 lumber around the perimeter to build legs for 5/8” sheet of birch upon which the cabinet’s original top would rest. I’m planning to place the tank on top of a sheet of foam, on top of the original cabinet top, but all of the weight gets distributed down through the 2x6’s, then dispersed across a piece of solid birch to make sure it was as evenly distributed as possible on the floor. I covered the inside with 1/8” plywood and we painted everything with white FlexSeal rubber plaint everyday for about 2 weeks to “rubberize” everything in the sump cabinet. I kept some on hand and painted the inside of the holes for plumbing, etc. to keep the clean look and keep from scratching plumbing or shorting out wiring on the plywood. Using the faces of the antique drawers with magnets superglued on the back attaching to the angle iron was completely unplanned but turned out awesome. I’m fairly confident and proud of the final solution but looking for any critique, suggestions, or questions before the tank actually gets here.
30 gallon birthday surprise:
picture of the original cabinet cracking under weight of the 30 gallon tank:
Walking home from Chinatown with lumber/plywood:
Destruction and rebuilding of antique cabinet:
Structural integrity test with a little help from a (terrified but trusting) friend:
PROGRESS TO DATE:
Before I dive into tons of detail about the mixing station and automation setup, here’s everything else cataloguing the build and bringing you up to date while I wait on the tank to ship (ETA mid to late May).
Peak ****show:
First plumbing test (left side):
Patching up the switch board to the breakout boards with 18 gauge thermostat wire (great for the breakout boards bc you can get it in a set of 8 with 8 different color wires):
FW test of the plumbing:
portrait/tall view (current state):
Last edited:


