210G BANG 4 UR BUCK Planet Aquariums - Mixed Reef

Fish_Sticks

Active Member
View Badges
Joined
Jan 22, 2019
Messages
446
Reaction score
968
Rating - 0%
0   0   0
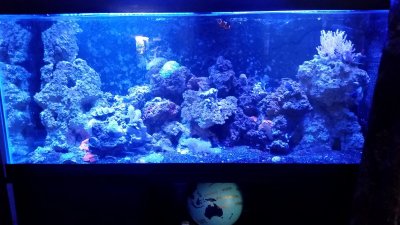
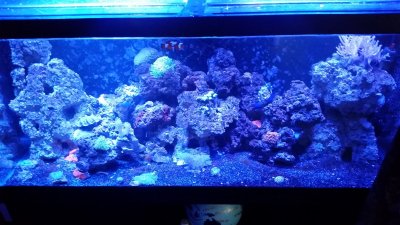
Aquariums - as good for our well being and state of mind as they are for the millions of creatures that inhabit it's seemingly small, and at the same time, unendingly vast and bountiful landscape. To us giants, we see the glass box with rocks, and coral, and it's torrents of water swishing about; however, those who live within the contents know it's lush fields of green and red plant life - rolling rocky hills and cliff faces perched above an undersea beach. To each and every inhabitant, the scale is immense, and their habitat as vast as our imagination will allow. Journey further down, deep deep down into the miles upon miles of sinking undersea caverns hidden amongst only one of your live rocks, uncountable measures of micro life creep and squeeze their way into unexplored caves and crevices in search of a new feast, or toward their resting spot for a particular night. Back outside and down below, bristlely serpents slither beneath a desert of breathing sand, tiny bugs, slugs, and everything else that serves a purpose in it's jungly world. Wait till nightfall... What strange creatures lurk about then? And above? What a wild world we have in our living rooms, offices, and sleeping quarters.
- Zen Reefing Approach article.

___________________________________________________________________________________________________________________

INTRODUCTION

Welcome to to bang for your buck 210G LPS +Soft Coral build. Follow along this fully fledged and self documented journey of a 210G Planet Aquariums tank and 75G DIY sump and refugium.

The entire process will be documented from soaking new rock, quarantining fish, tank drop off, sump construction, plumbing installation, equipment setup, aqua scaping, merging my currently existing 75G into the 210G, expanding the new tank with new fish and corals, and follow up updates.


___________________________________________________________________________________________________________________

LATEST UP-TO-DATE TANK PHOTOS / COMMENTS / GOALS


___________________________________________________________________________________________________________________

THE NEW 215G STRATEGY AND EQUIPMENT

This aquarium will be LPS and Soft Coral dominate, with emphasis on entirely new, low maintenance, low energy consuming, affordable equipment. I'm going for low-running cost, mid-price startup, no frills or extensively needless fixtures - just the basics (with a few fun features thrown in).

Overall, the entire build cost just under $3,300, with more than 70% being the cost of the aquarium, stand, lids, and a 50$ delivery fee to have it brought inside right to the office by the supplying LFS.

AQUARIUM: ($2100)
210 Gallon Planet Aquariums Low Iron Glass Aquarium - 72x24x29

Tideline overflow (Switched to Exotic Marine)
Maple Planet Aquariums Stand With Clear Varnish - 72x24x30
Glass Lids + Hinge

SUMP: ($150)
DIY 75 Gallon Aqueon Glass Aquarium, 48x18x21 (Petco 50% off Sale)

Exotic Marine Systems 75G Sump Kit

SKIMMER: ($180)
Aquamaxx FC-280

RETURN PUMP: ($100)
Jebao DCP Sine Wave DCP-8000

CONTROLLABLE WAVEMAKERS: ($160)
2x Jebao OW-50 449-5283 GPH
2x Unbranded 800 GPH Powerheads

LIGHTING FIXTURES: ($432)
3x SB Reef 18" Basic

HEATING: ($77)
2x Eheim Jager 250W Heaters

HEAT CONTROLLER: ($52)
Industrial Ranco ETC-111000 Digital Cold Temperature Controller

SAND: ($162)
80lbs Carib Sea Ocean Direct ($66)
40lbs Carib Sea Crushed Coral ($30)
40lbs Carib Sea Special Grade Reef ($42)
10lbs Natures Ocean 1mm-2.5mm ($12)
8lbs Natures Ocean Live Sand .1mm-.5mm ($12)

ROCK:

~ 150 lbs of high quality fiji/tonga rocks, collected over the years from various old tank sales.

___________________________________________________________________________________________________________________

THE OLD 75 GALLON SKIMMERLESS AND SUMPLESS AQUARIUM.

20170103_184438.jpg


20170103_184444.jpg


20170627_215827.jpg


20170706_215517.jpg

20170914_192123.jpg


20170914_192128.jpg


20180116_180623.jpg
20170801_175154.jpg 20170801_174910.jpg
 
Last edited:

Ron Reefman

Lets Go Snorkeling!
View Badges
Joined
Aug 12, 2012
Messages
9,284
Reaction score
20,871
Location
SW Florida
Rating - 0%
0   0   0
Looks like a good start and a great story!
 

ngoodermuth

5000 Club Member
View Badges
Joined
Mar 4, 2011
Messages
5,217
Reaction score
12,398
Location
York, PA
Rating - 0%
0   0   0
Can’t wait to see it! Nice intro [emoji1303]
 
OP
OP
Fish_Sticks

Fish_Sticks

Active Member
View Badges
Joined
Jan 22, 2019
Messages
446
Reaction score
968
Rating - 0%
0   0   0
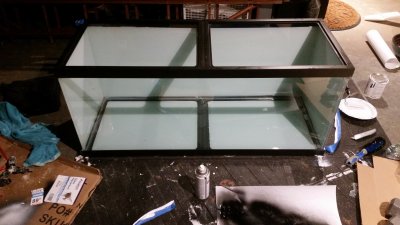
The tank has been sitting dry for about a month in my office. I figured having the tank early would give me a better idea of scale for equipment, rocks, sump size, and plumbing layout.

My first reaction was how nice of a job Planet Aquariums did, and how happy I was that I went with the clear finish on the maple stand. It would be a sin to paint this thing and hide the beautiful wood.

The seams of the aquarium are very well done. The black paint on the back looks invincible and is lightyears better than any rustoleum diy project Ive scrapped together in the past. Its almost like its a solid black panel.

The tank came with a tideline/ghost overflow which I did not read up about until it arrived. This thing sucks, dont buy it: http://www.dfwaquarium.com/Products/Tideline-Overflow-Box/TIDE-OF-16S_2.html

Tideline 16 OF.jpg

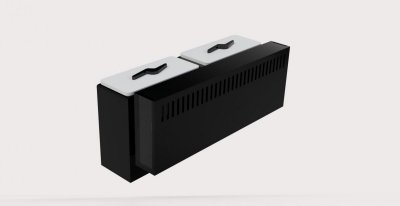
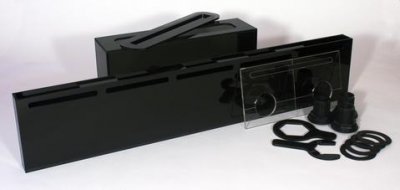
With only one bulkhead gasket for the overflow drains, the tideline overflow is prone to leaks and requires a lot of troubleshooting to set up without leaking. @Jimbo662 also had these problems.

I ultimately decided to return this to my LFS and order a custom fit 18" Exotic Marine Overflow from @TaylorPilot. I also ordered a diy 75g sump baffle kit from him as well and will be adding photos of that project and the new overflow when they arrive.

Full_Kit_-_35in_with_1in_drains_large.jpg


Three glass lids are waiting for me at the LFS. Ill be picking those up sometime this week when I return the overflow.

TimePhoto_20190216_113704.jpg
TimePhoto_20190216_113711.jpg
TimePhoto_20190216_113717.jpg
TimePhoto_20190216_113740.jpg
TimePhoto_20190216_113845.jpg
TimePhoto_20190216_113834.jpg
TimePhoto_20190216_113803.jpg
 
Last edited:
OP
OP
Fish_Sticks

Fish_Sticks

Active Member
View Badges
Joined
Jan 22, 2019
Messages
446
Reaction score
968
Rating - 0%
0   0   0
I've had some rock hanging around for a year now from an old tear down. About a month ago I started soaking it in 20g tubs in the garage. When I first put it in, it was at 60 tds. Today the water was at 200 tds.

TimePhoto_20190127_151223.jpg


Wait till you see the sand. Im going for a 2" sandbed with a large variety of grain sizes.
80lbs Carib Sea Ocean Direct
40lbs Carib Sea Crushed Coral
40lbs Carib Sea Special Grade Reef
10lbs Natures Ocean 1mm-2.5mm
8lbs Natures Ocean Live Sand .1mm-.5mm


Rinsing the sand removed a load of silicates. I only rinsed the Caribsea because theyre not live sands, but now Im tempted to rinse out the live sand with some tank water before putting it in. The crushed coral was the worst and this photo does not do it justice. It was like dumping out 2% milk.

TimePhoto_20190209_135812.jpg


Each bag of sand was unique and Ive finally mixed them together. They look really nice as a mix. Ill post photos when I get to putting the sand into the tank.
 
Last edited:
OP
OP
Fish_Sticks

Fish_Sticks

Active Member
View Badges
Joined
Jan 22, 2019
Messages
446
Reaction score
968
Rating - 0%
0   0   0
I picked up the 75G tank back in January at a petco 50% off sale. While waiting for my tank to arrive, I figured I'd go ahead and paint the sump white; or atleast thats where I thought I would go.

20190128_172132.jpg

20190128_172157.jpg

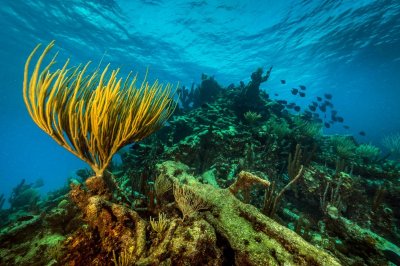
With the tank painted completely white, I could tell that this was not the best it could be. Chisel in hand, I took to scraping the white paint off the back panel. My idea was to paint a nice detailed background. After an hour of photoshop I turned this,

buck-island-reef-360-og.ngsversion.1484913606212.adapt.1900.1.jpg

into this,

Reefer Backdrop small.jpg

This is the same dimensions of the 75G's back panel. I would plot this out on a 48x20 sheet and trace it onto the back of the tank with rustoleum and some fine brushes. I decided to go with black/white/yellow to get a good contrast.

20190130_083643.jpg


It took three separate painting sessions and 6 hours, but there wasn't anything else for me to do while I was waiting on all the parts to get here. The yellow layer went on first, the black second, and the white third.
20190131_202903.jpg
20190131_210128.jpg


And here is what it looks like under my stand with the new equipment and some plumbing done.

TimePhoto_20190210_102648.jpg
TimePhoto_20190210_102628.jpg


Once I get the baffles in the mail from exotic Marine Systems, Ill put it together and post some more updates.

20190131_202909.jpg


75_Isometric_Front_large.jpg
 
Last edited:
OP
OP
Fish_Sticks

Fish_Sticks

Active Member
View Badges
Joined
Jan 22, 2019
Messages
446
Reaction score
968
Rating - 0%
0   0   0
Ive sorta run out of things to do until I get the sump kit and new overflow from Exotic Marine systems.

Then I remembered I have all this equipment to wire up. Started with this:

TimePhoto_20190216_113740.jpg
TimePhoto_20190218_172023.jpg


I had a spare 8$ RGB led light strip laying around, and what a huge difference it makes. The cable management will do for now, but the top power strip will run all dry side electronics: Mainly just the lights. The bottom strip plugs into a GFCI converter to run all wet side electronics: jebao wavemakers, jebao return pump, skimmer, two eheim 250w jager heaters, any additional utlity pumps.

TimePhoto_20190218_191906.jpg
TimePhoto_20190218_191822.jpg
TimePhoto_20190218_191803.jpg
TimePhoto_20190218_191658.jpg
TimePhoto_20190218_191340.jpg
TimePhoto_20190218_191404.jpg
TimePhoto_20190218_191424.jpg
TimePhoto_20190218_191502.jpg
TimePhoto_20190218_191536.jpg
TimePhoto_20190218_191556.jpg
TimePhoto_20190218_191610.jpg
TimePhoto_20190218_191621.jpg
TimePhoto_20190218_191626.jpg
TimePhoto_20190218_191658.jpg


Ill make the cables a lot more organized this week, but for now I think I've done an acceptable job. The sump looks killer though. Hopefully the baffles will look good.
 
Last edited:
OP
OP
Fish_Sticks

Fish_Sticks

Active Member
View Badges
Joined
Jan 22, 2019
Messages
446
Reaction score
968
Rating - 0%
0   0   0
Being that this tank is all about bang for your buck, the plumbing setup has to be a solid design so as to not waste energy. Aiming for a 5x tank turnover rate, I would need somewhere in the ballpark of 1000 GPH. Going off of what I saw other's doing, I went with this, but felt that I was being limited by forcing myself to return to both bulkheads.
210G PLUMBING.PNG


My problem with this setup was that it would be extremely inefficient energy wise to send up water to both 3/4" return bulkheads. My strategy shifted to plugging up one of the 3/4" bulkheads and only using one return bulkhead. This ensures that water is being returned in straight shot back to the tank without all the long pointless runs. Flipping the sump run direction also allowed me to put the electrical components and control panels on the right side of the tank.

210G PLUMBING.PNG


As you can see, I wont be wasting any watts and can turn down my jebao return pump.

At this point, I was using the old tideline overflow. Hopefully I wont have to refit my plumbing to the Exotic Marine Overflow too much, but I had done the plumbing a few days before I made the decision to switch overflows.

You can read more about the development of this idea on my plumbing thread: https://www.reef2reef.com/threads/p...l-good-diagram-included-please-assist.550366/

Hard plumbing is a bit of a chore. The #1 tip I can recommend is to get a pair of pvc cutters. They made the entire process super easy for only $12. I spent about 2 days dry fitting my parts together, gluing them, and painting the above water parts yellow. I was gonna get a gate valve for my primary siphon, but they are so overpriced and this is the bang for your buck aquarium. PS, dont paint the handle of the ball valve, I ended up scraping it off.
TimePhoto_20190210_093332.jpg


I also used this thread sealant. I still have half a stick left after doing all my threads. After reading countless plumbing threads, I've found that tephlon tape is a joke when compared to this stuff: https://www.amazon.com/gp/product/B004MYFP8C/ref=ppx_yo_dt_b_asin_title_o03__o00_s01?ie=UTF8&psc=1
 
Last edited:
OP
OP
Fish_Sticks

Fish_Sticks

Active Member
View Badges
Joined
Jan 22, 2019
Messages
446
Reaction score
968
Rating - 0%
0   0   0
So I picked up the new Planet Aquariums glass lids from my LFS today. They are the best lids I've ever seen. Will post some images tomorrow when the room has nice daylight. I've also updated the main thread to show that I'll be using SBreef 18" basic led lights. I've spent the past two weeks reading up on light spectrums and diodes.

I got into the LED game around 2014 and started with a pair of Chinese galaxy hydro ebay black boxes. At the time, everyone was pushing the super expensive leds or using t5HO. Using these black boxes was pretty taboo. I was ensured that the lights would explode, burn my house down, and melt corals; however, I found incredible growth results after removing some lenses, and great reliability by performing routine maintenance on the fans and cleaning out the dust from the housing on a 6 month basis. Now black boxes are common practice. They may not have pointless lightning and cloud effects that scare the crap out of your fish, but at least they are only $140e and not $700e.

I've always had glass lids on my tank to cut down evaporation as much as possible, but something else the lids are good for is diffusing light and lowering the disco effect that most leds put out.
 
Last edited:

Jason Miller

Active Member
View Badges
Joined
Mar 6, 2018
Messages
358
Reaction score
186
Location
NorCal
Rating - 0%
0   0   0
I picked up the 75G tank back in January at a petco 50% off sale. While waiting for my tank to arrive, I figured I'd go ahead and paint the sump white; or atleast thats where I thought I would go.

That is so awesome Bro.! Nice work:)

20190128_172132.jpg

20190128_172157.jpg

With the tank painted completely white, I could tell that this was not the best it could be. Chisel in hand, I took to scraping the white paint off the back panel. My idea was to paint a nice detailed background. After an hour of photoshop I turned this,

buck-island-reef-360-og.ngsversion.1484913606212.adapt.1900.1.jpg

into this,

Reefer Backdrop small.jpg

This is the same dimensions of the 75G's back panel. I would plot this out on a 48x20 sheet and trace it onto the back of the tank with rustoleum and some fine brushes. I decided to go with black/white/yellow to get a good contrast.

20190130_083643.jpg


It took three separate painting sessions and 6 hours, but there wasn't anything else for me to do while I was waiting on all the parts to get here. The yellow layer went on first, the black second, and the white third.
20190131_202903.jpg
20190131_210128.jpg


And here is what it looks like under my stand with the new equipment and some plumbing done.

TimePhoto_20190210_102648.jpg
TimePhoto_20190210_102628.jpg


Once I get the baffles in the mail from exotic Marine Systems, Ill put it together and post some more updates.

20190131_202909.jpg


75_Isometric_Front_large.jpg
 
OP
OP
Fish_Sticks

Fish_Sticks

Active Member
View Badges
Joined
Jan 22, 2019
Messages
446
Reaction score
968
Rating - 0%
0   0   0

Hopefully it doesnt all peel off in a few years. It was a lot of rustoluem ;Photogenic
 
OP
OP
Fish_Sticks

Fish_Sticks

Active Member
View Badges
Joined
Jan 22, 2019
Messages
446
Reaction score
968
Rating - 0%
0   0   0
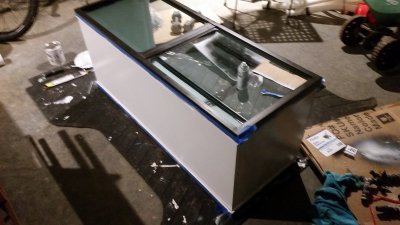
Planet Aquarium's glass lids are pretty awesome.

The little removable opener also doubles as a lid stand so that water doesnt slide back and onto the glass. I dont know if that was intentional, but I definitly consider it a huge plus. Theyre made to fit either a 180 or a 210 since the 210 is just a 6" taller 180.

20190220_221604.jpg
20190220_221620.jpg
20190220_221629.jpg
20190220_221638.jpg
20190220_221649.jpg
20190221_181147.jpg
20190221_181158.jpg
20190221_181237.jpg


If you take a look at these old glass lids on the 75G, you can see the water just slides back. This leaves a bunch of salt when it evaporates. I have to clean them about once a week.

I just take them to the shower and rinse them off. Dont let your wife see you doing that unless youve gotten her to like reefs Lol.

20190221_181309.jpg


There is no way a wrasse is making it out of this tank.
20190220_221649.jpg
 
OP
OP
Fish_Sticks

Fish_Sticks

Active Member
View Badges
Joined
Jan 22, 2019
Messages
446
Reaction score
968
Rating - 0%
0   0   0
Never the less, it’s pretty freakin awesome. You definitely got my Hamster wheels turning on some design ideas for my sump.:)
Sweet! I think this would be an awesome planted tank background idea as well.
 
OP
OP
Fish_Sticks

Fish_Sticks

Active Member
View Badges
Joined
Jan 22, 2019
Messages
446
Reaction score
968
Rating - 0%
0   0   0
Quick update:
The new overflow and 75g diy sump kit from Exotic Marine Systems is scheduled to arrive wednesday.
 
OP
OP
Fish_Sticks

Fish_Sticks

Active Member
View Badges
Joined
Jan 22, 2019
Messages
446
Reaction score
968
Rating - 0%
0   0   0
Ive aquascaped about a dozen tanks. Everything from your standard rock wall, big centerpeice, island, branches, the works.

This time I am going to take a different approach.

While honeymooning in the carribean this past May, my expectations of what a reef would be were massively changed. Being an architect, I've had to study scale, relationships, organic compositions, and obviously the rule of thirds, the golden ration, the silver ratio, blah blah blah.

While all these things are cool, I dont think applying them straight forwardly ever yeilds great results. A subliminal approach with these concepts in the back of your mind usually allows you to freestyle a bit more and get more oomph. Knowing rules is great, but following them gently and letting yourself drift away can allow you to trust your inner cool factor. Ill be taking this next week to focus solely on aquascape, in addition to the new overflow and sump kit that arrive today or tomorrow.

For now, Im really enjoying the 24 inches of deapth this tank has to offer. My focus will be to create a scape that really illustrates and magnifys the deapth and space in between rock structures. The most beautiful thing in the bahamas was the sand, and seeing how it divided the reef in peices.

Its all about scale and space inbetween, not how big of a rock pile you can shove into the tank :p

Since I plan on keeping lots of gobies, damsels, and ground dwellers, taking an approach of scattering about is going to really open up the tank and reveal so much deapth along the bottom.
 
OP
OP
Fish_Sticks

Fish_Sticks

Active Member
View Badges
Joined
Jan 22, 2019
Messages
446
Reaction score
968
Rating - 0%
0   0   0
The custom fit 18" overflow arrived during my lunch break...

Fits nicely in the weird hole setup planet aquariums did. @TaylorPilot and I had to coordinate a few times to verify these weird hole dimensions from planet aquariums.

Still waiting on the 75G sump kit, but thats the last thing I need to finally kick off the sump and start making a huge push towards filling up the aquarium.
TimePhoto_20190226_123035.jpg
TimePhoto_20190226_122417.jpg
 

Mastiffsrule

Where ever you go, there you are, so be nice 2 you
View Badges
Joined
Feb 10, 2019
Messages
8,440
Reaction score
33,571
Location
Charlotte
Rating - 0%
0   0   0
That set up is awesome.

I agree with you on the lids. I like the hinge closer to the front. Gives a large pane of glass toward the back so light doesn’t get blocked. I just bought new lids for my 180 and it had the hinge almost center.

Keep those pics coming
 

Caring for your picky eaters: What do you feed your finicky fish?

  • Live foods

    Votes: 7 23.3%
  • Frozen meaty foods

    Votes: 24 80.0%
  • Soft pellets

    Votes: 7 23.3%
  • Masstick (or comparable)

    Votes: 1 3.3%
  • Other

    Votes: 2 6.7%
Back
Top