Red Sea Reefer 250 G2
Table of Contents
May 31, 2022 - Update #2 - Setup, Rockscape, Tank Transfer
June 06, 2022 - Update #3 - General Update & Pics
June 18, 2022 - Update #4 - Legos & Corals
June 26 2022 - Update #5 - Wire Management & Pics
July 11, 2022 - Update #6 - General Check-In & Pics
July 17, 2022 - Update #6.5 - Reefmat 500
July 30, 2022 - Update #7 - QT Tank Setup
August 7, 2022 - Update #8 - Neptune Apex - Clownfish Eggs
September 3, 2022 - Update #9 - Picture Update
October 3, 2022 - Update #10 - Picture Update
November 11, 2022 - Update #11 - New Wrasse and Full Tank Pic
December 12, 2022 - Update #12 - Wrasse added to display tank
March 02, 2023 - Update #13 - Just Checking In
So I started a new adventure this weekend..
Some background & overview:
My current tank is a Fluval Flex 32.5 Marine with the curved front face. I've been dreaming of something 'larger' with more breathing room, no plastic lid, and I also wanted to get out of an AIO setup. The Flex was a great tank, but a couple of things could have been better. After some thought, and feedback from members in the forums here I decided to go with the Red Sea Reefer 250 G2.
The 250 G2 covered all the bases, an easy to set up 10gal sump & plywood cabinet. Rimless, lidless 55 gal 'low iron' glass tank. Updated revisions to the original reefer design for improved confidence. The final factor was the great customer services reported by other RS tank owners across various communities.
Since my current tank is running smoothly (*knock on wood*) and all my corals are not only alive but growing at their various rates it gives me a chance to take this new tank slow and really start off strong & right. I am younger guy (28yr), and really rushed the setup and start of my first and current tank, cut corners on some equipment and just overall could have done things differently at the start.
Tank Status:
On Thursday the tank was delivered via carrier on pallet. Unfortunately no appointment was scheduled so I was not home to receive it. The same day it poured rain. The boxes were soggy by the time I was home, so I threw a tarp over everything and waited for the rain to stop. The wet boxes made transfer into the house a pain, and my significant other was not a fan at all. After some reassurance to her we were able to get the tank up the stairs and inside on a rolling 'cart' (4 pieces of plywood on wheels).
On Friday I spent the day very carefully planning and then moving my current tank, rock, and inhabitants from one side of the office to the other so that I could put the new tank in it's current location once it was relocated.
On Saturday morning I built the stand, Saturday afternoon I did all the plumbing and 'installed' the sump (if you can call it that, it was pretty simple since Red Sea does 95% of set up for the user). The whole time I forced myself to take frequent breaks so that I was not making silly mistakes. The hardest part was leveling the stand feet and the stand doors. After being satisfied with the level of the actual stand/tank, I went back and forth with the doors for much longer than anticipated until everything was the same height and lined up to the point I was actually pretty impressed with myself.
On Sunday (today) I am slowing leak testing & filling with additional water.
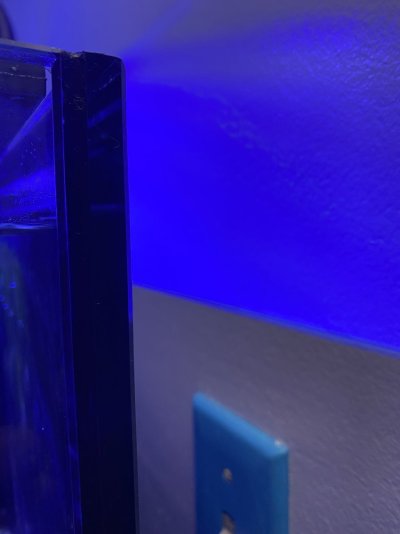
Here is the 1st round photo dump (ordered from least to most recent):


Next up is gathering the rocks and setting up the scape, cycling, wire management, ReefMat 500 addition, dialing in settings, transferring fish & corals, and so on..
I think the 1st new fish I want to add eventually is a Silver Belly Wrasse. Let me know what you think, any ideas, tips, tricks, feedback, questions and so on! Always happy to chat!!


- Aquarium
- 55 gallons - 36"L x 20"W x 21"H with 1/2" glass
- Sump
- 10 gallons - 19.2"L x 17.5"W x 13.5"H
- 3 gallon Stock ATO Reservoir
- Return Pump
- Powerheads
- Red Sea Reef Wave 25 Gyre
- Icecap 2k Gyre (from old tank)
- Lighting
- Skimmer
- Organization
- RODI
- Rock & Sand
- Cover
- Filtration & Media
- Control
Table of Contents
May 31, 2022 - Update #2 - Setup, Rockscape, Tank Transfer
June 06, 2022 - Update #3 - General Update & Pics
June 18, 2022 - Update #4 - Legos & Corals
June 26 2022 - Update #5 - Wire Management & Pics
July 11, 2022 - Update #6 - General Check-In & Pics
July 17, 2022 - Update #6.5 - Reefmat 500
July 30, 2022 - Update #7 - QT Tank Setup
August 7, 2022 - Update #8 - Neptune Apex - Clownfish Eggs
September 3, 2022 - Update #9 - Picture Update
October 3, 2022 - Update #10 - Picture Update
November 11, 2022 - Update #11 - New Wrasse and Full Tank Pic
December 12, 2022 - Update #12 - Wrasse added to display tank
March 02, 2023 - Update #13 - Just Checking In
May 2022


June 2022


July 2022


September 2022

March 2023

June 2022
July 2022
September 2022
March 2023
So I started a new adventure this weekend..
Some background & overview:
My current tank is a Fluval Flex 32.5 Marine with the curved front face. I've been dreaming of something 'larger' with more breathing room, no plastic lid, and I also wanted to get out of an AIO setup. The Flex was a great tank, but a couple of things could have been better. After some thought, and feedback from members in the forums here I decided to go with the Red Sea Reefer 250 G2.
The 250 G2 covered all the bases, an easy to set up 10gal sump & plywood cabinet. Rimless, lidless 55 gal 'low iron' glass tank. Updated revisions to the original reefer design for improved confidence. The final factor was the great customer services reported by other RS tank owners across various communities.
Since my current tank is running smoothly (*knock on wood*) and all my corals are not only alive but growing at their various rates it gives me a chance to take this new tank slow and really start off strong & right. I am younger guy (28yr), and really rushed the setup and start of my first and current tank, cut corners on some equipment and just overall could have done things differently at the start.
Tank Status:
On Thursday the tank was delivered via carrier on pallet. Unfortunately no appointment was scheduled so I was not home to receive it. The same day it poured rain. The boxes were soggy by the time I was home, so I threw a tarp over everything and waited for the rain to stop. The wet boxes made transfer into the house a pain, and my significant other was not a fan at all. After some reassurance to her we were able to get the tank up the stairs and inside on a rolling 'cart' (4 pieces of plywood on wheels).
On Friday I spent the day very carefully planning and then moving my current tank, rock, and inhabitants from one side of the office to the other so that I could put the new tank in it's current location once it was relocated.
On Saturday morning I built the stand, Saturday afternoon I did all the plumbing and 'installed' the sump (if you can call it that, it was pretty simple since Red Sea does 95% of set up for the user). The whole time I forced myself to take frequent breaks so that I was not making silly mistakes. The hardest part was leveling the stand feet and the stand doors. After being satisfied with the level of the actual stand/tank, I went back and forth with the doors for much longer than anticipated until everything was the same height and lined up to the point I was actually pretty impressed with myself.
On Sunday (today) I am slowing leak testing & filling with additional water.
Here is the 1st round photo dump (ordered from least to most recent):
Next up is gathering the rocks and setting up the scape, cycling, wire management, ReefMat 500 addition, dialing in settings, transferring fish & corals, and so on..
I think the 1st new fish I want to add eventually is a Silver Belly Wrasse. Let me know what you think, any ideas, tips, tricks, feedback, questions and so on! Always happy to chat!!

Last edited:


