DavidRod's 480g Outdoor Patio Tank

davidrod8

Active Member
View Badges
Joined
Jan 13, 2020
Messages
337
Reaction score
474
Location
Katy TX
Rating - 0%
0   0   0
After a lot of trial and error on my previous tank (DavidRod's 210g OUTDOOR Bare-bottom Tank) I decided to double down and go bigger. Spend the last 6 months looking for a larger set up, but they don't come up for sale that often. Started looking at the building one brand new but the cost was too much for me. Then at the beginning of March found a set up I really liked and went for it.

The tank was custom made by Midwest Custom Aquariums. As far as I know I'm the third owner but the tank is in pristine condition. It measures 96" long, 48" deep and 24" tall. The tank was originally made with 2 internal overflows "island style" in the middle of the tank. Previous owner removed them and installed a 20" Synergy Reef Overflow. It came with a metal stand and canopy with 14 lights (6 Kessils 360WE, 4 Hydras 26 and 4 Aquatic life T5 fixtures (2 48"s and 2 36"s)

As soon as I saw the post (Monday March 8th) I got in touch with the owner and the very next day I went to his house to see the tank. Even though he was over an hour away (Houston a is a very large city) it was totally worth it. I made him an offer right there and then, gave him a deposit, and started bringing stuff home. (He gave me a ton of equipment as he was leaving the hobby)

I really wanted to get things right this time around, so I took my time and made sure I was ready for when the tank came home.

First order of business was to move the 210 out of the way and set up the space for the 480.

Here's where the 210 has been sitting at for the last 15 months. Even though I have had many challenges, specially with the tank being outside, it's been a great experience.

IMG_8142.jpg


Here's the spot where the 210 is going to fit during this transition, right between the TV and the refrigerator.

IMG_8145.jpg


Early Saturday morning 3/13 and I was going at it, all by myself. Set up the tubs, and started the process of draining the tank and getting the livestock out. I removed the rocks, corals, inverts and fish.

IMG_8146.jpg


At this point everything was out of the tank except for the sand, and it was time to lift up the tank and put it on wheels so that I could push it into its new place.
IMG_8147.jpg


I bought one of those dolly sets out of Amazon to move heavy furniture and was able to crank up the tank by myself and put all 4 corners on top of the wheels, then it was fairly easy to move the tank into its temporary place.

IMG_8148.jpg


Here's a close up

IMG_8149.jpg


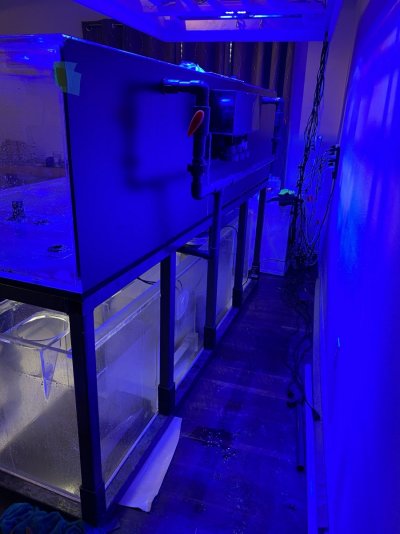
After the tank was moved into its new place, it was taken of the wheels and set on the floor. Since I was planning on temporarily transferring the livestock of the 480 into the 210, I went ahead and set up a couple of tubs with powerheads and heaters.

IMG_8151.jpg


My favorite part about this was the view from inside the house.

IMG_8190.jpg
 
OP
OP
davidrod8

davidrod8

Active Member
View Badges
Joined
Jan 13, 2020
Messages
337
Reaction score
474
Location
Katy TX
Rating - 0%
0   0   0
That same day, Saturday evening, I went back to the seller's house to pick up the Saltwater Mixing station. I had one, but it was severely undersized for the new tank. I was in a rush to get this set up so that I could make enough water for the new tank.

Since I don't own a pick up truck, I ended up renting a trailer to be able to transport both tanks back to my house.
By the time I got back home it was pretty late and it had already been a long day moving the 210, so I went to bed and early Sunday morning started working on hooking up the new saltwater mixing station.

The station sits inside of my garage, right behind the brick wall where the tank will sit, which is the same wall behind the tanks. The large tank on the left is 225g, the smaller one is 75g to make the salt water. The 2 blue tanks were my old mixing station. Once these tanks were full I had 400g of water ready to be moved into the new tank.

Since these mixing station is literally a couple of feet away from the tank, I used these containers as my ATO as well as my AWC. This is how I had them set up on the 210 and how I'm planning to set them up for the new tank.


IMG_8202.jpg
 
OP
OP
davidrod8

davidrod8

Active Member
View Badges
Joined
Jan 13, 2020
Messages
337
Reaction score
474
Location
Katy TX
Rating - 0%
0   0   0
Now that the RO/DI station was up and running, it was time to turn my attention to the where the tank was going to be located. I had a few issues that I needed to deal with. First off was the height of the system. My old tank had a 36" tall stand with a 28" tall aquarium. I always hated it that when I looked into the aquarium, my eyes were right at the very top and I always had to look down. The new tank stand was also 36" but the tank is only 24" tall which would make this problem even worse, so I went ahead and started building a base of 4x4 that would raise the tank 7" from the ground.

Issue #2 was that the sump that came with the new tank was pretty tall, and it made it quite hard to work on it. The skimmer cup couldn't even come out which would bring all sorts of additional problems. I worked around this by lowering the inside of the base 5 inches which would give me the additional clearance that I needed.

Last but not least, since this tank is set up outside, the patio's floor is not leveled, it has a slight decline away from the house. The first time that I set up my old tank I did not take this into consideration and it brought a ton of problems, so this time I wanted to make sure that I was ready for it.

Here's the first level of the base. I made sure to get wood that has been treated for wet environments. I also went ahead and gave it a extra coat of clear sealer to make sure we don't have any issues with the wood later on. After all, the weight of the water along is close to 5,000 lbs.

IMG_8211.jpg


Here's the box finished with plywood inside of it to support the sump. As recommended by the guys that moved the tank, I ended up adding a sheet of 1" insulation foam board to absorb any pressure points on the sump.

IMG_8221 (1).jpg
 

Pico bam

Well-Known Member
View Badges
Joined
Jul 28, 2019
Messages
977
Reaction score
1,630
Location
Lake elmo
Rating - 0%
0   0   0
So I'm guessing you have a mega chiller right? How do you deal with the temperature changes? Definitely following along, way to interested! Wish I could do something like this up in Minnesota. Ive Been thinking about an addition on the house for a large frag system and show tank.
 
OP
OP
davidrod8

davidrod8

Active Member
View Badges
Joined
Jan 13, 2020
Messages
337
Reaction score
474
Location
Katy TX
Rating - 0%
0   0   0
Fast forward to Friday March 19th, and this was by far the longest day. We spend well over 10 hours taking the tank down, removing all the water, coral, fish, inverts, live rock and tile. I honestly have nightmares about this day simply because of the amount of work and if it wasn't for a very motivated seller there was no way that I could have completed this task.

I completely underestimated the amount of work that we had to do that day. Many thoughts were going through my head... What have I done? Did I bite more that I can chew? and of course my favorite one... "I will never recover financially from this" :)

Once that the livestock had been removed, we proceeded to removed the plumbing. The seller did a very nice job with the return, and it was very easy to remove it along with the overflow. The biggest issue came with the closed loop. There was one inlet on either side and 3 outlets each side for a total of 2 inlets/6 outlets. All located at the bottom of the tank, connected with bulkheads. The pipe was then glued on the side which made it impossible to save it, so it had to be cut and re done once I set up back at home. I really like the closed loop but unfortunately was not able to change the way it was plumbed. After the Ice Storm here in Texas, it has been nearly impossible to find fittings / pipe. I did not want to wait weeks to get this done so I went ahead and replumb it the same way it was.

Once the plumbing was taken care of and everything had been cut, tagged and put away it was time to deal with the lights. The canopy was lowered and we removed all of the lights from there.

At this point it was almost 9pm, I still had to drive an hour home, unload the car, add all livestock to my old tank. Put all live rocks in tubs with heaters and pumps. I think I ended up going to bed somewhere around 2-3am.

Some pictures of the stand / sump as it was being taken down

IMG_8230.jpg
IMG_8231.jpg
IMG_8232.jpg
IMG_8233.jpg
IMG_8235.jpg
IMG_8236.jpg
IMG_8237.jpg


IMG_8226.jpg IMG_8227.jpg IMG_8228.jpg IMG_8229.jpg
 
Last edited:
OP
OP
davidrod8

davidrod8

Active Member
View Badges
Joined
Jan 13, 2020
Messages
337
Reaction score
474
Location
Katy TX
Rating - 0%
0   0   0
So I'm guessing you have a mega chiller right? How do you deal with the temperature changes? Definitely following along, way to interested! Wish I could do something like this up in Minnesota. Ive Been thinking about an addition on the house for a large frag system and show tank.

When I had the 220, I bought a 1 1/2 HP Eco Plus Commercial Grade Chiller. It was oversized for that tank, but I always wanted to upgrade proof myself. You can see it on this picture of my old 220 on the left side.

IMG_8142.jpg


That chiller worked great for that tank. Temperature in the tank never went over 81-82, and in all honesty the corals looked better at that temperature. I'll have to see how this year goes with this new tank. You are talking almost 3 times the volume, and acrylic vs glass. I read that acrylic holds the temperature about 15-20% better than glass, so we'll see.

So far this past weekend we had the hottest days, reaching 88 with a "feel like" of 94-95. Tank never made it to 79 so I'm hoping I won't need to get another chiller.

On the other side of the coin, this year we had an ice storm where we lost power for 3 days and the had freezing temps for almost a week. I believe it went down to single digits. I know for you guys up north it's not much, but keep in mind it rarely freezes here, we are not prepared to deal with this kind of weather.

What impressed me the much is how far "in" the ice/snow came. The roof line goes out a good 3 feet past the tank and as you can see from the picture it came way into the patio.

IMG_8015.jpg


This was early on the first night.
IMG_8016.jpg


Starting to get concerned...
IMG_8017.jpg


Tank was down into the low 60s the first day. I believe I was running 2700W of heaters, but the temperature would not go higher than 72
IMG_8033.jpg


I covered the tank in towels, blankets and tape, and this was the only way that I could get it to come up, I believe I was able to get it up to 79.
IMG_8035.jpg


I'm used to dealing with loosing power for weeks in Florida and Texas due to hurricanes, in the summer heat, but never in the cold, with ice and snow around it. Definitively a much different experience.

IMG_8039.jpg
 
OP
OP
davidrod8

davidrod8

Active Member
View Badges
Joined
Jan 13, 2020
Messages
337
Reaction score
474
Location
Katy TX
Rating - 0%
0   0   0
Back to the build! or should I say, the take down!
Back to Friday night, a few more pictures from that long day.

Tank was finally empty. At this point all the livestock and rocks had been removed. Previous owner covered all of the bottom of the tank with 4 x 4 travertine tiles. Over time the tiles had gotten some algae growth. I decided to keep them since I knew this would help out with the tank getting settled once I put everything back together.

IMG_8238.JPEG


A few pictures of the Synergy Reef 20" Ghost Overflow.
IMG_8242.JPEG


Few shots of the plumbing in the back of the tank
IMG_8244.JPEG
IMG_8246.JPEG


Couple of shots of the canopy being taken down. The canopy currently holds the following lights:
4 Hydra 26
6 Kessils A360WE
4 48" T5 Bulbs
4 36" T5 Bulbs

IMG_8256.JPEG
IMG_8257.JPEG
IMG_8260.JPEG
 

Attachments

  • IMG_8247.JPEG
    IMG_8247.JPEG
    138.6 KB · Views: 53
OP
OP
davidrod8

davidrod8

Active Member
View Badges
Joined
Jan 13, 2020
Messages
337
Reaction score
474
Location
Katy TX
Rating - 0%
0   0   0
After I come home, unloaded the truck, and put everything away, I was exhausted. Unfortunately it wasn't over, but when you want something really bad, you somehow find the willpower to push thru.
Slept for a couple of hours and hit the road again, as the crew from Galactic Coral was meeting me at the sellers house to pick up the tank and bring it home.

Things were moving so fast that morning that I barely had any time to take pictures, and before 8am we were already on the way back to my house.

IMG_8263.jpg


IMG_8265.jpg


I cannot say enough good things about David Rains and his team at Galactic. They moved the tank without any issues, checked my base to make sure it was leveled, worked around the buckets and equipment I had in the patio and within a couple of hours I had the tank set up in its new place.
IMG_8268.jpg
IMG_8269.jpg


The plan was to start working on it right away but I was exhausted! Previous day had been rough. so I decided to take the afternoon off, regroup, and get back at it the next day.

So yes, I'm a big guy and this is a BIG tank!

IMG_8273.jpg


Had to do the "cliché" pic :)
IMG_8280.jpg


After working for several hours Sunday and Monday on the plumbing, I did a leak test. I was quite surprised at the very small amount of leaks that I had. I then proceeded to clean the travertine tiles and put them back in the tank.

IMG_8285.jpg


After moving all the rock into the tank, I almost had enough water to fill up the complete system. I added a bottle of Brightwell Aquatics Michrobacter START XLM 500 ml. to help the transition and avoid a mini cycle. I did not save any of the water from the old tank not did I use any water from my old system. I did however saved all the rock from both systems, as well as all the travertine tiles.

I was thinking that I was going to wait until the following weekend to start moving all the livestock into the new system, until I noticed this:

IMG_8289.jpg


I did not have any lights set up (Canopy was still laying on the side) I didn't even notice that I had put them in there, they were attached to the rock. When I saw this, I figured the tank was stable enough to start the transition. All the numbers were coming back good from testing so I decided to start (slowly) moving the livestock. First a few fish, and then get to work on the lights.
 

Creating a strong bulwark: Did you consider floor support for your reef tank?

  • I put a major focus on floor support.

    Votes: 40 44.0%
  • I put minimal focus on floor support.

    Votes: 20 22.0%
  • I put no focus on floor support.

    Votes: 29 31.9%
  • Other.

    Votes: 2 2.2%
Back
Top