DIY Canopy - Paint the inside or leave bare wood

RyansReef

Community Member
View Badges
Joined
Mar 29, 2019
Messages
45
Reaction score
25
Rating - 0%
0   0   0
So I built out my first attempt at a canopy for a new 29 gallon home office tank that I started a couple of months ago. I think it came out fairly decent though l learned a lot in the process. My new pocket hole jig is pretty sweet. Love an excuse to get a new tool.

I have painted the outside in a semi-gloss black to match the stand. Do I paint the inside or leave bare wood. I am leaning towards bare wood unless there are good reasons not too. Wood is 1x2 pine with a 1/4" plywood not sure the veneer but maybe birch.
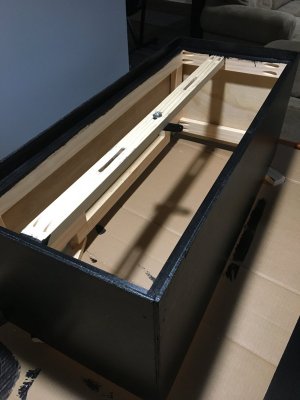
EE5FDE27-18EA-4272-B356-E943F43DA722.jpeg
 

theatrus

Valuable Member
View Badges
Joined
Mar 26, 2016
Messages
1,957
Reaction score
3,355
Location
Sacramento, CA area
Rating - 0%
0   0   0
I would also recommend filling those pocket holes with plugs and cutting flush before painting. This will keep salt water away from your metal screws as well.

This. Unless you used only 316 Stainless hardware you will want to provide a good sealing coat, even epoxy.
 

epatrick70

New Member
View Badges
Joined
Mar 2, 2020
Messages
16
Reaction score
29
Rating - 0%
0   0   0
Yes, paint it. I left mine bare originally and it did absorb water and even bowed a bit. Corrected that and painted the inside and been fine for the past month.
 

Peace River

Thrive Master
View Badges
Joined
Apr 29, 2014
Messages
21,519
Reaction score
164,621
Location
USA
Rating - 100%
1   0   0
High Gloss Oil Based White!

+1. This is what I usually use, but whatever you choose, you will want to go with a sealant that blocks out water and salt. The high gloss makes it easy to wipe down and the white reflects light back into the tank.
 
OP
OP
R

RyansReef

Community Member
View Badges
Joined
Mar 29, 2019
Messages
45
Reaction score
25
Rating - 0%
0   0   0
Thanks all for the feedback. Should have thought of asking sooner. Would have been easier to fill the holes without the sides put on. Oh well. I tend to learn as I go.

Any thoughts on maybe just sealing holes with silicon instead of wood dowels?
 

Peace River

Thrive Master
View Badges
Joined
Apr 29, 2014
Messages
21,519
Reaction score
164,621
Location
USA
Rating - 100%
1   0   0
The paint won't adhere to the silicone very well.
 

mav3rick478

Active Member
View Badges
Joined
Nov 11, 2017
Messages
295
Reaction score
193
Rating - 0%
0   0   0
Wood putty should work, might have to layer it but it's inexpensive, sandable and paint will adhere to it.
 

ccombs

Valuable Member
View Badges
Joined
Feb 26, 2019
Messages
1,656
Reaction score
4,644
Location
Nashville
Rating - 0%
0   0   0
Thanks all for the feedback. Should have thought of asking sooner. Would have been easier to fill the holes without the sides put on. Oh well. I tend to learn as I go.

Any thoughts on maybe just sealing holes with silicon instead of wood dowels?
Kreg makes pre cut plugs that are a little easier than working with a full dowel if you are tight on space.
 

rwb500

Community Member
View Badges
Joined
Apr 6, 2020
Messages
77
Reaction score
62
Rating - 0%
0   0   0
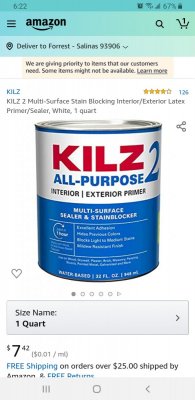
generally you always paint both sides of a board to prevent uneven moisture levels and warping. it is even more important for this application. I would use Kilz latex based primer and apply it heavily to all of the exposed hardware. I wouldn't worry about covering the pocket holes with anything else, as long as the screws are fully covered in primer.
 

Saltyreef

I'm not your dad...
View Badges
Joined
Nov 25, 2018
Messages
7,041
Reaction score
6,033
Location
Central Coast, California
Rating - 0%
0   0   0
Did you use the blue coated outdoor kreg screws or indoor silver screws? If blue, you shouldnt "need" to fill them. They will resist salt exposure.
Also, wood putty fills the holes just fine in either instance.
Next time, since you skinned it with wood. drill the pocket holes on the outside so you wont see them from the inside and still hidden behind the ply :)
Something I learned from building my first stand with a kreg jig kit.
But the holes filled fine with wood putty.
And +1 on kilz white primer.
On my first stand i used a marine spar varnish but it may have not been needed if i had used this kilz.

Screenshot_20200406-182212_Amazon Shopping.jpg
 
OP
OP
R

RyansReef

Community Member
View Badges
Joined
Mar 29, 2019
Messages
45
Reaction score
25
Rating - 0%
0   0   0
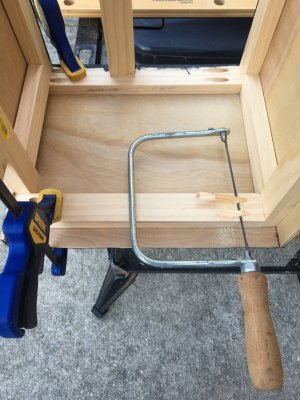
Thanks all. Hiding the pocket holes would have been smart. Luckily I found a dowel in the garage that fit and it wasn’t hard at all to plug and cut flush with a coping saw. Sanded smooth and painted first coat with Kilz white primer sealer that I also had on hand.

Sometimes (ok most times) I need multiple runs to the hardware store to finish a project. But it is nice when you have leftovers from past projects that suit.

76487C84-C932-41BA-ACE6-366B11B2A4D1.jpeg
 

Vette67

Reefing since 1997
View Badges
Joined
Mar 1, 2017
Messages
1,090
Reaction score
3,088
Location
North Olmsted, Ohio
Rating - 0%
0   0   0
But the holes filled fine with wood putty.
And +1 on kilz white primer.
On my first stand i used a marine spar varnish but it may have not been needed if i had used this kilz.
+1 on the kilz. I have made 2 canopies. First one for a 75, I painted with kilz. After 20+ years, it still looks good. And the canopy for my 180, I painted with spar urethane. The spar didn’t last as long and the oak plywood is starting to delaminate. In another few years I’m probably going to have to replace it. Now in all fairness, the kilz tank is exposed to fluorescent bulbs and the spar tank is lit with metal halides. So I can’t discount the effects of the heat and UV. But I will most definitely paint the inside of any future hood with kilz.
 

Saltyreef

I'm not your dad...
View Badges
Joined
Nov 25, 2018
Messages
7,041
Reaction score
6,033
Location
Central Coast, California
Rating - 0%
0   0   0
I too experienced issues with the spar varnish after not very long... not to mention the ambering effect. It was a canopy as well but with LED fixtures. I think the condensation was a big factor too.
Then again, at the time, I figured anything labeled marine was suitable for application to my saltwater aquarium ^_^
 

WallyB

REEF Techno-Geek
View Badges
Joined
Jan 24, 2017
Messages
3,127
Reaction score
8,094
Location
GTA Toronto, CANADA
Rating - 0%
0   0   0
Nice fixture!!

You can paint, but if you want to protect the wood, use a water based varathane.
Couple of coats, and it will be waterproof (after it cures)
Not sure about the other products since painting would required good ventilation, and long drying/curting time.

My wood canopy made 18 years ago was never protected (on inside Panels). Still good till this day.

I varathened ONLY the outside.
Canopy.jpg


Certainly consider painting the part of your canopy that touches the tank. It will get beaten up by salt, water, etc.

What you see is just the stain on the inside.
2020-04-07_WoodCanopy1.jpg


However I did something different for my side panels.
I put on a reflective sticker, to add more reflection inside the canopy.
Tape_zpsfpk4cu7t.jpg

In my Case to Refect the T5's. Not needed so much for a Hanging LED fixture.

2020-04-07_WoodCanopy2.jpg


Also the film has protected my wood. I just wipe the salt on it every so often.
The film has also stayed on (not peeled) for 15 years.

The reflective does make a difference for lighting.
2020-04-07_WoodCanopy3.jpg


The one thing I have enjoyed, that you still can add/modify on one side at least, is a HINGED side panels for access.
I can't imagine running, maintaining my tank with deep access from above (canopy on top).

Maybe in you case the plan it to remove your canopy each time. Probably not too much work for 29 Gallon Tank.
Mine is a 90 Gallon, 4 Foot tank.

Have you also thought how you are going to run plumbing with the Canopy.
Things like that make removing Canopy difficult, and affect you access to inside tank.

Again, maybe a 29 Gallon Tank is small enough to avoid the concerns I mention.
 
Last edited:

Rick.45cal

2500 Club Member
View Badges
Joined
Jan 14, 2016
Messages
3,693
Reaction score
9,214
Location
Lakeland Florida
Rating - 0%
0   0   0
Thanks all. Hiding the pocket holes would have been smart. Luckily I found a dowel in the garage that fit and it wasn’t hard at all to plug and cut flush with a coping saw. Sanded smooth and painted first coat with Kilz white primer sealer that I also had on hand.

Sometimes (ok most times) I need multiple runs to the hardware store to finish a project. But it is nice when you have leftovers from past projects that suit.

76487C84-C932-41BA-ACE6-366B11B2A4D1.jpeg

See the two little levers on your coping saw where the blade attaches to the frame? If you rotate those 45 or 90 degrees it will make trimming the dowels flush much easier, the frame of the saw will no longer be riding on the wood ;) when you get to the left side, you can rotate them 180 degrees and not have to saw in an awkward position. :)
 

Creating a strong bulwark: Did you consider floor support for your reef tank?

  • I put a major focus on floor support.

    Votes: 27 40.3%
  • I put minimal focus on floor support.

    Votes: 16 23.9%
  • I put no focus on floor support.

    Votes: 22 32.8%
  • Other.

    Votes: 2 3.0%
Back
Top