Will it fit in the compartment? Or do I need to cut the top out? The chamber is 8x16Consider a mat roller of you don't want to do socks.
Navigation
Install the app
How to install the app on iOS
Follow along with the video below to see how to install our site as a web app on your home screen.
Note: This feature may not be available in some browsers.
More options
You are using an out of date browser. It may not display this or other websites correctly.
You should upgrade or use an alternative browser.
You should upgrade or use an alternative browser.
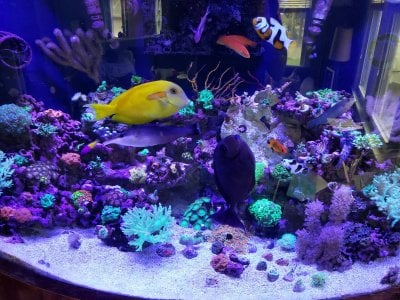
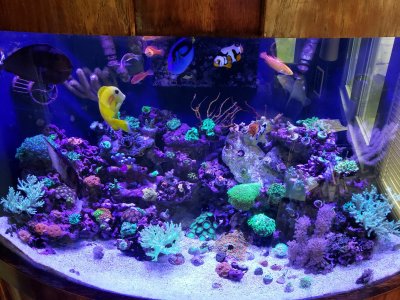
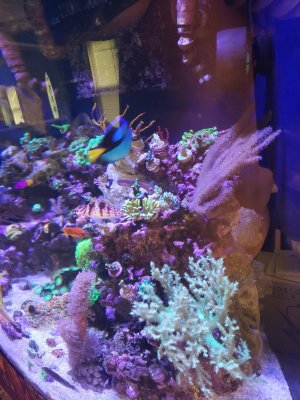
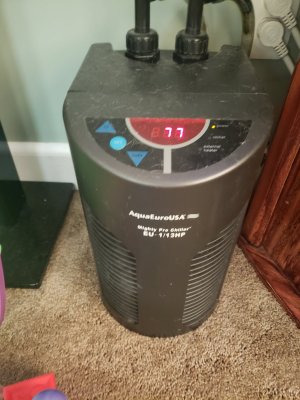
Equipment and tank tour, 2 and a half years up and running now. (Pic heavy)
- Build Thread
- Thread starter motortrendz
- Start date
- Tagged users None
A Clarisea can hang on the side
It'll fit if you have the height.
It'll fit if you have the height.
Anybody else have any ideas?
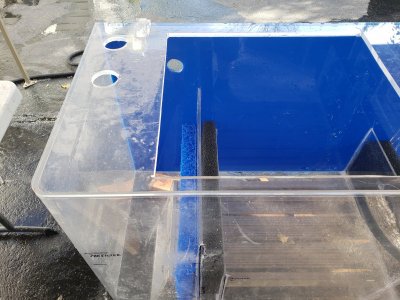
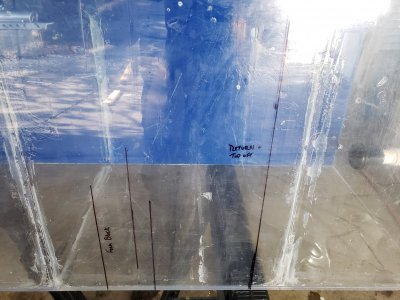
So the last few weeks little by little.i have been building my new sump. I got a 75g acrylic tank and baffled it drilled it and got it set up and just about ready to go. I also built a frag tank stand for my deep blue 30g frag tank. (24×24)


So on the sump I made a drain section and have to get octoaquatics to make me a magnetic filter sock holder for my first chamber. Which will also house a course and fine filter sponge. In the second chamber I have my skimmer (reef octopus 250sss with varios 6 pump) followed by another fine mesh filter sponge and then the return which will be a M2 by ecotech. On the far right is a 15gallon chamber which will be hooked up to my house drain for quick water changes.

I drilled the back for 1/4" mur lock quick connects. On the left you can see it's in the skimmer chamber and thay will be my syphon draw for my calcium reactor which will be returned to the sump in the return chamber by a kamoer fx doser.

In the return chamber I took my ATO made by autotopoff.com and made an acrylic bracket for the float switch and a mounting point for the back up switch above it. The top off will be pumped in through another 1/4" mur lock bulkhead in the rear of the sump.


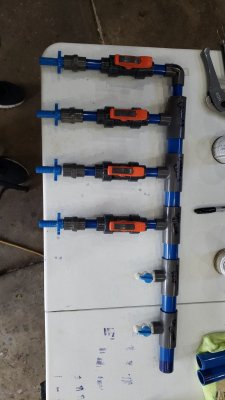
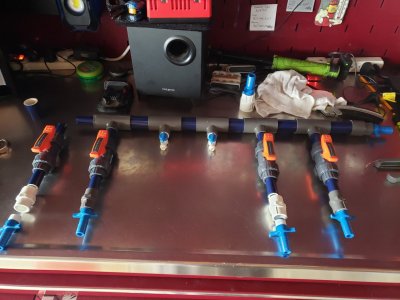
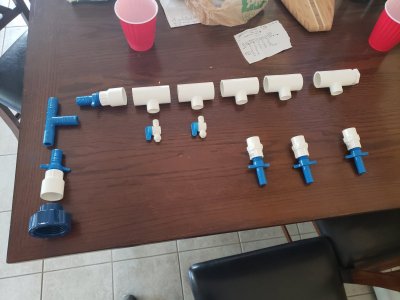
I made a manifold to be fed by my pump which will feed both my display tank and my frag tank(I'll get to that next) it has multiple 1/2" outlets for various equipment as needed(carbon, gfo and chiller) and 2 1/4" quick connect outlets one for drip acclimation and a spare(was originally going to feed the calcium reactor but changed my plans)
I also ran 2 dedicated 15A services to system.

For my frag tank I kept it simple, i had a 30g drop blue stored away. So i drilled the rear of the tank and installed a drain and a return. I also had an mp40qd so I put that on it I'm sure itll be dialled down to 20% I have a multi tiered frag rack from the blue glow that I'll be using. I put a layer of crushed aragnite sand on the bottom bc I will be housing a few working wrasses. And the front half has crushed coral from 2 little fishes for setting soft corals and allowing frags to grow freely on natural substrate. I have a hydra 26 over that tank but may double it up.


So let me know what you guys think... anything I overlooked? Always open for feedback. Thank you
So on the sump I made a drain section and have to get octoaquatics to make me a magnetic filter sock holder for my first chamber. Which will also house a course and fine filter sponge. In the second chamber I have my skimmer (reef octopus 250sss with varios 6 pump) followed by another fine mesh filter sponge and then the return which will be a M2 by ecotech. On the far right is a 15gallon chamber which will be hooked up to my house drain for quick water changes.
I drilled the back for 1/4" mur lock quick connects. On the left you can see it's in the skimmer chamber and thay will be my syphon draw for my calcium reactor which will be returned to the sump in the return chamber by a kamoer fx doser.
In the return chamber I took my ATO made by autotopoff.com and made an acrylic bracket for the float switch and a mounting point for the back up switch above it. The top off will be pumped in through another 1/4" mur lock bulkhead in the rear of the sump.
I made a manifold to be fed by my pump which will feed both my display tank and my frag tank(I'll get to that next) it has multiple 1/2" outlets for various equipment as needed(carbon, gfo and chiller) and 2 1/4" quick connect outlets one for drip acclimation and a spare(was originally going to feed the calcium reactor but changed my plans)
I also ran 2 dedicated 15A services to system.
For my frag tank I kept it simple, i had a 30g drop blue stored away. So i drilled the rear of the tank and installed a drain and a return. I also had an mp40qd so I put that on it I'm sure itll be dialled down to 20% I have a multi tiered frag rack from the blue glow that I'll be using. I put a layer of crushed aragnite sand on the bottom bc I will be housing a few working wrasses. And the front half has crushed coral from 2 little fishes for setting soft corals and allowing frags to grow freely on natural substrate. I have a hydra 26 over that tank but may double it up.
So let me know what you guys think... anything I overlooked? Always open for feedback. Thank you
vetteguy53081
Well known Member and monster tank lover
View Badges
Partner Member 2024
Excellence Award
Reef Tank 365
RGB
Article Contributor
Tampa Bay Reef Keepers
West Palm Beach Reefer
Hospitality Award
Ocala Reef Club Member
305 Reef Club
Wisco Reefers
Midwest Reefer
Fish Medic
MAC of SW Florida
Rock Pool Reef Keepers
R2R Secret Santa 2023
My Tank Thread
My Aquarium Showcase
Good work !
Yea acrylic makes it super easy to work with and modify. I love it I still like glass for the main tank though.... I think. When I upgrade the tank I've been pricing glass. Haven't talked to anyone about acrylic. Any recommendations?Very nice Mike ... I think that you see why I switched to acrylic 30 yrs ago!
- Joined
- Jun 4, 2019
- Messages
- 1,164
- Reaction score
- 4,691
Wow. Just... wow. Sump looking great, love the freedom you can give yourself with a near ground-up build. Very cool features you've added there. Same for the frag tank - nothing wrong with simple but viable!
Thanks. Its gonna give me so much more freedom than the 20g tank that's stuffed under my tank. And with a sump that big I wont have to change anything when I upgrade to my 240g and a larger frag tank.Wow. Just... wow. Sump looking great, love the freedom you can give yourself with a near ground-up build. Very cool features you've added there. Same for the frag tank - nothing wrong with simple but viable!
- Joined
- Jun 4, 2019
- Messages
- 1,164
- Reaction score
- 4,691
Planning for the future upgrade will definitely serve you well. Awesome all around.
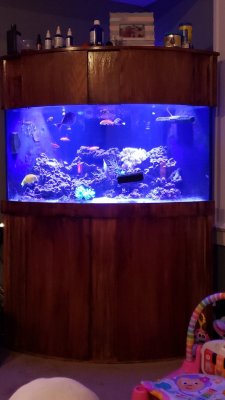
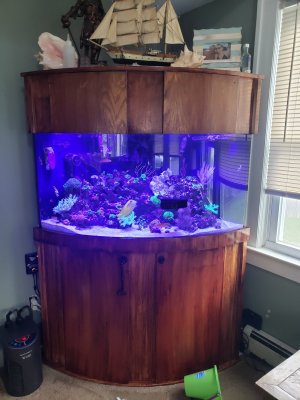
So when we bought our house I couldn't wait to get the tank up and running. My tank was bought used, i believe it's about 80 gallons (it's an odd shaped coner bow with a flat panel across the back)
I drilled and installed a weir with a 1.5in drain. And I sanded and redid the stand. ( wish I took pics at the time) after filling the tank I found a seam leak and had to break it back down to reseal the back panels.
After that debacle, it held water fine and ran well. I used florida dry rock and some left over pieces of Fiji and a few tonga pieces to make my aqua scape. I used a really pretty sugar sand to start(a mistake I later came to regret!) I had purchased 3 hydra 26s for the tank and supplemented with 2 retrofit t5s (one atinic and one purple plus)
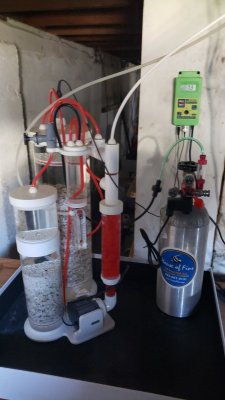
For equipment I used my diablo 200 skimmer from an older much bigger system, squeezed it into a 20g long aga tank i made into a sump with glass cut panels. I used a dual 4in filter sock intake in the sump, skimmer and heater section. And then my return section. My return pump is a jaebo 6000 running at 75% I have 2 reactors I mr1 for my go and one vertex 1liter for my carbon(this reactor is beautiful and I really love the vertex products.
The next few months were uneventful, ugly tank syndrome, various algaes and break outs...
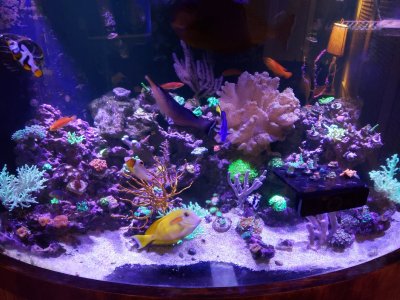
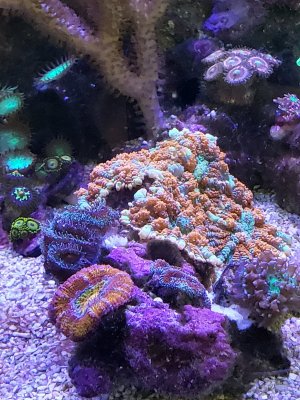
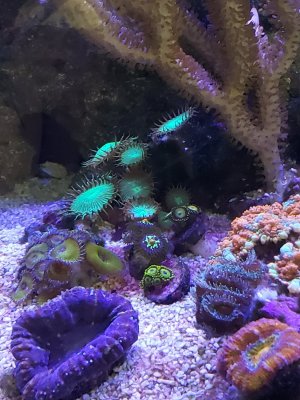
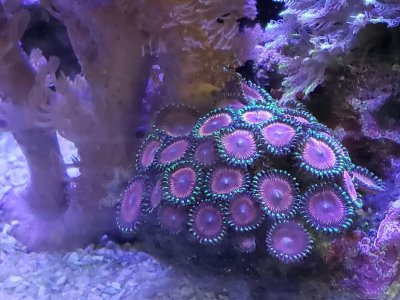
I started adding corals at 6 months, zoas, shrooms and some Lps did pretty good. Couldn't keep any sps for almost a year.
Once my tank settled in and rocks were covered in purple corraline I noticed my sps really starting to take off.
I eventually got tired of dosing and added a vertex calcium reactor filled with 2little fish meda mixed with zeovit magnesium rocks in the main chamber and a smaller grain argonite in the second chamber.
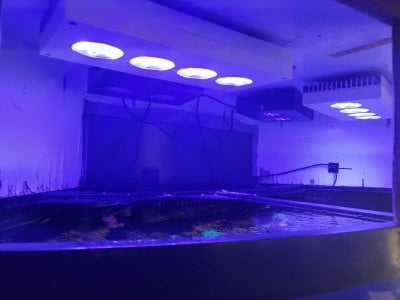
I've battled lighting issues forever. I eventually took down the t5s, then came across 2 hydra 52 which I used to replace the 3 hydra 26s, i finally started noticing more color pop and some faster growth in sps. FINALLY, felt like i was getting smoother. After a few months running, I noticed everything in the back half of the tank still looked dull, so I added 2 of the hydra 26s behind the 52s and set them to all to about 70% blues and 10% whites. Finally got it in the ballpark for a good lighting setup. (Only took 2 years to get it right)
My calcium reactor has been up and running for about a year now and I finally just had to turn it up to help maintain the new uptake is calcium and alk.
It's been a fun journey, delt with red slime outbreak, a turf algae, briopsis outbreak and then dinos. That was about 6 months of hell. But right now my tank is going through a "pretty stage" so I'm enjoying it while I can, bc we all now it's a rollercoaster ride of a hobby.
In the next week or 2 I will be completing a new sump, a 75 gallon acrylic tank to triple my sump volume with an integrated 15g water change compartment. And running my plumbing down to the basement. I purchased a vectra m2 return pump, for that sump. Built a new manifold to run everything. It should be a good build. I'll be posting that on here as I go.
Almost forgot a few pieces of equipment, I have an mp40qd, on my left side running on reef Crest at 80% and I just recently replaced a gyre (i really didn't like it at all in my system) with the nero 5. I really have to say i love it, the contollability and the amount of water it moves, as well as being able to program flows, intensities and patterns all on my phone. To only downside is that dang magnet mount. Its really just not strong enough! So hopefully there's a fix coming for that. And I just recently ordered a rear guard from a member on her to make sure I dont get any fish sucked in...
I also spent about 2 months replacing my fine sand with coarse sand. I finally got tired of always having cloudy looking water, sand storms and cleaning off my rocks of piles of sand. And my sump even looked like it had about 1/4in of sand in it.
I know it's a long post, I've been in the hobby for about 15 years had many tanks over the years. My goal is to eventually upgrade to a reef savvy tank. But this tank will do for a few more years.
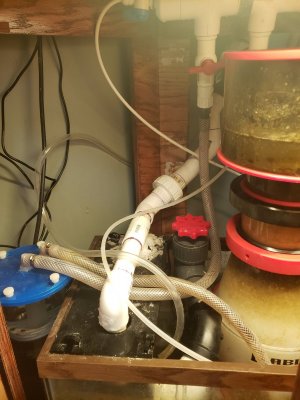
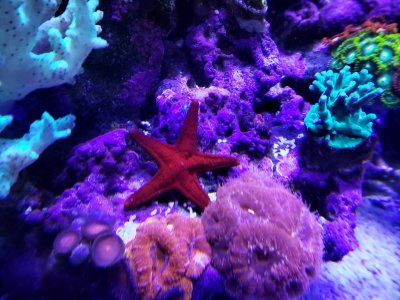
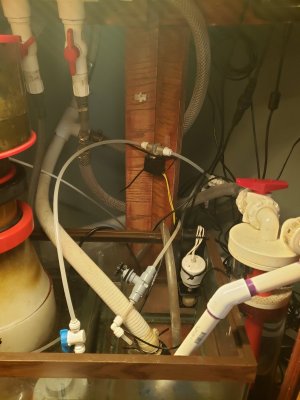
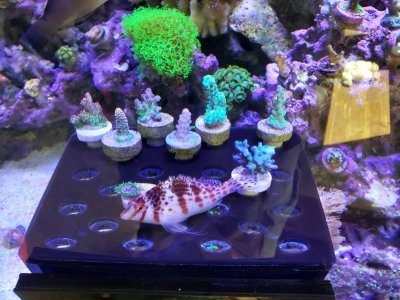
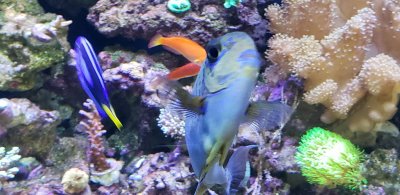
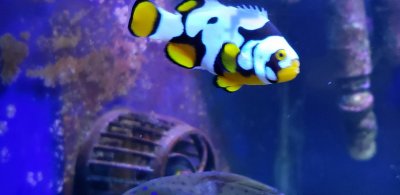
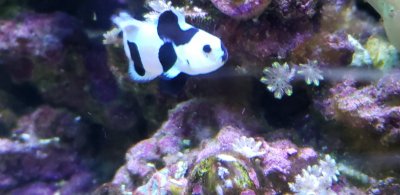
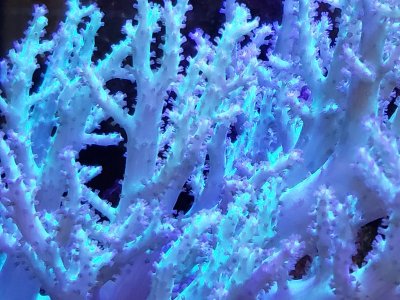
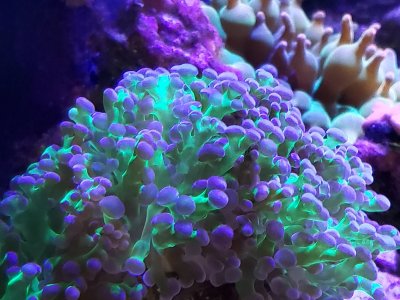
Now for the part everyone loves to see, the pictures..... they're a little out of order, but you can see the progression of the ta k and its growth and maturity. A tour of the equipment and of course some close up corals and fish. At the bottom is a few pics of the new sump build and manifold build.
Let me know what you guys think.
Thanks for looking.
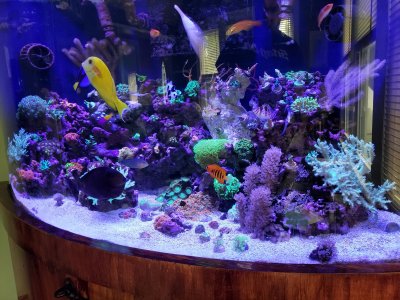
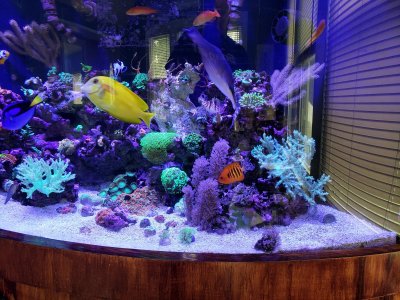
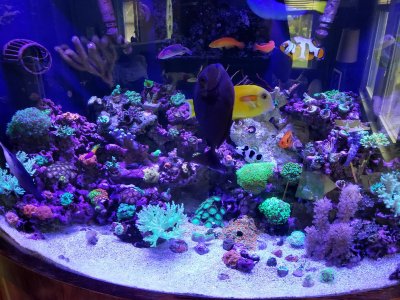
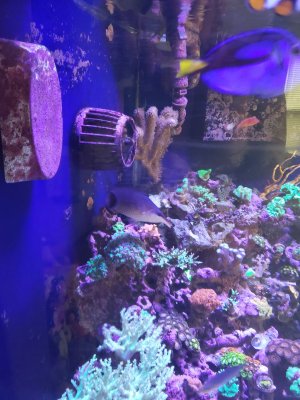
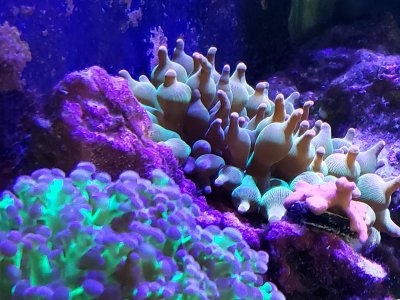
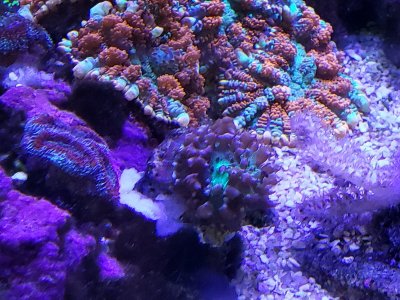
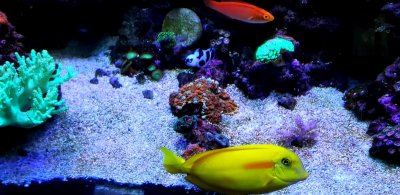
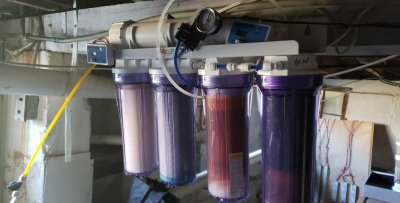
Looks VERY good to me!
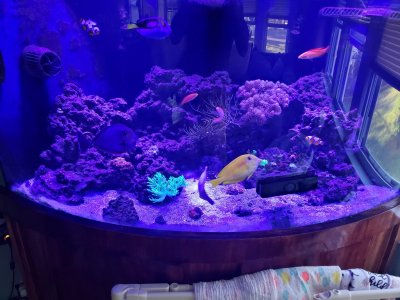
Is that a Bird Wrasse?
I really want one, but thought they were completely incompatible with a reef tank (not that it would be able to even FIND the pathetic nubs of (dying) coral that are in my tank at this point).
DO NOT get a bird wrasse. Lol. Shes my resident A-... I cant catch her, she wont go in any traps. I've had her for almost 3 years now. She was about 3 inches when I got her. thought she was super cool. Now at 7in long she eats every snail and hermit that put in the tank... terrible idea for a reef tank. I dont know what I was thinking Haha.Looks VERY good to me!
Is that a Bird Wrasse?
I really want one, but thought they were completely incompatible with a reef tank (not that it would be able to even FIND the pathetic nubs of (dying) coral that are in my tank at this point).
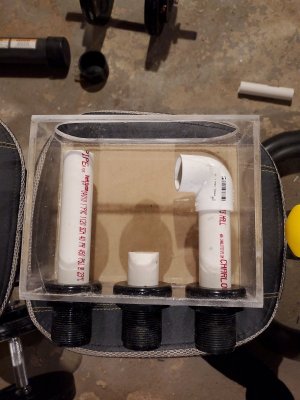
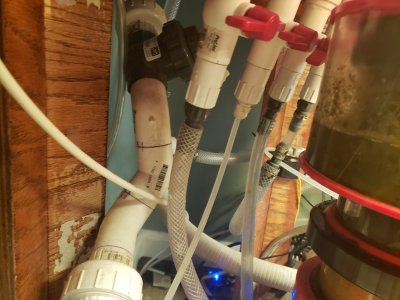
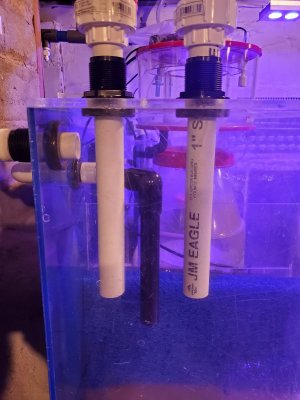
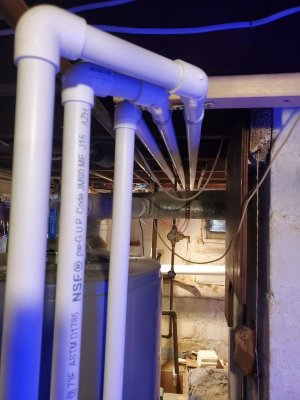
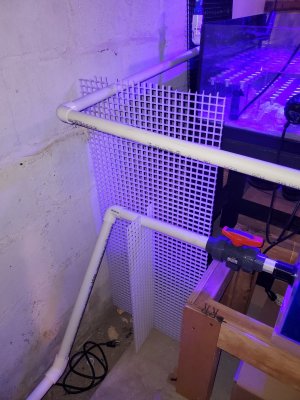
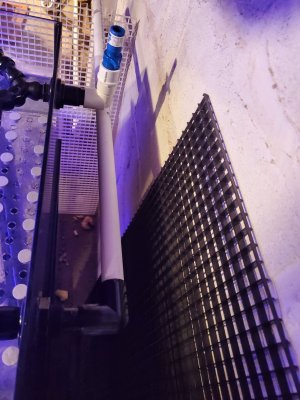
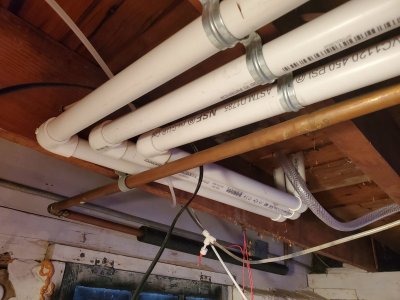
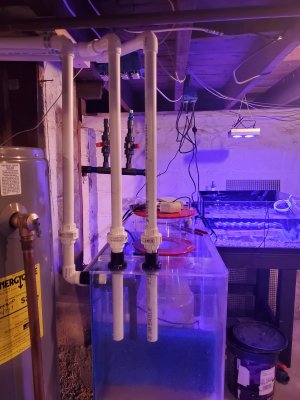
So some updates from today, ran most of the plumbing and built an overflow box for the back of my tank to be able to run a modified bean animal overflow.
So right now I have a single 1.5in bulkhead in the rear of my tank that drains to my sump. So I've made an overflow box that will attach to the 1.5" bulkhead and have 3 1in drains. One with a valve one with a durso type and a dry safety. All 3 lines will be run down to my basement and into the new sump. I also plumbed my water change chamber to my drain line and finished the plumbing on my frag tank that will be in my basement next to the sump.
Heres some pics. Let me know what you think.


- Joined
- Jun 4, 2019
- Messages
- 1,164
- Reaction score
- 4,691
Very impressive plumbing work! Loving the aesthetics of the alignment, if nothing else. I'm curious, though, is there a particular reason you didn't go with too many unions? Everything I've read and seen always says union this and union that when doing the hardened plumbing.
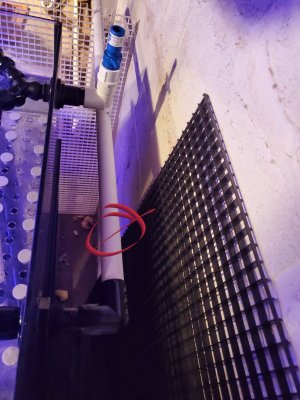
I'll have unions above the floor where they come through on top so I can separate them from the overflow box. And the valve I'm using on the one drain is a union valve so I can remove and clean it or replace if needed. I only used the unions at the back of the sump incase I need to disconnect thw sump to move it for some reason. The rest of the lines i left hard plumbed bc they're hard mounted and shouldn't need to ever be moved. I do need to cut the one drain off the back of the frag tank and add a union I have it and just forgot to install it.Very impressive plumbing work! Loving the aesthetics of the alignment, if nothing else. I'm curious, though, is there a particular reason you didn't go with too many unions? Everything I've read and seen always says union this and union that when doing the hardened plumbing.
- Joined
- Jun 4, 2019
- Messages
- 1,164
- Reaction score
- 4,691
Fair enough on unions; like I said I was just curious. Overflow box looks good! Compact but the classic design.
That's a nice looking reef you got there!
Similar threads
- Replies
- 2
- Views
- 118
- Replies
- 13
- Views
- 378
- Replies
- 18
- Views
- 295


