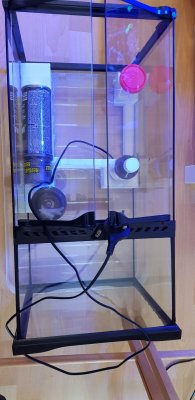
Exo Terra saltwater paludarium

Metalreefer

Community Member
View Badges
Joined
Mar 15, 2020
Messages
82
Reaction score
119
Location
London
Rating - 0%
0   0   0
Hello.

So I have a Fluval Spec 10L pico. But I feel like its not enough. SOO I decided to upgrade it to something greater. Something you not gonna see in every thread. I got an Exo terra mini X tall. So I’m going to do a half reef and half jungle setup with waterfall, mistmaker and live plants. Let the fun begin!
20200315_171931.jpg

Let’s do some assembly then.


What i used for the project:
Exo terra mini-Xtall paludarium
Cardboard for the beta design

Pvc tubing

Polystyrene sheets 3mm

Paper cutter

Hobby knife

Hot glue gun

Aqua mate silicone sealant

Brushes

Touch’n foam waterfall expanding foam

Coco fibre

Sphagnum moss

Charcoal

Mesh pots 5cm

Acrylic paint (black, white, yellow, flame)

Plasti Kote Spray 400ml super clear

Filter media

Aquarium gravel

Ziptie

D-D aquascape epoxy

Suction cups

instant cement

Different kind of wood pieces (spider wood, driftwood, some random foraged piece)

A random piece of rock from lfs and slate chipping for the waterfall


Equipment:
Hipargero 30W led light

Swell fogger

Eheim jager 25w heater

Tunze universal mini pump 2x

12V DIY PC fan for cooling

Smart Ato micro

Temperature sensor


Planting plans:

Nepenthes ampullaria, Drosera Capensis, Pinguicula gigantean, Utricularia Bisqumata

Cryptanthus ‘red star’, Mini Phalaenopsis, Mosses (this one I update later)


CUC for the jungle:

springtails

Reef part:

Yellow tail blue damsel,2 hermit crab,2 trocus snail, variety of zoas, favites, candy cane ,goniopora, red star polyp
 
Last edited:
OP
OP
Metalreefer

Metalreefer

Community Member
View Badges
Joined
Mar 15, 2020
Messages
82
Reaction score
119
Location
London
Rating - 0%
0   0   0
So first I made a skech what i want before buying anything just to see how i can figure out the whole setup what I want.
89799081_2769719209785679_5860486152452046848_o.jpg
.
89774348_2769719143119019_1417132632637964288_o.jpg

Then I put it together from cardboard.To see if iam happy what I see.
89760859_2769719306452336_5668485953086291968_o.jpg
 
OP
OP
Metalreefer

Metalreefer

Community Member
View Badges
Joined
Mar 15, 2020
Messages
82
Reaction score
119
Location
London
Rating - 0%
0   0   0
I cut out everything from the Poly sheets then glued the parts together with hot glue.Constantly checking the measurements.
20200315_171920.jpg

20200315_191945.jpg
20200315_191912.jpg
20200315_191936.jpg

Left and right picture: that is going to be the place for the mistmaker and the pvc tube for the pump.
Middle picture: far end side there is a hole for the plug from the pump. I am going to hide the hole with another piece of sheet later on.The purpose of the corner look is to give a free space for the cables and the pvc tube for the ATO into the reef part.Also it will function as straight way for the cool air from the fan i will put on the top of the tank.Then on the middle is the first barrier that will divide the land part from the reef part. I will fill it up with gravel to hide the plastic.Then the closer end is the box for the pump.
 
OP
OP
Metalreefer

Metalreefer

Community Member
View Badges
Joined
Mar 15, 2020
Messages
82
Reaction score
119
Location
London
Rating - 0%
0   0   0
After I glued all the parts together and checked all the measurements are correct and I am happy with the sizes and the result. (check if box big enough for the pump,check if cables can go through holes they meant to go through.Box is big enough for the mistmaker,the pvc pipe is long enough.
20200315_192228.jpg


Time to seal the top everywhere with silicone sealant. This is a very crucial step. You have to make sure you cover all the surface properly. Specially the corners as this structure going to be your main barrier against the polluted water from the background ( cocofibre is organic material and will rot overtime due constant contact with humidity and water. so all the wasteproduct from it will end up in the water going down on the top of your barrier.)So it will not leach into your reef below.
20200316_105413.jpg
 
OP
OP
Metalreefer

Metalreefer

Community Member
View Badges
Joined
Mar 15, 2020
Messages
82
Reaction score
119
Location
London
Rating - 0%
0   0   0
After the silicon coat dried overnight I decided to glue the whole thing into the terrarium.I put the mini pump already in because it would be pretty tricky to put it after the gluing.it isn't impossible but I saved myself from a headache.
20200316_134856-jpg.1473804

So now I will let it cure for 24H. Then I test it for dripping.As I said its a very important part to seal it properly inside and around with silicone.Meanwhile Ill prepare the woods and rock for the terrascaping. Boiling water all over.Then give it a nice scrape with toothbrush. After into the oven to dry and kill any unwanted hitchhiker around 150C for 30-60min.Will keep an eye on it.Looks like hitchhikers are bad no matter what type of habitat you are making :D.

20200316_141544.jpg


20200316_134856.jpg
 
Last edited:
OP
OP
Metalreefer

Metalreefer

Community Member
View Badges
Joined
Mar 15, 2020
Messages
82
Reaction score
119
Location
London
Rating - 0%
0   0   0
I love the ambition with this. I've seen so many successful freshwater versions of this so it's exciting to see if it's possible with a reef set up
Thanks a lot :)
Everything is possible you just need to find a way!
Here is my 10L fluval spec picoreef. Need re stocking tho. I lost a couple of corals in a crash like a year ago. it had to balance itself(dino,cyano,gha)now it looks alright.
20200316_142645.jpg
 
OP
OP
Metalreefer

Metalreefer

Community Member
View Badges
Joined
Mar 15, 2020
Messages
82
Reaction score
119
Location
London
Rating - 0%
0   0   0
So the first waterfall test did not ended as I expected.lots of leaks,too strong pump current,badly shaped container. So i decided to sacrifice the rest of the silicone,glued some addition:made the outflow better,glued an edge for the side and painted nearly the whole thing with silicone,filled the gaps. so now a long waiting time on schedule for the silicone to completely cure then testing again.
.
Inked20200317_224140_LI.jpg
 
Last edited:

Tl02022020

Community Member
View Badges
Joined
Feb 9, 2020
Messages
53
Reaction score
61
Rating - 0%
0   0   0
I love this concept! It's going to be tricky but a cool idea is worth a shot. What about an upper container that holds everything separate from the bottom? Sort of like a box that fits inside the paludarium and all the water/plant stuff is isolated in that? Waterfalls in vivs almost always leak as you've found.

Another thought is more of a lagoon style for the water part and brackish plants in the upper. More forgiving of any mixing of water and salt that occurs. A mangrove paludarium would be so cool.

Anyway I will be watching your progress, love the idea!
 
OP
OP
Metalreefer

Metalreefer

Community Member
View Badges
Joined
Mar 15, 2020
Messages
82
Reaction score
119
Location
London
Rating - 0%
0   0   0
So i repainted the whole thing a couple of times but it was leaking everywhere so i decided to clean off from the glass and start again with a different material.
20200321_115420.jpg
20200321_115424.jpg

I bought corrugated plastic sheets.
20200320_151936.jpg

I cut everything out again. And i secured the pieces together with electric tape.Then i used silicone on the top. And inside of the containers. And let it cure for 24h. Finally I hot glued the bottom parts at the connections.
20200320_193018.jpg

20200321_220306.jpg
20200321_220238.jpg
 
OP
OP
Metalreefer

Metalreefer

Community Member
View Badges
Joined
Mar 15, 2020
Messages
82
Reaction score
119
Location
London
Rating - 0%
0   0   0
Waterfall:
the base is epoxy putty.
I pressed the slate pieces on it. Then i sprayed expanding foam over it. So i can check/modify it before i fix it permanently into the tank. Avoiding any random splashing and uncontrolled water movement.

20200325_115806.jpg
 
OP
OP
Metalreefer

Metalreefer

Community Member
View Badges
Joined
Mar 15, 2020
Messages
82
Reaction score
119
Location
London
Rating - 0%
0   0   0
I didn't post quite a while now so its time to catch up.
So after the base and the waterfall ready. Time to make a design how it would look. if there is space for everything. and it would look the i want it then silicone the base into the tank. over the sides to fix it properly.After the silicon cured ready for the next step.
20200330_151514.jpg

Spraying insulation foam to cover everything. position the baskets upright.I added extra features such as cork bark ,slate pieces,and branches.Also i filled the pots with paper towel so the foam wont fill them up.
20200331_141633.jpg
 
Last edited:
OP
OP
Metalreefer

Metalreefer

Community Member
View Badges
Joined
Mar 15, 2020
Messages
82
Reaction score
119
Location
London
Rating - 0%
0   0   0
When the foam sets we can cut off any excessive parts. and creating the final shapes. I accidentally cut the cord of the pump so i had to remove it to replace it. BUT i wasn't able to put it back.plus the baskets were too flat. so i tore down that part.put the pump back then redone it again.After cutting . i took the pump out and cut the excessive foam, the way i can take out and back the pump any time. so if it get clogged or not working i can replace it without tearing apart the whole thing.
20200401_133753.jpg
 
OP
OP
Metalreefer

Metalreefer

Community Member
View Badges
Joined
Mar 15, 2020
Messages
82
Reaction score
119
Location
London
Rating - 0%
0   0   0
Time to cover the top of the foam with silicon. spread it all over. Then cover it with cocoa coir pressing it firmly against the silicone covered parts so it will not flake off too much overtime.
1.png
20200412_171558.jpg
 

More than just hot air: Is there a Pufferfish in your aquarium?

  • There is currently a pufferfish in my aquarium.

    Votes: 30 17.0%
  • There is not currently a pufferfish in my aquarium, but I have kept one in the past.

    Votes: 30 17.0%
  • There has never been a pufferfish in my aquarium, but I plan to keep one in the future.

    Votes: 32 18.2%
  • I have no plans to keep a pufferfish in my aquarium.

    Votes: 76 43.2%
  • Other.

    Votes: 8 4.5%
Back
Top