Kershaw’s 145g 60x28x20

Kershaw

Valuable Member
View Badges
Joined
Nov 11, 2015
Messages
2,439
Reaction score
1,473
Location
sacramento, ca
Rating - 0%
0   0   0
Hello fellow reefers.

I am restarting my build thread due to the delays and my thread kind of running off course. This time I will try to stick to the build and post as many pictures as possible.
i currently have abou 95% of what i need to get this tank running, but am planning on going semi slow to do things better then i have done them in the past

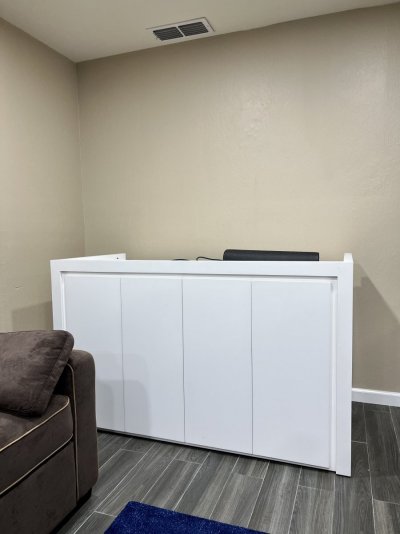
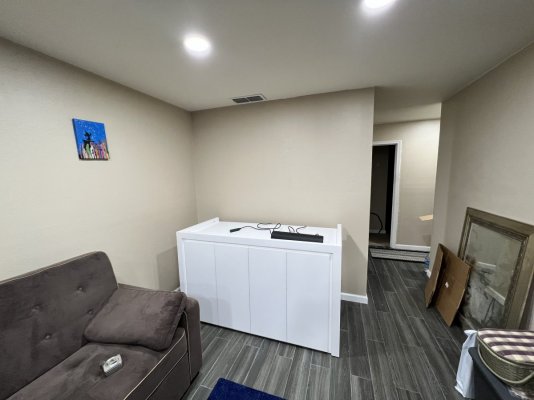
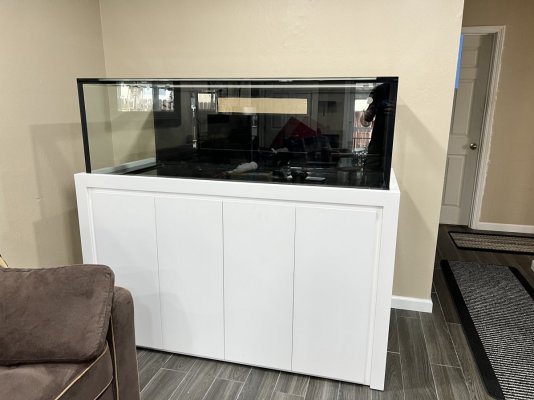
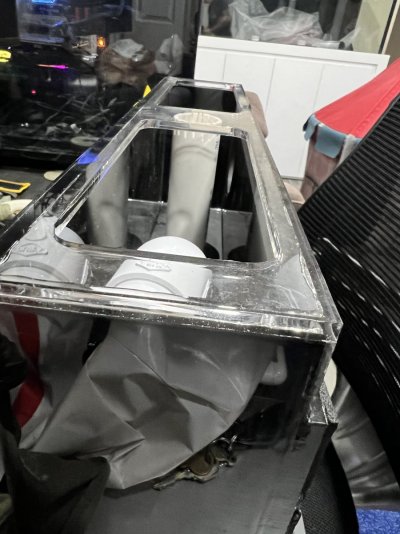
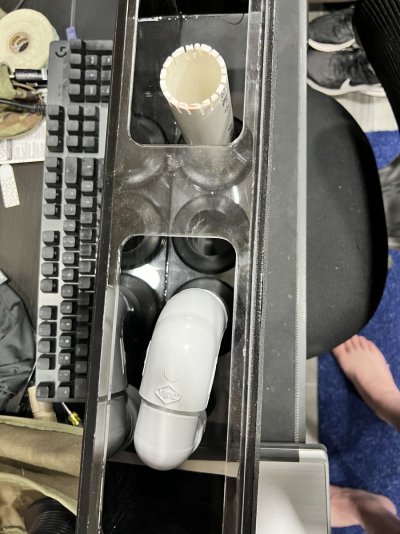
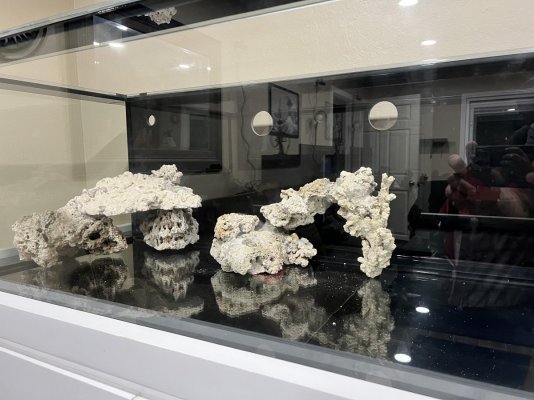
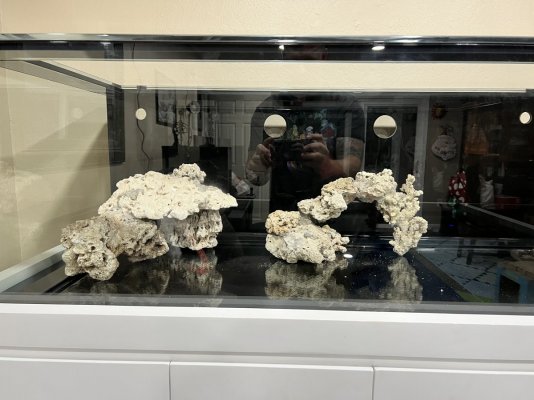
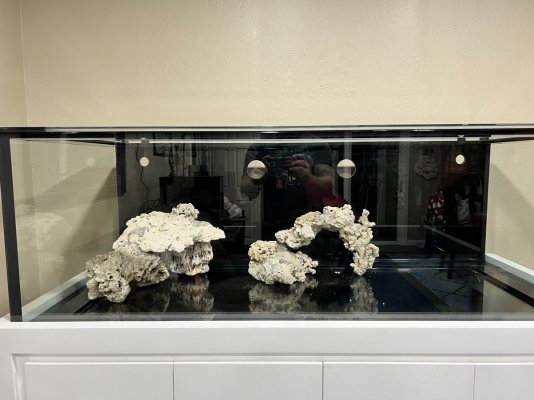
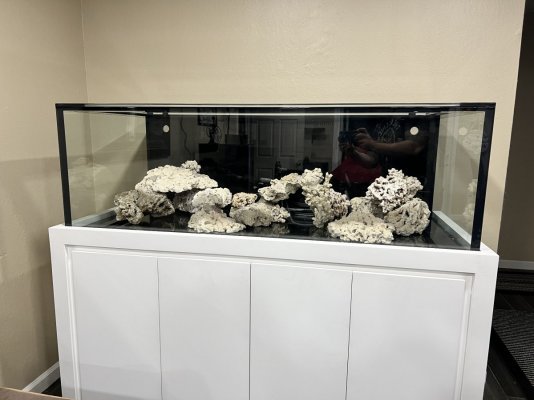
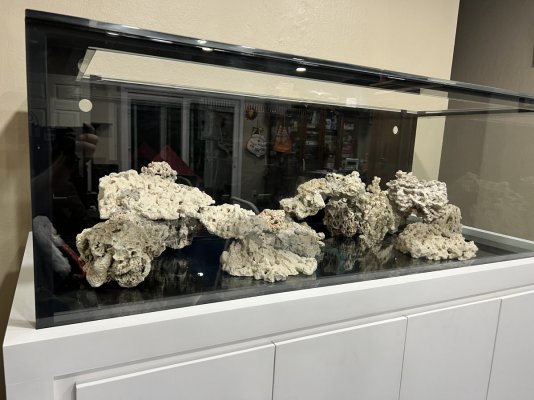
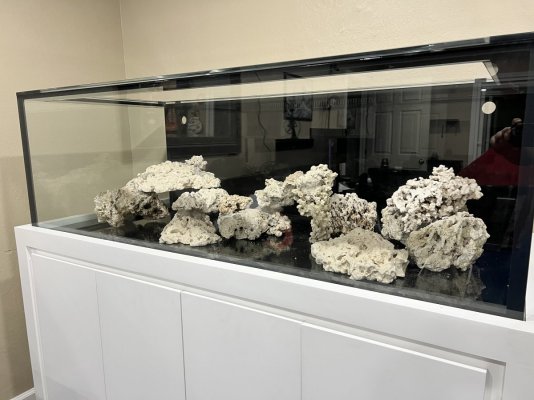
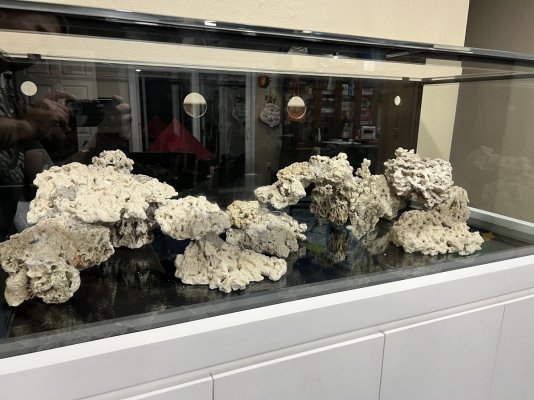
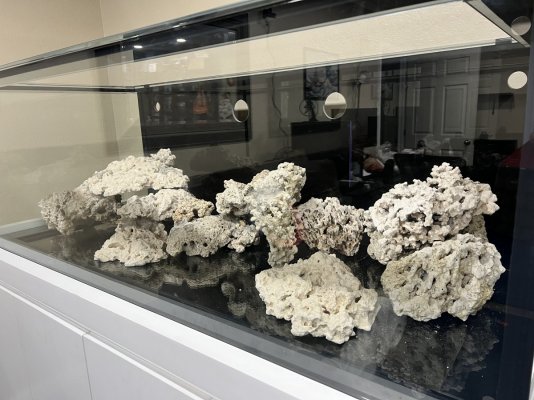
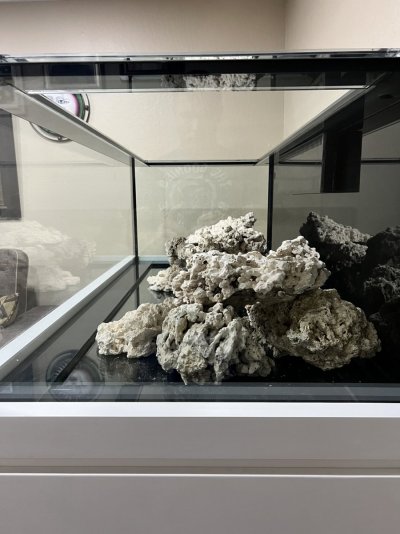
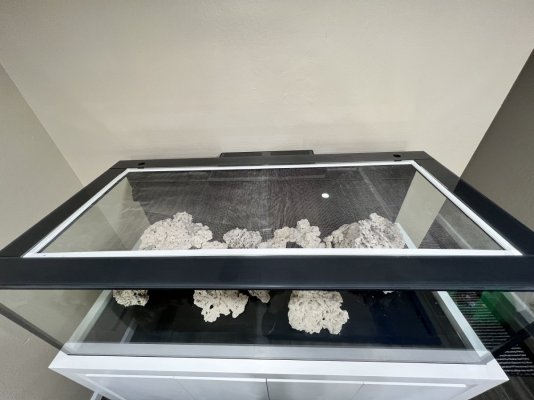
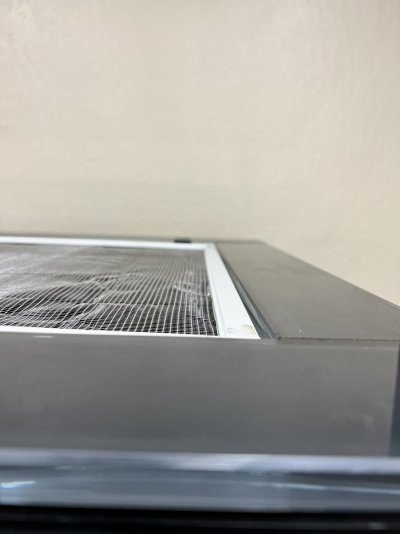
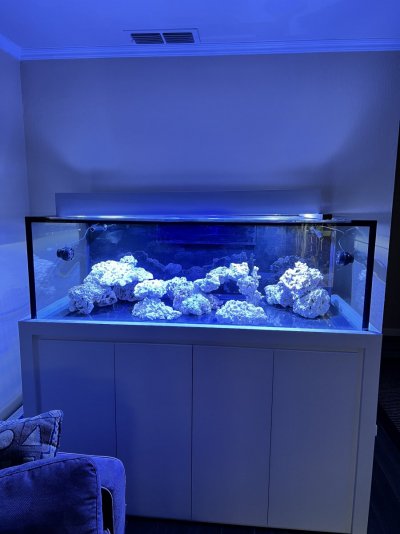
Tank: 60X28X20 CDA with 24IN Modular marine over flow and Steel stand wrapped in wood
The tank and stand was ordered in March of 2021 and i received the tank OCT 2021. there was numerous delays and problems with the tank when it arrived the first time.
i will say that CDA did take care of me and i feel the build of the tank and stand are high quality. my biggest problem with the company is communication.
the stand was damage in shipping, not too bad but i missed it during delivery as i was focused on the glass. Again CDA took care of it.

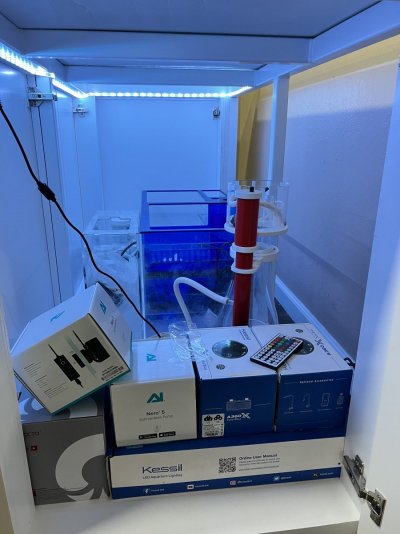
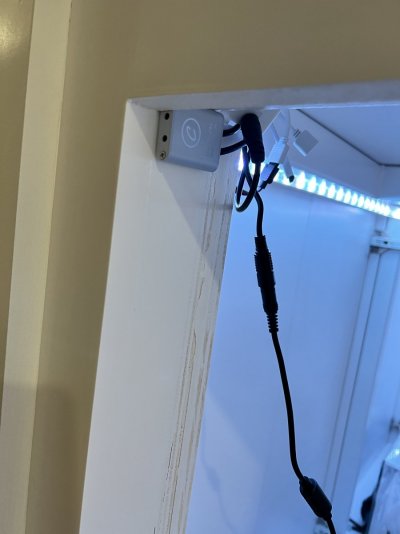
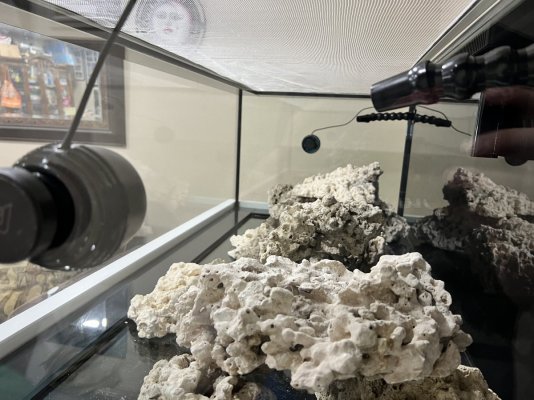
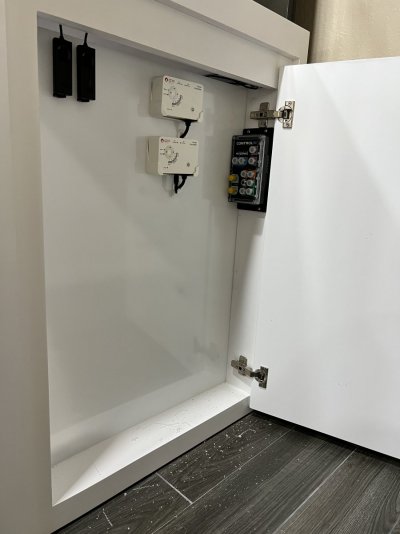
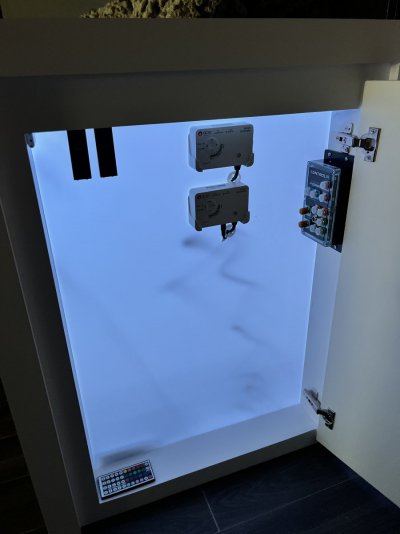
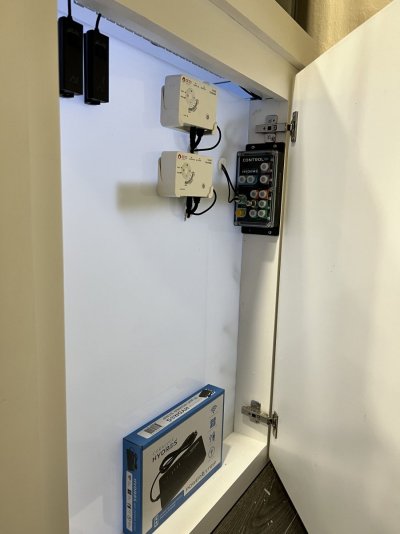
Lighting: 2X kessil a360X and 1 AP9X to start. i intend to add either T5 or more kessils down the road. I want to build a floating canopy to mount lights to but i am unsure how i want to go about it.

Sump: trigger Sapphire 34
Plan to upgrade this once i find a good deal on a larger one, also tempted to do another 40B sump like i used in the past. the trigger 34 is pretty tight to work in.

Filtration: Reef octopus elite 150 skimmer, Refugium and filter floss.

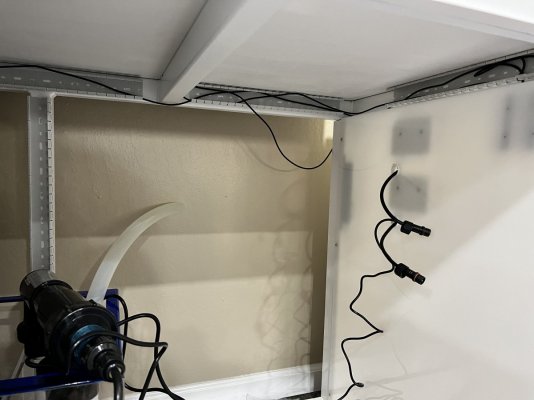
Flow: Return pump is a Reef Octopus Verious 6 and two Nero 5s
ill be adding tunzes down the road as well but wanted something more low profile for the sides of the tank, tunzes will be in back corners or back wall.

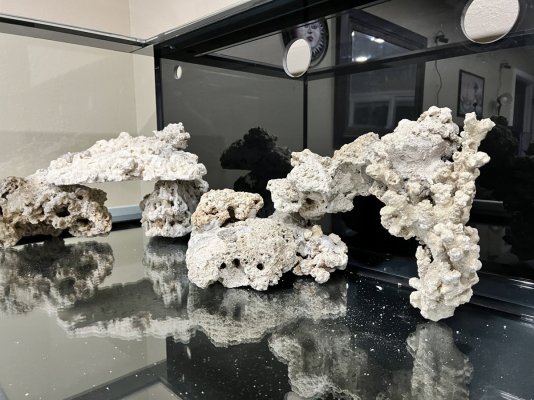
this will be my first real attempt at SPS, along with some of my favorites LPS as well.

Intended fish stocking (subject to change)
malanarus Wrasse
Checkerboard Wrasse
Leopard Wrasse
Purple Tang
probably another wrasse
Mag Foxface
two Clowns ( Picasso or something other then standard)
Midas Blenny.

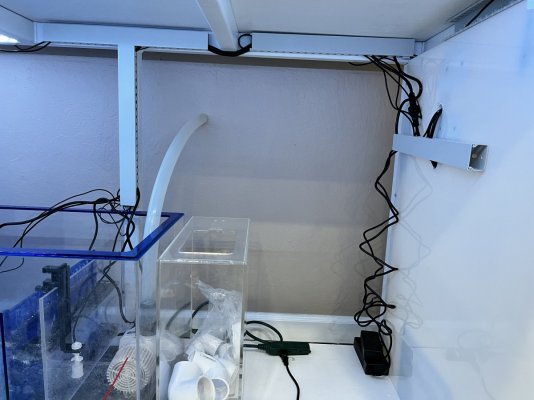
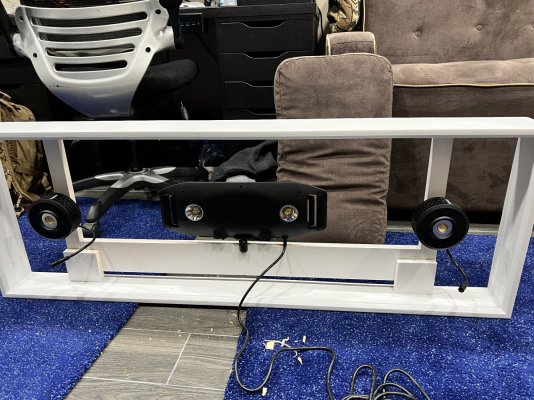
here are the pictures so far.

08343403-BA43-4D68-BC9A-4A1CC976E916.jpeg D721B0FD-C4DC-4BA6-B888-97DF5623CDB4.jpeg 43804A82-ECCB-4463-9F99-61D42F7AE1DB.jpeg C956E591-A0D3-4012-AF3C-126496E143FA.jpeg 80C4E503-88D2-4398-9327-620F31B79863.jpeg AA135278-55B2-48EE-AE43-9DF553CCBB9E.jpeg 43F8419A-C397-429D-AFE1-1A848765B10C.jpeg
 
OP
OP
Kershaw

Kershaw

Valuable Member
View Badges
Joined
Nov 11, 2015
Messages
2,439
Reaction score
1,473
Location
sacramento, ca
Rating - 0%
0   0   0
The tank stand is in its final resting place.

I cut a treadmill pad to fit under the stand just to have something between tile and steel stand.

I added some lights and a cabinet proximity sensor for the right side door which will be my electronic door once I make a board for it.
My next project will be to reroute my dedicated circuit from where my old tank was and move it behind the stand.
I also intend to add a box in the wall that’s used for washing machines so I can run 1/4” pex tubing for future AWC.
 

Attachments

  • 41CD4EBC-FEAF-4C64-9280-5E19D0B71CFA.jpeg
    41CD4EBC-FEAF-4C64-9280-5E19D0B71CFA.jpeg
    115.5 KB · Views: 85
  • EDEAD846-BCF9-4FE3-81E0-6946BE39AFA9.jpeg
    EDEAD846-BCF9-4FE3-81E0-6946BE39AFA9.jpeg
    146.2 KB · Views: 84
  • EB895C7D-5D4E-4E42-94DD-2F1E3432968A.jpeg
    EB895C7D-5D4E-4E42-94DD-2F1E3432968A.jpeg
    150.5 KB · Views: 84
  • A9D11FDD-F512-486F-A35F-D8460E0A9401.jpeg
    A9D11FDD-F512-486F-A35F-D8460E0A9401.jpeg
    83.7 KB · Views: 112
OP
OP
Kershaw

Kershaw

Valuable Member
View Badges
Joined
Nov 11, 2015
Messages
2,439
Reaction score
1,473
Location
sacramento, ca
Rating - 0%
0   0   0
finally got tank on stand, it was allot harder finding help then I thought it would be.
 

Attachments

  • A019ECDB-5529-4A7A-884D-7DE8A07A5D9F.jpeg
    A019ECDB-5529-4A7A-884D-7DE8A07A5D9F.jpeg
    152.9 KB · Views: 112
OP
OP
Kershaw

Kershaw

Valuable Member
View Badges
Joined
Nov 11, 2015
Messages
2,439
Reaction score
1,473
Location
sacramento, ca
Rating - 0%
0   0   0
Perfect fit. I really like that stand design. Looks like it goes up a bit to cover a sand bed on the front glass?
Yes it does, didn’t know that when ordered it. I intend to fill sand to be flush with stand so you don’t see all the stuff in sand bed.

I’m on the fence about making a diy reverse under gravel filter. My idea is to take starboard and drill very small holes every square inch. Using a small sicce pump to push water under it and out the holes.
 
OP
OP
Kershaw

Kershaw

Valuable Member
View Badges
Joined
Nov 11, 2015
Messages
2,439
Reaction score
1,473
Location
sacramento, ca
Rating - 0%
0   0   0
Mocking up my over flow. Never owned a 3 drain external before so I hope I’m doing it right
 

Attachments

  • A8F390BC-1F54-4EBC-B679-F24677549BB3.jpeg
    A8F390BC-1F54-4EBC-B679-F24677549BB3.jpeg
    183 KB · Views: 111
  • B9BB8597-8495-45B5-8174-9CE12EB078C5.jpeg
    B9BB8597-8495-45B5-8174-9CE12EB078C5.jpeg
    198.4 KB · Views: 107
OP
OP
Kershaw

Kershaw

Valuable Member
View Badges
Joined
Nov 11, 2015
Messages
2,439
Reaction score
1,473
Location
sacramento, ca
Rating - 0%
0   0   0
Couple of my larger rocks. Might get rest in tomorrow minus the live rock I’ll seed the rest with.
 

Attachments

  • E1091445-8490-4DB5-A921-1D7E9207B32B.jpeg
    E1091445-8490-4DB5-A921-1D7E9207B32B.jpeg
    249.3 KB · Views: 95
  • D2AF4E35-5505-4622-8627-8267123F87FC.jpeg
    D2AF4E35-5505-4622-8627-8267123F87FC.jpeg
    194.5 KB · Views: 100
  • 8EC903C6-B189-464D-AB58-65AFD1D3544A.jpeg
    8EC903C6-B189-464D-AB58-65AFD1D3544A.jpeg
    185.3 KB · Views: 89
  • CB13F383-D01C-4736-B4FC-A7ECCBCF79DC.jpeg
    CB13F383-D01C-4736-B4FC-A7ECCBCF79DC.jpeg
    167.5 KB · Views: 102
OP
OP
Kershaw

Kershaw

Valuable Member
View Badges
Joined
Nov 11, 2015
Messages
2,439
Reaction score
1,473
Location
sacramento, ca
Rating - 0%
0   0   0
What do you all think of the scape? I’m not totally satisfied with right side…
 

Attachments

  • 5BDCB711-F546-4F1C-AF4A-83D9DBDACEA8.jpeg
    5BDCB711-F546-4F1C-AF4A-83D9DBDACEA8.jpeg
    146.7 KB · Views: 105
  • 502DA2DE-4864-4FEF-88BB-3B1358DCDA64.jpeg
    502DA2DE-4864-4FEF-88BB-3B1358DCDA64.jpeg
    185.2 KB · Views: 112
  • 08B5842A-D306-4B0D-9F0B-22060F2B35A6.jpeg
    08B5842A-D306-4B0D-9F0B-22060F2B35A6.jpeg
    170.9 KB · Views: 93
  • ADD5C632-4642-4814-B9F9-4FC6BEADD09F.jpeg
    ADD5C632-4642-4814-B9F9-4FC6BEADD09F.jpeg
    213.4 KB · Views: 98
  • C9CCB265-87E2-41E4-80C3-4CA8E627C731.jpeg
    C9CCB265-87E2-41E4-80C3-4CA8E627C731.jpeg
    217.5 KB · Views: 87
  • 756BF5D1-1EF6-4041-8238-D7BAC4759916.jpeg
    756BF5D1-1EF6-4041-8238-D7BAC4759916.jpeg
    166.8 KB · Views: 95
OP
OP
Kershaw

Kershaw

Valuable Member
View Badges
Joined
Nov 11, 2015
Messages
2,439
Reaction score
1,473
Location
sacramento, ca
Rating - 0%
0   0   0
Few more small things done. Made a screen top. I really like how it fits in the bracing. Eventually I’d like to get a nice lid with feed door but this cost 11$ also installed lock line and put up my Nero 5s.
Plan on adding tunzes to the back wall before I get sps.

I’m behind on progress because I made my wife a wooden Xmas tree shelf thing that is now blocking the under house access where I have to go to add floor re-enforcement and run my electrical circuit and my water lines to where my mixing station will be.
 

Attachments

  • F4549A6E-935E-42F1-BBB2-E586937238E5.jpeg
    F4549A6E-935E-42F1-BBB2-E586937238E5.jpeg
    213.9 KB · Views: 82
  • B46B44E4-3AF1-44B8-8292-9A2B0DFB396C.jpeg
    B46B44E4-3AF1-44B8-8292-9A2B0DFB396C.jpeg
    166.1 KB · Views: 86
  • D48B4473-BA4F-454C-BFA5-D4A54DFF9C17.jpeg
    D48B4473-BA4F-454C-BFA5-D4A54DFF9C17.jpeg
    82.3 KB · Views: 92
OP
OP
Kershaw

Kershaw

Valuable Member
View Badges
Joined
Nov 11, 2015
Messages
2,439
Reaction score
1,473
Location
sacramento, ca
Rating - 0%
0   0   0
Build is going slower then @Smite build. But it’s coming along. Added HDPE plastic panel for electronics. This stuff is pretty easy to work with but a pain to get out of hole saw.
 

Attachments

  • E511583F-964A-41D3-B630-8D6D9CEA0C9F.jpeg
    E511583F-964A-41D3-B630-8D6D9CEA0C9F.jpeg
    111.1 KB · Views: 89
  • 661C277E-139A-4BB7-9EA6-C6C5AE7B8210.jpeg
    661C277E-139A-4BB7-9EA6-C6C5AE7B8210.jpeg
    121.4 KB · Views: 85
  • 41A8B467-32E0-440F-81A2-E40538E55784.jpeg
    41A8B467-32E0-440F-81A2-E40538E55784.jpeg
    90.5 KB · Views: 86
OP
OP
Kershaw

Kershaw

Valuable Member
View Badges
Joined
Nov 11, 2015
Messages
2,439
Reaction score
1,473
Location
sacramento, ca
Rating - 0%
0   0   0
Little more
On controller board
 

Attachments

  • 84D12BAD-A219-4BF5-8A31-4565EF137A86.jpeg
    84D12BAD-A219-4BF5-8A31-4565EF137A86.jpeg
    108.8 KB · Views: 82
  • 90747B71-1441-4E85-A1E4-F220A3BD3A10.jpeg
    90747B71-1441-4E85-A1E4-F220A3BD3A10.jpeg
    151.2 KB · Views: 95

Smite

2500 Club Member
View Badges
Joined
Oct 17, 2015
Messages
2,752
Reaction score
4,052
Location
Garden Grove
Rating - 0%
0   0   0
Build is going slower then @Smite build. But it’s coming along. Added HDPE plastic panel for electronics. This stuff is pretty easy to work with but a pain to get out of hole saw.
Man that is looking great. I like the illumination effect you'll have on the user side of the electrical wall. Very cool.

I ran conduit for years and have seen guys try to pry wood or metal out from the cutouts in the side of the hole saw. It's almost always easier to back the holesaw of the arbor and pop it out with the drill bit then thread the hole saw back on. Works great when it's something not too hard to drill like plastic, arcylic or wood.
 
OP
OP
Kershaw

Kershaw

Valuable Member
View Badges
Joined
Nov 11, 2015
Messages
2,439
Reaction score
1,473
Location
sacramento, ca
Rating - 0%
0   0   0
Man that is looking great. I like the illumination effect you'll have on the user side of the electrical wall. Very cool.

I ran conduit for years and have seen guys try to pry wood or metal out from the cutouts in the side of the hole saw. It's almost always easier to back the holesaw of the arbor and pop it out with the drill bit then thread the hole saw back on. Works great when it's something not too hard to drill like plastic, arcylic or wood.
Thanks, the illumination was not intentional lol. When I went to tap plastics. I told them I wanted the cheapest white 24x31x 1/4inch thick. For under 40$
Yeah taking the arbor off was the easiest way I found as well.
 
OP
OP
Kershaw

Kershaw

Valuable Member
View Badges
Joined
Nov 11, 2015
Messages
2,439
Reaction score
1,473
Location
sacramento, ca
Rating - 0%
0   0   0
Will hopefully get lights hung. Looks like I’ll get good coverage once I mount the lights
 

Attachments

  • EC9CFBE4-D7C8-4F95-9FF4-8ABCBCC1DF6A.jpeg
    EC9CFBE4-D7C8-4F95-9FF4-8ABCBCC1DF6A.jpeg
    310.3 KB · Views: 89
  • 0B2DF07C-886F-44FA-82F5-A12674E99451.jpeg
    0B2DF07C-886F-44FA-82F5-A12674E99451.jpeg
    133 KB · Views: 102
  • 9360EA8D-1577-4FB8-A380-8BA2E30FCE5E.jpeg
    9360EA8D-1577-4FB8-A380-8BA2E30FCE5E.jpeg
    133.6 KB · Views: 110

Creating a strong bulwark: Did you consider floor support for your reef tank?

  • I put a major focus on floor support.

    Votes: 26 39.4%
  • I put minimal focus on floor support.

    Votes: 16 24.2%
  • I put no focus on floor support.

    Votes: 22 33.3%
  • Other.

    Votes: 2 3.0%
Back
Top