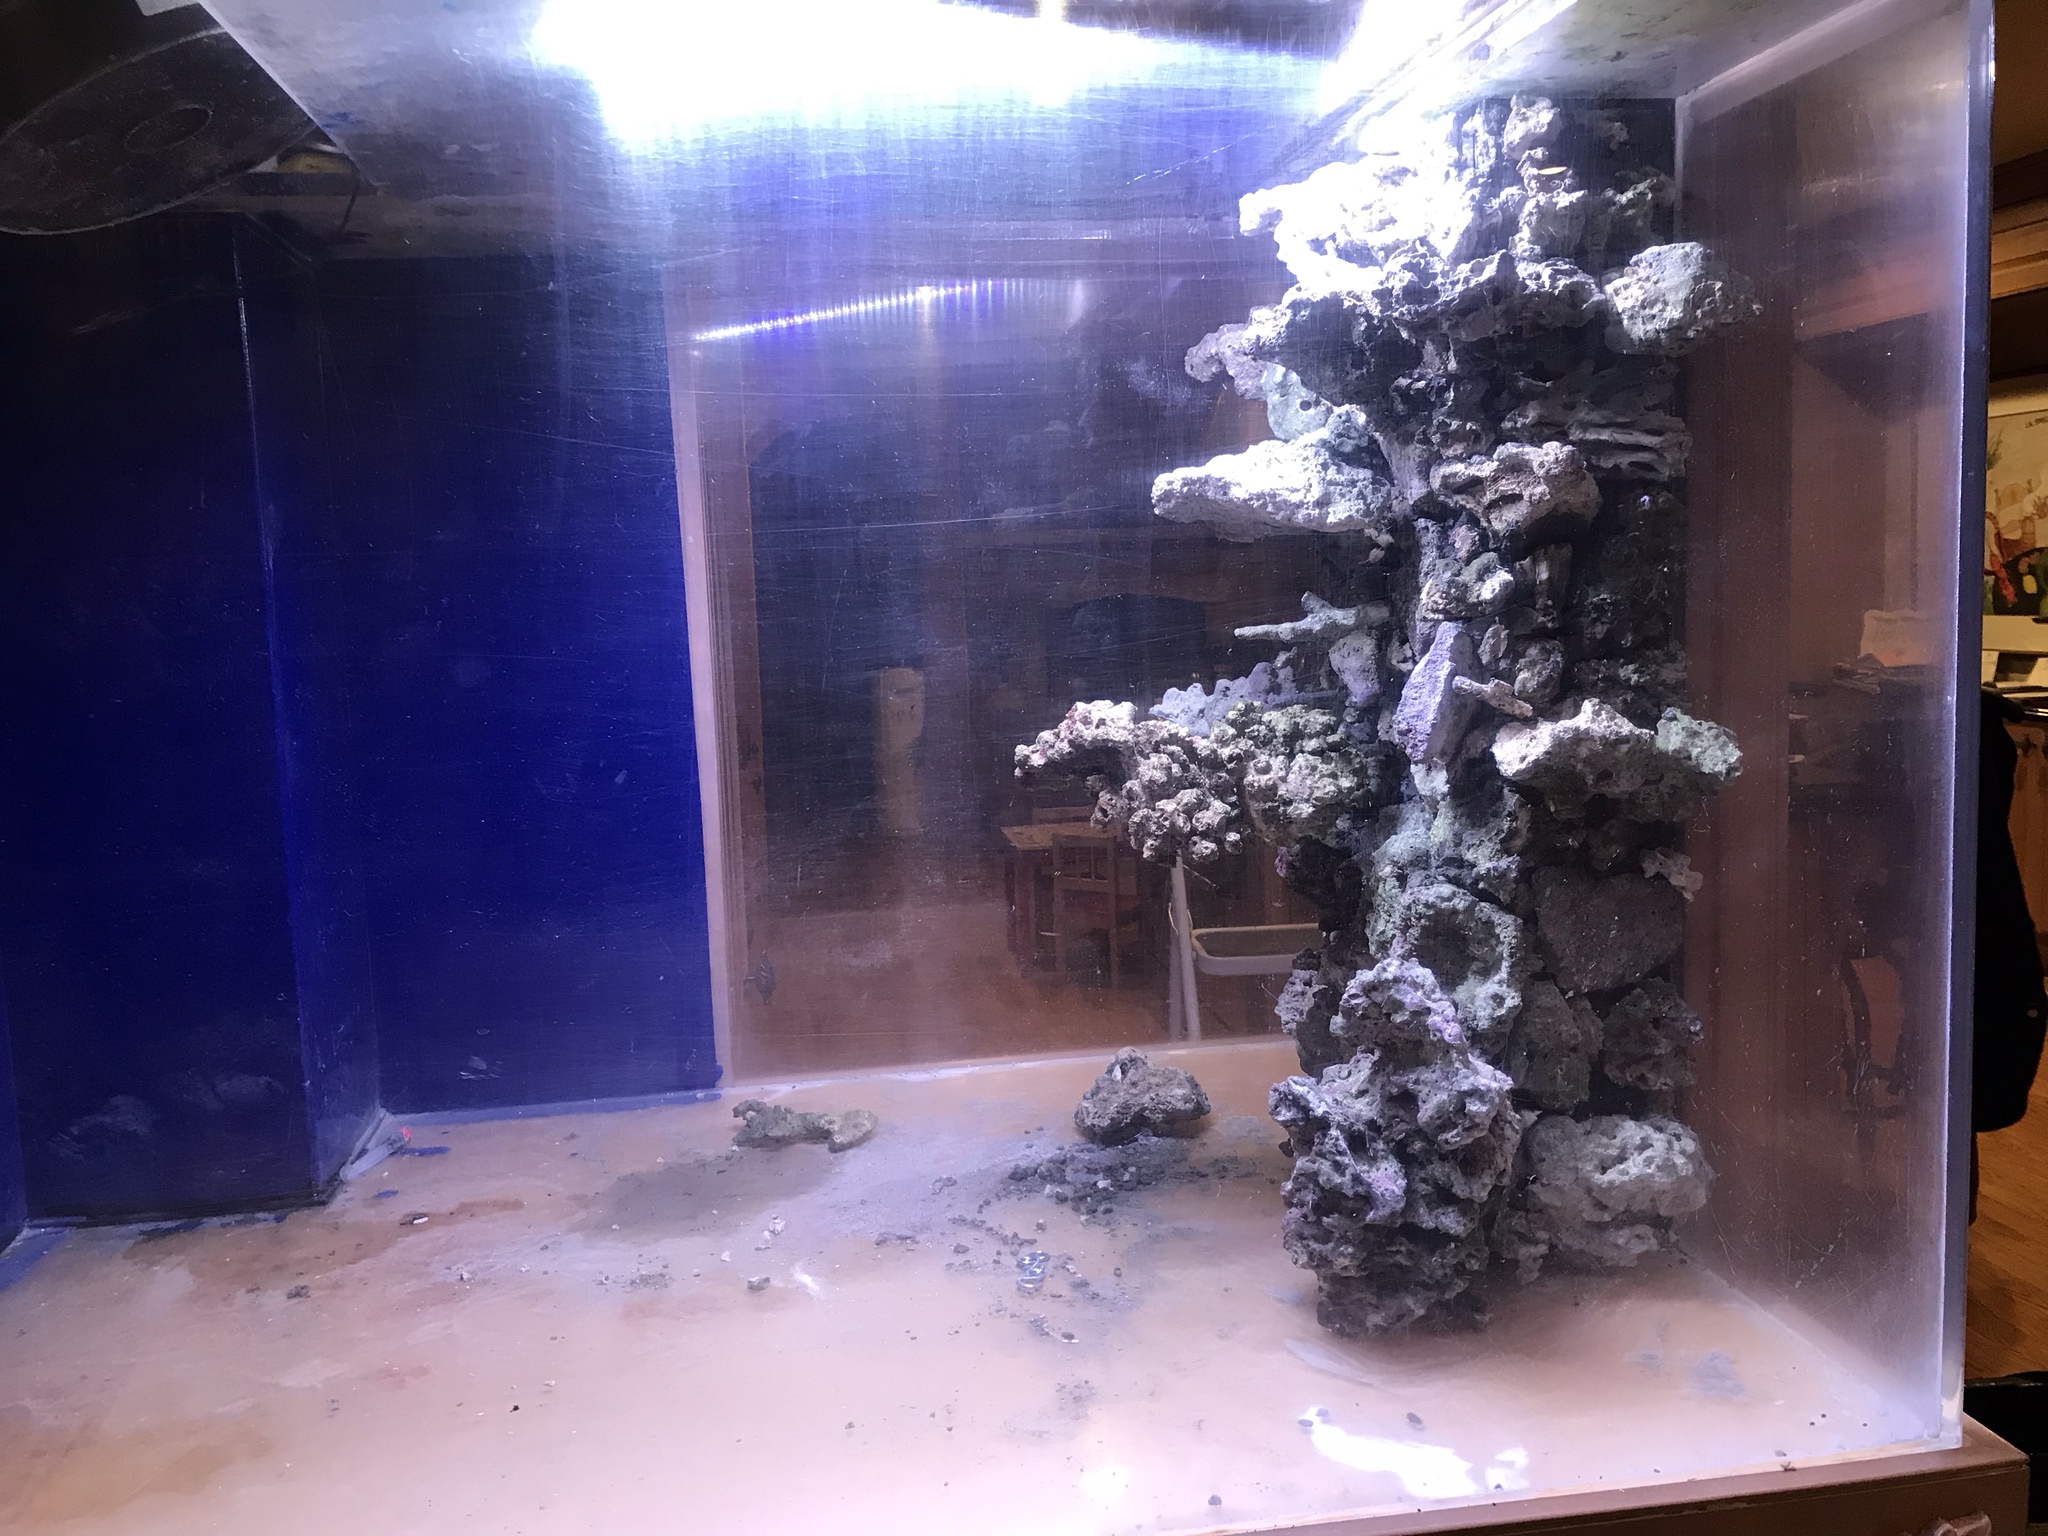
As part of a rehab/reboot of a large reef tank, I had to find a way to cover up what is essentially a tall 3-sided overflow box.
For years, in order to hide it (it definitely had to be hidden), I had stacked rocks up to the top. Now, physics being physics, it was difficult to go straight up without angling outward going to the base. That took up a lot of space. And physics being physics again, inevitably, the rocks would start to fall or slide. Here’s the reboot thread if you’re interested in following the project: https://www.reef2reef.com/threads/waking-up-from-the-nightmare-build-the-reboot.538918/
I finally came up with an idea to build a wall upon which I could mount rock shelves. If you have some live (or dry) rock lying around, this is a sub-$50 job.
Materials:
- plastic louvre (egg crate)
- hydraulic cement
- 1/8” acrylic sheet
- 1/2” (or so) acrylic rods
- Weldon 4 and plastic epoxy
- live/dry rock (sm-med pieces, shelf pieces, rubble pieces)
- drill and mortar bit sized for the acrylic rods
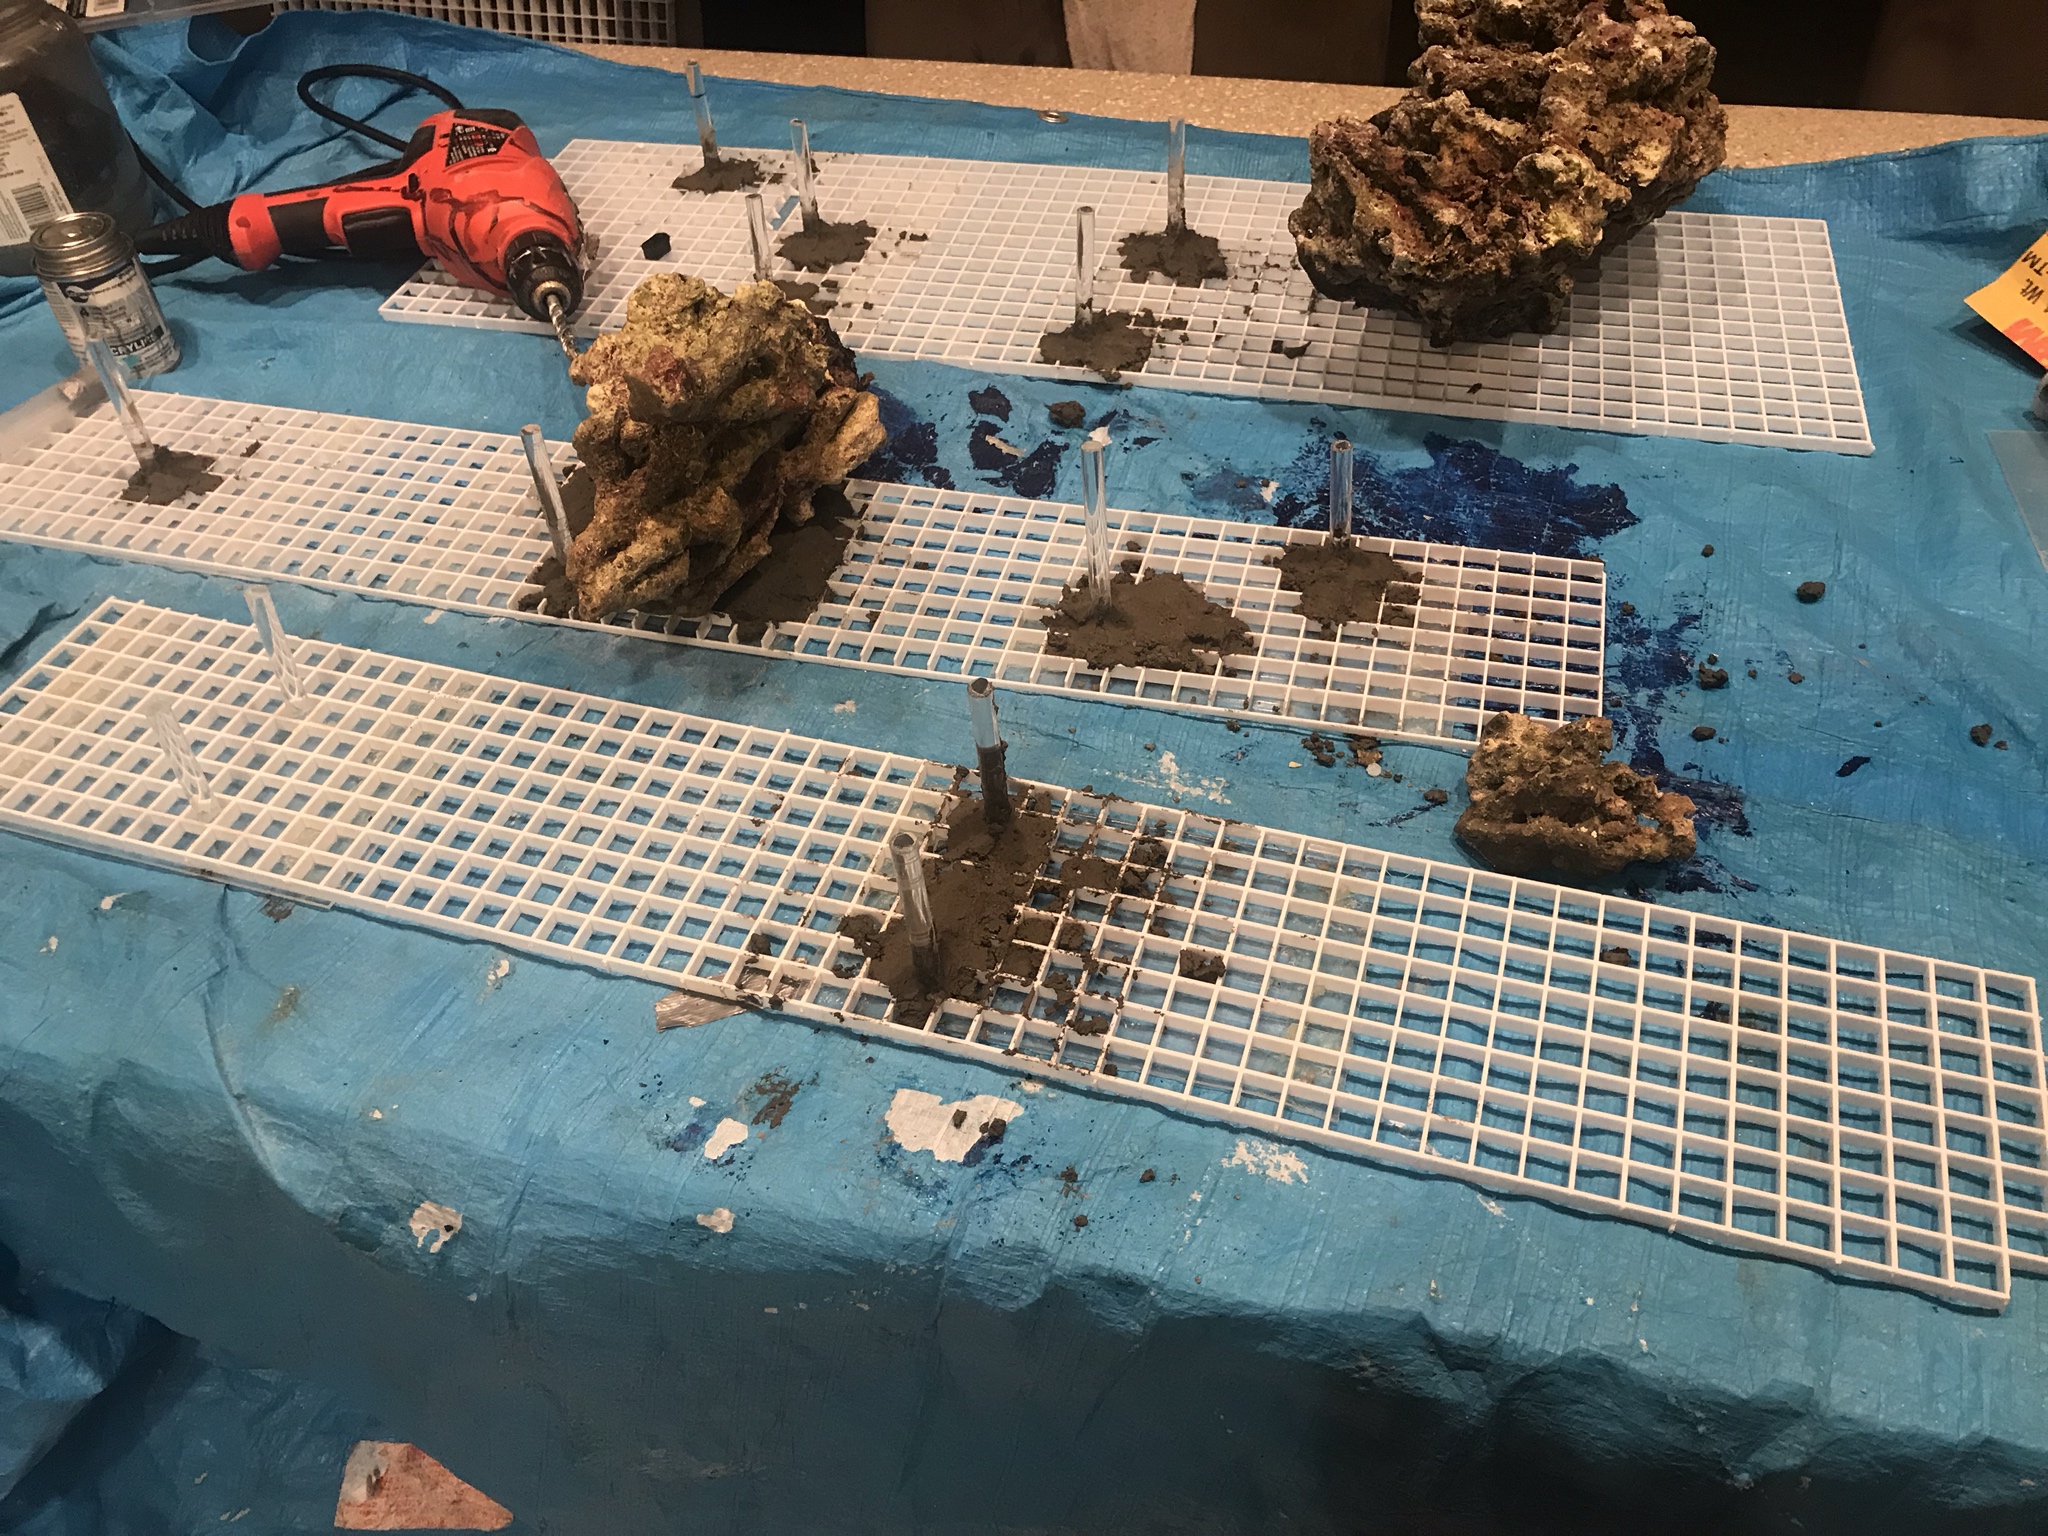
Pretty simple construction:
- cut some acrylic sheet pieces and use epoxy to attach them to the louvre where you want to build a shelf
- cut acrylic rods into 3-6” pieces, depending on size of the shelf pieces and weld them onto the acrylic pieces where you want shelves
- once cured, mix a small amount of hydraulic cement and pack it around the base of the rods (as extra reinforcement)
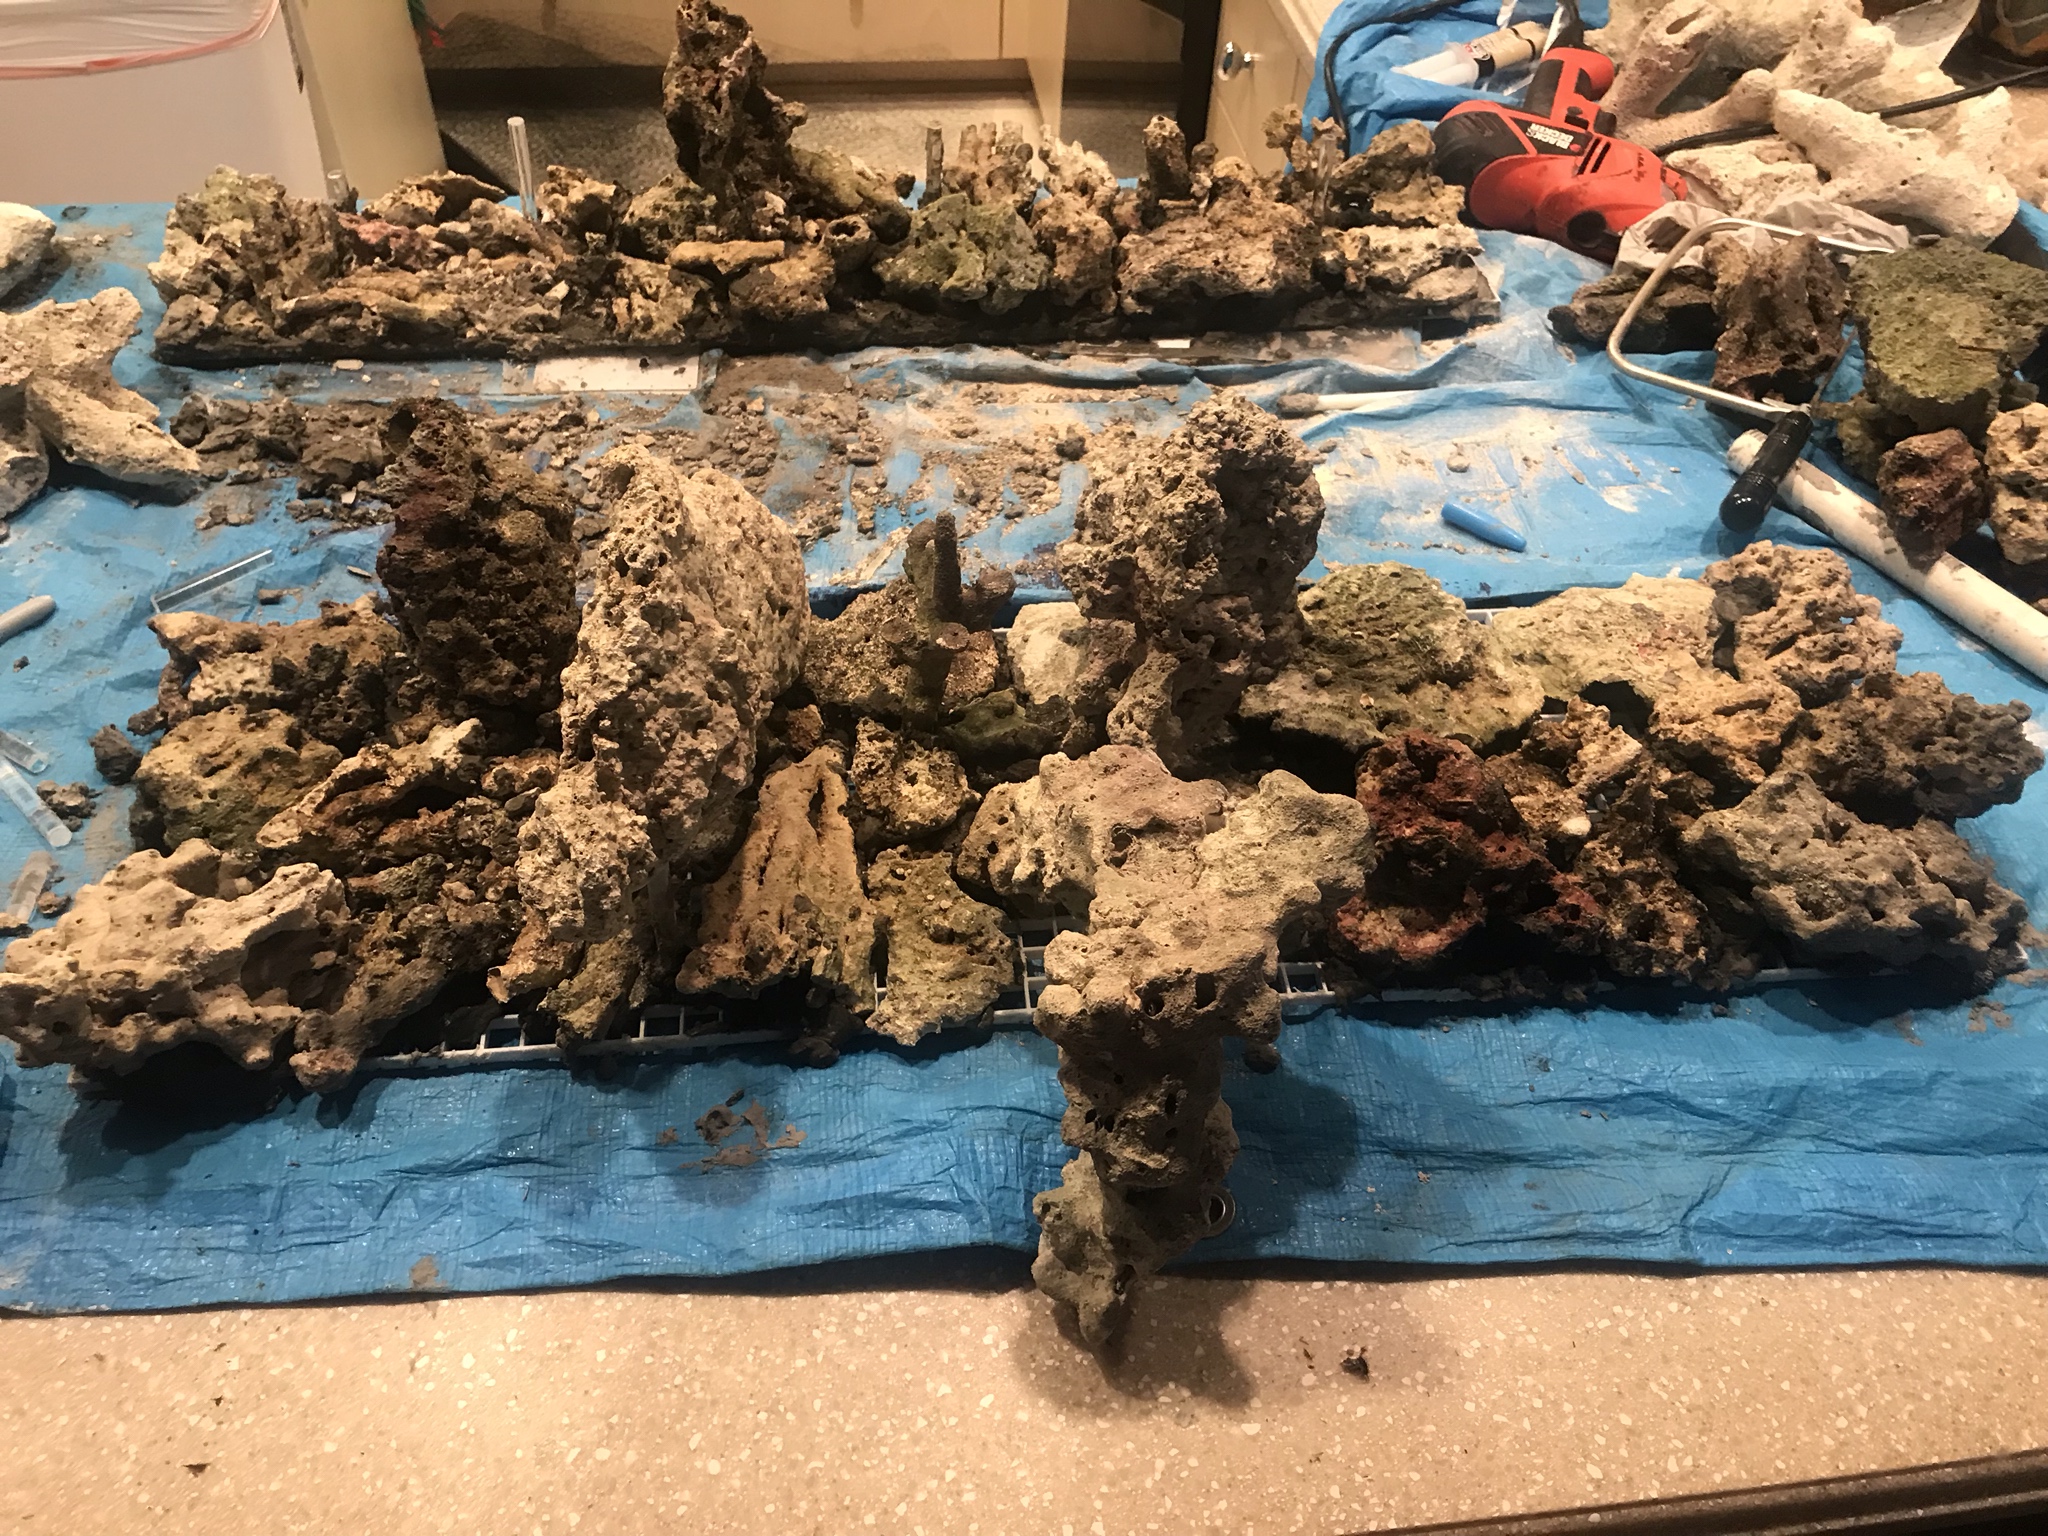
- organize the small to medium rock pieces to construct the wall
- mix roughly a large handful of cement at a time, at a viscosity of very thick pudding
- begin packing the cement onto the louvre, and pack rock pieces on at the same time. The cement begins to harden fairly quickly, so it helps to work fast
- as you go, use rubble and pulverized rock to cover exposed cement, as it is difficult to get algae/coralline growing on the cement
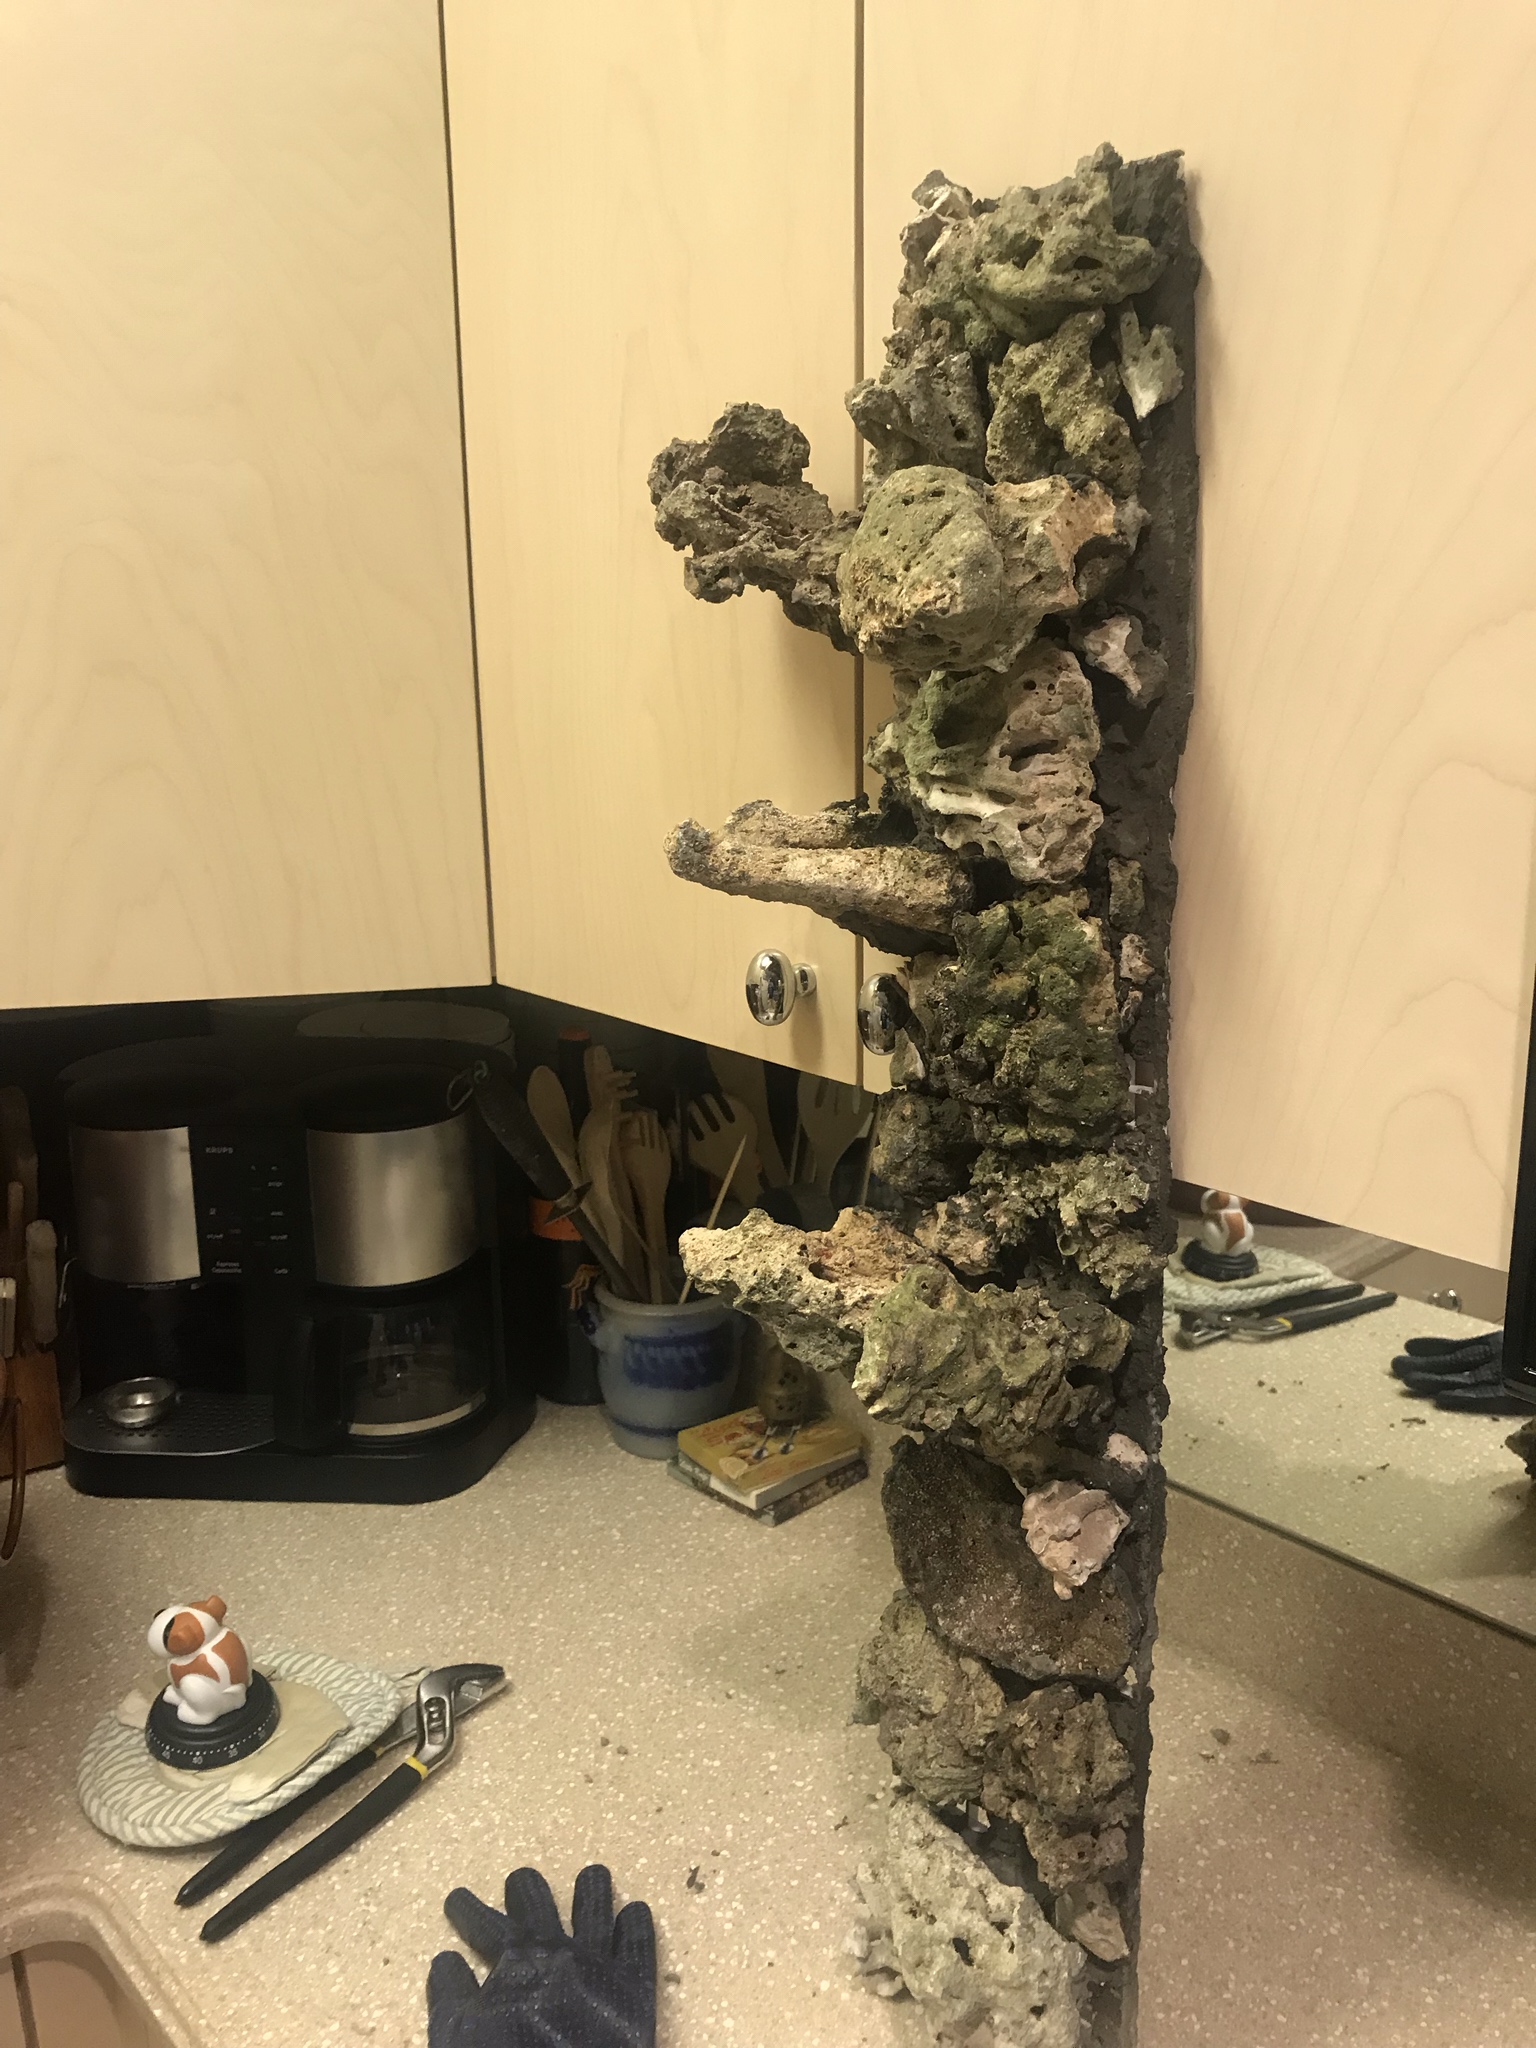
- work your way up the wall. Use small or very flat pieces where the shelves will be mounted.
- let it cure for ~24hrs
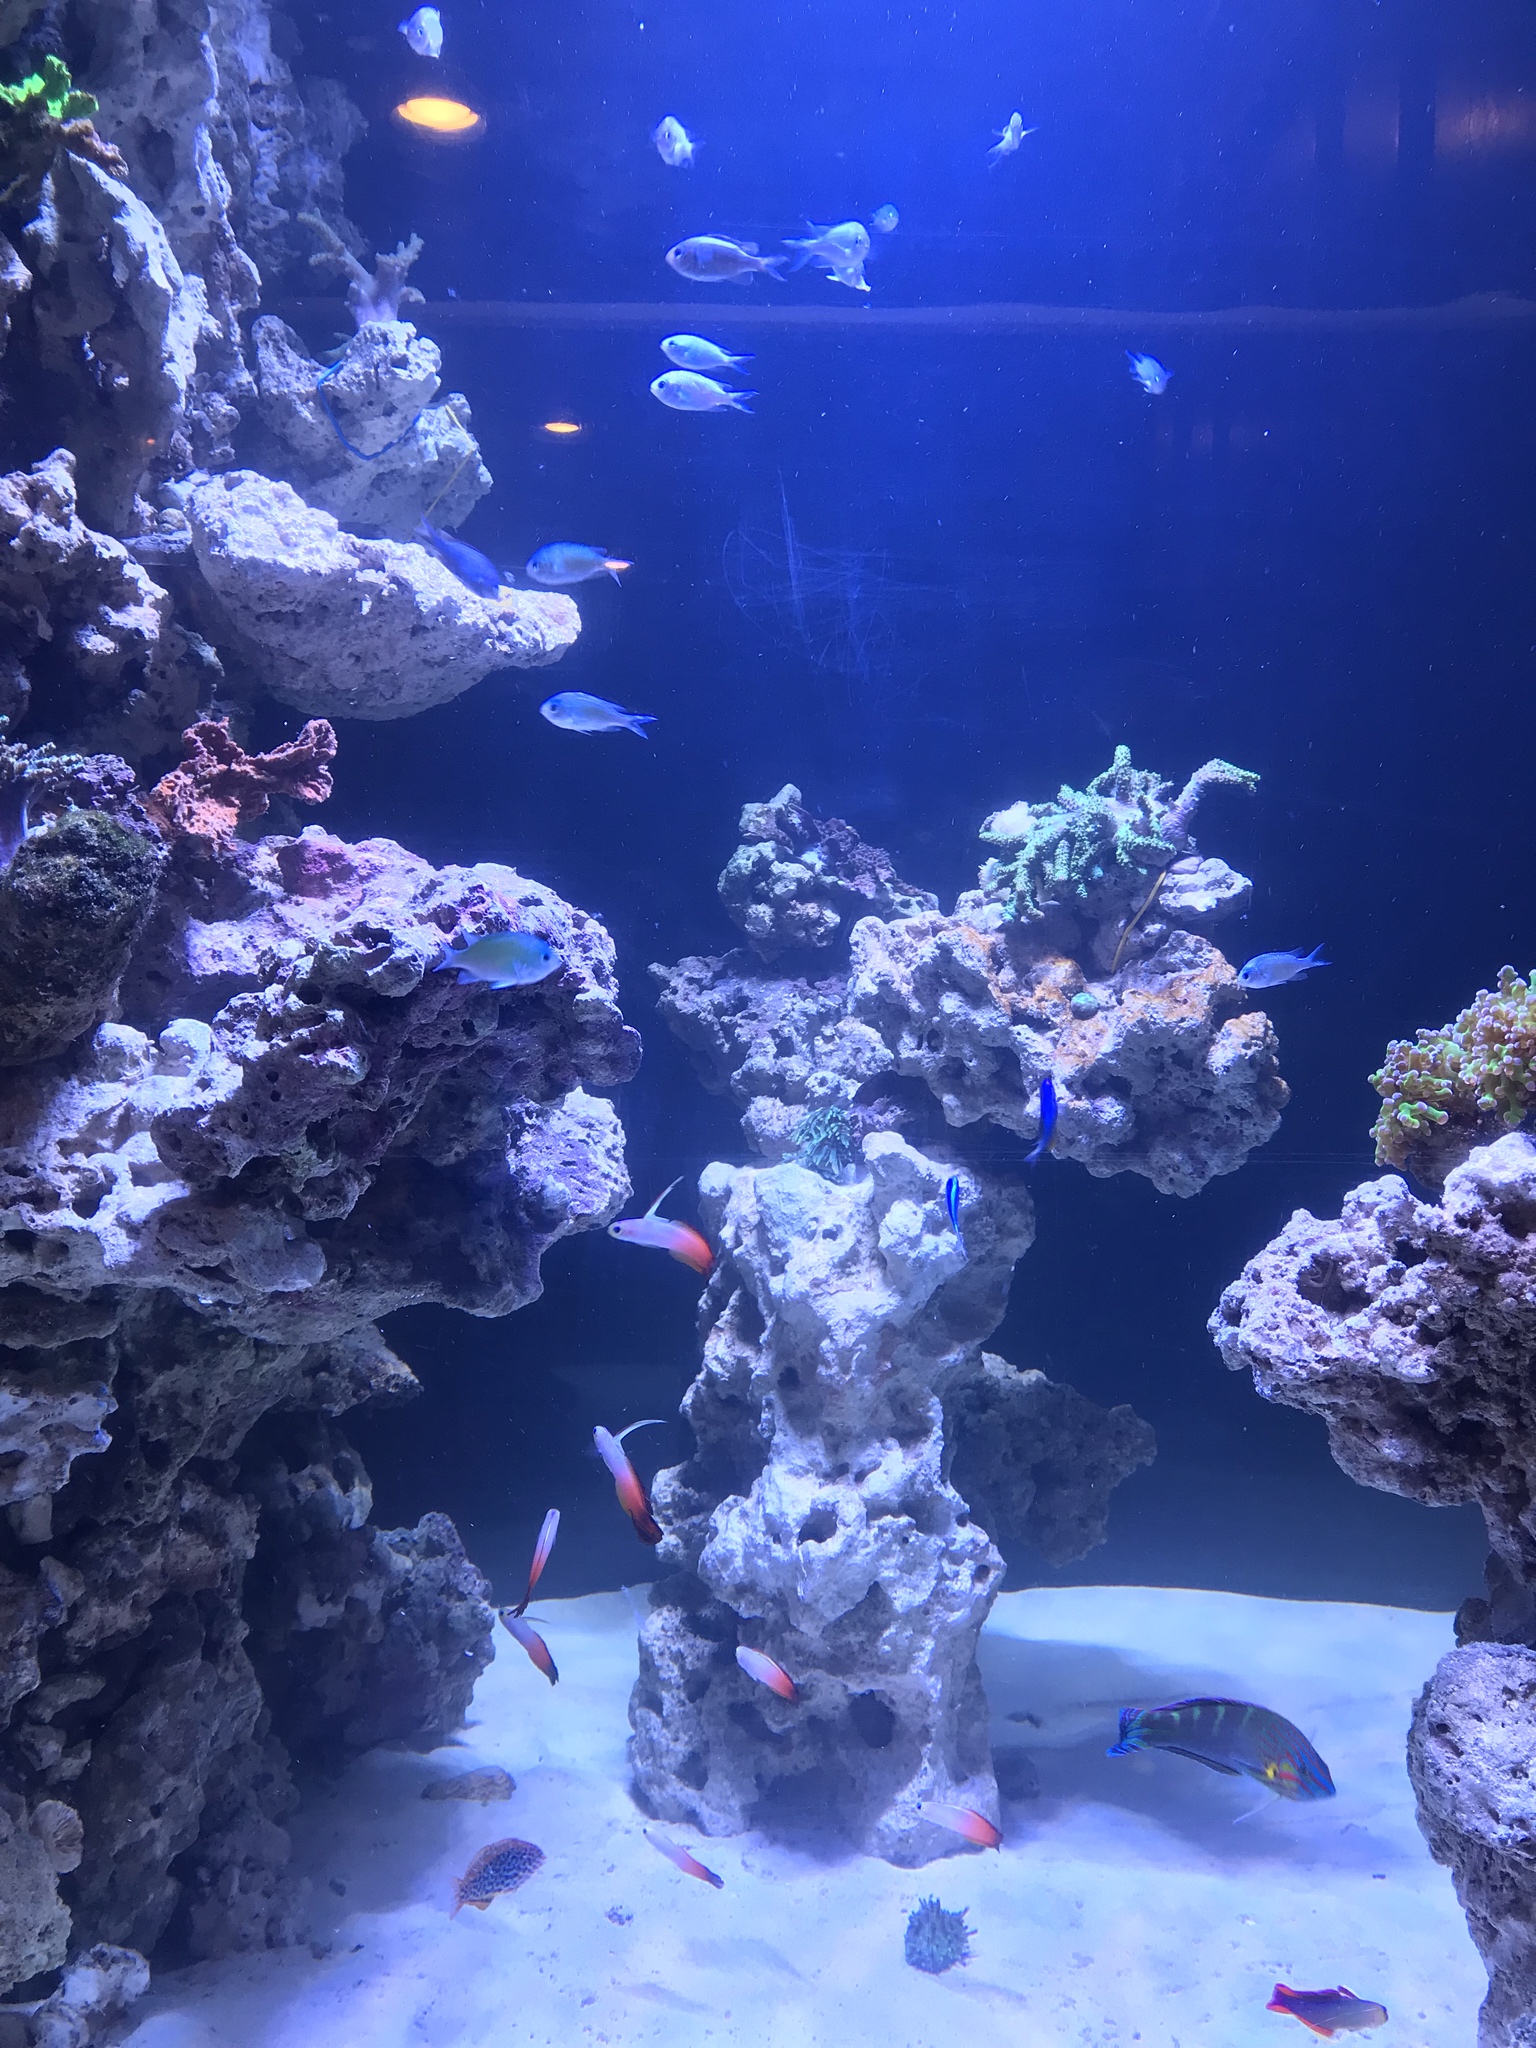
The walls end up being incredibly sturdy. The will stand freely if you construct a base, but they really should be bonded to the aquarium. I had the aquarium drained and dry, and I simply lathered the back of the wall with epoxy, stuck the walls on, and held them in place with PVC wedged between the wall and the aquarium panel.
I was really, really worried about the stability of the structure, but it is beyond solid. The acrylic rods are able to hold up shelf pieces over 10lbs with no problem at all.
For years, in order to hide it (it definitely had to be hidden), I had stacked rocks up to the top. Now, physics being physics, it was difficult to go straight up without angling outward going to the base. That took up a lot of space. And physics being physics again, inevitably, the rocks would start to fall or slide. Here’s the reboot thread if you’re interested in following the project: https://www.reef2reef.com/threads/waking-up-from-the-nightmare-build-the-reboot.538918/
I finally came up with an idea to build a wall upon which I could mount rock shelves. If you have some live (or dry) rock lying around, this is a sub-$50 job.
Materials:
- plastic louvre (egg crate)
- hydraulic cement
- 1/8” acrylic sheet
- 1/2” (or so) acrylic rods
- Weldon 4 and plastic epoxy
- live/dry rock (sm-med pieces, shelf pieces, rubble pieces)
- drill and mortar bit sized for the acrylic rods
Pretty simple construction:
- cut some acrylic sheet pieces and use epoxy to attach them to the louvre where you want to build a shelf
- cut acrylic rods into 3-6” pieces, depending on size of the shelf pieces and weld them onto the acrylic pieces where you want shelves
- once cured, mix a small amount of hydraulic cement and pack it around the base of the rods (as extra reinforcement)
- organize the small to medium rock pieces to construct the wall
- mix roughly a large handful of cement at a time, at a viscosity of very thick pudding
- begin packing the cement onto the louvre, and pack rock pieces on at the same time. The cement begins to harden fairly quickly, so it helps to work fast
- as you go, use rubble and pulverized rock to cover exposed cement, as it is difficult to get algae/coralline growing on the cement
- work your way up the wall. Use small or very flat pieces where the shelves will be mounted.
- let it cure for ~24hrs
The walls end up being incredibly sturdy. The will stand freely if you construct a base, but they really should be bonded to the aquarium. I had the aquarium drained and dry, and I simply lathered the back of the wall with epoxy, stuck the walls on, and held them in place with PVC wedged between the wall and the aquarium panel.
I was really, really worried about the stability of the structure, but it is beyond solid. The acrylic rods are able to hold up shelf pieces over 10lbs with no problem at all.