Hey R2R, let see your 80/20 projects and designs

jsker

Reefing is all about the adventure
View Badges
Joined
Apr 11, 2015
Messages
24,974
Reaction score
79,737
Location
Saint Louis
Rating - 0%
0   0   0
I ordered my for project that I design using 80/20 to suspend my light over my tank. One of the more difficult parts of designing the project was, what parts to us to connect and what part to use for movement.

PNG image.png


What advice can you give others ?
 
OP
OP
jsker

jsker

Reefing is all about the adventure
View Badges
Joined
Apr 11, 2015
Messages
24,974
Reaction score
79,737
Location
Saint Louis
Rating - 0%
0   0   0

Oregon Grown Reef

Valuable Member
View Badges
Joined
Sep 6, 2019
Messages
1,154
Reaction score
1,784
Location
Salem
Rating - 0%
0   0   0
I had Framing Tech design this for me. It's on the way this week. I'm using the tool hangers on their site to hang the light rack with the Aquatic Life hanging kit. This will allow me to move them forward and backwards as well as up and down. I'm using tbolts to attach the hanging kit to the wall brackets.

Screenshot_20220829-170829_Adobe Acrobat.jpg

Screenshot_20220829-170835_Adobe Acrobat.jpg
 
OP
OP
jsker

jsker

Reefing is all about the adventure
View Badges
Joined
Apr 11, 2015
Messages
24,974
Reaction score
79,737
Location
Saint Louis
Rating - 0%
0   0   0
OP
OP
jsker

jsker

Reefing is all about the adventure
View Badges
Joined
Apr 11, 2015
Messages
24,974
Reaction score
79,737
Location
Saint Louis
Rating - 0%
0   0   0
20210809_154937.jpg

As originally built last year.

20211010_133636.jpg


With the Kessil array as of last Fall. Wiring got a bit more tidied up after this shot, but I only see it when I drop a section of the below shroud.

20220806_163042.jpg

With the full PVC sheet shroud to minimize light spill.

Cheers,
Ray :cool:
Ray, nice design. did you use 1x1 for the drop downs?
 
OP
OP
jsker

jsker

Reefing is all about the adventure
View Badges
Joined
Apr 11, 2015
Messages
24,974
Reaction score
79,737
Location
Saint Louis
Rating - 0%
0   0   0
My simple light canopy. I needed something wall mounted, so came up with this.
20220430_124008.jpg


20220501_002627 (2).jpg

will add another LED bar to the back side soon.
How did you attach your lights to the 80/20?
 

LeftyReefer

2500 Club Member
View Badges
Joined
Jun 17, 2020
Messages
2,535
Reaction score
2,823
Location
Saginaw
Rating - 0%
0   0   0
How did you attach your lights to the 80/20?
I used the screws that came with the lights and (2) sets of the Aquatic Life 24" Hybrid Mounting Brackets.
I used (1) set of the bars, per light. The lights are Smat Farms.

For the LED bar, I just used the hinged brackets that it came with and mounted it to the 80/20 with t-nuts.
 
OP
OP
jsker

jsker

Reefing is all about the adventure
View Badges
Joined
Apr 11, 2015
Messages
24,974
Reaction score
79,737
Location
Saint Louis
Rating - 0%
0   0   0
I used the screws that came with the lights and (2) sets of the Aquatic Life 24" Hybrid Mounting Brackets.
I used (1) set of the bars, per light. The lights are Smat Farms.

For the LED bar, I just used the hinged brackets that it came with and mounted it to the 80/20 with t-nuts.
Thank you.

I have sets of 2" riser blocks coming with my parts. I am thinking of taping the block and adding a 4M stud, then screwing the tapped blocks with the studs into the lights. Depending on the size of the hole on the end of the 80/20 I might have to find an isert and then the stud.
 

rgulrich

Active Member
View Badges
Joined
Nov 27, 2018
Messages
236
Reaction score
432
Location
Marriottsville, MD
Rating - 0%
0   0   0
Ray, nice design. did you use 1x1 for the drop downs?
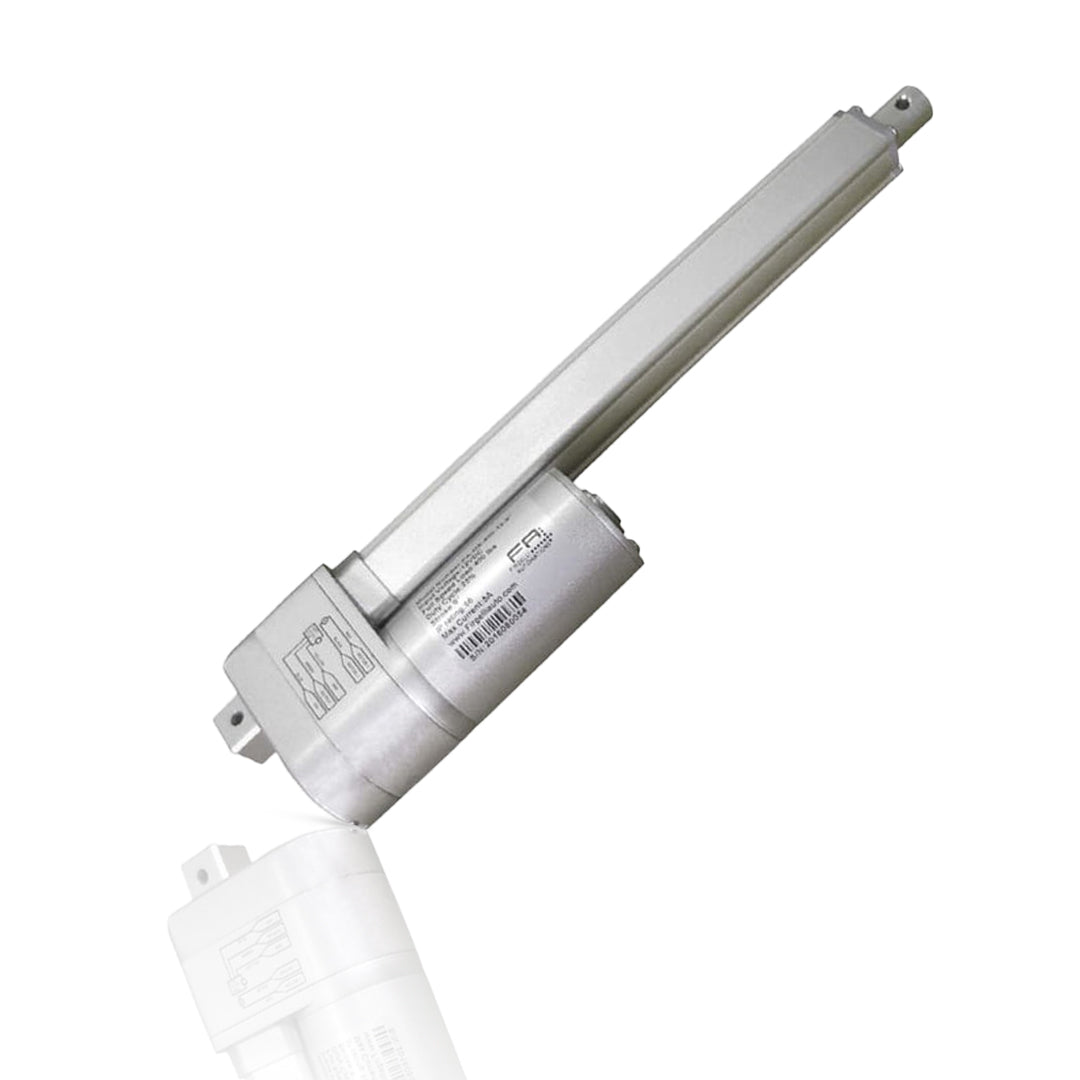
I used optical linear actuators for this design. I needed the ability to lift high enough to gain access all the way around the aquarium (you can view from all sides and the reef runs diagonally from the left rear to the right front).
Here's the link:
The "full kit" is also a remote control and whatnot, some jiggering (like so much of our hobby) to get things to fit in a *reliably stable* manner, and some fine tuning. I over-engineered the lift capacity (I tend to that...) as each of the actuators was rated at 200lbs and I outfitted it with four. Reason: maintain a level lift and lower along with redundancy (in case one fails things don't get wet).
This has worked very well for my needs and purposes.

Other things to note: the supports to the left against the wall are mounted into wall studs, and they are there for anti-torqueing only. The weight of the entire fixture is supported by the hooks and cables (adjusted by turnbuckles) torqued into ceiling trusses.

Push and hold a button and up it goes. Push and hold another button and lower again to your desired location.

Hope this helps.

Cheers,
Ray

p.s. I meant to add the frame itself is 1010 series, and the upper support is 1030. I can send a basic parts list if needed.
 
OP
OP
jsker

jsker

Reefing is all about the adventure
View Badges
Joined
Apr 11, 2015
Messages
24,974
Reaction score
79,737
Location
Saint Louis
Rating - 0%
0   0   0
I used optical linear actuators for this design. I needed the ability to lift high enough to gain access all the way around the aquarium (you can view from all sides and the reef runs diagonally from the left rear to the right front).
Here's the link:
The "full kit" is also a remote control and whatnot, some jiggering (like so much of our hobby) to get things to fit in a *reliably stable* manner, and some fine tuning. I over-engineered the lift capacity (I tend to that...) as each of the actuators was rated at 200lbs and I outfitted it with four. Reason: maintain a level lift and lower along with redundancy (in case one fails things don't get wet).
This has worked very well for my needs and purposes.

Other things to note: the supports to the left against the wall are mounted into wall studs, and they are there for anti-torqueing only. The weight of the entire fixture is supported by the hooks and cables (adjusted by turnbuckles) torqued into ceiling trusses.

Push and hold a button and up it goes. Push and hold another button and lower again to your desired location.

Hope this helps.

Cheers,
Ray

p.s. I meant to add the frame itself is 1010 series, and the upper support is 1030. I can send a basic parts list if needed.
Post them up please.

My goal of this thread, is to make the 80/20 easier and simpler for members.
 

rgulrich

Active Member
View Badges
Joined
Nov 27, 2018
Messages
236
Reaction score
432
Location
Marriottsville, MD
Rating - 0%
0   0   0
Starting off, 80/20 is basically an erector set with lots and lots of options. So, this is certainly not the be-all/end-all approach, but it serves my purpose and addresses all my system needs.
I picked up pretty much all of the 80/20 parts from Amazon, so those are the links provided.
The linear actuator parts are from Firgelli Automation, and the links to the parts I used are below the 80/20 list.
And then there's the Neptune power brick, lights, etc. that I'm sure everyone has their own preferences.
I really don't intend this to hijack your thread, and I certainly don't intend to make this a build thread (someday I might actually spend some time doing that...), so apologies if perceived as such.
Parts list is below, but I didn't count up the numbers of each required - just the parts needed to get there.

Parts lists:

80/20 Inc. (Light rack and hoist frame/support)

80/20 Inc, 1030-S, 10 Series Smooth 1" x 3" Extrusion x 96.5"


80/20 Inc, 1030, 10 Series, 1" x 3" Extrusion x 12"


Inside Corner Bracket, 8 Hole, for 10S


80/20 Inc, 4151, 10 Series 5 Hole 90 Degree Angled Flat Plate


80/20 Inc, 3393, 10 Series, Bolt Assembly: 1/4-20 x .5" Button Head Socket Cap Screw (BHSCS) and Slide-in Economy T-Nut (25 Pack)


80/20 Inc, 4119, 10 Series 2 Hole Inside Corner Bracket (10 Pack)


2 Hole Inside Gusset, for 10 Series


1010, 10 Series, 1" x 1" T-Slotted Aluminum Extrusion x 12" Long


80/20 Inc, 1010-Black, 10 Series, 1" x 1" Extrusion x 36"


80/20 Inc, 1020, 10 Series, 1" x 2" Extrusion x 12"


80/20 Inc, 1010, 10 Series, 1 Inch x 1 Inch Extrusion x 72 Inch Long


80/20 Inc, 4136, 10 Series 4 Hole Tall Inside Corner Gusset Bracket


80/20 Inc, 4140, 10 Series 5 Hole Tee Flat Plate


80/20 Inc, 3342, 10 Series, Flanged Button Head Socket Cap Screw (FBHSCS) 1/4-20 x .50" (25 Pack)


80/20 Inc, 3382, 10 Series 1/4-20 Centered Slide in Economy T-Nut (25 Pack)


80/20 Inc, 3393, 10 Series, Bolt Assembly: 1/4-20 x .5" Button Head Socket Cap Screw (BHSCS) and Slide-in Economy T-Nut (25 Pack)
https://www.amazon.com/gp/product/B00FDSEOWY/ref=ppx_yo_dt_b_search_asin_title?ie=UTF8&psc=1

80/20 Inc, 12314, 10 and 25 Series, Nylon Cable Tie Mounting Block, 25 Pack
https://www.amazon.com/gp/product/B01605660Q/ref=ppx_yo_dt_b_search_asin_title?ie=UTF8&psc=1

80/20 Inc, 2015, 10 Series, 1010 End Cap Black Plain (5 Pack)
https://www.amazon.com/gp/product/B00THD8NN2/ref=ppx_yo_dt_b_search_asin_title?ie=UTF8&psc=1

80/20 Inc, 3272, 10 Series, Black Push in Fastener (25 Pack)
https://www.amazon.com/gp/product/B00JAFOHPU/ref=ppx_yo_dt_b_search_asin_title?ie=UTF8&psc=1


Lots of ways to hang lights from these, from slide-ins such as these used with you bracket of choice:
80/20 2100 Tool Hanger, 3"L, (Pack of 2)
https://www.amazon.com/80-2100-Tool-Hanger-Pack/dp/B08JC83S24

To camera mounts like these:
VideoSecu 2 Pack 2-6 inch Adjustable Security Camera Metal Brackets Pan Tilt Wall Ceiling Mounts for CCTV CCD Box Body Camera Home Surveillance System 1SH
https://www.amazon.com/gp/product/B000IDBXBO/ref=ppx_yo_dt_b_search_asin_title?ie=UTF8&psc=1

The screws on these are conveniently the same ¼” as the 80/20’s, and makes for a secure mount with or without the gimbal. Just use the Economy T-nuts to secure the mount to the T-slot.
Let me know if you need the adaptor to mount a Kessil directly to this – I have link lying around here somewhere.

Firgelli Automation parts (hoist system):
Optical feedback Actuators (need optical to use the remote control to operate multiple actuators in synch) (get the stroke length and weight capacity you’ll need)
https://www.firgelliauto.com/products/optical-sensor-actuators

MB1-P Premium Mounting Bracket (to mount the actuator to the T-Slot; you'll need to pick up longer bolts to use these)
https://www.firgelliauto.com/products/mb1-p?variant=19021824838

Synchronous Control Board for Feedback Actuators (I use a four channel – four actuators)
https://www.firgelliauto.com/products/synchronous-control-board

2 Channel Remote Control System (so you can operate with a hand held remote, not a wired switch)
https://www.firgelliauto.com/products/two-channel-remote-control-system

Water Resistant LED Power Supply 12V 30A
https://www.firgelliauto.com/products/ac-to-dc-power-adaptor-12v-30a

Pics to follow in next post.

Cheers,
Ray :cool:
 
Last edited:

rgulrich

Active Member
View Badges
Joined
Nov 27, 2018
Messages
236
Reaction score
432
Location
Marriottsville, MD
Rating - 0%
0   0   0
Progression of the build (over a two year period...it's a hobby, after all):
20200502_173231.jpg

Hoist frame assembly (in progress) May20. I decided against using the winch to raise/lower the frame assembly. They work great for the barn to open the hayloft trapdoor, but didn't want to deal with a wired switch in this installation.
20200502_173238.jpg

Light frame build in progress. Lots of tweaking/measuring/making square, that sort of thing...but the basic plan is coming together at this point. Have a hoist frame with a means to raise and lower the light frame holding the lights.

20200530_193859.jpg

First operational test using linear actuators. Had some issues with keeping the light rack level, so went to an additional two actuators in synch.

20201220_145720.jpg

Some detail of light rack frame assembly. Originally designed to support six ViparSpectra (approximately 80lbs) and six Kessil A360WE. Moves and holds it all with no issues.

20210221_124954.jpg

Prior to my pulling the ViparSpectra and going to an all Kessil lighting system. May still shuffle things around a bit (yep, I still tinker), and this approach makes it easier for me to do that.:beaming-face-with-smiling-eyes:

Hope this helps in your adventures.

Cheers,
Ray:cool:
 

Hydrored

2500 Club Member
View Badges
Joined
Dec 25, 2019
Messages
4,010
Reaction score
15,220
Location
The great state of Texas
Rating - 0%
0   0   0
I did my adjustable light rack in 8020 and purchased my stand from framingtech. I'm happy with the outcome. Let me know if you have any questions-

Here was the first setup with GNC's prior to moving to Orpheks-

fb16480a-3331-4798-bcfc-f1ed3dffe59d-jpeg.2403722

83291284-6691-4bfc-94f3-6f17a5771bef-jpeg.2445122


Latest setup-

5297830b-2d30-4d60-a103-6683f0ac9a52-jpeg.2667153


I love 8020, options are pretty much limitless
 
Last edited:
OP
OP
jsker

jsker

Reefing is all about the adventure
View Badges
Joined
Apr 11, 2015
Messages
24,974
Reaction score
79,737
Location
Saint Louis
Rating - 0%
0   0   0
Progression of the build (over a two year period...it's a hobby, after all):
20200502_173231.jpg

Hoist frame assembly (in progress) May20. I decided against using the winch to raise/lower the frame assembly. They work great for the barn to open the hayloft trapdoor, but didn't want to deal with a wired switch in this installation.
20200502_173238.jpg

Light frame build in progress. Lots of tweaking/measuring/making square, that sort of thing...but the basic plan is coming together at this point. Have a hoist frame with a means to raise and lower the light frame holding the lights.

20200530_193859.jpg

First operational test using linear actuators. Had some issues with keeping the light rack level, so went to an additional two actuators in synch.

20201220_145720.jpg

Some detail of light rack frame assembly. Originally designed to support six ViparSpectra (approximately 80lbs) and six Kessil A360WE. Moves and holds it all with no issues.

20210221_124954.jpg

Prior to my pulling the ViparSpectra and going to an all Kessil lighting system. May still shuffle things around a bit (yep, I still tinker), and this approach makes it easier for me to do that.:beaming-face-with-smiling-eyes:

Hope this helps in your adventures.

Cheers,
Ray:cool:

I did my adjustable light rack in 8020 and purchased my stand from framingtech. I'm happy with the outcome. Let me know if you have any questions-

Here was the first setup with GNC's prior to moving to Orpheks-

fb16480a-3331-4798-bcfc-f1ed3dffe59d-jpeg.2403722

83291284-6691-4bfc-94f3-6f17a5771bef-jpeg.2445122


Latest setup-

5297830b-2d30-4d60-a103-6683f0ac9a52-jpeg.2667153


I love 8020, options are pretty much limitless
Wow, great designs

Thank you for posting your projects
 

Algae invading algae: Have you had unwanted algae in your good macroalgae?

  • I regularly have unwanted algae in my macroalgae.

    Votes: 44 35.2%
  • I occasionally have unwanted algae in my macroalgae.

    Votes: 27 21.6%
  • I rarely have unwanted algae in my macroalgae.

    Votes: 9 7.2%
  • I never have unwanted algae in my macroalgae.

    Votes: 10 8.0%
  • I don’t have macroalgae.

    Votes: 31 24.8%
  • Other.

    Votes: 4 3.2%
Back
Top