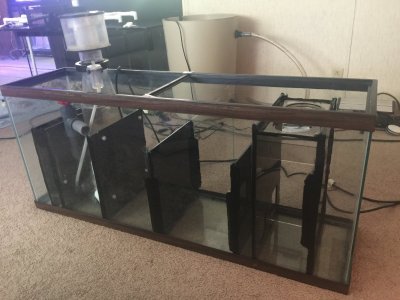
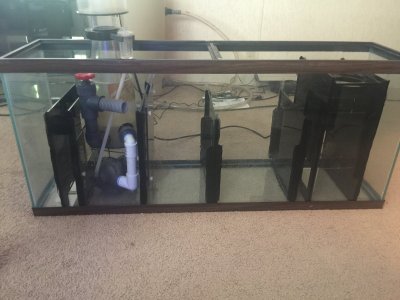
Huge score? Anyone familiar with Innovation Marine aquariums?

OP
OP
ThePlummer

ThePlummer

Active Member
View Badges
Joined
Feb 6, 2020
Messages
292
Reaction score
160
Rating - 0%
0   0   0
Ok, just ran into a bit of a snafu. The Reef Octopus RO PS 2000 INT that we found used for $110 has a pretty big footprint, with the pump mounted on the side. Unfortunately, it's about a inch too wide to turn sideways to minimize the skimmer chamber. But I think I've got a solution...

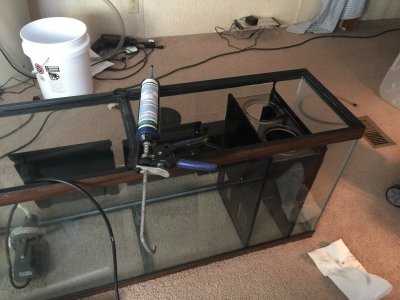
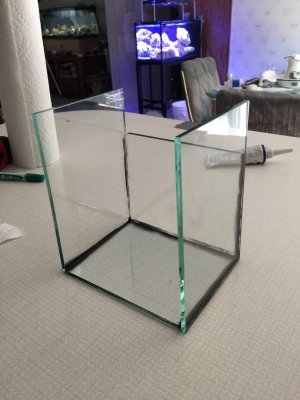
I've still got the glass partitions that I took out of the AIO section of the Innovative Marine 120. I'm going to make a shelf for the skimmer to sit on, and plumb the pump to sit under the skimmer. I can do this easily because the 55 gallon sump is so deep in the first place. All I have to do is cut one of the longer panels in half then glue up a three sided box.

I can't continue building the sump till I find male/female threaded elbows that will fit the skimmer. I think they are standard 1" threads, but they might be metric. I'll have to run to Lowe's to verify.

I also have to come across a glass cutter, as that's one tool in the arsenal that I have never needed yet. Those are cheap though, just got to find one locally.

Once this is made, then I can determine the size of the skimmer chamber, so I can maximize the RDSB and Refugium chambers.

One other thing, I'm looking to use Current USA Loop Bundle (2- 72" lights/brackets, 2-wave pumps, & 1 return pump). I will plumb for a second return pump for redundancy. This may be a while before I by it though. Now there's a bit of a problem with two of these pumps. The 55 is not quite wide enough for me to place two pumps facing each other with the strainers touching (to minimize the sump chamber), again to maximize the size of the RDSB & Refugium chambers.

I'm thinking that I can modify one of the strainer baskets by cutting it a bit short and just shoving them together, and still get them to fit, face to face. The size of the sump isn't going to matter because of the automatic ATO and Auto Water Change that I have planned.
 
OP
OP
ThePlummer

ThePlummer

Active Member
View Badges
Joined
Feb 6, 2020
Messages
292
Reaction score
160
Rating - 0%
0   0   0
The whole plan with this build is to be very high tech, without using a controller. Everything I'm building is designed to be as maintenance free and easy to do as possible, with multiple layers of redundancy in protection from failure.
 
OP
OP
ThePlummer

ThePlummer

Active Member
View Badges
Joined
Feb 6, 2020
Messages
292
Reaction score
160
Rating - 0%
0   0   0
Another update: filter box is in.

image.jpg
 
OP
OP
ThePlummer

ThePlummer

Active Member
View Badges
Joined
Feb 6, 2020
Messages
292
Reaction score
160
Rating - 0%
0   0   0
with regards to the Loop bundle return pumps. This is on the short list. Ultimately, 2 of them.
1593735554788.png

1593734707816.png


1593734749932.png


These pumps are fully integrate-able with the wave pumps and lights... I guess I lied, they are computer controlled... They also have a feature that is a bit gimmicky, in that you can hook up a pair of computer speakers to them and have an audio experience with your display tank. Who knows, it might be a bit of fun....

I am going to have to modify one of both of the strainers though, in order to get them to fit in the 55 facing each other though. Shouldn't be too much of a problem....

But heck, isn't this part of the fun in this hobby? Figuring out how to solve problems and get really creative...
 
Last edited:

Ippyroy

Defeater of Dinos
View Badges
Joined
Nov 19, 2019
Messages
5,504
Reaction score
33,187
Location
West Yellowstone
Rating - 0%
0   0   0
Ok, just ran into a bit of a snafu. The Reef Octopus RO PS 2000 INT that we found used for $110 has a pretty big footprint, with the pump mounted on the side. Unfortunately, it's about a inch too wide to turn sideways to minimize the skimmer chamber. But I think I've got a solution...

I've still got the glass partitions that I took out of the AIO section of the Innovative Marine 120. I'm going to make a shelf for the skimmer to sit on, and plumb the pump to sit under the skimmer. I can do this easily because the 55 gallon sump is so deep in the first place. All I have to do is cut one of the longer panels in half then glue up a three sided box.

I can't continue building the sump till I find male/female threaded elbows that will fit the skimmer. I think they are standard 1" threads, but they might be metric. I'll have to run to Lowe's to verify.

I also have to come across a glass cutter, as that's one tool in the arsenal that I have never needed yet. Those are cheap though, just got to find one locally.

Once this is made, then I can determine the size of the skimmer chamber, so I can maximize the RDSB and Refugium chambers.

One other thing, I'm looking to use Current USA Loop Bundle (2- 72" lights/brackets, 2-wave pumps, & 1 return pump). I will plumb for a second return pump for redundancy. This may be a while before I by it though. Now there's a bit of a problem with two of these pumps. The 55 is not quite wide enough for me to place two pumps facing each other with the strainers touching (to minimize the sump chamber), again to maximize the size of the RDSB & Refugium chambers.

I'm thinking that I can modify one of the strainer baskets by cutting it a bit short and just shoving them together, and still get them to fit, face to face. The size of the sump isn't going to matter because of the automatic ATO and Auto Water Change that I have planned.
I would also make sure to sand the edges after cutting the glass. It will be extra sharp and a sure way to lose a finger. Sounds amazing so far
 
OP
OP
ThePlummer

ThePlummer

Active Member
View Badges
Joined
Feb 6, 2020
Messages
292
Reaction score
160
Rating - 0%
0   0   0
BTW, I have to say.... This Exotic Marine Sump kit is really nice... I can't say too much for their staying in contact, and answering questions though.

He did however, make two custom panel sections for the RDSB. He didn't exactly understand what I was asking for at first, but he got it quickly....
 
OP
OP
ThePlummer

ThePlummer

Active Member
View Badges
Joined
Feb 6, 2020
Messages
292
Reaction score
160
Rating - 0%
0   0   0
I would also make sure to sand the edges after cutting the glass. It will be extra sharp and a sure way to lose a finger. Sounds amazing so far
No doubt... These pieces are already sharp anyway... When I removed them, I could tell that Innovative Marine didn't clean up the edges one bit....I'm guessing they never thought anyone would be removing them..... Hehe...

And thanks for the compliment.
 
OP
OP
ThePlummer

ThePlummer

Active Member
View Badges
Joined
Feb 6, 2020
Messages
292
Reaction score
160
Rating - 0%
0   0   0
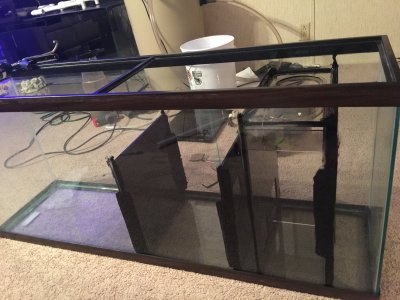
RDSB is in. I chose to make the divider between the RDSB and the fuge right under the center brace of the 55. I figure this will give me a place to attach a light deflector to prevent excess light spilling out of the fuge into the RDSB. Algae growth in the fuge would be a bad thing.

image.jpg
 
OP
OP
ThePlummer

ThePlummer

Active Member
View Badges
Joined
Feb 6, 2020
Messages
292
Reaction score
160
Rating - 0%
0   0   0
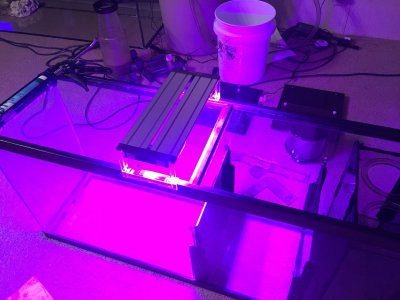
I’ve decided to make the sump 5” internal dimensions. And it looks like the skimmer will need to be 10”. That leaves me 8 1/2” for the fuge. A little smaller than I had hoped for, but I’m lighting it from the top with a Finnex light ( it’s like this thing was made for a 55) and lit from the bottom with a Tunze submersible fuge light. These will be on a simple $9.00 electronic timer from Harbor Freight. The ATO will be monitored with one of these also.

image.jpg
 
OP
OP
ThePlummer

ThePlummer

Active Member
View Badges
Joined
Feb 6, 2020
Messages
292
Reaction score
160
Rating - 0%
0   0   0
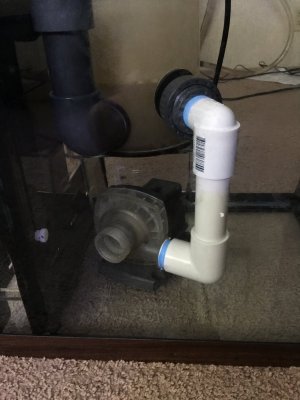
Just had a revelation... How dumb am I.... I've been struggling with how I'm going to get two of those pumps to fit in a decidedly small sump, because a 55 isn't wide enough to accommodate both. Well, since I'm a plumber by trade, the thought came to me, why not stand the pumps up on their tail, and just screw a elbow on the discharge, pointing up? That'll give me plenty of room....Could probably get a third one in there too.... LOL.
 
OP
OP
ThePlummer

ThePlummer

Active Member
View Badges
Joined
Feb 6, 2020
Messages
292
Reaction score
160
Rating - 0%
0   0   0
Woo Hoo, just checked the Current USA Loop bundle... We hadn't pulled the trigger on that just yet. Good thing we did, just got two lights, two wave pumps, & return pump and saved $116.00.... Gotta love sales... Ohh, and got $52.00 in rewards....
 
OP
OP
ThePlummer

ThePlummer

Active Member
View Badges
Joined
Feb 6, 2020
Messages
292
Reaction score
160
Rating - 0%
0   0   0
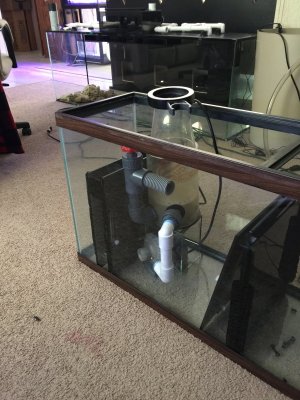
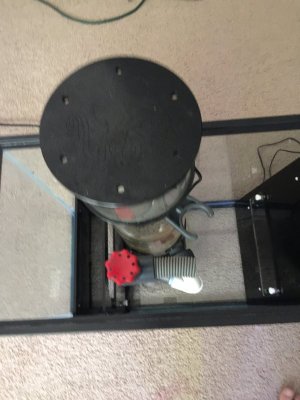
So, what do you do when your skimmer is too big for your sump? Make it smaller... Here's the relocated pump. Now I can finish installing the last baffle between the fuge and skimmer chamber.

image.jpg image.jpg image.jpg

I really like that the skimmer cup is now above the top of the aquarium. Gonna make for a very clean, easy lid. Not to mention easy maintenance.
 
OP
OP
ThePlummer

ThePlummer

Active Member
View Badges
Joined
Feb 6, 2020
Messages
292
Reaction score
160
Rating - 0%
0   0   0
Lest baffle installed. Gotta wait a while before I finish assembling the bubble trap.

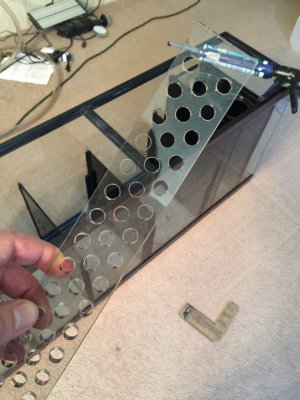
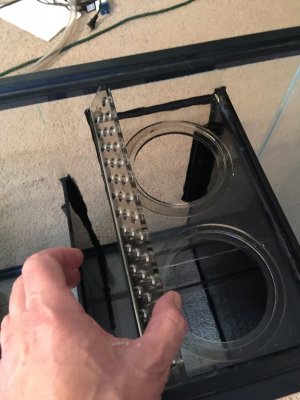
I’ve got one piece of the kit left. And for the life of me, I can’t figure out where it goes. The kit didn’t come with instructions, but there’s a pretty good video on YouTube. Sadly it doesn’t explain or install this piece.

The only thing I can figure out is it goes above the filter sock chamber.

Any thoughts or suggestions?

image.jpg image.jpg

I'm thinking mabye the second picture? Doesn't fit vertically, but maybe it's not supposed to, because Exotic Marine claims a 'silent' sump. This position would allow water to flow through the holes, without the water squirting and crashing into the next chamber.
 

codycolina707

Active Member
View Badges
Joined
Jun 9, 2019
Messages
473
Reaction score
389
Rating - 0%
0   0   0
Woo Hoo, just checked the Current USA Loop bundle... We hadn't pulled the trigger on that just yet. Good thing we did, just got two lights, two wave pumps, & return pump and saved $116.00.... Gotta love sales... Ohh, and got $52.00 in rewards....
I would've skipped the current usa lights they are alright but I gave mine away after about 1 month to my dad for a freshwater tank I just don't like being limited by how underpowered they are ya they might grow sps 2 inches away from the light but things like lps in the sandbed I doubt
 
OP
OP
ThePlummer

ThePlummer

Active Member
View Badges
Joined
Feb 6, 2020
Messages
292
Reaction score
160
Rating - 0%
0   0   0
I would've skipped the current usa lights they are alright but I gave mine away after about 1 month to my dad for a freshwater tank I just don't like being limited by how underpowered they are ya they might grow sps 2 inches away from the light but things like lps in the sandbed I doubt
I’ve got their lights on a 14” deep aquarium and the corals at the bottom are growing well. This display is only 16” deep so I’ll be just fine.

If not, I may supplement with a 50/50 T5.
 

codycolina707

Active Member
View Badges
Joined
Jun 9, 2019
Messages
473
Reaction score
389
Rating - 0%
0   0   0
I’ve got their lights on a 14” deep aquarium and the corals at the bottom are growing well. This display is only 16” deep so I’ll be just fine.

If not, I may supplement with a 50/50 T5.
Oh didn't see it was so shallow yeah you will probably be fine I had mine on a 24 deep
 
OP
OP
ThePlummer

ThePlummer

Active Member
View Badges
Joined
Feb 6, 2020
Messages
292
Reaction score
160
Rating - 0%
0   0   0
Ugg! I despise it when I make a mistake. I accidentally installed the last baffle, between the refugium and the skimmer chamber, upside down. Luckily I caught the mistake before the silicone was totally secured, as it was really difficult to remove.

The silicone I got from BRS is some really good stuff, however, here it's been two days, and the silicone hasn't set up enough for me to rub it off the acrylic panel.

I think I made this mistake because I got taken off my mission of building the sump, when I had to redesign the skimmer to make a smaller footprint, so I could minimize the skimmer chamber to maximize the size of the fuge, when I went back to the sump, I totally spaced on watching what I was doing there.

Oh well, I managed to get more of the rocks sawed in half, to make the background, and I managed to take the time to finish cutting the steel arch supports for the stand. Now I have to weld and paint them and they'll be done, ready to install in the stand.

Aside from installing the last panel in the sump, I'm going to paint the whole back side of the sump, for aesthetics to hide the myriad of wires, pipes, and tubing, for a cleaner look, as well as keeping the fuge light, in the fuge. Don't want light to spill over into the RDSB and skimmer chambers, algae growth there would be a bad thing.

Once the sump is installed, I'll begin making light louvers to keep the light only in the fuge. I've got some neat ideas there, but I'm having trouble finding the panels that I want to use.

At one time Home Depot sold some plastic greenhouse panels that looked like corrugated cardboard, but larger spaces between the faces. I've checked around, and No, Home Depot doesn't carry the panels anymore, and I'm having trouble sourcing them on the internet. Anyone out there reading this blog know what I'm talking about and where to source these panels?
 

High pressure shells: Do you look for signs of stress in the invertebrates in your reef tank?

  • I regularly look for signs of invertebrate stress in my reef tank.

    Votes: 36 31.6%
  • I occasionally look for signs of invertebrate stress in my reef tank.

    Votes: 27 23.7%
  • I rarely look for signs of invertebrate stress in my reef tank.

    Votes: 21 18.4%
  • I never look for signs of invertebrate stress in my reef tank.

    Votes: 30 26.3%
  • Other.

    Votes: 0 0.0%
Back
Top