Kattz's 400 Stand-alone and Fish Room

Status
Not open for further replies.

kattz

Old surfer dude
View Badges
Joined
Nov 6, 2011
Messages
163
Reaction score
105
Location
Not where I want to be...
Rating - 0%
0   0   0
Greetings!

Well, we have officially started the 300g system. I will be posting pics up as we move along. Note: it's gonna take a while!

Basics:

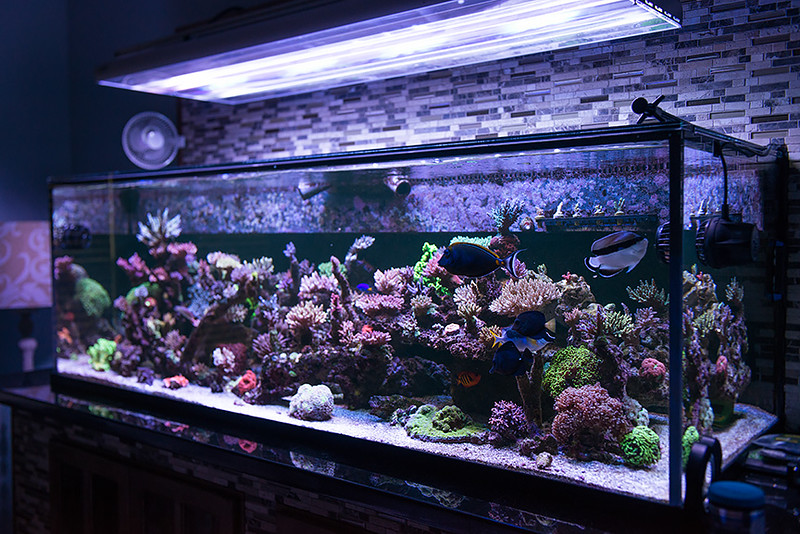
This is a 300g Deep Dimension DT. It is on a DIY stand.
The stand will be tile-faced and have no doors on the front.
There will be an 8" granite surround around the base of the tank.
Substrate or bare-bottom is TBD.

There is a separate fish room holding the sump, reactors, skimmer, frag tank, water change system, Apex, 'fuge, and DSB filter. This room is started and the drywall is complete.

Regarding the DT, we are installing an Apex-controlled shadowbox on the rear of the tank. Blue LED lighting synced to the tank lighting cycle.

Because of this, I want the tank corner overflows completely eliminated. I plan on using a Barracuda return pump to two OM 4-ways - one 4-way will feed water at the top four corners of the tank and the second four-way will feed the bottom via the original return openings. Return will be via two 16" Synergy Reef shadow overflows on the SIDES of the tank.

I am open to advice on how to plumb the above! I plan on a Y-check valve with true-union ball valves above and below the check valve to allow maintenance. The plan is to hide the outputs at the four corners of the tank in dry rock cut to fit around the openings.

This is planned for an all dry-rock aquascape, seated on Lowe's pavers and using hydraulic mortar and PVC pipe for the skeleton.

Anyway open to any and all ideas...

Kev
 

Diesel

ME=1, CANCER=0.
View Badges
Joined
Apr 14, 2012
Messages
13,613
Reaction score
16,448
Location
Katy
Rating - 0%
0   0   0
Looking forward to some pics my friend.
 

Diesel

ME=1, CANCER=0.
View Badges
Joined
Apr 14, 2012
Messages
13,613
Reaction score
16,448
Location
Katy
Rating - 0%
0   0   0
How I missed that Granite ledge.
Wonder if they all copied the Diesel tank.

d18.jpg

From a old outdoor kitchen that we replaced for lighter granite I used the old granite.

d27.jpg


20151107_DSC9804_BenV-L.jpg

Not sure if you can see the black granite but the tank is reflecting in it.
 

revhtree

Owner Administrator
View Badges
Joined
May 8, 2006
Messages
47,740
Reaction score
86,907
Rating - 100%
1   0   0
Following!
 
OP
OP
kattz

kattz

Old surfer dude
View Badges
Joined
Nov 6, 2011
Messages
163
Reaction score
105
Location
Not where I want to be...
Rating - 0%
0   0   0
Yes, this thread is useless without pics... and that ledge is similar to what we are planning. We had never seen it done before, so...

Anyway, pics!

My miter saw was having issues so I had Lowe's cut to the CAD drawing. First step: straight boards!

boards.jpg


The cut result.

cut-boards.jpg


Next, Kreg jig, lots of screws, square, and lots of waterproof glue.

first-framing.jpg


These corner legs are stout and once glued, would probably support a large SUV.

corner.jpg


Bottom skin cut and ready to glue.

bottom-skin.jpg


Tank base top frame and bracing in place. Yes, that is my Valentino Rossi helmet in the rear...

top-frame.jpg


The top and sides going on. This was about midnight.

top-skinned.jpg


Bottom sealed with foam. Will be coated with white epoxy later.

foam-sealed.jpg


Maintenance openings on the rear cut out.

rear-cutouts.jpg


Moved by myself down the hill and in through the double French doors. Tank is going to be moved from old house shortly, so I added a 3/4" additional layer to top with glue and screws - now extremely strong and very level - and cut out the holes for the returns.

overflow-cutouts.jpg


Lined up in proper location in downstairs room versus the equipment room behind it.

base-in-place.jpg


And the tank in place.

tank-in-place.jpg


The base is level and shimmed. Tank is level in all directions. It is 18" from the wall to allow maintenance from the rear.

Overflows will be cut out and new Synergy Reef Shadow overflows will be installed on the sides.

More to follow in a month or so!
 
Last edited:

Diesel

ME=1, CANCER=0.
View Badges
Joined
Apr 14, 2012
Messages
13,613
Reaction score
16,448
Location
Katy
Rating - 0%
0   0   0
Hmm.. might have to ask a mod to delete this post and do it again!

Click report and explain why.
Or just edit ;)
 

ScottW

Manchester United
View Badges
Joined
Feb 16, 2009
Messages
915
Reaction score
693
Location
Atlanta
Rating - 100%
1   0   0
Looks great so far! Love the Granite idea!
 

mixer911

Make them green with envy
View Badges
Joined
Jun 11, 2009
Messages
2,422
Reaction score
748
Location
Murfreesboro
Rating - 0%
0   0   0
@aquavista99 :

Tim, thanks for the overflows! This will help me save some $ and give me more flow throughout the tank! Much appreciated.

brand.jpg
overflows.jpg


Kev
Those are some of the older Beta overflows we used to make a few years ago for Reef Savvy. These were great at the time, but just an FYI the magnet will rust on those weirs in about 6 months. Also one of those is a custom hole pattern, so once your tank is drilled you are stuck with that pattern.
 
OP
OP
kattz

kattz

Old surfer dude
View Badges
Joined
Nov 6, 2011
Messages
163
Reaction score
105
Location
Not where I want to be...
Rating - 0%
0   0   0
Thanks for the heads-up, Rick! Appreciate it. I noticed the magnets and going to seal all of them with USAF-grade sealant. Good enough for Mach 2, think it'll be ok in the tank. I also noticed the 8mm difference in the piping, so I'm going to mill out that one side and weld a filler in the crescent that I'll cut from the waterjet.

Cheers!

Kev
 
Status
Not open for further replies.

Being sticky and staying connected: Have you used any reef-safe glue?

  • I have used reef safe glue.

    Votes: 148 88.6%
  • I haven’t used reef safe glue, but plan to in the future.

    Votes: 9 5.4%
  • I have no interest in using reef safe glue.

    Votes: 7 4.2%
  • Other.

    Votes: 3 1.8%
Back
Top