That's very exciting for him! And for you as well, I'm sure. Must be awesome to share interest in this hobby with a family member. I wish him success with his own tank, hope it's filled with fascination and fun.Nice build!! I just bought my son the IM Nuvo 20 gallon. Cycling now. He loves my 90 gallon and really wanted to start one for himself.
I will follow along for ideas and inspiration!
Navigation
Install the app
How to install the app on iOS
Follow along with the video below to see how to install our site as a web app on your home screen.
Note: This feature may not be available in some browsers.
More options
You are using an out of date browser. It may not display this or other websites correctly.
You should upgrade or use an alternative browser.
You should upgrade or use an alternative browser.
samnaz’s Long and Shallow Rimless [upgrade in progress]
- Build Thread
- Thread starter samnaz
- Start date
- Tagged users None
- Joined
- Nov 8, 2017
- Messages
- 80
- Reaction score
- 41
Yep, I will be using some established live rock from my current tank to help seed the dry rock and cut down any cycle or possible issues. Not sure exactly how much live rock I will add initially or how long I'll leave it in before removing it... I have to look into that some more. Thanks for the tip!
NICE! Your name doesn't sound familiar... which is strange cause I thought for sure I knew everyone on the forums doing the same/similar build I'm doing. Where's your build thread? On here or elsewhere perhaps? I would love to follow along if you've got one.
Yeah, I don't really post much on the forums. In fact I don't have a build thread. But I do have this system setup and running now. So if you have any questions or would like to see how I did it feel free to ask and I can post pics etc. I'm not exactly a pro so it isn't perfect, but I think it came out pretty good for my first build put together from the ground up.
Dang. I'm curious to see more of your setup. I do have a few questions for you...Yeah, I don't really post much on the forums. In fact I don't have a build thread. But I do have this system setup and running now. So if you have any questions or would like to see how I did it feel free to ask and I can post pics etc. I'm not exactly a pro so it isn't perfect, but I think it came out pretty good for my first build put together from the ground up.
Is that the 1200 gph model, and if so does it have 3/4" uniseals or did you get it customized? How do you have the internal box plumbed? Bean animal? What sump and return pump are you working with?
I think you might as well just make a build thread for us... ;-)
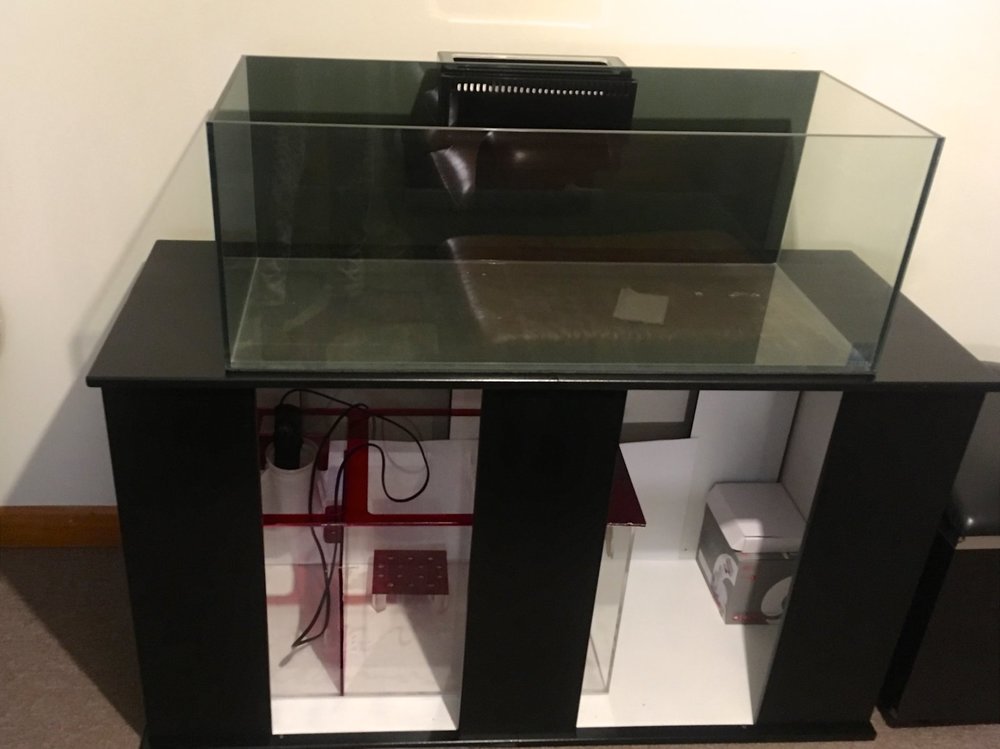
I finished painting the inside of the stand white, finished the waterproof gloss top coat on the exterior, and cut a yoga mat to fit along the bottom for extra protection.
Also finally decided on the location - right around the corner from the current setup. I originally wanted it to go in the same place, but setting it up around the corner is going to make everything 10x easier and less stressful. I'll probably end up keeping both tanks cause let's be honest, even their combined 50 gallons isn't big enough...

Also finally decided on the location - right around the corner from the current setup. I originally wanted it to go in the same place, but setting it up around the corner is going to make everything 10x easier and less stressful. I'll probably end up keeping both tanks cause let's be honest, even their combined 50 gallons isn't big enough...
Next, buffing the scratches out of a used trigger ruby sump....

Sump in place and ready to go (and looking brand new if I don't say so myself)!


Looking for lighting ideas for the stand interior.
I got some LED tape lights but they aren't motion activated. Anyone know if I can I add a motion sensor to these or should I purchase something else entirely?

I got some LED tape lights but they aren't motion activated. Anyone know if I can I add a motion sensor to these or should I purchase something else entirely?
- Joined
- Nov 8, 2017
- Messages
- 80
- Reaction score
- 41
Lol. It is the 1200 gph box, and I asked the guy to upgrade to 1 inch uniseals. Just to be on the safe side, and in case I ever go bigger and need to move more water. I do have it plumbed bean animal, except I don't have the elbows on the ends of the pipes. It's essentially just 3 bare ended pipes. I did order a flat grate for the main drain, and the elbows for the others but I found that they don't fit. And I got the wrong size grate. As of yet, I don't see any real reason why I would need those other parts though as it runs completely quiet as is unless I'm missing something. I'm using a trigger emerald 26 sump and a Vectra s1 return pump.Dang. I'm curious to see more of your setup. I do have a few questions for you...
Is that the 1200 gph model, and if so does it have 3/4" uniseals or did you get it customized? How do you have the internal box plumbed? Bean animal? What sump and return pump are you working with?
I think you might as well just make a build thread for us... ;-)
- Joined
- Nov 8, 2017
- Messages
- 80
- Reaction score
- 41
Still need to clean up my cables mount my controllers, and work on the rock scape but this should give you an idea of what I have going on.
Thanks a lot, that’s very helpful.


Still need to clean up my cables mount my controllers, and work on the rock scape but this should give you an idea of what I have going on.
I see you have the secondary and emergency drain going into the second chamber of your sump. I have the Ruby sump version which has two drain holes in the first chamber... So I was planning on the main and secondary for the first chamber, emergency for the second chamber. Does that make a difference at all? Is one better/safer than the other? Say the main pipe clogs, nothings gonna overflow...right? Sumps/plumbing confuses the crap outta me.
This is my plan for the internal box bean animal plumbing.
Not my photos. (can't for the life of me remember the guys username to credit him)
Your tank looks awesome btw.
Nice build. Following
Thanks, rockstarta. I have high hopes for this one.
- Joined
- Nov 8, 2017
- Messages
- 80
- Reaction score
- 41
Thanks a lot, that’s very helpful.
I see you have the secondary and emergency drain going into the second chamber of your sump. I have the Ruby sump version which has two drain holes in the first chamber... So I was planning on the main and secondary for the first chamber, emergency for the second chamber. Does that make a difference at all? Is one better/safer than the other? Say the main pipe clogs, nothings gonna overflow...right? Sumps/plumbing confuses the crap outta me.
This is my plan for the internal box bean animal plumbing.


Not my photos. (can't for the life of me remember the guys username to credit him)
Your tank looks awesome btw.
Thanks, rockstarta. I have high hopes for this one.
Thank you! In most builds I have seen, that is how they set it up. Primary and secondary drain in first chamber, emergency in second chamber. I don't think it makes too much of a difference either way. The only reason I have mine set up as I do is because of how the emerald sump is designed. If you're running bean animal, it should be next to impossible for anything to overflow. All three drains would have to clog. Only thing you may have to be careful about is if your sump will hold all the backflow from the display in the event that your pumps stop for some reason. My guess is you shouldn't have a problem with this, as I think your sump is about the same size as mine and mine handles it fine. You could also use check valves on the return lines so water can't flow back into the sump.
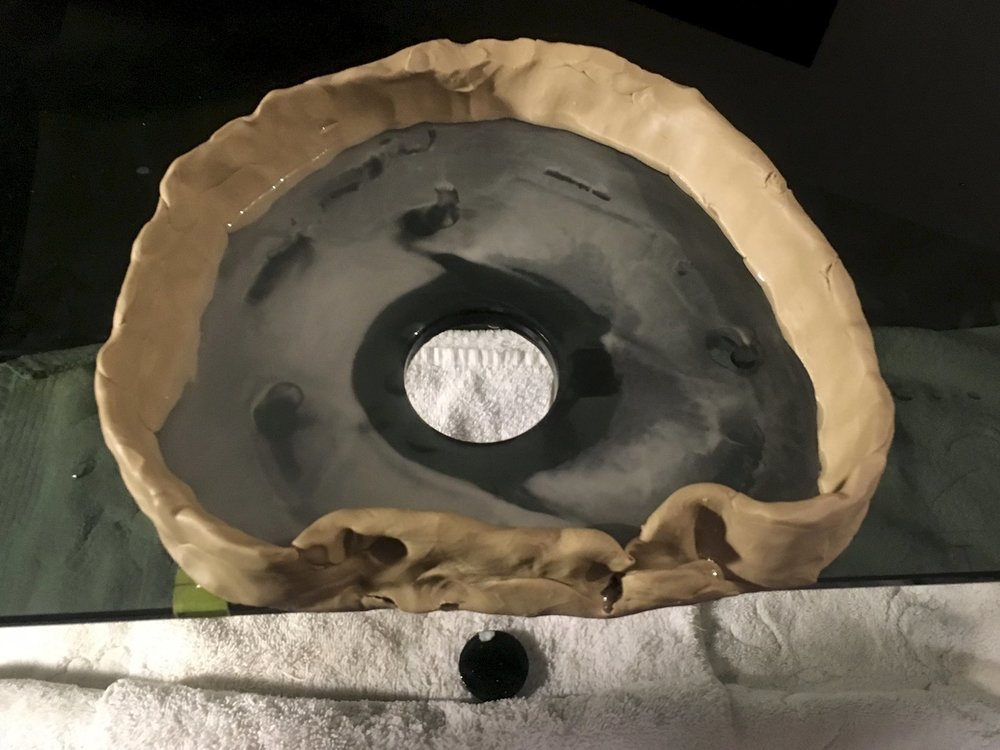
I did it. I finally drilled the tank. After putting it off for months, I'm so glad to have it over and done with. Everyone says it ends up being way easier than they thought it would be, but I have to disagree. That may have something to do with the fact that this was my first time ever using a drill. I should have practiced on a different tank first to get the hang of it. After drilling two holes I've got it down. Only one more hole to go... as soon as I figure out where the return should go.
The first hole was stressful, nerve wracking, and scary. I used a drill guide instead of the template. The drill guide wouldn't stay in place, it was jumping/spinning around the entire time, causing the putty dam to leak. I kept having to put the putty back in place and refill the dam with water. It took forever to finish. Much longer than expected (about 15-20 mins per hole). I was so careful not to give it too much pressure, maybe I wasn't giving enough? Who knows... Perhaps it took forever because of the diamond coated hole saw I got on amazon for $4, the lowest possible quality drill bit you can get.
Before hole #1
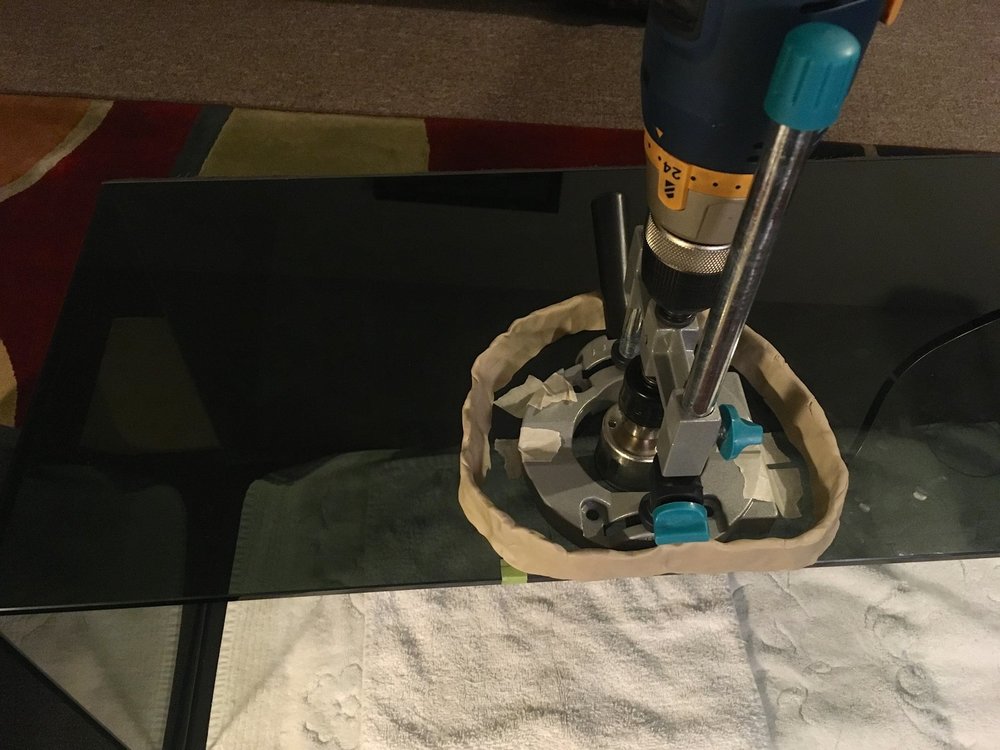
Hole #1 complete:
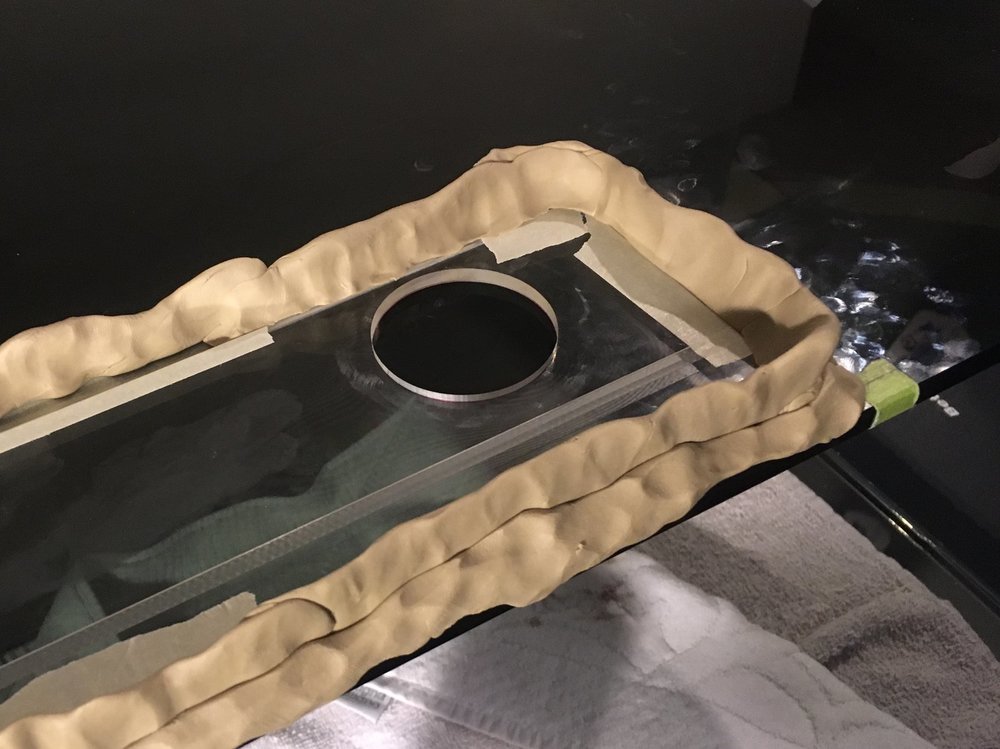
For the second hole, I ditched the awful drill guide and used the included template instead. It was 10x easier. Piece of cake.
Before hole #2:
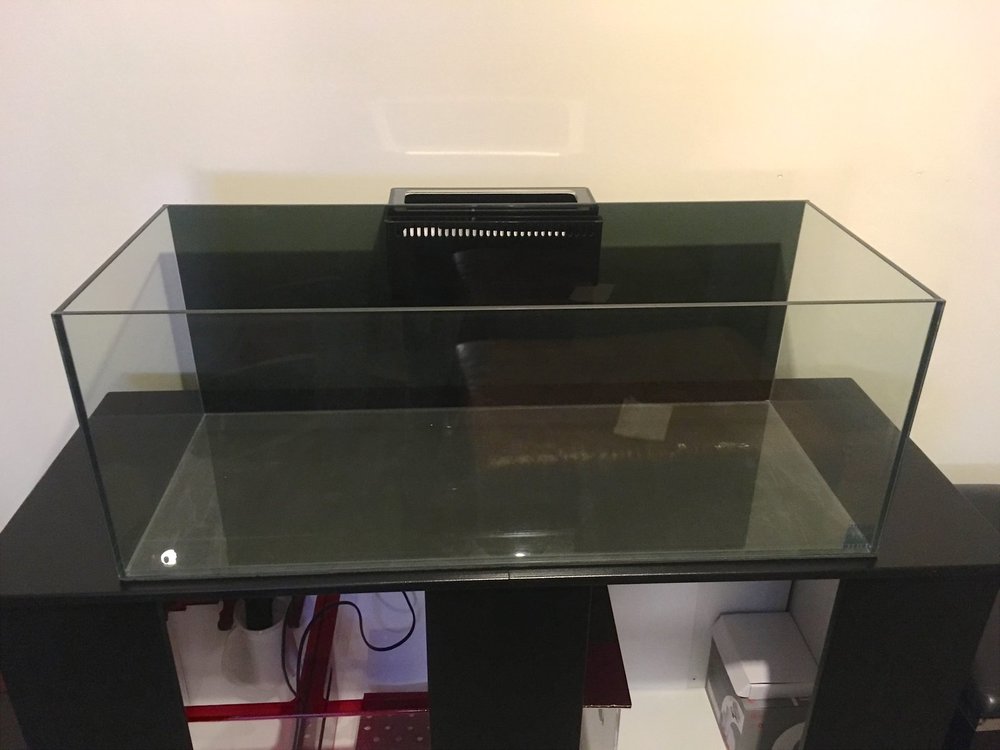
And here's the finished product with overflow box installed:

It looks *so* good in person. These pics are crap.
Now that I have that out of the way, I can actually start putting this tank together instead of just thinking about it.
The first hole was stressful, nerve wracking, and scary. I used a drill guide instead of the template. The drill guide wouldn't stay in place, it was jumping/spinning around the entire time, causing the putty dam to leak. I kept having to put the putty back in place and refill the dam with water. It took forever to finish. Much longer than expected (about 15-20 mins per hole). I was so careful not to give it too much pressure, maybe I wasn't giving enough? Who knows... Perhaps it took forever because of the diamond coated hole saw I got on amazon for $4, the lowest possible quality drill bit you can get.
Before hole #1
Hole #1 complete:
For the second hole, I ditched the awful drill guide and used the included template instead. It was 10x easier. Piece of cake.
Before hole #2:
And here's the finished product with overflow box installed:
It looks *so* good in person. These pics are crap.
Now that I have that out of the way, I can actually start putting this tank together instead of just thinking about it.
Very clean looking setup! You did a great job drilling the tank.
Following to watch it come to life.

Following to watch it come to life.
Thank you! I have high hopes for this one, hope I don't disappointVery clean looking setup! You did a great job drilling the tank.
Following to watch it come to life.

From the looks of what you have done so far, I would say you can't miss! Just keep up the good work!Thank you! I have high hopes for this one, hope I don't disappoint
- Joined
- Apr 26, 2017
- Messages
- 115
- Reaction score
- 87
Tank looks great! And nice to see so many good reviews on this overflow. I also ordered one for a 30g tank but went with the 1600gph instead so i can fit my european/metric bulkheads(not enough room in the 1200gph) So yeah, easier plumbing but kinda overkill.
What kinda 30g? IM Nuvo or standard.. or somethin else? Also ya gotta build thread?Tank looks great! And nice to see so many good reviews on this overflow. I also ordered one for a 30g tank but went with the 1600gph instead so i can fit my european/metric bulkheads(not enough room in the 1200gph) So yeah, easier plumbing but kinda overkill.
- Joined
- Apr 26, 2017
- Messages
- 115
- Reaction score
- 87
What kinda 30g? IM Nuvo or standard.. or somethin else? Also ya gotta build thread?
It's a tank i built many months ago. I do have a build thread although no updates in a while as i've been working/planing on adding the sump. I will post the hole progress as soon as it arrives.
you built a tank? I'm intrigued! do post when you get it going.It's a tank i built many months ago. I do have a build thread although no updates in a while as i've been working/planing on adding the sump. I will post the hole progress as soon as it arrives.
Similar threads
- Replies
- 17
- Views
- 345


