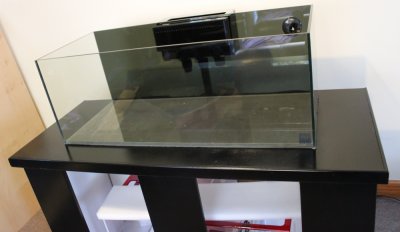
samnaz’s Long and Shallow Rimless [upgrade in progress]

jsker

Reefing is all about the adventure
View Badges
Joined
Apr 11, 2015
Messages
24,974
Reaction score
79,737
Location
Saint Louis
Rating - 0%
0   0   0
Here it is from the inside.... hope this helps

3D0153B5-1272-4F8F-BBF7-438E99466499.jpg

696A92A1-4B6E-4220-85CD-6108728887F0.jpg

Looking at the picture, the seem come to my attention with the tank sitting in the middle of the cabinet. I would suggest installing a 2x4 along that seem and using spax washer head screws 3" and screwing two screws from the outside in, into the 2x4. you and use a little black paint to cover the screw. That would brace and support the tank propper. I like the idea of the 3/4 ply in top also since the cabinet is all MDF. It will look chunky but you can also bank around the top with trim wood and that would give you a modern look and a strong top, and if it got wet the cabinet would be sound.
 
OP
OP
samnaz

samnaz

Earthling
View Badges
Joined
Dec 30, 2016
Messages
3,564
Reaction score
6,879
Location
Humble.fish
Rating - 0%
0   0   0
Now I'm not an expert, but I've seen the comment many times that the rubber gasket goes on the non-threaded side for bulkheads. Not 100% sure looking at the photos, but it looks like it's on the nut side on yours. Apologize if I'm wrong. Just want to bring it up just in case...nothing worse than the slow drip, drip, drip.
https://www.reef2reef.com/threads/installing-bulkhead-tips.34973/

And good on you with the Two Hearted...my main go to as well!
thanks for bringing that to my attention. I'll definitely have to switch the return bulkhead gasket to the correct side. only reason I put it on the outside of the tank was because that is how I was told to do the overflow box.

Overflow box instructions say...
"You do not need a washer on the flange of the bulkhead inside the tank. Install the washer on the bulkhead between the outside aquarium wall and the plumbing box."
 

Rick Krejci

Active Member
View Badges
Joined
Jun 4, 2017
Messages
279
Reaction score
222
Location
Beavercreek, OH
Rating - 0%
0   0   0
thanks for bringing that to my attention. I'll definitely have to switch the return bulkhead gasket to the correct side. only reason I put it on the outside of the tank was because that is how I was told to do the overflow box.

Overflow box instructions say...
"You do not need a washer on the flange of the bulkhead inside the tank. Install the washer on the bulkhead between the outside aquarium wall and the plumbing box."
I suppose if they went through the trouble to specify it's OK, then their design must allow for it. Interesting.
Love the 30l...my favorite aspect ratio for aquariums
 

siggy

My Aquariums Going Again
View Badges
Joined
Feb 16, 2017
Messages
7,123
Reaction score
21,417
Location
MI
Rating - 0%
0   0   0
thanks for bringing that to my attention. I'll definitely have to switch the return bulkhead gasket to the correct side. only reason I put it on the outside of the tank was because that is how I was told to do the overflow box.

Overflow box instructions say...
"You do not need a washer on the flange of the bulkhead inside the tank. Install the washer on the bulkhead between the outside aquarium wall and the plumbing box."

Now you thinking, I see you have a plan, and the trim you can choose all shapes and profiles at the lumber store to match you stand. You have a flat bottom tank and screwing from the top down you may have to put a small recess or really drive the screws down so the heads don't sit above the top creating pressure points on the glass !!!! the ply is soft and you should be able to do that going into the 2x4. here's a tip, If it doesn't sink on first attempt back screw out halfway and run down again at full speed, if it starts to strip the screw throw it away and get a fresh one. now screwing the rest of the top down, you will need a shorter screw and trying to run the head below the surface may be troublesome in the MDF.....thinking that C-clamp until the glue dries may be good enough...@jsker ( need a # for the woodsmen ) and ladies) how to screw and glue top down?
PS straight edge/level the top so its flat...... ( can you tell I have 3 daughters )
 
OP
OP
samnaz

samnaz

Earthling
View Badges
Joined
Dec 30, 2016
Messages
3,564
Reaction score
6,879
Location
Humble.fish
Rating - 0%
0   0   0
Now you thinking, I see you have a plan, and the trim you can choose all shapes and profiles at the lumber store to match you stand. You have a flat bottom tank and screwing from the top down you may have to put a small recess or really drive the screws down so the heads don't sit above the top creating pressure points on the glass !!!! the ply is soft and you should be able to do that going into the 2x4. here's a tip, If it doesn't sink on first attempt back screw out halfway and run down again at full speed, if it starts to strip the screw throw it away and get a fresh one. now screwing the rest of the top down, you will need a shorter screw and trying to run the head below the surface may be troublesome in the MDF.....thinking that C-clamp until the glue dries may be good enough...@jsker ( need a # for the woodsmen ) and ladies) how to screw and glue top down?
PS straight edge/level the top so its flat...... ( can you tell I have 3 daughters )

Looking at the picture, the seem come to my attention with the tank sitting in the middle of the cabinet. I would suggest installing a 2x4 along that seem and using spax washer head screws 3" and screwing two screws from the outside in, into the 2x4. you and use a little black paint to cover the screw. That would brace and support the tank propper. I like the idea of the 3/4 ply in top also since the cabinet is all MDF. It will look chunky but you can also bank around the top with trim wood and that would give you a modern look and a strong top, and if it got wet the cabinet would be sound.

do you think gluing the new plywood top on top would suffice? i'd really rather not screw the top down if I can just glue it instead. seems like the weight of the tank would keep it from budging at all, even without glue.

also, is there a kind or brand of paint you recommend for the painting of the plywood top and trim wood?

I grabbed a couple kinds of spray paint at the store tonight and thought i'd try them out on the scrap wood to see if they might work, just because that would be easier and quicker... but I forgot I'm in NO rush at all to finish this dang build... so just tell me what's best and I'll take the time to do it.

should the wood be sanded before / during / after painting at all, or no?

@jsker @siggy @JoshH @redfishbluefish I would love to hear your thoughts/advice on this if you've got any....
 

JoshH

Tank Status: Wet...ish, growing things....
View Badges
Joined
Dec 3, 2016
Messages
9,994
Reaction score
35,394
Location
Humble
Rating - 0%
0   0   0
Honestly if your trim is thick enough I wouldn't glue or screw at all and let it sit inside your trim as long as you have no plans on moving (Sliding) the tank full of water across the stand it should be fine. If that might be an issue than just a few dabs of glue a few inches in from the corners (PL Premium or some other construction adhesive, not wood glue) will work fine. Add your trim and use wood filler to fill in any cracks or nail, screw holes you have, then Sand and paint. Personally I sand between every coat of paint, spray or rolled with increasingly finer sand paper but not entirely necessary AFTER the first coat. Paint wise, I use melamine paint (latex hybrid), in your situation ideally a clear coat would be applied on top regardless of the paint or finish chosen to add durability. Spray paint will work, I always say prime first whatever paint you choose as it will always give you best adhesion. One thing I never mentioned and hasn't been suggested, if budget isn't a HUGE concern you might even consider skipping the extra wood top with trim and have a counter top made to fit overtop of the stand, ideally in quartz or another relatively non porous material. Super slick look, will give you the strength you need and will provide a nice water proof finish for testing and things. Just a thought if your budget fits. Did it for my stand exstentions and love the look.

20180330_214815.jpg


20180330_214808.jpg
 

siggy

My Aquariums Going Again
View Badges
Joined
Feb 16, 2017
Messages
7,123
Reaction score
21,417
Location
MI
Rating - 0%
0   0   0
counter top made to fit overtop of the stand
Now that's an idea, a chunk of counter top or even formica over the plywood would be slick.
Check out @Greybeard epoxy bar top on his build. Just a thought and not sure but, How does a cut piece of Smoked Glass sound, No work other than center brace, maybe
 

jsker

Reefing is all about the adventure
View Badges
Joined
Apr 11, 2015
Messages
24,974
Reaction score
79,737
Location
Saint Louis
Rating - 0%
0   0   0
do you think gluing the new plywood top on top would suffice? i'd really rather not screw the top down if I can just glue it instead. seems like the weight of the tank would keep it from budging at all, even without glue.

also, is there a kind or brand of paint you recommend for the painting of the plywood top and trim wood?

I grabbed a couple kinds of spray paint at the store tonight and thought i'd try them out on the scrap wood to see if they might work, just because that would be easier and quicker... but I forgot I'm in NO rush at all to finish this dang build... so just tell me what's best and I'll take the time to do it.

should the wood be sanded before / during / after painting at all, or no?

@jsker @siggy @JoshH @redfishbluefish I would love to hear your thoughts/advice on this if you've got any....
I have to run, I will get back to you later today
 

jsker

Reefing is all about the adventure
View Badges
Joined
Apr 11, 2015
Messages
24,974
Reaction score
79,737
Location
Saint Louis
Rating - 0%
0   0   0
Thanks for the help guys.

Heading to the store tomorrow... Only thing I'm really unsure about it the trim wood for around the edge.

Here's the list:


Screen Shot 2018-03-29 at 10.04.16 PM.png
Efficient:)
 

jsker

Reefing is all about the adventure
View Badges
Joined
Apr 11, 2015
Messages
24,974
Reaction score
79,737
Location
Saint Louis
Rating - 0%
0   0   0
Now you thinking, I see you have a plan, and the trim you can choose all shapes and profiles at the lumber store to match you stand. You have a flat bottom tank and screwing from the top down you may have to put a small recess or really drive the screws down so the heads don't sit above the top creating pressure points on the glass !!!! the ply is soft and you should be able to do that going into the 2x4. here's a tip, If it doesn't sink on first attempt back screw out halfway and run down again at full speed, if it starts to strip the screw throw it away and get a fresh one. now screwing the rest of the top down, you will need a shorter screw and trying to run the head below the surface may be troublesome in the MDF.....thinking that C-clamp until the glue dries may be good enough...@jsker ( need a # for the woodsmen ) and ladies) how to screw and glue top down?
PS straight edge/level the top so its flat...... ( can you tell I have 3 daughters )

I agree with @siggy the washer head spax should not be used on the top down application. I would suggest these link but a 1.25 for the reason that using a phillips head screw, the screw head will strip out and with the star bit the head should pull flush with the wood. I would also suggest not to pre drill the MDF because the MDF will not hold the screw. If you run into the issue of the screw not being flush or slightly below the surface use one of these link

I will state this again this would be the best and simplest way to modify your cabinet for support
2 x 4 example of placement.png
 
OP
OP
samnaz

samnaz

Earthling
View Badges
Joined
Dec 30, 2016
Messages
3,564
Reaction score
6,879
Location
Humble.fish
Rating - 0%
0   0   0
I agree with @siggy the washer head spax should not be used on the top down application. I would suggest these link but a 1.25 for the reason that using a phillips head screw, the screw head will strip out and with the star bit the head should pull flush with the wood. I would also suggest not to pre drill the MDF because the MDF will not hold the screw. If you run into the issue of the screw not being flush or slightly below the surface use one of these link

I will state this again this would be the best and simplest way to modify your cabinet for support
2 x 4 example of placement.png
Thanks so much for the visual, I will do exactly that.

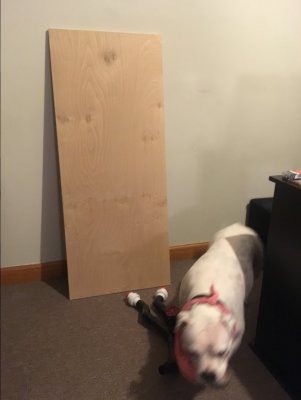
In addition, since I already bought the supplies, I’ll be adding a 3/4” Baltic Birch top. Obviously glass or custom counter top would look better but the funds don’t allow, gotta cut myself off at some point.


The supplies....

Baltic Birch (and my favorite living being on earth... my niece Lacey)
8CA85CC3-82EA-496A-99CD-096FE207B9C0.jpeg

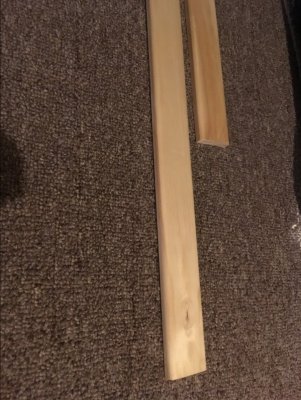
1 5/8” pine wood trim which I’m just now realizing is a hair to small but I don’t care, good enough.
A432C680-12A7-45B0-A32C-63A08670C2C6.jpeg

Got the screws on the left perhaps for attaching the trim. The others various sizes for attaching the 2x4.
A17D0712-1BD7-4FAD-82BE-52DB5B6365B3.jpeg


And now I got to work. May it turn out as good as it does it my head. And most important, support the tank for years to come.
 

jsker

Reefing is all about the adventure
View Badges
Joined
Apr 11, 2015
Messages
24,974
Reaction score
79,737
Location
Saint Louis
Rating - 0%
0   0   0
Thanks so much for the visual, I will do exactly that.

In addition, since I already bought the supplies, I’ll be adding a 3/4” Baltic Birch top. Obviously glass or custom counter top would look better but the funds don’t allow, gotta cut myself off at some point.


The supplies....

Baltic Birch (and my favorite living being on earth... my niece Lacey)
8CA85CC3-82EA-496A-99CD-096FE207B9C0.jpeg

1 5/8” pine wood trim which I’m just now realizing is a hair to small but I don’t care, good enough.
A432C680-12A7-45B0-A32C-63A08670C2C6.jpeg

Got the screws on the left perhaps for attaching the trim. The others various sizes for attaching the 2x4.
A17D0712-1BD7-4FAD-82BE-52DB5B6365B3.jpeg


And now I got to work. May it turn out as good as it does it my head. And most important, support the tank for years to come.
I like the pup:)
 
OP
OP
samnaz

samnaz

Earthling
View Badges
Joined
Dec 30, 2016
Messages
3,564
Reaction score
6,879
Location
Humble.fish
Rating - 0%
0   0   0
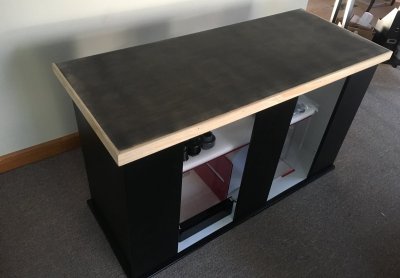
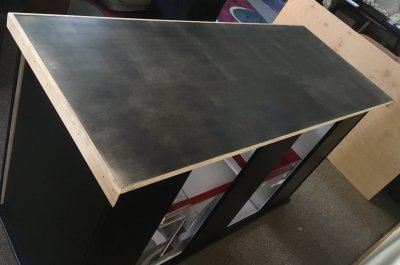
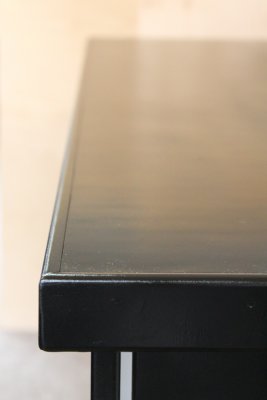
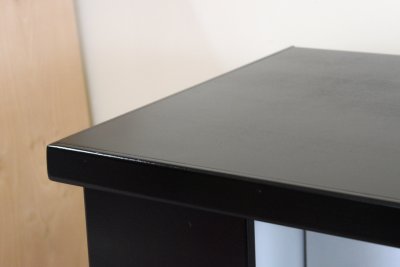
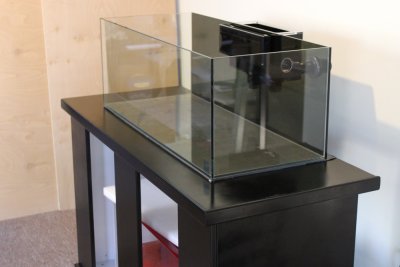
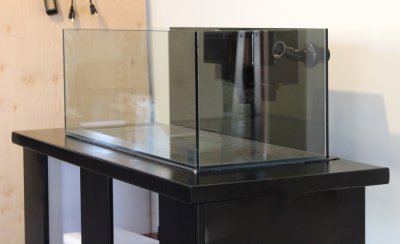
Finished stand modification part one for support, a ply top.

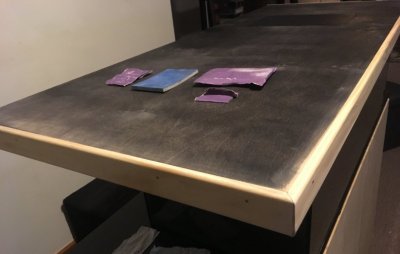
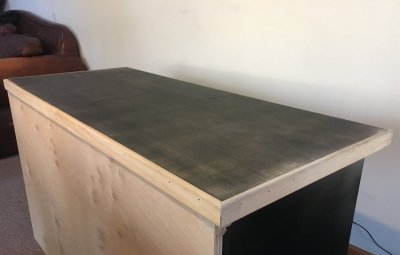
After throwing a coat of paint on the board, I realized it was a terrible idea to paint anything until the top was fully assembled. So I cut and placed the edges around the board and filed and sanded for what seemed like forever...
IMG_4193.JPG

IMG_4213.JPG


IMG_4224.JPG

IMG_4221.JPG


I messed up and cut the edge wood too short twice, so I wasted a lot and didn't end up having enough for the back. Don't think it really needs it though.
IMG_4226.jpg


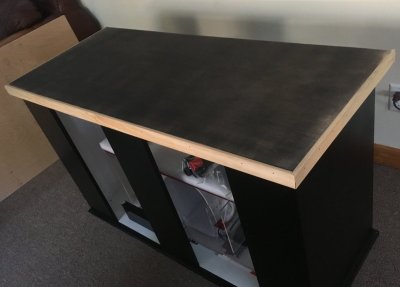
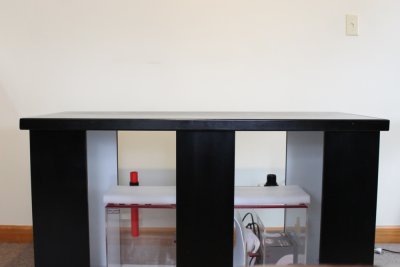
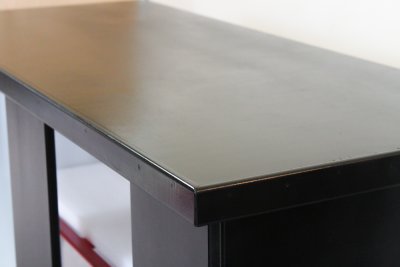
And thennnnn, after many coats of paint, the final product.
20180406-IMG_7904-20.jpg

20180406-IMG_7926-22.jpg

20180406-IMG_7920-21.jpg

20180406-IMG_7957-24.jpg


Tank back in place.
20180407-IMG_8019-24.jpg

20180407-IMG_8012-22.jpg

20180407-IMG_8001-21.jpg


Next.... adding a 2 x 4 center brace support, and it's all done.
 

JBKReef

Valuable Member
View Badges
Joined
May 15, 2017
Messages
1,961
Reaction score
2,315
Location
Bloomington, Indiana
Rating - 0%
0   0   0
This is gorgeous. I wish to no end I would have made/modified my stand to fit my needs more.

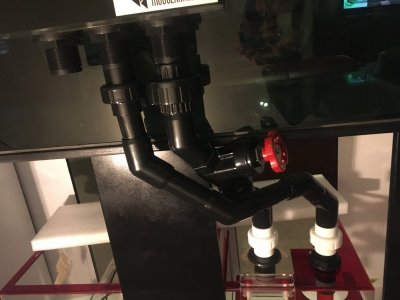
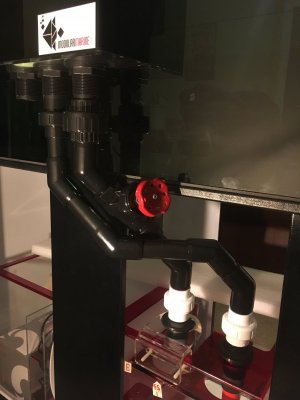
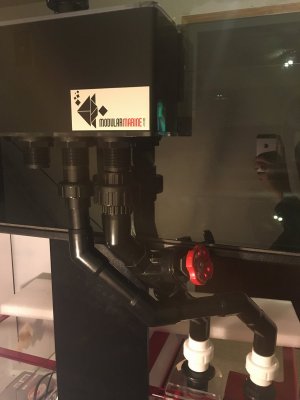
I like the second attempt at hard plumbing. The 45's look good and not the excessive amount of 90's you had originally.
 

High pressure shells: Do you look for signs of stress in the invertebrates in your reef tank?

  • I regularly look for signs of invertebrate stress in my reef tank.

    Votes: 42 31.3%
  • I occasionally look for signs of invertebrate stress in my reef tank.

    Votes: 31 23.1%
  • I rarely look for signs of invertebrate stress in my reef tank.

    Votes: 27 20.1%
  • I never look for signs of invertebrate stress in my reef tank.

    Votes: 34 25.4%
  • Other.

    Votes: 0 0.0%
Back
Top