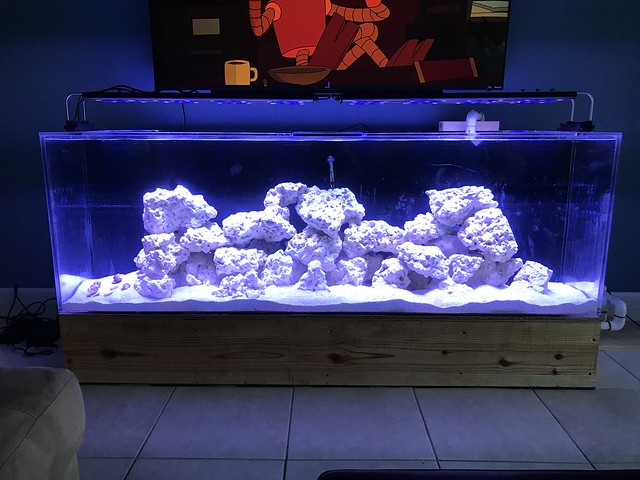
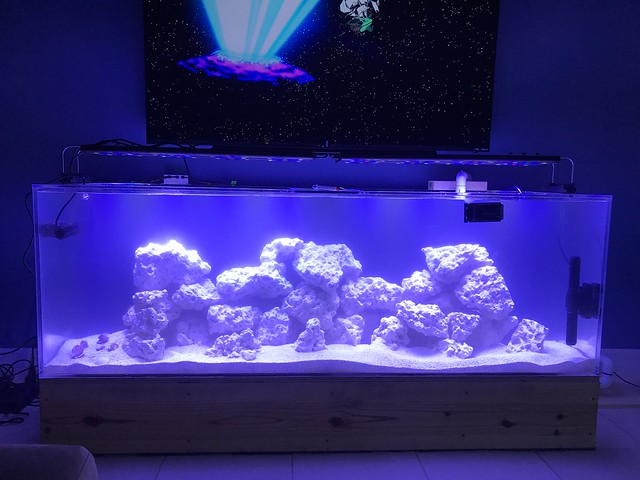
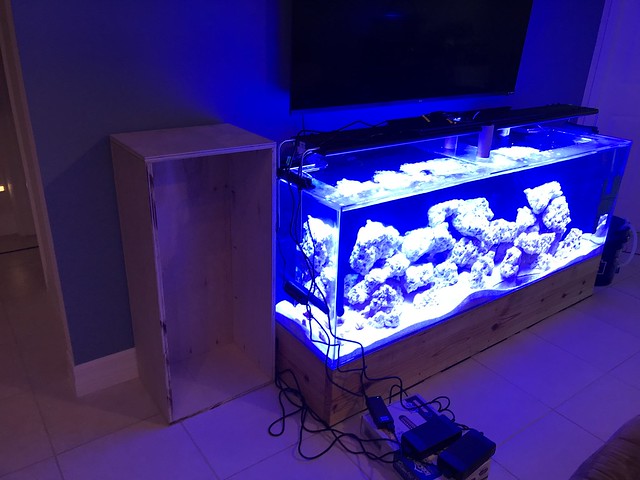
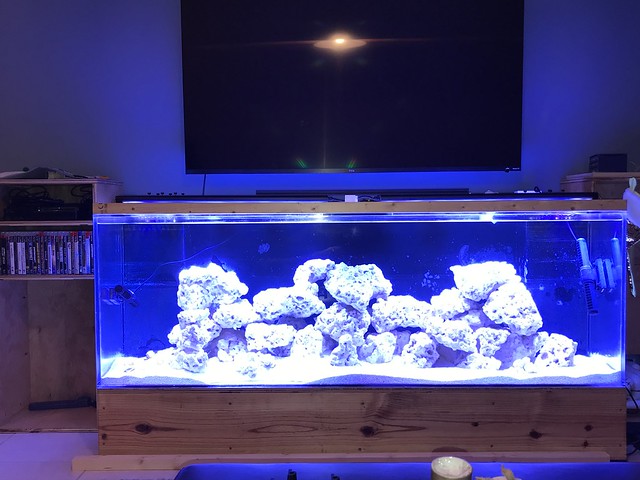
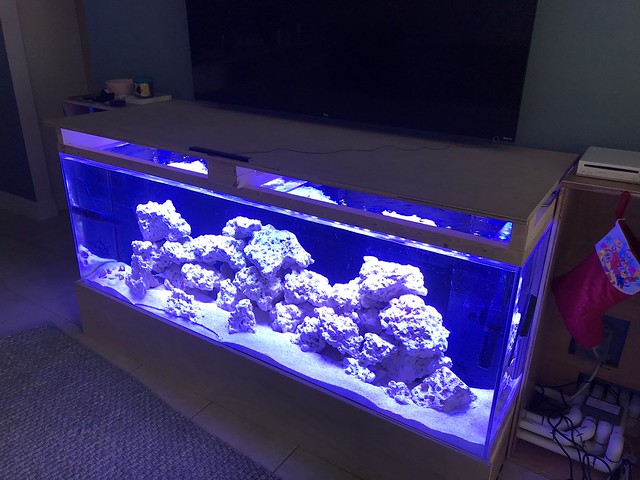
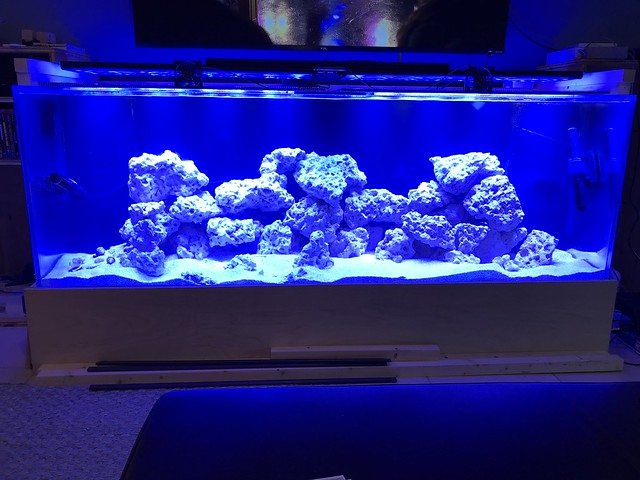
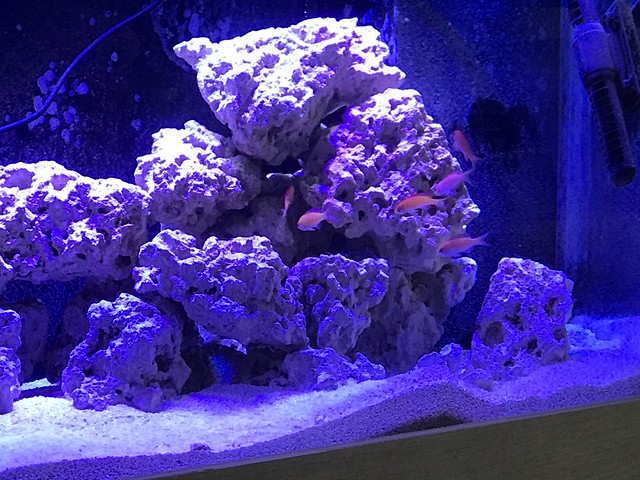
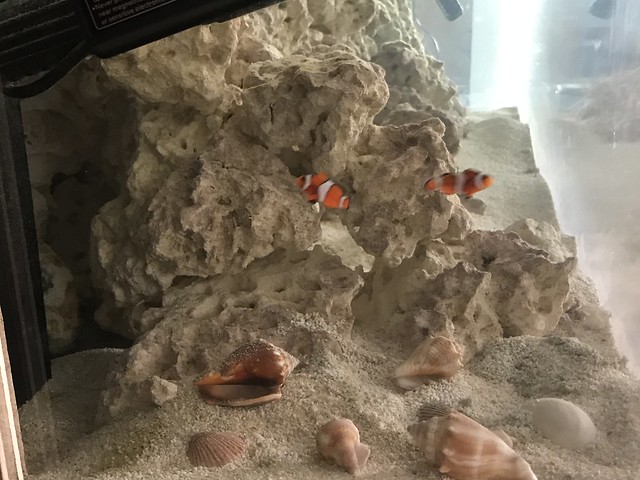
I bought a used 180g acrylic tank in June of 2018 at a good price, but due to multiple life changes had not set it up. It sat in storage, joined me on a 1000+ mile move, then sat in storage a bit longer. Then in July of this year I bought my first house, which means this baby is getting water! All of August was dedicated to the house/lawn, but in late September I started working on the build. So good news is I’m starting this thread after a lot of the slow initial work, but it is still going to be a slow process  . Spoiler alert, the tank already has water in it and is cycled.
Design
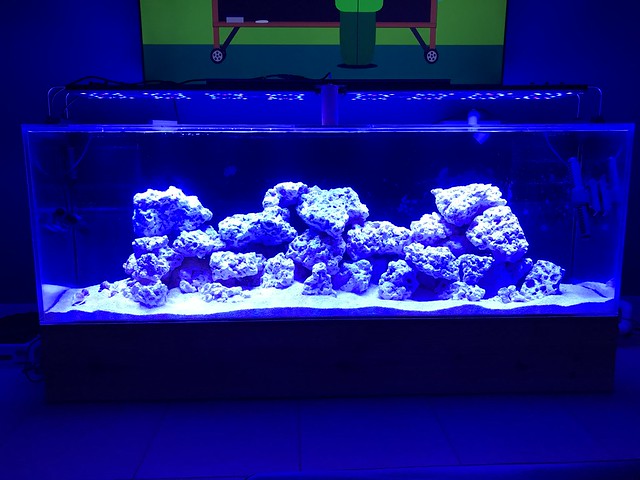
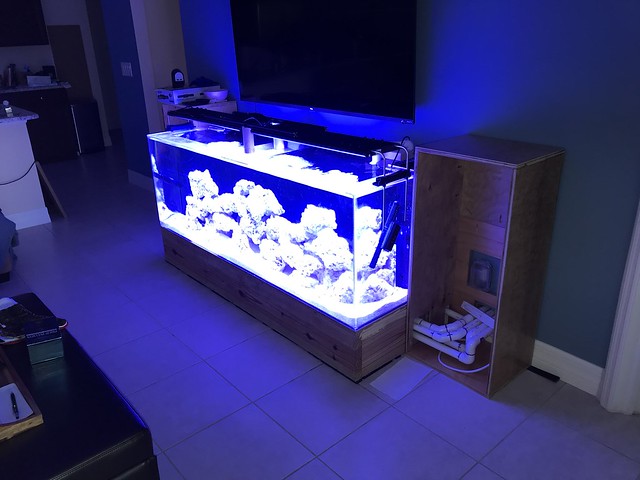
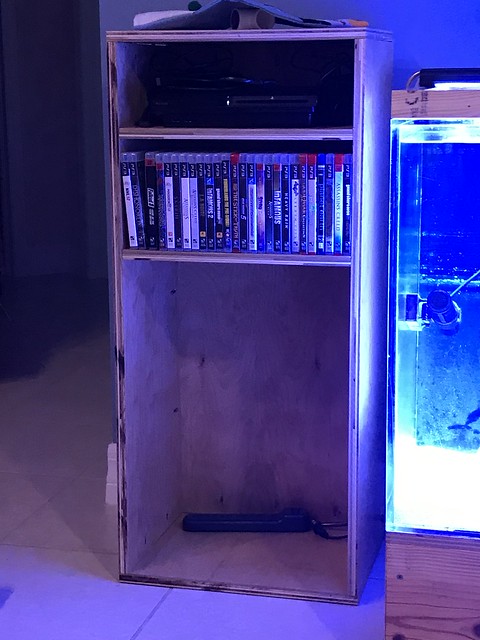
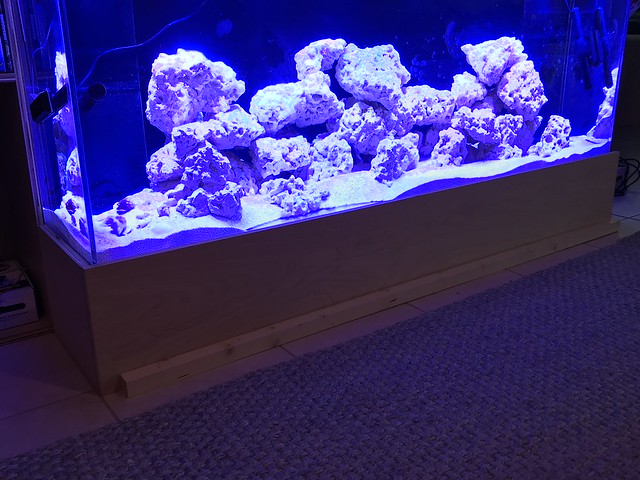
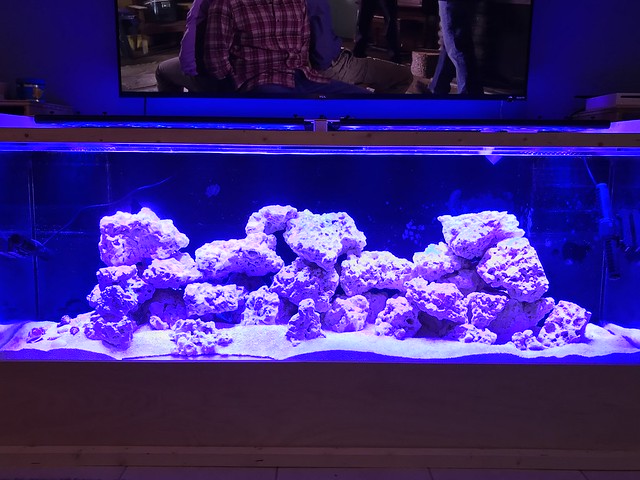
The tank sits below my wall mounted TV in the living room and I am building bookshelves on the sides and a canopy for the top. In my head this has the potential to look super awesome, but there are numerous challenges that I’ll dive into later in this post. Below is the general concept (the shelves shows are just for reference, there will be more shelves). The shelves will not come to the front of the aquarium, so the side panels will be viewable.
https://flic.kr/p/2k9nvHV]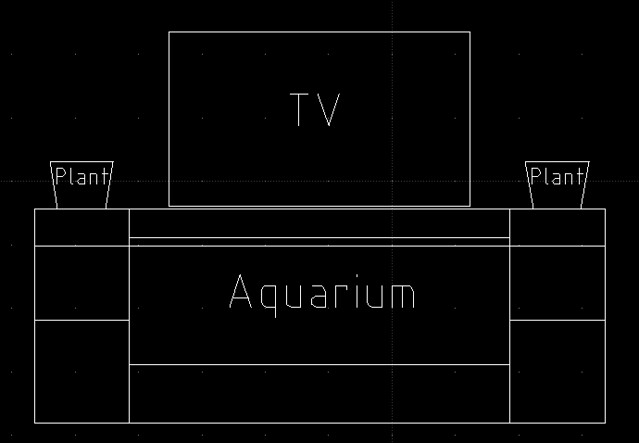 [/url]
https://flic.kr/p/2k9nd4r]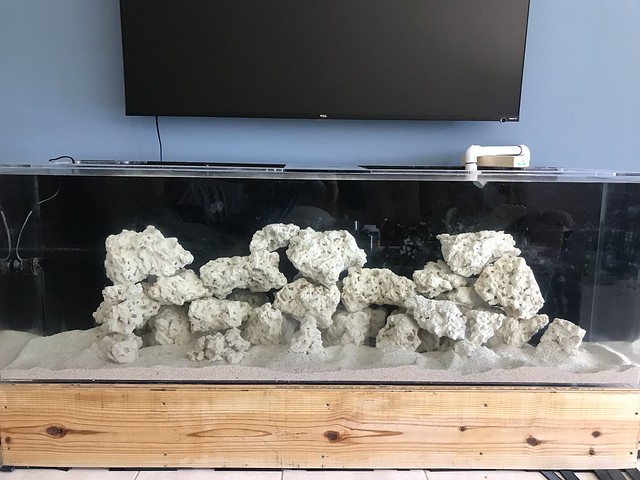 [/url]
https://flic.kr/p/2k9rt1b] [/url]
Sump
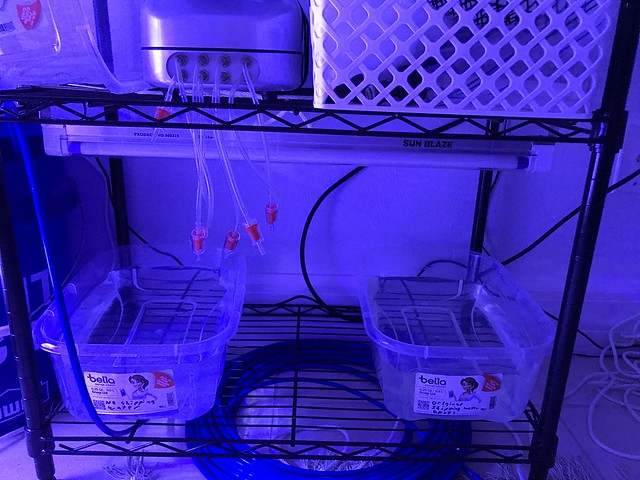
The sump is a 90g tank in a guest room. Fortunately the master bedroom closet is behind the right bookshelf and the other side of the closet comes out in a corner of the guest room. So the plumbing routes to the right side of the tank (when looking at it), through the closet, then into the guest room, as seen below. The Apex equipment in the closet is temporary until I move the Apex off my 18g tank. I will also be building a cleaner shelving system in the closet to hide the pipes and allow for storage. In the last picture, the return pipes are on the far right. As soon as they come through the wall they 90 degree straight up.
https://flic.kr/p/2k9ncqC]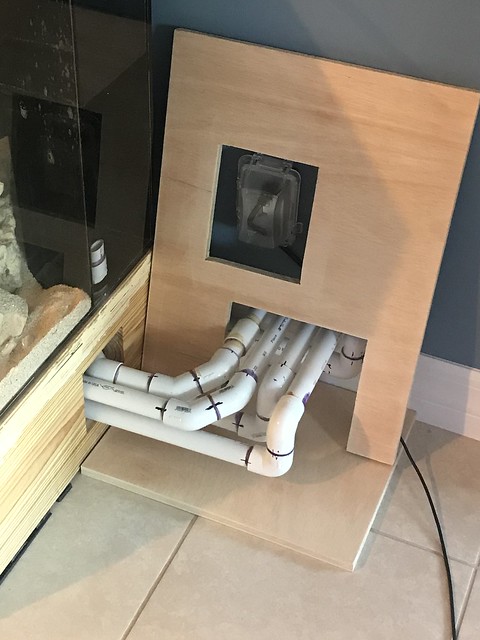 [/url]
https://flic.kr/p/2k9rsJe] [/url]
https://flic.kr/p/2k9rsR8] [/url]
Challenges
Let’s start with mistakes .
.
First mistake was that I originally had the return pump (COR-15) on the right side of the tank. Since I’m a doofus, I originally had a 1” pipe feeding into the inlet of the pump and a 1.25” pipe coming out of the pump. Well as you can imagine, as soon as the pump got up to 50% it was trying to pull more water than was coming through the 1” pipe. Reducing the outlet to 1” did not fix it. I didn’t want to make the hole in the wall bigger or redo the whole run, so I moved the return pump into the sump and piped the outlet into the inside of the sump bulkhead.
Second mistake/challenge, the tank is sitting on a 2x10” frame. Since there are no legs, I cut a 5”x5” access port in all of the cross beams. This is barely enough room for all four drain pipes, but it is sufficient. The challenge is that I had to get the bulkheads tight, then cement the plumbing in place. I originally planned on having the bulkheads come straight into unions, but there wasn’t enough room, so any plumbing work requires cutting pipe. This challenge led to my biggest mistake.
For some reason the right overflow gets more water than the left one. Originally I had an 18” piece of PVC in each primary drain and a 22” piece of PVC on each emergency drain. The COR-15 is set to 100% with about 15’ of horizontal run and 2.5’ of vertical run. Should be pushing somewhere between 800 and 1000 gph, which is right around the max gravity volume for a 1” pipe. However, when I turned the pump on, the right primary drain immediately full siphoned and overflowed into its emergency drain and the left primary just barely filled, slightly below a full siphon. My belief is this is due to the drains going back up about 18” on the sump, so there is back pressure. The gurgling of the right emergency pipe was way too much, so I tried to remove the primary pipe to see if the added pressure of the water in the overflow chamber would take the volume below the emergency pipe. Whelp, the pipe was screwed into the bulkhead tighter than the bulkhead nut, which means in doing so, I unscrewed the bulkhead and started draining water onto the floor.
Good news is my house is one story, concrete foundation, and all tile, so there was no damage to the house. The stand also had to be shimmed all the way around, so very little water came into contact with the wood. However, in addition to the ~5g of water in the overflow chamber, the pipe started siphoning water out of the bubble tower on the sump. So I threw a towel down, ran to the sump and pulled the pipe out of the water, then started siphoning water out of the overflow chamber into a bucket. Probably drained 2-3 gallons onto the floor, which is a surprisingly large amount of water.
Once I got the water cleaned up I had to cut the pipe to redo the plumbing. In the picture of the pipes above you can see where I joined one of the pipes back together with a coupler. This was the most difficult part due to the small amount of working space. My hand barely fit in enough to allow the tips of my fingers to wedge the bulkhead nut against the side of the plywood while my other arm reached over the 24” tall tank and barely reached the nub of a pipe I left. By holding the nut still, I secured the bulkhead by turning the pipe on the inside. Though I had to stop just the right amount of loose so that I could put the male thread of the exit pipe into the bulkhead and tighten that simultaneously with the nut. This took several tries to get right.
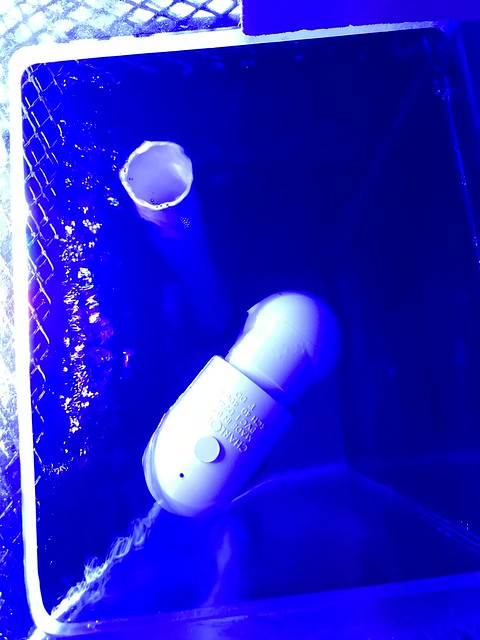
Now, due to the above, I have the plumbing in the right overflow chamber as seen below. This however is very worrisome. My sump is roughly half full, so it can handle about 45 gallons of tank water siphoning back. If the overflow chambers were to ever leak, this would required 18” pipes in the overflow chambers, which I do not currently have.
https://flic.kr/p/2k9rsXq]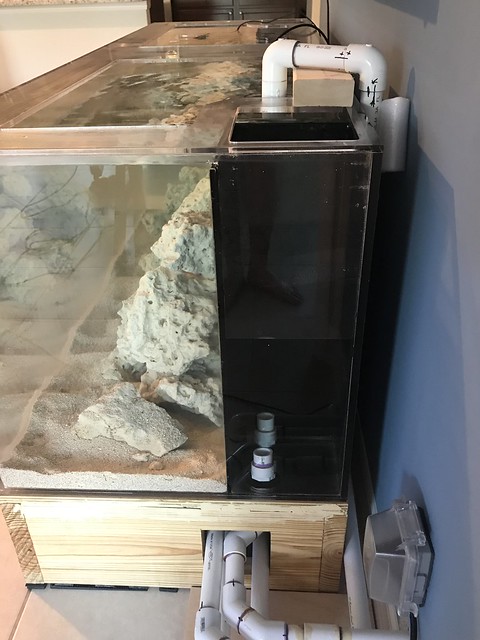 [/url]
Unfortunately I do not have a solution for this yet, but would love some feedback. If I leave the primary at this height and the emergency drain at 22”, the entire chamber floods and the emergency drain starts gurgling. I do not want to put a gate valve on the primary drain and restrict it enough to put the emergency drain in full siphon, as that defeats the purpose. Maybe putting a durso on the emergency drain and raising the primary back to 18” would keep the emergency drain quiet enough?
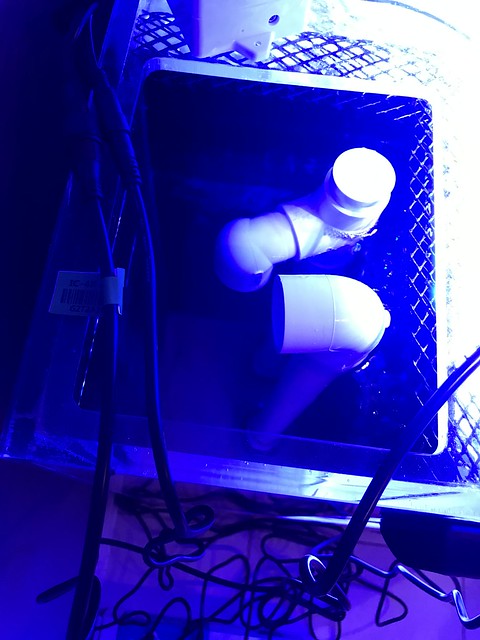
Below is the left overflow for reference.
https://flic.kr/p/2k9rsNN]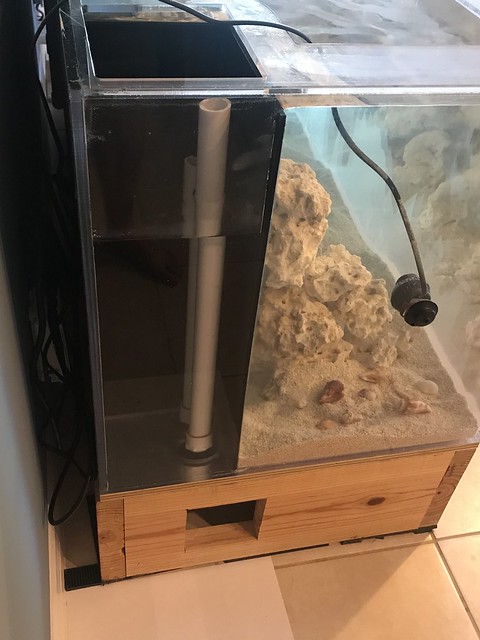 [/url]
And my Frankenstein return pump plumbing!
https://flic.kr/p/2k9r391]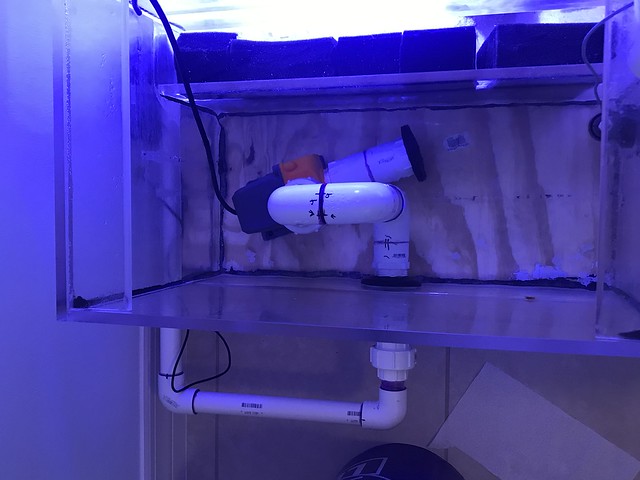 [/url]
Few other random issues I had:
The tank had a pinhole leak in the bottom seem. Literally pinhole, when I water tested a single droplet pushed out, but that single droplet was enough to prevent any other water from pushing through, so it didn’t leak, just sat there. I did two rounds of Weldon #4 around the entire bottom seam, followed by two rounds of Weldon #16 around the entire bottom seam. The bottom will be covered, so the bubbles won’t be visible.
My tile floor is not perfectly flat and one of my 2x10s developed a very slight warp. I ended up having to separate the plywood top from the 2x10 by an eighth of an inch or so. I filled the gap with composite shims, then wood filler, then wood glue. Then I had to shim the entire thing, which took DAYS. It was a real pain, but after a few days of making minor adjustments to ~48 composite shims, I had it level.
I didn’t break the shims off as I wanted to make sure the tank stayed level until completely full. I used my multitool to trim the shims, but was very nervous with the ones that were flush to the ground. Luckily I do not think I nicked any of my tiles.
Lighting
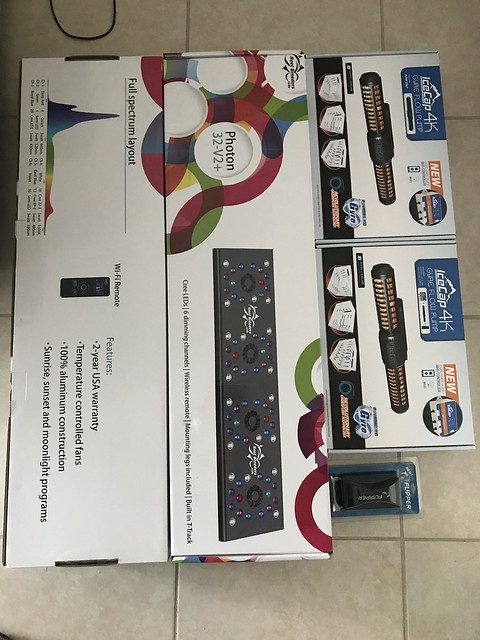
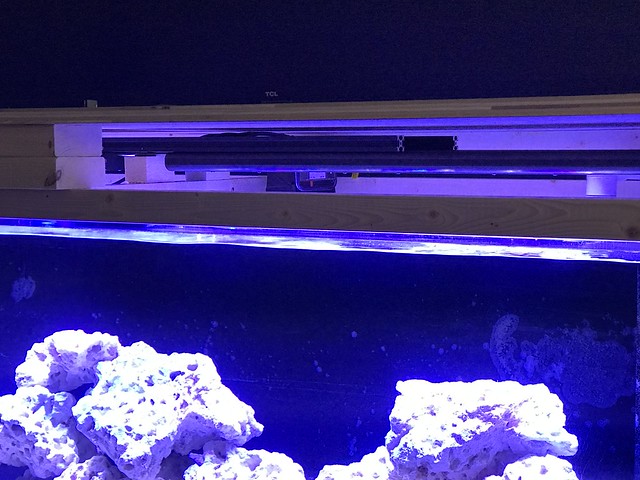
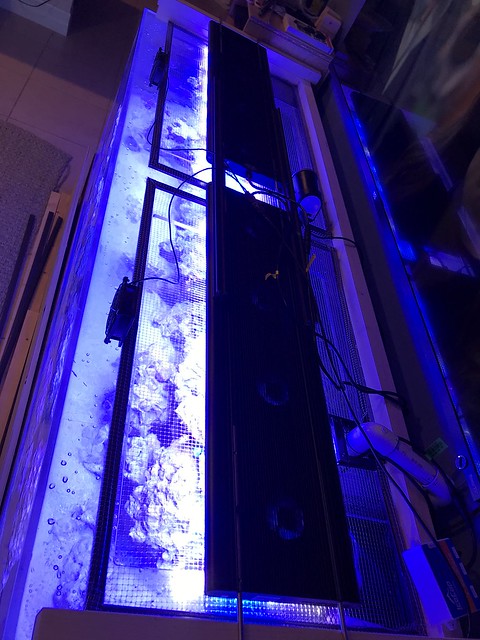
The height between the top of my tank and the TV is 6.5”. Luckily my TV mount has small screw adjusters that will lift it a little bit, but it is not a lot of room to work with. I ordered two ReefBreeders Photon V2 32s and the linking rails that will hopefully arrive Wednesday. My plan is to use the feet to rest them on top of the tank and build the canopy over it. I won’t mount them to the canopy.
Flow
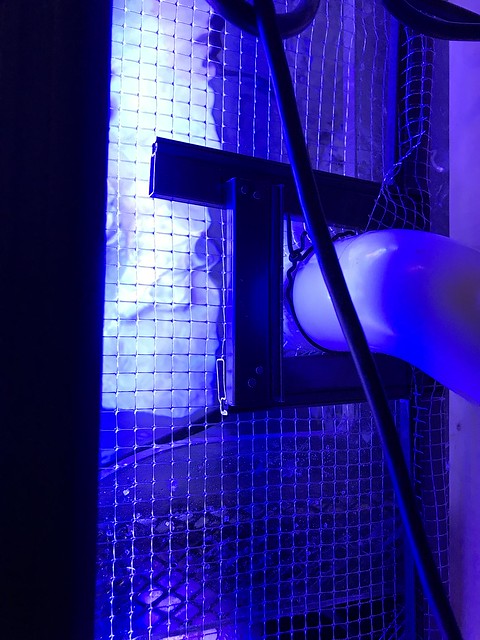
I ordered two IceCap 4k gyres that should also be here Wednesday (both these and the lights were on a black Friday sale ). I plan to put one vertically on a side panel and one horizontally on the other side panel. My return pump has a 45 degree elbow blowing into the back center of the tank, but I will likely add another smaller pump in the back of the tank.
Aquascape
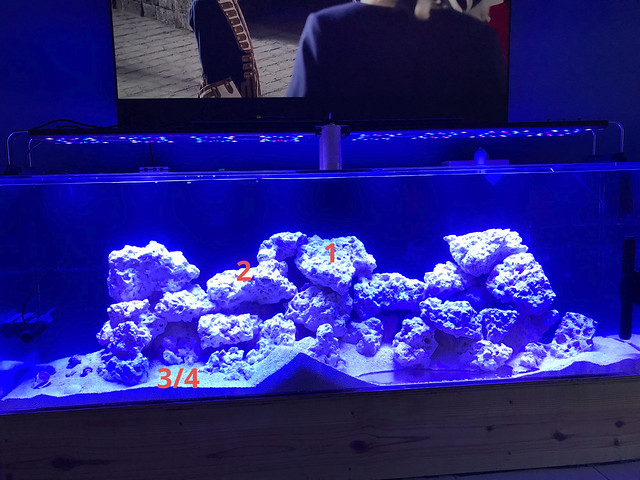
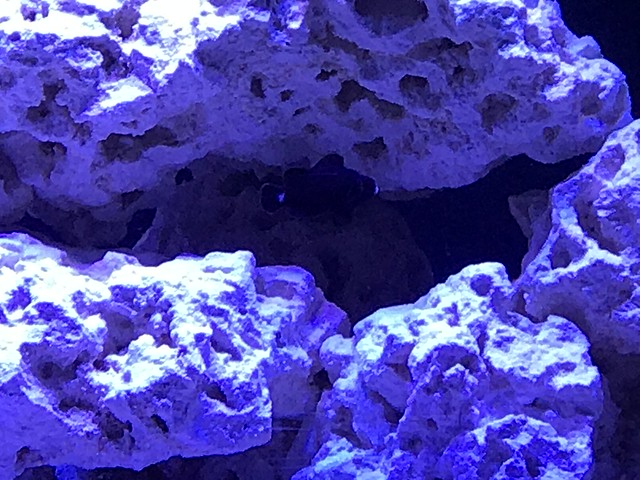
I started my first reef tank in 2002. At that time real Fiji rock was a thing and the goal was to fit as much rock into the tank that would fit. I personally prefer high quantity rock mounds as it feels much more natural to me. As such, my tank has roughly 250 lbs of dry base rock with another 50 lbs in the sump. I also put in 60 lbs of TropicEden Mesoflakes and have another 30 lbs that will go in the sump/fuge.
I started cycling half of my rock and a about 10 lbs of sand beginning of October. The rest of the rock and sand was added to the display with the cycled rock and sand about two weeks ago.
Livestock
Fishes (Still a work in progress, not finalized)
- Batch 1
- Pair of Clowns (not sure on species yet)
- Royal Gramma
- Batch 2
- Ignitus Anthias (not sure how many yet, 5-8)
- Batch 3
- Yellow Tang
- Yellow Eye Kole Tang
- Powder Blue Tang
- Batch 4
- Green Mandarin (pair)
- Clown Gobies
- Batch 5
- Carpenter Wrasse
- McCosker Wrasse
- Leopard Wrasse
- Watchman goby/shrimp
Coral
Strictly acropora and montipora
Inverts
- Fire shrimp pair
- Cleaner shrimp pair
- Clams
- Fromia starfish
- Micro brittlestars
Quarrantine
Fishes
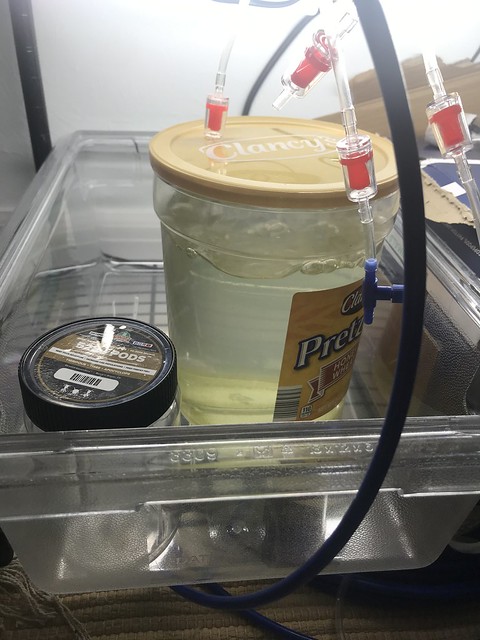
I am planning on buying all my fishes from Quarrantined Fish and likely won’t do any additional quarrantine on my side, mostly due to space, but will put everything into acclimation boxes in the display tank to ensure they are eating well and confident enough to survive.
Coral
I plan on getting all my corals from Battle Corals, but will place them in an 18g tank to light acclimate them before going into the display.
Inverts
I am concerned about the clams and snails introducing algae and/or parasites. I’ve been researching for a couple of months but haven’t found a good solution for this yet. An observation period does not seem sufficient to me. Anyone have any ideas on more extreme quarrantine measures for inverts?
Other Notes
My 18g tank has had horrible algae issues and never really started growing any coralline. That tank is around a year old. I’m likely going to add a purple and pink bottle of the ARC Reef coralline.
I plan to make my own fish food and use the Apex feeder. I work from home, so I plan to have the auto feeder drop New Life Spectrum pellets three times a day, feed frozen twice a day, and feed nori once a day. I’ll also likely dose Red Sea Reef Energy AB+.
I’ll likely add a kalk reactor and use the DoS for Ca/Alk. I may dose Red Sea Trace Colors, but not positive yet.
I’m going to try and run this tank skimmerless. If it becomes an issue I will likely add a Reef Octopus, but only if absolutely necessary.
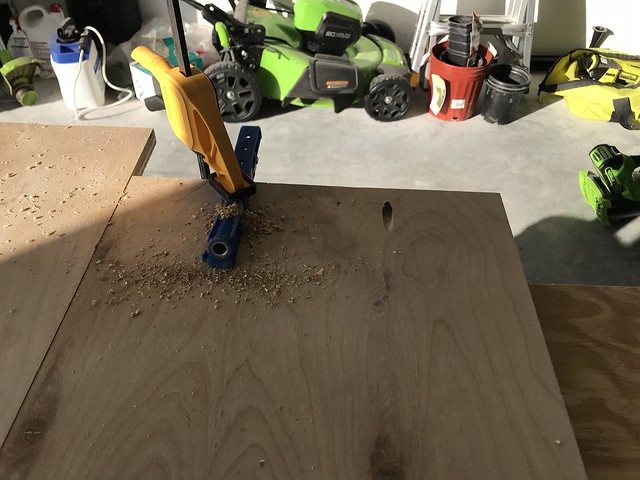
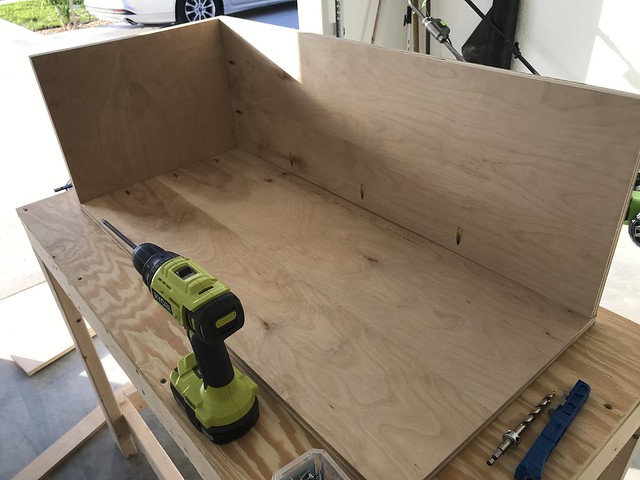
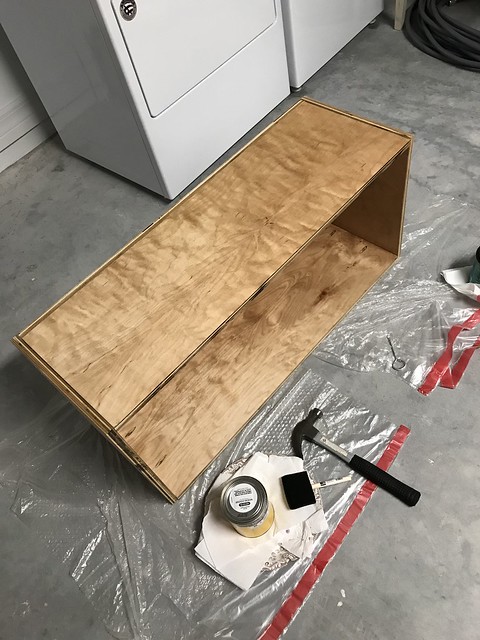
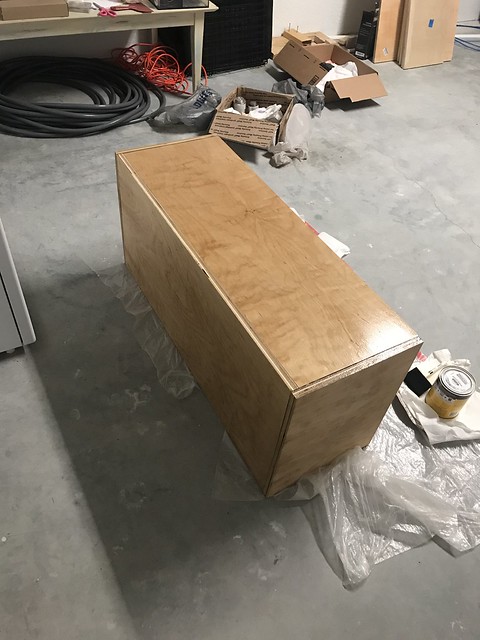
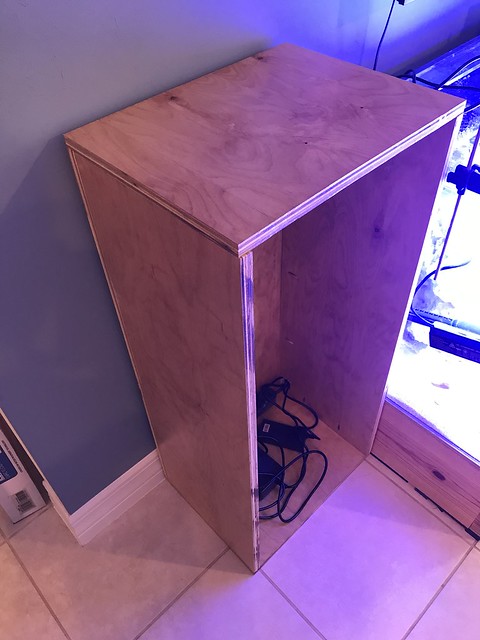
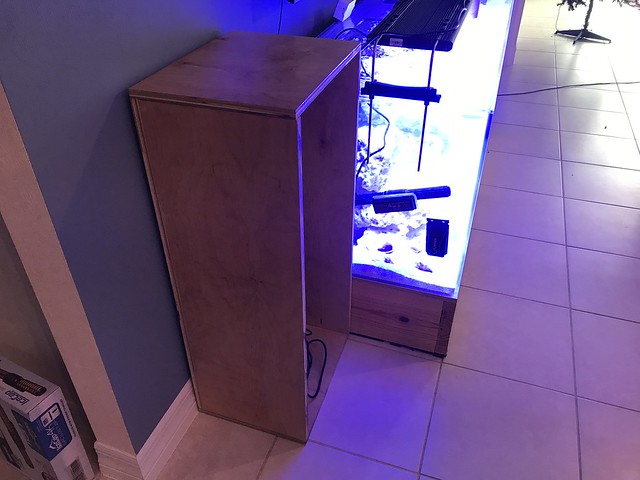
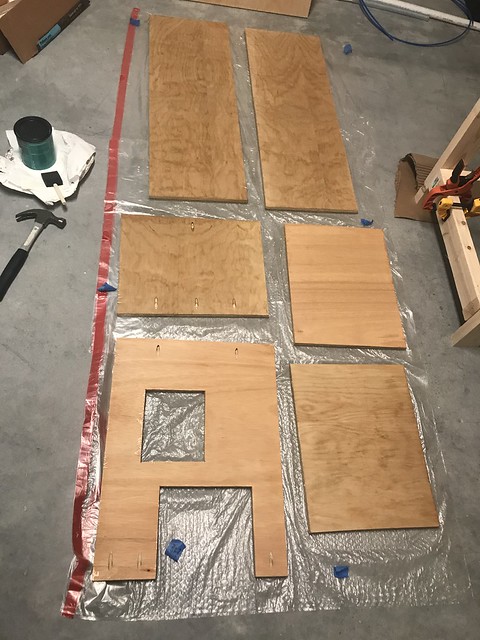
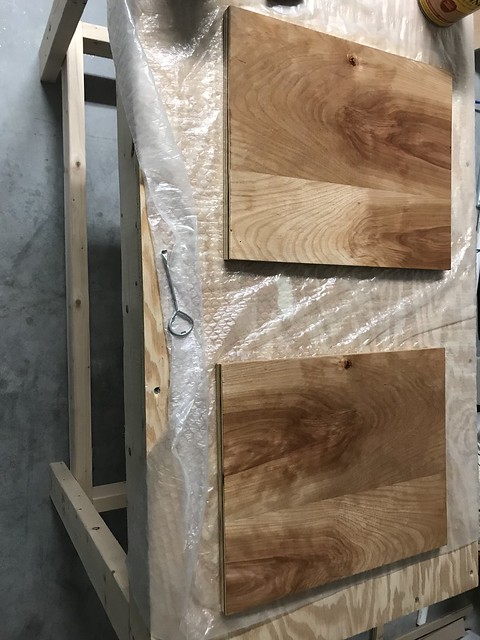
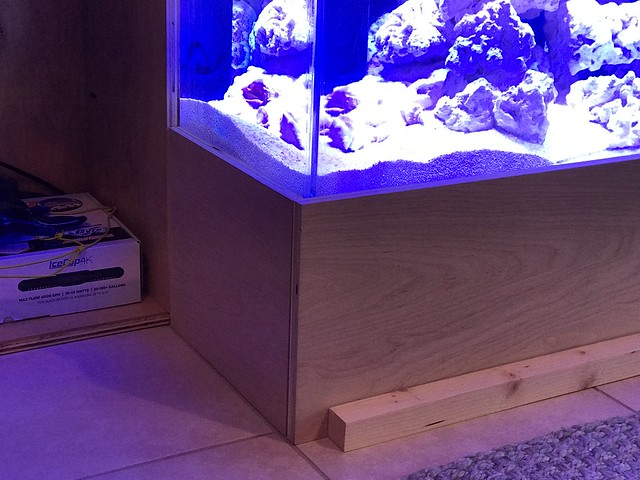
The bookshelves are a work in progress. You can see the bottom and part of a back panel for the right side in one of the pictures above. I am waiting for the lights to arrive before doing any more work to make sure the height under the TV is going to work so I don’t cut the side panels too short. I’m going to stain the shelves/canopy honey maple. There will be additional plywood wrapping the exposed 2x10s that will come up just over the bottom pane of acrylic. There will also be doors of some sort on the bottom to cover the plumbing.
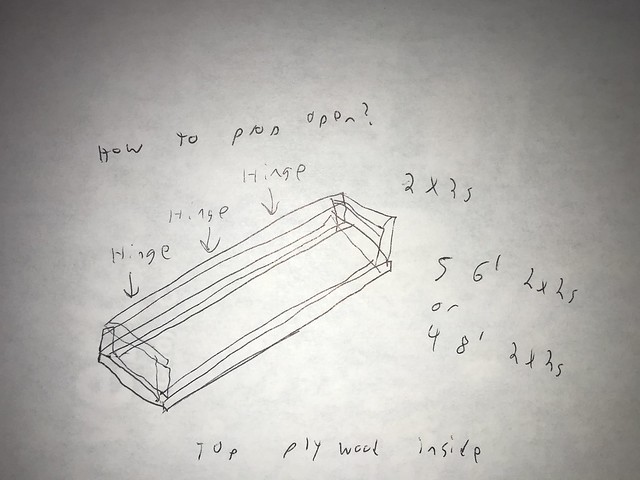
The canopy design is still a work in progress. I plan to have mesh screen over the top of the tank with the photons sitting on the tank, so I need the canopy to open in a way that I can fully access the tank. I’m thinking it will have hinges at the edge of the bookshelf so the entire front half will lift up/back.
Whelp, that’s everything I remember for now. Feel free to shoot any suggestions/questions and thanks for reading!
Design
The tank sits below my wall mounted TV in the living room and I am building bookshelves on the sides and a canopy for the top. In my head this has the potential to look super awesome, but there are numerous challenges that I’ll dive into later in this post. Below is the general concept (the shelves shows are just for reference, there will be more shelves). The shelves will not come to the front of the aquarium, so the side panels will be viewable.
https://flic.kr/p/2k9nvHV]
 [/url]
https://flic.kr/p/2k9nd4r]
 [/url]
https://flic.kr/p/2k9rt1b]
 [/url]
Sump
The sump is a 90g tank in a guest room. Fortunately the master bedroom closet is behind the right bookshelf and the other side of the closet comes out in a corner of the guest room. So the plumbing routes to the right side of the tank (when looking at it), through the closet, then into the guest room, as seen below. The Apex equipment in the closet is temporary until I move the Apex off my 18g tank. I will also be building a cleaner shelving system in the closet to hide the pipes and allow for storage. In the last picture, the return pipes are on the far right. As soon as they come through the wall they 90 degree straight up.
https://flic.kr/p/2k9ncqC]
 [/url]
https://flic.kr/p/2k9rsJe]
 [/url]
https://flic.kr/p/2k9rsR8]
 [/url]
Challenges
Let’s start with mistakes
First mistake was that I originally had the return pump (COR-15) on the right side of the tank. Since I’m a doofus, I originally had a 1” pipe feeding into the inlet of the pump and a 1.25” pipe coming out of the pump. Well as you can imagine, as soon as the pump got up to 50% it was trying to pull more water than was coming through the 1” pipe. Reducing the outlet to 1” did not fix it. I didn’t want to make the hole in the wall bigger or redo the whole run, so I moved the return pump into the sump and piped the outlet into the inside of the sump bulkhead.
Second mistake/challenge, the tank is sitting on a 2x10” frame. Since there are no legs, I cut a 5”x5” access port in all of the cross beams. This is barely enough room for all four drain pipes, but it is sufficient. The challenge is that I had to get the bulkheads tight, then cement the plumbing in place. I originally planned on having the bulkheads come straight into unions, but there wasn’t enough room, so any plumbing work requires cutting pipe. This challenge led to my biggest mistake.
For some reason the right overflow gets more water than the left one. Originally I had an 18” piece of PVC in each primary drain and a 22” piece of PVC on each emergency drain. The COR-15 is set to 100% with about 15’ of horizontal run and 2.5’ of vertical run. Should be pushing somewhere between 800 and 1000 gph, which is right around the max gravity volume for a 1” pipe. However, when I turned the pump on, the right primary drain immediately full siphoned and overflowed into its emergency drain and the left primary just barely filled, slightly below a full siphon. My belief is this is due to the drains going back up about 18” on the sump, so there is back pressure. The gurgling of the right emergency pipe was way too much, so I tried to remove the primary pipe to see if the added pressure of the water in the overflow chamber would take the volume below the emergency pipe. Whelp, the pipe was screwed into the bulkhead tighter than the bulkhead nut, which means in doing so, I unscrewed the bulkhead and started draining water onto the floor.
Good news is my house is one story, concrete foundation, and all tile, so there was no damage to the house. The stand also had to be shimmed all the way around, so very little water came into contact with the wood. However, in addition to the ~5g of water in the overflow chamber, the pipe started siphoning water out of the bubble tower on the sump. So I threw a towel down, ran to the sump and pulled the pipe out of the water, then started siphoning water out of the overflow chamber into a bucket. Probably drained 2-3 gallons onto the floor, which is a surprisingly large amount of water.
Once I got the water cleaned up I had to cut the pipe to redo the plumbing. In the picture of the pipes above you can see where I joined one of the pipes back together with a coupler. This was the most difficult part due to the small amount of working space. My hand barely fit in enough to allow the tips of my fingers to wedge the bulkhead nut against the side of the plywood while my other arm reached over the 24” tall tank and barely reached the nub of a pipe I left. By holding the nut still, I secured the bulkhead by turning the pipe on the inside. Though I had to stop just the right amount of loose so that I could put the male thread of the exit pipe into the bulkhead and tighten that simultaneously with the nut. This took several tries to get right.
Now, due to the above, I have the plumbing in the right overflow chamber as seen below. This however is very worrisome. My sump is roughly half full, so it can handle about 45 gallons of tank water siphoning back. If the overflow chambers were to ever leak, this would required 18” pipes in the overflow chambers, which I do not currently have.
https://flic.kr/p/2k9rsXq]
 [/url]
Unfortunately I do not have a solution for this yet, but would love some feedback. If I leave the primary at this height and the emergency drain at 22”, the entire chamber floods and the emergency drain starts gurgling. I do not want to put a gate valve on the primary drain and restrict it enough to put the emergency drain in full siphon, as that defeats the purpose. Maybe putting a durso on the emergency drain and raising the primary back to 18” would keep the emergency drain quiet enough?
Below is the left overflow for reference.
https://flic.kr/p/2k9rsNN]
 [/url]
And my Frankenstein return pump plumbing!
https://flic.kr/p/2k9r391]
 [/url]
Few other random issues I had:
The tank had a pinhole leak in the bottom seem. Literally pinhole, when I water tested a single droplet pushed out, but that single droplet was enough to prevent any other water from pushing through, so it didn’t leak, just sat there. I did two rounds of Weldon #4 around the entire bottom seam, followed by two rounds of Weldon #16 around the entire bottom seam. The bottom will be covered, so the bubbles won’t be visible.
My tile floor is not perfectly flat and one of my 2x10s developed a very slight warp. I ended up having to separate the plywood top from the 2x10 by an eighth of an inch or so. I filled the gap with composite shims, then wood filler, then wood glue. Then I had to shim the entire thing, which took DAYS. It was a real pain, but after a few days of making minor adjustments to ~48 composite shims, I had it level.
I didn’t break the shims off as I wanted to make sure the tank stayed level until completely full. I used my multitool to trim the shims, but was very nervous with the ones that were flush to the ground. Luckily I do not think I nicked any of my tiles.
Lighting
The height between the top of my tank and the TV is 6.5”. Luckily my TV mount has small screw adjusters that will lift it a little bit, but it is not a lot of room to work with. I ordered two ReefBreeders Photon V2 32s and the linking rails that will hopefully arrive Wednesday. My plan is to use the feet to rest them on top of the tank and build the canopy over it. I won’t mount them to the canopy.
Flow
I ordered two IceCap 4k gyres that should also be here Wednesday (both these and the lights were on a black Friday sale
Aquascape
I started my first reef tank in 2002. At that time real Fiji rock was a thing and the goal was to fit as much rock into the tank that would fit. I personally prefer high quantity rock mounds as it feels much more natural to me. As such, my tank has roughly 250 lbs of dry base rock with another 50 lbs in the sump. I also put in 60 lbs of TropicEden Mesoflakes and have another 30 lbs that will go in the sump/fuge.
I started cycling half of my rock and a about 10 lbs of sand beginning of October. The rest of the rock and sand was added to the display with the cycled rock and sand about two weeks ago.
Livestock
Fishes (Still a work in progress, not finalized)
- Batch 1
- Pair of Clowns (not sure on species yet)
- Royal Gramma
- Batch 2
- Ignitus Anthias (not sure how many yet, 5-8)
- Batch 3
- Yellow Tang
- Yellow Eye Kole Tang
- Powder Blue Tang
- Batch 4
- Green Mandarin (pair)
- Clown Gobies
- Batch 5
- Carpenter Wrasse
- McCosker Wrasse
- Leopard Wrasse
- Watchman goby/shrimp
Coral
Strictly acropora and montipora
Inverts
- Fire shrimp pair
- Cleaner shrimp pair
- Clams
- Fromia starfish
- Micro brittlestars
Quarrantine
Fishes
I am planning on buying all my fishes from Quarrantined Fish and likely won’t do any additional quarrantine on my side, mostly due to space, but will put everything into acclimation boxes in the display tank to ensure they are eating well and confident enough to survive.
Coral
I plan on getting all my corals from Battle Corals, but will place them in an 18g tank to light acclimate them before going into the display.
Inverts
I am concerned about the clams and snails introducing algae and/or parasites. I’ve been researching for a couple of months but haven’t found a good solution for this yet. An observation period does not seem sufficient to me. Anyone have any ideas on more extreme quarrantine measures for inverts?
Other Notes
My 18g tank has had horrible algae issues and never really started growing any coralline. That tank is around a year old. I’m likely going to add a purple and pink bottle of the ARC Reef coralline.
I plan to make my own fish food and use the Apex feeder. I work from home, so I plan to have the auto feeder drop New Life Spectrum pellets three times a day, feed frozen twice a day, and feed nori once a day. I’ll also likely dose Red Sea Reef Energy AB+.
I’ll likely add a kalk reactor and use the DoS for Ca/Alk. I may dose Red Sea Trace Colors, but not positive yet.
I’m going to try and run this tank skimmerless. If it becomes an issue I will likely add a Reef Octopus, but only if absolutely necessary.
The bookshelves are a work in progress. You can see the bottom and part of a back panel for the right side in one of the pictures above. I am waiting for the lights to arrive before doing any more work to make sure the height under the TV is going to work so I don’t cut the side panels too short. I’m going to stain the shelves/canopy honey maple. There will be additional plywood wrapping the exposed 2x10s that will come up just over the bottom pane of acrylic. There will also be doors of some sort on the bottom to cover the plumbing.
The canopy design is still a work in progress. I plan to have mesh screen over the top of the tank with the photons sitting on the tank, so I need the canopy to open in a way that I can fully access the tank. I’m thinking it will have hinges at the edge of the bookshelf so the entire front half will lift up/back.
Whelp, that’s everything I remember for now. Feel free to shoot any suggestions/questions and thanks for reading!


