MaddyP's 12G Long - Node-Red Nano Peninsula

OP
OP
MaddyP

MaddyP

'Til Reefdom Come...
View Badges
Joined
Jul 21, 2016
Messages
1,907
Reaction score
4,530
Location
Vancouver, WA
Rating - 0%
0   0   0
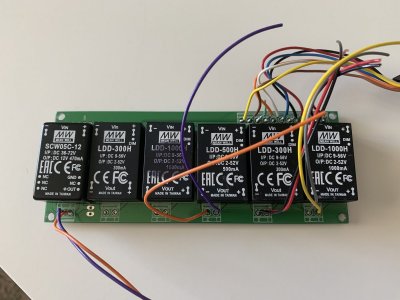
Started thinking through how I’ll be implementing the Nanobox LED over this tank. Originally, the plan was to run it with 0-10V from either an Apex/GHL so Dave outfitted the power supply with a PWM to 0-10V converter. I really like how compact these buckpuck boards are...
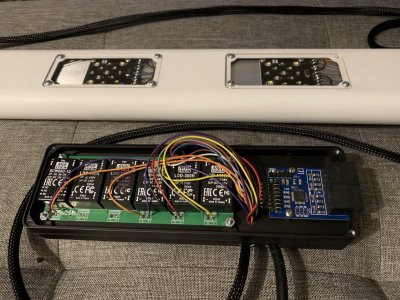
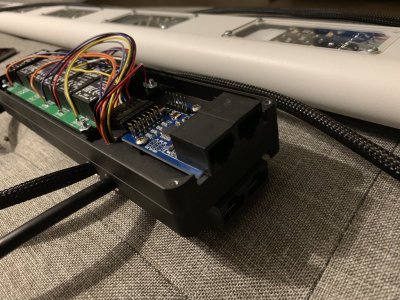
37192C91-A468-4D02-B6E1-5E8F3619D9BB.jpeg
58155A73-CA36-4B77-A1B5-FE92D2FDBA89.jpeg

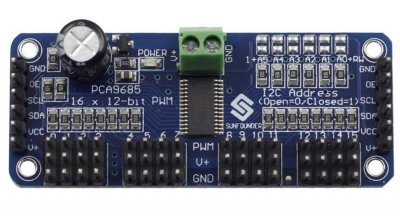
But now that this controller is Raspberry Pi based, it’ll be easier going straight to the PWM with a multi-channel PWM hat for the LED channels. The converters will be used to interface the 0-10V pumps.

One of these should do for PWM control...
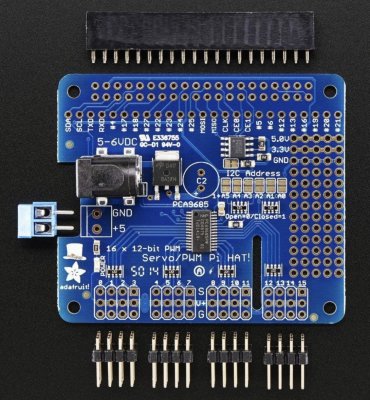
440B7B9E-33DB-4C11-81AD-5903DAB8162E.jpeg
319D99B2-B78B-4FD7-A122-7EA7C3FBF75D.jpeg

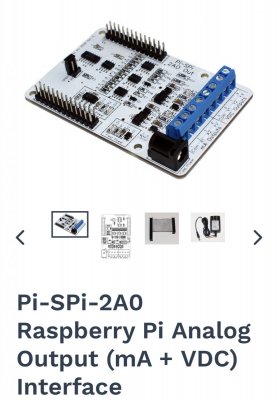
In addition, I’ve ordered a couple of analog input/output boards to see if the PLC is even needed. Node-Red offers well built PID nodes so the control needed for regulating the drain valve should be possible directly from Pi and these boards.
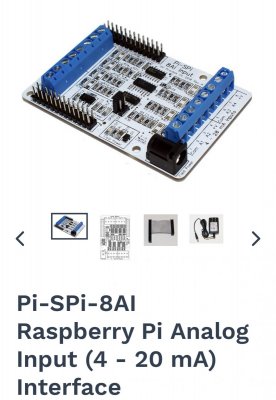
9371F9F9-EA97-48F2-BFA3-1B50435C52C2.jpeg
EF4443DC-554E-4607-A1B8-B8053614B312.jpeg


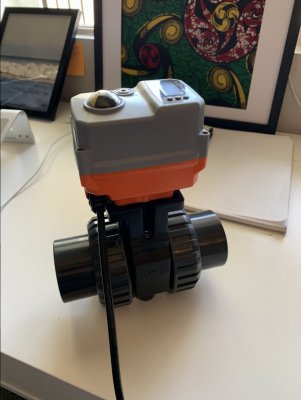
Once the valve shows up from the UK, I’ll set the concept tanks up to run a PID loop controlled by Node-Red to verify it performs adequately. Depending on performance and how accurately the failsafes respond to simulated failures, testing of the PLC will be evaluated.
 
OP
OP
MaddyP

MaddyP

'Til Reefdom Come...
View Badges
Joined
Jul 21, 2016
Messages
1,907
Reaction score
4,530
Location
Vancouver, WA
Rating - 0%
0   0   0
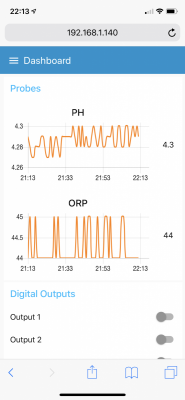
Update on the Tentacle board: probes have been polled for readings every two seconds for the last 24 hours with no errors. Both probes are read at the same time via I2C. It will be interesting adding two more probes polling at the same frequency.

B50A65F0-C98D-40ED-9E59-110D20BEC66C.png
 

samnaz

Earthling
View Badges
Joined
Dec 30, 2016
Messages
3,564
Reaction score
6,879
Location
Humble.fish
Rating - 0%
0   0   0
Awesome... although to be honest I understand none of the technical parts. Great work so far, will be following this one for sure.

That Nanobox fixture is a thing of beauty. I have the Nanobox Quad, and thought mine was a beast ha.
 

Tihsho

Active Member
View Badges
Joined
Oct 10, 2011
Messages
236
Reaction score
217
Rating - 0%
0   0   0
For something like this, why would you go with a single Pi solution? For the speed of processing the data I would have either considered a faster SBC such as the ASUS TinkerBoard (which correct me if I'm wrong has true 1gig Eth) or gone with a cluster. That also said, I'd look into adding a small gigabit switch to your din rail and trying to get as much of the controller talking over eth to simulate what cars have been doing with a CANBUS to keep the controller modular to allow room for expansion in the future. Problem with that is your Modbus process would have to change so that the networking doesn't get too wonky.

I've been looking into doing a similar project (SBC controller) and found that in order to get readings quick the best option was to mount NodeMCU style boards as a single host to each monitoring interface and having them feed to a database (be it on a SBC, PC or on the web) via MQTT and then having an external SBC parse the information and then host it to a website for a dashboard.

Regardless of all my yammering above, this is one heck of a neat project you have going on! I really like the industrial approach to it as well.
 
OP
OP
MaddyP

MaddyP

'Til Reefdom Come...
View Badges
Joined
Jul 21, 2016
Messages
1,907
Reaction score
4,530
Location
Vancouver, WA
Rating - 0%
0   0   0
For something like this, why would you go with a single Pi solution? For the speed of processing the data I would have either considered a faster SBC such as the ASUS TinkerBoard (which correct me if I'm wrong has true 1gig Eth) or gone with a cluster. That also said, I'd look into adding a small gigabit switch to your din rail and trying to get as much of the controller talking over eth to simulate what cars have been doing with a CANBUS to keep the controller modular to allow room for expansion in the future. Problem with that is your Modbus process would have to change so that the networking doesn't get too wonky.

I've been looking into doing a similar project (SBC controller) and found that in order to get readings quick the best option was to mount NodeMCU style boards as a single host to each monitoring interface and having them feed to a database (be it on a SBC, PC or on the web) via MQTT and then having an external SBC parse the information and then host it to a website for a dashboard.

Regardless of all my yammering above, this is one heck of a neat project you have going on! I really like the industrial approach to it as well.
You make some good points in your "yammering"! I don't have any experience with the ASUS Tinkerboard, but the specs indeed allude to this being a superior SBC. To be honest, the decision to go with RasPi was primarily due to accessibility, price, and available hats/shields. As this project develops though, I am leaning towards eliminating the PLC altogether and save it for a later, more complex build. We will see if the RasPi can handle reading the ultrasonic sensor and controlling the modulating actuator before the decision is made for sure.

Another interesting idea you touched on was MQTT. One thought moving forward is to see if each module (relay power strip, LED controller, and dosing pump) could be built with a wifi-enabled board and utilize MQTT to communicate with the head unit controller. So each module would only need power and could be placed anywhere in the stand.
 

Tihsho

Active Member
View Badges
Joined
Oct 10, 2011
Messages
236
Reaction score
217
Rating - 0%
0   0   0
The Tinkerboard can use the Pi hats interchangeably which is nice, but it has it's own flavor of OS which is different from the Debian base that Raspbian is on. Also, if you want to use the graphical output of this device... Be sure to set the resolution in the MicroSD prior to booting or you won't be able to read a dang thing. At least I couldn't as it booted with uber resolution on a 40" screen leaving text the size .5 font.

As for MQTT, if you're interested in it, look into NodeMCU. The boards are cheap as anything, say like around $10 each on the high end for clones (but if you can shell out for the originals, please do! A much better fit and finish on the soldering) and all you need to do is write some simple java to throw into the Arduino compiler and flash the board. Once you do that, a little power and this thing just shuffles data where you want it. The NodeMCU is also 100% wireless, so as long as you have WiFi, you can pull the data from the sensor, format it with your Java code, and within the Java code you can punt it to whatever you want. Ideally, you're going to punt it to an MQTT database and then parse the data to some dashboard. The NodeMCU sample rates are also insane for the price. So if you want to have a constant stream of data at all times that isn't stale, this is a cheap and simple solution for it.

What I did in my new fish room when I was first setting it up in my new home was setup a bunch of these with temperature and humidity probes so I could figure out the cold spots of the unfinished room so I knew the extra places to insulate. I was able to pull data from the 25'x12' room over the week with sample rates of each location for environmentals being punted to MQTT every second of every day for a week. When I plotted the data, I could see where the temperatures fluctuated during the day, and I also logged when my AC (as this was summer) kicked on with a NodeMCU setup near a vent so I could compare the cold air getting into the non HVAC ventilated room. Post insulating the room I moved to sealing it off from the humidity leaking out from the tanks evaporation to optimize the dehumidifier I have running in there to only be drying the room air and not the air leaking past the insulation. Now I'm just monitoring the space between the joists to make sure humid air isn't back feeding into the finished part of the basement as to not promote mold.

SBC's with a little ingenuity can provide a ton of data and automation. You just need to know what you want and the road to get there is pretty well documented on the web.
 
OP
OP
MaddyP

MaddyP

'Til Reefdom Come...
View Badges
Joined
Jul 21, 2016
Messages
1,907
Reaction score
4,530
Location
Vancouver, WA
Rating - 0%
0   0   0
The Tinkerboard can use the Pi hats interchangeably which is nice, but it has it's own flavor of OS which is different from the Debian base that Raspbian is on. Also, if you want to use the graphical output of this device... Be sure to set the resolution in the MicroSD prior to booting or you won't be able to read a dang thing. At least I couldn't as it booted with uber resolution on a 40" screen leaving text the size .5 font.

As for MQTT, if you're interested in it, look into NodeMCU. The boards are cheap as anything, say like around $10 each on the high end for clones (but if you can shell out for the originals, please do! A much better fit and finish on the soldering) and all you need to do is write some simple java to throw into the Arduino compiler and flash the board. Once you do that, a little power and this thing just shuffles data where you want it. The NodeMCU is also 100% wireless, so as long as you have WiFi, you can pull the data from the sensor, format it with your Java code, and within the Java code you can punt it to whatever you want. Ideally, you're going to punt it to an MQTT database and then parse the data to some dashboard. The NodeMCU sample rates are also insane for the price. So if you want to have a constant stream of data at all times that isn't stale, this is a cheap and simple solution for it.

What I did in my new fish room when I was first setting it up in my new home was setup a bunch of these with temperature and humidity probes so I could figure out the cold spots of the unfinished room so I knew the extra places to insulate. I was able to pull data from the 25'x12' room over the week with sample rates of each location for environmentals being punted to MQTT every second of every day for a week. When I plotted the data, I could see where the temperatures fluctuated during the day, and I also logged when my AC (as this was summer) kicked on with a NodeMCU setup near a vent so I could compare the cold air getting into the non HVAC ventilated room. Post insulating the room I moved to sealing it off from the humidity leaking out from the tanks evaporation to optimize the dehumidifier I have running in there to only be drying the room air and not the air leaking past the insulation. Now I'm just monitoring the space between the joists to make sure humid air isn't back feeding into the finished part of the basement as to not promote mold.

SBC's with a little ingenuity can provide a ton of data and automation. You just need to know what you want and the road to get there is pretty well documented on the web.
NodeMCU seems to be perfect for integrating into each separate module of this build! Thank you for pointing it out as an option!
 
OP
OP
MaddyP

MaddyP

'Til Reefdom Come...
View Badges
Joined
Jul 21, 2016
Messages
1,907
Reaction score
4,530
Location
Vancouver, WA
Rating - 0%
0   0   0
Thanks to @Tihsho this project has taken another interesting turn!

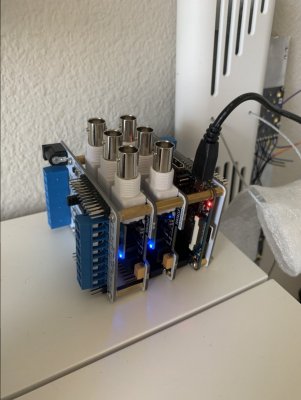
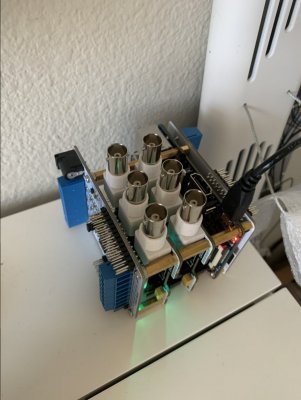
Switched the Raspi to an Asus Tinker Board S to see if the performance differences would justify the cost. Simply loading Node Red, MQTT, and the desktop environment was enough to convince me this is indeed a superior board. I also prefer the desktop/tools over stock Rasbian. Second Tentacle board and sensor/valve control boards came in and were mounted into a nice little brick.

DD7633D0-2B52-4D44-B472-924C84E5AFC8.jpeg
805F16CF-FD38-4273-AFF8-21CAF6795CE0.jpeg

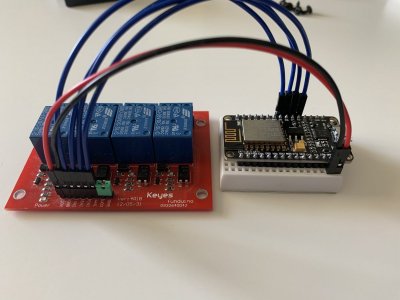
As mentioned above, MQTT is now taking a central role in this project. If possible, all “modules” will be connected to the motherboard via MQTT protocol using NodeMCU boards. I’ve already sketched up the relay module which will be implemented in a 2ft power strip.

8438EADC-DE47-44DD-8A99-195EF5CC5D70.jpeg

A NodeMCU board will also drive the PWM pins on these BuckPuck boards...

6773E8B5-C9F1-49E3-BCEA-D91D1F5EF67C.jpeg

More to come...
 

Tihsho

Active Member
View Badges
Joined
Oct 10, 2011
Messages
236
Reaction score
217
Rating - 0%
0   0   0
Glad I was of some help!

Just as another tip, I would recommend the following just for the sake of debugging and spreading load.

I would get a simple wifi router and have a standalone network for your automation.

1) This means nothing but the Pi/Tinker board/NodeMCU should connect to it minus maybe a PC for interfacing.
2) You can setup a Pi as a VPN to this network and manage your automation remotely/check on any alerts without punching a hole into your personal network and putting your other electronics at risk.
3) Another big reason is to limit load on the network device doing the data transfers between devices. With a standalone network, you won't have to worry about someone else in the house clogging up the works with Netflix going out where the rest of this traffic stays local.

Additionally, to all of that, save any webfront stuff to go to another device. Don't pile on more tasks to the tinkerboard. Either add another tinkerboard or put the web aspect on the Pi that you just replaced.
 

WV Reefer

I do what I want!
View Badges
Joined
May 31, 2018
Messages
2,000
Reaction score
6,192
Rating - 0%
0   0   0
Just found this thread and I love it! Your 12 gallon long is the exact opposite of mine........ low tech vs. high tech. :D


And I think @eschulist inspired tons of 12 Longs out there.
 
OP
OP
MaddyP

MaddyP

'Til Reefdom Come...
View Badges
Joined
Jul 21, 2016
Messages
1,907
Reaction score
4,530
Location
Vancouver, WA
Rating - 0%
0   0   0
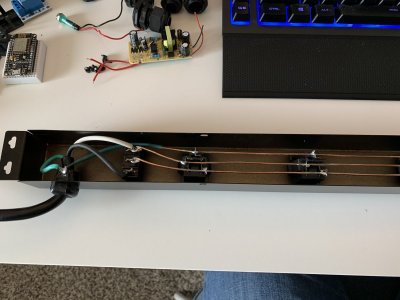
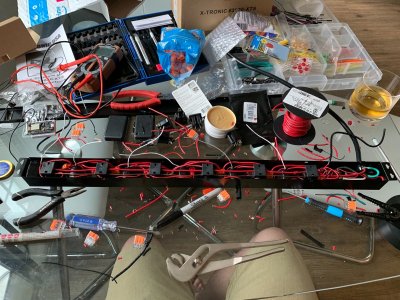
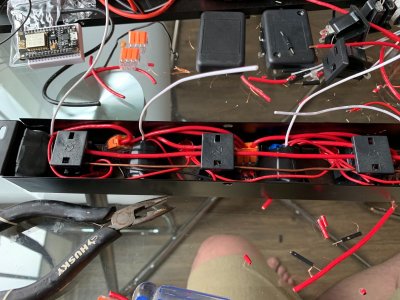
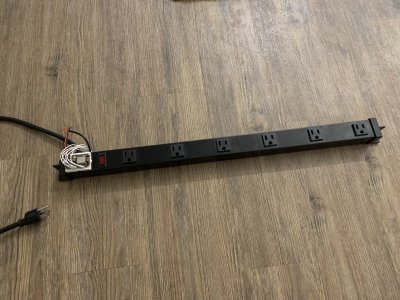
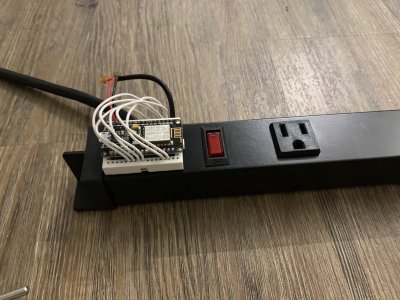
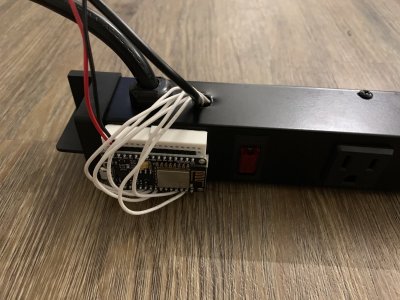
More progress! Mostly finished NodeMCU power strip! Working great thus far...

C4AFD491-2999-4851-820A-EC3F9B778361.jpeg

976F5543-8E6A-48EF-BCC0-0B6C6D83B5AF.jpeg

6E35AD95-FE23-4EFD-8CFF-45A6DEF3ED7D.jpeg

2FD7BD1E-69CF-4D80-B327-4E1550D269B8.jpeg

Once I find a properly sized project box to mount to this power strip, the NodeMCU will be protected and wired more permanently.

7E7CA8B9-C392-42C5-9563-CF6F4744841E.jpeg

D9DAE539-423A-444E-A570-C287EA55E63B.jpeg

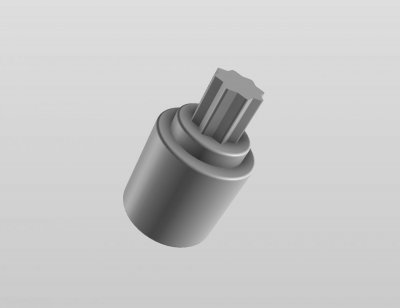
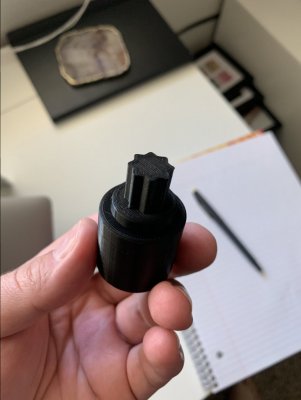
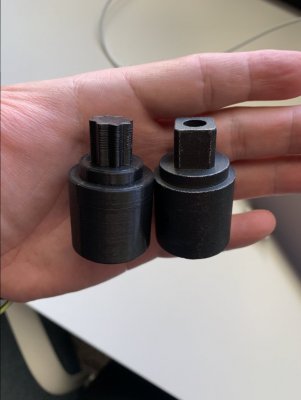
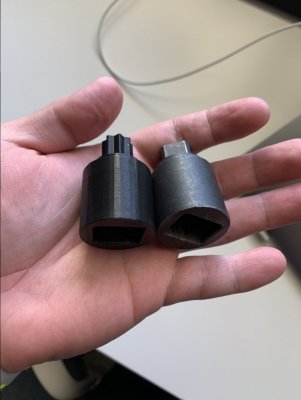
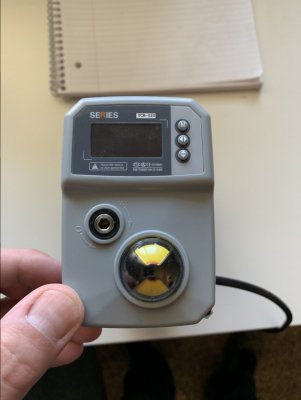
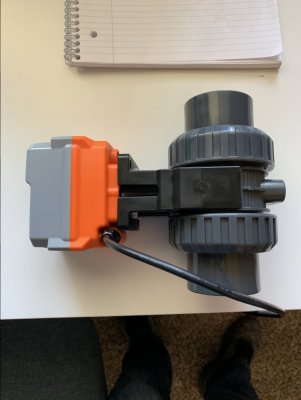
Hopefully this next week I will be able to set up the valve and sensor to verify this concept will work. The mounting kit which came with the ball valve included the wrong size drive adapter so having one 3D printed (PLA 100% infill) from 3D Hubs. Should be strong enough to handle the torque.

22106A61-C638-4C2C-B41B-CFBCC09DA469.jpeg
 

Tihsho

Active Member
View Badges
Joined
Oct 10, 2011
Messages
236
Reaction score
217
Rating - 0%
0   0   0
First off, are those Wago Lever Nuts I see? :thumbsup:

What material are you getting the adapter printed in? The reason I ask are two fold:

1) Make sure it hasn't shrunk post print if it's PLA. I know a few people who have had this issue with parts printed being 90-95% of the actual size of the designed model. That said, I've never had an issue with PLA or PETG on any of my printers.

2) Make sure it's something that can handle torque! Depending on the axis the model is lined up and the layer adhesion, you may run into sheering issues. A way around this, as it's a mechanical part, is to have the adapter printed in ABS or Nylon. If you REALLY want it to be strong once you have it up and running, send the model to a CNC shop and have them CNC out one in delrin if you want to keep the price low and want a true one piece adapter.
 
OP
OP
MaddyP

MaddyP

'Til Reefdom Come...
View Badges
Joined
Jul 21, 2016
Messages
1,907
Reaction score
4,530
Location
Vancouver, WA
Rating - 0%
0   0   0
First off, are those Wago Lever Nuts I see? :thumbsup:

What material are you getting the adapter printed in? The reason I ask are two fold:

1) Make sure it hasn't shrunk post print if it's PLA. I know a few people who have had this issue with parts printed being 90-95% of the actual size of the designed model. That said, I've never had an issue with PLA or PETG on any of my printers.

2) Make sure it's something that can handle torque! Depending on the axis the model is lined up and the layer adhesion, you may run into sheering issues. A way around this, as it's a mechanical part, is to have the adapter printed in ABS or Nylon. If you REALLY want it to be strong once you have it up and running, send the model to a CNC shop and have them CNC out one in delrin if you want to keep the price low and want a true one piece adapter.
Wago lever nuts were my preference, but locally the push in nuts were the only connector I could find.

This adapter is being printed in PLA at 100% infill. I went with PLA because tolerance tends to be better than other materials. Shear may be an issue depending on how it is printed, but the forces on this will be rather low as the ball valve is buttery smooth. The adapter is scheduled for delivery today...
 

Tihsho

Active Member
View Badges
Joined
Oct 10, 2011
Messages
236
Reaction score
217
Rating - 0%
0   0   0
100% infill would help, but it's not an end all. Hopefully it works, just wanted to give you heads up so you knew what may happen and some possible resolutions if the part fails. If all seems to work, I'd recommend getting a spare for every valve you have running these just so that if something failed, you can fix it fairly quick.
 

ryboy707

Active Member
View Badges
Joined
Feb 24, 2016
Messages
256
Reaction score
113
Rating - 0%
0   0   0
Wow, impressive to say the least. To have pid control over a valve would be great for level sensors and overflow drains. I’m so tired of adjusting my Red Sea overflow drain every day. It would be nice to have level sensors trigger control modifications to the valve position automatically
 

Iván Olalla

Well-Known Member
View Badges
Joined
May 18, 2018
Messages
556
Reaction score
1,440
Location
México
Rating - 0%
0   0   0
Following, got to love builds out of the box with all the bells and whistles while still DIY.
I don't like the looks of equipment un the display either, i'm building my frag tank that needs to be as pretty as my display, bought the TLF overflow box (In out) that will be very low profile and not an eye sore. Plus: i'm overkilling the return pump capacity to take advantage of one of the overflow perks which is a pulsing effect, i might not need a powerhead or a wavemaker un tje display if this works the way i expect it to do.

Check out the IN OUT Xaqua, it might work for your setup!
Regards
 

ntableman

Community Member
View Badges
Joined
Oct 25, 2017
Messages
29
Reaction score
44
Location
Hudson Valley
Rating - 0%
0   0   0
Hey I am trying to get my EZO stamps to read in node-red instead of python on the R Pi. Were you able to get a read from the i2c inside node-red? If so can you share the flow/code?
 

Clear reef vision: How do you clean the inside of the glass on your aquarium?

  • Razor blade

    Votes: 126 59.2%
  • Plastic scraper

    Votes: 62 29.1%
  • Clean-up crew

    Votes: 76 35.7%
  • Magic eraser

    Votes: 36 16.9%
  • Other

    Votes: 63 29.6%
Back
Top