My $10,000 Dollar 150 Gallon Reef Tank Build DIY Stand

BRSBrokeMe

Community Member
View Badges
Joined
Dec 30, 2020
Messages
47
Reaction score
141
Location
Manchester,TN
Rating - 0%
0   0   0
Hey Everyone
I had some time today so I wanted to start a build thread so everyone can see why my wife is so ticked at me lol.
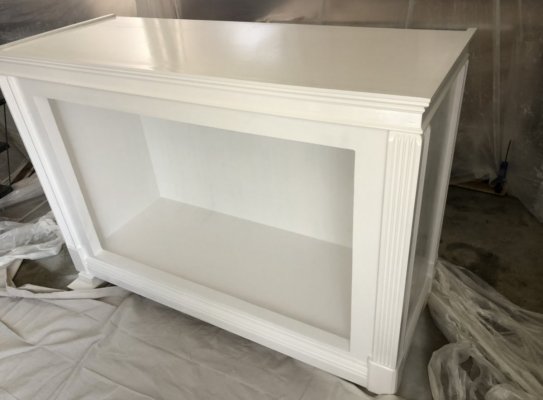
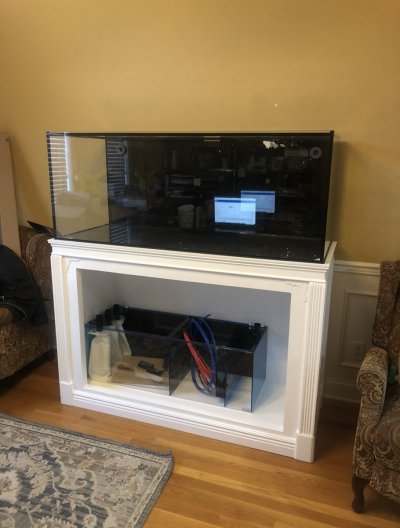
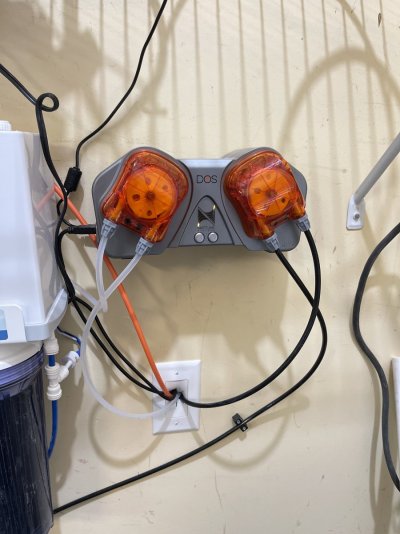
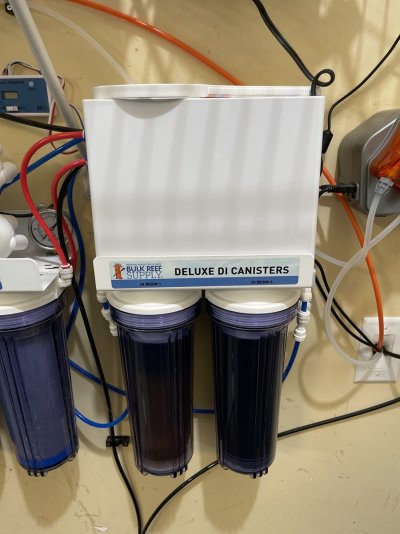
I will be adding pics of my progress I am about 3 months into my build and 15 days into my cycle and boy its been a long 15 days.
I look forward to hearing yawls opinions on what you thing I'm doing correct and what I should do different.
Remember This is my first tank so be easy
Tonight or tomorrow I will start adding pics of my past progress and try to get it up to speed
 

Nano925

Active Member
View Badges
Joined
Jan 7, 2021
Messages
269
Reaction score
732
Location
california
Rating - 0%
0   0   0
can't wait GIF
 
OP
OP
BRSBrokeMe

BRSBrokeMe

Community Member
View Badges
Joined
Dec 30, 2020
Messages
47
Reaction score
141
Location
Manchester,TN
Rating - 0%
0   0   0
Ok guys “YA’LL” lol I always get comments about that but that’s just the way us southerners talk
So here are some pics of the stand I have build for my 150 gallon tank.
The frame of it is made with prime cut 2x6 there are 2 on each corner and one in the center of the sides and back and it is very solid.
The height is 42 inch by 60 wide 24 deep
Then I wrapped the entire frame with 1/2 inch birch plywood the trim is just some stuff I found at Home Depot I wish I would have done something different we’re the vertical trim meets the top trim but I just rounded it off and went with it as for the doors I wanted them to be glass so I’m having a guy that I know build them for me but that’s going to be the only part of this I don’t do myself
I painted it with my graco magnum spray gun and it tends to spit sometimes so I had to go behind when done spraying and roll out the spit marks from the paint gun you can see in the background were I built a paint booth with some plastic hanging from the rails on my garage door

The paint I used was oil based ultra white and man that oil based paint was a good decision because since I’ve been putting it together I have spilt so much water and it will not soak in at all I could not imagine what it would look like now if I used latex paint
I filled every joint and nail hole with paintable latex caulk to make sure everything looks really smooth
In the last picture you can see how perfect it fit I spent a lot of time measuring and remeasuring
I have to say this is my first cabinet build and everything came out really strait and fit perfectly around the tank with only about a 1/8 inch gap on each side front to back was dead on though.

the aquarium is from sc aquarium I purchased it on eBay I think 1200 dollars for the 24x24x60 150 gallon
The return drain is a center bottom outlet and I wish I would have gotten a external overflow or more room inside the tank but I made it work
From the factory it had 3 1 inch holes drilled for bulkheads 1 for emergency drain one for siphon and one for return and I wanted to do a bean animal style drain so I made the center hole an emergency drain and the right hole the low siphon and the left hole my high siphon
For my returns I drilled the back of the glass in the rear upper left and right sides with a bit I ordered for brs and installed 1 inch bulk heads to get the larges so my return line will be 1 inch up to the bulk head and I’ll use a 1inch x 3/4 bushing for my lock line
The sump you see in the cabinet is a triton44-v2-sump-trigger-systems i wanted to get the biggest size I could fit in there with a little bit of room for electronics to have as much water volume as possible I wish I would have ordered the trigger platinum but I was eager to buy and didn’t do enough research More on that later
I guess that’s about all I can say about this part of my build I hope it wasn’t too long winded And sorry for the punctuation I’m definitely not a writer but if anyone has any questions let me know and I will add the next parts of my build later
 

Attachments

  • B6941235-BA5F-4133-A02F-41EB27EFDA6F.jpeg
    B6941235-BA5F-4133-A02F-41EB27EFDA6F.jpeg
    88.2 KB · Views: 120
  • 79B5A347-E172-4C9A-AE29-00BD14E277EC.jpeg
    79B5A347-E172-4C9A-AE29-00BD14E277EC.jpeg
    99.3 KB · Views: 134
  • CAA96415-2134-4D85-9E2A-ACF1D7B618FE.jpeg
    CAA96415-2134-4D85-9E2A-ACF1D7B618FE.jpeg
    128.7 KB · Views: 143
OP
OP
BRSBrokeMe

BRSBrokeMe

Community Member
View Badges
Joined
Dec 30, 2020
Messages
47
Reaction score
141
Location
Manchester,TN
Rating - 0%
0   0   0
Part 2 Salt Water Mixing - RODI Water - Auto Water Change - And Auto Water Top Off SYSTEM
Ok ladies and gentlemen here is the next part of my build that I have completed still have a few little kinks to work out but ready and in use now.
The two thanks are 40 gallon tanks I got from tank depot and the 2 stands I got from Home Depot down the street
Pipe and ball valves I got form brs and the 6stage 200 gallon a day RODI system works great for 0 tds water and the little buddy does a great job of removing the water that sat in the resin before letting it go into my containers
I have filled these two containers probably 10 times and still have half of the first resin left is that good or bad I’m not sure seems pretty good from what others say
I have the dOS set upto do auto water changes to a gallon and a half a day not and it is a little loud glad I put it outside I could not handle that thing going off every 20 min inside my house
The teach water from the RODI unit and the DOS both have a drain that go to the opposite side of my house and stub out we’re no one cares what my grass looks like there.
Welp not much else to say about a salt mixing RODI auto water change system if anyone has any questions let me know.
Thanks Happy eefing
7B7D0AA9-7193-4C26-83EC-AC834D51906F.jpeg
 

Attachments

  • image.jpg
    image.jpg
    155 KB · Views: 100
  • image.jpg
    image.jpg
    147.6 KB · Views: 80
  • image.jpg
    image.jpg
    110.9 KB · Views: 77
  • image.jpg
    image.jpg
    161.7 KB · Views: 79

Zach B

Noo-Psyche Sales Rep
View Badges
Joined
Nov 7, 2020
Messages
4,904
Reaction score
32,601
Location
Slinger, WI
Rating - 100%
3   0   0
Nice setup! Following
 
OP
OP
BRSBrokeMe

BRSBrokeMe

Community Member
View Badges
Joined
Dec 30, 2020
Messages
47
Reaction score
141
Location
Manchester,TN
Rating - 0%
0   0   0
So to build my rocks cape my wife and kids were at here moms for the weekend and I got the living room all to myself took me about 3 days to build
I used a mixture of shelf rock and regular Marco rock and if I would have know how easy Marco rock is too cut to make a base piece I wouldn’t have purchased any
If you look at the mushroom looking thing I made that with a Milwaukee carbide saw zaw blade in about 10 minutes so any of you that need some base pieces do not buy them (sorry BRS)
So I attached all the pieces with the Jurassic glue and the rapid set stuff that Jurassic gel is amazing stuff
After it sat over night used Marco mortar to go over all the joints then went back over that with liquid super glue and covered the super glue with crushed Marco rock
Every joint is crazy solid and could probably be tossed across the room and hold up

check it out let me know what you think
C030BA28-CABB-4C97-955A-D3FE15284036.png
CA217E1D-8546-4822-8BED-B76270B8C775.png
3D58DFC5-8E26-4D7C-A76D-D1FC41F70B21.png
5409FD12-0B96-4835-B7B1-2BB4C2BE2CB5.png
0CA4A575-DBD8-4799-AEA3-A0BC9B6748DD.png
45F0E27A-E778-47CE-9013-A29CB923AEDB.jpeg
 
Last edited:

CMMorgan

Counting my blessings...
View Badges
Joined
Oct 12, 2020
Messages
3,907
Reaction score
14,795
Location
Punta Gorda
Rating - 0%
0   0   0
So to build my rocks cape my wife and kids were at here moms for the weekend and I got the living room all to myself took me about 3 days to build
I used a mixture of shelf rock and regular Marco rock and if I would have know how easy Marco rock is too cut to make a base piece I wouldn’t have purchased any
If you look at the mushroom looking thing I made that with a Milwaukee carbide saw zaw blade in about 10 minutes so any of you that need some base pieces do not buy them (sorry BRS)
So I attached all the pieces with the Jurassic glue and the rapid set stuff that Jurassic gel is amazing stuff
After it sat over night used Marco mortar to go over all the joints then went back over that with liquid super glue and covered the super glue with crushed Marco rock
Every joint is crazy solid and could probably be tossed across the room and hold up

check it out let me know what you think
C030BA28-CABB-4C97-955A-D3FE15284036.png
CA217E1D-8546-4822-8BED-B76270B8C775.png
3D58DFC5-8E26-4D7C-A76D-D1FC41F70B21.png
5409FD12-0B96-4835-B7B1-2BB4C2BE2CB5.png
0CA4A575-DBD8-4799-AEA3-A0BC9B6748DD.png
45F0E27A-E778-47CE-9013-A29CB923AEDB.jpeg
This aqua scape is sick. You're giving me major Star Wars vibes....
Cry About It GIF by MOODMAN
 

High pressure shells: Do you look for signs of stress in the invertebrates in your reef tank?

  • I regularly look for signs of invertebrate stress in my reef tank.

    Votes: 19 38.0%
  • I occasionally look for signs of invertebrate stress in my reef tank.

    Votes: 13 26.0%
  • I rarely look for signs of invertebrate stress in my reef tank.

    Votes: 9 18.0%
  • I never look for signs of invertebrate stress in my reef tank.

    Votes: 9 18.0%
  • Other.

    Votes: 0 0.0%
Back
Top