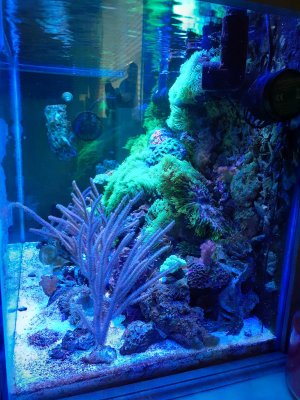
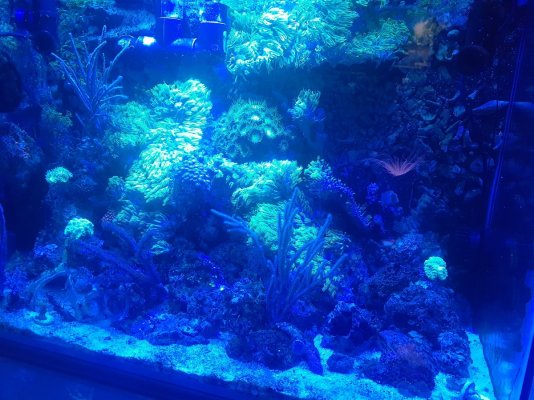
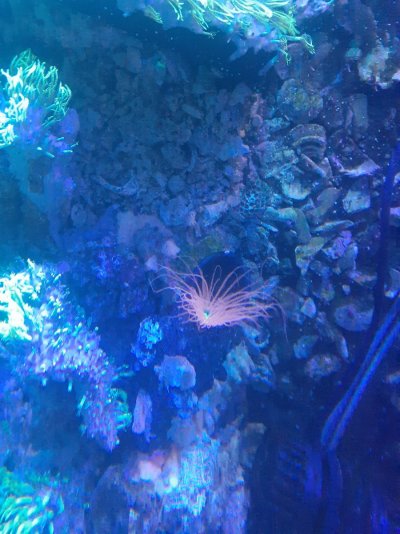
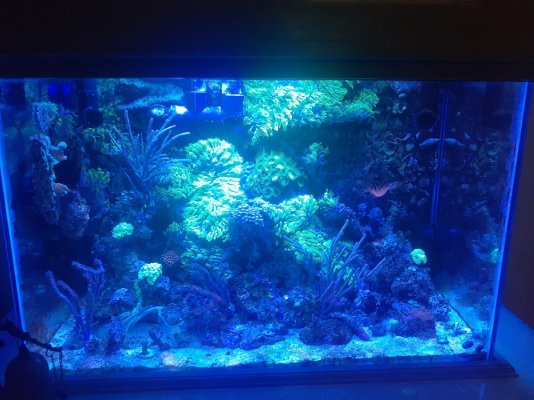
My 20 gallon reef (it's a Diy monster)

Savas

Community Member
View Badges
Joined
Nov 27, 2017
Messages
26
Reaction score
54
Location
New port Richey/Hudson Fl
Rating - 0%
0   0   0
Hey everybody...

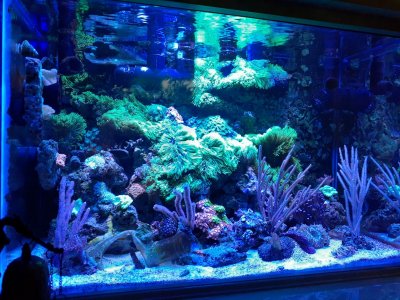
First off, here's my current tank - upgraded from a 10 gallon a week ago. (yes, I started with picos roughly three years ago)
20190821_174144.jpg


I worked on the stand for about 4 months or so while I was remodeling the house my girlfriend bought. I would have built it faster but I was replacing the matchsticks used to build the house with better lumber.
So the tank...
I built it with only two measurements in mind, the height I wanted the tank to be and the width. These measurements changed eleven times, but that's what I get for measuring with my hammer. All of the lumber was free and it's a combination of pine, oak and poplar.
I like the boxy (boxie?) look and prefer to have a covered tank minimizing light spill. I want the tank lit but not the entire room. I use to document every step thinking someone would read my posts one day and find them helpful but I don't know if that's the case. Last long well documented post I made on another forum the only response I got was 'that looks like too much rock'...
(I tend to ramble so just skim this)
I wanted to build a stand that could double for a pillar for the second story if need be and that I did. For the moment it is only supporting the tank.
I did take a few pictures of of various stages, mostly so I could bounce ideas off of my friend who can't keep goldfish or turn a screw so he was my go-to guy for ideas, I'll post some of them in a bit or a while, whichever happens.
(this will be a bit drawn out so feel free to get a snack - I'll wait)

...

No, really I waited...

So as the stand progressed, so did the tank idea. Originally it was going to be a 10 gallon, then maybe a 15 because I liked that idea. Eventually it became a 20 tall because it was given to me free of charge which of course cost me a lot in the long run - my boss gave it to me and reminds me of that everytime he remembers.

One side of the tank has a tiny chip near the bottom so of course that is the side I made the front because I wasn't paying attention when I drilled it :rolleyes:

Back to that in a bit.

I wanted the tank to be self reliant, but that probably isn't the right word. I wanted it to be hands off as much as possible. Things like timers and a ATO make this possible.

I made all of the trim and molding with my router table and all of the boards started out as 2x8 and 2x12 lumber which I cut to whatever size I needed. Everything was pocket screwed and glued. To reiterate I over built this stand, not because I was afraid it couldn't support the tank and not because I was afraid it would just collapse when I leaned on it to view the tank, I over built it because I wanted it to be nearly impossible for me to move it into position by myself. It took me an hour to get it in the back of the truck to move it so again I succeeded.
I reused as much as I could from my previous tank-the pumps, Gravel/substrate, leds, rocks, everything that wasn't epoxied to the tank (I like to epoxy rock to the tank...).
20190628_180255.jpg

(current tank background)

*I'm writing this between breaks at work so it will be a bit scattered...

I built my led fixture, I've done this since I rebuilt the one I bought for my first tank. I like having several channels that can be adjusted individually and come on at different times. I know, I know, I should have built it to be exactly how many leds I needed and in the perfect color but I decided to not do that, and instead go with six different channels that come on 15 minutes apart except for the moon which comes on 5 minutes before lights out and goes off 5 minutes after lights on. I'm sure there is a easier way to do lighting instead of six timers, six dimmers and six power supplies but I had most of the stuff on hand and in the end I felt it was a better idea with more overall control.

*I don't know if there is a limit on post length or if the pictures take up too much room so I will continue in another post... Go take a bathroom break.
 

Jon Fishman

Cleveland Ohio, buy/sell local!
View Badges
Joined
Feb 18, 2019
Messages
5,105
Reaction score
8,689
Rating - 0%
0   0   0
If it were any bigger, I would say take-it-down based on the chip..... “better safe than sorry” etc etc. But for a 20g I say keep a close eye on it, and make sure there is nothing electrical around that tank on the floor......

Looks good.
 

Tiger Brown

Well-Known Member
View Badges
Joined
Jan 21, 2019
Messages
654
Reaction score
5,715
Location
North Central PA
Rating - 0%
0   0   0
Dude...that looks like too much rock.


But seriously, it looks awesome and I really enjoyed reading your post and look forward to the next installment. Thank-you for sharing, and also, welcome to R2R!
 
OP
OP
Savas

Savas

Community Member
View Badges
Joined
Nov 27, 2017
Messages
26
Reaction score
54
Location
New port Richey/Hudson Fl
Rating - 0%
0   0   0
Jon, the chip is tiny, minute even but it's there and I see it because it waves at me when I look at the tank. I understand the concern though but I imagine if something was going to happen it would be around the bulkheads I drilled. The first hole cracked the glass because my template was on the tank trim a hair and well it cracked. It's not tempered glass of course but it's also no longer one piece. I fixed it by siliconing a second piece of glass over both holes and drilling new ones. Just so we're all aware-you, me and the bug on the windshield- I'm not being cocky or hard headed by saying I'm not concerned about it, it just isn't something I'm worried about.

Tiger, thanks for the compliments.

In all reality I think there is some 30lbs of rock in the tank and sump, a good deal of it is epoxied to the back wall and sides of the sump walls (odd I know but there is a plan. Or maybe I was experimenting or something). I may end up adding more sand over the next few days to bring the level up some, I believe it is about a inch for the most part but would like it deeper in the rear of the tank.

*I'm waiting to get home to finish the build post because I don't want to go through my phone for pictures from a few months ago.
_0D529~5.JPG


This was my very first reef tank, 2.5 gallons of inspiration. (I had to tear apart the light to remove the lenses because of the lack of color blending...
20170324_201140.jpg


that tank became this one, still a 2.5 gallon but with a modded aquaclear 70 hob filter

20171008_191016.jpg

And then - 'no and then' - it became this, (still 2.5 gallons) but it had a sump, a whole 2.5 gallon sump

20180712_175212.jpg


Then it became this (and stayed that way for over a year) it was a 6.5 gallon semi-hex with a matching sump. Put my first skimmer on this one. This was the tank with too much rock.

My tank evolutions didn't come about due to the tank crashing, they came about because the corals outgrew them, or I got tired of various things like wires I couldn't get to or difficulty getting in the sump, that and I don't know when to leave well enough alone

This was a good segue.
 

Jon Fishman

Cleveland Ohio, buy/sell local!
View Badges
Joined
Feb 18, 2019
Messages
5,105
Reaction score
8,689
Rating - 0%
0   0   0
I would grow GSP on the back-panel that you epoxied the rocks too....... Would look great and probably thrive
 
OP
OP
Savas

Savas

Community Member
View Badges
Joined
Nov 27, 2017
Messages
26
Reaction score
54
Location
New port Richey/Hudson Fl
Rating - 0%
0   0   0
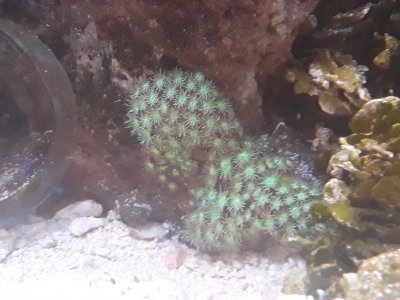
Jon you've read my mind, i have two types and have them in various nooks on the back wall and am waiting for them to cover it all. I'd cover it in pulsing xenia if I could find some, but apparently where I am it is either 40$ for a thumbnail of non pulsing xenia (read as wilted, dying, maybe dead). I had some a while back and it grew like crazy-as is on the warning label- for almost a year and then it didn't like changing tanks. A small clump held on for a while but got bullied by a hermit crab who coulding figure out what they were waving at...

This should read - "i want any and all pulsing Xenia, seriously, I would love several large clumps of it." but unfortunately it isn't available and I haven't seen any decent deals online. I guess people caught on to the hype and upped the prices...

It's been 7 minutes and I'm still waiting on the GSP to spread. I'll try and snap a few pictures of what I have.
 
OP
OP
Savas

Savas

Community Member
View Badges
Joined
Nov 27, 2017
Messages
26
Reaction score
54
Location
New port Richey/Hudson Fl
Rating - 0%
0   0   0
Ok so now that I am on my computer (his name in Pinky)I looked, and then looked a few more time and I apparently didn't take a single picture of the building of the stand-which is surprising but I did find about 340 other pictures of all the things I tore out and changed during the remodel, but none of that applies here. well, not now anyway.
So what I did take pictures of I'll post and fill in whatever details I can recall.

I'll just list this out because who doesn't like a list, not that it matters: (go get a snack, I did)

Lighting. I talked about it a little before so I'll just add to it. We all know like so many things in life, heat-sink size matters, so I made my own because it seemed like a good idea at the time (If my future self is reading this hopefully he'll let me know how it all turns out). My grand idea for a heat-sink was U shaped aluminum track because aluminum is decent at wicking away heat, (and even dissipating it as well). I had a large pile of aluminum tracks used to build screen cages around pools, which is what I do, build pools, but not screen cages-although I have, but they don't pay me to. I used the smaller track which is roughly 1" high by about 1 1/2" wide. I cut several pieces to length, the JB welded them into something that resembled a heat-sink.
Now I know what you're thinking, yes you James, and you too Brandon, but it works. What was nice about it was the fact that it curved slightly creating a bowed shape, similar to this --> ( which gave me a idea. But before that I had these copper sheets that are used in crafting and I decided that I should attach one of those to the face of the heat-sink that the LEDs would be attached to, so I did that. Now I don't have any pictures of this and I'm describing it poorly to poorly imagine it if you can. Now after a day or so when all of the JB weld had cured I put the whole thing on my table saw and cut groves every inch across the wings of the aluminum track creating small gaps that would increase surface area and allow the fans to move more air throughout. (this is all speculative of course-in fact keep your skepticals on, this could get outlandish). Most people have seen the type of heat-sink I was trying to recreate, something like this...
chipset-heat-sink.jpg

Ok so once I finished that I played with the curve of the heat-sink (now I'll breakout my MS Paint skills for illustrations when necessary)
Hood Diagram.jpg


Now that image is self explanatory, it even has words but it is not to scale and the light beams are a guestimation. The whole point was to minimize light spill on the front glass. In theory it works, in reality it looks like it works (but it doesn't pay bills).

so then I started with the actual LEDs (and I have actual pictures of this part). These are cheap 3w LEDs bought off ebay, some are new, some are reused from my last tank and some are from a light I built for a friend but he tore down his tank to move and gave it all to me. I used thermal tape to adhere them to the copper sheet and before I'm told that there all going to fall off I just want to say I installed a splash shield to catch them. ;)

Each bank or set or group or whatever of lights is ran off of a 19v 3. something or other amps. Not the norm but ran my other LEDs for years. I believe they are in series parallel, or a parallel series, I always get that mixed up. In the end they are under-volted and under-amped so they won't just up and melt without help. Everything was tied into six groupings:

Royal blues (440-450nm) and a few UVs 395-400nm)
2019-05-13 20.57.57.jpg

Regular blues (460-470nm)
2019-05-13 20.58.28.jpg


I call this group Cyan (490-495nm) but there are a few blues, RB and whites mixed in. These are also angled inwards to direct the light away from the glass
2019-05-13 20.58.41.jpg


This group is Full Spectrum (380-840nm) and is more a spectrum filler than anything. These come on first and go off last creating a sunset and sunrise look (I know, I know I'm special and the fish don't care)
2019-05-13 20.58.11.jpg

Next up is White which are neutrals, but again this is another section with some blues and UVs
2019-05-13 20.57.40.jpg


I ended up adding a few 60 degree lenses to several of the LEDs, unpictured at this point due to lack of signing the waiver.

And the whole shebang!
2019-08-22 16.05.59.jpg


My camera isn't very good, it's a cell phone and maybe you noticed or you didn't, but it sucks, so this is the best representation of my lighting combined according to my phone

2019-08-21 17.42.13.jpg


Fans for cooling heatsink
2019-08-27 17.31.53.jpg


Controller for fans. This is a NZXT Sentry(?) from a computer I built a long time ago and then got rid of. Basically its a PC fan controller, it has five thermometers for lack of remembering the right word, and you attach the probes to whatever, hard drive, CPU, RAM, the cat, the back of your neck, yada yada and the corresponding fan withh speed up or down based on temperature. It works pretty good but I don't take the temperature readings for much more than a average.
2019-08-27 17.32.07.jpg


Pictures of timers and dimming knobs. There are some switches in the picture as well but don't confuse them for the knobs.

2019-08-27 17.30.09.jpg

So assuming you read this by choice and not at threat of harm I hope this made sense. Well at least some sense could be made of it. That's my lighting. It brightens my day.
 
OP
OP
Savas

Savas

Community Member
View Badges
Joined
Nov 27, 2017
Messages
26
Reaction score
54
Location
New port Richey/Hudson Fl
Rating - 0%
0   0   0
Hopefully you guys had breakfast because I haven't. So at this point I figure I will continue to keep things out of order and talk about my sump, or rather what I have that is imitating a sump. The journey through my sump won't be near as exciting as a trip through Anatomy Park so please lower your expectations. Thanks.

*before that and to preface all future posts-I think much faster than I type, by a very large margin so sometimes I miss a word, you may notice or not but I just wanted to make that/this clear*

My sump is a 10 gallon tank divided into three sections, left, middle and right. The left and right sides are divided into three more sections. The middle section is divided in half.

The left and right sides both have skimmers, little ones that I can't remember off hand - I can look it up if you want, but I doubt you do. Each skimmer section is fed by their own drains from the display. The baffle after the skimmer is all the way to the bottom of the sump which should create a type of settling chamber - the type where stuff settles. I figure this has a few benefits, one the heavier stuff (stuff being anything from fallen LEDs to crabs trying to escape and everything in between) will fall and settle on the bottom where it will break down and feed the benethic creatures that will eventually grow there. I haven't put my head under the skimmer chambers but I do assume it's dark in there and those creatures prefer it. Second I figure the longer time the water dwells in the first chamber the more skimmer contact time it has. This could all be for naught and act as nothing more than a place for swamp thing to sleep in between filming TV shows and disappearing when you turn your head. Let's keep our skepticals on for the rest of this, ok. Cool.
Ok so after the epic fall and aeration and settling of chamber one (keep in mind that this all happens simultaneously on both sides) the water flows into chamber two over a piece of filter floss which is held by my very original idea of a eggcrate media rack.
Of course I don't have a picture.
Imagine if you will...
Eggcrate. Cut and glued. To make....
A media rack.

Filter floss on top to catch the fallen LEDs should they decide to float. Under this is a section of plastic filter media, it looks like filter floss and sort of is. It's used in koi ponds and in ponds full of goldfish that people call kois. Again I don't recall the name, but I will take a picture and add it. My theory here is that bacteria will grow. That's it. Bacteria growing. Maybe some kind of sponge, maybe a tunicate. Pods even. I just don't know, no one has responded to my 'for rent' ad.
That's chamber two.
Chamber three, the exit. Water goes through the aforementioned floss on floss and rises up through another (Yep) eggcrate media rack. This one is packed full of marine pure balls. From here the water falls into the fuge. (that's in the middle chamber)
OK so I know you just went for another glass of wine/beer/water and are now perched on the edge of your seat perspiring anticipation and eager to know what's next.
What's next?
The fuge obviously. The middle chamber has a baffle in the middle. Yeah you read that right. One half is the fuge where I have fern caulerpa growing in about 2 inches of substrate. This all came from my previous sump and was teeming with life. Pods, worms and sponges and tunicates and sea monkeys. The other half is the return pump. It returns water to the tank and not much else.
I wish it did laundry.
Just like the background of the tank I epoxied rock to the sides of the middle chamber. I have some Gsp in there and believe it or not it does grow under the red/blue grow light I use for the caulerpa. Besides that I figure it will become a place for pods and other life to cling to.
20190827_172936.jpg
20190827_172953.jpg


For those who noticed, there is another of the NZXT fan controllers in the lower storage area. Most of these temperature probes just give ambient temperature in the stand, two are in the sump-one on each side-and the last one is attached to the bottom of the sump so I know how hot or cold the bristle worms are. Two of the fans it controls are visible in the back of the stand, these blow 24/7 into the stand just to keep air moving which according to myself will help to keep the humidity down but I might have that backwards. A third fan is positioned in the hood and blows across the surface of the water and splash shield in a effort to keep fresh air across the water and reduce condensation on the splash shield. The fourth fan the controller controls is positioned behind the controller itself just to keep it cool. There is no fifth fan. That fan pin never worked so it never was used for anything.

Currently there are only two mystery crabs in the sump. I usually keep a snail or two there to keep things tidy. You would think I'd keep hermit crabs in there because snails can't hold brooms but that's a story for another day.
So the mystery crabs...
20190828_080856.jpg

Here's one, he or she is the twin of the other one. This is the first time I've seen it since they were dumped in and given last rites. I've no idea what they are, I got them from a local brackish water area where I collected some wild sponge growing on the side of a floating dock. If anyone knows what they are let me know so I can tell them. I'll post a few pictures of the sump when it was little more than glass baffles, the pictures are from the top with the tank on its side and I honestly don't know why I took them. Maybe I was going to ask my buddy who's never had a sump for his thoughts. I don't remember but that was probably it.
20190305_184255.jpg
20190305_184250.jpg


So that's my sump, it's over complicated to put it mildly. I know what you're thinking, "why hide such a piece of art!"
(ok, probably not)
But if you were thinking that you should know, I keep it covered because it has crabs.
 
OP
OP
Savas

Savas

Community Member
View Badges
Joined
Nov 27, 2017
Messages
26
Reaction score
54
Location
New port Richey/Hudson Fl
Rating - 0%
0   0   0
Well Dorian is expected to hit us early next week so the weekend will be spent preparing for that. Somebody needs to find the painting so we can destroy him before he gets here. Hopefully anyone else in Florida is prepared. We'll see what happens.
 
OP
OP
Savas

Savas

Community Member
View Badges
Joined
Nov 27, 2017
Messages
26
Reaction score
54
Location
New port Richey/Hudson Fl
Rating - 0%
0   0   0
I'll add more to the build detail later but I wanted to put up some pictures of the new fish I added. One is supposed to be a something basslet? I don't know, the lady at the store seemed like she was making the names up as she went. So, here are pictures as I'll probably never see them again...
My tank has a case of the uglies going on, that's why I'll post pictures but not let it leave the house, so keep that in mind, thanks.
20190831_160106.jpg
20190831_160824.jpg
20190831_160834.jpg


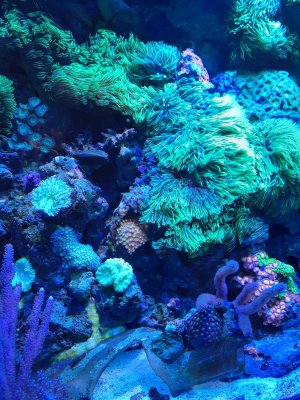
I picked up this galaxy coral for 15 and managed to get two nice rocks with pink xenias attached!
 
OP
OP
Savas

Savas

Community Member
View Badges
Joined
Nov 27, 2017
Messages
26
Reaction score
54
Location
New port Richey/Hudson Fl
Rating - 0%
0   0   0
One day soon (ish) I'll add more details about the build, but not today. Today I'll just take a Photo Dump and go...
I'm building a new sump, changing a few things around planning some new plumbing.
Yes already.
Yes I know it's only been a month.
But until then, here are some pictures I took with my phone because it's a camera also.

2019-09-19 18.47.33.jpg
2019-09-19 18.47.09.jpg
2019-09-19 18.44.00-1.jpg
2019-09-19 18.42.36.jpg
2019-09-19 18.43.22.jpg
2019-09-19 18.42.29.jpg
2019-09-19 18.42.03.jpg
2019-09-19 18.41.54.jpg
2019-09-19 18.41.45.jpg
2019-09-19 18.41.29.jpg
2019-09-19 18.41.12.jpg
2019-09-19 18.41.04.jpg


2019-09-19 18.47.33.jpg 2019-09-19 18.42.03.jpg
 
OP
OP
Savas

Savas

Community Member
View Badges
Joined
Nov 27, 2017
Messages
26
Reaction score
54
Location
New port Richey/Hudson Fl
Rating - 0%
0   0   0
The tank first thing in the morning...
 

Attachments

  • 16204729594253636868999962940236.jpg
    16204729594253636868999962940236.jpg
    279.4 KB · Views: 29
  • 16204753736866736881747725450304.jpg
    16204753736866736881747725450304.jpg
    217.5 KB · Views: 25
  • 16204753962587962658426561028444.jpg
    16204753962587962658426561028444.jpg
    225.3 KB · Views: 28

More than just hot air: Is there a Pufferfish in your aquarium?

  • There is currently a pufferfish in my aquarium.

    Votes: 30 18.1%
  • There is not currently a pufferfish in my aquarium, but I have kept one in the past.

    Votes: 27 16.3%
  • There has never been a pufferfish in my aquarium, but I plan to keep one in the future.

    Votes: 32 19.3%
  • I have no plans to keep a pufferfish in my aquarium.

    Votes: 69 41.6%
  • Other.

    Votes: 8 4.8%
Back
Top