My first frag tank

OP
OP
jmatt

jmatt

Just gettin' started. Again.
View Badges
Joined
Apr 27, 2022
Messages
553
Reaction score
803
Location
Lehigh Valley, PA
Rating - 0%
0   0   0
Rocks! :grinning-face-with-big-eyes:

A shout out to Saltwateraquarium.com for not only carrying these (BRS does not) but getting them here in 48 hours.

This is the 40 pound box. It arrived with its contents wonderfully intact and unbroken (small chip here and there). Here they are laid out on my tank's 'floorplan', if you will.

I was originally going to have an egg crate area in the middle with these sitting on top. But now that I see them, I'm thinking about building an individual (egg crate?) base of some sort for each piece. That way, they can be set at differing heights and rearranged.

I can also set smaller pieces on top of larger pieces so that some of them have more vertical structure for visual interest.

They will be little islands unto themselves and water can flow through and around. But perhaps more importantly, since they are not all on the same egg crate base, fish and critters can navigate up and down between them.

But one thing is for sure: I bought way too much rock.

1652488944608.png


1652489132799.png
 
Last edited:
OP
OP
jmatt

jmatt

Just gettin' started. Again.
View Badges
Joined
Apr 27, 2022
Messages
553
Reaction score
803
Location
Lehigh Valley, PA
Rating - 0%
0   0   0
I'd rather have too much than not enough! Bacteria agrees
I'm gonna get this stuff soaking in a Brute can of saltwater with some sand and Dr Tim's this weekend. That's the goal.

But first I need to find the heater/controller combo and pump. Having read many threads, I think I'm just gonna run with the pack and do Inkbird / Finnex Titanium heater. Still have research to do, but I'm leaning toward a Neptune COR15 ... I'd still have to wrap my brain around everything Apex before doing so I guess.

And once the tank gets up and running, doing a dual heater / dual pump on individual breakers and GFCI outlets for redundancy. Still a long way to go before I get there.
 
Last edited:
OP
OP
jmatt

jmatt

Just gettin' started. Again.
View Badges
Joined
Apr 27, 2022
Messages
553
Reaction score
803
Location
Lehigh Valley, PA
Rating - 0%
0   0   0
Busy day. Brewed up a new batch of water, preparing for seeding and cycling the rock biofilm.

Slapped together a crude frame to give me a sense of proportion when aquascaping. In the pics, I have the flatz supported by some pink foamboard I have laying around; I set them at various heights. I will find a way to build a base for each piece.

The other pieces I have coming are pretty big, so there may be fewer islands. I like the gaps between, it will allow dappled light to filter down between them. My goal is to not have people look at the tank. I want them to look through the tank, if that makes sense.

1652578217517.png


1652578256345.png
 
OP
OP
jmatt

jmatt

Just gettin' started. Again.
View Badges
Joined
Apr 27, 2022
Messages
553
Reaction score
803
Location
Lehigh Valley, PA
Rating - 0%
0   0   0
When I was first contemplating this, I was thinking about a bare bottom. But I've been seeing a lot of board and video content that says it's a bad idea. I like the visual aspect of some kind of aragonite sand bottom... but now I'm wondering how I'd vacuum below these structures.

Tbh, I've had three reef tanks in the past and never vacuumed the sand once once. So perhaps with a decent CUC I can get away without having to do it too much.
 
OP
OP
jmatt

jmatt

Just gettin' started. Again.
View Badges
Joined
Apr 27, 2022
Messages
553
Reaction score
803
Location
Lehigh Valley, PA
Rating - 0%
0   0   0
This is a lot of rock, more still in the box. The pics don't really convey what it looks like firsthand, it just looks like a purple mess.

I bought two of the "Tree" model of Liferock. Since the tank is shallow, I used them to make 4 small trees, one at each corner.

That big rock in the middle is the "Table". The base snapped off it during transit, I will have to epoxy it back together. Right now it's just sitting on pink foamboard. Most of the rock arrived 98% intact.

I made two small mounds of the "Flatz" and that other piece under the Table is just a "Base" that can be used to support other structures with rods.

One of the things I'm pleased about is that with the "Trees", I can flip the top piece upside down so it's like a "Flat" facing the lights above, but has a more realistic look below. I can place random rocks on top to break up the perfectly flat upper half and give it more character.

1652837531624.png


1652837555831.png


1652837575173.png


1652837592541.png
 
OP
OP
jmatt

jmatt

Just gettin' started. Again.
View Badges
Joined
Apr 27, 2022
Messages
553
Reaction score
803
Location
Lehigh Valley, PA
Rating - 0%
0   0   0
Kinda using this as my diary for this process, so not every post will be all that scintillating. Sorry. ;)

Anyhoo, water, salt, pump, heater and mesh-bagged cycled rocks from the LFS in a Brute can... anticipate adding my Caribsea rock while waiting for the tank. The Brute can definitely won't hold all the rock.

Still no plumbing or electrical work done in the basement (does anyone work any more?), so I have to run a freaking garden hose down to make RODI. Then I have to pump all the waste water out. I made a custom female-female hose adapter so I can pump the water out without having to reverse 50 feet of hose.

1653784669404.jpeg
 
OP
OP
jmatt

jmatt

Just gettin' started. Again.
View Badges
Joined
Apr 27, 2022
Messages
553
Reaction score
803
Location
Lehigh Valley, PA
Rating - 0%
0   0   0
Sink is almost in, pump will be installed tomorrow. Electrical work is in progress. Sink is 40" high, I find it a convenient work height.

I went to pick up the tank today. Lining up the men and vehicle was difficult... until I put in a call to Patrick at Coast To Coast Custom Aquariums. He told me it wasn't an issue, he could help me load it myself, which meant I didn't need a vehicle big enough for three people and the tank, and only needed guys at the home end of the trip to get it downstairs. I gotta tell ya, I was extremely worried every instant the thing was being carried.

But it's a beautiful tank and looks bigger than I expected for some reason.

Oh, and my 30 lbs of live sand arrives tomorrow from Tampa Bay Saltwater; I have to pick it up at the airport. It will reside in the trough for now.

And lastly, at this point I am $11k in and still haven't purchased lights, an ATO kit or a skimmer. Yikes.


1657672765459.jpeg


1657672818663.jpeg
 
Last edited:
OP
OP
jmatt

jmatt

Just gettin' started. Again.
View Badges
Joined
Apr 27, 2022
Messages
553
Reaction score
803
Location
Lehigh Valley, PA
Rating - 0%
0   0   0
Egads. This is taking forever.

I lost five weeks in August/Sept... I laid down Thompson's Water Seal on the cement and it refused to dry. Walking on it was like thwick thwick thwick. I tried everything to dry it and eventually gave up. Was able to remove it buy rolling out mineral spirits all over the floor, covering that with Simple Green degreaser, scrubbing it in with a brush and then mopping it all up. :confounded-face:

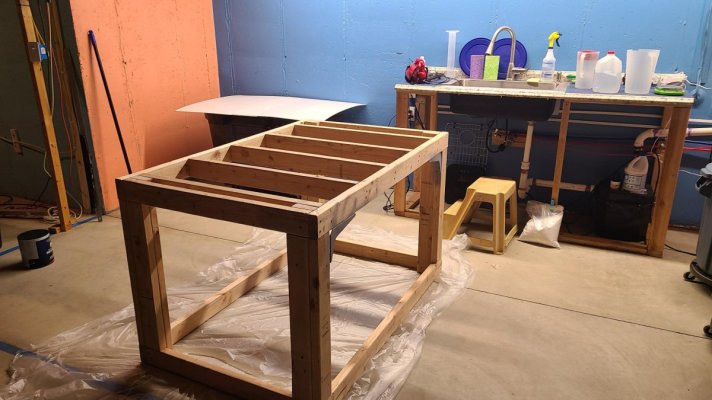
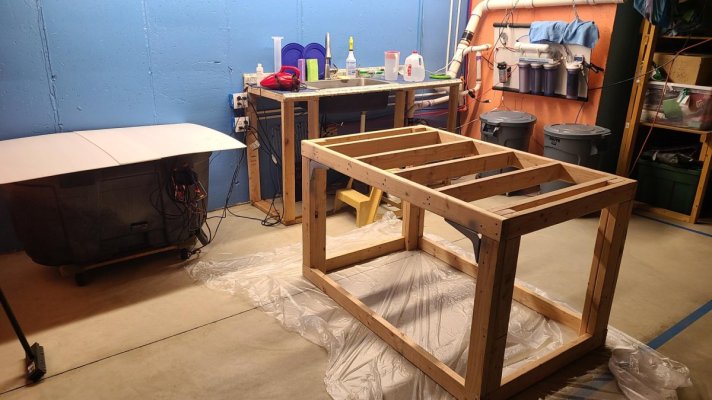
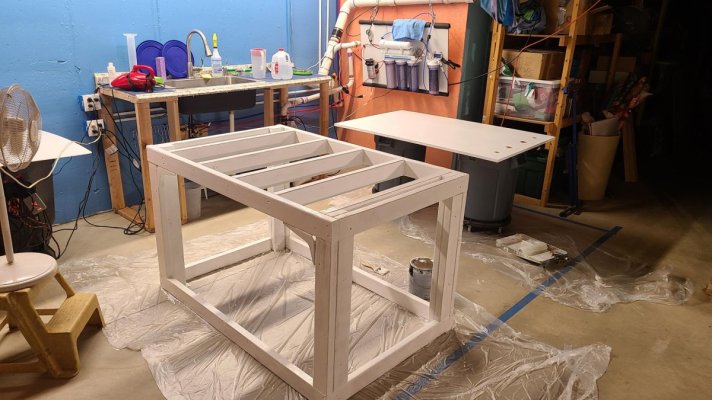
Anyway, the stand is built and painted as of 10 minutes ago. The frame will eventually be covered by removable panels. I will have plenty of space and easy access below.

Presently I am trying to wrap my brain around the plumbing. I guess I'm trying to keep the pipes as big as I can... but am frustrated that the drain eventually has to be reduced to 1" for the Reefmat 1200 and the COR-20 pump seems to be the same.
 

Attachments

  • Tank stand 1.jpg
    Tank stand 1.jpg
    152.9 KB · Views: 45
  • Tanks stand 2.jpg
    Tanks stand 2.jpg
    164.9 KB · Views: 55
  • 20221001_205240.jpg
    20221001_205240.jpg
    177.2 KB · Views: 51

907_Reefer

2500 Club Member
View Badges
Joined
Apr 13, 2022
Messages
2,823
Reaction score
16,171
Location
Alaska
Rating - 0%
0   0   0
All I know is, my favorite projects are the ones that took the most amount of work. I'm no plumbing expert so I'll have to end this post there I can see it coming together though!
 
OP
OP
jmatt

jmatt

Just gettin' started. Again.
View Badges
Joined
Apr 27, 2022
Messages
553
Reaction score
803
Location
Lehigh Valley, PA
Rating - 0%
0   0   0
The Dri-Dek is down. Using a bandsaw and razor I was able to cut it to fit perfectly. And yesterday the mounting boards for the hanging lights were put up. And I painted the underside of the stand deck so it would reflect more light back down.

Now what? Sump and Reefmat for a dry fit, I suppose.

Dri-dek 1.jpg

Dri-dek 2.jpg
 
Back
Top