My fully automated in wall 220. Visible from two rooms

Brett S

Valuable Member
View Badges
Joined
Nov 28, 2016
Messages
1,062
Reaction score
1,373
Location
Orlando
Rating - 0%
0   0   0
I guess this will be the official introduction for myself and my tank to R2R. It won’t really be a build thread since the tank already exists, but I’ll cover some of the build in here as well.

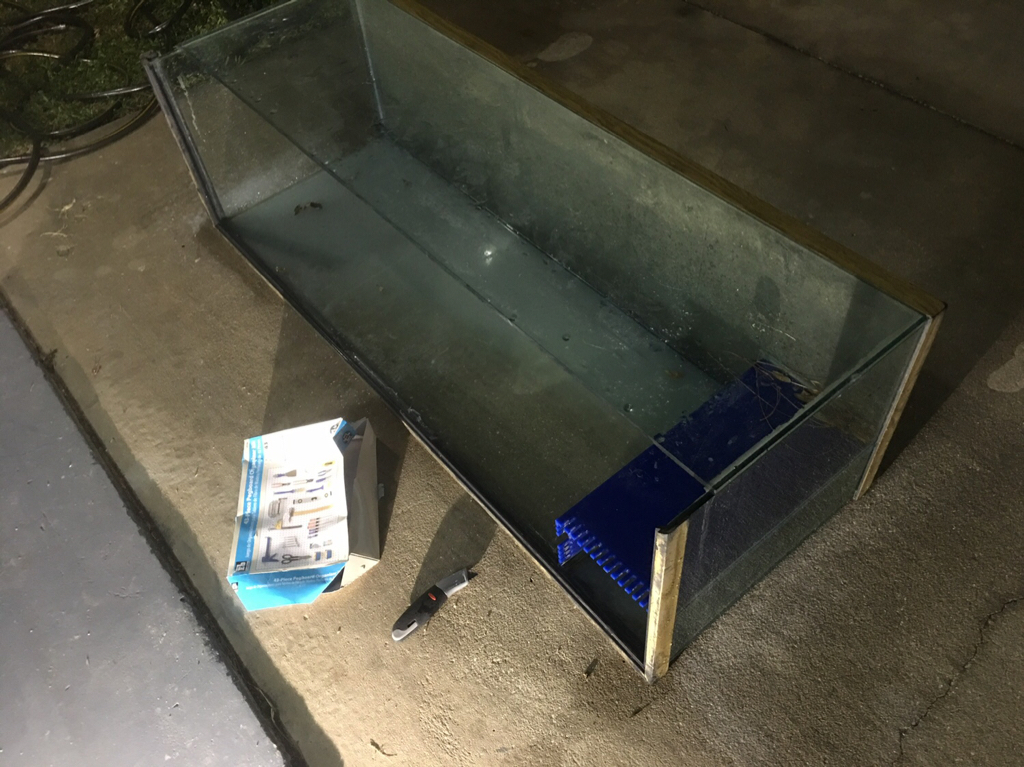
Here are a couple of pics of the tank

409e9905b46d146bdd4c2ccb8ee56aaf.jpg

7ccbb7d50295abf6098de55ec07222ec.jpg


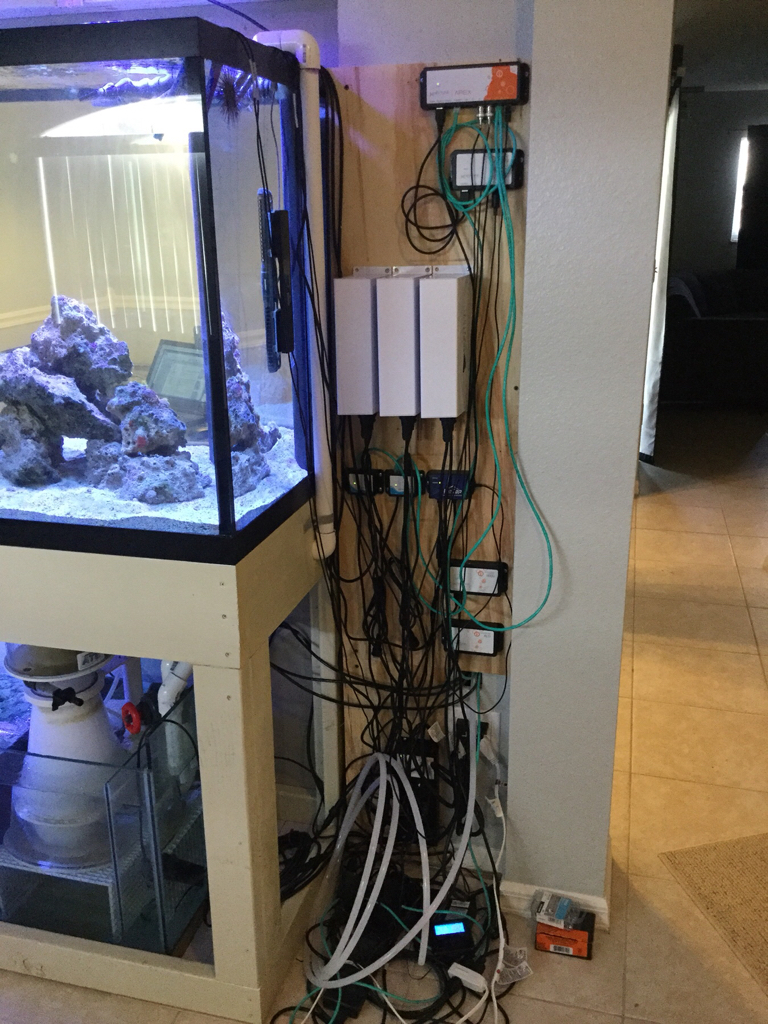
To start with, I am definitely a tech and automation junkie. Maybe I’m just lazy, but if something can be automated so I don’t have to do it, then I’m absolutely going to automate it.

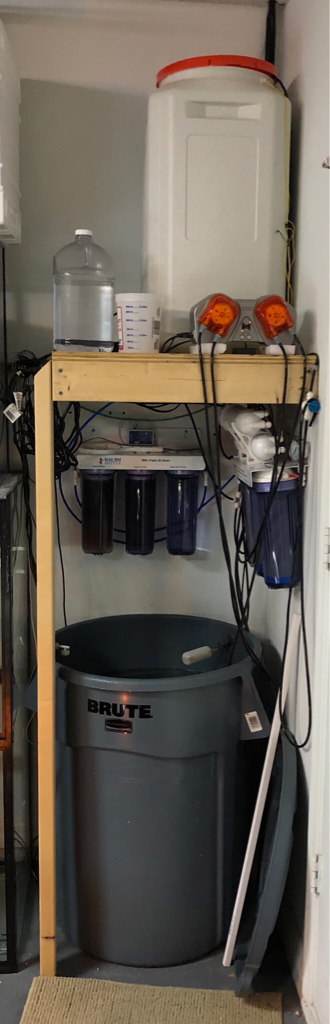
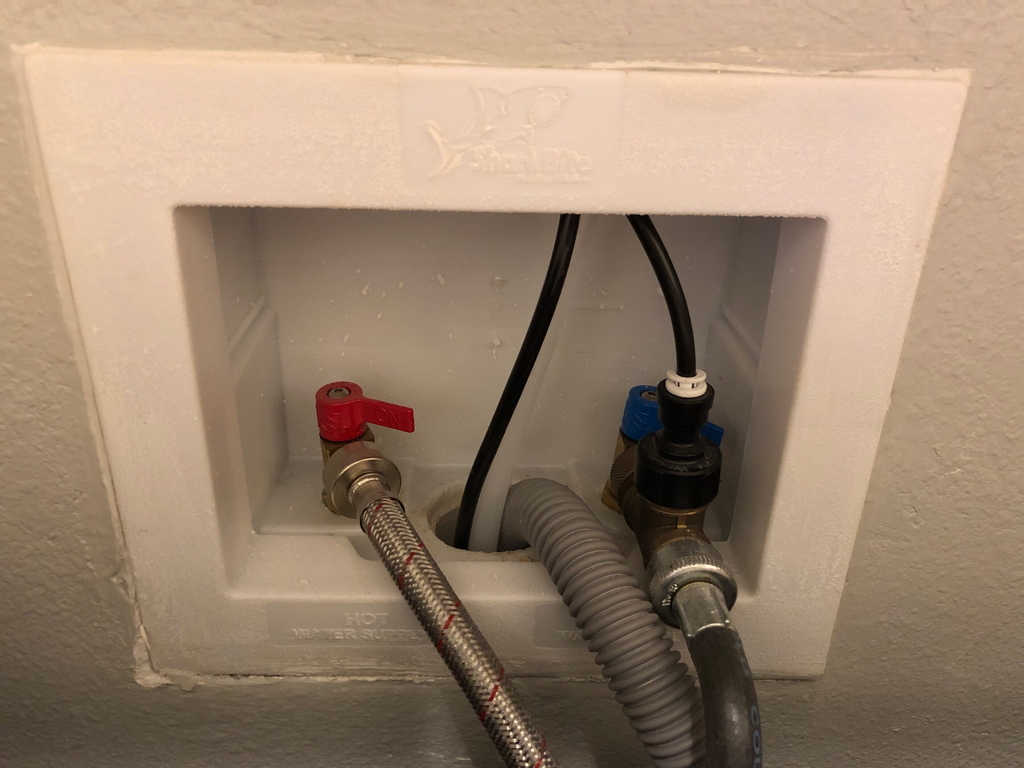
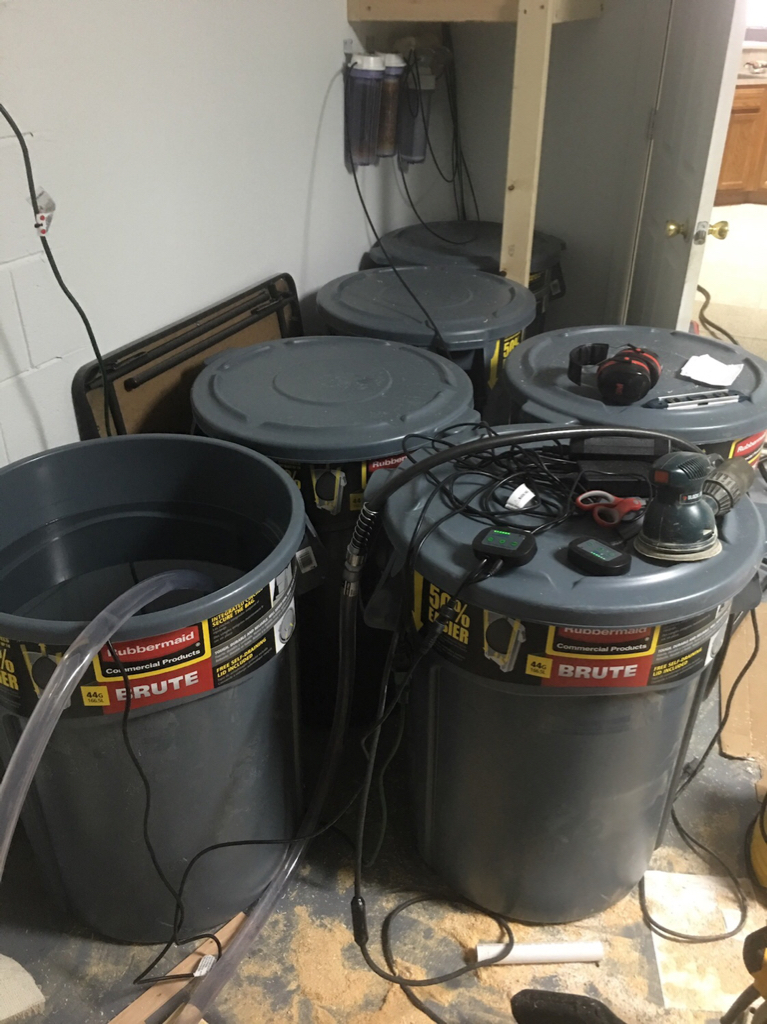
My tank is run by my apex and the apex does everything from controlling the lights, temp, and pumps to feeding the fish, dosing two part, auto top off and auto water change. It even pumps my skimmate into the drain and automatically turns on my RODI filter to refill my ATO reservoir and NSW reservoir when they run low.

The only tasks I need to routinely do are cleaning the glass, refilling the auto feeders and dosing containers and adding salt to the NSW reservoir after the apex refills it. I can literally go days or even weeks without having to spend a minute on the tank if I don’t want to.

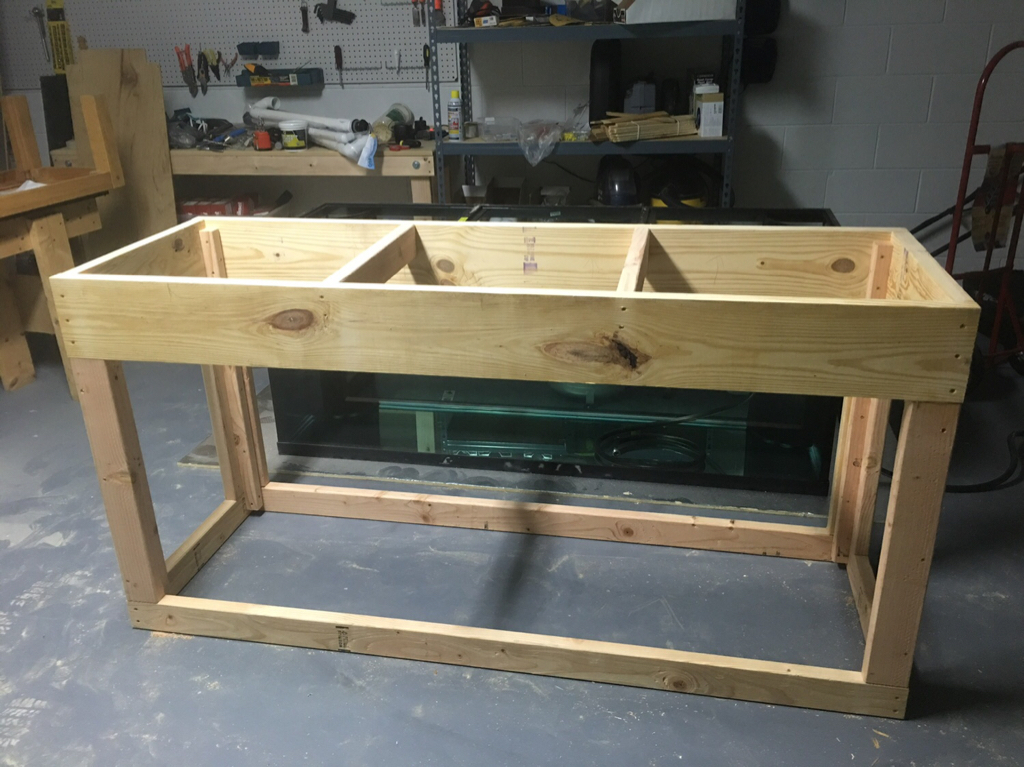
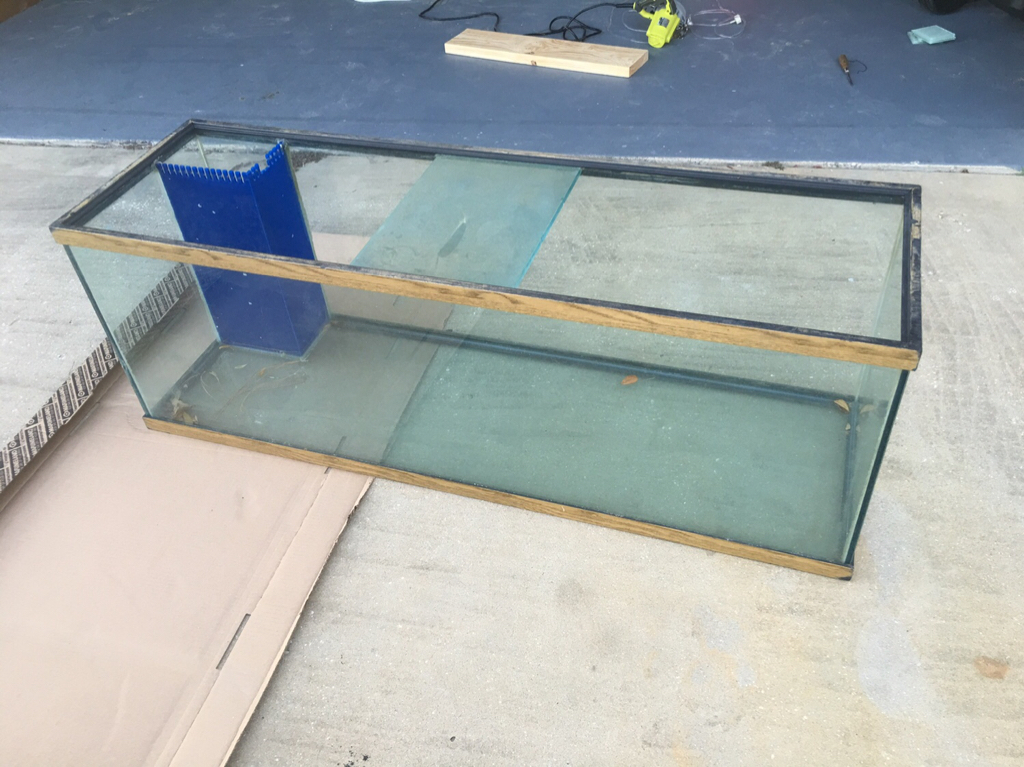
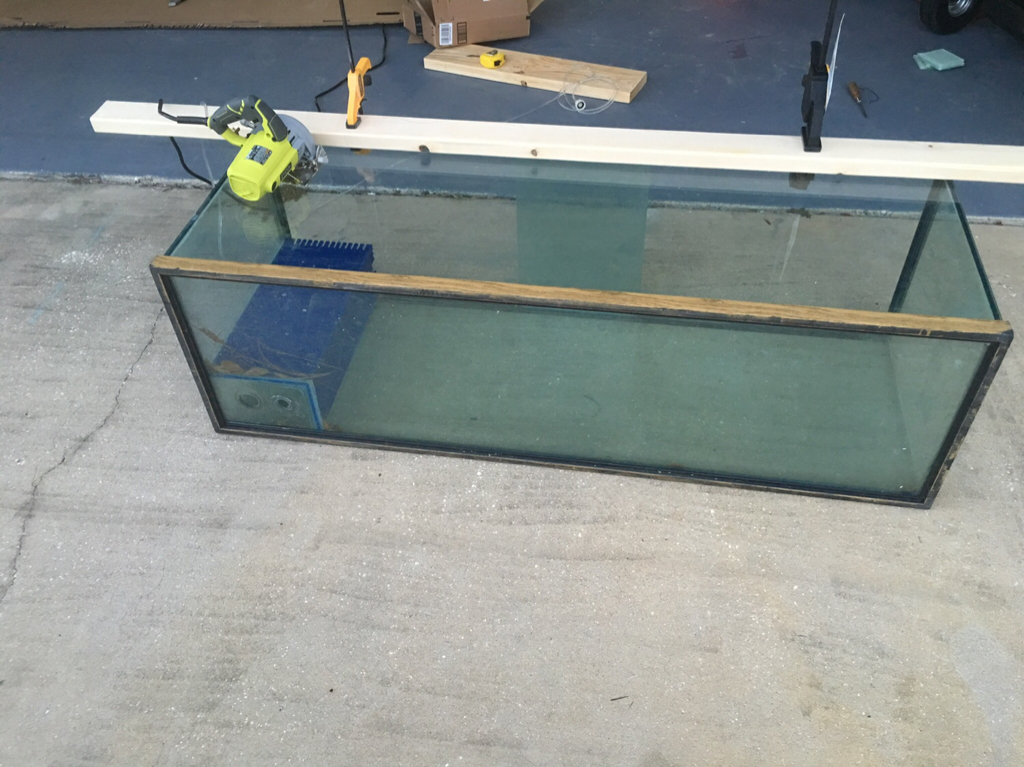
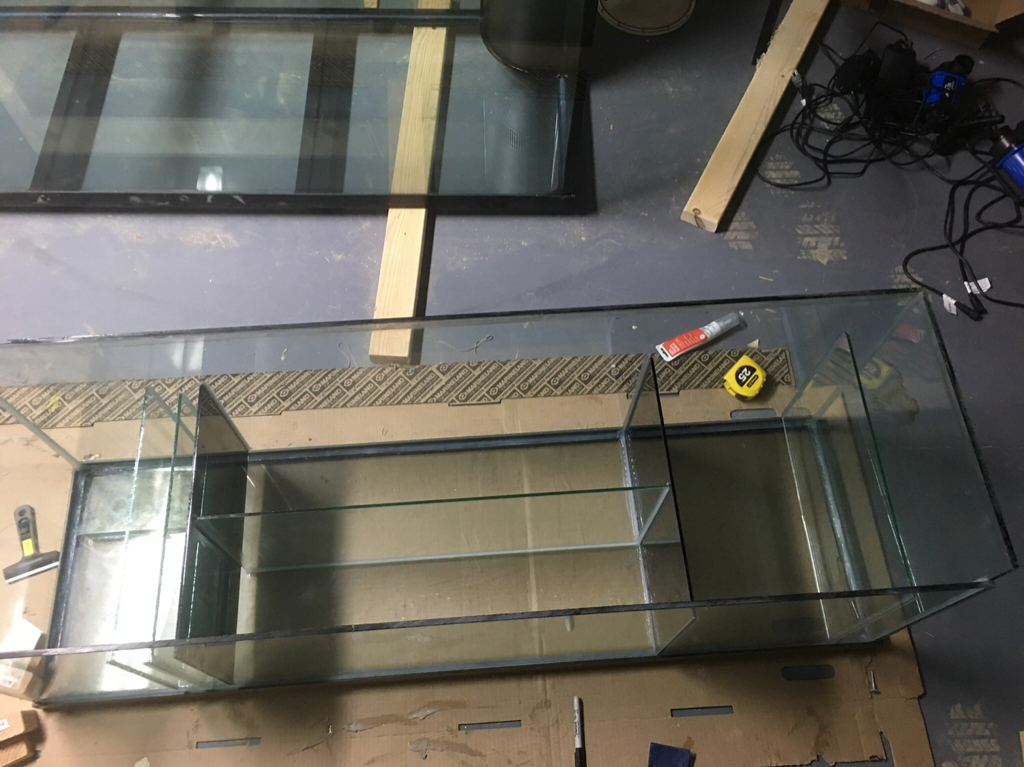
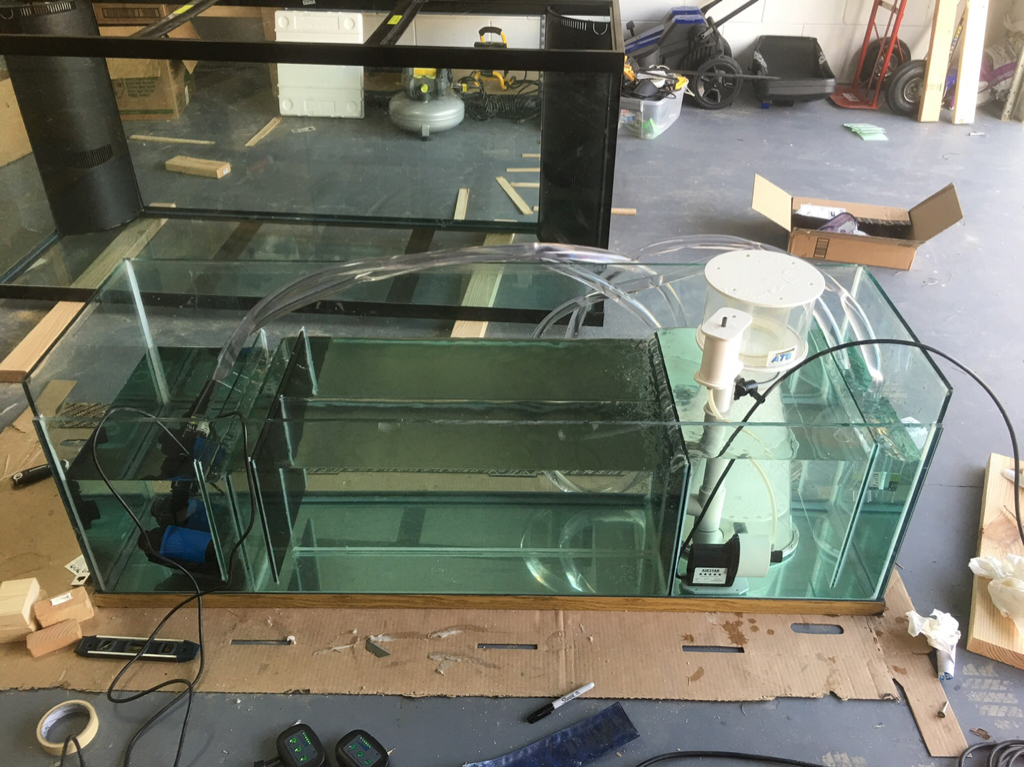
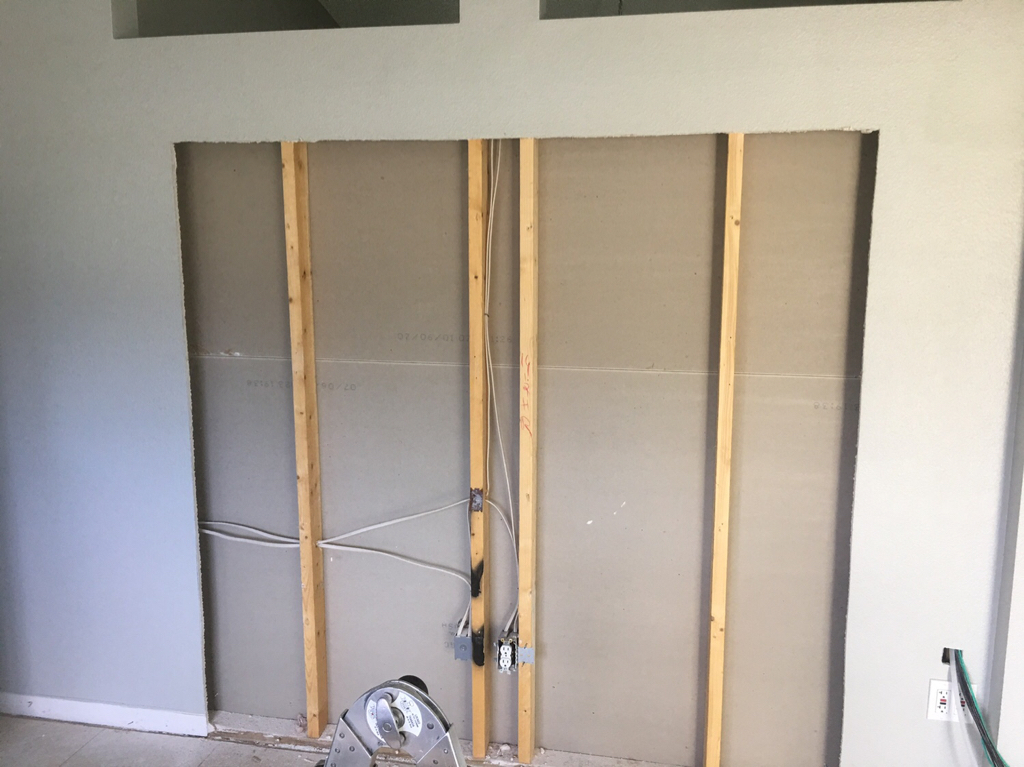
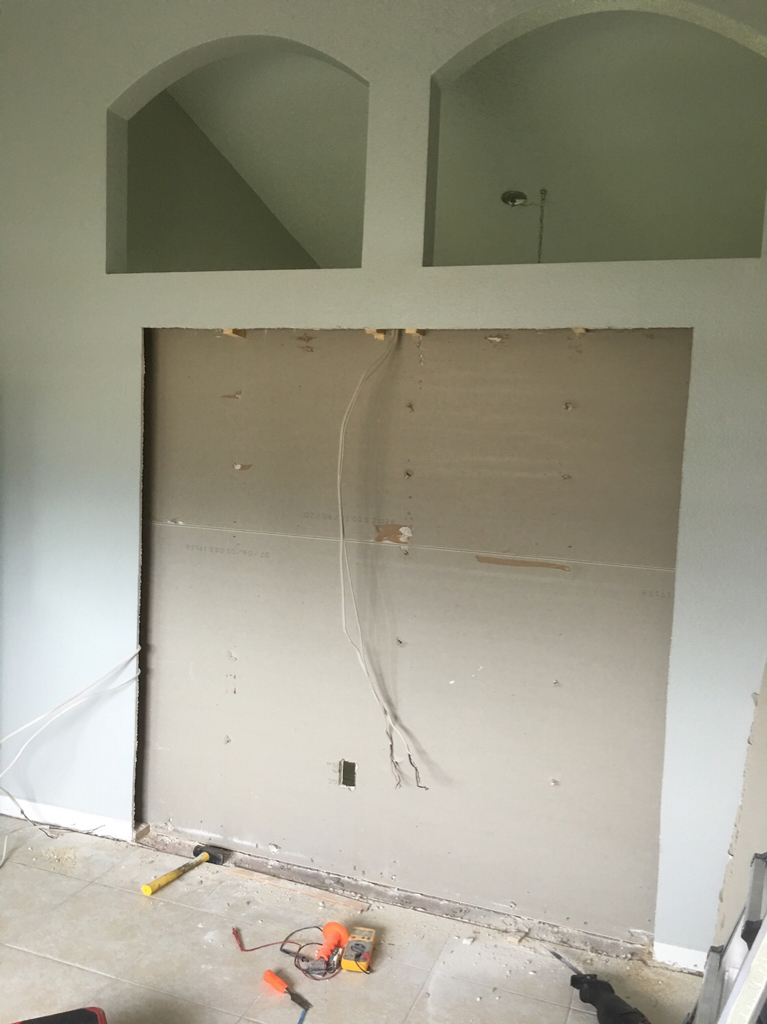
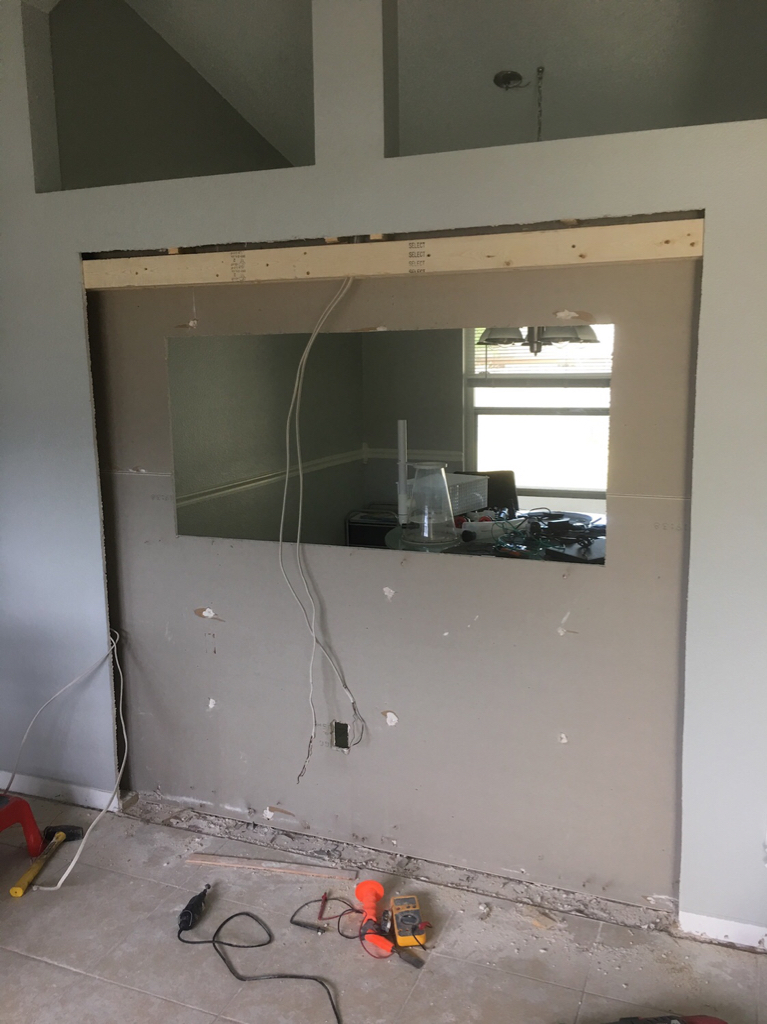
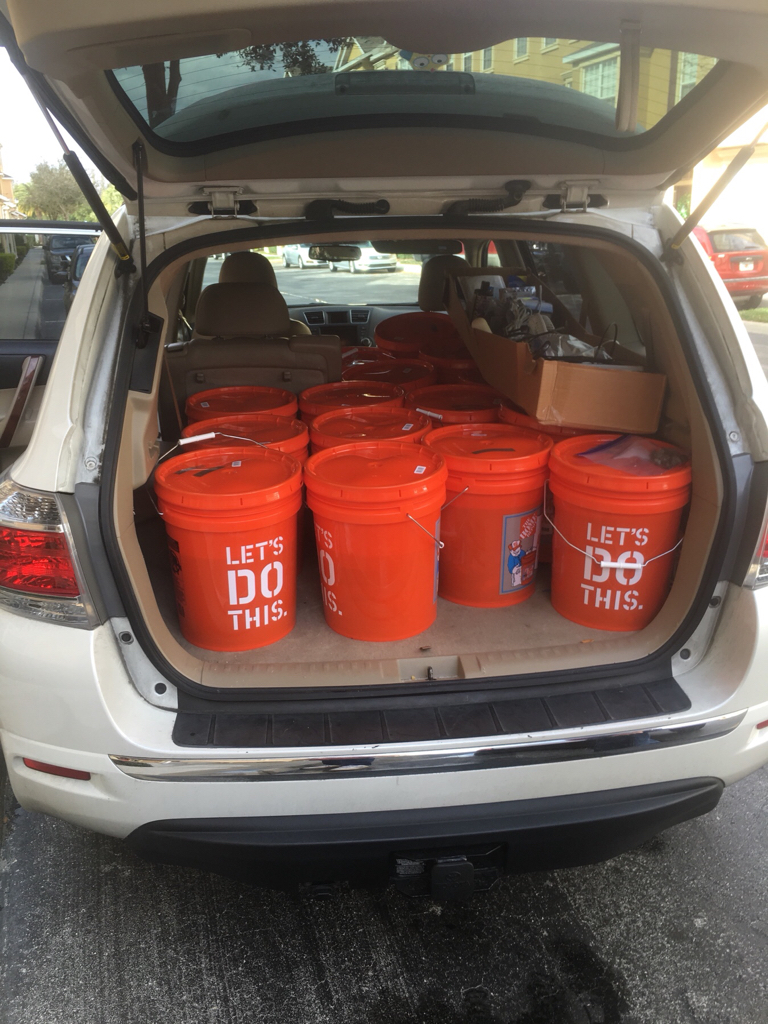
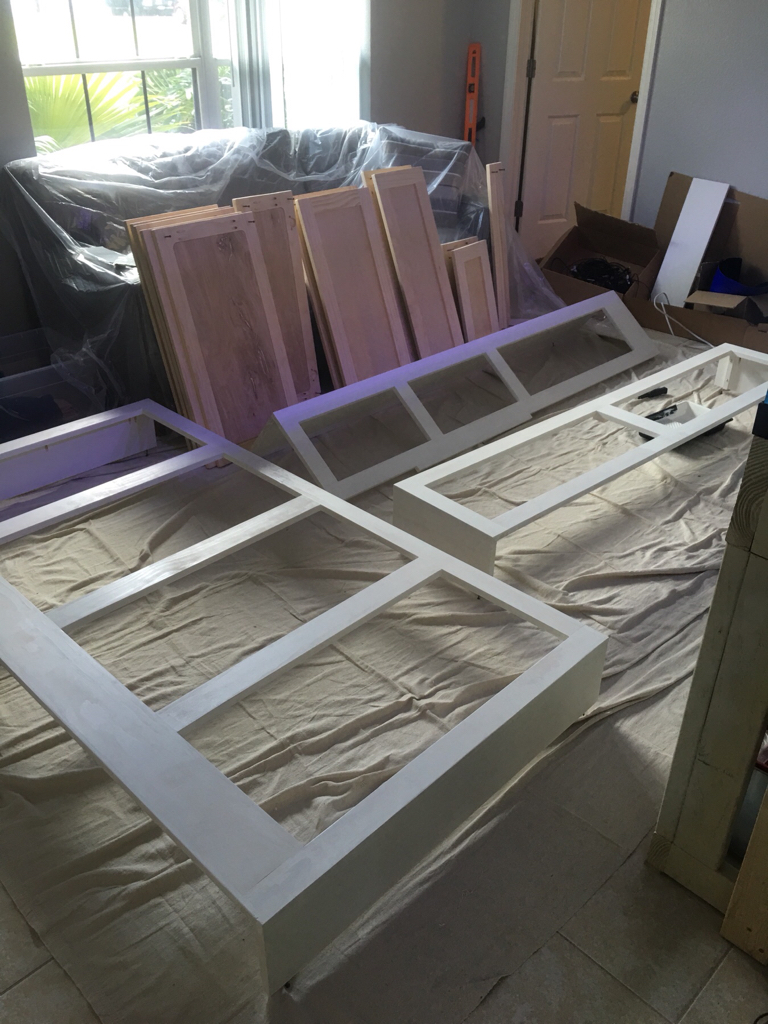
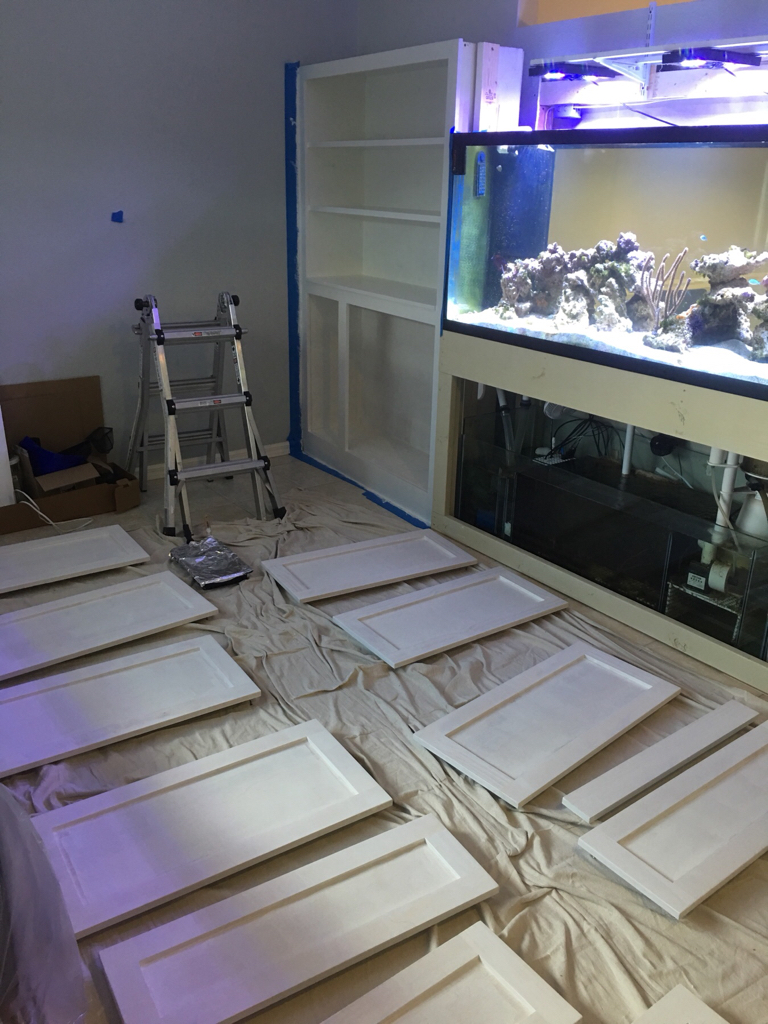
I’ll spend a lot of time covering the automation in this thread since I think that’s part of what makes my tank unique, but before we get there I’ll show you the rooms where the tank lives and some of the pics from when it was getting built.

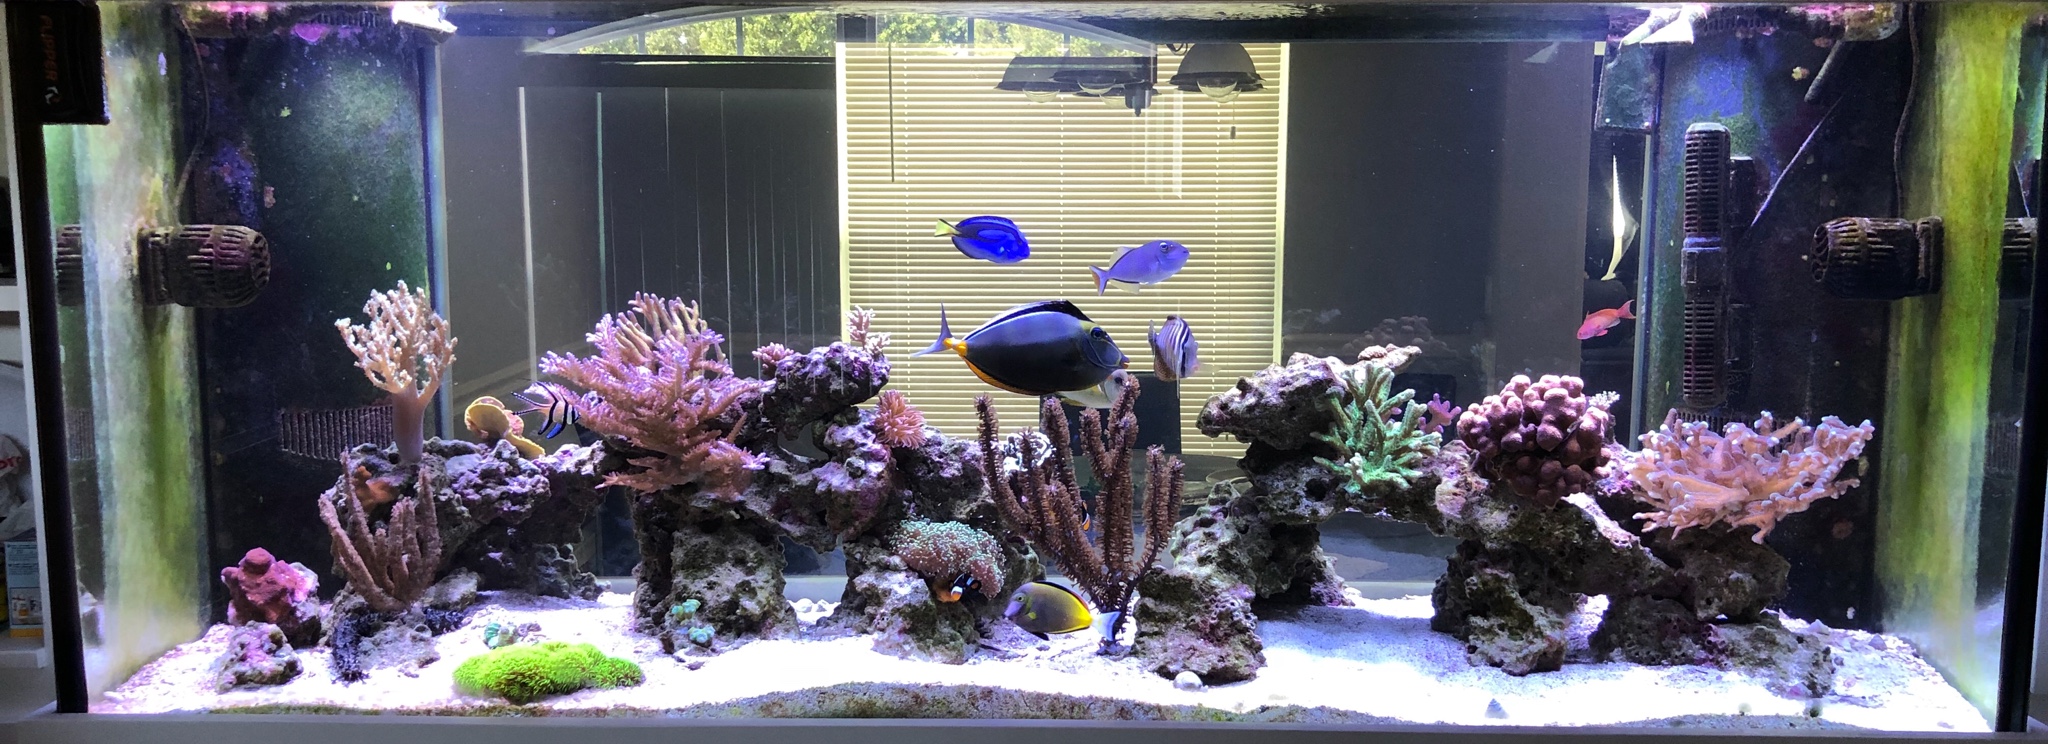
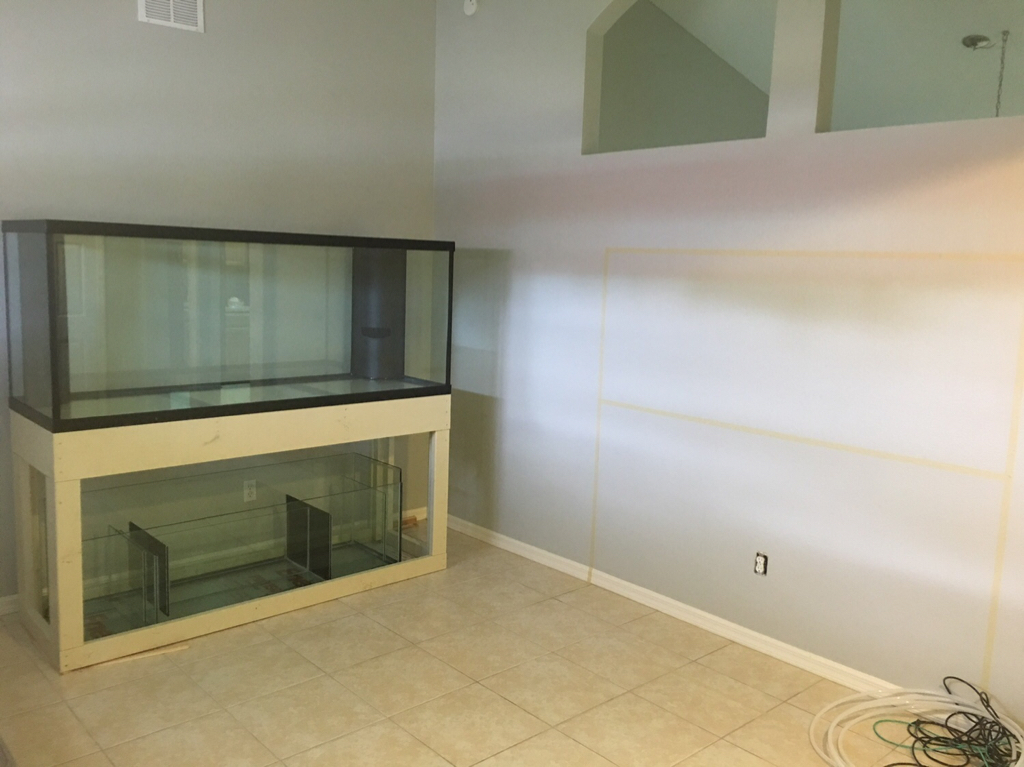
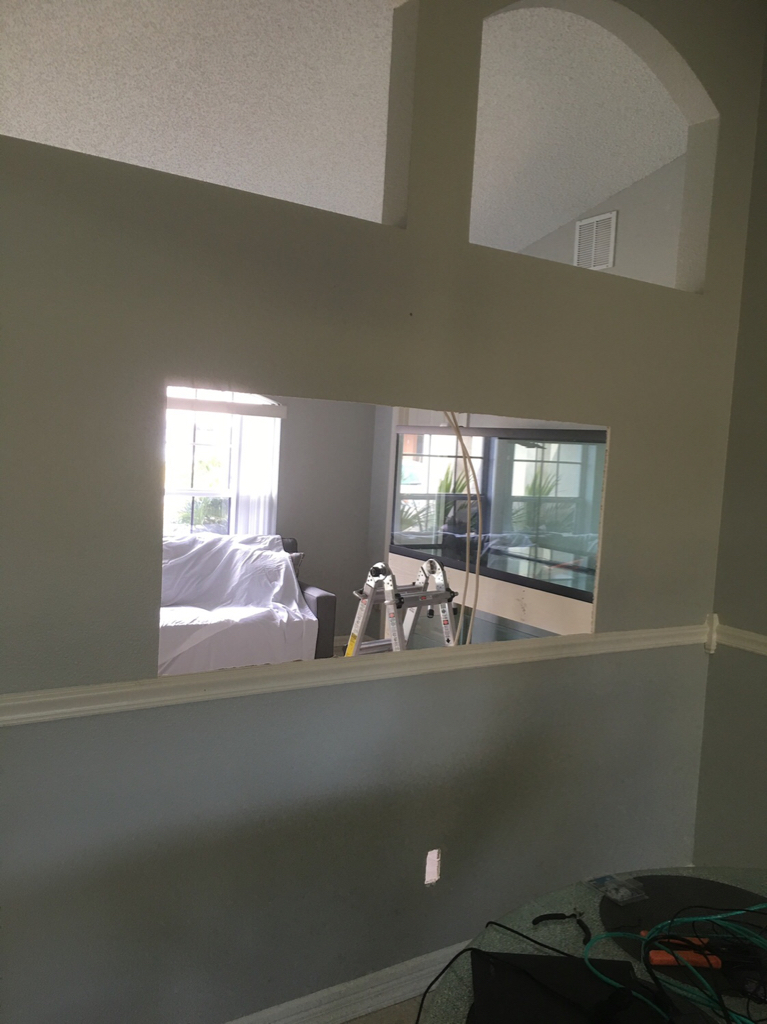
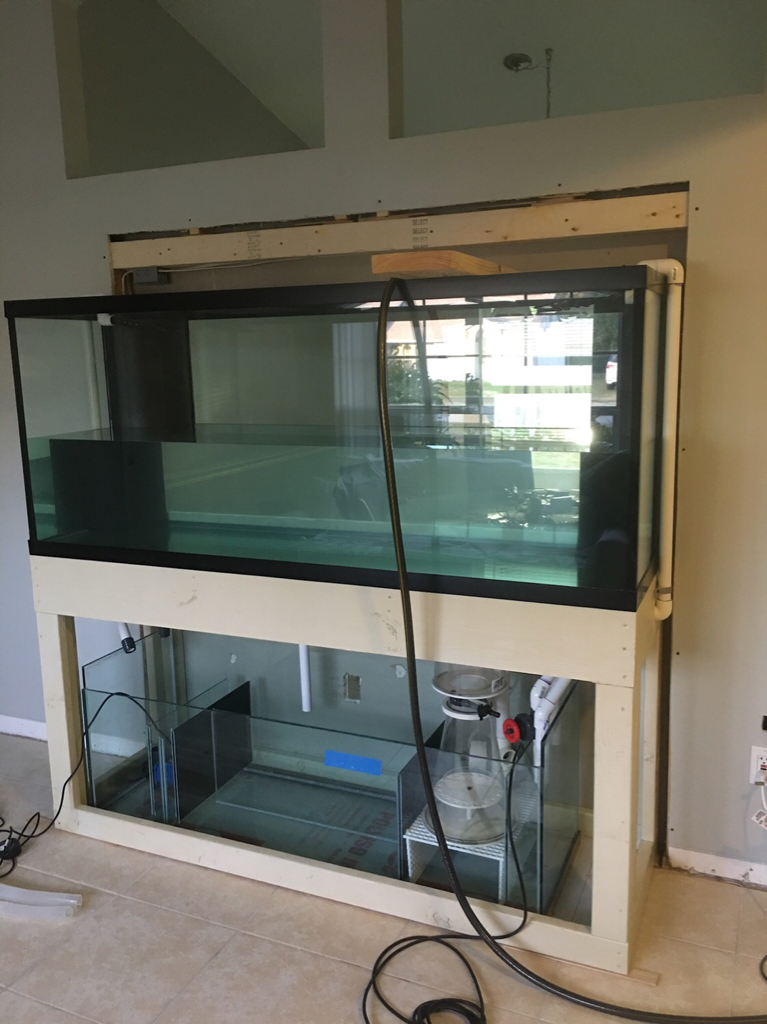
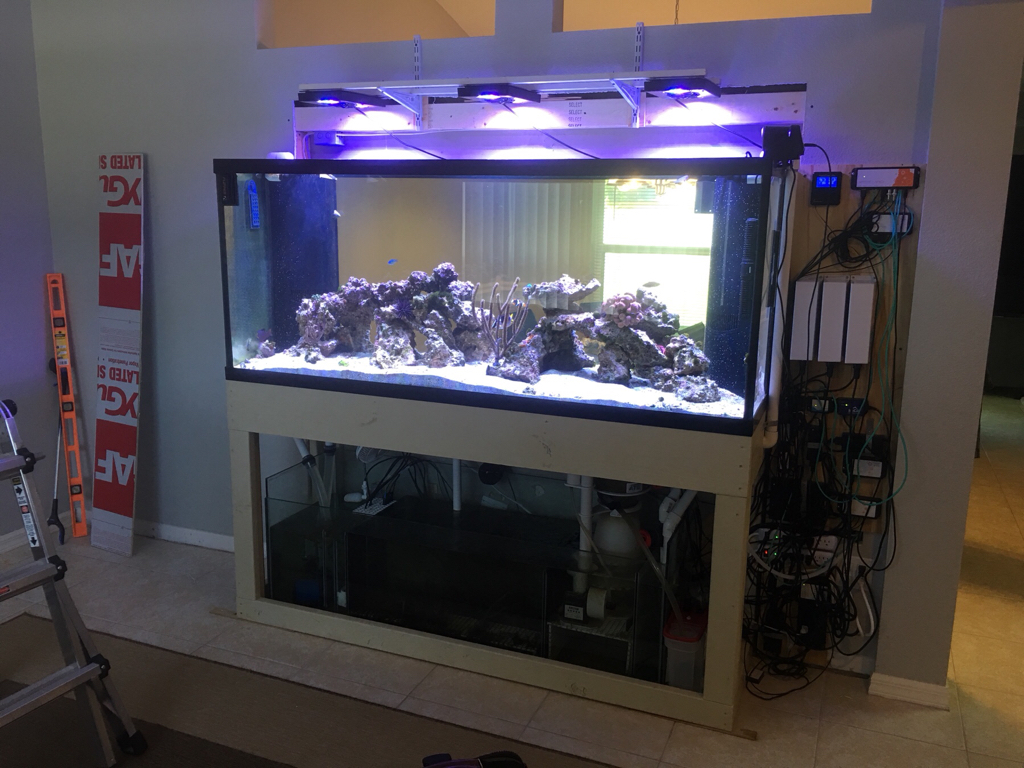
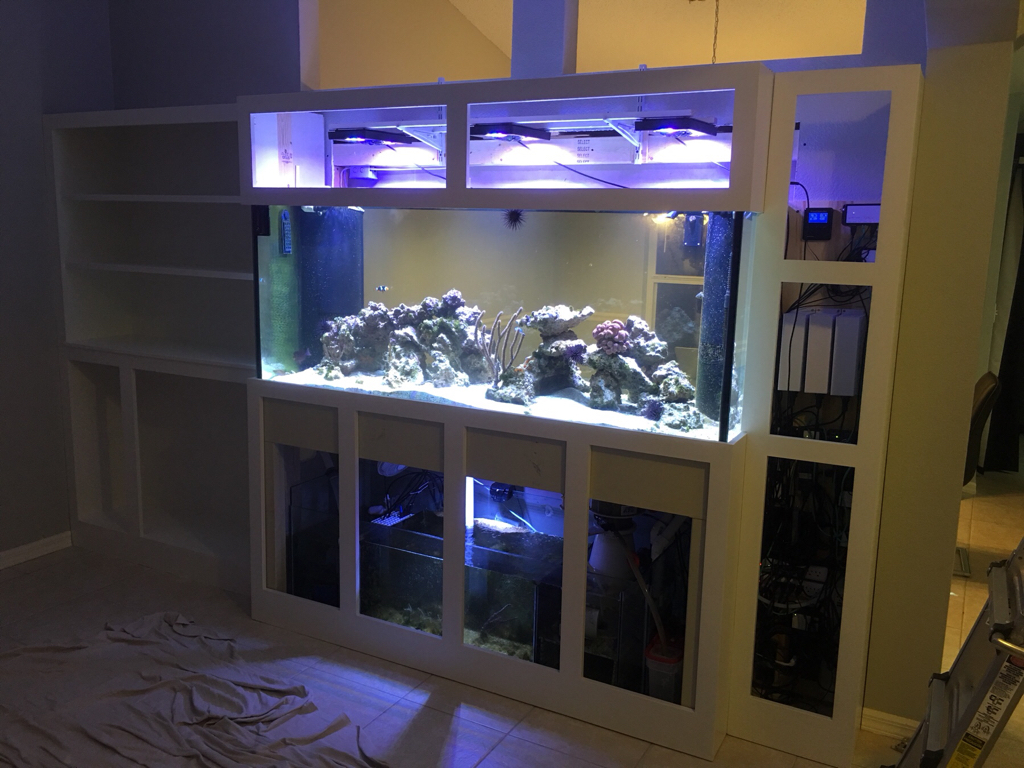
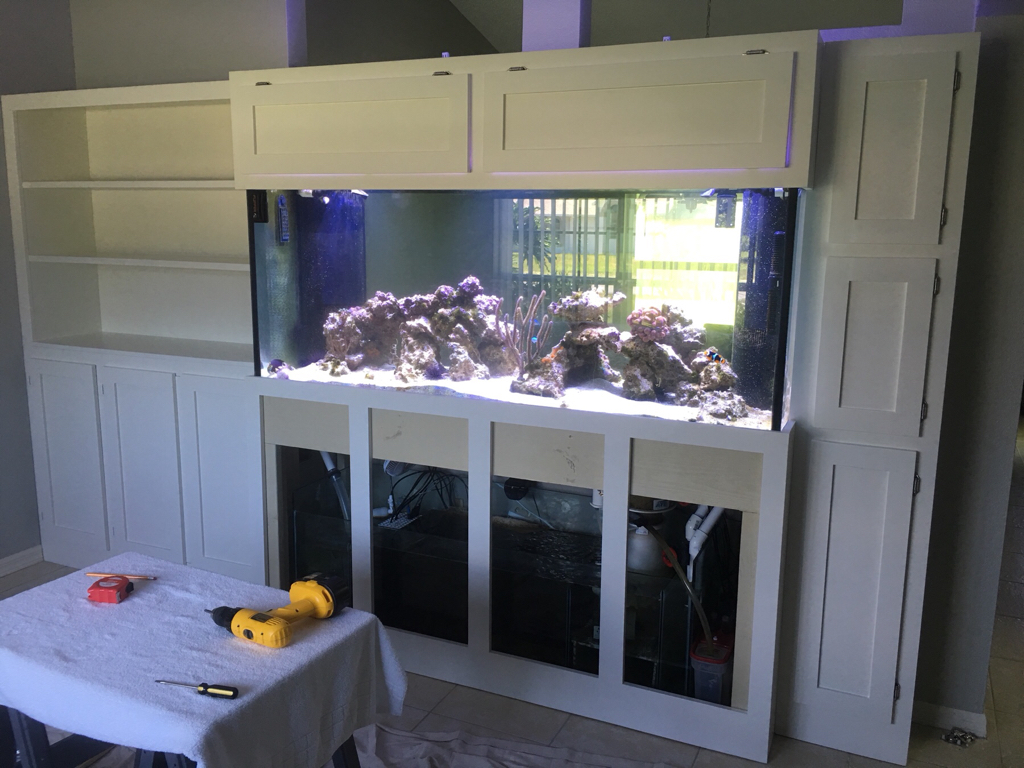
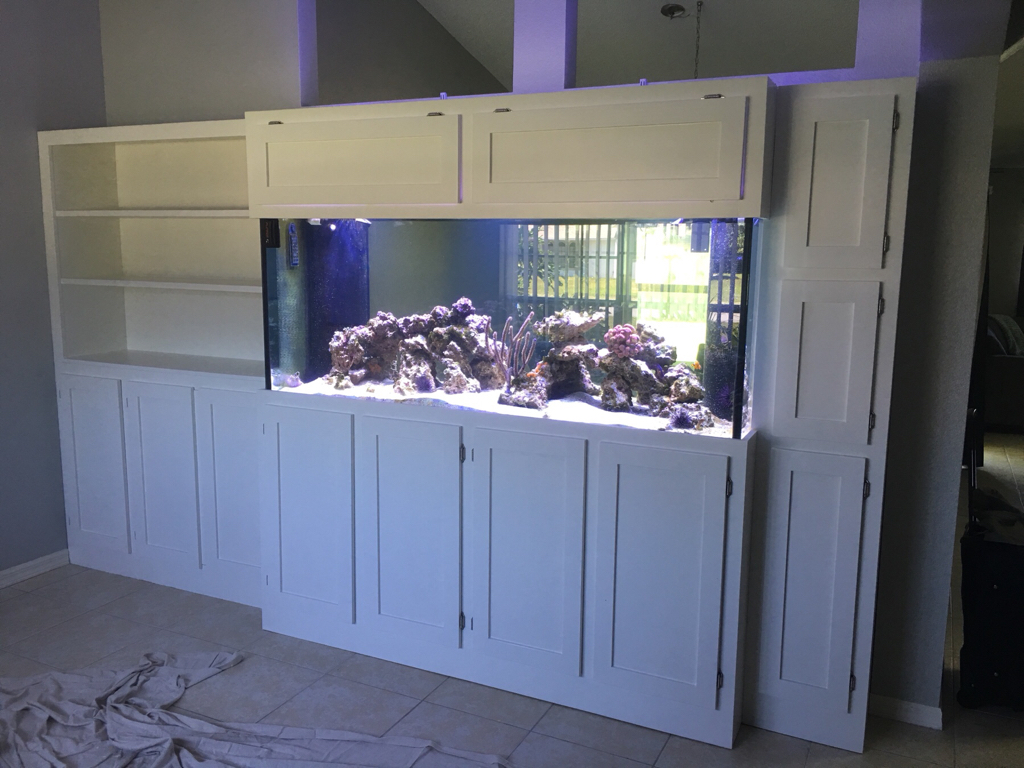
The tank is installed in the wall between my living room and my dining room so it’s visible from both rooms. Here’s the tank from the living room:

8f838a405e7d67db9f7603c9cc59b997.jpg


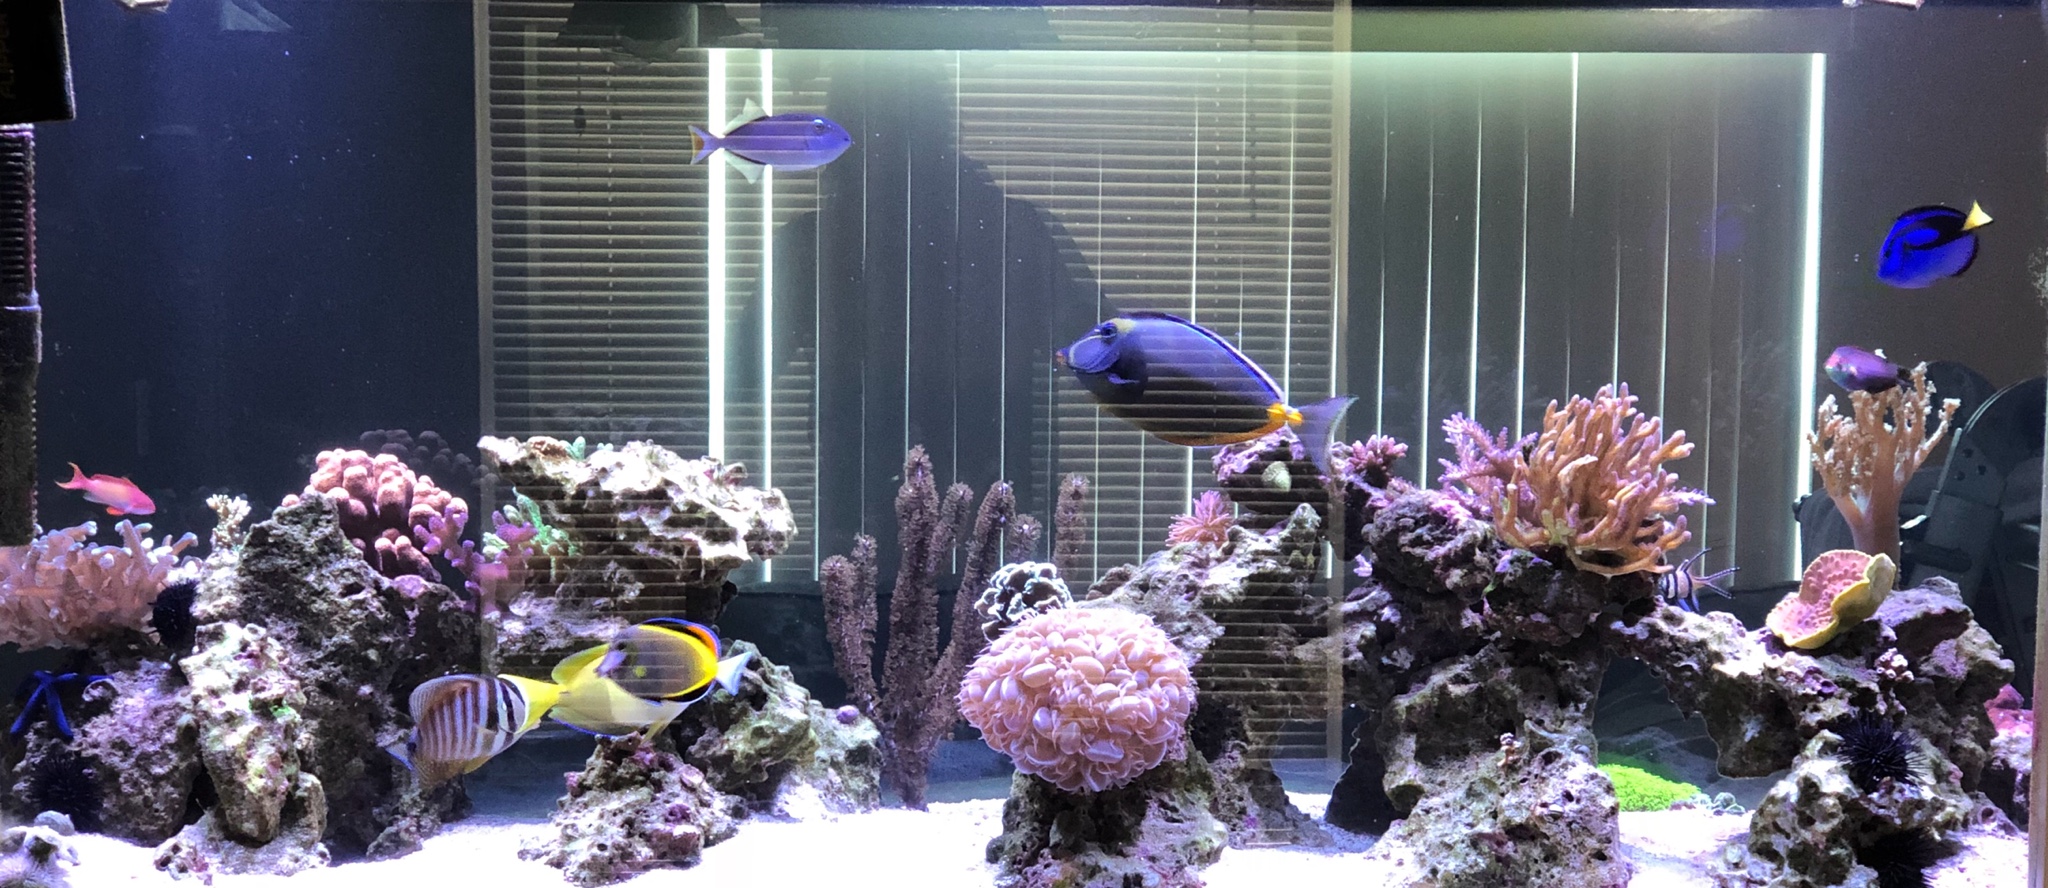
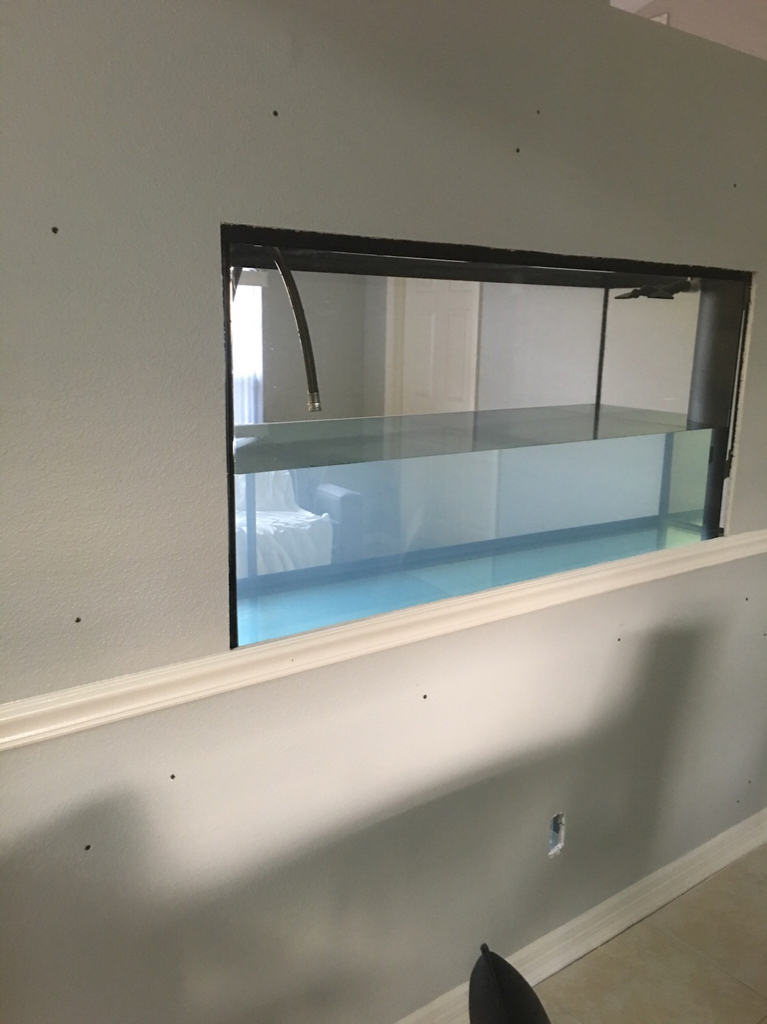
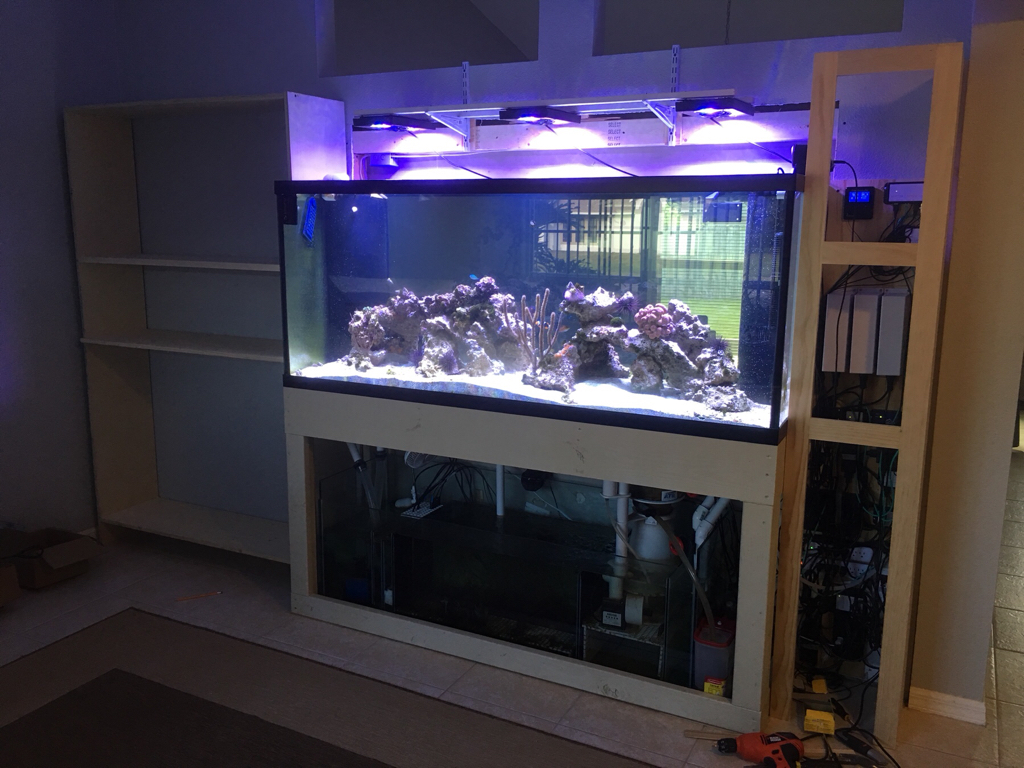
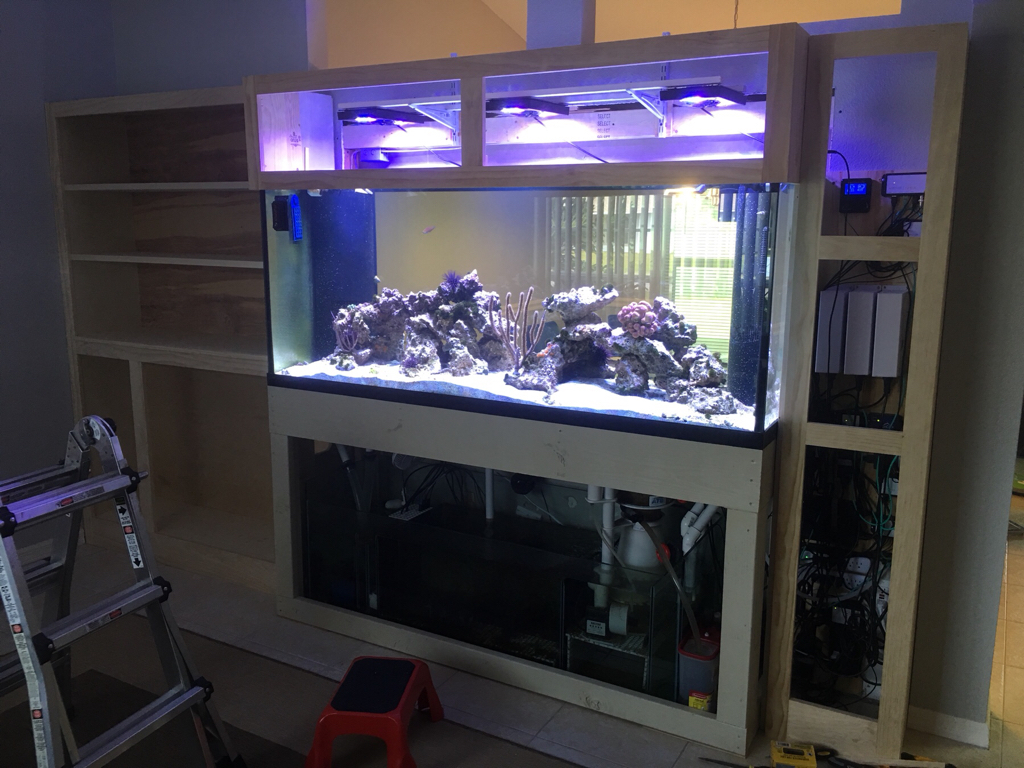
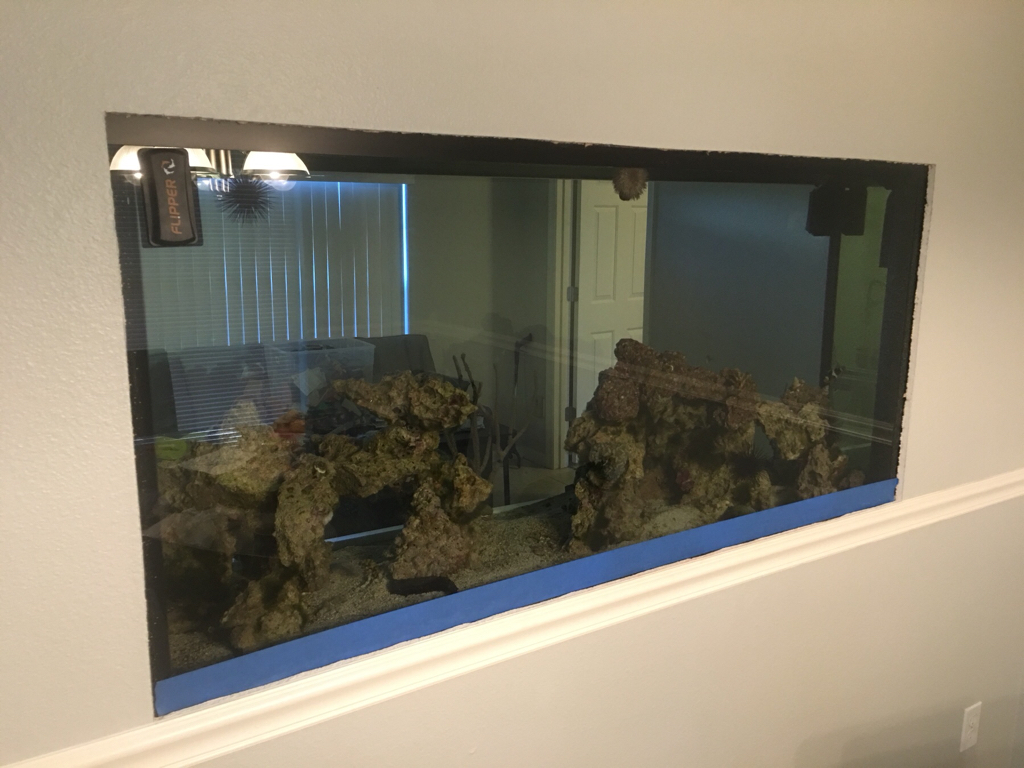
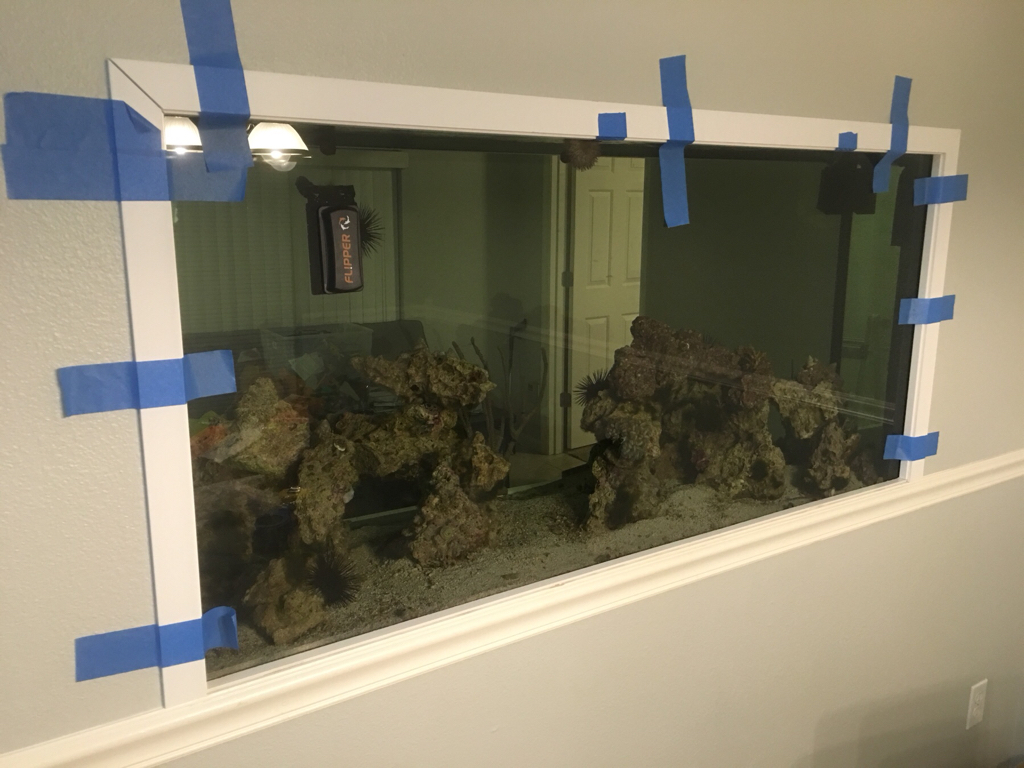
And the other side of the tank from the dining room:

9635e0907a1a068ed7a829eefc6dfbfd.jpg


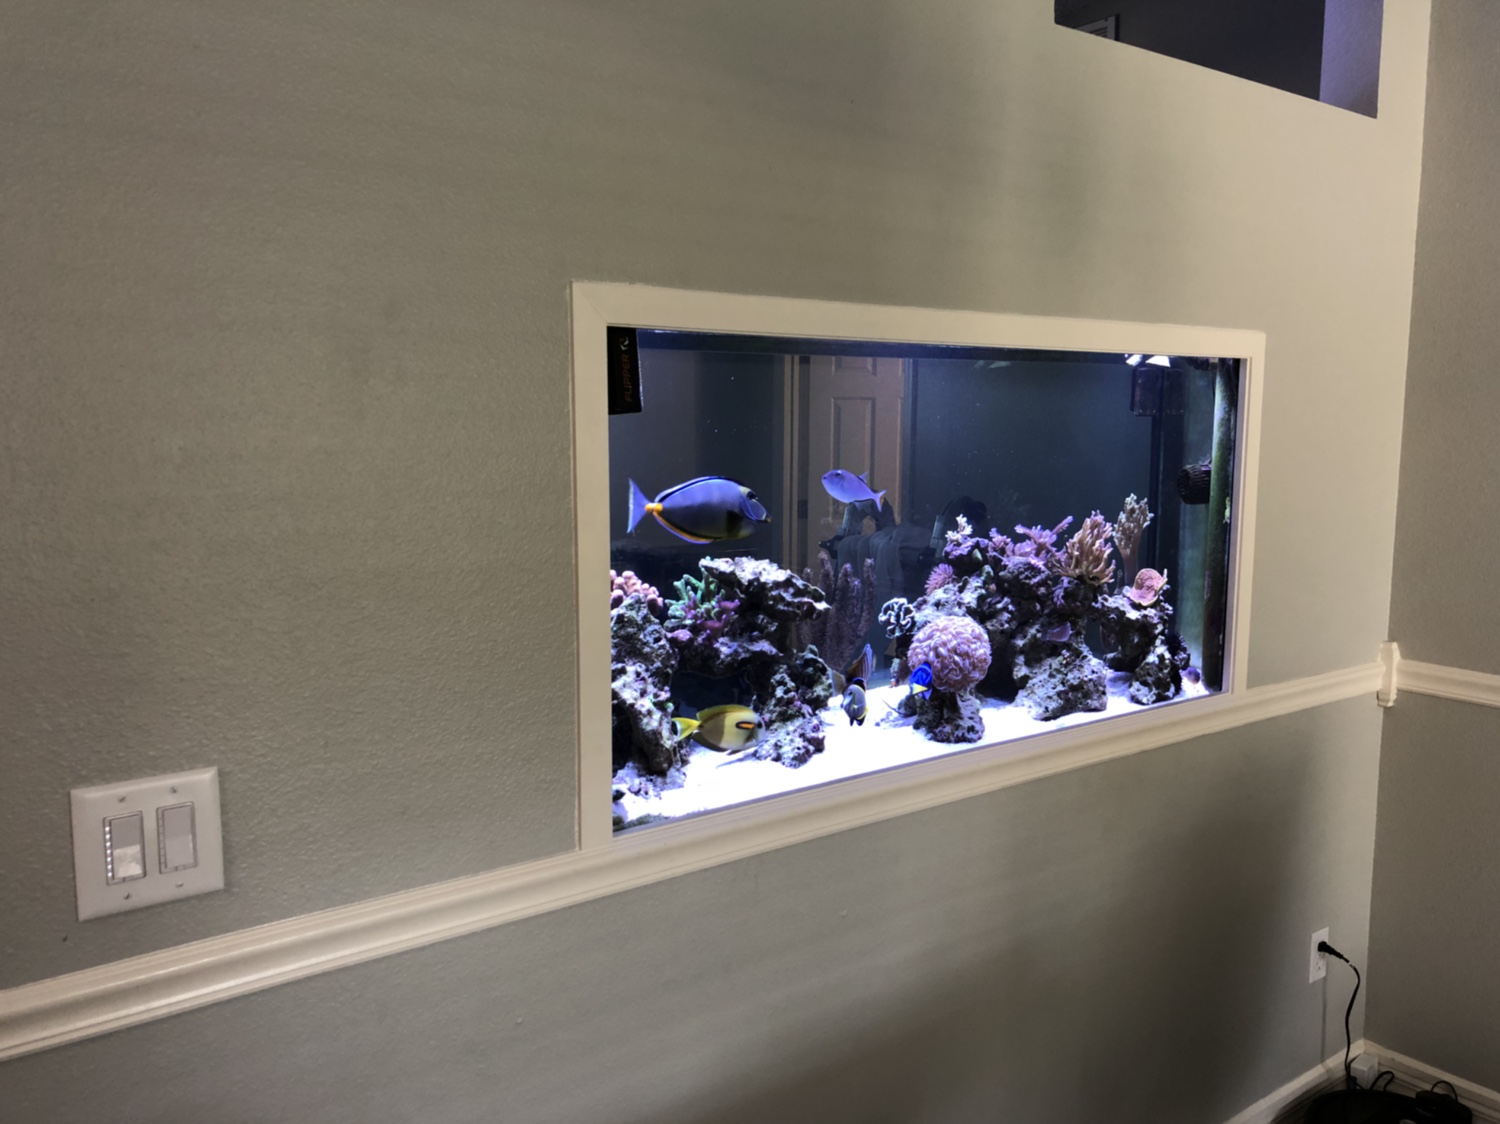
I love having so much of the tank visible it gives me two large areas to put corals and it keeps the fish and inverts out in the open because there really aren’t any rocks that they can hide behind. If you have the option to make both sides of your tank visible then I highly recommend it.
 
OP
OP
B

Brett S

Valuable Member
View Badges
Joined
Nov 28, 2016
Messages
1,062
Reaction score
1,373
Location
Orlando
Rating - 0%
0   0   0
So, to start at the beginning, I had a 75G reef tank, but less than a year after I set it up I moved to a new house. I started trying to plan out the move and realized that it would be much easier if I could set up a new tank, then move the livestock, then tear down the old tank. Of course at that point I realized that if I was setting up a new tank anyway then I could go with a bigger tank. I kept thinking bigger and bigger until the space I had and my budget at the time maxed out at about 220G.

First I needed something to hold the tank, so I built a stand based on rocket engineer’s plans:

109e50561313b6476ec120669600ab3d.jpg


I needed a sump as well. As much as I really wanted to set up a fish room there was just no way I could make it work in this house, so everything needed to go under the stand. I wanted as much water volume as I could get in the sump and found a 100G tank on Craigslist that was 5 feet long had a great footprint to use as my sump.

5312973dc9a0e76ed2f065bcd9617224.jpg


Unfortunately I realized that this tank was slightly too tall and it would make accessing the equipment in the sump very difficult. I decided to try to cut down the front glass panel. I figured I didn’t have much to lose... I didn’t have a significant amount invested in the tank and I needed it to be a little shorter. I took off the front part of the top frame and got a 4 inch wet saw with a diamond blade and held my breath while sliced off the top three or 4 inches of the front glass panel.

0160500c891264dd4b5b16959df56cf6.jpg


d3a39b2f66f64ed99f7c24a65a8cff84.jpg


In the end it worked perfectly. Once I knew it was going to work I took off the rest of the top frame and I cut out the overflow and siliconed a piece of glass over the drain holes. I cut out the silicone in the corners and re-siliconed the tank, then I got some glass panels cut at a local glass shop and siliconed them in. I used smoked glass on the edges of the lit section in the middle in the hopes of discouraging algae growth in the other sections.

a09330ee4cca3f092ab31c8ef0febd31.jpg


At that point I filled it and ran some water through it to test it for a while and I had myself a sump[emoji4]

59fdaf86ec5796600844a415792811c4.jpg


After using it for more than two years now I honestly love the cut down glass in the front. It lowers it enough that I can easily access everything in the sump, but in addition with the back and sides being several inches taller they act as splash guards and help keep the water from splashing out of the sump as well.
 
OP
OP
B

Brett S

Valuable Member
View Badges
Joined
Nov 28, 2016
Messages
1,062
Reaction score
1,373
Location
Orlando
Rating - 0%
0   0   0
Now that I had a tank and a stand to put it on and a sump to put under it I needed to get the tank from the garage to the living room where it was going to live. Unfortunately it weighs nearly 400 pounds when it’s empty. It turned out that I had some furniture delivered to the house about the time I was ready to move the tank and I bribed the delivery guys with $80 to pick up the tank and move it to the living room.

f24d0c2af815c406578d7fb7a1dfefb6.jpg


You can see the masking tape I put on the wall when I was trying to figure out tank size and placement and in the bottom right you can see some tubes and wires that I ran up through the wall and into the attic to get to a drain and to the garage where I was planning to put my ATO and NSW reservoirs. I also installed and tested the pvc plumbing for the drains and returns while it was here. Unfortunately I don’t really have any pictures of the plumbing, but the tank had two overflows with two 1 inch bulkheads in each. I decided to go with a dual herbie config, so I ran the returns up the sides of the tank and over the top.

Now the tank was in the house and all I had left was to cut some holes in the wall and install the tank.

My father came to visit and helped with the deconstruction.

8fdd153211acf864a9f04a16137d144e.jpg

8fc92cd731a1d30a4aee47f1a0525e19.jpg

a236d0e25d4e04685a5e65d6d866764c.jpg

99c02f42813616ce191befaf9de936a9.jpg


Once we had the wall ready we put some furniture sliders under the stand and slid the tank across the tile and into position.
7a8c47bccd9e95788c0536ad1df5c0c1.jpg


Then I started filling it with the water I had been making in the garage and storing in brute trash cans.

13d42d2aae6d984943306ba04a7000b2.jpg

8d8f183d78185ce6b86e6fc0cc75c097.jpg
 

apt220

Community Member
View Badges
Joined
Jun 28, 2017
Messages
79
Reaction score
102
Location
SoCal
Rating - 0%
0   0   0
Wow I never seen anyone cut the glass down like that! AWESOME. I often think that people use too tall standard tanks for sumps. You took care of that problem!
 

Diablo2112

New Member
View Badges
Joined
Feb 12, 2018
Messages
20
Reaction score
61
Location
Albuquerque
Rating - 0%
0   0   0
Amazing work! Thanks so much for posting, and really looking forward to your descriptions of the automation. Bravo!
 
OP
OP
B

Brett S

Valuable Member
View Badges
Joined
Nov 28, 2016
Messages
1,062
Reaction score
1,373
Location
Orlando
Rating - 0%
0   0   0
So now I had a tank in the wall that was full of water. I spent a very long Saturday pulling the livestock, rock and sand from the 75 gallon tank at the old house and bringing it all to the new tank. I reused the sand, since it was less than a year old, but I did make an effort to rinse it with some of the old tank water.

I think I had around 20 or 25 five gallon buckets filled with rocks, sand, and livestock.

76ecb51a70a7a78fd18f15412f78be54.jpg


I finally got everything into the tank although the water was still pretty cloudy

1ade07db819594f18e791d2bb4a96cbf.jpg


I brought the apex and the two Gen 3 radion Xr30w pro’s that were over the 75 and added a third radion. The electrical stuff was installed on a board to the right of the tank

dd3f064c187e9d06c040e2e1ca3f8c78.jpg


Everything was in the new tank and the tank was up and running at this point, but it was still unfinished.

6f1c4e9d0670a8cb2844ea9fe68139fb.jpg


It stayed in this functional, but unfinished state for a couple of months until my father came to visit and he build the wood cabinetry that goes around the tank. Woodwork has been his hobby for a long time and he was able to make it look amazing over a long weekend.

He started framing out the bookshelf on the left of the tank and the cover for the electrical equipment on the right

29b38d4dbf23f74d386b4ce41a3d508c.jpg


The radions were held up by shelf brackets and 1x2’s in what was supposed to be a cheap temporary solution until I got the canopy built, but it turned out that it worked quite well and was hidden by the canopy, so they are still held up the same way now.

The bookshelf on the left was finished and the canopy was started to get framed out here

efec95b7e0ae8e7e25923477c414e5e3.jpg


And then the framing for the cover for the stand

481a02a54e6a0c06e1933229561e6abd.jpg


Doors were made and the wood was painted

24caa56cf4c2507a02ce7850df98ab7a.jpg


9bf80b1c3441acf5d4b76b5c8dc9bc1a.jpg


Then everything was put into place and the doors were installed

2d5bc00088d0814fbecd0b55fe20f330.jpg


b324a29d171f259c4c96a2cfd6144a4a.jpg
 
OP
OP
B

Brett S

Valuable Member
View Badges
Joined
Nov 28, 2016
Messages
1,062
Reaction score
1,373
Location
Orlando
Rating - 0%
0   0   0
The dining room side was much easier to finish. I simply glued the molding to the wall. It was held in place with painters tape until the glue dried.

fc4608a5ac168788abb2af90a8eb2c67.jpg


5d6b65ec2e6224ea349d43a3d1e1933b.jpg


Then I caulked it and painted it and it was done

7f844c7f87305040f0d92b015bc09622.jpg


I love the cabinetry that my father did. The bookshelf on the left is permanently installed, but the canopy and the part under the tank covering the sump are really just facades. The doors are functional and most of the time I access the top to the tank and the sump through those doors, but each part is just held on with a couple of small latches and can be completely removed to give me full access to the top of the tank or the sump when I need to do a lot of work. That way I don’t have to worry about squeezing through small doors and I could even completely removed the sump if I needed to.

Likewise, the part on the right covering the electronics can be fully removed as well so I can get easy access there if I need to do a lot of work in that area. Most of the time I just use the doors, but when I upgraded from the apex classic to the 2016 apex it was great that I could just pull everything away to easily be able to switch out the systems.
 

Fudsey

Jack of all trades, Master of none ;-)
View Badges
Joined
May 7, 2016
Messages
10,038
Reaction score
48,998
Location
So. New Hampshire
Rating - 0%
0   0   0
Incredible build ! ! ! Gorgeous setup you got ! !

Tagging along :)
 

SPR1968

No, it wasn’t expensive dear....
View Badges
Joined
Feb 21, 2017
Messages
20,039
Reaction score
124,692
Location
Nottinghamshire England
Rating - 0%
0   0   0
Following along and great build and photos so far.
 
OP
OP
B

Brett S

Valuable Member
View Badges
Joined
Nov 28, 2016
Messages
1,062
Reaction score
1,373
Location
Orlando
Rating - 0%
0   0   0
OK, I think today’s post is going to be all about my water station (also known as a small corner in my garage). I’m also going to start to get into a lot of the automation in this post as well.

301cc2e7b29fe3277a5d09473d4bedca.jpg


As with the sump and the equipment installed under and next to my tank I tried to get as much as possible into the smallest amount of space with my water station as well. Unfortunately as much as I love this house there just isn’t a lot of extra room.

Before I installed the tank I knew that I was going to be putting a water station in the garage, so I ran a number of tubes and wires out to the garage and to my laundry room, which is next to the garage. This is a one story house with no basement (unfortunately there are no basements in florida) so all of this was run up inside the walls and through the attic.

Between the tank and the garage I have three vinyl 1/4 inch tubes. One carries RODI water for the ATO, one carries new salt water for the auto water change and the other carries the old tank water that is removed as part of the auto water change. In retrospect if I had to do this again I probably would have run polyethylene tube instead. It’s much stiffer and less flexible and I worry a little that the vinyl might compress a little over time where it makes the turns to go down the walls and such. However, it’s been operational for more than two years now without that happening, so maybe I have nothing to worry about.

I also have an Ethernet cat5 cable that is used for the float sensors and flood sensors in the garage (the breakout box and apex flood sensor module is inside next to the tank) and I have a long aquabus extension cable for the apex modules that are installed in the garage.

In the laundry room I have a 1/2 inch polyethylene tube that goes from under the tank to the washer drain that I use to pump skimmate from my skimmate container. I have a 1/4 inch vinyl tube for the old tank water that goes from the garage (where the auto water change DOS is) to the washer drain, and I have a 1/4 inch polyethylene tube that goes from the laundry cold water supply to feed my RODI filter.

fc0f049ad37a25711b346ff43b6f53ef.jpg


Finally, before I installed the tank I also ran two 20 amp circuits to power everything. I don’t need nearly that much power at the tank, but since I was running wire anyway it really wasn’t much additional cost or work to run wire for 20 amps, or to run wire for a second circuit and I figure that should definitely future proof it. I also like having two circuits for redundancy. Both circuits have GFCI outlets and as you know GFCI’s occasionally trip for no good reason. With two circuits I can create a lot of redundancy. I have two return pumps with one plugged into each circuit. I have two heaters with one in each circuit and I have my lights divided between the two circuits. If one circuit should fail for some reason then the tank will still have heat, some light, and water flow and can run for some time that way even if it happens while I’m away from home.
 
Last edited:

Caring for your picky eaters: What do you feed your finicky fish?

  • Live foods

    Votes: 14 26.4%
  • Frozen meaty foods

    Votes: 44 83.0%
  • Soft pellets

    Votes: 7 13.2%
  • Masstick (or comparable)

    Votes: 4 7.5%
  • Other

    Votes: 2 3.8%
Back
Top