My rendition of 300

OP
OP
Sisterlimonpot

Sisterlimonpot

Effortless Perfection
View Badges
Joined
Jul 15, 2009
Messages
3,866
Reaction score
7,906
Location
Litchfield Park
Rating - 0%
0   0   0
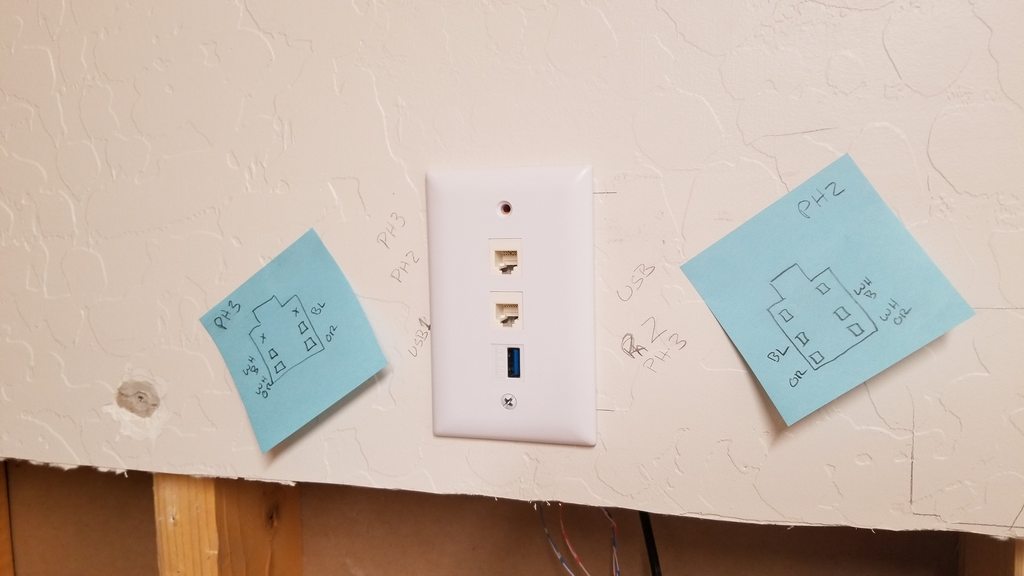
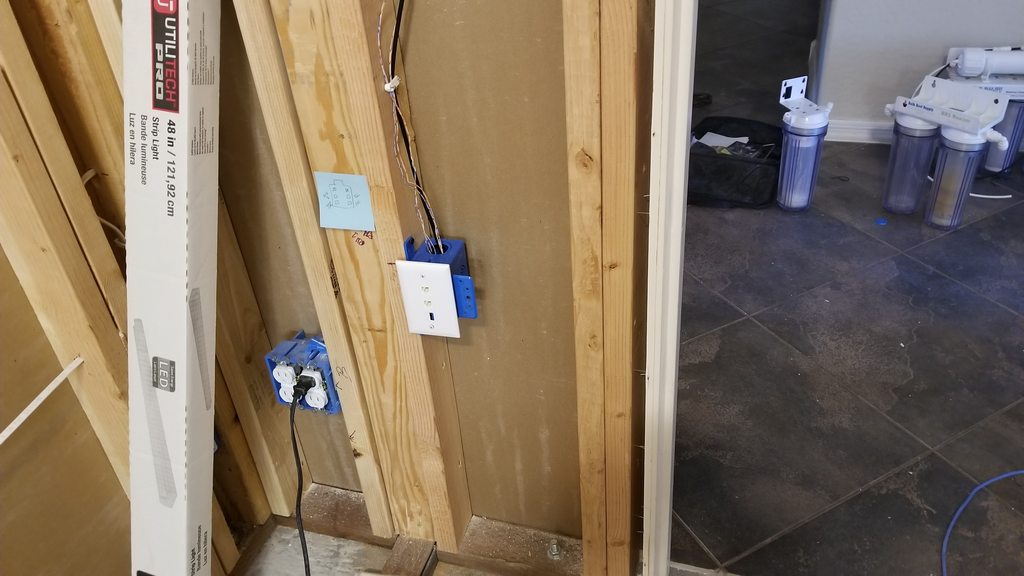
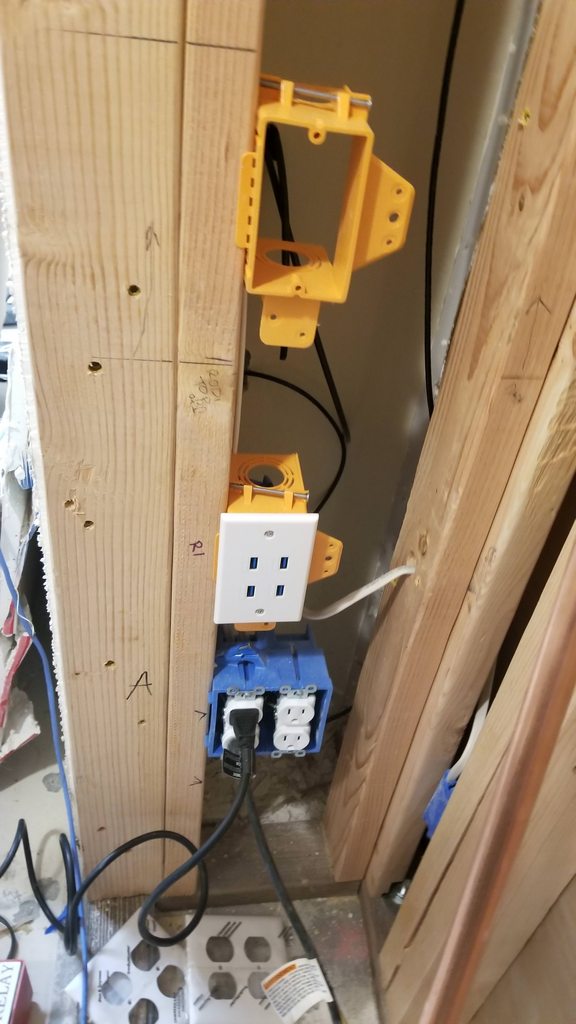
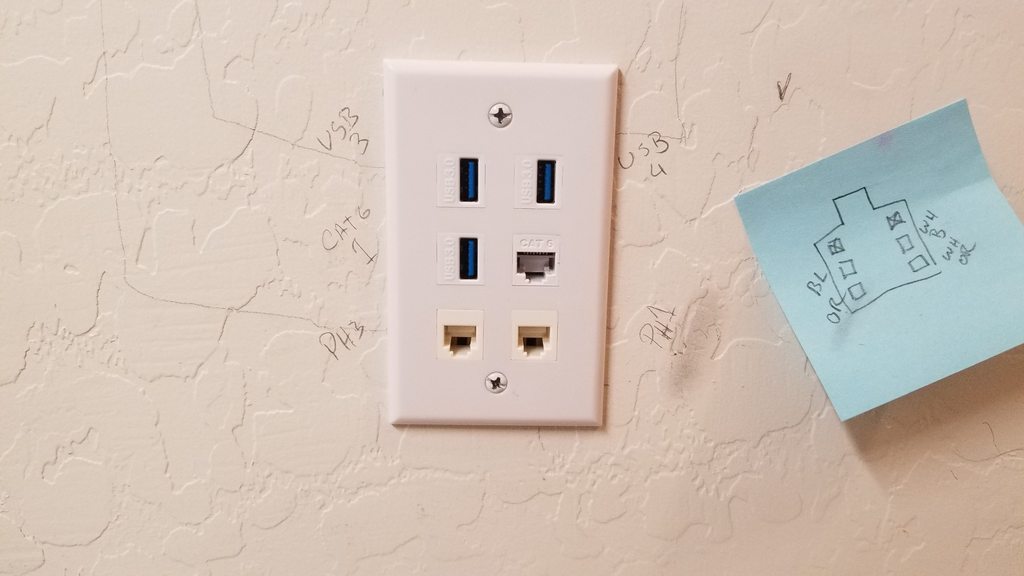
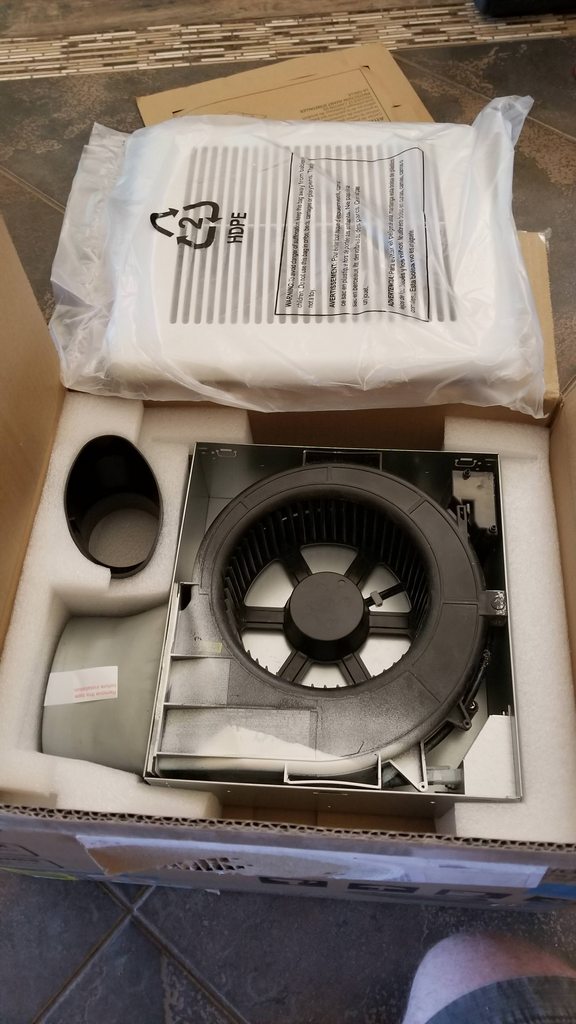
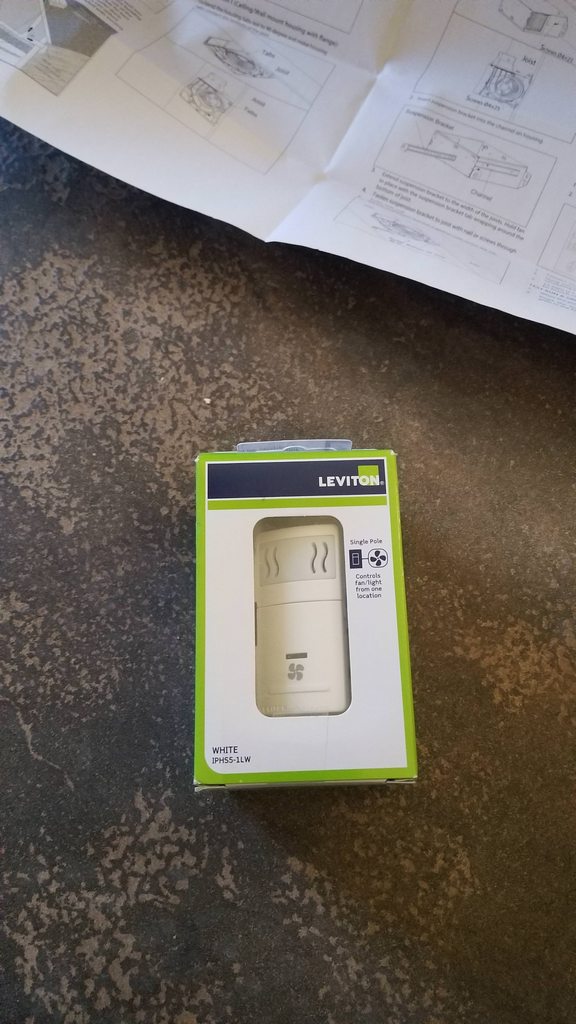
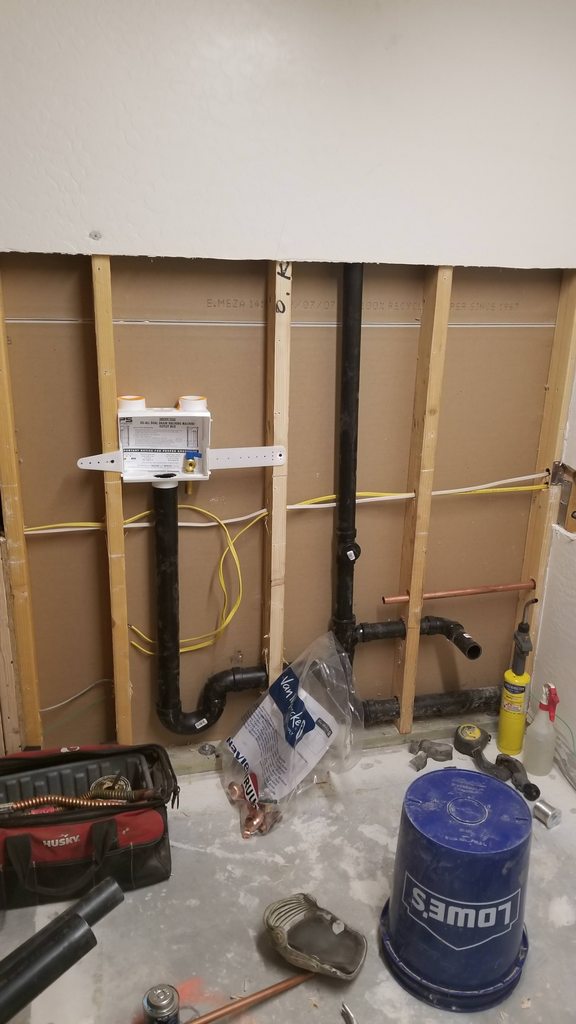
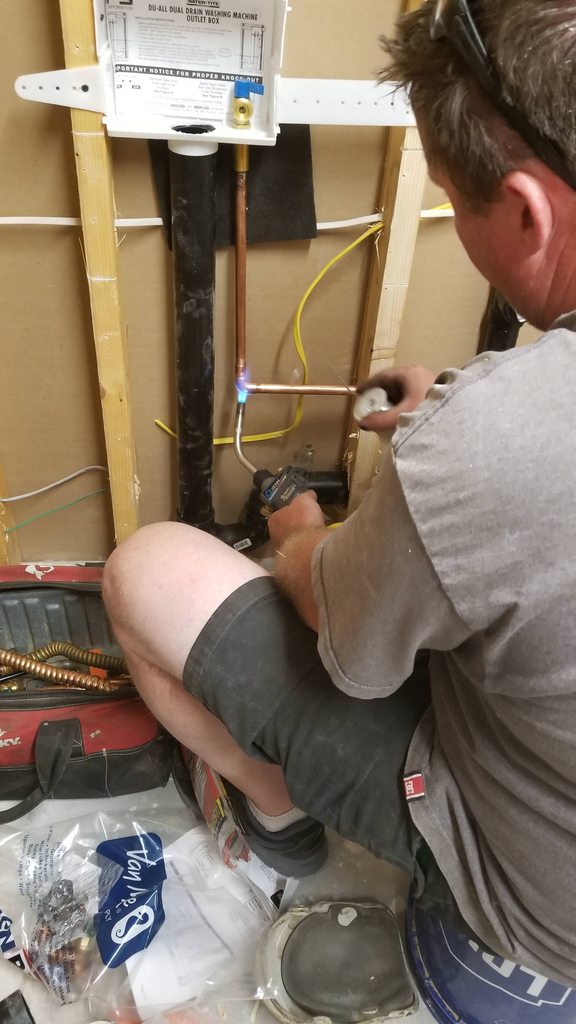
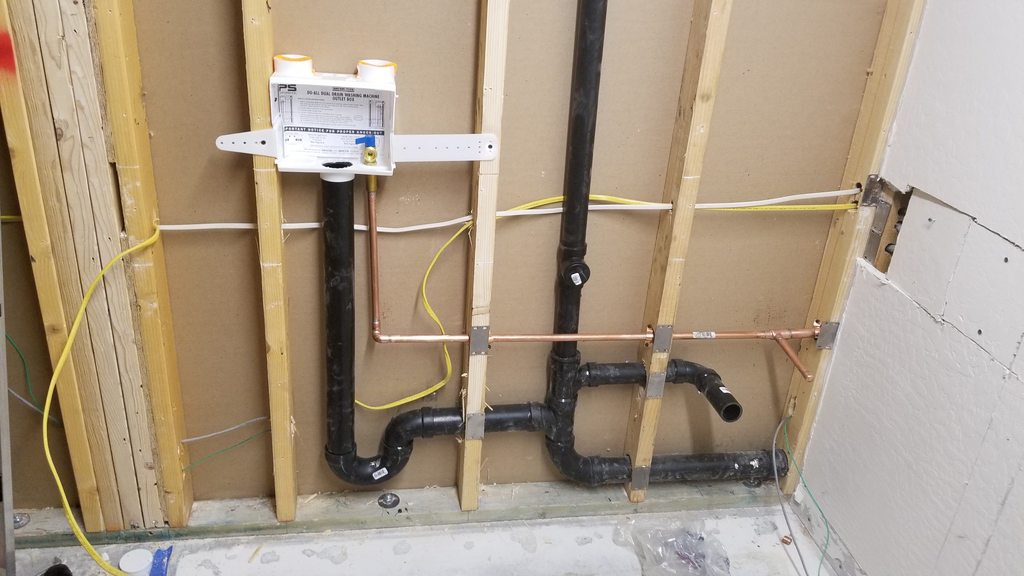
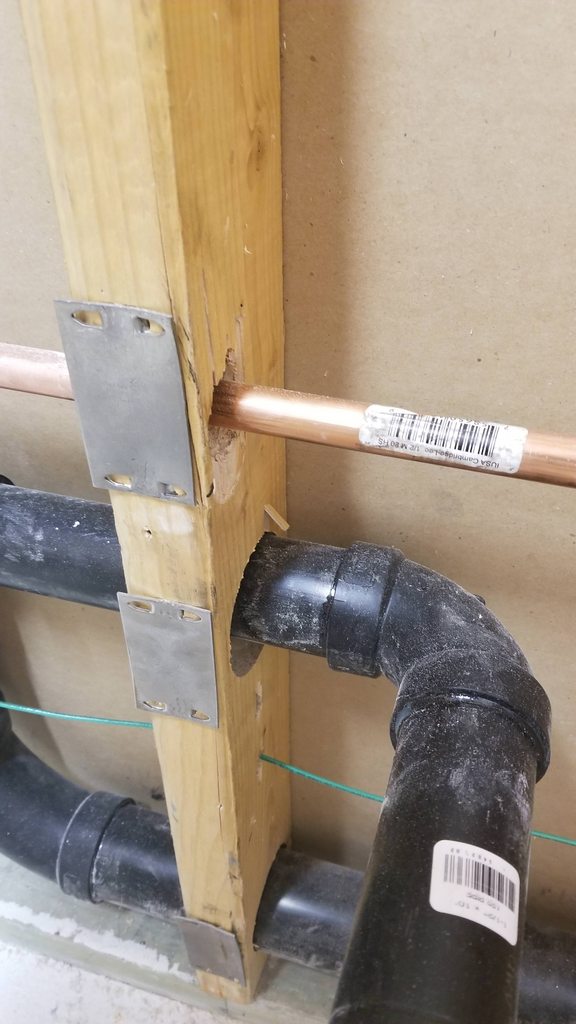
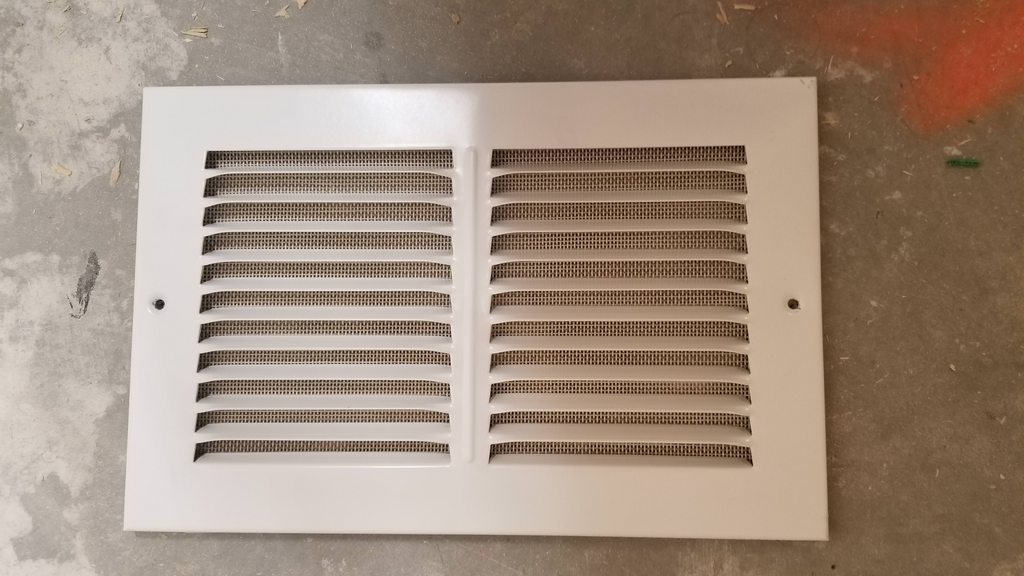
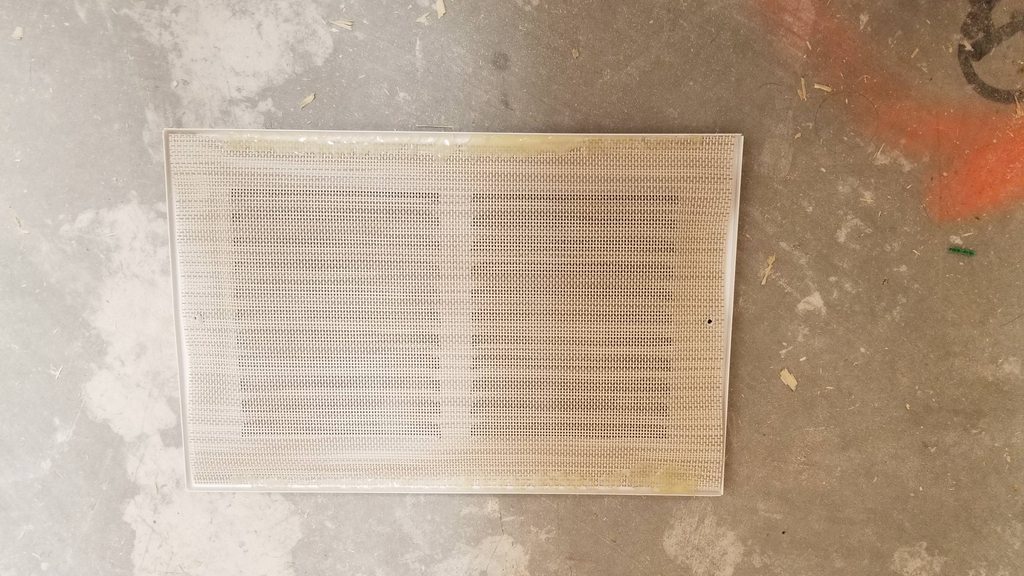
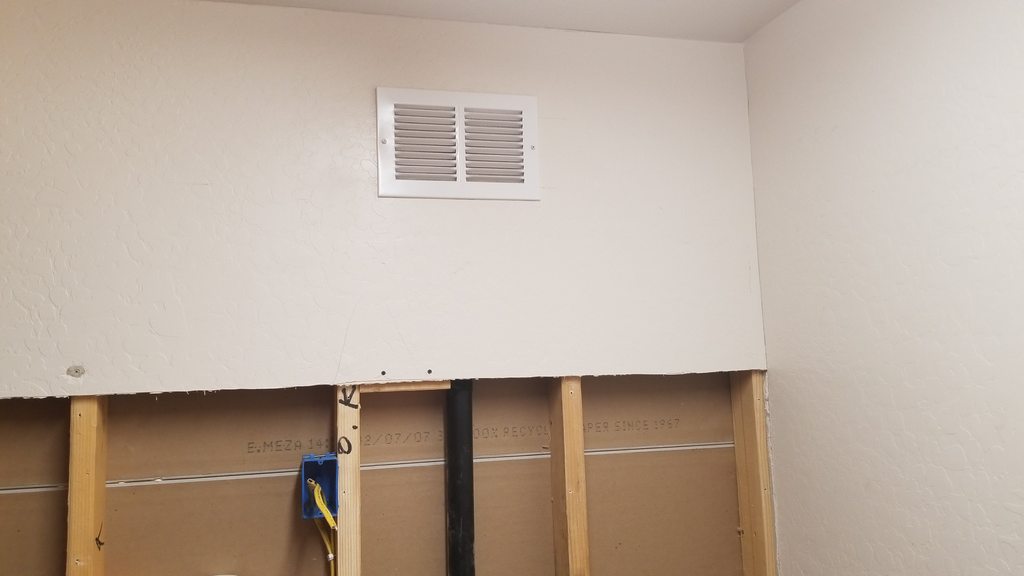
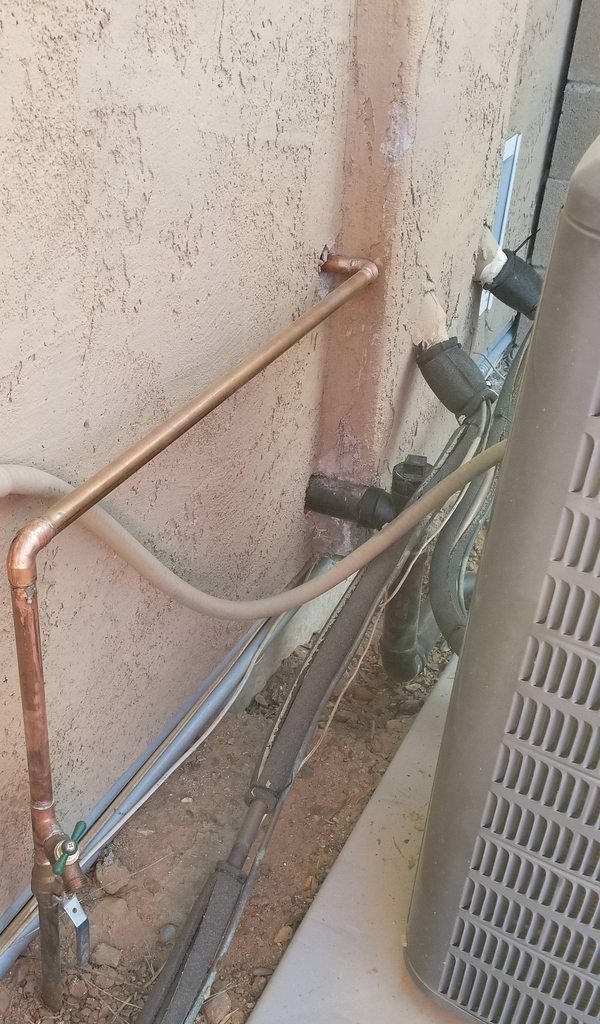
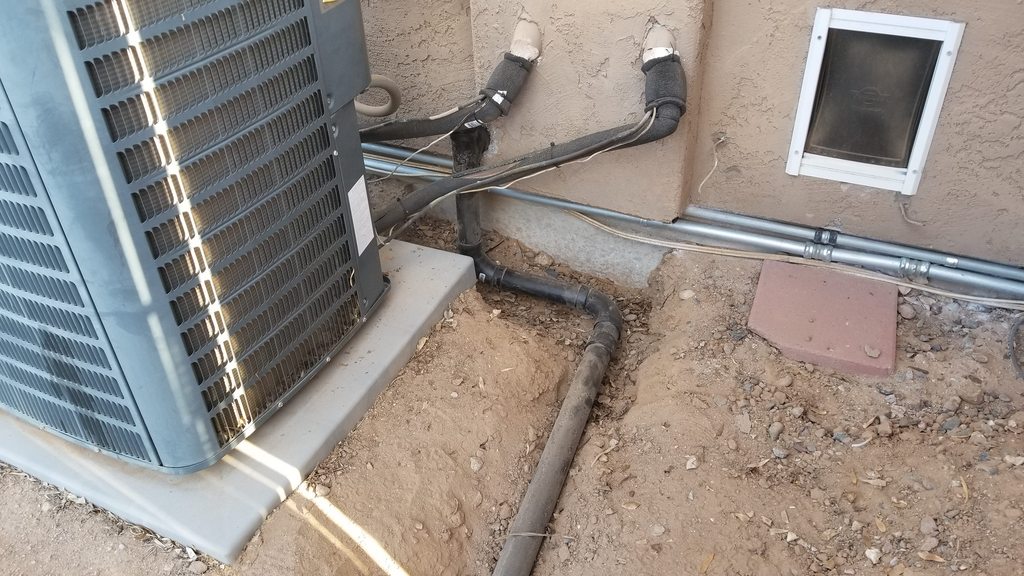
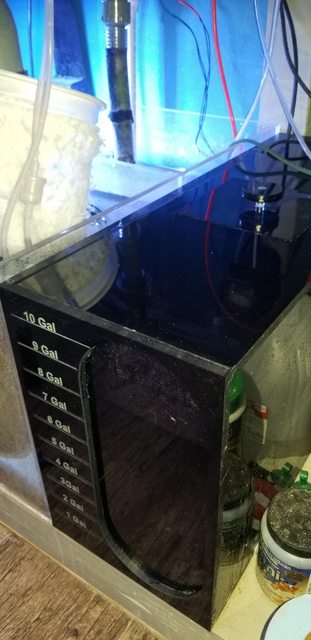
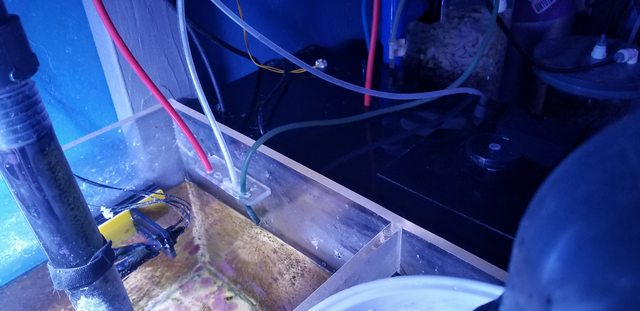
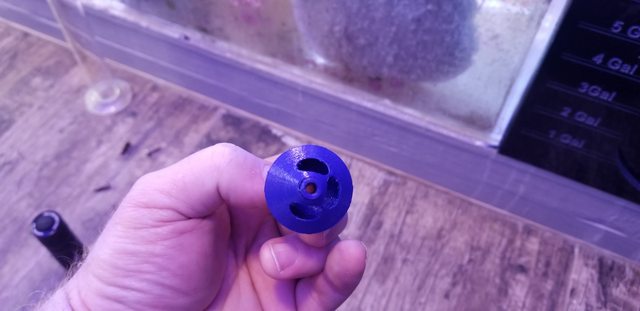
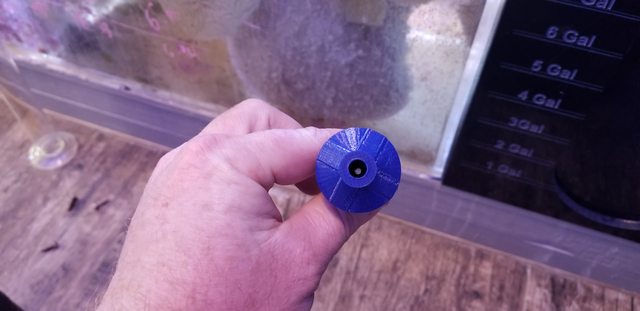
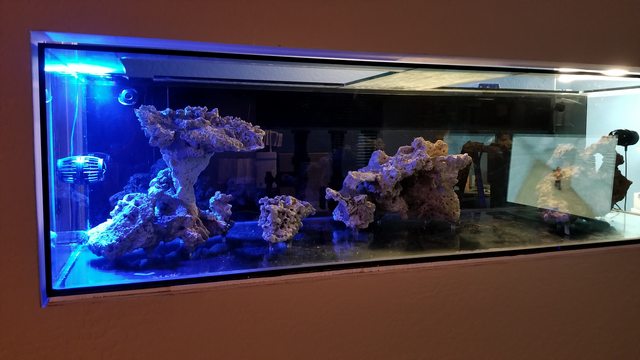
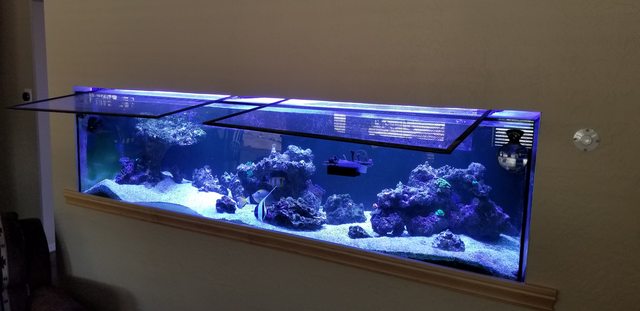
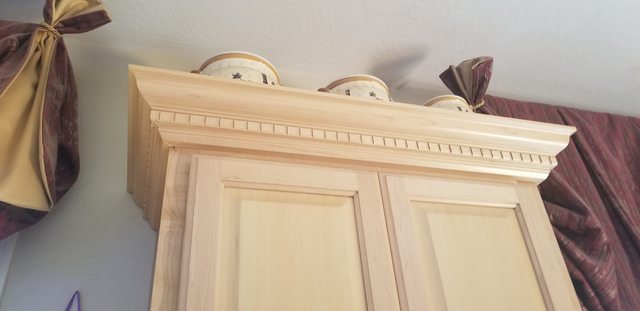
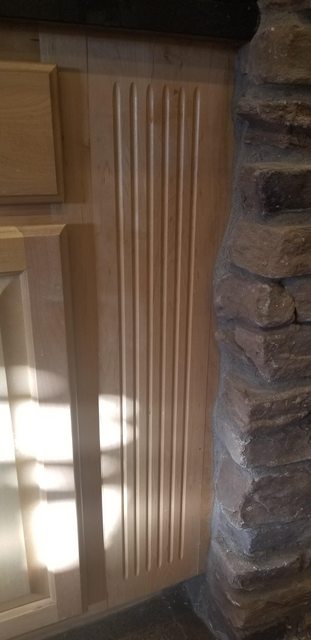
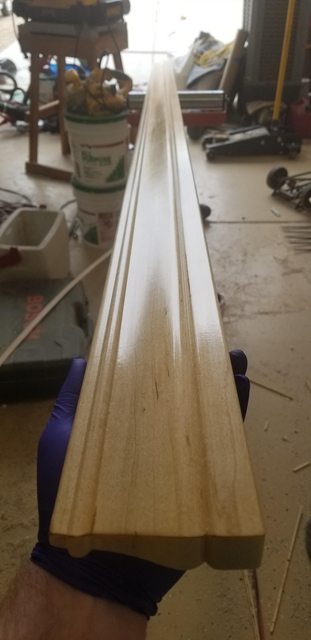
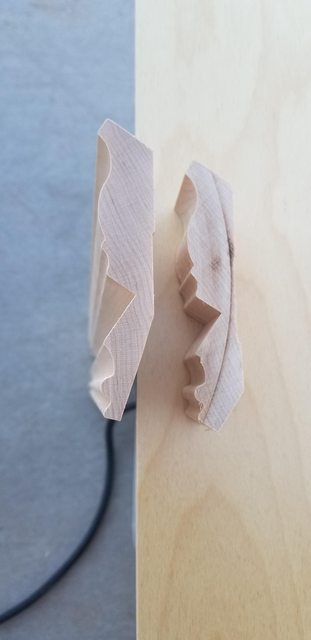
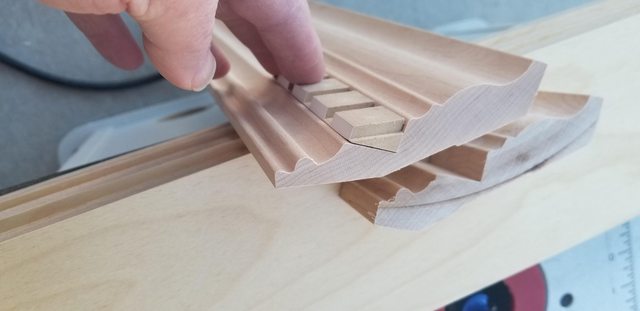
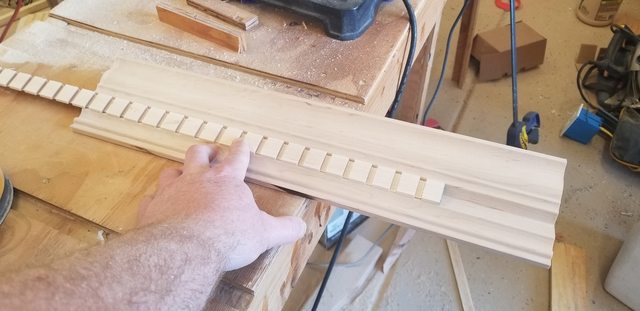
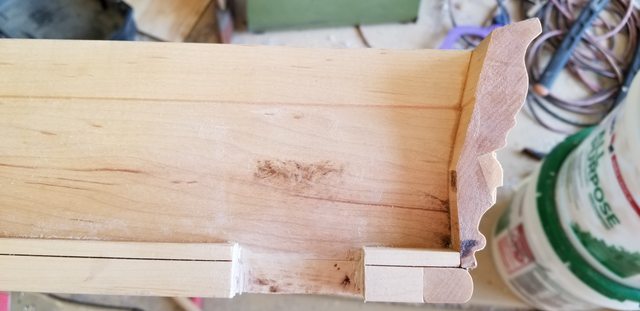
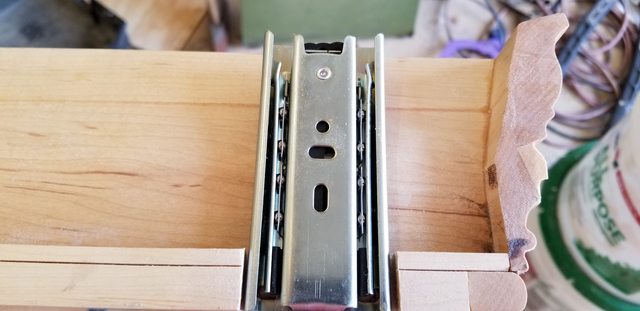
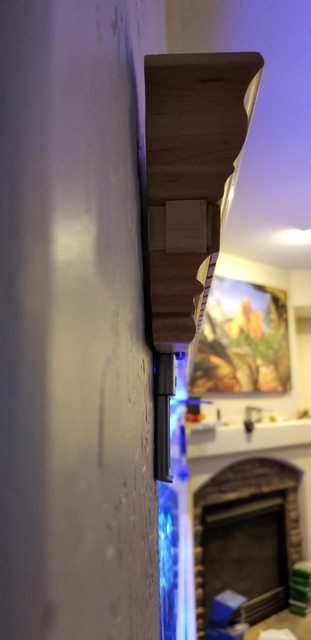
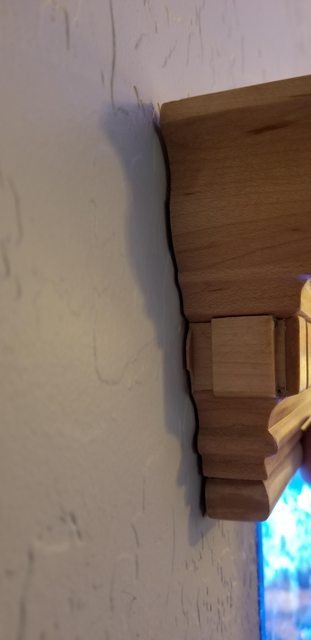
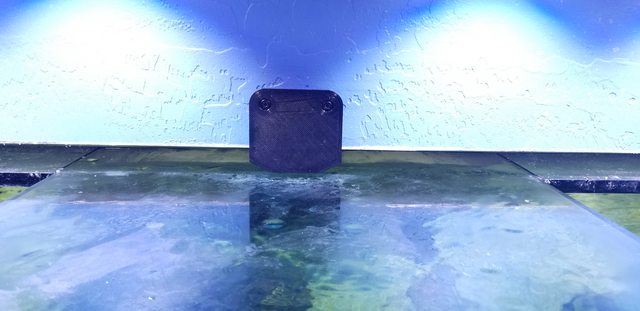
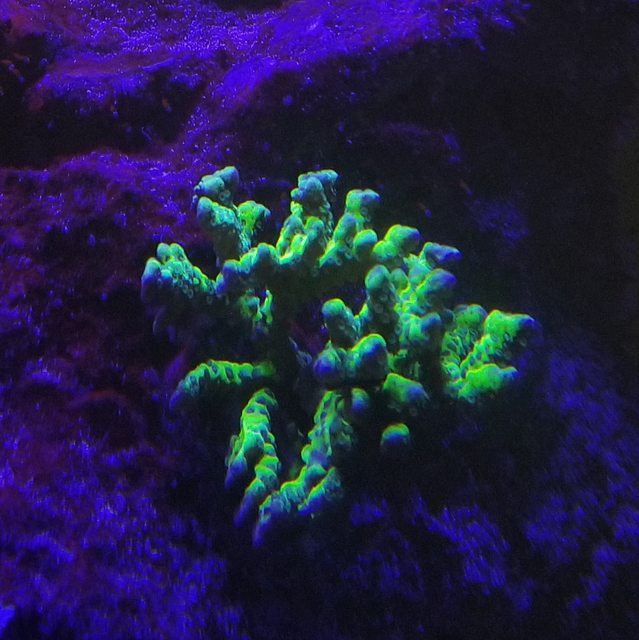
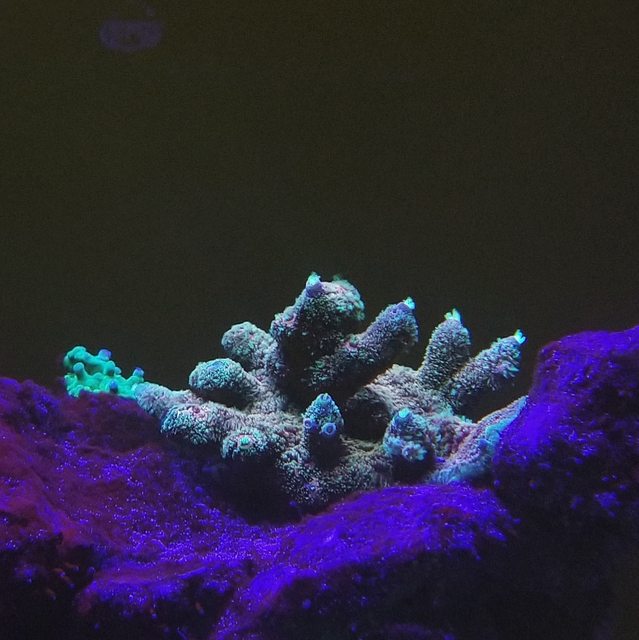
was a bit motivated the other night to snap some pictures:

WXYO8ghl.jpg


IPRqzV1l.jpg


wc0006ml.jpg


Kj7TJKil.jpg


iJ6owwPl.jpg


ITPS7Opl.jpg


ZXGLD7Hl.jpg


QtnstTvl.jpg


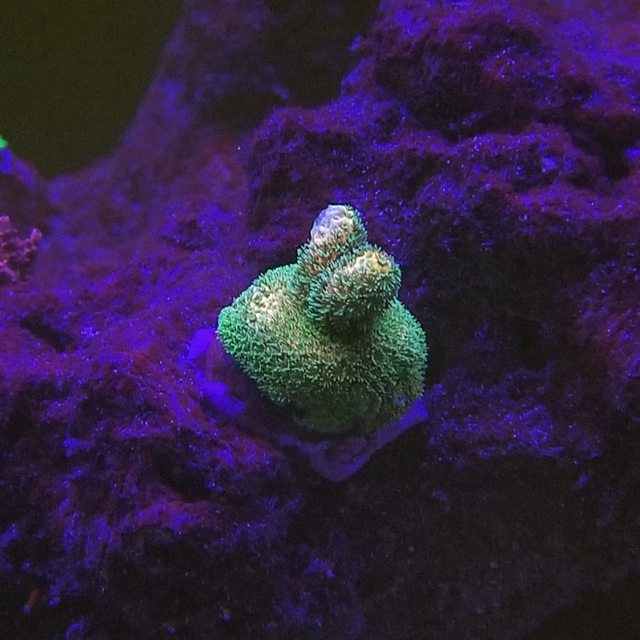
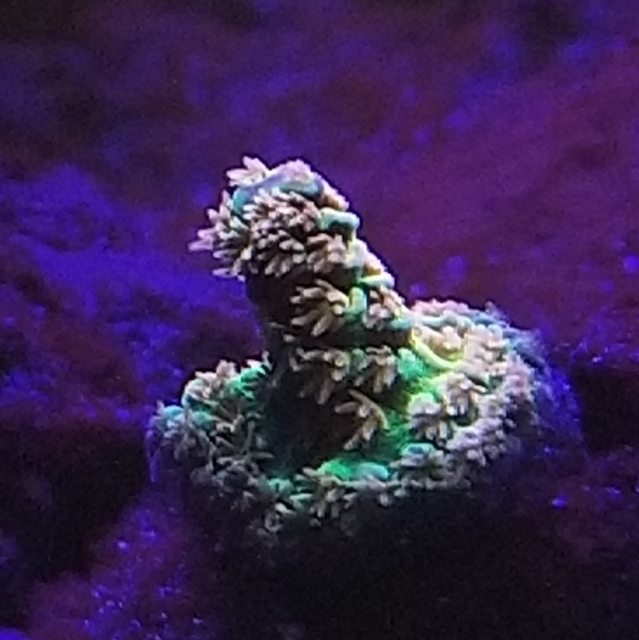
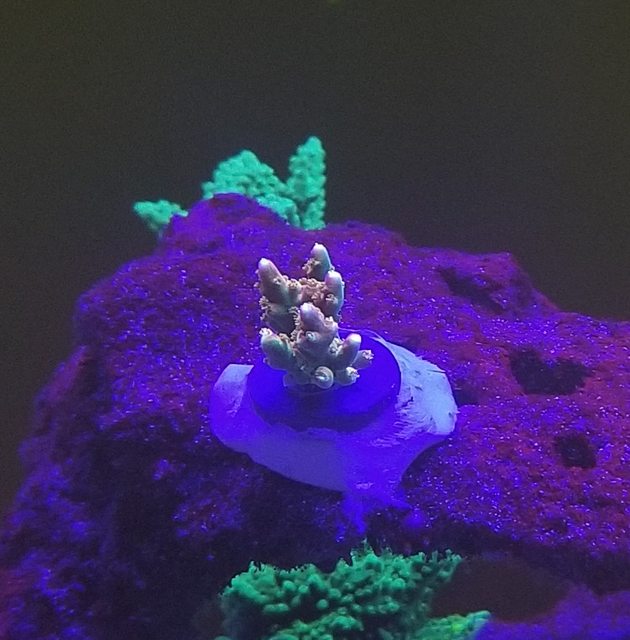
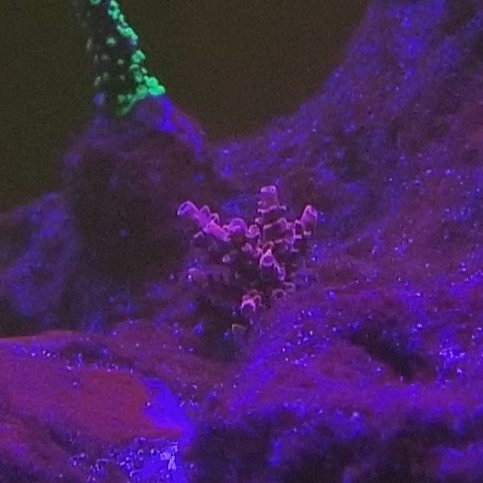
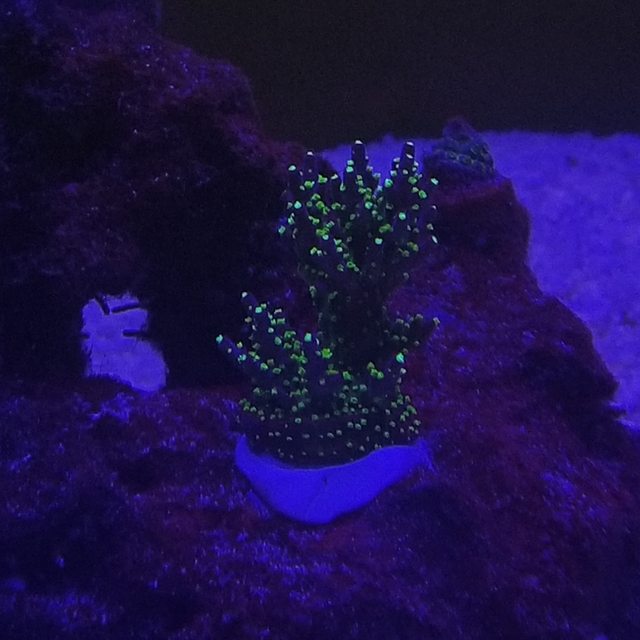
One day I'll invest in a good lens for my DSLR, until then you get cellphone pics.
 
OP
OP
Sisterlimonpot

Sisterlimonpot

Effortless Perfection
View Badges
Joined
Jul 15, 2009
Messages
3,866
Reaction score
7,906
Location
Litchfield Park
Rating - 0%
0   0   0
Looks awesome!! getting me inspired to start my 300 Gallon Build!!
Weather is starting to cool down, no time like the present to get started. Let me know when you do so I can follow along. What's the dimensions of your 300?
 

Dr. Dendrostein

Marine fish monthly
View Badges
Joined
Nov 8, 2017
Messages
9,581
Reaction score
20,790
Location
Fullerton, California
Rating - 0%
0   0   0
Snap a few USB's and a CAT6 in place, screw the plates on just to take the pictures

ng3UDGRh.jpg


Xt0Minxh.jpg


1lARbWbh.jpg


KH5EPdPh.jpg


During all of this the doorbell rang and looky what just came in time to keep me moving forward:

Lo9r4uqh.jpg


JIeiMRyh.jpg


I purchased a 0.6 sones 80 cfm exhaust fan that will be controlled by a humidistat. Once I get that in and connect the 1/4 water lines for the ATO and hopefully an automatic water change system down the road, I will be able to start drywalling.
We really enjoyed your thread, thanks for sharing, comrade
 
OP
OP
Sisterlimonpot

Sisterlimonpot

Effortless Perfection
View Badges
Joined
Jul 15, 2009
Messages
3,866
Reaction score
7,906
Location
Litchfield Park
Rating - 0%
0   0   0
Today was the final day that the Moorish Idol and the twinspot goby had to live in the QT. They've been cooped up in there for 50 days.

For those that don't remember, they did a 7 day treatment of Prazipro all while I dropped the salinity to 1.008 to put them through 6 weeks of hyposalinity. During this time the Idol showed signs of lymphocystis that got really bad, but he continued to eat. Along the way I added selcon and vita-chem to his food and the signs of the virus went away within a week.

The twinspot looked healthy from the get go and was simply along for the ride.

After putting them in, the goby went off and hid, while my big concern was the idol. he went in and stayed out in the open. Not a lot of aggression towards him. Here's a video 5 hours after he was put into the tank.


The aggression from the tangs wasn't so much "I'm going to kill you", it was more "establishing the hierarchy". The idol would simply be chased off by the tangs in almost a ritualistic fashion. The one thing I found fascinating is the peculiar way that they did this. At first, none of the fish cared about the introduction of the idol except the blonde naso, he would exert his dominance for about 30 minutes and then not give him a second glance. After blondie accepted him, then the powder brown started in once he was done then the purple tang had his turn. That's where I'm at right now. I'm not sure who's next, the only other big fish left are the fox face and the hippo tang. I have yet to see aggression from them... it'll be interesting to see if they do anything.

In preparation, I over fed the fish a few days prior so that they didn't feel like there was simply another fish to share in the bounty of free prepared food. After adding the idol, I've been feeding smaller portions more frequently. The first 2 feedings the Idol wasn't too interested in eating, but from the 3rd feeding on, he's been keeping up with the rest of his new tankmates.

I'm not out of the woods yet, the next week will determine how well he adapts, but so far so good.
 

CasaReefer

Promoted To Sponge
View Badges
Joined
Sep 22, 2019
Messages
1,204
Reaction score
5,527
Location
Surprise, AZ.
Rating - 0%
0   0   0
Man It's a Really Good Thing I didn't see this before I posted my ( O.K will call it a Build Thread ) I would not have even had the nerve to post mine. Because Man you are Very Smart and Talented. The only phrase that comes to me is " Mind BLOWN ".. Truly Breath Taking.... I Bow to you Sir......
 
OP
OP
Sisterlimonpot

Sisterlimonpot

Effortless Perfection
View Badges
Joined
Jul 15, 2009
Messages
3,866
Reaction score
7,906
Location
Litchfield Park
Rating - 0%
0   0   0
Man It's a Really Good Thing I didn't see this before I posted my ( O.K will call it a Build Thread ) I would not have even had the nerve to post mine. Because Man you are Very Smart and Talented. The only phrase that comes to me is " Mind BLOWN ".. Truly Breath Taking.... I Bow to you Sir......
I'm flattered! I certainly get hung up in design details, In the end none of it really makes a difference in having a beautiful tank.

You're always welcomed to come see it first hand, and I would love to come see your set up as well.
 

buck27

Well-Known Member
View Badges
Joined
Jul 9, 2011
Messages
632
Reaction score
156
Location
Huntsville AL
Rating - 0%
0   0   0
The plumber came over to finish everything so that I can move on. Last week we took a trip to the plumbing supply store to get everything necessary to do all the sewage but when he laid everything out he said, "this isn't going to work" so we went back to the supply store to get more stuff, plus all the copper to run the supply line in. I'm not one to marvel at efficiency because I rarely see it but I was amazed to sit back and watch him work, it's like he does this stuff every day. He would take measurements of the sink drain, mumble some numbers as if he's adding and subtracting fractions in his head, then mark the wall, take a few more measurements and repeat the process until all the marks he needed was placed on the wall. Then he just started cutting ABS into various sizes and before you knew it holes were drilled and everything was dry fit and ready to be glued. within 10 minutes my walls went from nothing to this:

EhM0t1dh.jpg


He did the same thing with the copper he measured, mumbled, drilled, cut and sweat.

BOquSa5h.jpg


and there it is, in it's finished state:

iqg4rXGh.jpg


I felt like I wasn't contributing at all, as he was cleaning up to move outside to tie everything up, I started thinking, I don't want to run a screw through pipe after the walls are enclosed, I sprang into action and grabbed these safety plates and hammered them to the wall... there, I did something other than stand and watch

wfWGp4zh.jpg


Some of you may want to know the purpose of the black pipe that is going up underneath the drywall. That is a vent pipe. Most homes have vent pipes that simply run to the roof and the basic need is to allow the drain to breath, if it was sealed off the water running down the pipe will trap air and gurgle, as reefers I'm sure most of us have run across this in our efforts to plumb the tank.

I didn't want to run a breather tube all the way out the roof, the easy fix was to put an automatic vent in the wall. Basically it's a 1 way check valve that allows fresh air in the system but doesn't allow sewer smell out. The plumber told me that I'd want to have access to it just in case it ever needs to be serviced or replaced. He wanted to run the vent back out of the wall to have access and I wanted to leave it in the wall to avoid the ugliness. This was my solution:

zSvpTOFh.jpg


Use a large enough vent return that will gives easy access and allow that section of wall to breath.

RdvzNGsh.jpg


I used this mesh to hide the possibility of being able to look past the vent and seeing it. I just hot glued it into place

B01cmU4h.jpg


The only obstacle this now poses is that I am planning to put shelving up there, I will have to work around that and hopefully I wont have to gain access to service often if ever!!!

CS8OQVTh.jpg


And as for the outside, he tied everything in so quick that I didn't have time to take any pictures, these are from this morning before I filled in the holes:

FLjsYb2h.jpg


6euhvpnh.jpg
Is that a pet door I see there in the last photo????
 
OP
OP
Sisterlimonpot

Sisterlimonpot

Effortless Perfection
View Badges
Joined
Jul 15, 2009
Messages
3,866
Reaction score
7,906
Location
Litchfield Park
Rating - 0%
0   0   0
4 times a week a pump in my 55 gallon RODI storage tank fills a 10 gallon ATO container that sits next to my sump.

RO3fJIKl.jpg


The problem is that when the ATO container is completely full the end of the hose (red line) that delivers RODI water to the sump is lower than the water line in the ATO container. You already know where this is going... This is a cause for concern because 4 times a week I get a high water alarm because the RODI is siphoning into my sump.

Yw4KSFzl.jpg


Because the system is over 300 gallons, there's no concern for major salinity fluctuation, which means the alerts were more an annoyance rather than a big problem, also meaning it wasn't a priority to deal with.

Today, I decided to deal with it. I could easily cut a piece of acrylic, drill a hole and bond it to the inside of the sump higher than the ATO container water line. I thought, "where's the innovation in that?". So I turned to solidworks and designed a funnel to elevate the red hose higher than the ATO water line when full.

qjUYYVwl.jpg


Bottom side
LYPoGJ0l.jpg


Top Side
poLLUStl.jpg


Slid the hose in place and pressed the funnel into the acrylic shelf.

b6AgO8ml.jpg


Now when I get a high water alert, I will have to take it serious.
 

AZMSGT

2500 Club Member
View Badges
Joined
May 6, 2019
Messages
3,988
Reaction score
7,896
Rating - 0%
0   0   0
4 times a week a pump in my 55 gallon RODI storage tank fills a 10 gallon ATO container that sits next to my sump.

RO3fJIKl.jpg


The problem is that when the ATO container is completely full the end of the hose (red line) that delivers RODI water to the sump is lower than the water line in the ATO container. You already know where this is going... This is a cause for concern because 4 times a week I get a high water alarm because the RODI is siphoning into my sump.

Yw4KSFzl.jpg


Because the system is over 300 gallons, there's no concern for major salinity fluctuation, which means the alerts were more an annoyance rather than a big problem, also meaning it wasn't a priority to deal with.

Today, I decided to deal with it. I could easily cut a piece of acrylic, drill a hole and bond it to the inside of the sump higher than the ATO container water line. I thought, "where's the innovation in that?". So I turned to solidworks and designed a funnel to elevate the red hose higher than the ATO water line when full.

qjUYYVwl.jpg


Bottom side
LYPoGJ0l.jpg


Top Side
poLLUStl.jpg


Slid the hose in place and pressed the funnel into the acrylic shelf.

b6AgO8ml.jpg


Now when I get a high water alert, I will have to take it serious.
That’s one way to solve it. I just pump straight into my main tank up high.
 
Last edited:

NeverlosT

SPS nut
View Badges
Joined
Feb 28, 2011
Messages
1,070
Reaction score
950
Location
San Luis Obispo, California
Rating - 0%
0   0   0
A lot of cool stuff here!

Is the bean animal less silent with the gate valve so high in the primary drain, or does it just eventually flush of air and function silently? I always put my gate valve very close to the bottom of the run because I was worried the pipe wouldn't be full everywhere and might be noisy.

Are you having any algae issues in the sump with the grow light so high? I ended up with a lot of growth in my reactors/skimmer so I ended up shrouding in the refugium area which helped a lot.

How is the flow working out? Do you run a ton of flow or not so much? I like flow so much that I cant have sand. But I partially don't like sand because I don't want to clean the sandbed, do you maintain your sandbed?

Sweet build!
 
OP
OP
Sisterlimonpot

Sisterlimonpot

Effortless Perfection
View Badges
Joined
Jul 15, 2009
Messages
3,866
Reaction score
7,906
Location
Litchfield Park
Rating - 0%
0   0   0
A lot of cool stuff here!

Is the bean animal less silent with the gate valve so high in the primary drain, or does it just eventually flush of air and function silently? I always put my gate valve very close to the bottom of the run because I was worried the pipe wouldn't be full everywhere and might be noisy.

Are you having any algae issues in the sump with the grow light so high? I ended up with a lot of growth in my reactors/skimmer so I ended up shrouding in the refugium area which helped a lot.

How is the flow working out? Do you run a ton of flow or not so much? I like flow so much that I cant have sand. But I partially don't like sand because I don't want to clean the sandbed, do you maintain your sandbed?

Sweet build!
Hey Ben,

Glad to see you found my build. So much to unpack here,

Bean Animal: I've never had an issue with noise and from a standpoint of fluid dynamic, it makes perfect sense to have it lower. I go into feed mode at least 4 times a day, and never have the issue of trapped air causing noise, it works itself out in the matter of a few minutes. At the beginning of the build I was having the standpipe terminate 3-4 inches below the water which proved to be a concern to the point that the siphon never started because the water level in the overflow got so high it just went out the emergency. I ended up cutting the termination point of the full siphon to less than 1 inch under water and that fixed the problem. I would imagine that having the restriction of the gate valve lower would have achieved the same fix (less build up of air).

Since you have your gate valve lower, do you get the luxury of having the standpipe deeper in the water?

Sump Grow Light: At the beginning all I got was awesome growth of the chaeto, but ever since I dosed the tank with fluconazole, the algae has stopped growing. Not sure if it has anything to do with that or if it has something to do with cheap amazon LEDs.

To answer your question, I don't get much algea growth in the sump other than the chaeto.

Flow: The main return pump is Vectra L1 and it's set to max speed, I never calculated head loss nor have I ever found the need to put a flow meter in line to see what the actual numbers are. I think that's mostly because I dont concern myself with turn over rate as much as I do with flow in the tank.

I went way overboard with power heads, four MP60s and two MP40s and they are set to run at about 50% of the max speed in reefcrest mode and at night they go into nutreint export at 40%.

The sand is definitely a factor and if I had to do it all over again I would go with a heavier sand or bare bottom although I'm not too keen on the latter.

I don't keep the sand as clean as most people do, I try to rely on sand sifters to do that job, but at the moment I only have 1 goby and he's partial to the left side of the tank. I've been wanting to get a couple bella gobies but haven't quite pulled the trigger. We do have a list of additional fish that we want to add and this is the time of year to purchase them. But there's other priorities at the moment...
 

buck27

Well-Known Member
View Badges
Joined
Jul 9, 2011
Messages
632
Reaction score
156
Location
Huntsville AL
Rating - 0%
0   0   0
@Sisterlimonpot great build thread my friend, provided me with really good motivation and got the ideas flowing. I really like the fact that you did almost all of it yourself especially the laser, printer and sump portions man. Cant wait to see the 1 year old pics!!!
 
OP
OP
Sisterlimonpot

Sisterlimonpot

Effortless Perfection
View Badges
Joined
Jul 15, 2009
Messages
3,866
Reaction score
7,906
Location
Litchfield Park
Rating - 0%
0   0   0
A few weeks back, my brother in law and his son were visiting from Wisconsin to take in all the car auctions in the area.

When he came over for dinner, he pointed something out that I have become tolerantly blinded to. He said, "I see, you still haven't put wood trim around the tank". Wait what? He's right!! He pointed out something that I have complacently forgot about, I've looked at the tank for so long that "No border" looked like a finished product to me.

Horrible about taking pictures of the process, here's some old pics to give a visual

3tfqgZCl.jpg


VsR7SoTl.jpg


I have since become reliant on having the front open so that I can push the screens forward to gain access to the tank from behind.

kfKRBpAl.jpg


I can't permanently block that after all these years... And if you know me, you probably already guessed, I'm going to completely complicate this part as well!!! hehe.

Last week a local reefer named Ken sent a text stated he was bored and wanted to do something, of course he wanted to drop everything and go on a 6 hour road trip to CA to check out some of the LFS's. My alternative suggestion was, come help me pick out the wood for this project..... He was here in the hour.

In the past I've given it a lot of thought and decided I want to match the decor of the maple kitchen cabinets, specifically the crown molding and fluted accents.

NwOQ1DVl.jpg


775Bdril.jpg


After explaining to Ken what I wanted, he (who is a wood worker himself) new just where to go to get the maple required to get the job done. Sorry no pictures...

With my first big reef tank (125g), I made an oak stand for it and over the years it got the occasional splashing of salt water dripped on it and eventually it soaked into the wood changing the color. And with maple being such a light color I wanted to learn from that and decided to make each piece separately and seal them front to back and side to side with polyurethane. First was the bottom, after cutting, gluing and sanding I added 2 coats of tung oil hand rubbed, and 10 coats of hand rubbed poly:

s55wAX4l.jpg


Next was the crown molding. I stewed over how to tackle this for almost a week. I wanted the crown molding look, but because it was going to be at most peoples head level, I didn't want it protruding off the wall at a 45 degree like most all crowns do. I ended up setting up the tablesaw to cut a few angles and brought it in 15 degrees.

It's hard to see but the profile of the one on the right is normal and the new 30 degree cut is on the left.

afdxbfAl.jpg


With that out of the way I had to make the dental portion of the crown to match the kitchen. Again no photos of the painstaking process.

jbwm8rFl.jpg


VAIxrT7l.jpg


Here I am entertaining myself with proper fit of the dental pieces. Wood workers, machinists might appreciate the complex angles that I had to add to the dental to make it parallel to the wall.


before seeing the crown completed, as stated earlier, I loved being able to pull the screens out from the front, which meant I needed to figure out a way to move the top molding up out of the way so that the screens can slide out.

I had 2 criteria, What ever idea I went with, it needed to be hidden, and I didn't want the action of moving it to damage the wall.

Another few days went by while pondering the issue, I decided to use 4" drawer glides, they were short enough to be hidden and if I mounted the glides 2 degrees from parallel it will pull away from the wall as it travels up.

Tv4dGPll.jpg


JSaJLNul.jpg


Up, slightly pulled away from the wall

Iprd1drl.jpg


Down, hugging the wall with 1/16th gap

gYGtwmBl.jpg


Unfortunately, I'm not quite done with the framing, but hot off the 3D printer, the mechanism that will hold the crown molding up:


Mounting it with 2 screws on the back

vGPRnq9l.jpg


My daughter being the trooper she is, held the camera while I showed off this part:


Building up the effort to finish the fluted sides, and when I'm done with that I will post up the finished product.

Thanks for following along.
 

crusso1993

7500 Club Member
View Badges
Joined
Oct 21, 2018
Messages
8,671
Reaction score
44,647
Location
SW, FL, USA
Rating - 0%
0   0   0
A few weeks back, my brother in law and his son were visiting from Wisconsin to take in all the car auctions in the area.

When he came over for dinner, he pointed something out that I have become tolerantly blinded to. He said, "I see, you still haven't put wood trim around the tank". Wait what? He's right!! He pointed out something that I have complacently forgot about, I've looked at the tank for so long that "No border" looked like a finished product to me.

Horrible about taking pictures of the process, here's some old pics to give a visual

3tfqgZCl.jpg


VsR7SoTl.jpg


I have since become reliant on having the front open so that I can push the screens forward to gain access to the tank from behind.

kfKRBpAl.jpg


I can't permanently block that after all these years... And if you know me, you probably already guessed, I'm going to completely complicate this part as well!!! hehe.

Last week a local reefer named Ken sent a text stated he was bored and wanted to do something, of course he wanted to drop everything and go on a 6 hour road trip to CA to check out some of the LFS's. My alternative suggestion was, come help me pick out the wood for this project..... He was here in the hour.

In the past I've given it a lot of thought and decided I want to match the decor of the maple kitchen cabinets, specifically the crown molding and fluted accents.

NwOQ1DVl.jpg


775Bdril.jpg


After explaining to Ken what I wanted, he (who is a wood worker himself) new just where to go to get the maple required to get the job done. Sorry no pictures...

With my first big reef tank (125g), I made an oak stand for it and over the years it got the occasional splashing of salt water dripped on it and eventually it soaked into the wood changing the color. And with maple being such a light color I wanted to learn from that and decided to make each piece separately and seal them front to back and side to side with polyurethane. First was the bottom, after cutting, gluing and sanding I added 2 coats of tung oil hand rubbed, and 10 coats of hand rubbed poly:

s55wAX4l.jpg


Next was the crown molding. I stewed over how to tackle this for almost a week. I wanted the crown molding look, but because it was going to be at most peoples head level, I didn't want it protruding off the wall at a 45 degree like most all crowns do. I ended up setting up the tablesaw to cut a few angles and brought it in 15 degrees.

It's hard to see but the profile of the one on the right is normal and the new 30 degree cut is on the left.

afdxbfAl.jpg


With that out of the way I had to make the dental portion of the crown to match the kitchen. Again no photos of the painstaking process.

jbwm8rFl.jpg


VAIxrT7l.jpg


Here I am entertaining myself with proper fit of the dental pieces. Wood workers, machinists might appreciate the complex angles that I had to add to the dental to make it parallel to the wall.


before seeing the crown completed, as stated earlier, I loved being able to pull the screens out from the front, which meant I needed to figure out a way to move the top molding up out of the way so that the screens can slide out.

I had 2 criteria, What ever idea I went with, it needed to be hidden, and I didn't want the action of moving it to damage the wall.

Another few days went by while pondering the issue, I decided to use 4" drawer glides, they were short enough to be hidden and if I mounted the glides 2 degrees from parallel it will pull away from the wall as it travels up.

Tv4dGPll.jpg


JSaJLNul.jpg


Up, slightly pulled away from the wall

Iprd1drl.jpg


Down, hugging the wall with 1/16th gap

gYGtwmBl.jpg


Unfortunately, I'm not quite done with the framing, but hot off the 3D printer, the mechanism that will hold the crown molding up:


Mounting it with 2 screws on the back

vGPRnq9l.jpg


My daughter being the trooper she is, held the camera while I showed off this part:


Building up the effort to finish the fluted sides, and when I'm done with that I will post up the finished product.

Thanks for following along.


Trim turned out great! Thanks for sharing the process and the videos too!
 

High pressure shells: Do you look for signs of stress in the invertebrates in your reef tank?

  • I regularly look for signs of invertebrate stress in my reef tank.

    Votes: 22 34.9%
  • I occasionally look for signs of invertebrate stress in my reef tank.

    Votes: 15 23.8%
  • I rarely look for signs of invertebrate stress in my reef tank.

    Votes: 12 19.0%
  • I never look for signs of invertebrate stress in my reef tank.

    Votes: 14 22.2%
  • Other.

    Votes: 0 0.0%
Back
Top