
Looking good man and gonna love to see this thing wet. @Joe Glass Cages and his team do awesome work with acrylic, so I really want to see this thing out of the wrap and on the stand lol.The base plates (white panels) are done. I still have some vacuuming to do. Sawdust stays were you expect. This stuff goes everywhere. Still sneezing.
This pic is missing the final 2 foot panel but all is complete now. Time to lift the tank onto the stand so I can dry fit the plumbing and Synergy overflows.


Navigation
Install the app
How to install the app on iOS
Follow along with the video below to see how to install our site as a web app on your home screen.
Note: This feature may not be available in some browsers.
More options
You are using an out of date browser. It may not display this or other websites correctly.
You should upgrade or use an alternative browser.
You should upgrade or use an alternative browser.
New Build: 10 foot frag tank
- Frag Build
- Thread starter ScottB
- Start date
- Tagged users None


Thanks Eagle. I have several steps to go yet.Looking good man and gonna love to see this thing wet. @Joe Glass Cages and his team do awesome work with acrylic, so I really want to see this thing out of the wrap and on the stand lol.
a) Dry fit as much plumbing as possible here
b) Break down 3 tanks and sumps move livestock into the stock tank.
c) Clear all that stuff out and move this in place with two existing sumps.
d) Glue and fill.
Compared to @dca22anderson my pace is glacial, but I am okay with that. My other hobbies continue to steal more time & money now that the weather is improving.
"B" is always the most fun lol. I am dreading 1.5 years from now, as I will be moving back to FL.Thanks Eagle. I have several steps to go yet.
a) Dry fit as much plumbing as possible here
b) Break down 3 tanks and sumps move livestock into the stock tank.
c) Clear all that stuff out and move this in place with two existing sumps.
d) Glue and fill.
Compared to @dca22anderson my pace is glacial, but I am okay with that. My other hobbies continue to steal more time & money now that the weather is improving.
I plan to get a tank setup down there over the rest of this year, so I have a place to put it all. Being as I go there at least a week every 2 or so months, it makes that sort of easy. Just got to get a tank built lol. Still have not decided on size, but after polishing my 7' acrylic tank back to its former glory, I am going with acrylic for sure. Just the difference in weight is almost enough of a reason to use it lol.
As for your pace, go at your speed and you will have less issues overall. We all know that ruching never works out lol.

I will literally be giving away 2 of the tanks/stands. The stands are nearly rusted through; the tanks are all scratched up. Keep one for QT."B" is always the most fun lol. I am dreading 1.5 years from now, as I will be moving back to FL.
I plan to get a tank setup down there over the rest of this year, so I have a place to put it all. Being as I go there at least a week every 2 or so months, it makes that sort of easy. Just got to get a tank built lol. Still have not decided on size, but after polishing my 7' acrylic tank back to its former glory, I am going with acrylic for sure. Just the difference in weight is almost enough of a reason to use it lol.
As for your pace, go at your speed and you will have less issues overall. We all know that ruching never works out lol.
I have seen your setups and that is a lot to move. Call in some US Army logistics folks when the time comes. I think they will carry me out of this house before this tank goes anywhere.
")
Good to hear your favor for acrylic; I have been "worried" as I don't have much experience with an acrylic tank. If that thing were glass, no way I could have moved it solo.
We are a Marine Corp family, so I have dedicated help lol. Plus, if ti doesnt work, we will just blow it up.I will literally be giving away 2 of the tanks/stands. The stands are nearly rusted through; the tanks are all scratched up. Keep one for QT.
I have seen your setups and that is a lot to move. Call in some US Army logistics folks when the time comes. I think they will carry me out of this house before this tank goes anywhere.
Good to hear your favor for acrylic; I have been "worried" as I don't have much experience with an acrylic tank. If that thing were glass, no way I could have moved it solo.
As for the acrylic, a little elbow grease is all that is needed if you get a scratch. I have it sort of outlined in my build thread and when I get time will make a video using a smaller acrylic tank I have. In short, I was able to take a severely scratched up and hazed over 7'x30"x16" tank and get it back to crystal clear in 4 or so hours. Was about 60 bucks in sandpaper/polish pads. I also did not drain the tank to do it. To me, it is worth it. Glass scratches too. Low iron, even more chance to scratch with it being a little softer. Yes, you can get them out, but no way to do it with tank running.
Well if it comes to demolition, be sure to get good video. Youtube will eat it up.We are a Marine Corp family, so I have dedicated help lol. Plus, if ti doesnt work, we will just blow it up.
As for the acrylic, a little elbow grease is all that is needed if you get a scratch. I have it sort of outlined in my build thread and when I get time will make a video using a smaller acrylic tank I have. In short, I was able to take a severely scratched up and hazed over 7'x30"x16" tank and get it back to crystal clear in 4 or so hours. Was about 60 bucks in sandpaper/polish pads. I also did not drain the tank to do it. To me, it is worth it. Glass scratches too. Low iron, even more chance to scratch with it being a little softer. Yes, you can get them out, but no way to do it with tank running.
I was a USAF brat. Mom was logistics for fighter squadrons, so planes were always my thing. Finally cobbled together enough time and money to start flying as a student again. 100 octane ain't cheap these days though.

I will literally be giving away 2 of the tanks/stands. The stands are nearly rusted through; the tanks are all scratched up. Keep one for QT."B" is always the most fun lol. I am dreading 1.5 years from now, as I will be moving back to FL.
I plan to get a tank setup down there over the rest of this year, so I have a place to put it all. Being as I go there at least a week every 2 or so months, it makes that sort of easy. Just got to get a tank built lol. Still have not decided on size, but after polishing my 7' acrylic tank back to its former glory, I am going with acrylic for sure. Just the difference in weight is almost enough of a reason to use it lol.
As for your pace, go at your speed and you will have less issues overall. We all know that ruching never works out lol.
I have seen your setups and that is a lot to move. Call in some US Army logistics folks when the time comes. I think they will carry me out of this house before this tank goes anywhere.
Good to hear your favor for acrylic; I have been "worried" as I don't have much experience with an acrylic tank. If that thing were glass, no way I could have moved it solo.
My LFS buddy is coming over in half hour or so for the big heave-ho onto the stand.
So no trouble lifting the tank onto the stand. For good measure, slapped on the overflow and return bulkheads. She looks real purty up there I think. Randy at Life-Aquatic.com agrees as he helped me lift it. Nice work there @Joe Glass Cages .

One question came up just as I was turning in. Take a look at the video for the return bulkhead. Not sure what I was expecting, but I don't immediately understand what kind of 90 degree fitting I use for this. There are no threads. If I glue a 90 degree that is permanent. I am missing something. What is it?

 youtube.com
Return nozzle fitting for frag tank
youtube.com

There are 2 ways to do this.One question came up just as I was turning in. Take a look at the video for the return bulkhead. Not sure what I was expecting, but I don't immediately understand what kind of 90 degree fitting I use for this. There are no threads. If I glue a 90 degree that is permanent. I am missing something. What is it?
Return nozzle fitting for frag tank
Option 1
- New bulkhead with thread inside/outside or thread inside and slip outside.
Option 2
- Use a slip/ threaded insert glued in on the inside (if needed). Link below for a threaded insert. I take a short piece of pvc, glue it it, then glue the female slip to threaded couper onto the short piece of PVC when I use slip/slip bulkheads. Although I prefer threaded in tank and slip on outside. Link to female slip to 1" thread below for reference.
- Use a "street elbow". I have a link below as an example. When this is glued in, the bulkhead will still be able to come out, due to the way the 90 is. Link is for a 1"
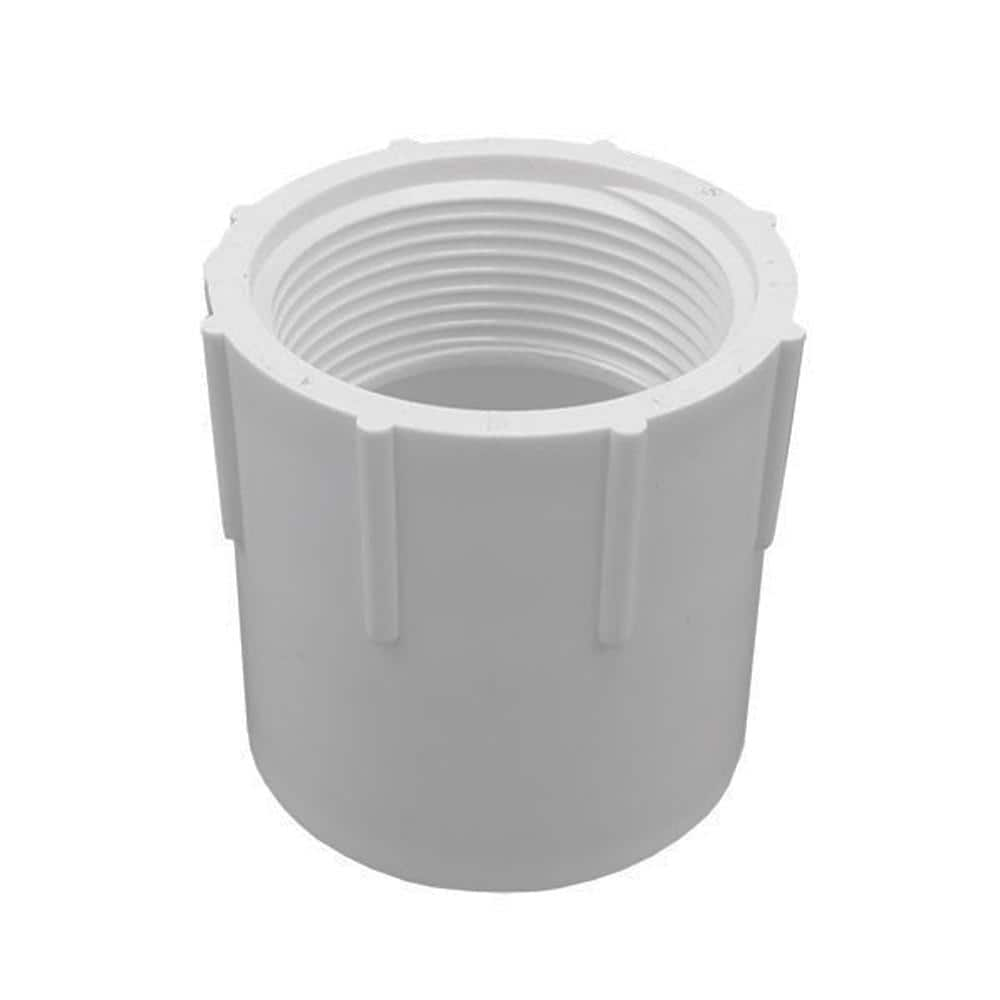
HYDROMAXX 1 in. Schedule 40 PVC Pipe Slip x FIPT Female Adapter (75-Pack) 435-010-75 - The Home Depot
Female Adapter for Schedule 40 PVC Pipe (Slip x FIPT). Female adapters are used to connect two parts with two different end types; a female adapter has a female (FIPT) socket on side and a slip socket
www.homedepot.com
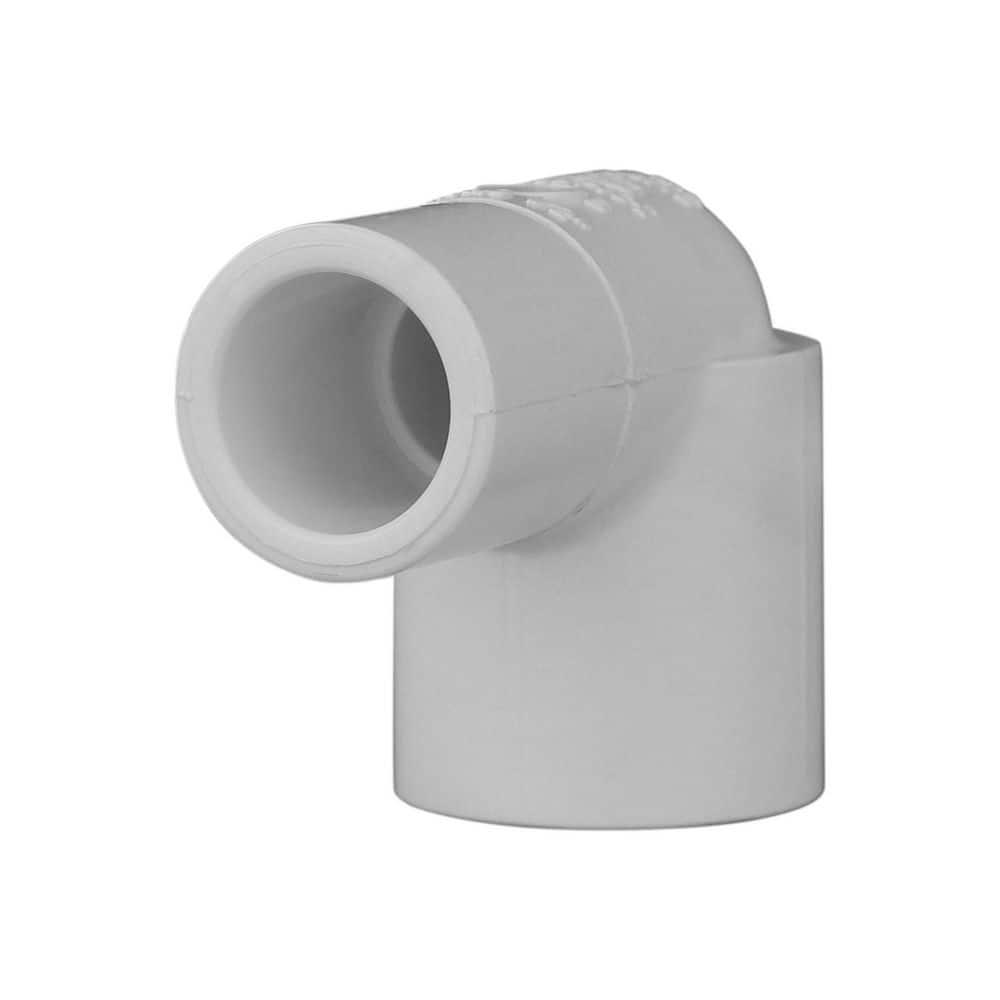
Charlotte Pipe 1 in. PVC Schedule. 40 90-degree Spigot x S Street Elbow Fitting PVC 02304 0800HD - The Home Depot
PVC schedule 40 pipe and pressure fittings are used in irrigation, underground sprinkler systems, swimming pools, outdoor applications and cold water supply lines. These fittings are highly resilient,
www.homedepot.com
Thank you. I am going to purchase some threaded bulkheads, but plow ahead with the existing slip bulkheads. I will put a union just after the first 90 degree so not much will be lostThere are 2 ways to do this.
Option 1
- New bulkhead with thread inside/outside or thread inside and slip outside.
Option 2
- Use a slip/ threaded insert glued in on the inside (if needed). Link below for a threaded insert. I take a short piece of pvc, glue it it, then glue the female slip to threaded couper onto the short piece of PVC when I use slip/slip bulkheads. Although I prefer threaded in tank and slip on outside. Link to female slip to 1" thread below for reference.
- Use a "street elbow". I have a link below as an example. When this is glued in, the bulkhead will still be able to come out, due to the way the 90 is. Link is for a 1"
HYDROMAXX 1 in. Schedule 40 PVC Pipe Slip x FIPT Female Adapter (75-Pack) 435-010-75 - The Home Depot
Female Adapter for Schedule 40 PVC Pipe (Slip x FIPT). Female adapters are used to connect two parts with two different end types; a female adapter has a female (FIPT) socket on side and a slip socketwww.homedepot.com
Charlotte Pipe 1 in. PVC Schedule. 40 90-degree Spigot x S Street Elbow Fitting PVC 02304 0800HD - The Home Depot
PVC schedule 40 pipe and pressure fittings are used in irrigation, underground sprinkler systems, swimming pools, outdoor applications and cold water supply lines. These fittings are highly resilient,www.homedepot.com
Funny thing with almost all my projects: by the time I am done, I am darn near competent. In the beginning, not so much.
- Joined
- Dec 24, 2015
- Messages
- 849
- Reaction score
- 3,323
Thank you. I am going to purchase some threaded bulkheads, but plow ahead with the existing slip bulkheads. I will put a union just after the first 90 degree so not much will be lostifwhen I screw it up and have to cut it away.
Funny thing with almost all my projects: by the time I am done, I am darn near competent. In the beginning, not so much.
Tank is narrow and shallow enough that this may not apply, but I have found it useful to place unions low enough to be able to access from within the stand. Generally most helpful for the overflow plumbing. Just something that may be beneficial in the future if access from the sides will be affected by the placement of your tank.

I will have reasonable access all around and I won't be hanging panels on the stand. The basement is "MY" space and not under the jurisdiction of the aesthetic police. My DT on the other hand...Tank is narrow and shallow enough that this may not apply, but I have found it useful to place unions low enough to be able to access from within the stand. Generally most helpful for the overflow plumbing. Just something that may be beneficial in the future if access from the sides will be affected by the placement of your tank.
Got a couple hours in yesterday just measuring out the return plumbing that seemed to work. The first return is glued. The last foot or two will be silicone hose for each pump to limit vibration. Cut PVC for the other 3 returns. Then cut 1 1/4 pipe for inside the Synergy overflows.
A pic of my idea how to sand down the edges at 15 degrees or so. I pinched an orbital sander in a vice. Maybe 30 seconds per end. Just my method.
UPS reports that many goodies should arrive tomorrow which is exciting. Given the forecast here there won't be many interruptions aside from some work stuff. Cannot fly. Cannot play golf. Just cut & glue.
Got much more of the return plumbing done and will finish that tomorrow along with the Loc-Line components, adapters and nozzles once UPS delivers. Also tomorrow (post UPS delivery), I will glue the gate valves and most of the overflow plumbing.
Plumbing support brackets from Framing Technology should be coming tomorrow. Already have brackets for overflow plumbing.
NOTE: the tank and stand remain on dollies so that they can roll into place once I break down the existing tanks. It then get pretty serious.
Progress pics:
A five minute , unedited walk around video of the current state. Still waiting on some Framing Tech fasteners to come in so I can clamp the plumbing to the stand. The combined weight of the overflow plumbing keeps shifting the overflow box out of level.

Fasteners arrived and given the weather forecast I might be grounded tomorrow.
Today's work for the temporary (hopefully) stock tank:
a) Extended dosing lines for A/B and kalkwasser
b) Installed Tunze osmolator (auto top off).
c) Two gyres and 2 MP40s for flow. We will see if they can hold on. Imperfect mounting surfaces. Ugh.
d) Calibrated some older (3) heaters in a bucket. 400 watts total. Pray with me.
e) Regular Saturday tank maintenance.
The real challenge is I am moving 300G system volume into 150G stock tank. I have been selling/gifting away as much as possible. It is all about rack space. Stock tanks are round. Racks are square. Hard to optimize. Starting to understand how my kids feel.
A) Following this build along now that I found it...
B) Did you by any chance help me load my 50g lowboy frag tank into the car with Randy? (I kinda recognize you with the respirator mask on lol )
C) If you still need to rehome the yellow eye Cole tang let me know (or any coral ) I've been thinking of a tomini /bristle tooth/ square tail tang of some sort for pest management in the frag tank
a) Glad you came across the thread. Slow going, but there is some incremental progress each day. I will do another update soon, as I just drew up a 9' sump design that I could use some advice with.A) Following this build along now that I found it...
B) Did you by any chance help me load my 50g lowboy frag tank into the car with Randy? (I kinda recognize you with the respirator mask on lol )
C) If you still need to rehome the yellow eye Cole tang let me know (or any coral ) I've been thinking of a tomini /bristle tooth/ square tail tang of some sort for pest management in the frag tank
b) Highly probable. I thought I was pretty much incognito with the respirator. Guess I will have to deal with the paparazzi now lol.
c) I will see how the two tominis and two koles get on when I move them to the stock tank. They are both fairly good algae grazers.

a) Glad you came across the thread. Slow going, but there is some incremental progress each day. I will do another update soon, as I just drew up a 9' sump design that I could use some advice with.
b) Highly probable. I thought I was pretty much incognito with the respirator. Guess I will have to deal with the paparazzi now lol.
c) I will see how the two tominis and two koles get on when I move them to the stock tank. They are both fairly good algae grazers.
Haha I ordered my 50g low boy frag tank at life aquatic... so when I picked up I parked in the lot... so randy had me move my car to the street side to load??
Also, I'd love to help but I'm afraid I'm no expert lol I'm trying to figure out the plumbing to that 50g low boy as we speak... cant get the flow right!
But I will live vicariously through someone that can afford such an awesome 10ft tank lol
Last edited:
I would need to see the larger picture (in person) to help but clearly you know how to cut/glue PVC which can be the tricky bit sometimes. DM me if you are looking for input on flow.Haha I ordered my 50g low boy frag tank at life aquatic... so when I picked up I parked in the lot... so randy had me move my car to the street side to load??
Also, I'd love to help but I'm afraid I'm no expert lol I'm trying to figure out the plumbing to that 50g low boy as we speak... cant get the flow right!

But I will live vicariously through someone that can afford such an awesome 10ft tank lol
In my case, sump flow is secondary. I don't want it to leak or create salt creep too much. Most of my flow is in the tank itself via MP pumps and gyres. DM me and we can debug and optimize.
Similar threads
- Replies
- 20
- Views
- 1,346
- Replies
- 128
- Views
- 7,366
- Replies
- 13
- Views
- 782
North Carolina Aquariums Sumps Refugiums
72" X 30" X 20" (L X W X H) acrylic peninsula reef tank, extruded aluminum stand, and Lifereef sump and refugium
- Price: 2500
- Shipping NOT Available
- Replies
- 5
- Views
- 1,510
- Replies
- 45
- Views
- 3,290


