New Waterbox Frag 105.4 Build

Maxcmo

Active Member
View Badges
Joined
Jun 17, 2021
Messages
216
Reaction score
241
Location
Miami
Rating - 0%
0   0   0
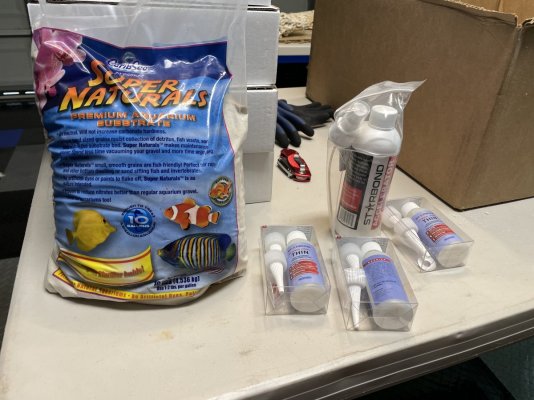
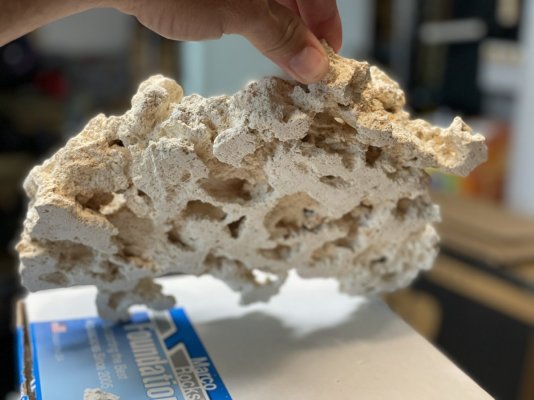
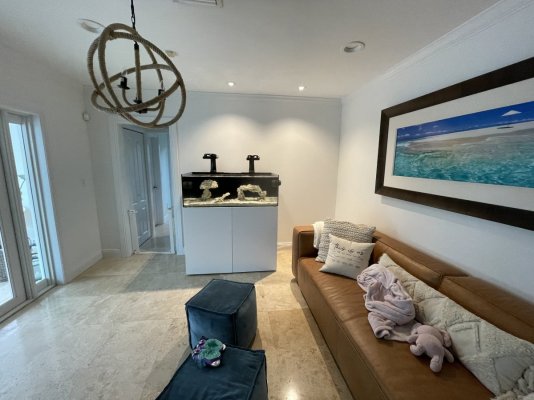
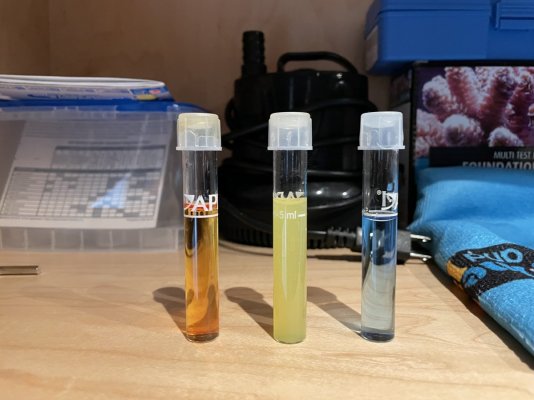
Ive been lurking around here for a bit reading about how much has changed in the last 14 years. The last reef tank I owned was a bowfront 92 with a mudfilter, caulepera, and regular r/o water plumbed from an outside house right into the sump. 3 years ago I bought my son a biocube which he kept freshwater fish in he caught out of our canal. Last year he left to school and emptied it before he left. I made the mistake of filling it back up with water and making it a reef tank lol. Ever since then I have been reading and ended up buying a Waterbox which took about 7 weeks to get and I have started to set up. I have read thru alot of good build threads that were extremely informative in understanding how to set up a tank today so I am going to document my build in the hopes of doing the same for others…

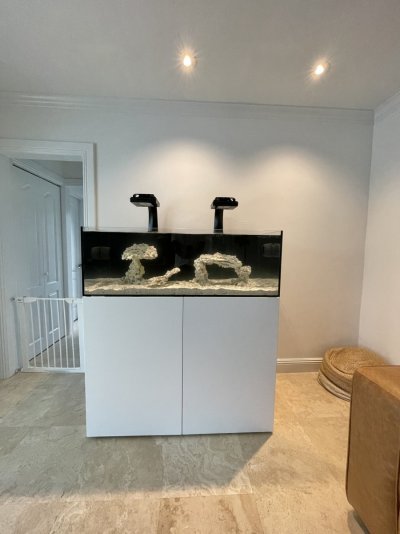
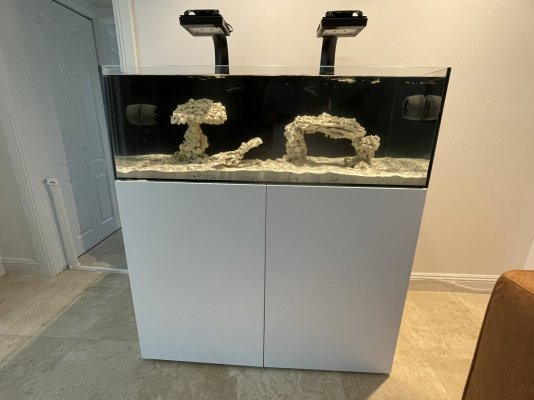
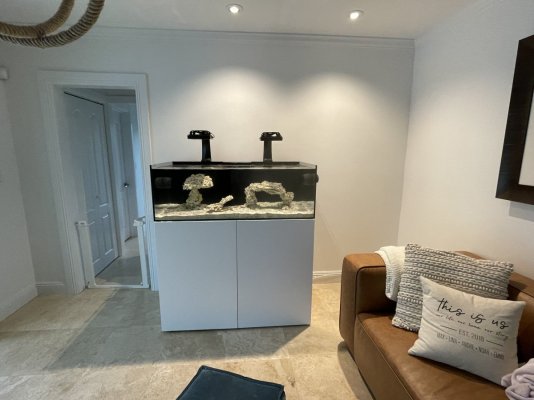
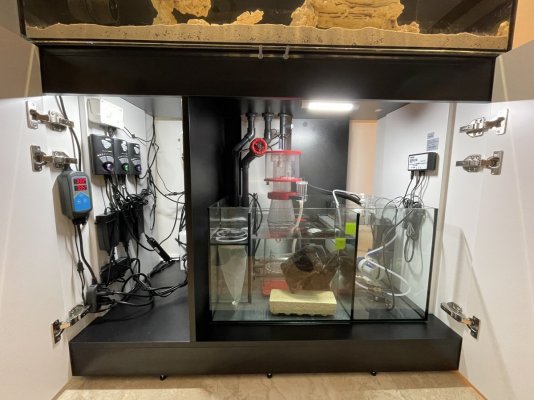
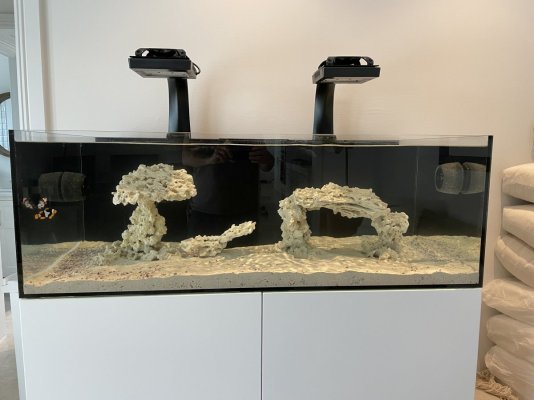
I received the tank a day before I went on vacation which kind of sucked (hard to complain about a vacation) but I was waiting for 7 weeks to receive this tank after having probably spen 6 months watching videos and reading threads on building a new tank so the anticipation level was pretty high. Anyhow as soon as I got back I tore off all the wood and started building the cabinet. The instructions were very good and it was a one person job about three hours to get the cabinet built and the doors installed and leveled. Leveling the cabinet itself alone was tough luckily since I knew It was gonna be a one man show I leveled the Base first and only had to make minor adjustments to get it level with all that extra weight in it. Next step was to get the sump into the cabinet and get the tank up on top.

676F7179-060F-43BC-A940-85E82BE00B90.jpeg


9F316CB1-72C9-4364-AE15-7016D8FF43CE.jpeg


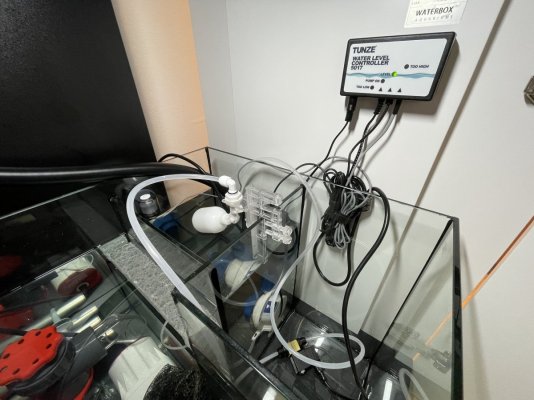
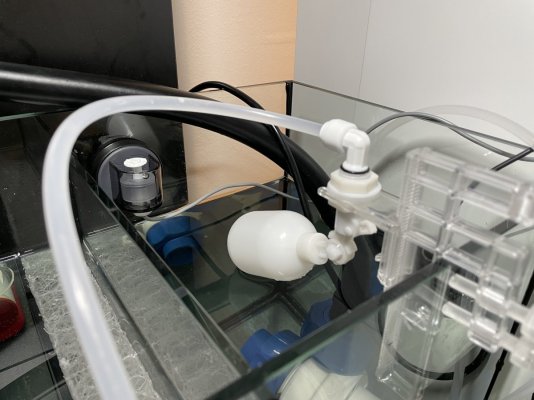
Next step was getting the plumbing installed which is a one man job if u can reach from the back but since I set the tank up against the wall I needed my wife's help to get it done. The plumbing for a waterbox is extremely simple to install. Everything is tightened by hand EXCEPT the little square plug where an extra supply line for additional accessories goes this eventually needed to be done with a small wrench.

A9A299F5-CED3-444F-87C2-026A843DF9D7.jpeg

So that was pretty much all my progress on day 1. That was 4-5 hours solo except to get the tank on top my son helped me with that and for my wife to hold the bottom half of the plumbing while I twisted in the top halfs (about 5 minutes to install all the plumbing minus the pump).
 
Last edited:

revhtree

Owner Administrator
View Badges
Joined
May 8, 2006
Messages
47,725
Reaction score
86,765
Rating - 100%
1   0   0
Ooh congrats on the new tank!
 

attiland

2500 Club Member
View Badges
Joined
Jul 22, 2020
Messages
2,594
Reaction score
4,800
Location
United Kingdom
Rating - 0%
0   0   0
Excited to see this build as it is very similar to the one I am planning to do in the near future.
The only thing is I unlikely can get my wife to take part of plumbing. If anything she is interested to see the outcome and making me to be sure the sand is white ;)
 
OP
OP
Maxcmo

Maxcmo

Active Member
View Badges
Joined
Jun 17, 2021
Messages
216
Reaction score
241
Location
Miami
Rating - 0%
0   0   0
So I was tempted to do the typical rock aquas cape with tons of rock like I have done in the last tank I owned but after searching around I found the minimalitistic scapes more appealing to me in order to be able to have lots of room and good flow around everything with no dead spots. I watched a bunch of videos online and the Korean aquascaping ones using very thing glue, dry sand, and accelerator seemed like the way to go. Here is one of those videos:

They don’t seem to use accelerator over there but I found it to speed up the process immensely especially when your trying to do bigger structural connections that are built up with the sand and glue. I had some inspiration to do a tree and this tree will eventually either be full on the top portion with all Euphylllia or Zoas depending on the flow and lighting that ends up being in that spot. The other structure I build will be the same one or the other the plan is to have one full of Zoas and one full of Hammers. The base of these structures will be Ricordea. I will have an island rock structure and I am not sure for what yet. On the waterbox FB page I saw someone growing GSP on the overflow box and they said it would be easy to keep in check on there and it looked great so that is my thinking in terms of what I am trying to achieve. Little Rock with a lot of Coral and plenty of room for flow and fish to roam around.

These are some of the different items I used to get started:
 

Attachments

  • 59A0476F-2AE8-43E9-8836-2A040540F445.jpeg
    59A0476F-2AE8-43E9-8836-2A040540F445.jpeg
    193.5 KB · Views: 145
  • 6F6A66D6-B88D-484B-98BF-78106A3B675D.jpeg
    6F6A66D6-B88D-484B-98BF-78106A3B675D.jpeg
    120.6 KB · Views: 118
  • A1635CEE-02AC-4D2F-BA53-942AFCC14EA0.jpeg
    A1635CEE-02AC-4D2F-BA53-942AFCC14EA0.jpeg
    242.3 KB · Views: 108
  • 4A781E70-B87F-4B24-814E-7C816842FE6E.jpeg
    4A781E70-B87F-4B24-814E-7C816842FE6E.jpeg
    178.8 KB · Views: 101
OP
OP
Maxcmo

Maxcmo

Active Member
View Badges
Joined
Jun 17, 2021
Messages
216
Reaction score
241
Location
Miami
Rating - 0%
0   0   0
I started messing around to try and create the tree:
 

Attachments

  • 6F434C5F-10D1-4671-B329-78EAAA0C7AE8.jpeg
    6F434C5F-10D1-4671-B329-78EAAA0C7AE8.jpeg
    135.3 KB · Views: 87
  • 9C982ABA-1018-4CE1-AE20-035151CA7347.jpeg
    9C982ABA-1018-4CE1-AE20-035151CA7347.jpeg
    162.7 KB · Views: 95
  • 10CBD057-56BD-4C86-ABEC-738921DE1D82.jpeg
    10CBD057-56BD-4C86-ABEC-738921DE1D82.jpeg
    141.3 KB · Views: 98
  • 6739C28C-4BC9-470F-94BD-B8AE883AAC67.jpeg
    6739C28C-4BC9-470F-94BD-B8AE883AAC67.jpeg
    132.1 KB · Views: 99
  • E0815B5F-38E7-4614-AB39-4E034102CF18.jpeg
    E0815B5F-38E7-4614-AB39-4E034102CF18.jpeg
    148 KB · Views: 129
OP
OP
Maxcmo

Maxcmo

Active Member
View Badges
Joined
Jun 17, 2021
Messages
216
Reaction score
241
Location
Miami
Rating - 0%
0   0   0
I got so involved in working on this scape (and probably high from the glue) I forgot to take pics along the way but here is the finished scape for now I left room to add a little more in the future if/when I need to….
 

Attachments

  • 37E3CB06-D60B-4260-9E01-F61149BFA423.jpeg
    37E3CB06-D60B-4260-9E01-F61149BFA423.jpeg
    230.5 KB · Views: 155
  • C3CD9FC5-A2F6-4566-9AD1-5D61892DEFBA.jpeg
    C3CD9FC5-A2F6-4566-9AD1-5D61892DEFBA.jpeg
    133.3 KB · Views: 174
  • C5CF770E-C661-4FB7-A4CC-FFC22690B320.jpeg
    C5CF770E-C661-4FB7-A4CC-FFC22690B320.jpeg
    130.6 KB · Views: 165
  • 927A59BB-4B99-4383-BD82-59EFBF8F1DA2.jpeg
    927A59BB-4B99-4383-BD82-59EFBF8F1DA2.jpeg
    177.2 KB · Views: 171
  • 02BCC8BE-E0D0-4AFB-B54F-E5AB950BF17A.jpeg
    02BCC8BE-E0D0-4AFB-B54F-E5AB950BF17A.jpeg
    137.4 KB · Views: 173
  • 9B9EA58F-CAD5-495C-95F7-EE000DBC56BD.jpeg
    9B9EA58F-CAD5-495C-95F7-EE000DBC56BD.jpeg
    155.7 KB · Views: 196
OP
OP
Maxcmo

Maxcmo

Active Member
View Badges
Joined
Jun 17, 2021
Messages
216
Reaction score
241
Location
Miami
Rating - 0%
0   0   0
It’s very hard to do it any justice with an IPhone but the bases of everything was built with base rock so there is plenty of area fo the Ricordea and each structure is a lot bigger than it looks like in these pictures. My only concern is the tree is very close to the top of the water I may be forced to put the Zoas there and Hammers on the other piece. I also put an Xport media block in the sump to make up for the lack of rock from what I have seen this seems to be more than enough surface area for a tank this size for the bacteria to populate. I soaked it in microbacter7 and put it in to start the cycle. I am using Dr Tim‘s ammonia to try and do a FISHLESS cycle. 19 days in at this point and still have 2ppm of Ammonia. Hoping when I get back home after this weekend I am all done.
 
OP
OP
Maxcmo

Maxcmo

Active Member
View Badges
Joined
Jun 17, 2021
Messages
216
Reaction score
241
Location
Miami
Rating - 0%
0   0   0
I also worked on the ATO after having left town last weekend. The water in my Waterbox sump evaporates out of the ATO reservoir in almost 4 days. No good I don’t want to be tied down to just 4 days so I ordered the Tunze switch, a float valve, and plumbed my RO water right into the sump into the return chamber. I have a 40 gallon water tank in the garage that I fill overnight and then shut off the RO to avoid TDS creep and to be able to monitor the filters, etc. I purchased an RODI system from BRS and it was incredibly easy to get this plumbed under my garage utility sink and then plumb it into my water tank. The water feeds into my sump using gravity coming out of the bottom of the water tank across and eventually thru my wall along the baseboard. I used clear tubing and held it in place using electrical cord clips in white to match my baseboards.

I strapped all my cords together for now this will be a future project to clean this up but for now its organized enough for me for now…. I am not a fan of having additional cabinets or what not when this tank is closed I want it to look as clean and pretty as possible so I need to find a solution for these cords at some point.

I pretty much followed the BRS guys recommendations in terms of using the Tunze ATO which has 2 sensors as well as the float valve. I also added a water sensor alarm which seems like a simple way to be alerted should something leak.
 

Attachments

  • E18CD2A6-7E81-44E0-80E2-83FF5807E398.jpeg
    E18CD2A6-7E81-44E0-80E2-83FF5807E398.jpeg
    186.8 KB · Views: 187
  • A9094E4B-B0D3-4261-B57F-8084D69525CA.jpeg
    A9094E4B-B0D3-4261-B57F-8084D69525CA.jpeg
    146.9 KB · Views: 196
  • CE055A98-DFDB-4E84-AD1C-FB9A3C2C08C5.jpeg
    CE055A98-DFDB-4E84-AD1C-FB9A3C2C08C5.jpeg
    180.6 KB · Views: 226
  • 9034C489-C206-4680-85B3-66CCADBECF02.jpeg
    9034C489-C206-4680-85B3-66CCADBECF02.jpeg
    111.6 KB · Views: 186
  • 815A6F27-C94E-49C9-860A-93881FB51B48.jpeg
    815A6F27-C94E-49C9-860A-93881FB51B48.jpeg
    88.7 KB · Views: 153

pudge

New Member
View Badges
Joined
May 22, 2019
Messages
20
Reaction score
17
Rating - 0%
0   0   0
I really like the aquascape. Came together nicely. Looks like in the pics you have MP40s on each end (I set mine up the same way but haven't dialed in the flow I want yet). If you don't mind me asking; what lights and skimmer did you go with?
 
OP
OP
Maxcmo

Maxcmo

Active Member
View Badges
Joined
Jun 17, 2021
Messages
216
Reaction score
241
Location
Miami
Rating - 0%
0   0   0
I really like the aquascape. Came together nicely. Looks like in the pics you have MP40s on each end (I set mine up the same way but haven't dialed in the flow I want yet). If you don't mind me asking; what lights and skimmer did you go with?
Yes they are MP 40's on reef mode at 40% at the moment but I still have not added any livestock to the tank so unfortunately I do not have any input for you yet other than those 2 MP40's at 40% make a TON of flow on that setting. I bought the Reef Octopus Regal 150INT 6" Internal Protein Skimmer (VarioS). This is my first skimmer I watched a ton of videos online and from what I gathered reef octopus are very easy to adjust and get going to be effective. I have not turned it on and left it on yet (waiting to finish cycling) but I did test it for a bit and it was extremely to adjust so I am excited about gettin git up and running finally when its needed it should be easy. I was thinking of plumbing it into a container in my ATO since it is now empty to make cleaning easier. Does anyone have any experience doing this and if so what is the best container to use?

IMG_6140.JPG


Here is a picture in the sump before I finished up it fits perfectly and I have also bought an Octo Aquatics divider and it still fits perfectly with that in the sump. (More on that later)
IMG_6142.JPG
 
OP
OP
Maxcmo

Maxcmo

Active Member
View Badges
Joined
Jun 17, 2021
Messages
216
Reaction score
241
Location
Miami
Rating - 0%
0   0   0
23 days to cycle using Frtyz Zyme fishless fuel and and export media brick soaked in Microbacter 7 and daily doses of the same. Waiting to get a little more established to put in the Tangs and turn on the lights.

Question: one mega water change or wait til my nitrates drop on their own. Refugium is up and running…

currently 20ppm
 

Attachments

  • EA09A0D6-5EB6-4059-8EEF-79C07B3BE306.jpeg
    EA09A0D6-5EB6-4059-8EEF-79C07B3BE306.jpeg
    142.9 KB · Views: 154
  • 8A8BDEF8-87BD-441B-8F65-8F714BF0C650.jpeg
    8A8BDEF8-87BD-441B-8F65-8F714BF0C650.jpeg
    139 KB · Views: 167
Back
Top