Ocean_dreamer89

Community Member
View Badges
Joined
May 13, 2020
Messages
69
Reaction score
52
Location
Nashville, TN
Rating - 0%
0   0   0
Hello!

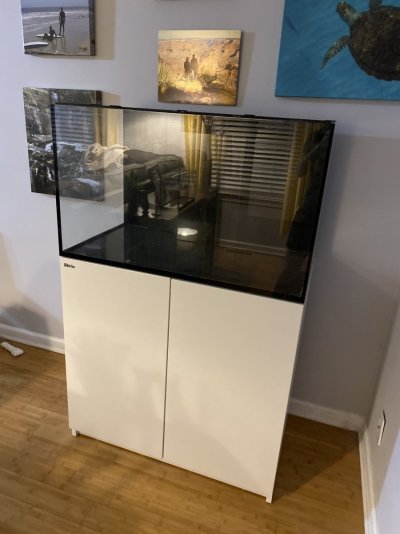
Welcome to my first build thread on R2R! About a year and a half ago, I started my first reef aquarium which was a BioCube 16. Even though I had been told nano tanks can be hard to maintain due to the small water volume, I had a great time with that tank and learned a TON. For me, it worked very well to "get my feet wet" in the reefing world. The small size and (relatively) cheaper cost, allowed me to get started and find out if I really enjoyed it and would stick with it. I always knew that if I did really enjoy reefing, that I would eventually upgrade to a larger aquarium. I had originally wanted to go with a RedSea Reefer 425XL, but a friend of a friend decided to sell his RSR 250 and it was a deal that I could not pass up! The tank had been up and running for about six months before he took it down and it is in near perfect condition. I bought the tank back in August 2020 and today (2/5/21), I am finally adding water to it. I'll add more details in subsequent posts, but just wanted to get this thread started and say Hello! As this thread continues, I'll try to keep this first post updated with the latest equipment and livestock.


Tank: RedSea Reefer 250
Salt: Fritz RPM
Aquascape: About 50 lbs CaribSea Life Rock (40 lbs regular rock/10 lbs arches)
Sand: 20 lbs CaribSea Arag-Alive Special Grade Live Sand (about 1 inch deep)
Lighting: RedSea ReefLED 90W x2
Return Pump: Octopus Varios-6
Powerhead: Ecotech Vortech MP40wQD x2
Skimmer: Nyos Quantum 160
Algae Turf Scrubber: IceCap 20W
Heater: Finnex 150W Heater with Inkbird WiFi controller
Chemical Filtration: TBD
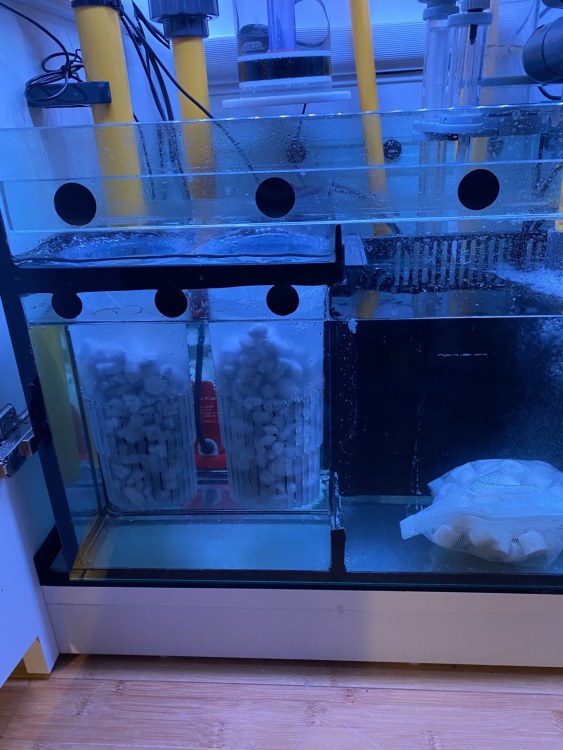
Mechanical Filtration: RedSea Filter Cups filled with Matrix and topped with filter floss
ATO: TBD, Innovative Marine HydroFill Reservoir 15 Gal
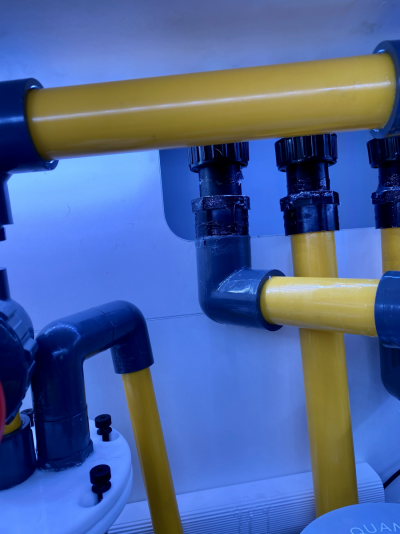
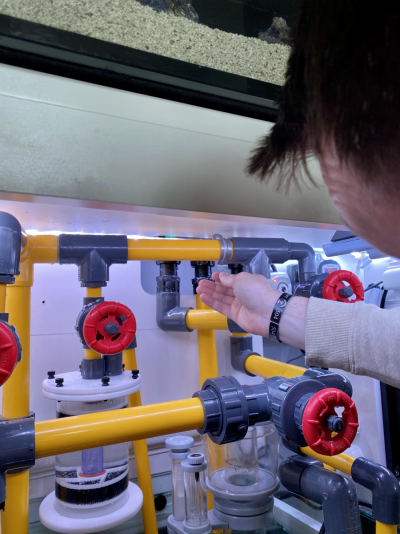
Tank Modifiations: Removed stock plumbing and replaced with custom plumbing

P.S. I love hearing other people’s opinions and suggestions! Please comment all you want!!!

Edited: 3/2/21

Livestock:

TBD -
Will be transferring over 2x Ocellaris Clownfish and 1x Blood Fire Shrimp
1x Coral Beauty and 1x Melanurus Wrasse in QT

Corals:

TBD - will be transferring:
Duncan
1x Green/Purple Hammer
1x Toxic Green Hammer
2x Ricordea Florida (orange and green)
Ultra Orange Rhodactis Mushroom
Blastomussa merletti (I believe, could be wellsi)
Green star polyp
Frogspawn
Candy Cane
Plating red Montipora
Solid pink Scoly
Meteor Shower Cyphastrea
JF Burning Banana Stylocoeniella
Encrusting white/green Montipora
Neon Green Cabbage Leather
Rainbow Trachyphyllia
 
Last edited:

Peace River

Thrive Master
View Badges
Joined
Apr 29, 2014
Messages
21,505
Reaction score
164,536
Location
USA
Rating - 100%
1   0   0
Nice start to your build thread! It looks like you have several nice pieces of equipment! I also have one of the IceCap algae scrubbers and an InkBird controller. One additional thing that you may want to consider is an ATO.
 
OP
OP
Ocean_dreamer89

Ocean_dreamer89

Community Member
View Badges
Joined
May 13, 2020
Messages
69
Reaction score
52
Location
Nashville, TN
Rating - 0%
0   0   0
When I got the opportunity to buy this RSR 250, I immediately hoped on here and a few other sites to begin researching different builds. I saw a ton of ideas that I loved, but my experience in plumbing is zippo and I'm not very crafty, so I knew I'd be limited by time and ability.

61949158972__D4CDE3AF-6920-4611-BDAC-8B72AB0F7175.JPG

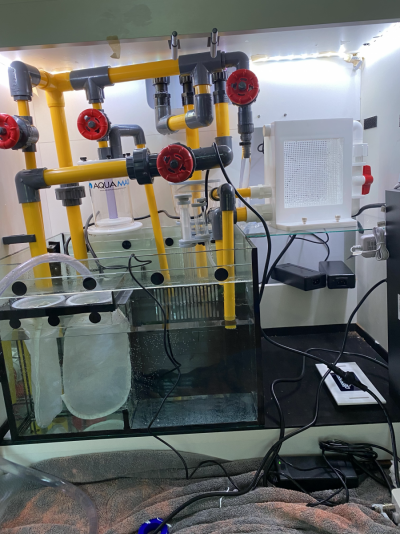
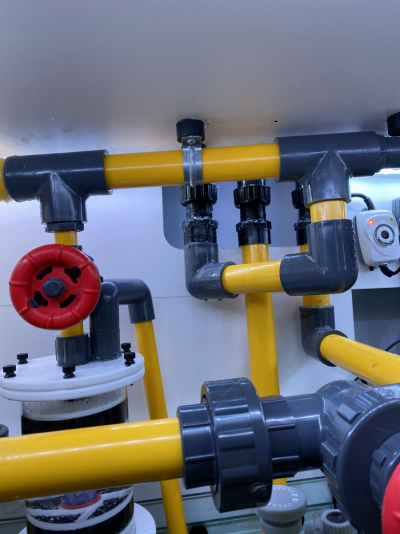
I thought a good place to start was to plan the sump area and equipment I wanted, that way I could begin to think about how I wanted it plumbed. I contemplated sticking with the stock plumbing, but I knew I wanted an algae scrubber and at least one reactor, so I decided to go with a manifold. I knew space would be limited in the small sump area so extra pumps all over the place to power water through those would be ineffective. The challenge for me would be to try to plan this plumbing with my limited experience, and thennnnn convincing my husband to actually do the plumbing! Luckily once I showed him pictures and explained what I wanted and what would need to be different, he was game. I ran into @Eight build thread and borrowed heavily from his his manifold plan. (Shout out! You were a life saver!!) I modified his plan a little but his part list and detailed plan with all of it written out was amazing. If you get the chance, hop over to his thread and check it out! Build Thread Jason's Reefer 250: Fish added! Sump Mod, Clarisea, custom plumbing, aquascape w/E-Marco, IKEA cabinet mod. (Pic heavy!)

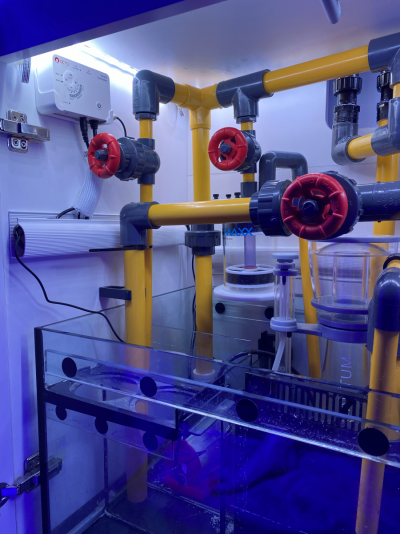
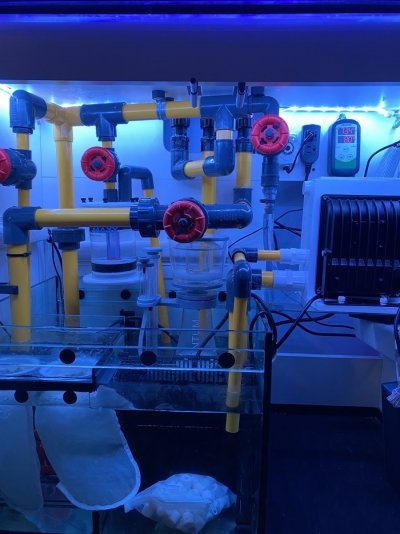
One major change that I did was hard plumbing the algae scrubber. In Jason's build thread, he had two reactors, but I only plan on using one, so in the place of the second, I added in some soft tubing to run to the scrubber and then hard plumbed the drain back into the sump. For the shelf, we added a piece of glass setting on four brackets screwed into the wall and/or glued to the sump. All in all the plumbing by far had been the most time consuming part of the build. I got the tank in August 2020 and the plumbing got finished about a month ago. Granted my husband was only able to work on it here and there with our weird work schedules. Once it was complete, I ran a leak test and had to fix several leaks. Overall, I think it was a pretty good success considering this was the first time for either of us working with this much plumbing. Silicone on o-rings and a lot of glue solved all the leaks. Hopefully, it'll hold up long term, but I'll get y'all posted.

tempImaget6Mcbn.png

Leak Test Video

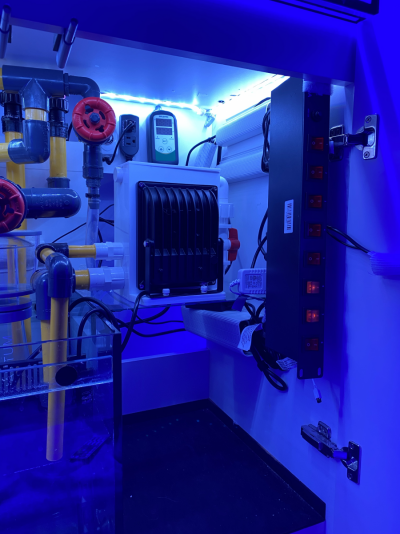
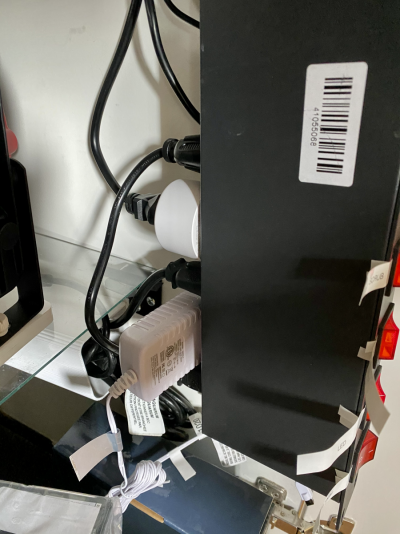
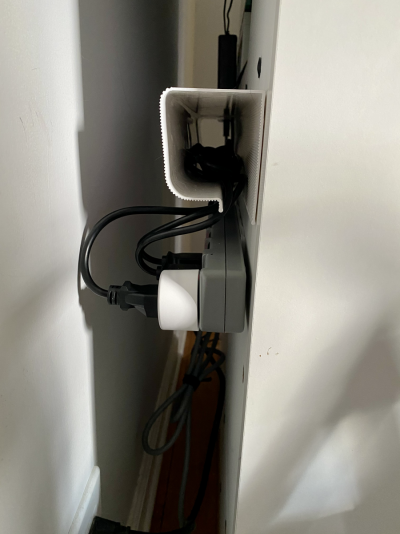
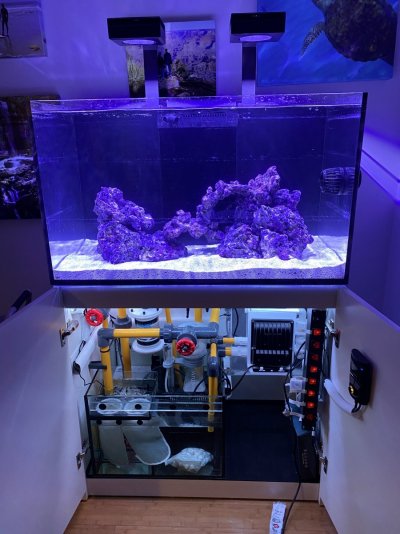
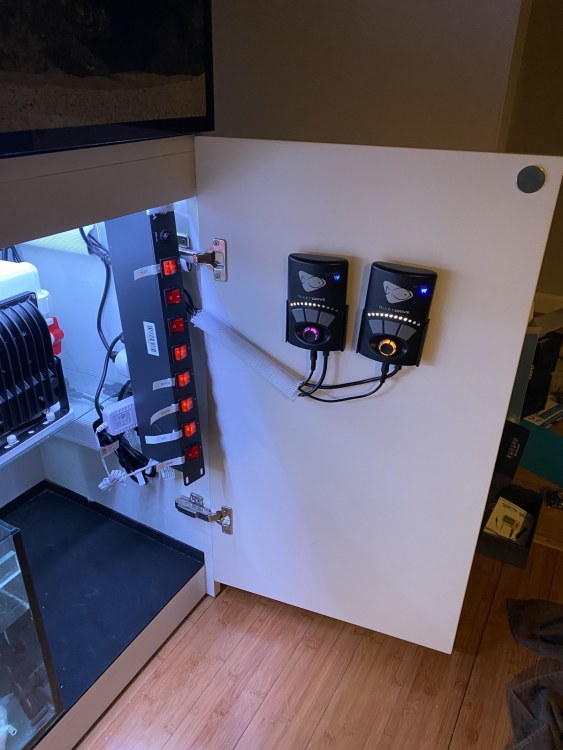
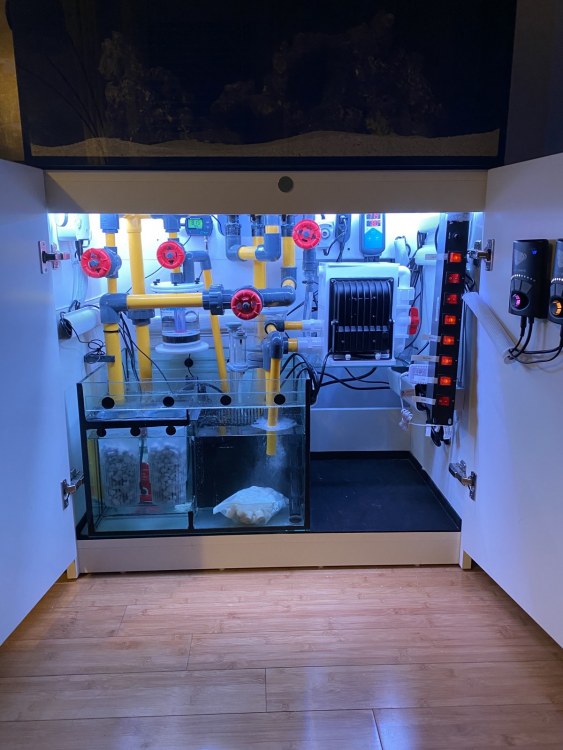
Once all the plumbing was done, I began the work of getting all the electronics installed and wire management. For my equipment, I was able to get pretty much all of it from Ebay or Facebook marketplace. All of them arrived in great condition and had only been used for a few months by all of the previous owners. Also, since the plumbing took so long, I was able to space out all these expenses. Big plus! I ordered some tracks for the wires from Amazon and got an LED light strip for the inside of the cabinet. Without the LEDs, it's way too dark in the cabinet to be able to do any work. Below is what it looks like with all the electronics, wire management, and plumbing done.

Right side underneath cabinet
tempImagevq7k5X.png

Left side underneath cabinet
tempImagea5cJ75.png

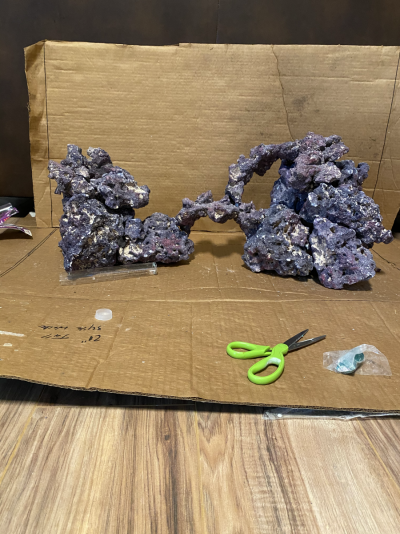
The next step for me was the rockscape. I ordered about 40 lbs of regular life rock and 10 lbs of life rock arches. This whole process didn't take as long as I thought it would, but the main frustration for me is once I got a design I liked, I could never replicate it a second time! This occurred several times while I was putting the epoxy in. I used just a regular two part epoxy for this. For the structure on the left, I made them into two larger sections that I could stack and the one on the right is three sections. I also connected the two arches in the middle. The idea behind this was to be able to pull the rocks out fairly easily if I needed to, but still wanted a stable structure. This worked perfectly for adding the rocks into the tank because I didn't have to carry a huge, very heavy rock structure up the stairs. To plan the rocks, I measured the tank dimensions and then drew a template onto a cardboard box and went from there. I also used a piece of cardboard on the back to measure the height of the tank and make sure that I had enough height and dimension in the overall scape. This is what I ended up with.

tempImageRN31WV.png

tempImageMPcEIi.png

Any all feedback is welcome!
 
Last edited:
OP
OP
Ocean_dreamer89

Ocean_dreamer89

Community Member
View Badges
Joined
May 13, 2020
Messages
69
Reaction score
52
Location
Nashville, TN
Rating - 0%
0   0   0
Nice start to your build thread! It looks like you have several nice pieces of equipment! I also have one of the IceCap algae scrubbers and an InkBird controller. One additional thing that you may want to consider is an ATO.

Yes! I have one, just forgot to mention it! It's currently on my biocube still, but I upgraded the reservoir and plan on placing it next to the tank. Thank you for the input!

How do you like the algae scrubber?
 

Peace River

Thrive Master
View Badges
Joined
Apr 29, 2014
Messages
21,505
Reaction score
164,536
Location
USA
Rating - 100%
1   0   0
Yes! I have one, just forgot to mention it! It's currently on my biocube still, but I upgraded the reservoir and plan on placing it next to the tank. Thank you for the input!

How do you like the algae scrubber?

Good news on the ATO! I got the #IceCap 60w scrubber last fall and it was easy to set up, grows algae well, and is effective at removing nutrients for a tank that I intentionally overfeed - I have been very happy with it!
 
OP
OP
Ocean_dreamer89

Ocean_dreamer89

Community Member
View Badges
Joined
May 13, 2020
Messages
69
Reaction score
52
Location
Nashville, TN
Rating - 0%
0   0   0
welcome to the show. :cool:
is the aquascape cemented together?
Thanks!

It is to an extent. The left side is cemented together into two larger sections and the right is the same concept but three larger sections. The arches that go across the middle are also cemented, but rest securely on the left and right side.
 
OP
OP
Ocean_dreamer89

Ocean_dreamer89

Community Member
View Badges
Joined
May 13, 2020
Messages
69
Reaction score
52
Location
Nashville, TN
Rating - 0%
0   0   0
Thought I would take some time and talk about the "controllers" of my aquarium. As much as I would love a system like Apex. I just can't justify the cost for me right now. I don't plan on keeping super expensive fish or coral in this tank, otherwise it would be a no brainer. However, I think it is still important to implement redundancy and fail-safes where I can.

The most important piece, I believe, is maintaining some sort of flow or gas exchange in the event of a power outage. I have a plan for that but have not set it up yet. A while back I purchased the Cobalt Rescue Air Pump after seeing a BRS video of it. I'll post a link to the video at the end of this paragraph. Although, it is not the best of best solution, I feel comfortable with this choice for now, with the plan to eventually get one of the battery backs for at least one of my MP40s. If anyone has any experience with this product, please let me know.


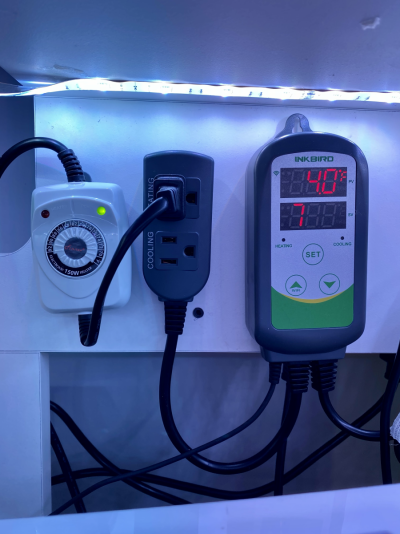
My temperature redundancy is fairly simple. I have the Wifi enabled Inkbird with a heater attached. The heater also has its own temperature control. Right now the way I have it set up is that the heater temp is set just above the Inkbird temperature. I have the temperature probe in the drain section of the sump and then the heater in the chamber after that. My thought process there is that the drain section will be the closest temperature to the display, so the Inkbird will operate the heater based on that temperature. I knew I didn't want the heater in the return chamber so that it'll never have the chance of being dry, but I not sure which would be better: chamber 2/4 or 3/4. Or if it would make any real difference. I went with 2/4 foley on the fact that I have more room in that chamber (no skimmer) and that it's after the temp probe. Right now, I have the Inkbird version with a heating and cooling option, but I don't yet have a fan. I also have the Inkbird with two heater options, so I may switch it out. I plan on seeing what is needed once the tank get going.

Don't mind the numbers, they blink with my camera and the water is not flowing at the moment.
tempImageELMroK.png

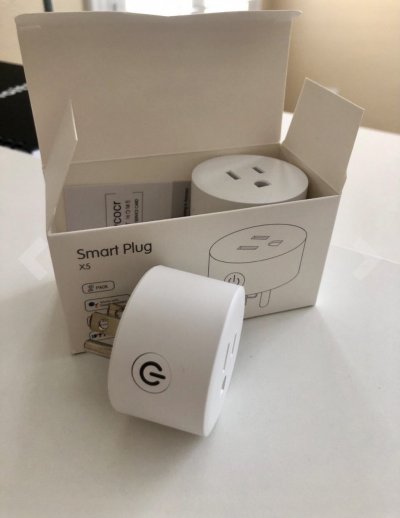
The last real automation (besides Mobius for the Vortech) that I have is for the algae scrubber. I had it all set up and then realized that I needed some sort of timer for the lights. In my Biocube, I had a LED strip with built in timer for my "refugium," so I completely forgot about this! I hopped online and realized that indoor timers are super outdated and HUGE. I needed something compact to fit onto my power strips without occupying multiple plugs. The best solution I could come up with was some Wifi smart plugs that I found on Amazon. They fairly compact and depending on what's plugged in beside them, only take the place of one plug. These particular plugs were very affordable and have the option to set up a schedule on their app. Just got them plugged in and set up and it seems like it is going to work. I'll post the link below the pictures.

IMG_0596.jpg

tempImage2JyHm0.png

tempImageSd6deP.png


I've got a few more smaller items coming in the next few days and will be included in some following updates. Right now I'm just trying to make enough water to fill this tank up! So far I'm on Day 2 of making water on and off ‍
 
OP
OP
Ocean_dreamer89

Ocean_dreamer89

Community Member
View Badges
Joined
May 13, 2020
Messages
69
Reaction score
52
Location
Nashville, TN
Rating - 0%
0   0   0
Your custom plumbing is quite impressive!
Thank you so much! This is my first time working with any kind of plumbing. I had the vision, but my husband did all the work with it. Just got all the water in the tank and noticed one more small leak Currently letting some more silicon set on it and we'll see how it holds up. It's been a long day of making water and I thought I was ready to start the cycle
 
OP
OP
Ocean_dreamer89

Ocean_dreamer89

Community Member
View Badges
Joined
May 13, 2020
Messages
69
Reaction score
52
Location
Nashville, TN
Rating - 0%
0   0   0
After spending two days making enough water to fill the tank, I am still unable to start the cycle . Got the tank finally filled up last night about 11 pm and started up the return. I was letting it run for a minute and messing with the main drain valve trying to get it to quiet down, when I noticed a very small leak where the manifold connects to the tank. It was one a little drop coming out every second or so, so I slapped some more silicone on it and called it a night.

When I woke up this morning, I turned on the return pump and didn't see any leaks! Buttttttt after about 30 sec, I noticed a big bubble of silicone popping out where that previous leak had been. I wish I would've grabbed a picture of that but I was too ticked.

The pipe on the left is connected to the manifold. The leak is on the right side of the far left pipe.
tempImagesv5iES.png

I grabbed my husband before he left for work and we decided that the manifold not being supported from the top was putting too much pressure on that connection for it to seal properly. Luckily he had bought lots of extra stuff on our many Home Depot runs and TBH he's a bit of a hoarder when it comes to tools and supplies. Drives me nuts most of the time but definitely thankful this instance! He was able to find some rubber washers that he had to compensate for the gap left by the 1 in pipe support. Immediately, the difference of pressure on that connection that was leaking was apparent. Once everything was secured, I place some new silicone around the pipe and am currently letting it dry. I'll update probably later today.

tempImage3MIxdD.png

tempImagehPVoD0.png
 
Last edited:
OP
OP
Ocean_dreamer89

Ocean_dreamer89

Community Member
View Badges
Joined
May 13, 2020
Messages
69
Reaction score
52
Location
Nashville, TN
Rating - 0%
0   0   0
Well 7 hours of chasing small leaks, I finally got it to the point where I can keep it running. Have a small leak that I missed on the backside of the emergency and one at the soft tubing connection to the algae scrubber. Right now the tank is running with the water level below the emergency and the scrubber is shut off from water while the silicone dries in those spots. Going to keep it running for another hour while I observe it. If nothing new pops up, I'll let it go through the night and check again in the morning with the same game plan. If all goes well when I get home from work tomorrow, I'll finally start the cycle!

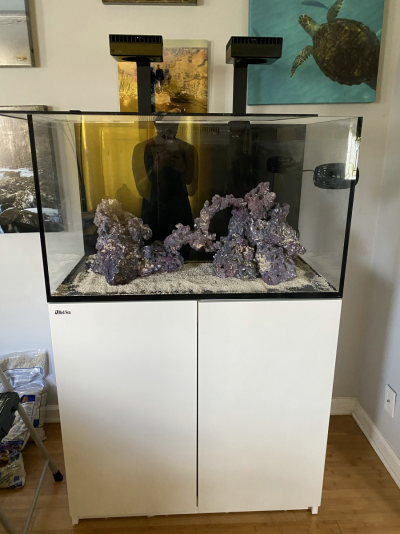
Pictures for fun. Who doesn't like some pics??
IMG_0606.jpg

IMG_0607.jpg

Lights on just for the picture
 
OP
OP
Ocean_dreamer89

Ocean_dreamer89

Community Member
View Badges
Joined
May 13, 2020
Messages
69
Reaction score
52
Location
Nashville, TN
Rating - 0%
0   0   0
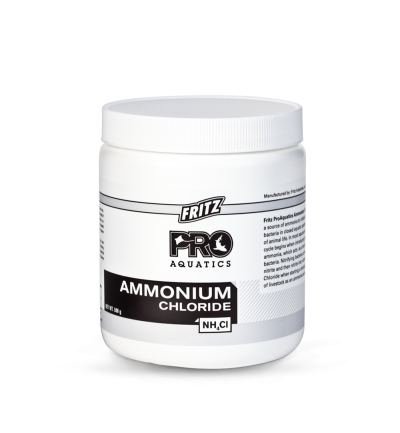
Got the cycle going tonight. I'm going with the same process I did for my Biocube, just scaled up. I used Fritz Ammonium Chloride. The directions say to add 1 Tsp per 100 gallons. My tank is 66 total system volume minus rocks and sand, so I added half that. I waited for about 10 min and tested for Ammonia using my API test kit. It showed between 2-4 ppm, so I dumped in Dr. Tims's nitrifying bacteria. I can't remember the exact bottle size, but the whole bottle treats up to 60 gallons.

The wait begins.


Fritz_Pro_Ammonium_Chloride.png
 

Waynerock

2500 Club Member
View Badges
Joined
Jul 4, 2018
Messages
2,619
Reaction score
5,307
Rating - 0%
0   0   0
Looks great so far! I love my reefer 250! Just wish it was bigger I had to pretty much stop stocking mine in less than six months to account for growing room. Love your plumbing hate the stock stuff
 
OP
OP
Ocean_dreamer89

Ocean_dreamer89

Community Member
View Badges
Joined
May 13, 2020
Messages
69
Reaction score
52
Location
Nashville, TN
Rating - 0%
0   0   0
Looks great so far! I love my reefer 250! Just wish it was bigger I had to pretty much stop stocking mine in less than six months to account for growing room. Love your plumbing hate the stock stuff
Thank you!! I'm really excited about it. I'm upgrading from a 16 gal Biocube that I've maxed out with corals so I'm excited for the new space!
 
OP
OP
Ocean_dreamer89

Ocean_dreamer89

Community Member
View Badges
Joined
May 13, 2020
Messages
69
Reaction score
52
Location
Nashville, TN
Rating - 0%
0   0   0
So now that the tank is cycling, I figured I should really start thinking about the stocking list. I plan on transferring everything in my Biocube over, which isn't very much as far as livestock for a 50+ gallon tank.

Current livestock that will transfer:
2x Ocellaris Clownfish
1x Blood Fire Shrimp
1x Rainbow Bubble Tip Anemone

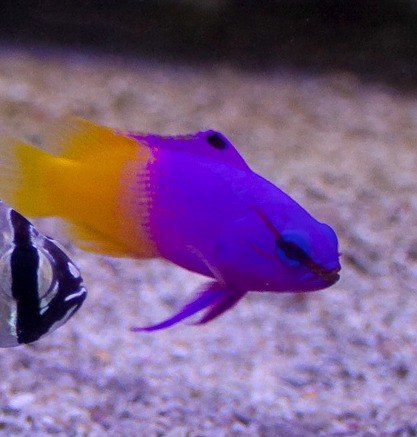
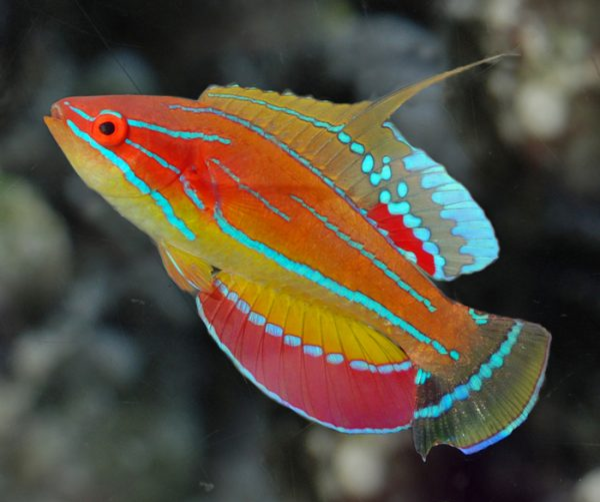
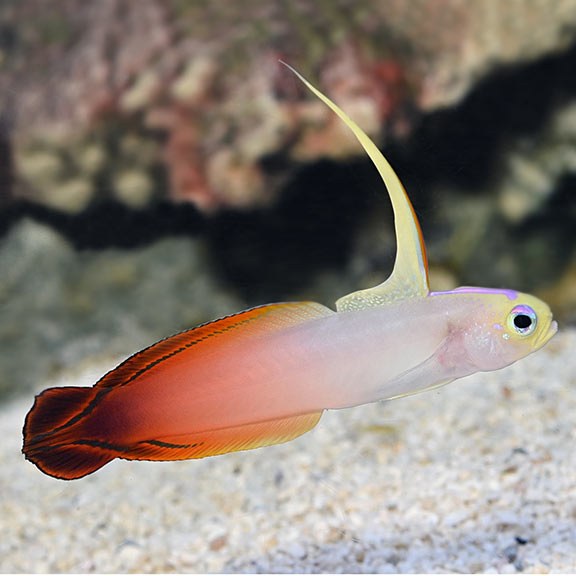
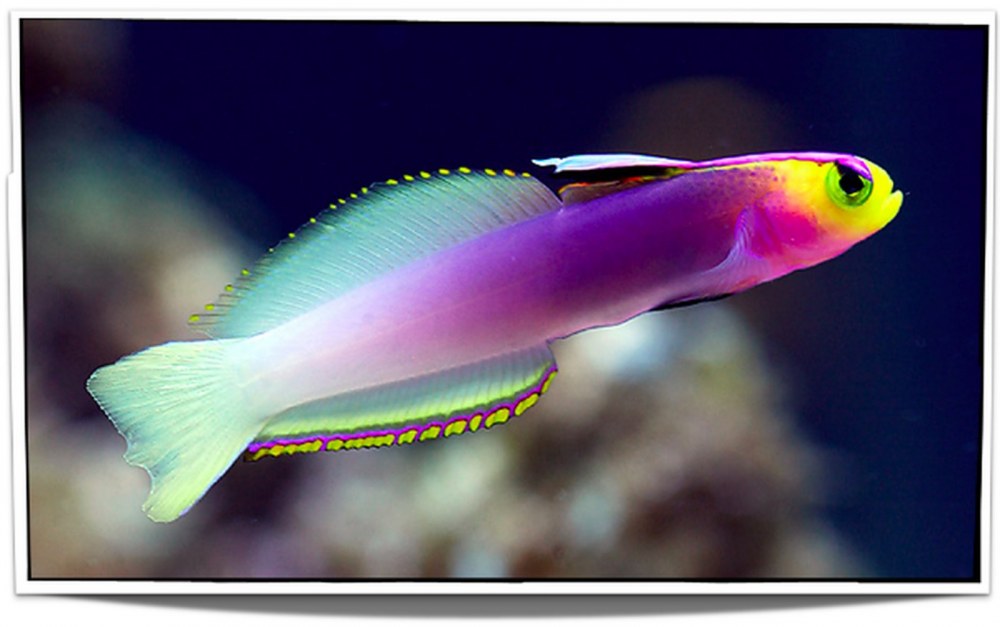
I'll list some ideas below, but I'm at the very beginnings of this and very open to suggestions. My husband is only really into looking at the fish, so active fish that are visible are a big plus. My possibilities below are not going to really be a list of must haves, but just ideas. In other words, I may list more than what would be an acceptable bio-load for the tank. It should be noted that I intentionally got an oversized skimmer for the tank in the case that I did want to push the limit a little bit. Like I said, my husband really likes looking at the fish, so anything that I can do to keep him on board with this hobby I will! Haha I would love to hear ideas!!

Possibilities:
Royal Gramma
Royal-Gramma-by-ahisgett.jpg.fc415943e03fc9ac55ba07f02939411d.jpg

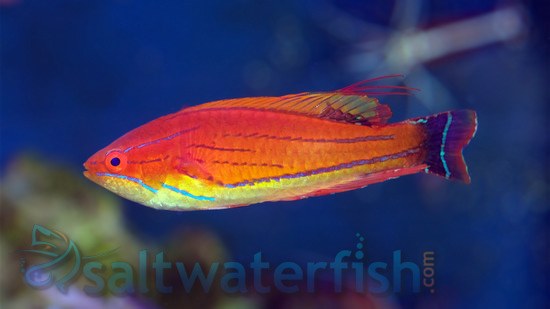
Flasher Wrasse
Screen-Shot-2017-08-17-at-12_55.53-PM.png.c1b1cff1b6d66e9fb9c7b407161fb810.png McCosker's 1772_carpenters-flasher-wrasse_1.jpg.c2a73df2e20608dfbe2c72fc2e09df00.jpg Carpenter

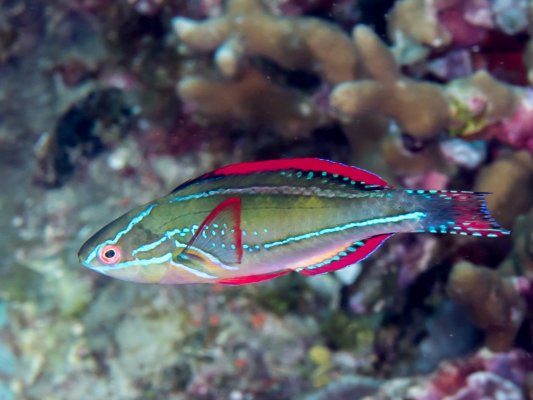
Exquisite Fairy Wrasse
exquisite-wrasse.jpg

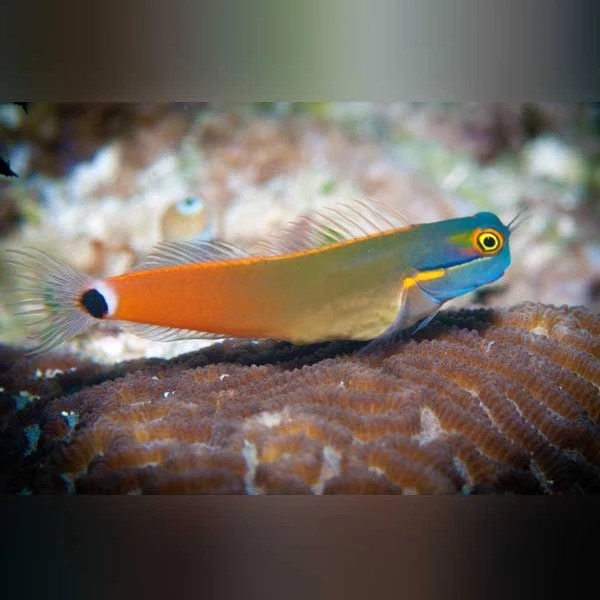
Tailspot Blenny
Tailspot-Blenny_600x600.jpg.5661a36e3114f0477308ff61fd06ff0a.jpg

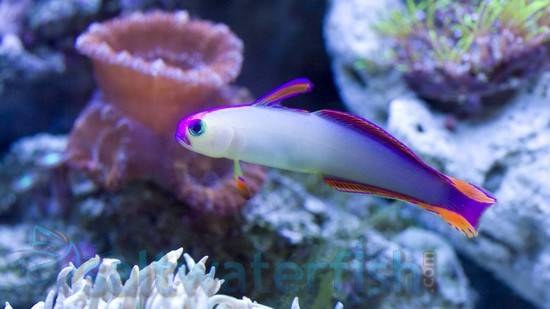
Firefish
lg_71133_Firefish.jpg.0ff5caeb8a1a2d018c8da001c4cbf6a7.jpg Regular Helfrichs_Firefish_Pet_Fish_for_Sale_www.petfishforsale.com__87063.1459653266.png.thumb.jpeg.6bdea01c34781924068675b092cfc49e.jpeg Helfrichi 250_purple-firefish-goby_1.jpg.82c81691ffef38705681123a4bc0a996.jpg Purple

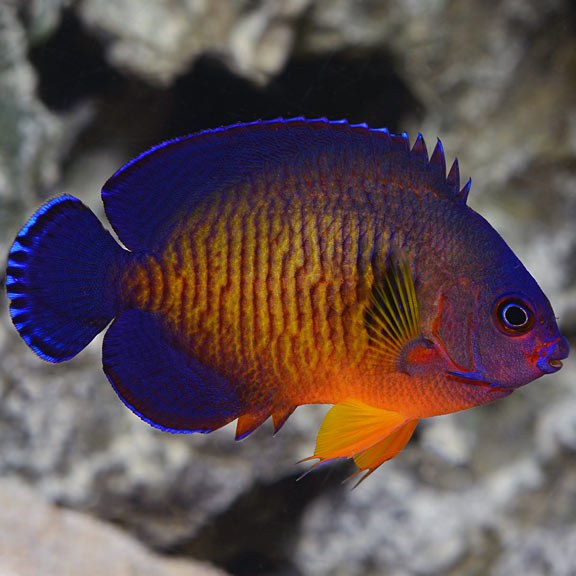
Coral Beauty Angelfish
lg66118CoralBeautyAngel.jpg.12dfd3567538f152fa27b5f09b6269d1.jpg

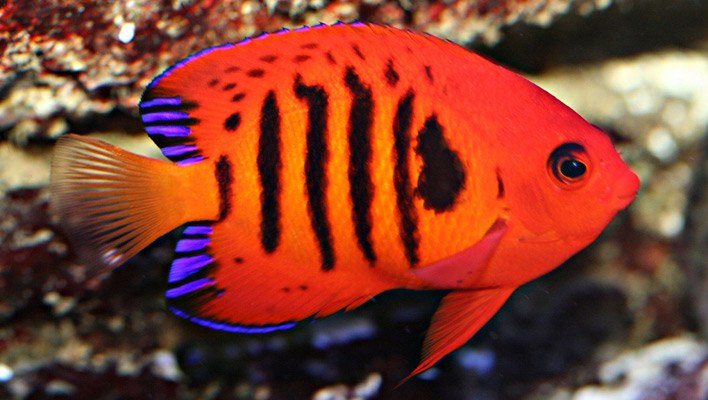
Flame Angelfish
flame-angelfish.jpg.04a10023fd6f3683d6e3e7ebc79b144f.jpg

I know there's some issues with corals for the last two, which I would have to keep an eye on. The blenny would I guess be the "utilitarian" fish of the group since I believe this tank in too small for tangs. The RG would be my closest must have due to sentimental value for me. Anyone have experience or tips with any of these fish? Any ideas of additional possibilities? Not really interested in Cardinals. I know they're cool, active fish, but I'm looking for more color.
 
Last edited:
OP
OP
Ocean_dreamer89

Ocean_dreamer89

Community Member
View Badges
Joined
May 13, 2020
Messages
69
Reaction score
52
Location
Nashville, TN
Rating - 0%
0   0   0
So both of my MP40's I have, I bought them used. One of them has been sitting for in my basement since before I bought this tank. When I first received it, I had to buy the black RF chip to make it Mobius compatible. I got that set up and then let it since until last week, probably close to 8 months. Anyway, I went to set it up with this tank and discovered that the driver had gone bad. I ordered a new one and finally got it today, after going through some hassle with FedEx who delivered it to the wrong house. Luckily, I have an awesome neighbor that put it in my mailbox today. Anyway, I got the new driver set up and got to work with more wire management.. Am I the only one that has really started to despise wire management???

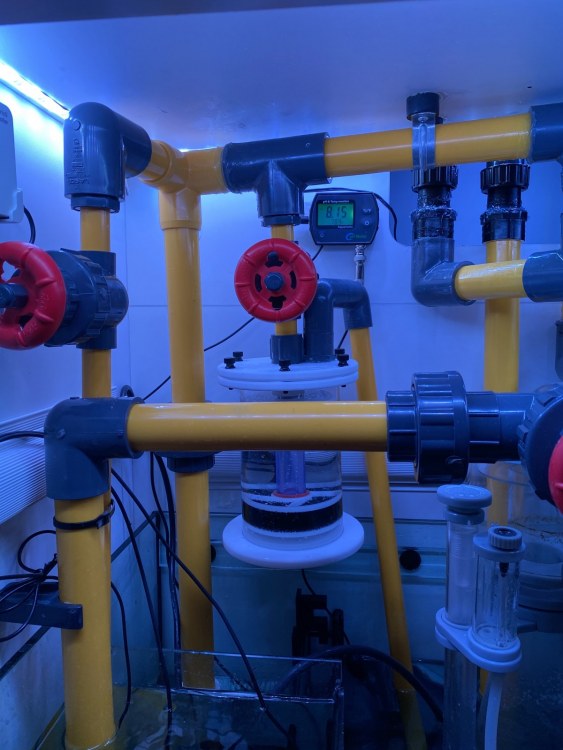
But I digress. While I was in wire hell, I went ahead and got one of the other small projects that I've been putting off a bit. I've been catching up on the BRS 360 videos and have been thinking a lot about what they talk about with pH and saying that in order to provide the best life we can for the animals in our tank, the way we (as a hobby) think about the acceptable range for pH may be the wrong approach. They basically are saying that the best practice for pH is not the larger range of acceptable, but to keep it as close as we can to 8.3. My Biocube has always maintained a lower pH (around 7.9) and I have never successfully been able to get it higher. I basically accepted that this was the natural value for the tank and since everything looked fine, I just went for consistency. I'd like to try a different approach with this new tank and maintain that 8.3 number. My issue is that I have four animals and two humans in my house and we all exhale a bunch of CO2! So I'm going to do some more research about how to increase pH (right now I'm thinking Kalkwasser is going to be my best bet), but in the meantime I wanted something to make my life a bit easier for keeping an eye on the value. I found a pretty cheap pH probe on Amazon. It has decent reviews, so I decided to go with it. I know a lot of times you get what you pay for, but at least this can give me a rough idea of where the pH is without having to test daily. Of course this added more wires!! I'm not completely happy with how I have the additional wires managed right now, but I will probably play around with it later.

Now for some pictures!
IMG_0610.thumb.jpg.42f15ac936a71e6848e60804148f32c1.jpg

This is the pH monitor. It's supposed to have an error range of 0.1 either way, but it's probably closer to 0.3 after spending about 30 min trying to calibrate it. I'll take it for $32.
IMG_0611.thumb.jpg.2a56b993235809555ca969ac143d66a3.jpg

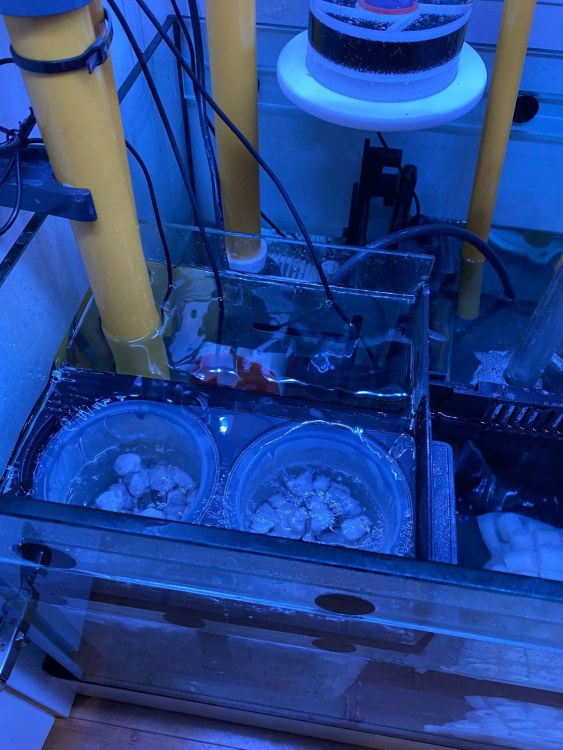
I also added the Red Sea media cups. I put the drain for the algae scrubber in a place where it can make it a little more difficult to change the socks. With the cups, I added in some Seachem Matrix and plan on putting filter floss on top. I figured this will save some time and make maintenance easier, which means I more likely to do it more often!

IMG_0613.thumb.jpg.8f26bf6743f47574e5480a0eb9a69cbd.jpg

IMG_0614.thumb.jpg.8703ca1b93cc042e95e8fc3146e60850.jpg

IMG_0612.jpg

As always, I appreciate anyone's thoughts or suggestions!
 
OP
OP
Ocean_dreamer89

Ocean_dreamer89

Community Member
View Badges
Joined
May 13, 2020
Messages
69
Reaction score
52
Location
Nashville, TN
Rating - 0%
0   0   0
For Valentine's Day yesterday, my husband took me around to a couple LFS to look at some fish and corals (and he got me some store credit for a present!). I went in the attitude that unless I saw something I really wanted that I would just enjoy the stores a browse. We went to three total and I stuck with the gameplay throughout. I saw some pretty cool coral but my Biocube just doesn't have much more room and I don't really want to add something to it just to wait until the new tank is ready. So at the end of the day, I didn't see any coral that I couldn't live without. At the last store, however, they had one of the fish that was on my list of potentials. I kept my QT ready at all times in the case that I need to set it up fast and I had recently mixed some fresh saltwater before we left, so I decided to jump on it and picked up a Coral Beauty. I'll go through my QT plan in a bit, but it'll take enough time for the new tank to be ready and worst case scenario, it can stay in the QT longer if it needs to. I talked about my QT setup in my Biocube build thread on Nano-reef.com, but I've made a couple changes so I'll go over it again.

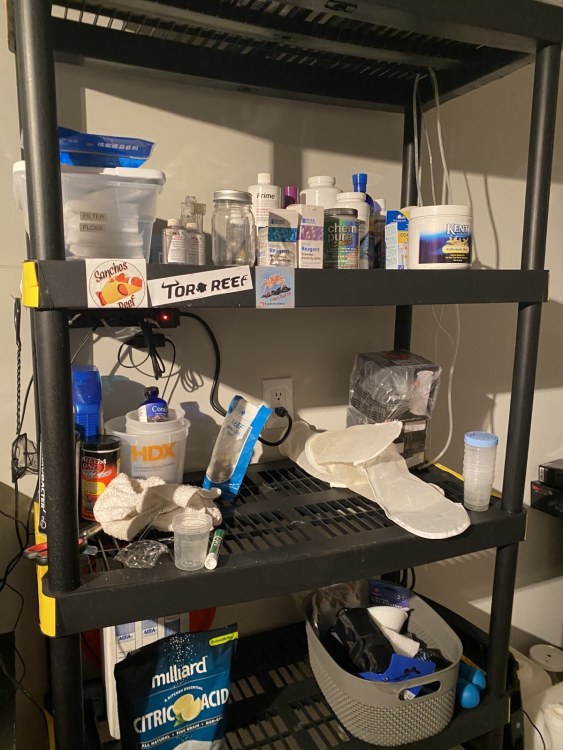
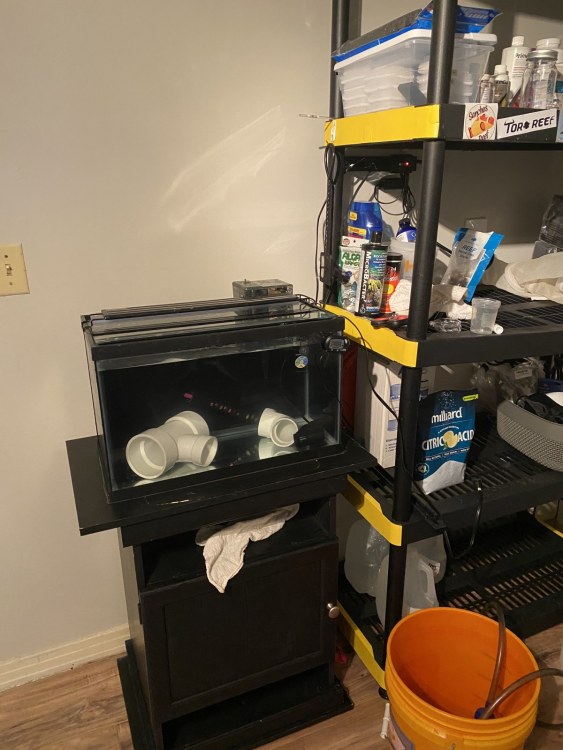
This is the shelving that I keep almost all of my fish related equipment. The QT used to be on that middle shelf where the filter socks are. Don't mind the mess there, recently moved the QT so I'm still working on the organization for that part.

IMG_0642.thumb.jpg.7d501f7558e2cb497993e1f7a104e905.jpg

I noticed that the tank was probably too heavy for that shelf and it was warping pretty bad. It was still stable enough, but I just didn't feel comfortable filling it up again. Another issue with the tank right there, was the clearance above the tank. It was tight! This made doing any kind of work with the filter or topping off the tank a big pain. So I decided to reuse my old Biocube stand, which was a stand that I had picked up fairly cheap on Amazon, and place it right next to the shelving. This works great because it's nice and sturdy, gives me some extra storage, and no more clearance issue! Plus it gets the stand out of my way and puts it to good use again haha.

IMG_0643.thumb.jpg.88103fe323e4538d7a896000d4d0f597.jpg

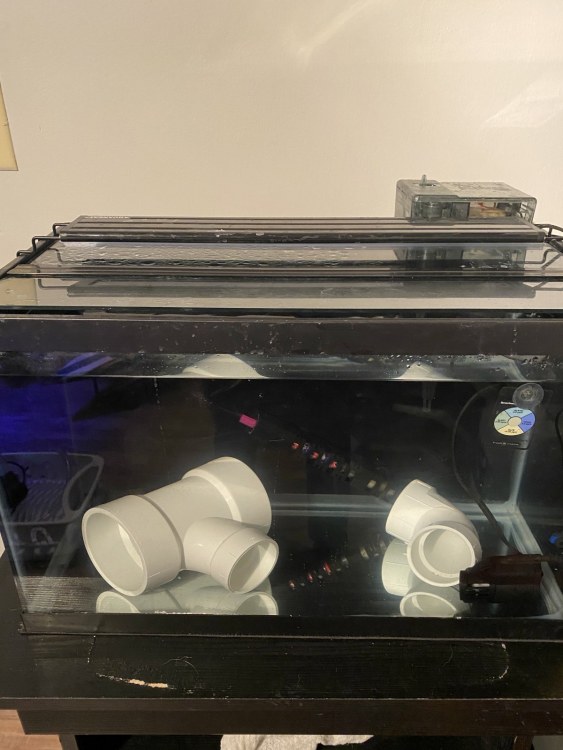
For the actual QT, I went cheap but practical. I have a 50W heater, Fluval HOB filter, a small powerhead, a simple LED light strip, and some PVC. I've found that even this small powerhead really blasts the fish and I can't turn it down, so I leave it off most of the time and just use it to help collect uneaten food. The HOB provides the aeration and a gentle flow to the tank. If I start to notice a problem with pH or anything, I can always position the powerhead closer to the top and get some more surface agitation that way.

IMG_0644.thumb.jpg.43c53fe8c2c1e7464fee14070e704553.jpg

The tank is just a 10 gallon glass tank from Petco and I painted three sides of it black to help prevent the fish from getting spooked. The light stays off unless I am down there observing or feeding. During the day time, I'll leave the room light on just to give the fish a little light. This whole setup is in a windowless extra room in my basement that we really just use for storage. I keep some bio media in the return chamber of my Biocube for the QT. When I set it up, I just fill it with fresh saltwater, heat it up and throw the bio media into the HOB filter. I've haven't used medications in my QT yet, so this current bio media is about 18 months old. When I get the RSR 250 up and running I plan on keeping several small bags of extra bio media in the sump for the QT. This way when I use medications, I can completely sterilize it and reuse or toss it and still have some in reserve.

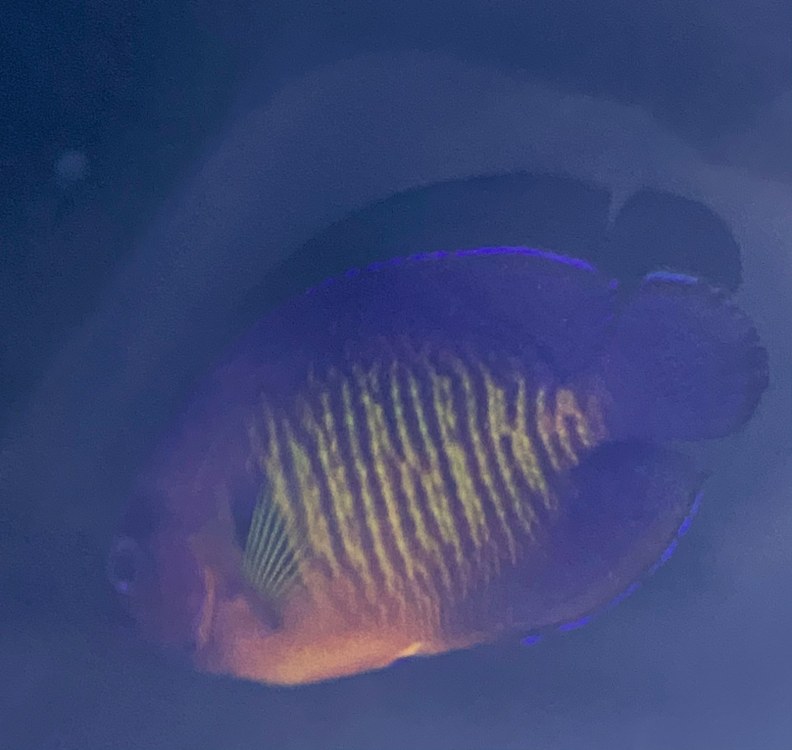
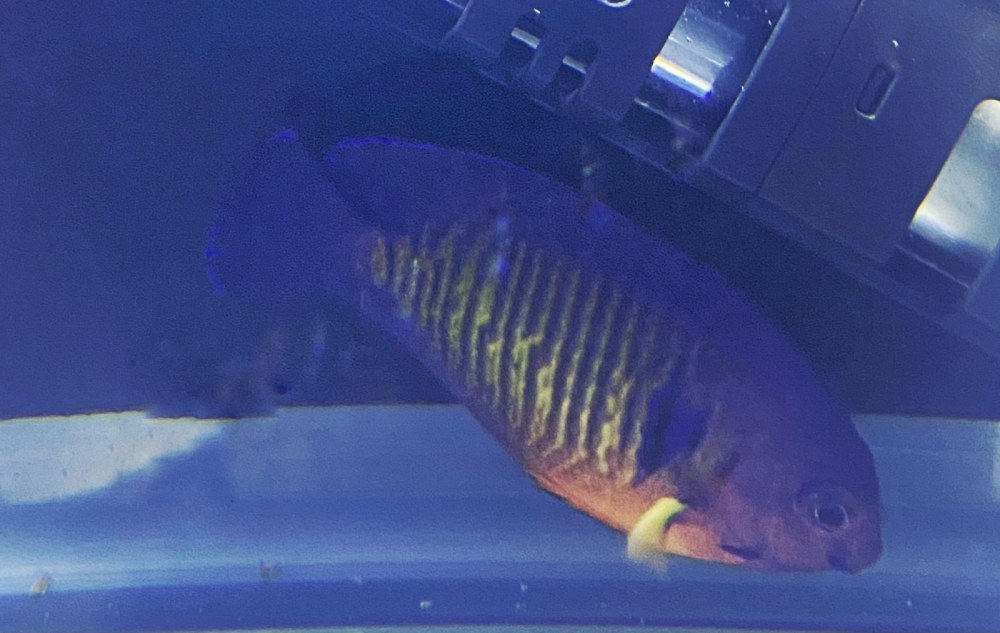
Now for the fish! Like I said, I picked up a Coral Beauty. If you remember my post about potential fish, I had posted that either a Coral Beauty or a Flame Angel were possibilities that I was considering. I knew I couldn't get both, so I asked Tyler which one he preferred. He liked the Coral Beauty since we already have two clownfish that are orange. Made sense to me and I like them both! I haven't been able to get very good pictures of it yet, but here's a couple.

IMG_0632.thumb.jpg.df627371b0906a79870d61ca754250d3.jpg

IMG_0639.thumb.jpg.fc2151d04ef6052ebe7e7fb3528eb4f5.jpg

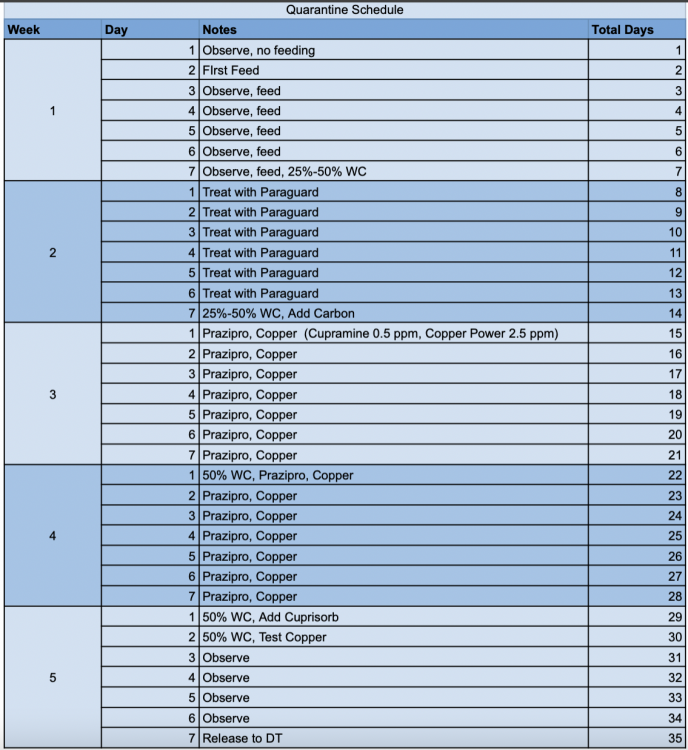
It's been in the QT for about a full day now and got it's first meal this morning. I gave it some frozen food with a tad of garlic and it ate it right up. The plan I have for quarantine is about a five week plan that I found that @hawaiifavo uses. First, I'll just observe it and let it adjust to its new environment completing the week with a 25%-50% water change depending on parameters. Then week 2, I'll start treatment with Paraguard. Paraguard is basically a safer to use Formalin. It's used to treat external fungal/bacterial/viral lesions. It stays active in the water column for 24 hours, so it needs to be redosed daily. This will kinda be the catch all treatment before I move into the copper treatment. I'll then do another 25%-50% WC and add carbon to get the last of the Paraguard out. For weeks 3 and 4, I will be treating with Prazipro and Copper Power. Right now, I plan on slowly increasing the Copper to therapeutic levels over two or three days and starting the 14 day count when it reaches therapeutic. Halfway through the 14 days, I will do a 50% WC and treat the new saltwater with the Copper Power and Prazipro before adding it in. This way the water will maintain the proper levels. Once the 14 days is complete, I'll add in Cuprisorb and do another 50% WC. I will do 50% WC and test for copper daily after this until the copper is gone. Hopefully it should just be the two WCs. I'll use the last of week 5 to observe the fish and then afterwards, the new tank should have already cycled and the clownfish transferred into it. Here's a break down.

433105929_ScreenShot2021-02-15at10_19_57AM.thumb.png.c71496a70478f6ff9ff9378e17178f3f.png

Any thoughts or concerns? This will be my first time prophylactically treating fish. I know there are a thousand ways to do this. But I was looking for a option that is not super time consuming or takes a really long time. I work 2nd shift, so I only have a few hours in the morning to workout, eat, and get ready for work, and I go to bed as soon as I get home. Time can definitely be an issue for me and morning time is really the only time I have to mess with the tank.
 

Fusion in reefing: How do you feel about grafted corals?
  • I strongly prefer grafted corals and I seek them out to put in my tank.

    Votes: 3 4.8%
  • I find grafted corals appealing and would be open to having them in my tank.

    Votes: 37 59.7%
  • I am indifferent about grafted corals and am not enthusiastic about having them in my tank.

    Votes: 16 25.8%
  • I have reservations about grafted corals and would generally avoid having them in my tank.

    Votes: 5 8.1%
  • I have a negative perception and would avoid having grafted corals in my tank.

    Votes: 1 1.6%
Back
Top